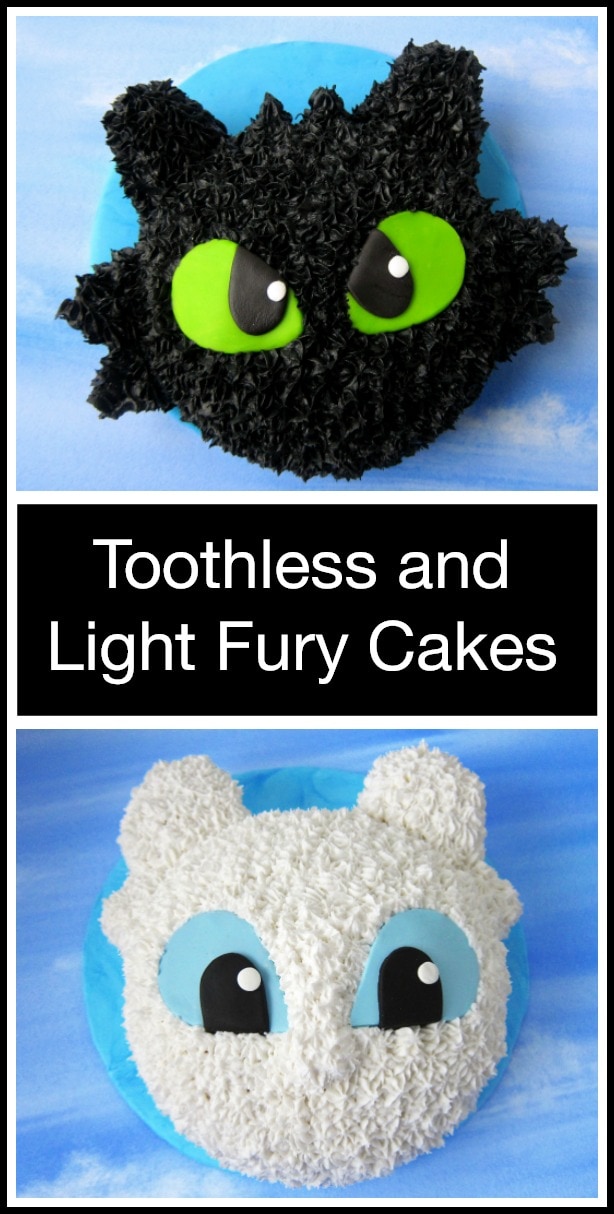
Learn how to make and decorate simple Toothless and Light Fury Cakes for your How To Train Your Dragon: The Hidden World Party. Each small round cake is simply decorated with frosting stars and easy-to-make modeling chocolate eyes.

I am a sucker for a good love story, even when the characters are mythical, and I can't wait to see how the animators at DreamWorks make sparks fly between Toothless and Light Fury in the new movie How to Train Your Dragon: The Hidden World.
Throughout the movie series, we've witnessed Hiccup create a gloriously chaotic dragon utopia. In this final chapter, darkness descends upon the people of Berk, and Hiccup and Toothless must leave the only home they’ve known and journey to a hidden world to protect everything that is important to them.
In the midst of this darkness, they find the beautiful Light Fury, and Toothless falls in love.
I am such a huge fan of these How To Train Your Dragon movies, and I have a feeling The Hidden World is going to be my favorite of them all.
I had so much fun earlier this week creating Toothless, Light Fury, Stormfly, and Meatlug Lollipops that I just couldn't resist making these Toothless and Light Fury Cakes to share with you.
These simple-to-make cakes will be perfect to make for a How to Train Your Dragon party. Watch the video in the recipe card to see how you can make these at home.
RELATED: See more decorated cakes, here.
Ingredients
- butter and flour to coat the inside of the pans
- white cake mix
- instant white chocolate or vanilla pudding mix
- sour cream
- egg whites
- water
- oil
- 1 recipe white modeling chocolate
- electric green, black, and blue gel food coloring
- white frosting (see recipe below)
- black frosting (color chocolate frosting using black food coloring)
Supplies
- muffin tin with 6 or 12 cupcake cavities
- 2 6-inch round cake pans
- 2 6-inch round parchment papers to fit in the bottom of the cake pans
- 2 8-inch round cake boards or 1 large 13-inch by 19-inch cake board
- optional, silicone mat (if you don't have one, then dust your work surface with cornstarch)
- silicone rolling pin
- 3-inch by 1 ¾ inch tear drop cookie cutter
- ¾ inch wide oval cutter
- small round plunger cutters
- #21 open star pastry tip
- pastry bags
You can find most of these supplies on Amazon (commission earned for sales at no additional cost to you).
 Wilton Recipe Right Non-Sti...Shop on Amazon
 Wilton Performance Pans Alu...Shop on Amazon
 Wilton Easy Flex Silicone 1...Shop on Amazon
 Wilton Fondant 9 Inch Rolli...Shop on Amazon
 Wilton 8-Inch White Cake Ci...Shop on Amazon
 AmeriColor, Super Black, .7...Shop on Amazon
 Wilton Decorator Preferred ...Shop on Amazon
 Wilton 19-by-13-Inch Cake B...Shop on Amazon
 Ateco Plain Edge Tear Drop ...Shop on Amazon
") 12 Shapes Cookie Cutter Set...Shop on Amazon
12 Shapes Cookie Cutter Set...Shop on Amazon Americolor Gel Paste Food C...Shop on Amazon
") NutriMill Artiste Kitchen E...Shop on Amazon
NutriMill Artiste Kitchen E...Shop on AmazonInstructions

STEP 1: Bake the cakes and cupcakes.
- two 6-inch round cakes
- 4 cupcakes
- I used a doctored white cake mix. I added some sour cream and instant white chocolate pudding mix to make the cake really moist and flavorful.
- You can simply use a white cake mix, as is, or make a white cake from scratch.
How to prepare cake pans so cakes won't stick?
- Butter (or grease with shortening) the bottoms and sides of the cake pans and 4 cupcake cavities.
- Dust them with flour, then turn the pan upside down to allow the excess flour to fall out.
- Line the round cake pans with a round piece of parchment paper to guarantee the cake won't stick to the pan.
- I don't recommend lining the cupcake pans with liners, as you want the cupcake to bake directly in the muffin tin so that you get a nicely shaped cupcake that is the right size. A liner will create a smaller cupcake with ridges.
Why use a 6-inch pan?
- One doctored cake mix made the perfect amount of batter to fill two 6-inch round pans and 4 cupcakes.
- Also, if you want to use cupcakes for the ears, they fit best on a 6-inch cake.
- If you want to make larger 8-inch cakes, then you'll need to make more than one cake mix, and you'll need to bake the smaller cakes in jumbo cupcake pans, ramekins, or small bowls.
- The cupcakes or smaller cakes will become the spikes on the Toothless and Light Fury cakes.

Modeling Chocolate
- You can find my detailed recipe for making homemade modeling chocolate (or candy clay - which is made using Candy Melts) on my Chocolate Making Tips page, but below are the quick directions. Be sure to check out the tips page so that you can easily make perfect modeling chocolate (that isn't greasy or hard) the first time.
- Stir together 12 ounces of melted chocolate or candy melts with ⅓ cup of corn syrup until thickened.
- Knead until smooth.
- Cover in a zip-top bag and allow to cool for at least 30 minutes.

NOTES about Candy Clay
- If modeling chocolate is made using confectionery coating (Candy Melts) then it is known as candy clay.
- I love working with candy clay. It tastes great and is easy to shape, cut, and sculpt.
- I even wrote an entire book about candy clay filled with recipes, troubleshooting tips, and 17 really fun projects. It's called Candy Clay Creations, and it's available on Amazon in print format or Kindle format.
How to make black modeling chocolate.
- You can make black modeling chocolate by kneading black food coloring into modeling chocolate that has been made using semi-sweet chocolate.
- Or you can make candy clay using black Candy Melts. You'll need to add more black coloring to get a true black color.
- Learn more about how to color modeling chocolate, here.
How to make white modeling chocolate.
- If you use pure white chocolate, your modeling chocolate will actually be off-white. You'll want to knead in some bright white food coloring to make it pure white.
- Or for a vibrant white, you can just make candy clay using Bright White Candy Melts.

How to make eyes for the Toothless Cake:
- Color about 1 ½ ounces of white modeling chocolate using electric or neon green food coloring and 1 ounce using black coloring. You'll use black for both Toothless and Light Fury.
- To color the modeling chocolate, knead in food coloring. Be sure to wear food-handling gloves.
- You may need to allow the modeling chocolate to sit at room temperature for 15-30 minutes in order to firm up after being colored.
- Roll out the green modeling chocolate to about ⅛th inch thickness.
- Cut out a teardrop shape using a 3-inch-long by 1 ¾-inch wide cutter or cut by hand using a knife or pizza cutter.
- Cut off the tips of each teardrop to create a slightly more rounded eye.
- Cut two ¾ inch wide ovals out of black modeling chocolate.
- Set one oval over each green eye to create the pupils.
- Cut off the excess at the top edge of the eye.
- If the two pieces do not stick together, use a bit of water to attach them together.
- Roll out some white modeling chocolate super thin.
- Cut out two small circles.
- Attach them to the black pupils on the eyes using a dab of water.
- Be sure the white highlights are coming from the same direction on both of Toothless' eyes.

Decorate a Toothless Cake.
- Optional: Cover an 8-inch round cake board with blue modeling chocolate.
- Pipe a bit of frosting on the cake board and set the small 6-inch cake along one edge.
- Attach the two eyes to the cake using some frosting.
- Pipe stars of black frosting around the eyes and then over the surface and sides of the lower part of the cake.
- Cut two spikes out of the top of the cake.
- Cut the cupcakes into the large spikes that will go on Toothless' head.
- Attach the cupcake spikes using frosting, then pipe stars of black frosting over those and over the rest of the cake.

Make modeling chocolate eyes.
- Color about 1 ½ ounces of white modeling chocolate light blue using blue food coloring.
- Roll out the light blue modeling chocolate to about ⅛th inch thickness.
- Cut out a teardrop shape using a 3-inch-long by 1 ¾-inch wide cutter or cut by hand using a knife or pizza cutter.
- Cut off the bottom edge of the teardrops to create the iris of each eye.
- Cut two ¾ inch wide ovals out of black modeling chocolate.
- Set one oval over each light blue iris to create the pupils.
- Cut off the excess at the bottom edge of the eye.
- If the two pieces do not stick together, use a bit of water to attach them together.
- Roll out some white modeling chocolate super thin.
- Cut out two small circles.
- Attach them to the black pupils on the eyes using a dab of water.
- Be sure the white highlights are coming from the same direction on both Light Fury's and Toothless' eyes.
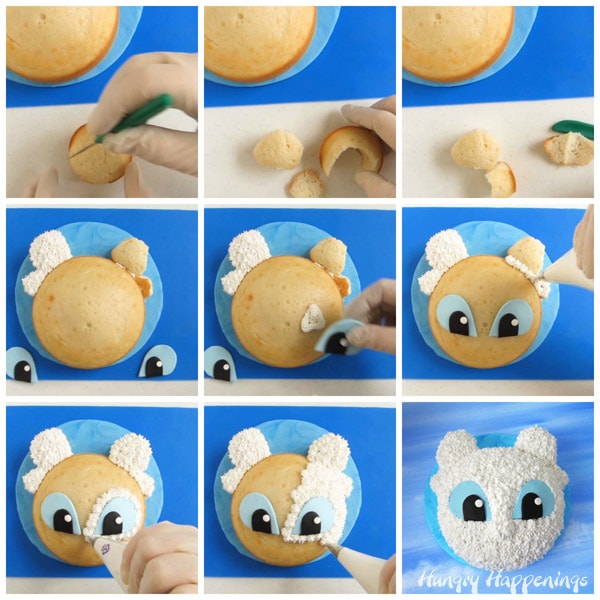
Decorating a Light Fury Cake
- Optional: Cover an 8-inch round cake board with blue modeling chocolate.
- Pipe a bit of white frosting on the cake board and set the small 6-inch cake along one edge.
- Attach the two eyes using some white frosting.
- Pipe stars of white frosting around the eyes and then over the surface and sides of the lower part of the cake.
- Cut the cupcakes into the large spikes and small spikes that will be placed on either side of Light Fury's head.
- Attach the cupcake spikes using frosting, then pipe stars of white frosting over those and the rest of the cake.

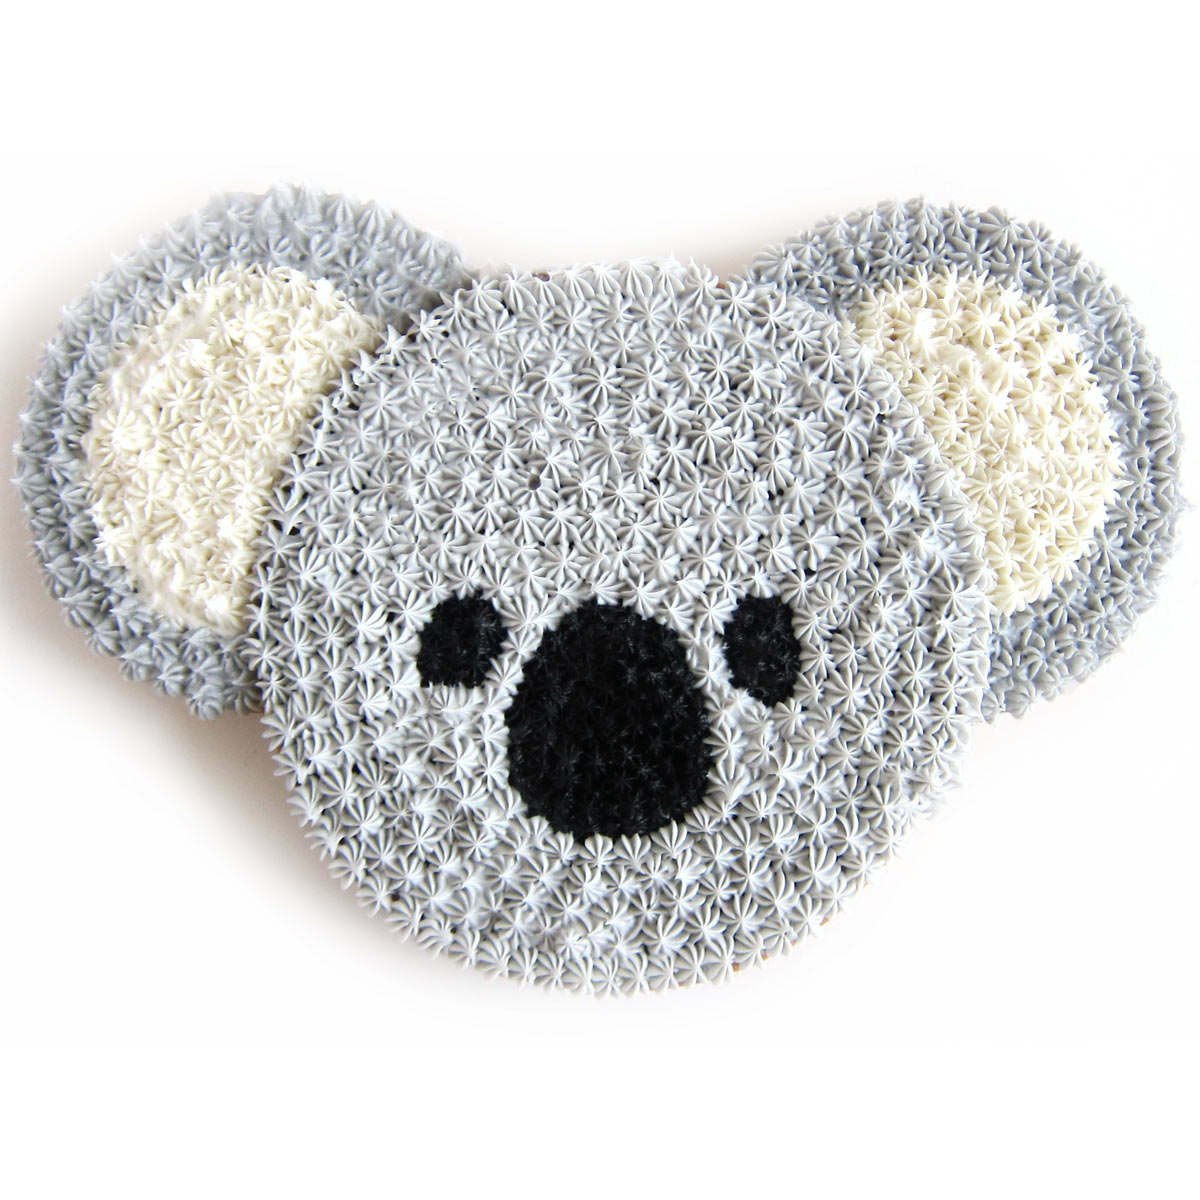
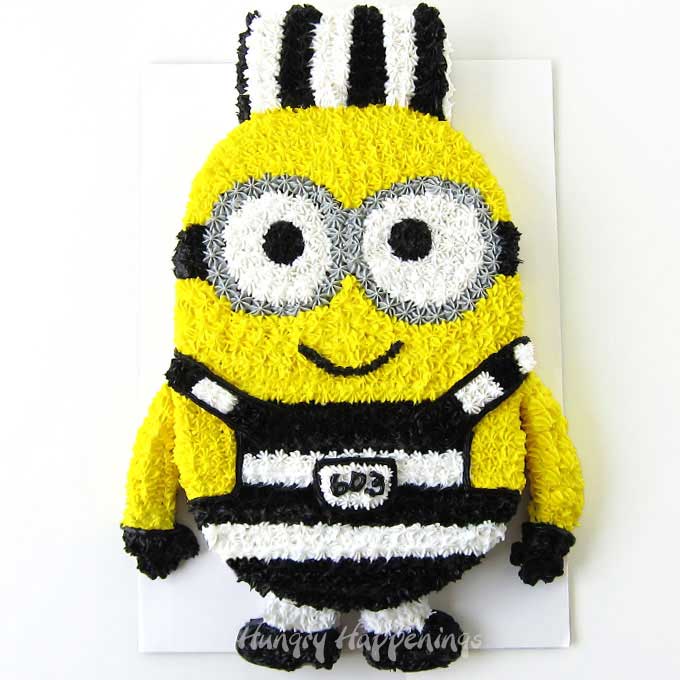
Other Decorated Cakes

Recipe

Decorate easy Toothless and Light Fury Cakes using frosting and modeling chocolate for your How To Train Your Dragon parties.
- 1 box 15.25 ounce white cake mix
- 1 cup water
- ⅓ cup vegetable oil
- 4 egg whites or 3 whole eggs
- ¼ cup sour cream
- ¼ cup instant white chocolate pudding mix
- 1 cup vegetable shortening preferably hi-ratio shortening
- ½ cup butter softened
- 6 cups powdered sugar
- 3 tablespoons milk plus up to 3 tablespoons more, if needed
- 1 ½ teaspoons vanilla extract
- ⅓ cup cocoa powder
- black food coloring
- 1 ½ ounces electric green modeling chocolate, candy clay, or fondant
- 1 ounce black modeling chocolate, candy clay, or fondant
- ½ ounce white modeling chocolate, candy clay, or fondant
- 1 ½ ounces light blue modeling chocolate, candy clay, or fondant
-
Allow the cake ingredients to sit at room temperature for about an hour.
-
Preheat oven to 350 degrees Fahrenheit.
-
Brush two 6-inch cake pans with butter then dust with flour and line with a round of parchment paper.
-
Brush 4 cupcake cavities in a muffin tin with butter then dust with flour.
-
Combine the cake mix, water, oil, egg whites, sour cream, and pudding mix together in a large mixing bowl.
-
Use an electric mixer to beat on low for 30 seconds then increase speed to medium and beat for 1 ½ minutes.
-
Fill 4 cupcake cavities about ⅔'s full with batter.
-
Divide the remaining batter among the two 6-inch cake pans.
-
Bake the cupcakes and cakes for 18-26 minutes removing the cupcakes as soon as they are done at around 18-20 minutes. Check the cakes at around the 22 minute mark.
-
A toothpick inserted into the cakes should come out with just a few moist crumbs. Or the cakes should spring back when your press a finger on top.
-
Allow the cakes and cupcakes to cool for 10 minutes in their pans then remove them and set them on a cooling rack. Peel off the parchment paper once the cakes are cooled completely.
-
Beat the shortening and butter together until well combined using an electric mixer.
-
Add the powdered sugar and beat until light and fluffy.
-
Add the vanilla and 3 tablespoons of the milk and beat until fully incorporated and the frosting is smooth.
-
Add more milk as needed to make the frosting soft enough to pipe through a star tip yet hold it's shape.
-
Spoon ⅔ cup of the frosting into another bowl.
-
Stir the cocoa powder into that small bowl of frosting then color using black food coloring and add more milk, if needed.
-
Roll out the green, black, white, and light blue modeling chocolate to about ⅛th inch thickness on a silicone mat using a silicone rolling pin.
-
Cut out 2 green and 2 blue tear drops, 4 black ovals, and 4 tiny white circles then attach them together forming two green eyes and 2 blue eyes with pupils and white highlights.
-
Attach the green eyes to one cake and the blue eyes to another.
-
Cut the cupcakes to form the spikes on each of the dragon cakes.
-
Pipe black frosting stars over the entire surface and sides of the cake with the green eyes and pipe white frosting stars over the cake with the green eyes.
-
See the tutorial for detailed decorating instructions - https://hungryhappenings.com/toothless-and-light-fury-cakes/
Recipe Video
Allow the frosting to crust over then cover the cakes with a large box or plastic wrap and store at room temperature for up to 2 days.
So what do you think? Would you make these cakes for a How To Train Your Dragon: The Hidden World party?
If you plan to host a How To Train Your Dragon party be sure to check out these other fun projects...
- Toothless, Light Fury, Stormfly, and Meatlug Lollipops
- Light Fury Purse Clutch
- Toothless and Light Fury Finger Puppets

- Banana Split Bars – A Fun and Easy Summer Dessert - March 4, 2026
- Pineapple Fudge (No Candy Thermometer Needed!) - March 4, 2026
- No-Bake Peanut Butter Pie Recipe - March 3, 2026
Grandma Bonnie says
thank you I was looking for an idea granddaughters birthday dragon party...
Beth Klosterboer says
Have fun making your cake!
Tara says
Could you use the modeling chocolate as a covering, like you would with fondant, instead of starring the icing?
Beth says
Definitely! These cakes would look great covered in modeling chocolate. If you make them, I'd love to see a picture of your cakes.
Lourdes Partida says
Gracias, muy buena explicación y fácil de seguir, lo pondré en práctica para un joven que ama a chimuelo.
Beth says
I'm glad you found the instructions helpful. I hope you have fun making your cakes!
Bondita says
I was thinking to bake something different cake for my daughter's birthday and I came across this amazing recipe. Thank you for sharing this recipe with proper details. Will definitely recommend this to my friends also
Beth says
Thanks, Bondita. I'm so glad you like the cake and appreciate you sharing it with your friends.
Lorraine says
Thanks for the tutorial! It was massively helpful for my son's birthday cake!
Beth says
I am so happy to hear that you made these cakes for your son's birthday! I hope he loved his special birthday dessert.
The Partiologist says
The cakes turned out darling and look like they would be easy enough to make! Looks like a Dragon movie is in my near future! 😉