Fill homemade chocolate Easter eggs with soft chewy caramel then wrap the caramel eggs in colorful foil wrappers to make them look festive for the holiday.
You'll want to make a lot of these caramel-filled chocolate eggs to fill your Easter baskets.
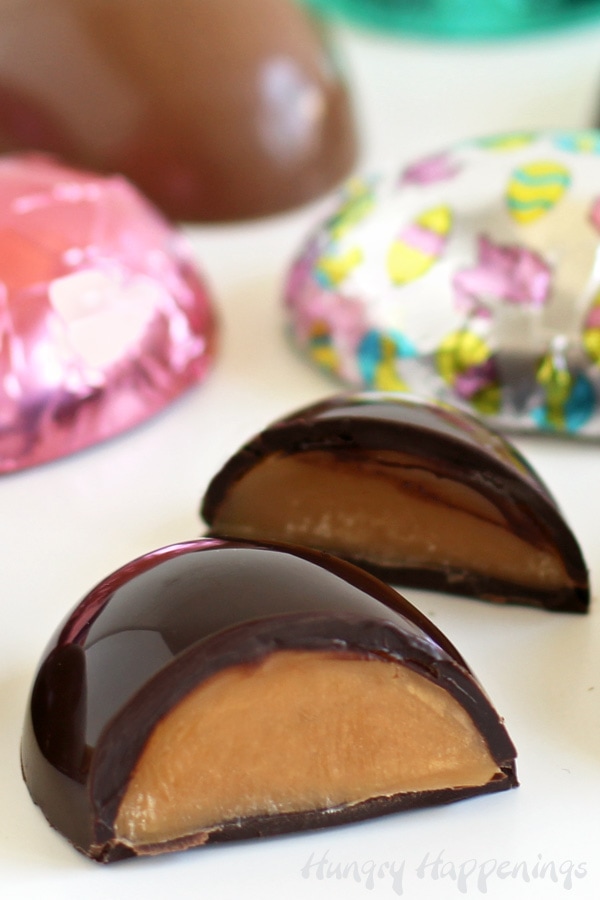
When I ask my family what chocolate Easter Eggs they want to find in their baskets, most will say they must have at least a few Milk or Dark Chocolate Caramel Eggs.
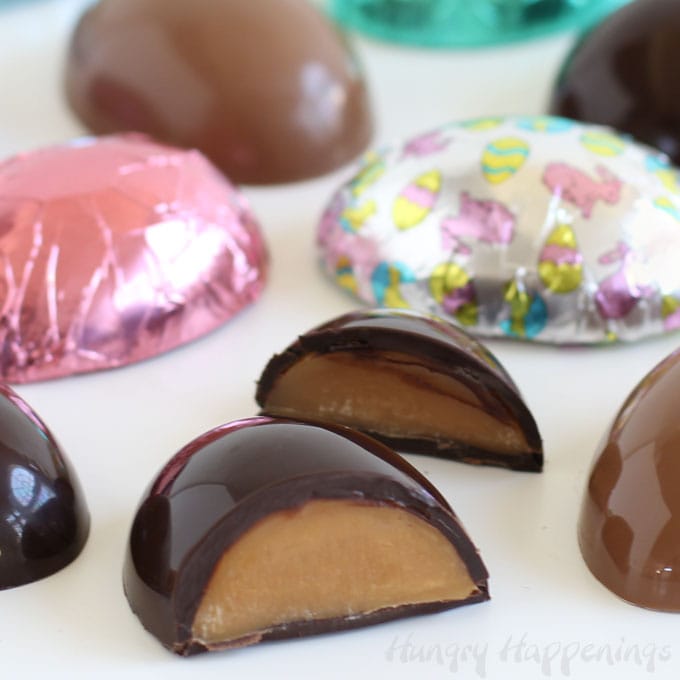
These eggs have a nice thick layer of caramel covered in decadent chocolate.
I've been making caramel-filled chocolate eggs since I opened my first candy store back in 1989. I can't even imagine how many thousands of these eggs I have made and wrapped (and eaten) over the years.
You can find recipes to make some of my other popular Easter eggs using the links below. I will be adding links as I get the recipes published.
- chocolate bark eggs and solid chocolate eggs
- peanut butter eggs
- coconut cream eggs
- marshmallow eggs
- chocolate truffle eggs
- chocolate raspberry eggs
- hollow Easter egg hot chocolate bombs
- breakable candy-filled chocolate Easter eggs
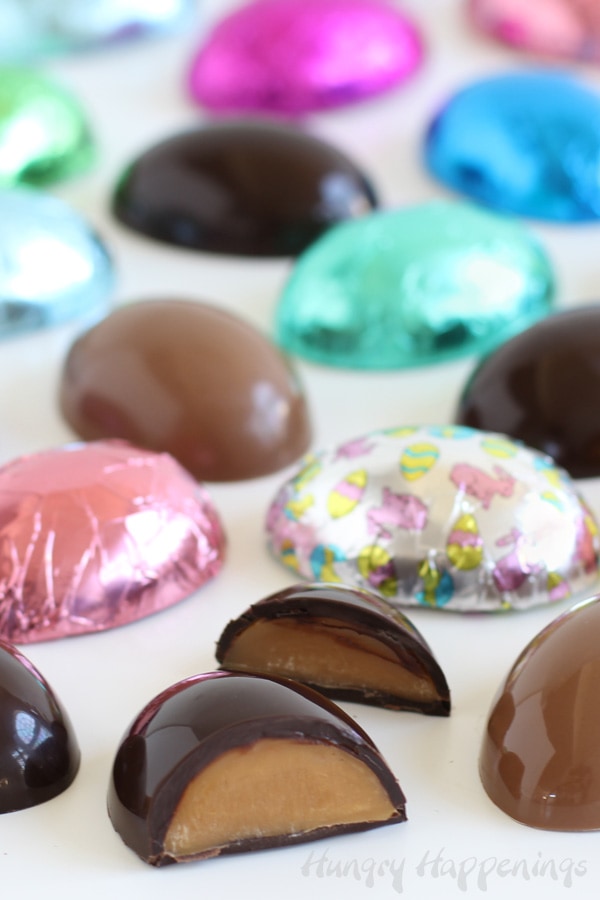
Caramel-Filled Chocolate Eggs
To make 20 of these eggs you will need:
- 16 ounces dark, milk, or white chocolate*
- 16 ounces caramel
* You'll need about ¾ ounces of chocolate per eggshell, but you'll need extra chocolate if you use polycarbonate molds to make the eggshells because you will fill the mold with chocolate then dump out the excess in order to make the chocolate eggshells, so plan on having about 24 ounces of melted (and tempered) chocolate on hand to make 20 chocolate caramel eggs.
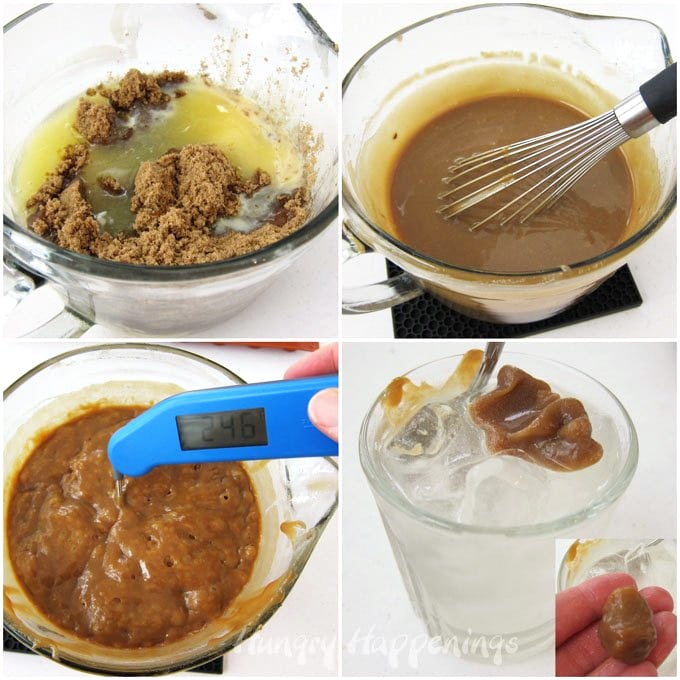
Let's talk about caramel.
You can make homemade caramel to fill your chocolate eggs or you can purchase loaves of soft and chewy caramel.
If you want to make homemade caramel, I suggest using this quick and easy caramel recipe. It's made in the microwave!
Easy Microwave Caramel Recipe
- 1 cup butter
- 2½ cups packed dark brown sugar
- 1 cup light corn syrup
- 1 – 14oz can Eagle Brand sweetened condensed milk
- 1 teaspoon vanilla
-
Melt butter in a large microwave-safe bowl on high power for 45-75 seconds.
-
Stir in dark brown sugar, corn syrup, and sweetened condensed milk.
-
Heat on high power for 5 minutes.
-
Remove and whisk until smooth.
-
Heat for 5 more minutes, then stir.
-
Heat for an additional 5 minutes, then stir.
-
Check temperature, if it's between 245 - 250 degrees Fahrenheit.
-
If needed, heat for 1-minute increments, stirring after each until it reaches the desired temperature.
- Stir in the vanilla.
- Pour the caramel into a well-buttered 8-inch square pan.
-
Let the caramel harden for about 2 hours.
- Then you can cut the caramel into ¾ ounce pieces to use to fill your chocolate eggs.
If you have a favorite stovetop caramel recipe then make a batch and use the caramel to fill these eggs.
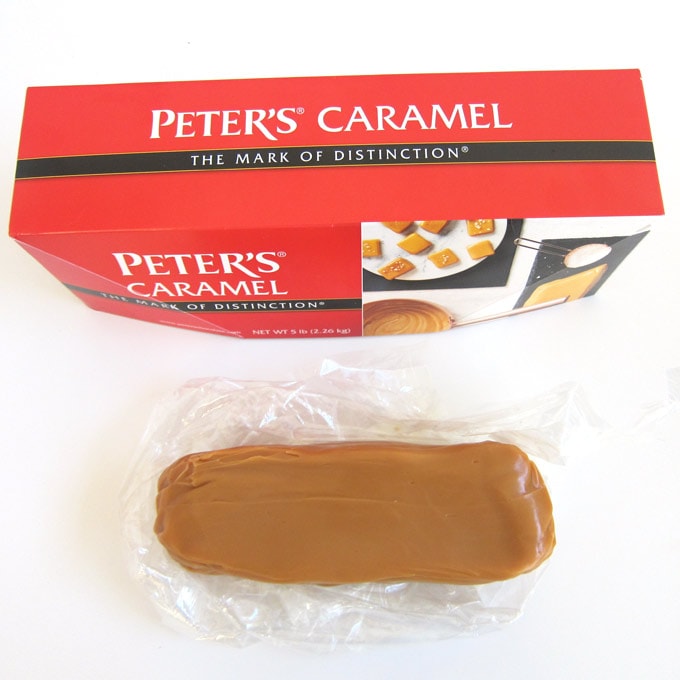
Peter's Caramel
If making homemade caramel intimidates you or you just don't want to fuss over a bowl of boiling sugar, you can use Peter's Caramel to fill your chocolate eggs.
I have to be honest, I have been filling my caramel eggs with Peter's Caramel for as long as I have made them. When I first tried this soft and chewy caramel, I fell in love with it. It is absolutely delicious and always has the perfect texture. It's never gritty.
Back when I had to make thousands of these caramel eggs to sell to my customers at Easter, I just didn't have time to make batches and batches of homemade caramel in addition to making and filling the chocolate eggs. I also didn't want to worry that my homemade caramel would crystalize days later.
So, I opted to use Peter's Caramel as many chocolate-makers do. My customers loved it!
Peter's Caramel comes in 5-pound loaves but you can purchase smaller quantities from candy-making supply stores or online retailers. You'll need about 1 pound to make 20 caramel eggs.
Can I use store-bought caramel squares?
- Caramel squares, like those made by Kraft, are not typically very soft, so I don't recommend using them to make caramel eggs.
- You can use Werthers Soft Caramels or any other caramel that's soft enough to press into your chocolate eggs. Just note that you will be unwrapping a lot of candies and you'll need more than one to fill your eggs.
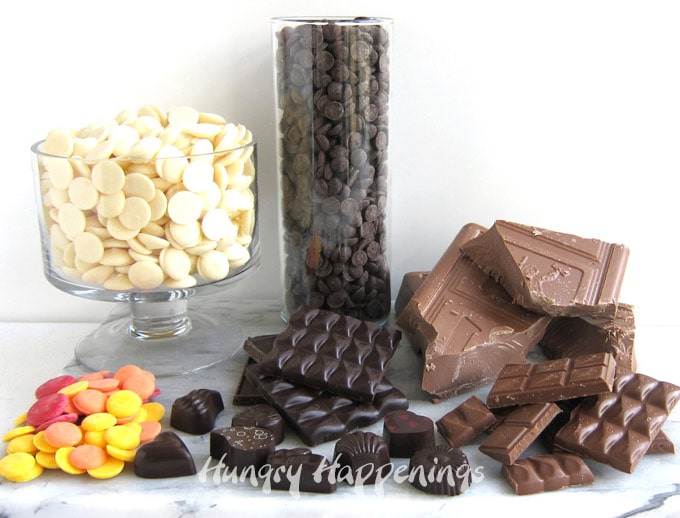
Let's talk about chocolate.
To make the chocolate eggshells you can use pure chocolate or compound chocolate (also known as Candy Melts, confectionery coating, melting wafers, and almond bark).
Pure Chocolate
- Pure chocolate contains cocoa butter which melts at body temperature so it gives the chocolate a luxuriously smooth texture when it melts on your tongue.
- The flavor is decadently rich and delicious.
- When pure chocolate is in temper it has a wonderful snap and shine.
- Pure chocolate MUST be tempered (heated and cooled to specific temperatures).
I use Peter's Burgundy Chocolate Bars or Callebaut Couverture Chocolate Callets to make my chocolate eggs.
If you have never tempered chocolate, I highly recommend purchasing the chocolate callets because they are easy to melt and temper. Chocolate Callets look like chocolate chips but they are not.
Chocolate Chips
Chocolate chips contain emulsifiers that inhibit them from melting at low temperatures. I don't recommend using chocolate chips to make your chocolate eggs.
Compound Chocolate
I highly recommend using pure chocolate to make your chocolate eggs however pure chocolate must be tempered which takes time and practice. You can use compound chocolate instead.
- Compound chocolate, also known as, candy melts, confectionery coating, melting wafers, or almond bark can be used to make your chocolate eggs.
- Compound chocolate contains vegetable oil, typically palm kernel oil, instead of cocoa butter so it does not need to be tempered.
- This type of chocolate is easy to melt and it hardens beautifully without any fuss.
- Most compound chocolate comes in the form of wafers, but almond bark comes in bars. If using bars, be sure to chop them finely before melting.

How to melt chocolate.
- Pour your finely chopped chocolate or candy melts into a microwave-safe bowl and heat on high power for 30 seconds then remove and stir.
- Repeat this process until most of the chocolate is melted.
- Then heat at high power for 15-second increments, stirring after each, until completely melted.
- Alternatively, you can melt your chocolate in a double boiler set over low heat.
- Fill a pot with 1-inch of water and set a tight-fitting bowl over the opening of the pan.
- Fill the bowl with chocolate and heat on low stirring often until melted.
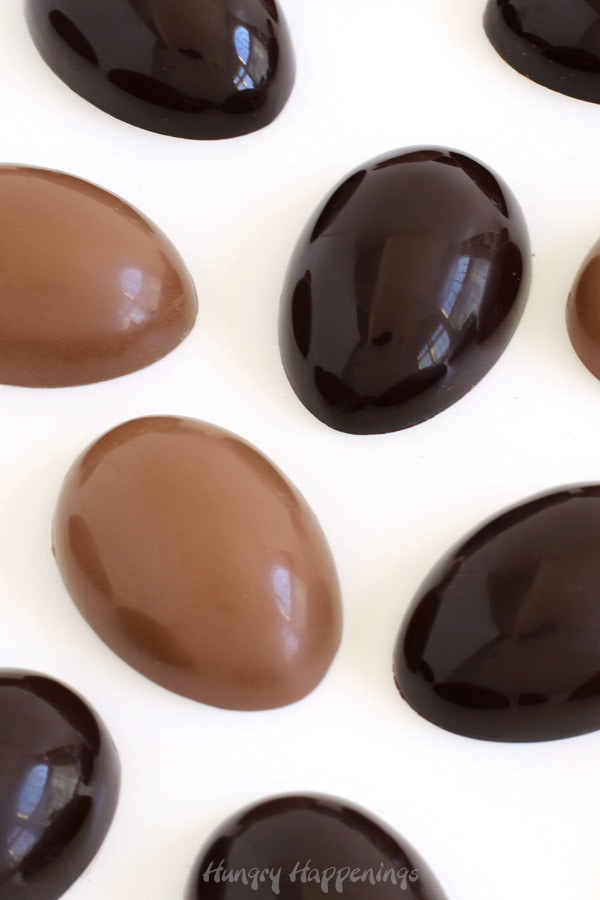
See how beautifully shiny these chocolate eggs look? They were made using tempered pure chocolate. Tempering is the process of heating and cooling chocolate to specific temperatures so that the chocolate hardens properly.
If chocolate is not tempered properly it will be too soft to remove from a candy mold and will bloom (become streaky and spotty).
You can read a more in-depth conversation about tempering chocolate on my chocolate-making tips page but I'll share a brief explanation below.
Seeding Method of Tempering Chocolate
- Melt 12 ounces of dark chocolate to 115°-120° Fahrenheit, milk chocolate to 110°-115° F, or white chocolate to 105-110° F by heating it in the microwave for 30-second bursts of high power until melted or in the top of a double boiler (a bowl set over a pan filled with 1-inch of water) set over low heat, stirring often, until melted.
- Begin to cool the chocolate by stirring in about 2 more ounces of chocolate.
- Continue to stir, scraping down the sides of the bowl until all of those chocolate pieces have melted.
- Check the temperature of the chocolate.
- Continue to sprinkle in small amounts of the chocolate callets and stir to cool the bowl of chocolate.
- Be sure to always scrape the sides of the bowl. You do not want the chocolate to harden around the edge of the bowl.
- Your goal is to get the chocolate to 88-91 °F for dark chocolate; 86-88°F for milk and 82-84°F for white.
- Once the chocolate reaches that temperate, remove any unmelted chocolate pieces. If there aren't many pieces you can also just dissolve them using an immersion blender. If there are too many, however, you don't want to do that as you will run the risk of cooling the chocolate too much.
- You need the chocolate to melt and stay within the tempering range of:
- 88-91 degrees Fahrenheit for dark chocolate
- 86-88 degree Fahrenheit for milk chocolate
- 82-84 degrees Fahrenheit for white chocolate
- Test the temper of the chocolate by dipping a metal spatula, spoon, or knife into the chocolate.
- Shake it, to remove the excess chocolate then set it aside at room temperature.
- In 3-5 minutes, the chocolate should harden and look shiny.
- While you are waiting, be sure to stir your bowl of chocolate, to make sure it doesn't cool too much around the edge.
- If your test chocolate has hardened and looks shiny be sure to check the temperature of your bowl of chocolate before proceeding to make your chocolate eggs as the chocolate will have cooled slightly and will need to be warmed slightly!
- Heat it in the microwave for about 5 seconds then remove and stir and check the temperature. Do not let it go above temper temperature (91° dark, 88° milk, or 84° white). If it does, you have to start this whole process over again.
- You are now ready to fill your molds with chocolate.
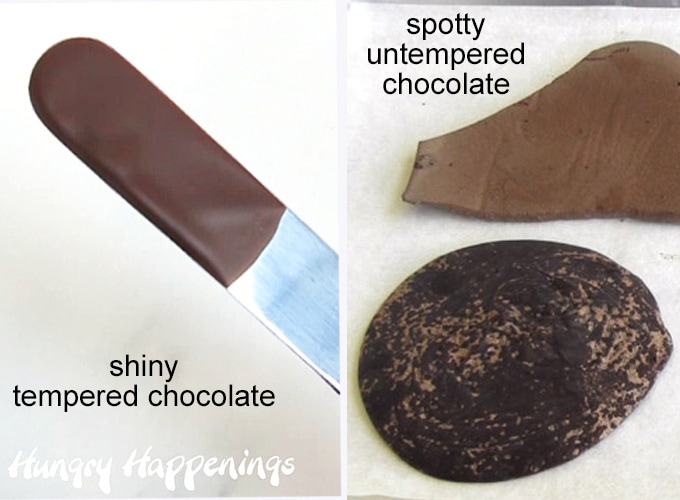
Shiny vs. Spotty Chocolate
- Cocoa butter contains crystals that are stabilized at certain temperatures and if you temper your chocolate properly it will be shiny.
- If the chocolate is not tempered, the cocoa butter crystals will not be stable and the crystals will bloom (come to the surface of the chocolate) forming spots or streaks on the surface of your chocolate. Bloom may take several days to appear.
Soft Chocolate (that won't come out of the mold)
- When tempered chocolate is poured into a mold it shrinks slightly as it cools and hardens so it's easy to remove from the molds.
- If you do not properly temper your chocolate it will NOT harden properly and it will not retract from the mold, meaning it will stick to the mold and you won't be able to remove it.
- If this happens, you will need to wash the chocolate out of the mold using hot water, dry the mold, then try again.
Tips for ensuring shiny chocolates.
- Make sure your molds are clean and dry before using them.
- I recommend brushing the inside with a soft cotton ball. This will ensure they are completely clean and it will make your chocolates really shiny.
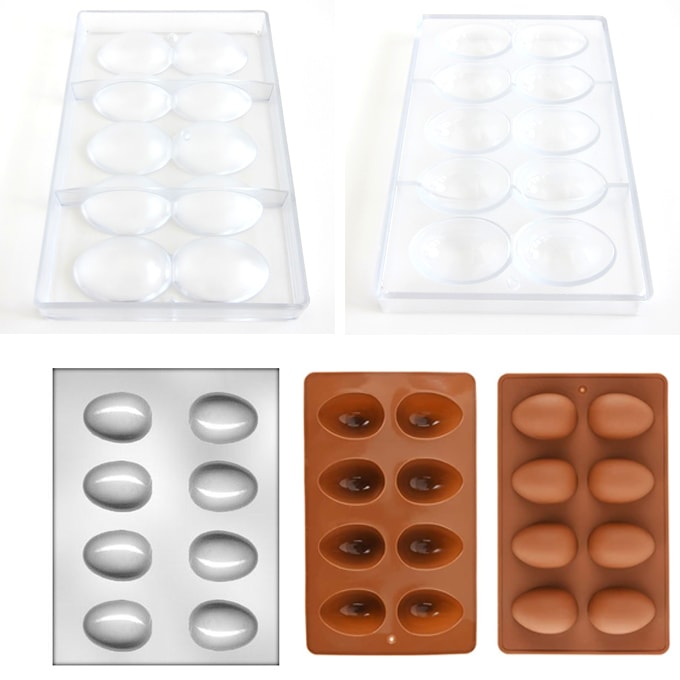
Egg Molds
You can use polycarbonate, plastic, or silicone molds to make your chocolate eggs. I prefer molds with egg cavities that are between 2 ½ and 3 inches in length.
- polycarbonate egg molds (my favorite!)
- I prefer using these durable FDA approved heavy-duty plastic molds to make chocolate eggs. The molds are a bit pricey, but they will last for many years. My egg molds are almost 30 years old, have been used to make tens of thousands of chocolate eggs, and they still look brand new.
- hobby-grade plastic egg molds
- For many years, I used plastic hobby-grade plastic candy molds to make my chocolate eggs but found I could make the eggs so much faster using the polycarbonate molds. If you don't plan to make a lot of eggs or you don't want to invest in the nicer molds, these will work fine.
- silicone egg molds
- Another low-cost alternative.
Other supplies you'll need to make your caramel eggs:
- microwave-safe bowls or a double boiler
- silicone spatula
- offset metal spatula
- metal bench scraper (or use a putty knife that's only used for chocolate work)
- optional, food-use only paintbrush if you plan to use silicone molds
- food handling gloves are imperative when working with chocolate that you wear gloves so that you
- disposable pastry bags or parchment paper cones
- parchment paper or wax paper set on cookie sheets or cutting boards
- an instant-read thermometer is a must if you plan to temper pure chocolate (my favorite is a Themapen)
You can find the supplies needed to make these hot cocoa bombs from Amazon. I earn a small commission at no extra cost to you when you use any of the affiliate links in this post.
 Peter's Caramel Loaf - 5 lb...Shop on Amazon
 Callebaut No 811 Finest Bel...Shop on Amazon
  Peter's Gourmet Burgundy Di...Shop on Amazon
  Callebaut Chocolate Block S...Shop on Amazon
  Wilton Light Cocoa and Brig...Shop on Amazon
  Merckens Coating Melting Wa...Shop on Amazon
  Vanilla Almond Bark, 24 Oun...Shop on Amazon
  Mirenlife 8 Cavity Silicone...Shop on Amazon
  CK Products Candy Molds, Cl...Shop on Amazon
  Decora 50050 Egg Polycarbon...Shop on Amazon
  Candy Molds N More 6 x 6 in...Shop on Amazon
  Candy Molds N More 6 x 6 in...Shop on Amazon
  CK Products Foil Wrappers, ...Shop on Amazon
  BESTONZON 200pcs Metallic F...Shop on Amazon
  Webake Chocolate Wrappers P...Shop on Amazon
  Candy Molds N More 6 x 6 in...Shop on Amazon
  Candy Molds N More 6 x 6 in...Shop on Amazon
  Candy Molds N More 6 x 6 in...Shop on Amazon
  Candy Molds N More Gold Con...Shop on Amazon
  6" X 6" Orange Confectioner...Shop on Amazon
  Anchor Hocking Batter Bowl,...Shop on Amazon
  ALLTOP Bench Scraper & Chop...Shop on Amazon
  Putty Knife Scrapers, Spack...Shop on Amazon
  Dre Health Synthetic Nitril...Shop on Amazon
  Wilton 12-Inch Disposable C...Shop on Amazon
 Video
Be sure to watch the video to see how my peanut butter eggs are made. You will use the same techniques to make the chocolate eggshells then you will follow the instructions below to fill the chocolate eggs with caramel.
I'll also share step-by-step instructions below.
[adthrive-in-post-video-player video-id="rKkeUFd0" upload-date="2021-03-09T23:50:14.000Z" name="Peanut Butter Eggs Video" description="Peanut butter fudge-filled chocolate eggs can be made using dark chocolate, milk chocolate, or white chocolate. Wrap them in colored foil to make them look festive in your Easter baskets. " player-type="default" override-embed="default"]
step-by-step instructions
Making chocolate eggs using a polycarbonate mold.
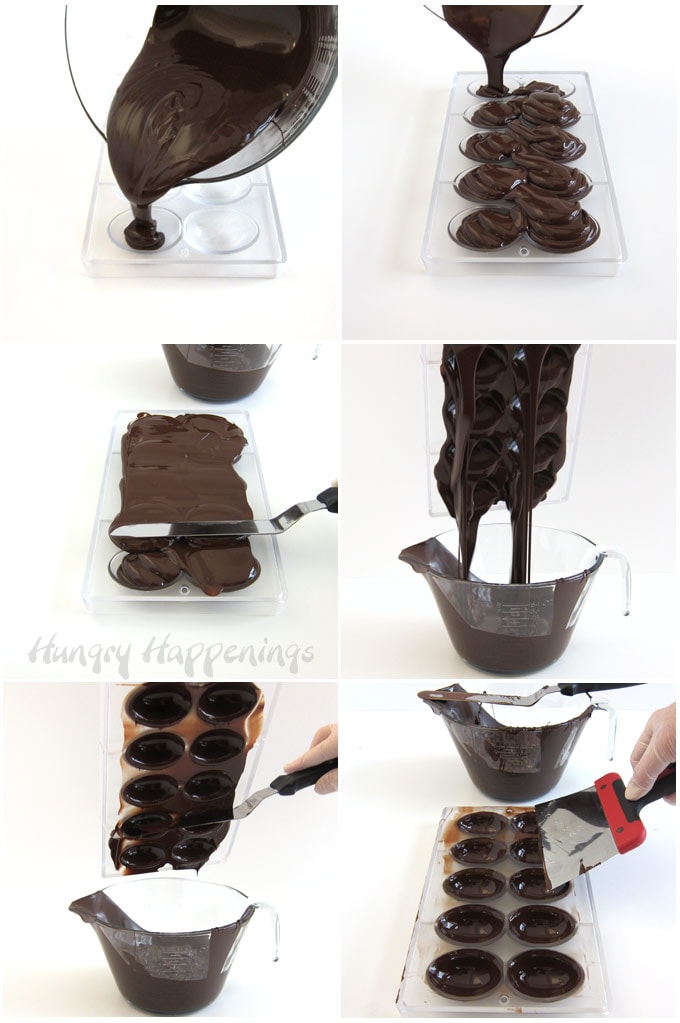
- Fill the egg cavities in your mold completely with chocolate.
- Turn the mold upside down over your bowl of chocolate and allow the excess chocolate to drip out.
- Tap the side of the mold a few times to encourage all of the excess chocolate to drip out of the mold.
- Use an offset spatula to scrape off the excess chocolate.
- Set the egg mold upright and use a metal bench scraper or food-use-only putty knife to scrape over the mold to ensure all of the excess chocolate has been removed.
- You really want to make sure the top surface of the mold is as clean as possible because you'll be adding another layer of chocolate over the filled chocolate eggs and will need to scrape it directly at the surface. So, bumps of hardened chocolate will make that difficult.
- Chill pure chocolate eggshells in the refrigerator for about 10-15 minutes until hardened. If your room is cool, you can also allow the chocolate to harden at room temperature.
- If using compound chocolate (candy melts, almond bar, etc.), chill the eggs in the freezer for about 5 minutes just until hardened. If let in the freezer too long, the eggshells may crack.
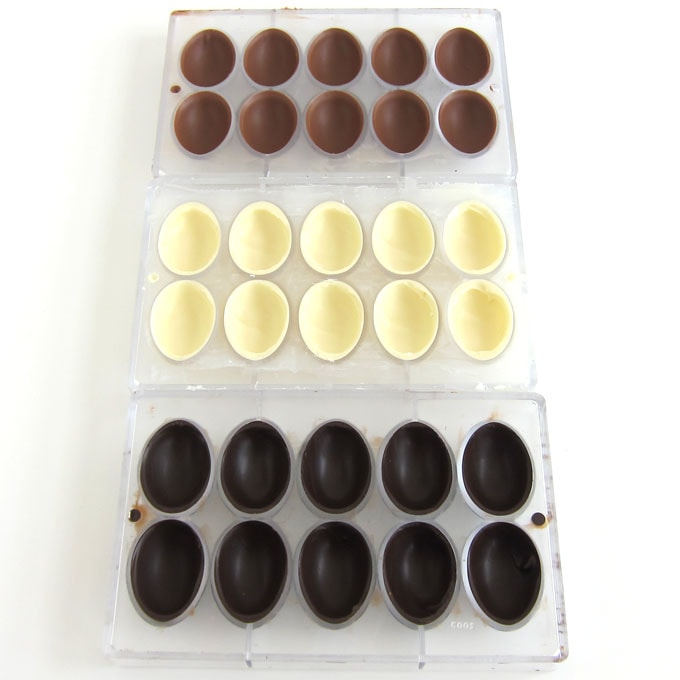
You can make your eggshells using milk, dark, or white chocolate.
You can even use colored candy melts if you want to make colorful white chocolate eggs.
Note about thin chocolate.
- If you have used really thin (viscous) chocolate or candy melts, you may want to set the mold upside down on a parchment paper-lined baking sheet before chilling so that the chocolate doesn't sink to the bottom of the mold.
- If the chocolate is extremely thin, you may need to add a second layer.
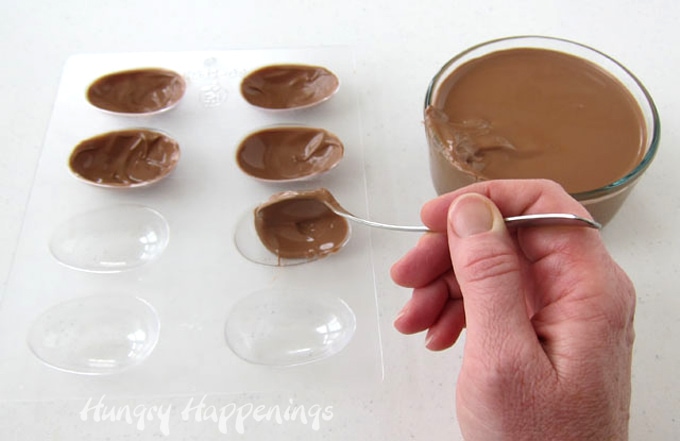
Make your chocolate eggs using a plastic candy mold or a silicone mold.
- Spoon some chocolate into the egg cavity then use the spoon or a food-use-only paintbrush to brush the chocolate up around the edges of the mold.
- Completely cover the inside of the mold.
- Be sure you cannot see through any of the chocolate and that the top edge of the chocolate is not too thin.
- Scrape any chocolate that has gotten onto the top of the candy mold. You want the top edge of each chocolate eggshell to be smooth.
- Chill pure chocolate eggshells in the refrigerator and chill compound chocolate (candy melts) eggshells in the freezer until hardened.
If your plastic egg mold is completely flat (no ridge around the edge), you can use the pour and dump method listed above for the polycarbonate molds.
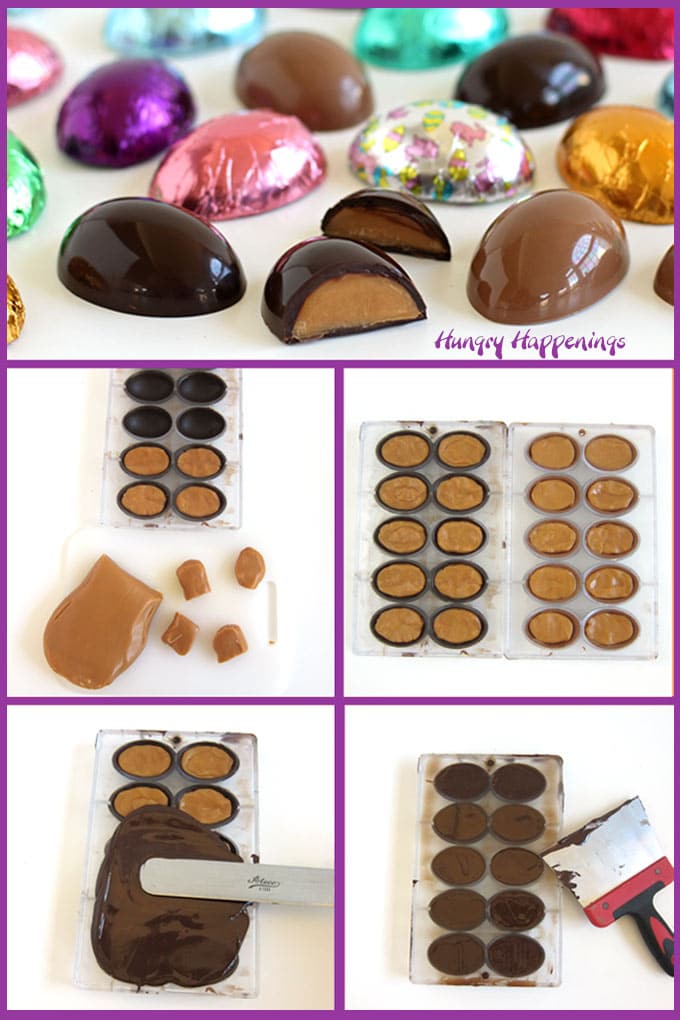
Caramel-filled Chocolate Eggs
- Once your chocolate eggshells have hardened you can fill them with caramel.
- Cut off ¾ ounce-size pieces of caramel.
- You don't have to weigh these, just eyeball it. You'll get the hang of it once you've filled a few eggs with the caramel.
- Gently press the soft caramel into the chocolate egg.
- Flatten the top surface of the caramel so you have about 1/16 inch over top to cover with chocolate.
- Pour chocolate over all the eggs then use an offset spatula to smooth out the chocolate.
- Tap the mold a few times on the counter to allow any air bubbles to come to the surface and pop.
- Scrape the excess chocolate off into your bowl of chocolate.
- Then use a bench scraper or food-use-only putty knife to scrape over the top of the mold, creating a nice smooth surface on your chocolate eggs. (Watch the video to see how this is done. You'll get a nice flat bottom to your eggs if you use this technique.)
- If you have used a plastic or silicone mold to make your eggshells, you can pipe chocolate over the top of your eggs or spread it overtop using a small offset spatula. If you can, I still recommend you scrape over the top using the bench scraper.
- Chill in the refrigerator if using pure chocolate, or in the freezer, if using compound chocolate (candy melts, melting wafers, almond bar, etc.) until hardened, about 5 minutes.
- Remove the mold from the fridge and unmold the eggs.
- I like to place a piece of parchment paper over the eggs, turn the mold upside down, and allow them to fall out. You can place a cutting board or cookie sheet over the mold and flip it all over if you prefer.
- Just note that well-tempered chocolate eggs may fall right out of the mold, so don't just turn it upside down, high above your countertop because the eggs may fall out and get damaged if they fall too far.
Can I spoon hot caramel into my eggs?
- NO!
- Do not make homemade caramel then pour it into the chocolate shells while it is hot. You will melt the chocolate eggshell and throw it out of temper.
- If you allow the caramel to cool down to about 88 degrees F, then you can pour it into the chocolate shells.
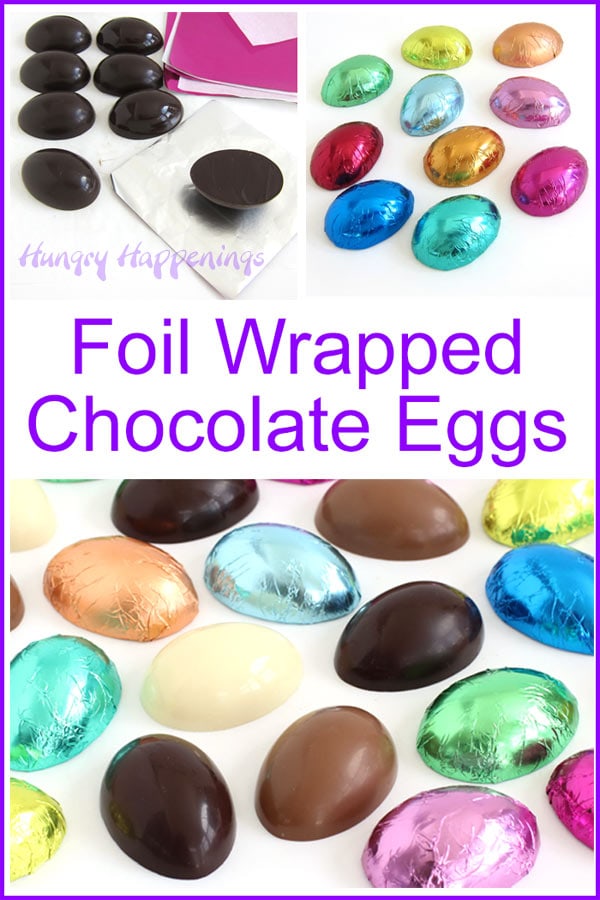
You can serve your chocolate eggs on a platter or simply place them in your Easter baskets, but I like to make them look pretty by wrapping them in colored foil wrappers.
It's also a great way to differentiate the chocolate egg flavors. As I mentioned, I used to make more than a dozen different chocolate egg flavors and I wrapped them all in a different color.
Wrap your caramel eggs in colored foil.
- Purchase 6-inch square pieces of colored foil candy wrappers then cut them down to 5-inch square wrappers. Unfortunately, the foils do not come in 5-inch squares. They come in 3-inch, 4-inch, and 6-inch. You can even buy Easter bunny and egg printed foil.
- Lay an egg with the curved side down on the foil.
- Fold in two corners, then fold in the other two corners.
- Smooth out the wrinkles.
If you watch the video, you will see how easy it is to wrap your eggs.
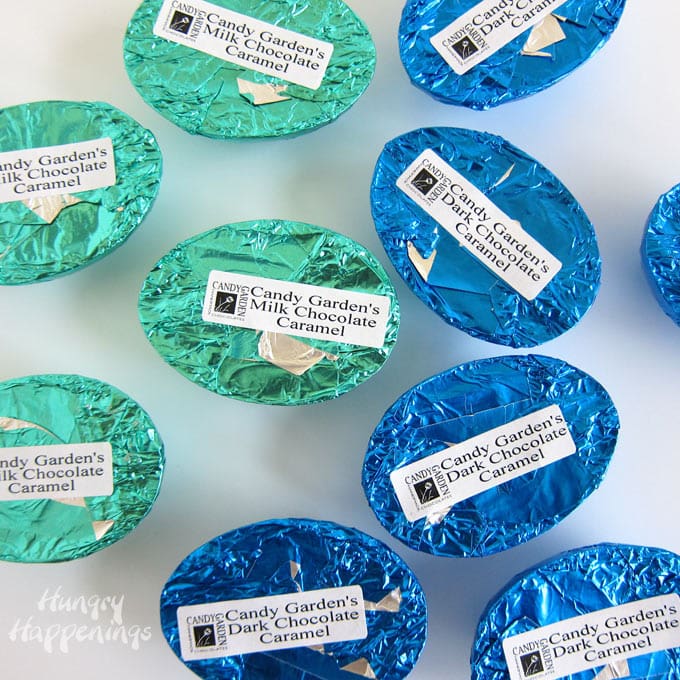
Labeling your eggs:
- I typically make more than a dozen different chocolate egg flavors for Easter. I usually wrap each flavor in a different foil color then add a flavor label on the bottom.
- I used small return address labels from Avery.
- You can easily print your own labels using the templates on Avery's website.
- Buy small return address labels, use the return address label template, type the chocolate egg flavor into the template, add a picture or logo, and follow the instructions to print the labels.
IMPORTANT: If you are making a variety of filled chocolate eggs, I recommend you unmold them onto parchment paper-lined baking sheets. Write the name of the filling on the parchment paper as soon as you unmold them so you don't get them confused. You can even put a sticky note directly onto the candy mold to ensure you know what is inside the eggs.

How to store your chocolate caramel eggs?
- Store at room temperature for up to 3 months.
- They'll be fine to eat for at least 6 months after they are made but will taste best if eaten within the first few months.
- If you don't wrap your chocolate caramel-filled eggs in foil, I recommend storing them in an airtight container, to keep them from getting dusty and to keep them fresh.
- I do NOT recommend refrigerating these eggs as chocolate will pick up smells and condensation from the refrigerator.
- If you live in a hot climate and you have to refrigerate your chocolate eggs, be sure to seal them in an airtight container along with a piece of paper towel (it will wick up any moisture). When you are ready to serve the eggs, set the container on your counter for about an hour before opening it. This will help to eliminate any condensation.
- You can freeze your chocolate eggs if you need to keep them for a longer period of time.
- Wrap the caramel eggs in foil, and place them in a cardboard box then place the box inside a zip-top bag and freeze for up to 6 months. Or place the foil-wrapped eggs in between layers of paper towels in a zip-top bag and freeze. The cardboard box or paper towels will help to wick up any moisture. Remove the bag from the freezer and set it on your counter, unopened, for several hours, until the chocolate thaws before opening.
The Sugar Academy Chocolate Making Classes
If you'd like to learn more about the art of making chocolate, be sure to check out my online video chocolate-making classes at The Sugar Academy.
Save 20% off any class using coupon code HUNGRYBLOG20.
Caramel Eggs Recipe

Make chocolate eggshells then fill them with soft and chewy caramel. Wrap the eggs in brightly colored foil to make your Easter baskets festive and fun!
- 16 ounces melted and tempered dark, milk, or white chocolate (or melted compound chocolate/candy melts/almond bark) - See Notes.
- 16 ounces soft caramel (Use Peter's Caramel or make homemade caramel. See the recipe for homemade caramel in notes section.)
-
Fill the egg cavities of a polycarbonate mold with melted and tempered pure chocolate or melted compound chocolate (candy melts, melting wafers, or almond bark).
-
Tap the mold a few times to remove air bubbles.
-
Invert the mold over the bowl of chocolate and allow the excess to drip out.
-
Scrape any excess chocolate off the flat surface of the mold.
-
Alternatively, you can paint chocolate into the bottom and up the sides of a plastic or silicone egg mold.
-
Chill in the refrigerator if using pure chocolate and in the freezer, if using compound chocolate until hardened, about 5 minutes in the freezer and between 10-15 minutes in the fridge.
-
Cut ¾ ounce pieces of caramel. Shape into an oval.
-
Press into the chocolate eggshells.
-
Flatten the surface of the caramel so you have at least 1/16 inch overtop to cover with chocolate.
-
Spread chocolate over the top of the caramel-filled eggs, then scrape off the excess.
-
Chill until hardened.
-
Unmold and wrap the caramel eggs in colorful foil wrappers.
Store your eggs at room temperature for up to 3 months.
Homemade Microwave Caramel
Ingredients:
1 cup butter
2½ cups packed dark brown sugar
1 cup light corn syrup
1 – 14oz can Eagle Brand sweetened condensed milk
1 teaspoon vanilla
Instructions:
Melt butter in a large microwave-safe bowl on high power for 45-75 seconds.
Stir in dark brown sugar, corn syrup, and sweetened condensed milk.
Heat on high power for 5 minutes.
Remove and whisk until smooth.
Heat for 5 more minutes, then stir.
Heat for an additional 5 minutes, then stir.
Check temperature, if it's between 245 - 250 degrees Fahrenheit.
If needed, heat for 1-minute increments, stirring after each until it reaches the desired temperature.
Stir in the vanilla.
Pour the caramel into a well-buttered 8-inch square pan.
Let the caramel harden for about 2 hours.
Then you can cut the caramel into ¾ ounce pieces to use to fill your chocolate eggs.
An alternative method to making caramel eggs:
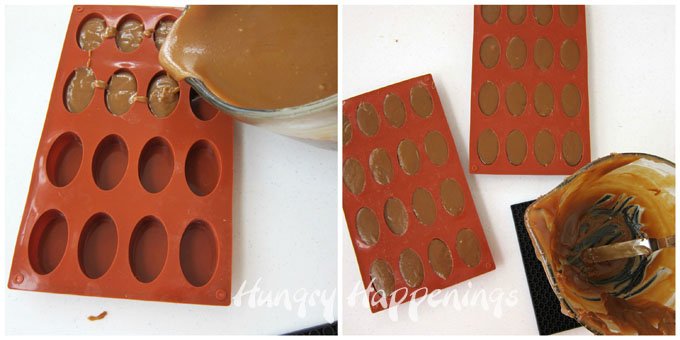
You can make oval-shaped homemade caramels using a silicone mold. Then you can either use those ovals in your chocolate shells or you can dip the oval-shaped caramels into chocolate.
I used the molds to create Caramel Footballs.
You can see how I made these caramel ovals here - Microwave Caramel Footballs.
More chocolate egg recipes...
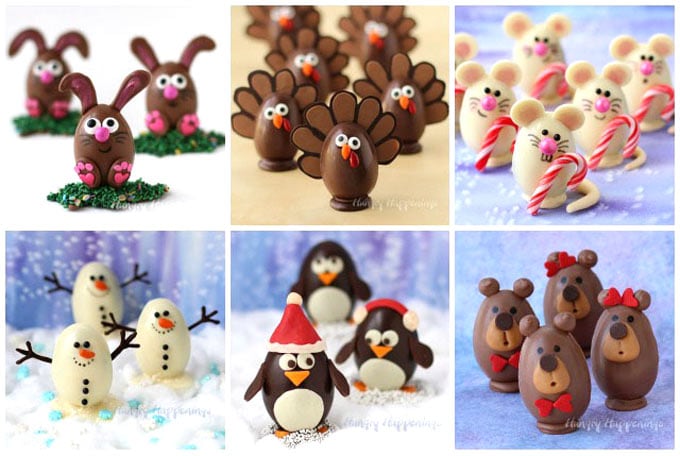
Chocolate eggs aren't just for Easter!
If you want to really go all out and decorate your eggs, be sure to check out my step-by-step tutorials to make these fun treats.
- Milk Chocolate Easter Egg Bunnies filled with my favorite peanut butter fudge
- Milk Chocolate Egg Turkeys filled with pumpkin ganache
- White Chocolate Egg Mice filled with cashew milk ganache
- White Chocolate Egg Snowmen filled with chocolate hazelnut coffee ganache
- Dark Chocolate Egg Penguin filled with Amaretto raisin ganache
- Milk Chocolate Buckeye Bears filled with peanut butter buckeye filling (made with butter, powdered sugar, and peanut butter)
More Easter Chocolate ideas...
Easter Egg Hot Chocolate Bombs
These hollow chocolate eggs are filled with hot chocolate mix and marshmallows but could be filled with candy.
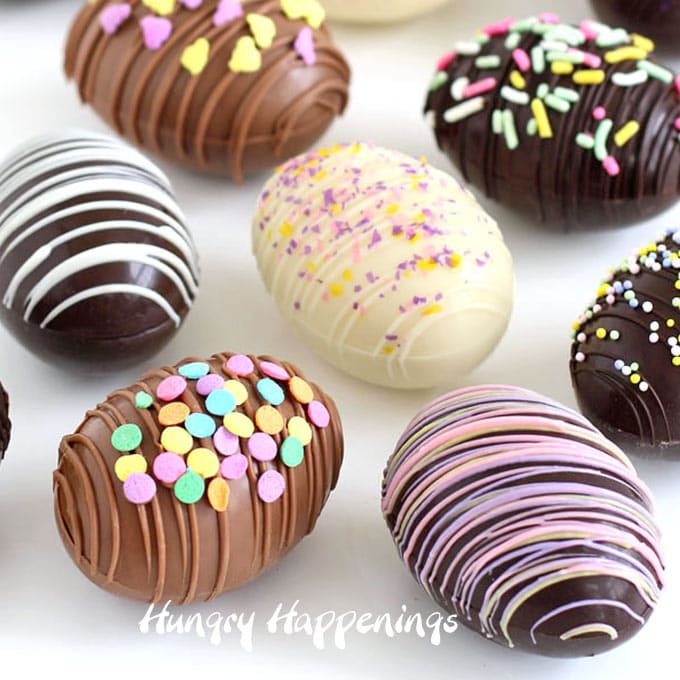
If you want to make 3-D chocolate eggs filled with caramel that look like these decorated chocolate eggs, you can "glue" two halves together with chocolate or melt the bottom of one egg half and attach it to another half.
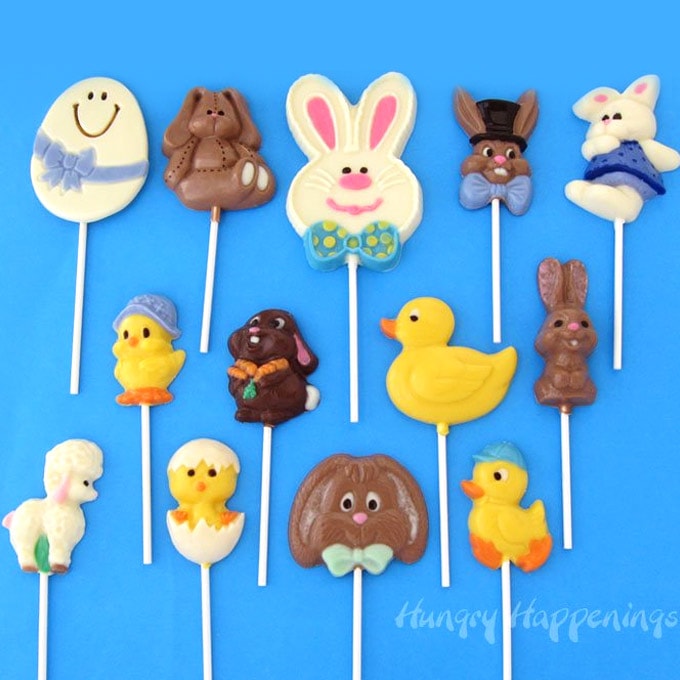
Handpainted Chocolate Easter Lollipops are fun to make and decorate with and for kids.
![]()
Did you make this recipe or have a question about it? Let me know by leaving a comment below. Be sure to rate the recipe too. If you love the recipe, please give it a 5-star rating.

I love making fun food for parties and special occasions and sharing my creative ideas with you.
If you make this recipe and share it online be sure to link back to this post.
Thanks and have a sweet day! -
Beth
- How to make peanut butter? - February 15, 2024
- OREO Penguins - December 20, 2023
- OREO Snowmen - December 20, 2023



Paula Richter
Great recipe for the Easy Microwave Caramel! I might have missed the step where you add the vanilla, I didn't see it written but i added it at the very end. I love that I found your Pintrest, 'been baking for years and started a cottage bakery in 2016. I have a degree in culinary and am currently in pastry school. I want to work more in chocolate!
Beth Klosterboer
Thanks, Paula. Yes, you add the vanilla at the end. It's always best to add it after you have heated your mixture. I hope you take some time to check out more of my chocolate-making posts. I've been a chocolatier for over 40 years and love working with chocolate. Good luck in pastry school.
Sylvia
This chocolate caramel egg recipe was super helpful. Thank you so much for all the great tips. The video really helped and my eggs turned out great. I am planning to fill my Easter baskets with the chocolate eggs and I know my family will love them.
Beth
That's great to hear! I'm glad you enjoyed making and eating the caramel eggs. Have a wonderful Easter!
Amanda
I'm going to guess my thermometer no longer works. I tried this and the caramel feels soft as it's cooling then turns to hard candy status. Will try again with new candy thermometer.
Beth
It sounds like your caramel is getting too hot. It will get hard if it's cooked to temperatures beyond 245 degrees F. You can check your thermometer by putting it in boiling water. It should register 212 degrees F. If you are at high altitudes, these temperatures will be different. According to Wikipedia, "water boils at 100 °C (212 °F) at sea level, but at 93.4 °C (200.1 °F) at 1,905 meters (6,250 ft.) altitude. If you dip your thermometer into boiling water and it doesn't register 212 degrees F if at sea level, then the thermometer needs to be calibrated (if possible).