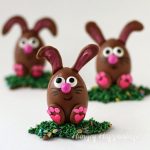
These sweet little Peanut Butter Fudge Filled Chocolate Easter Egg Bunnies will make the perfect centerpiece for any Easter dessert table.

I'm so sorry it took me so long to get these chocolate Easter bunnies made and shared with you. I realize it's going to be too late for most of you to make them this year, so you'll just have to pin them and remember to make them next year.
This design has been swimming around in my head since I made my first egg shaped chocolate truffle animal last Thanksgiving.
How could I possibly let Easter go by without creating another one?

Each one of these egg shaped treats has a different filling so if you don't want to fill your chocolate bunnies with peanut butter fudge, you can swap out the filling with any of these:
- Chocolate Turkey Truffles filled with Pumpkin Ganache
- Triple Chocolate Truffle Christmas Mice
- Snowman Truffles filled with Chocolate Hazelnut Coffee Ganache
- Chocolate Penguin Truffles filled with Amaretto Raisin Ganache
- Buckeye Bears - Peanut Butter Fudge Filled Chocolate Teddy Bears (a different fudge recipe)
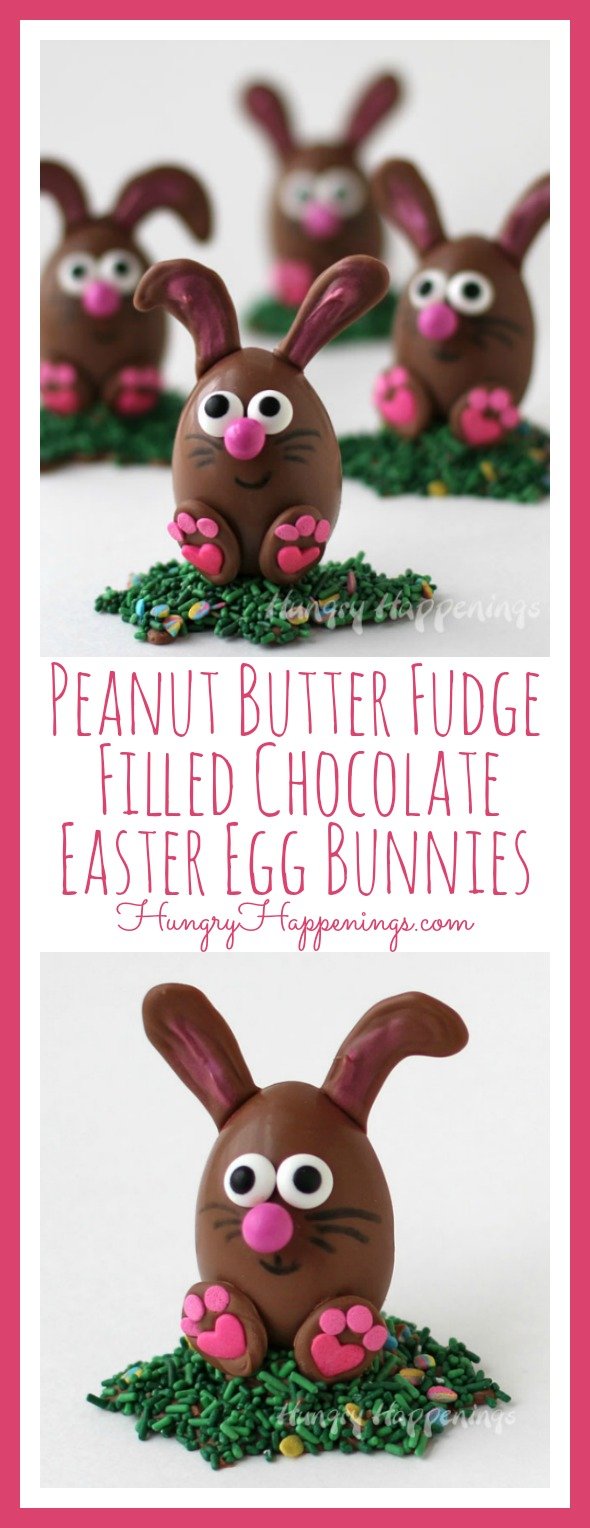
Don't you just want to reach into the screen and grab one of these Easter Egg Bunnies?
Not only are these bunnies darling, but they are decadently rich, as well.
Each one is filled with my favorite peanut butter fudge which is made with peanut butter, peanut butter chips, and white confectionery coating. The simple recipe is so easy to make and is creamier than any other fudge I've ever tried. My customers love it and can't get enough of it.

If you are experienced at tempering pure milk chocolate, I highly recommend making these using real chocolate. If not, they can also be made using confectionery coating (Candy Melts.) If you aren't sure what all of this means, click over to read my Chocolate Making Tips page for all the details.
Either way you make them, they will be the hit of your Easter dessert table, I'm sure.

RELATED: Find dozens of easy fudge recipes at HowToMakeEasyFudge.com.
Peanut Butter Fudge Filled Chocolate Easter Egg Bunnies
- 8 ounces white confectionery coating*
- 4 ounces Reese's Peanut Butter Chips
- 1 cup creamy peanut butter I suggest Jif Peanut Butter
- a pinch of salt
- Chocolate -
- 24 ounces melted and tempered pure milk chocolate
- or melted light cocoa confectionery coating Candy Melts*
- 50 candy eyes I used ½ inch eyes
- 25 pink Sixlets
- black food coloring marker
- 25 large pink heart sprinkles
- 75 small round pink confetti sprinkles
- 1 ½ cups green jimmies
- I mixed green jimmies with Wilton's Easter Sprinkle Mix of light green jimmies & eggs
-
Combine white confectionery coating wafers and peanut butter chips in a microwave safe bowl. Heat on high power for 15-30 second increments, stirring after each until melted.
-
Stir in peanut butter and salt.
-
Allow it to cool enough so that it no longer feels warm to the touch.
-
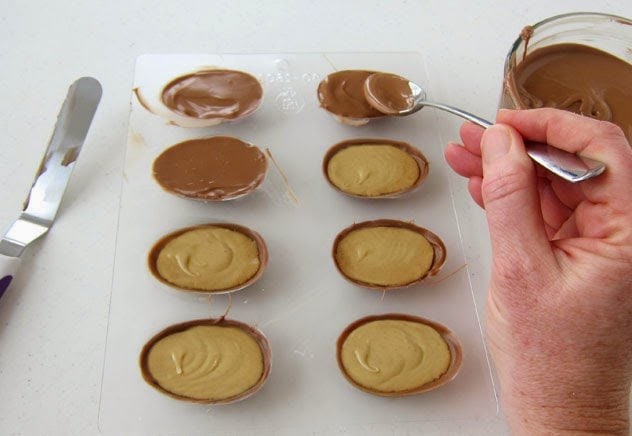
Paint a thin shell of melted chocolate into plastic egg molds.
-
Refrigerate until hardened.
-
Pour peanut butter fudge into chocolate shells.
-
Refrigerate until firm. Then allow to warm up to room temperature.
-
Top with a thin layer of chocolate.
-
Refrigerate until firm then un-mold.
-
Pipe chocolate ears and paws onto a parchment paper lined baking sheet.
-
Add pink hearts and confetti sprinkles to paws.
-
Refrigerate until hard.
-
Remove and brush pink luster dust over ears.
-
Spoon some chocolate onto a parchment paper lined baking sheet and set one egg on top, then sprinkle on green sprinkles and hold egg in place until it sticks.
-
Decorate each egg by adding 2 candy eyes, a pink candy nose, 2 candy ears, and 2 paws using melted chocolate.
-
Draw on smile and whiskers using black food coloring marker.
Instructions:
I will show you two different methods for making the peanut butter fudge filled eggs, one using plastic hobby grade candy molds and the other using polycarbonate commercial grade molds.

**See my Chocolate Making Tips page for detailed information about melting and tempering chocolate and confectionery coating.
Paint a thin layer of chocolate into each egg shaped cavity in your candy molds.

Make sure you fill in any thin spots or holes and be sure the chocolate goes all the way up to the edge of the egg cavity. Wipe the excess chocolate off around the edge of the eggs.
If using pure chocolate pop the molds in the refrigerator for about 5 minutes until the chocolate hardens. If using confectionery coating, place the mold in the freezer for about 5 minutes.

While your chocolate egg shells are hardening, make the filling.
I use Peter's White Caps which you can usually find at cake/candy decorating stores. A grocery store option is to use Nestle Premier White Morsels (white chips) which when melted may need a teaspoon of vegetable oil stirred in, if too thick, but they have the right flavor.

Place white confectionery coating wafers and peanut butter chips in a microwave safe mixing bowl. Heat on high power for 30 seconds. Remove and stir. Heat for 25 more seconds, then stir. Heat for 20 seconds, then let it sit in the microwave for 2-3 minutes, then stir vigorously. If all of the chips are not melted, heat at ten second intervals, stirring in between each, until completely melted. If you don't have a microwave, you can melt this in a double boiler.
Once melted, stir in peanut butter and salt.
Allow it to cool enough so that it no longer feels warm to the touch. This should take anywhere between 15 and 30 minutes. Don't wait too long or the fudge will set firm. If this happens, just heat it in the microwave again, as needed.

Pour the filling into a disposable pastry bag or large zip top bag, snip off the tip, and pipe the fudge into the chocolate egg shells. Fill to ⅛th inch from the top.
Allow the eggs to sit until the fudge firms up, about 30-60 minutes. You can speed this up by refrigerating them for about 15 minutes, but once you remove them from the fridge, you need to allow them to come to room temperature before topping with chocolate.Spread a layer of chocolate over top of the fudge and scrape off any excess chocolate using an offset spatula.
Pop them in the refrigerator for pure chocolate and freezer for confectionery coating for 5 minutes until the top coat is hardened.

Carefully turn the mold upside down, holding your hands over the chocolates (not pictured) and allow the chocolate eggs to fall out.

If you have polycarbonate molds (very thick heavy molds) the egg making process goes a bit more quickly. Pour chocolate all over the top of the mold, spread the chocolate into the egg cavities. Turn the mold upside down over your bowl of chocolate (or in my case my chocolate tempering machine) and allow the wet chocolate to drip out. Scrape the top of the mold and allow that chocolate to drop back into the bowl.
Turn the mold right side up and use a bench scraper (mine is a brand new paint scraper from the hardware store that has been washed and only used for chocolate) to scrape off all the chocolate that is on the top of the mold. Pop the mold into the refrigerator until the chocolate hardens.
Remove and let the chocolate come to room temperature. Pipe the peanut butter fudge into the chocolate egg shells. Allow the fudge to firm up.
You may have noticed these pictures are of dark chocolate eggs. I took them as I was making all my Easter eggs and got distracted and never took them of the milk chocolate eggs until I got to the next step.

Pour chocolate over top of the eggs. Smooth it out using an offset spatula. Scrape the excess chocolate off the top using a bench scraper. Chill the chocolate eggs until the chocolate sets.
Un-mold the eggs by turning the mold upside down. Be careful, the eggs will fall right out! I pick up a piece of parchment paper and set it over the eggs then allow them to fall out onto the parchment paper.
These eggs will be nice and shiny. This is how I created the eggs for my Easter egg bunnies.

Now to turn the chocolate eggs into bunnies, you first need to add ears. Pipe some chocolate ears onto a parchment paper lined baking sheet then set an egg over the bottom tips of the ears.

Use chocolate to attach two candy eyes and one pink Sixlet nose to each bunny.
Place in the refrigerator for 5 minutes so the ears will harden.

Pipe little ovals onto parchment paper for the bunny feet. Add one large heart sprinkle and three small pink confetti sprinkles to form the foot pad and three toes. Try to put the tip of the heart into the chocolate a bit to round out the bottom edge of the foot pad.
Chill in the refrigerator for 5 minutes until the chocolate hardens.

Attach two feet to the bottom of each egg shaped bunny using some chocolate.
Use a black food coloring marker to draw on whiskers and a smile.

Pipe some chocolate on a parchment paper lined baking pan creating a little grassy patch for the bunnies to sit on. Set the bunny on top and sprinkle with green jimmies and tiny Easter egg sprinkles. Hold the bunny in place until it stands upright on it's own.

Allow the chocolate to harden for 15 minutes.

Lift the bunnies up off the parchment paper and allow the excess sprinkles to fall off.
Store in an airtight container for up to a month. Be very careful as you are handling these as the ears are very fragile.
You can find supplies needed to create this recipe on Amazon. I earn a small commission when you use the sales links in this post to make a purchase at no extra cost to you.
 Chocolate Mold Half-Egg 2-7...Shop on Amazon
  Wilton Jumbo Heart Sprinkle...Shop on Amazon
  White And Black ½-Inch Ca...Shop on Amazon
 Wilton Colorful Egg Sprinkl...Shop on Amazon
 CK Products 3.2 Ounce Jimmi...Shop on Amazon
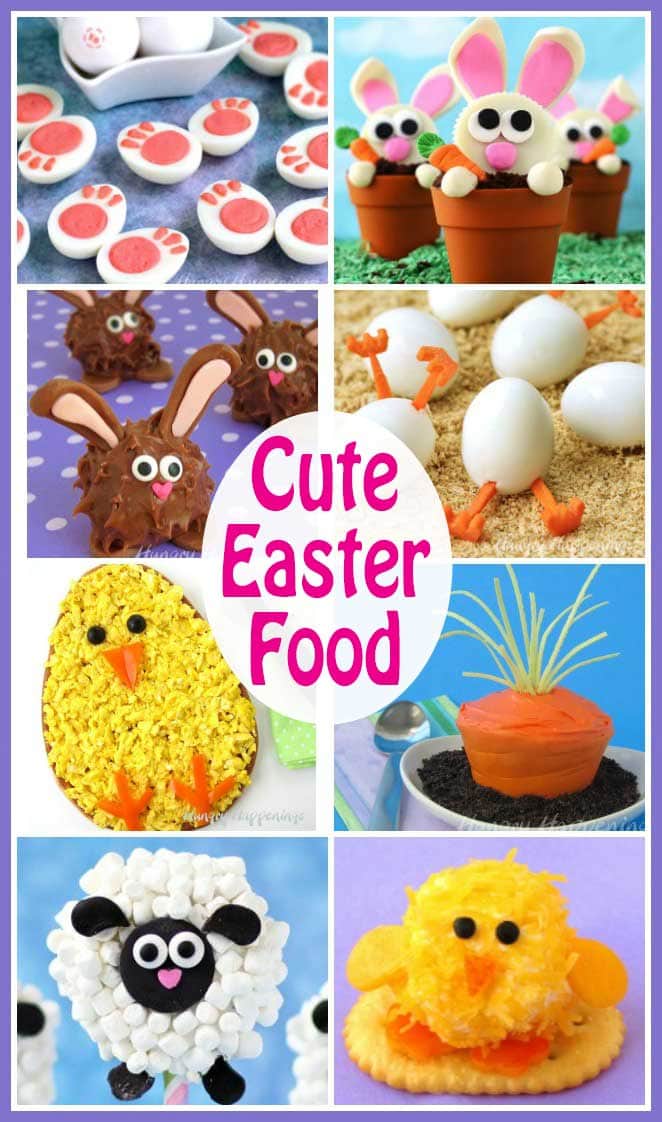
More Easter Chocolates
from Hungry Happenings


Reese's Cup Easter Bunny Cupcakes

2 Ingredient Reese's Fudge Bunnies


Reese's Peanut Butter Bunny Feet
If you recreate these Peanut Butter Fudge Filled Chocolate Easter Egg Bunnies
be sure to link to this tutorial and send pictures to beth@hungryhappenings.com, so I can share it in my Readers' Gallery.
If this Easter Recipe interests you, then you should go and check out all these other delicious ideas.

- Banana Split Bars – A Fun and Easy Summer Dessert - March 4, 2026
- Pineapple Fudge (No Candy Thermometer Needed!) - March 4, 2026
- No-Bake Peanut Butter Pie Recipe - March 3, 2026
Pamela @ Brooklyn Farm Girl says
I just came across your amazing blog full of wonderful chocolate adventures and wanted to thank you. I just visited the chocolate mold store (rows and rows of beauties!) yesterday and tonight will be my first chocolate attempt. I hope to do some filling in with oreos and pretzels. Wish me luck! Thanks again for this tutorial, it helped a bunch!
Beth says
Hi Pamela,
I'm so happy you found my site and I hope you enjoy looking around at all the projects. Be sure to check out my Chocolate Making Tips page for lots of really good tips on working with chocolate and candy molds. https://hungryhappenings.com/chocolate-making-tips/
Have fun and don't hesitate to ask questions if you need help.
Beth
Tavette Tavetta says
Your latest egg bunny with the adorable tootsies.....too cut. First of all one needs to make a hollow egg which is always time consuming to paint it so it's fully covered & just the right thickness. You mentioned pouring the chocolate directly over the mold and then turning the mold upside down to let the excess drip out. I'd seen that done (on TV) but I don't recall them mentioning using a heavy duty commercial mold so I probably missed that part.
beth says
There are a few reasons it's better to use the filling, dumping, scraping technique with heavy duty polycarbonate mold. First, those molds are sturdy and are easier to turn upside down and scrape than the flimsy hobby grade ones. They also do not have any bumps or curved edges. They are completely flat, so they are once again they easier to scrape. Finally, the cavities in the polycarbonate molds are closer together so you don't have to scrape off quite as much as you would if you used the hobby grade molds. All in all, it's just easier and as you mentioned, much faster. That's not saying you can't use that technique with the other mold, but it's much more challenging and messy.
I did a video where I used this technique to make smaller chocolate pieces. You can watch it on You Tube - https://www.youtube.com/watch?v=wb9Yn_DdrHk
Davie Cooper says
Well, this looks amazing but in the same time really complicated for me to prepare it. My kids will love it, may be I will try to do something like this.. like home-made chocolate eggs. But this looks so professional! Congrats 🙂
Tavette Tavetta says
I've been thinking about all the other wonderful things you've made using that egg mold (even bought one) and today - WHALA. The cutest Easter bunnies ever. Their tootsey-whootsey little feet are adorable and setting them on their own little patch of paradise (grass) is a great idea.
My mouth is watering, but I'm sure I couldn't just chomp into one of these - I'd have to wait and admire it til after Easter. Set them in the middle of each dinner plate and the guests wouldn't even notice what you've fixed for dinner - they'd be waiting for dessert.
Another great idea. Know your party tonight will be fun filled and you deserve all the oohs and aahs that are sure to happen. Thanks for including us by way of the photos and recipes. Oh yes - these will be made next Easter.
Tavette - S. Fla.
beth says
I know I can't believe it took me so long to get an egg animal created for Easter. I had ideas for 4 of them and only got one done. Oh, well, there is always next year.
It will be interesting to see if any of my guests have the heart to bite into one of these bunnies today. I'm now hosting 20 guests and am so excited to have some little kids joining us. I pulled together an Easter egg hunt for them. It should be fun.
I hope you have a lovely Easter too.
Anu-My Ginger Garlic Kitchen says
Awww, so cute and adorable bunnies. Loved them so much! Major drooling!
beth says
Thanks so much. They sure are drool worthy:)
The Partiologist says
You've done it again, I want chocolate at 7:30 a.m. I have loved all your chocolate eggs, but this little bunny sitting on the chocolate grass is my favorite!!!
beth says
I always want chocolate at 7:30 a.m. LOL! I'm happy to hear these are your favorites.