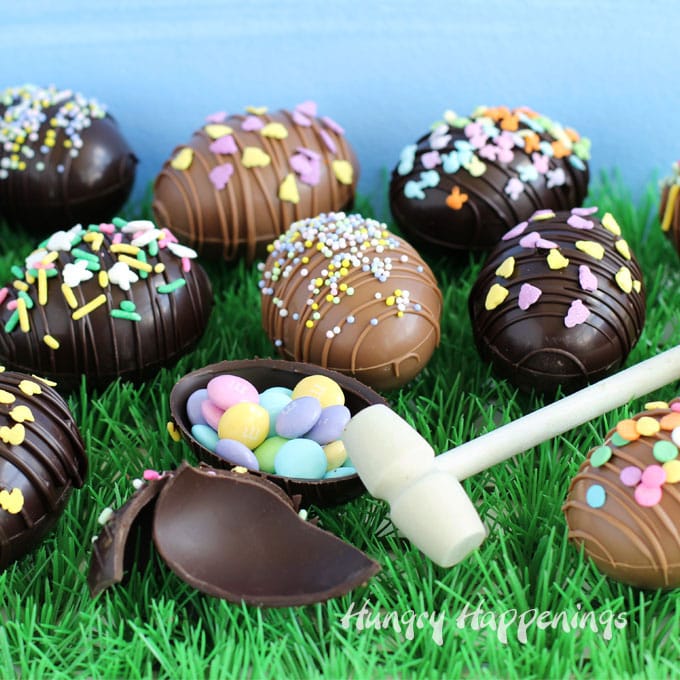
Crack open a breakable chocolate Easter egg to find candy hiding inside.
Each of these hollow chocolate eggs can be filled with your favorite Easter candy like jelly beans, M&M's, or malted milk eggs and can be decorated with festive Easter sprinkles.
They are fun to make and will be great additions to your Easter baskets.
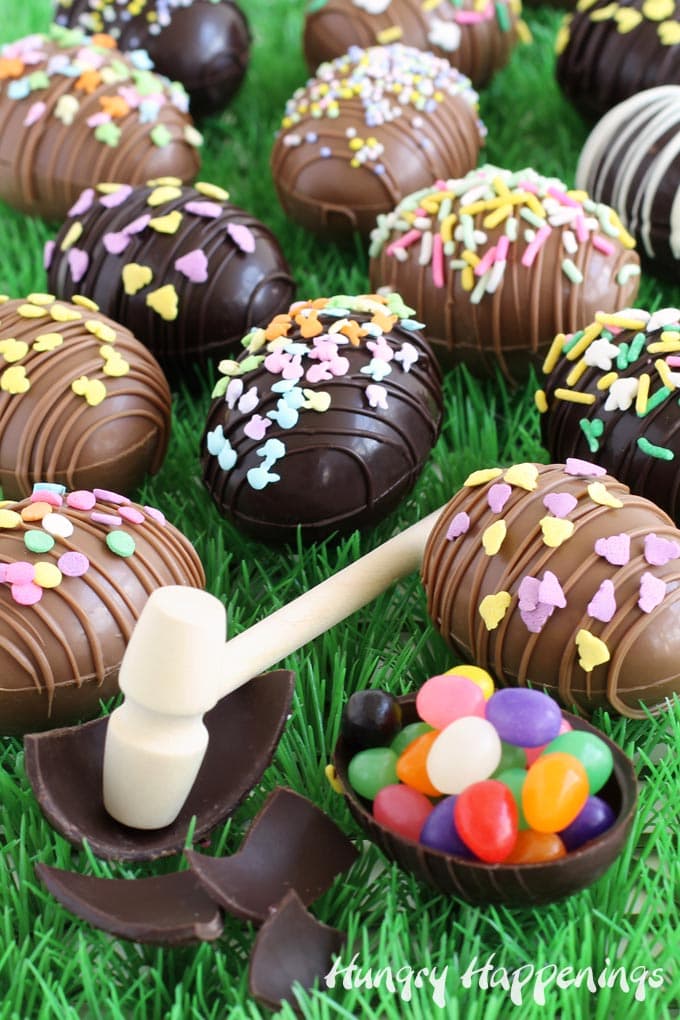
Breakable candies have become a trendy treat and these eggs are perfect to make for Easter.
Your entire family can work together to make and decorate these chocolate eggs or you can make them yourself and surprise your family with them by hiding them in their Easter baskets.
You can fill each egg with your kid's favorite candy or other small snacks like nuts, cookies, or fruit snacks.
In this tutorial, I will show you how to make:
- dark, milk, or white chocolate Easter eggs drizzled with chocolate and decorated with sprinkles
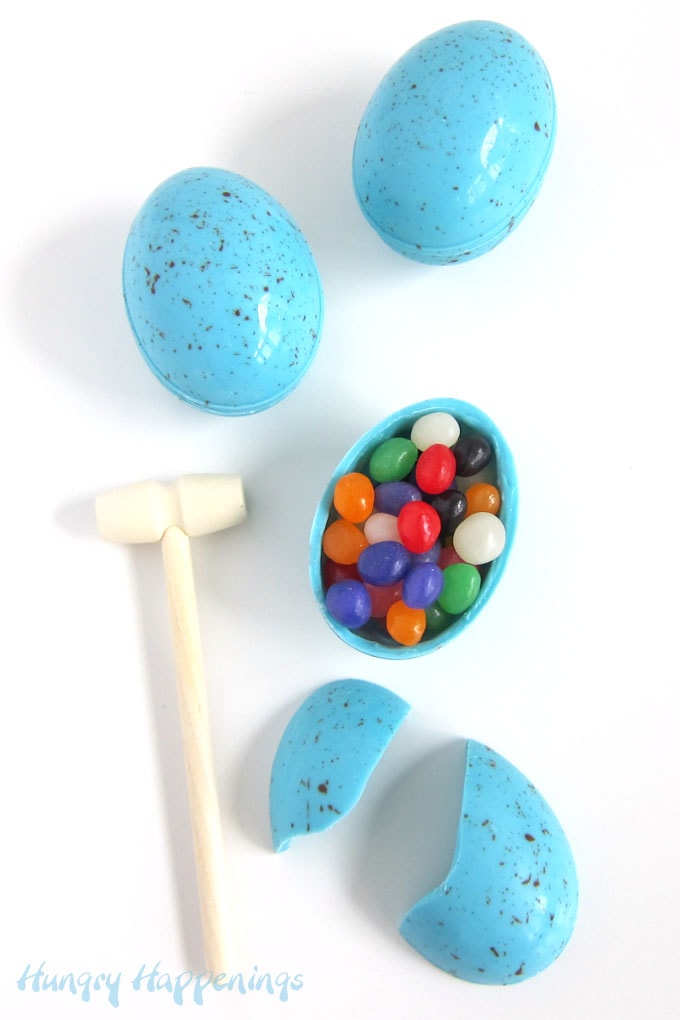
- blue speckled robin's eggs, like those pictured above, made with light cocoa and light blue candy melts
- personalized breakable chocolate eggs
Video
You can start by watching this video to see how to make the hollow chocolate eggs, fill them with candy, then decorate them for Easter.
[adthrive-in-post-video-player video-id="yQ4zo0vC" upload-date="2021-03-25T21:51:51.000Z" name="Breakable Chocolate Easter Eggs" description="Breakable chocolate Easter eggs can be filled with Easter candy like M&M's, malt ball eggs, or jelly beans. Crack them open to find the candy hiding inside. " player-type="default" override-embed="default"]
More Chocolate Egg Recipes:
You can find recipes to make some of my other popular Easter eggs using the links below. I'll be adding more of the links as I post the recipes.
- chocolate bark eggs and solid chocolate eggs
- peanut butter eggs
- caramel eggs
- coconut cream eggs
- marshmallow eggs
- chocolate truffle eggs
- chocolate raspberry eggs
- hollow Easter egg hot chocolate bombs
Chocolate
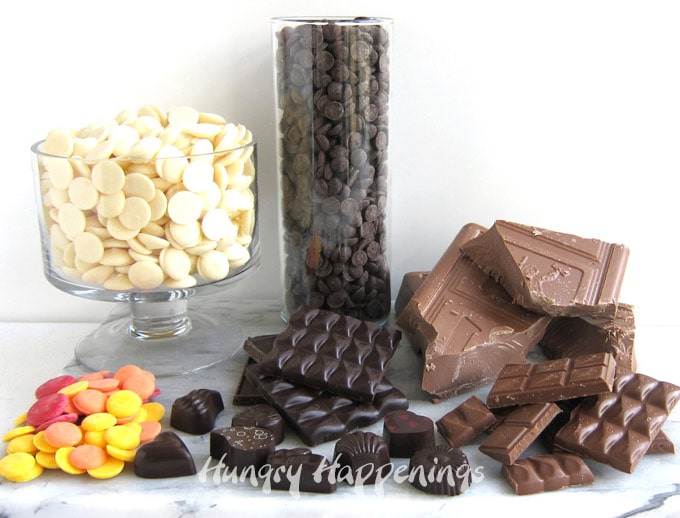
You can use:
- pure chocolate that contains cocoa butter and needs to be melted and tempered (heated and cooled to specific temperatures)
- available in dark chocolate, milk chocolate, or white chocolate
- compound chocolate (also known as confectionery coating, candy melts, melting wafers, or almond bark) that contains palm kernel oil and only needs to be melted
- available in dark, light, white, or a variety of colors

Start by melting your chocolate. You can use the stovetop or the microwave.
Melt the chocolate on the stove using a double boiler.
- You can melt your chocolate in a double boiler set over low heat.
- Fill a pot with 1-inch of water and set a tight-fitting bowl over the opening of the pan.
- Fill the bowl with chocolate and heat on low stirring often until melted.
- Be careful that no water or steam gets into your chocolate. When you pick the bowl up off the pot be sure to wipe the water off the bottom of the bowl.
If you are using compound chocolate (candy melts, almond bark, etc.) then you are ready to make your chocolate bomb Easter eggs. If you are using pure chocolate, you must follow the instructions listed below for tempering your chocolate.
Melting Chocolate in the Microwave
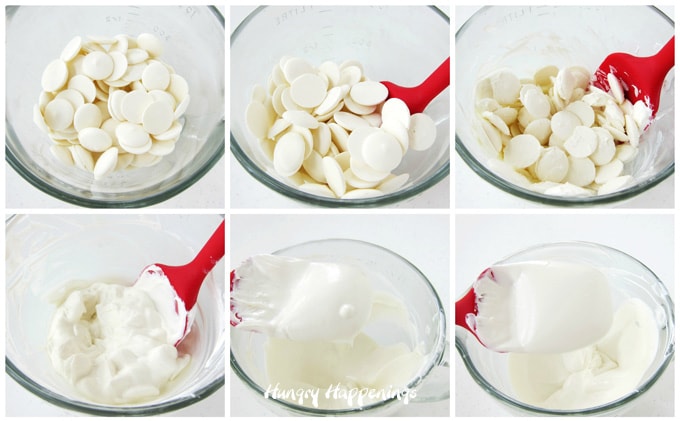
If you are using bars or blocks of chocolate, chop it into very small uniform-size pieces.
- Pour your chocolate or candy melts into a microwave-safe bowl.
- Heat on high power for 30-second bursts of power, stirring after each, until about 75% of the chocolate pieces have melted.
- Then heat at high power for 15-second bursts of power until most of the chocolate has melted.
- Set the bowl aside for a minute or two then stir again. The residual heat in the bowl will help to melt the remaining pieces of chocolate.
- If needed, heat for an additional 15 seconds, and stir until melted.
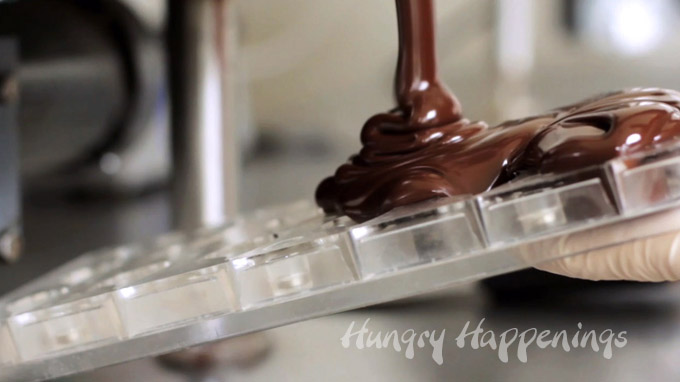
Tempering Pure Chocolate
When you purchase chocolate it will be in temper. It should look shiny and it should snap when broken.
Once you melt pure chocolate above certain temperatures it will go out of temper. You can carefully melt your chocolate so that it doesn't go above these temperatures (88-91 °F for dark chocolate; 86-88°F for milk and 82-84°F for white) but that can be tricky.
If the chocolate gets heated a degree or two over those temperatures, your chocolate will be out of temper, which means the chocolate will not harden properly and will stick inside the molds. So, I recommend using the seeding method to temper your chocolate.
seeding method of tempering
- Melt ¾'s of your finely chopped chocolate.
- You need to heat dark chocolate to 115°-120° Fahrenheit, milk chocolate to 110°-115° F, or white chocolate to 105-110° F.
- Begin to cool the chocolate by stirring in about ½ of your reserved chocolate. Continue to stir, scraping down the sides of the bowl until all of those chocolate pieces have melted.
- Check the temperature of the chocolate.
- Your goal is to get the chocolate to 88-91 °F for dark chocolate; 86-88°F for milk and 82-84°F for white.
- Continue to sprinkle in small amounts of the chocolate and stir to cool the bowl of chocolate until you reach the high end of the temperatures listed above.
- Once the chocolate reaches that temperate, remove any unmelted chocolate pieces and check the temper by dipping a metal spatula, spoon, or knife into the chocolate. Shake off any excess chocolate and set it aside for 3-5 minutes. If the chocolate has hardened and looks shiny, it is in temper.
- If the chocolate doesn't harden on the spatula then your chocolate is too hot and needs to be cooled further.
- If the chocolate looks streaky or spotty, then the chocolate has cooled too much, and you'll need to heat it up a bit, just be careful it doesn't go above the top temperature listed above for each type of chocolate.
- If the chocolate goes below the tempering temperatures (example: below 88 degrees F for dark chocolate), you can carefully reheat it in the microwave (3-5 seconds) or in the double boiler just until it reaches the higher temperature ( example: 91 degrees F for dark chocolate).
NOTES:
- During the process of making these chocolate eggs, you will need to retemper your chocolate so it's good to have more chocolate on hand so that you can reheat the chocolate in your bowl and seed it with more solid (tempered) chocolate.
Read more detailed information about the types of chocolate and how to melt and temper chocolate on my chocolate-making tips page.
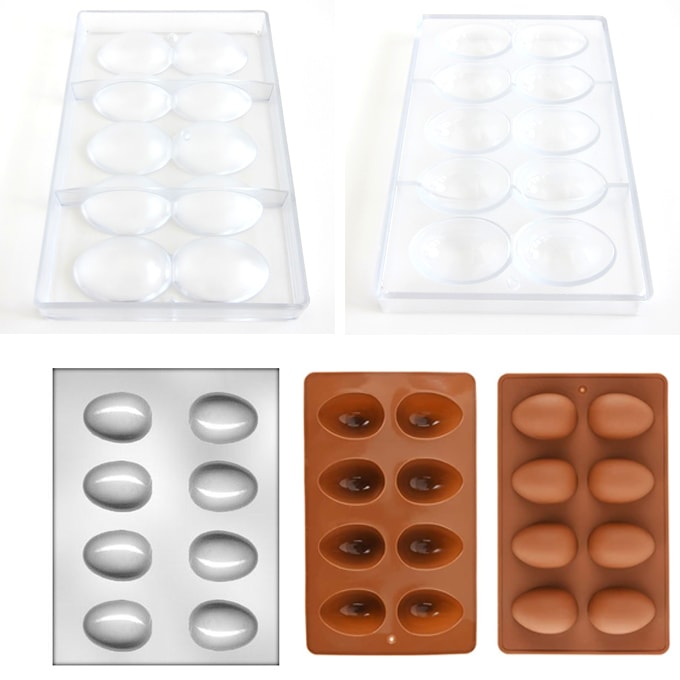
Egg Molds
You have several choices when it comes to molds to make your egg-shaped chocolates.
- polycarbonate egg molds (my favorite!)
- imprinted polycarbonate egg molds with design
- hobby-grade plastic egg molds
- plastic 2-piece egg ornaments
- silicone egg molds
Other supplies you'll need to make your chocolate eggs:
- microwave-safe bowls or a double boiler
- silicone spatula
- offset metal spatula
- metal bench scraper (or use a putty knife that's only used for chocolate work)
- optional, food-use only paintbrush if you plan to use silicone molds
- food handling gloves are imperative when working with chocolate that you wear gloves so that you
- disposable pastry bags or parchment paper cones
- parchment paper or wax paper set on cookie sheets or cutting boards
- an instant-read thermometer is a must if you plan to temper pure chocolate (my favorite is a Themapen)
Buying Chocolate & Supplies
You can order everything you need to make these chocolate eggs from Amazon. I earn a small commission at NO extra cost to you when you use the affiliate links below.
 Callebaut No 811 Finest Bel...Shop on Amazon
  Peter's Gourmet Burgundy Di...Shop on Amazon
  Callebaut Chocolate Block S...Shop on Amazon
  Wilton Light Cocoa and Brig...Shop on Amazon
  Merckens Coating Melting Wa...Shop on Amazon
  Wilton Candy Melts - Blue 3...Shop on Amazon
  Decora 50050 Egg Polycarbon...Shop on Amazon
  Crystalia Polycarbonate Egg...Shop on Amazon
  CK Products Candy Molds, Cl...Shop on Amazon
  1/2/3/4/10/27 Holes Texture...Shop on Amazon
 EchoDone Egg Shape Soap Mol...Shop on Amazon
  8x6CM Egg Shape Clear Chris...Shop on Amazon
  Wilton EZ Thin Dipping Aid ...Shop on Amazon
  Anchor Hocking Batter Bowl,...Shop on Amazon
  ALLTOP Bench Scraper & Chop...Shop on Amazon
  Putty Knife Scrapers, Spack...Shop on Amazon
  Dre Health Synthetic Nitril...Shop on Amazon
  Wilton 12-Inch Disposable C...Shop on Amazon
  Food Items Sprinkle EASTR M...Shop on Amazon
  Sprinkles Mix-Spring Nonpar...Shop on Amazon
  Wilton 6 Mix Easter Sprinkl...Shop on Amazon
 Celebakes by CK Products Ea...Shop on Amazon
  CK Products Squeeze Bottle ...Shop on Amazon
  2022 Update Individual Cupc...Shop on Amazon
  OLSAinny 4-Compartment Disp...Shop on Amazon
  ONE MORE Clear Cupcake Boxe...Shop on Amazon
  18PCS Mini Wooden Hammer fo...Shop on Amazon
  Wooden Crab Lobster Mallets...Shop on Amazon
Making chocolate easter eggs using a polycarbonate mold.
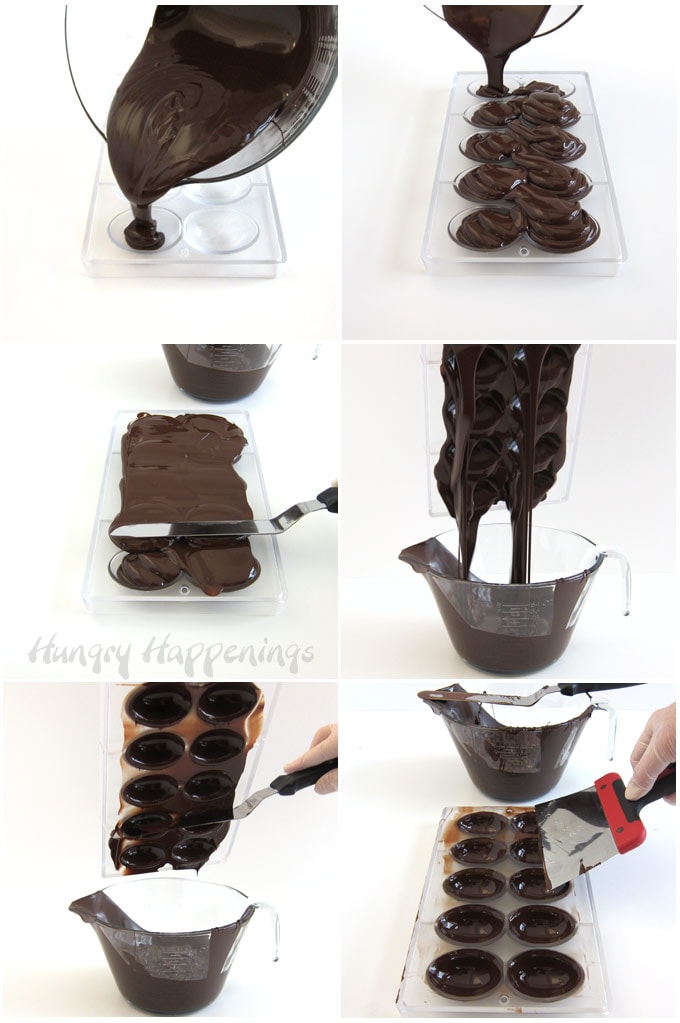
- Fill the egg cavities in your mold completely with chocolate.
- Tap the mold a few times to allow air bubbles to come to the surface and pop.
- Turn the mold upside down over your bowl of chocolate and allow the excess chocolate to drip out.
- Tap the side of the mold a few times to encourage all of the excess chocolate to drip out of the mold.
- Use an offset spatula to scrape off the excess chocolate.
- Set the mold upright and use a metal bench scraper or putty knife to scrape over the mold to ensure all of the excess chocolate has been removed.
- If using pure chocolate, you can leave the chocolate to harden at room temperature, but to speed up the process, you can chill the chocolate eggs in the refrigerator for about 20 minutes.
- If you are using compound chocolate (candy melts, almond bark, etc.) then freeze the egg mold for about 5-10 minutes until the chocolate hardens. Don't chill in the freezer for too long or the chocolate eggshells may crack.
- To check to see if your chocolate has retracted from the mold, look on the underside of the mold to see if the chocolate looks all one color.
- If there are dark spots, that area of the chocolate has not hardened.
- Chill a bit longer then try again.
- To remove the chocolate from the molds you can simply slide them out of the cavities or you can place a cutting board or cookie sheet on top of the mold, flip it over, and allow the chocolates to fall out.
- If the chocolates won't come out of the mold, place the mold back in the refrigerator for a few more minutes and try again.
- After waiting for a while (more than 45 minutes) for the chocolate to harden and it just won't come out of the mold that means your chocolate was not in temper. You can pop the mold in the freezer to see if you can get the chocolate to harden so you can remove it from the mold, but your chocolate will bloom (become streaky or spotty) and will soften as it thaws.
- If you can't get the chocolate eggshells out of the mold then you will have to wash the chocolate out of the mold using hot water and try tempering the chocolate again.
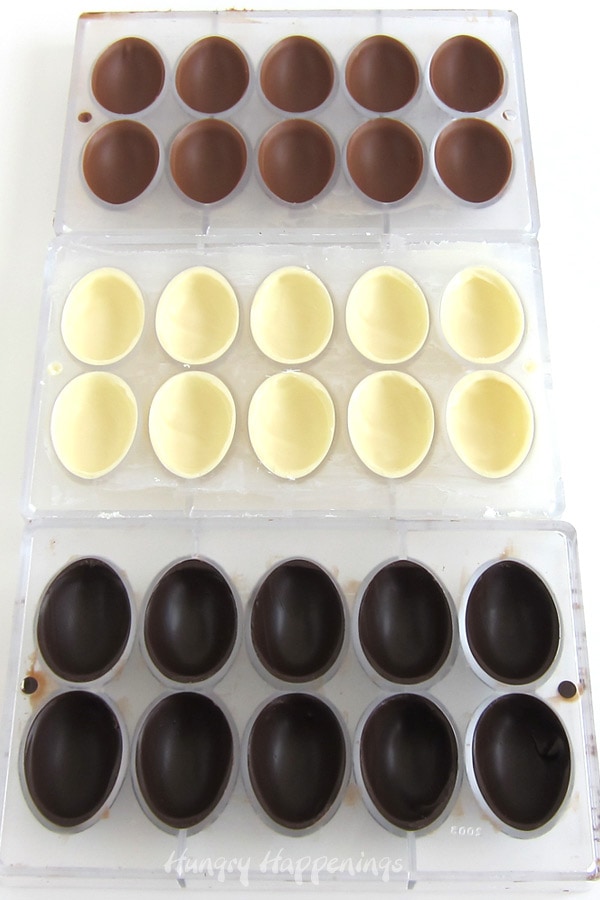
You will use the same fill, dump, empty, and scrape method when you make milk chocolate, white chocolate, or dark chocolate eggs.
If your chocolate or candy melts are really thin, you'll want to turn the mold upside down on a parchment paper-lined baking sheet before chilling the eggs. This will keep the chocolate from pooling at the bottom of the egg mold.
You might also need to paint a second layer of chocolate into the mold. If you watch the video, you'll see how I do this when making the blue speckled robins egg.
Tips for ensuring shiny chocolates.
- Make sure your molds are clean and dry before using them.
- I recommend brushing the inside of a polycarbonate or plastic mold with a soft cotton ball. This will ensure they are completely clean and it will make your chocolates really shiny.
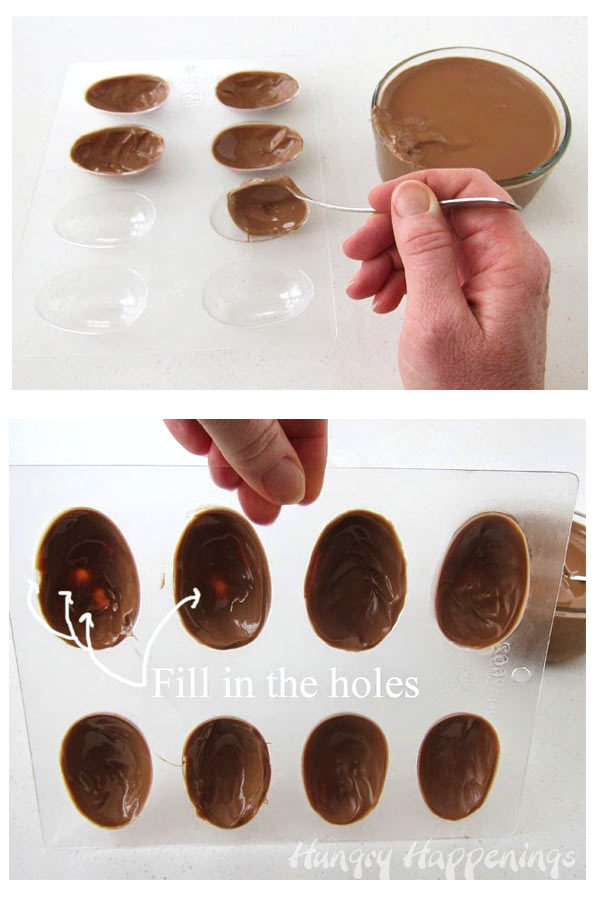
Using a plastic hobby-grade candy mold.
- Pour some chocolate into the egg cavity.
- Use a spoon or a food-use-only paintbrush to brush the chocolate up the sides of the mold.
- Make sure you fill in all of the light spots or holes with chocolate.
- Wipe off around the edge of each chocolate egg using a bench scraper.
- Chill in the fridge if using pure chocolate and in the freezer, if using compound chocolate (candy melts/almond bark) until the chocolate sets.
- You might need to paint in a second coat of chocolate especially around the top edge of the mold.
![]()
silicone mold
You can use the same technique of painting chocolate when using a silicone mold. I used this half-sphere mold to make hot chocolate bombs. You can do the same if using a silicone egg mold.
- Fill the mold about ⅓ full with tempered pure chocolate or melted compound chocolate (candy melts, etc.)
- Use a paintbrush to brush the chocolate up the sides of the mold.
- If the chocolate pools in the bottom of the mold continue to brush it up around the sides until the edges are well coated.
- Chill pure chocolate in the refrigerator and candy melts (or any compound chocolate) in the freezer.
- Brush a second coat of chocolate around the edges and chill again.
- To remove from the mold, tug on the silicone mold right around the chocolate you want to remove and the chocolate will pop out.
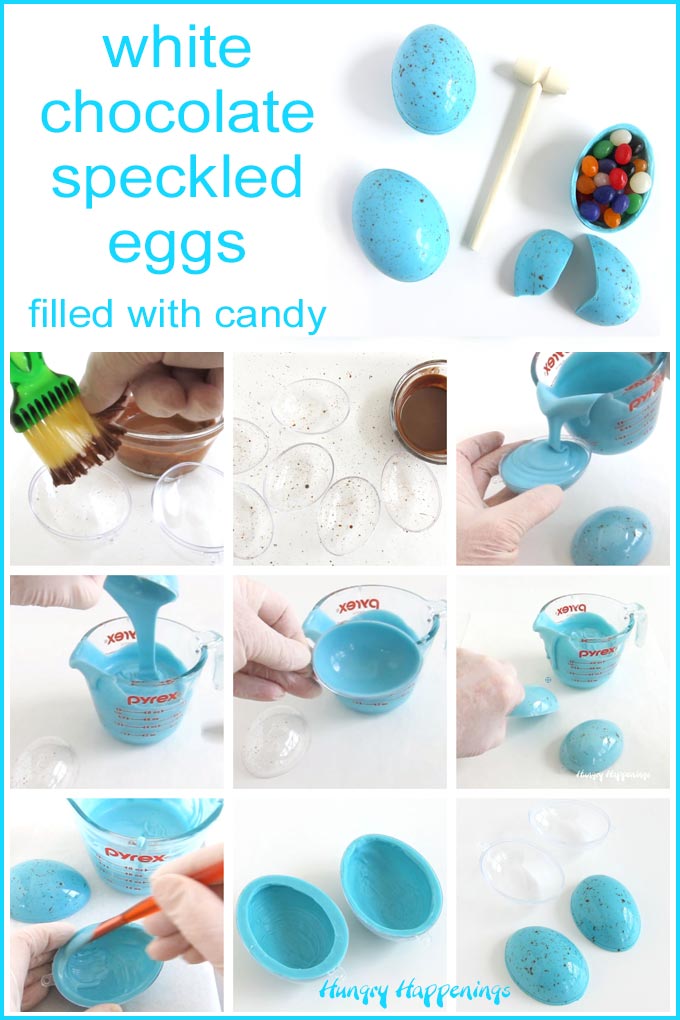
Make speckled chocolate eggs using a plastic egg ornament.
- Pull the two pieces of your plastic Easter egg ornament apart.
- Make sure the molds have been washed and dried fully before using. I also recommend brushing the inside with a soft cotton ball. This will ensure they are completely clean and it will make your chocolates really shiny.
- If you want to make speckled chocolate eggs using compound chocolate (candy melts), thin out some light cocoa candy melts using Wilton EZ Thin or Paramount Crystals.
- You can also thin out pure chocolate using melted and tempered cocoa butter or you can create your speckles using colored cocoa butter.
- Dip a stiff bristle brush into the thinned chocolate then flick the chocolate into the mold creating speckles.
- You'll need to clean and dry this brush often as you work.
- Alternatively, you can simply crush up chocolate cookies into fine crumbs and stir a small amount into blue candy melts until they look speckly. Then use that chocolate to make the eggshells.
- Pour chocolate into one half of the mold filling it completely.
- I used light blue candy melts. I actually lightened the candy melts by stirring in some white candy melts, but you can leave them as they are if you want brighter blue robin eggs.
- Tap the mold a few times to remove air bubbles.
- Turn the mold upside down over your bowl of melted chocolate and use the end of your spatula to tap the mold allowing the excess chocolate to drip out.
- Use your metal spatula to scrape away any excess chocolate around the edges of the mold.
- Place the mold, open side down, onto a piece of parchment paper. This will allow the chocolate to pool towards the edge and not towards the bottom of the mold.
- Repeat filling the second half of the ornament mold.
- If using candy melts, immediately place the chocolate eggshells into the freezer for about 5 minutes. If you are using pure chocolate you can continue to fill your molds and allow your chocolate to harden at room temperature or you may place the chocolate in the refrigerator.
- If the layer of chocolate looks thin, paint on a second layer.
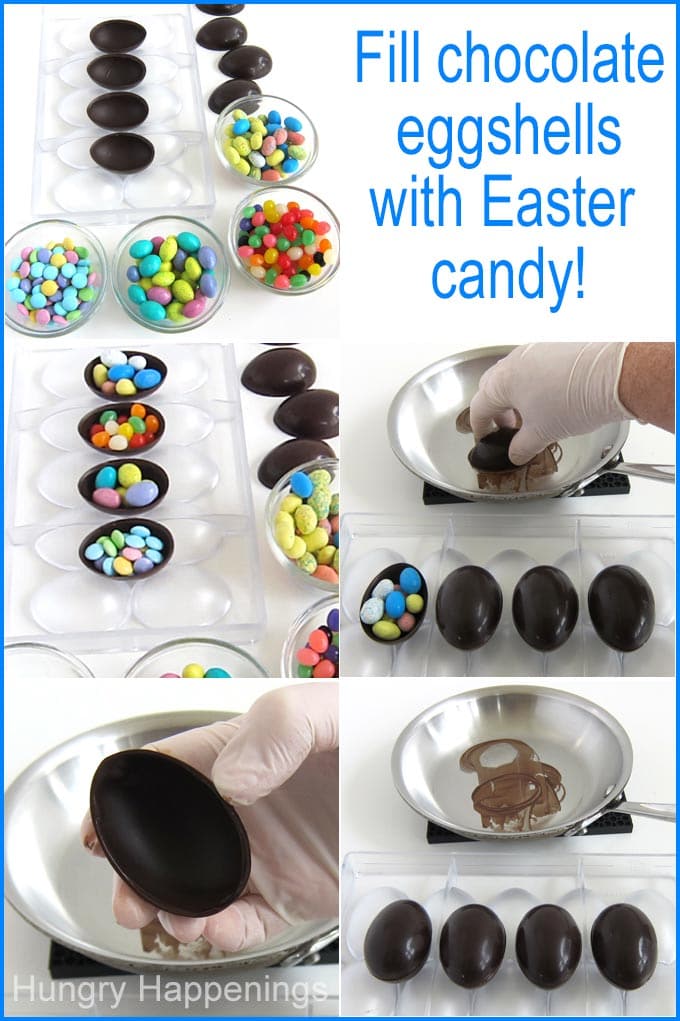
Fill chocolate eggs with candy then seal the two halves together.
NOTE: Whenever handling your chocolate eggs, I suggest you wear food handling gloves. They will keep your eggs clean from fingerprints. Be sure to wipe off any melted chocolate as you work.
- Fill half of your chocolate eggshells with Easter candy.
- Heat a skillet on low heat for 20 to 30 seconds (just long enough to warm up the pan.)
- Pick up one of the empty chocolate eggshells and hold it with the open side down.
- Set it in the warm pan, and allow it to melt slightly.
- Lift the chocolate egg out of the pan then set it over one of the filled chocolate eggs, pressing the two halves together gently to seal them together.
- You'll notice in the video that I use the side of my hand to gently push on the top of the breakable chocolate egg to ensure the two halves are sealed well because I had melted chocolate on my fingertips.
- Repeat.
- Once the pan cools too much to melt the edges of your chocolates clean the pan and reheat it. Do not heat the pan filled with any chocolate as it will burn.
- Watch the video to see how this is done.
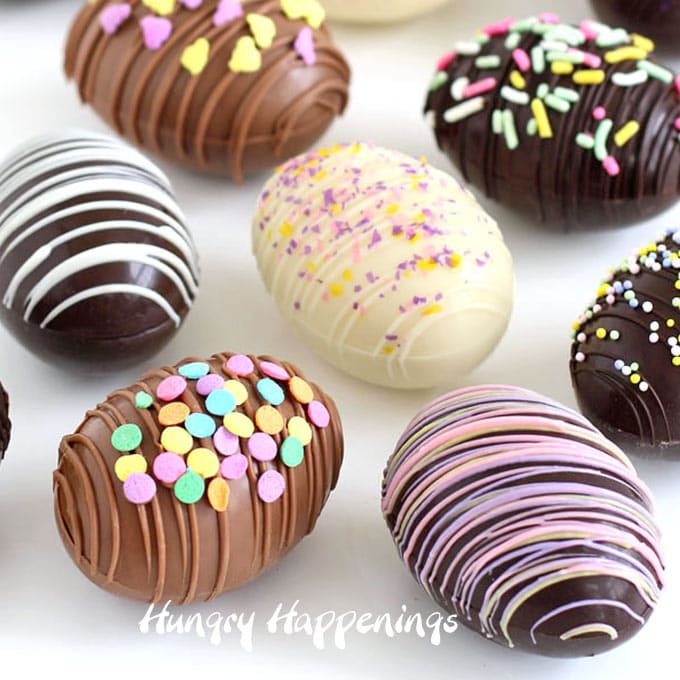
Decorating your chocolate eggs.
- Pipe a thin drizzle of chocolate over the top of the chocolate eggs then, if desired, immediately add sprinkles or edible glitter.
- There are so many colorful Easter sprinkles available but you can use brightly colored nonpareils, round confetti sprinkles, or jimmies too.
I like adding a drizzle of chocolate over my eggs, but there are many other ways you can decorate your eggs. If you scroll past the recipe card you will see how I made bunnies, bears, chicks, and more by adding decorations to my hollow chocolate eggs (and spheres).
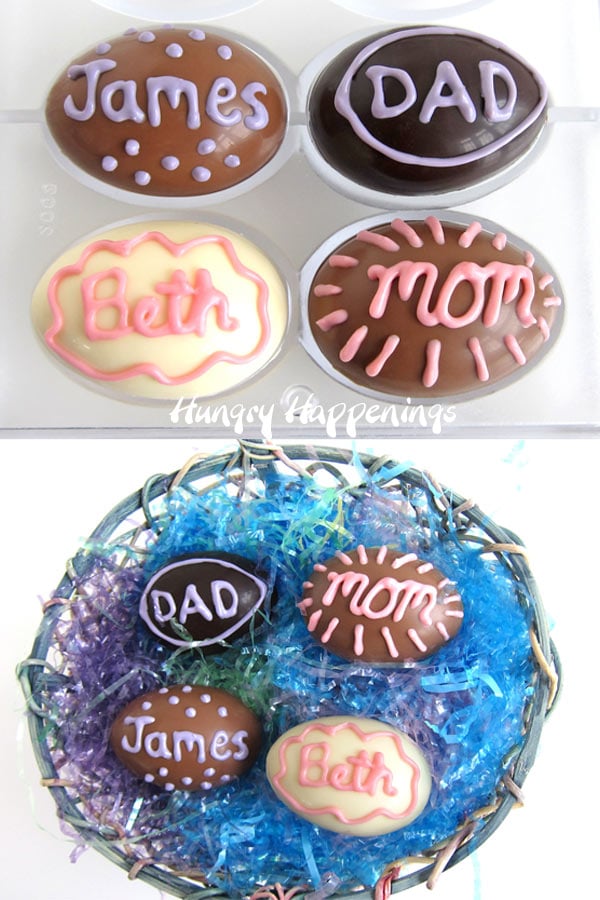
One of my favorite ways to decorate a breakable chocolate egg is by adding names on top. If your kids have longer names, you will want to make bigger chocolate eggs! It's challenging to pipe really small letters using melted chocolate.
Personalizing chocolate eggs.
- Pour your chocolate into a squeeze bottle, a pastry bag, or a parchment paper cone, and pipe names onto the top of your chocolate eggs.
- I love using microwave-safe CK Products SqueezeIt Bottles.
- The entire bottle can be microwaved to reheat your chocolate as it cools, including the tip.
- I use a toothpick to pick out any chocolate that has hardened in the tip then pop the entire bottle in the microwave for 10-15 seconds.
- I used a #3 pastry tip to pipe the chocolate letters onto my eggs and was only able to write 5 letters. You'll need to use a smaller tip if you want to add longer names to your eggs.
Your eggs are now ready to share with family and friends.
They'll be the perfect treat to put into Easter baskets.
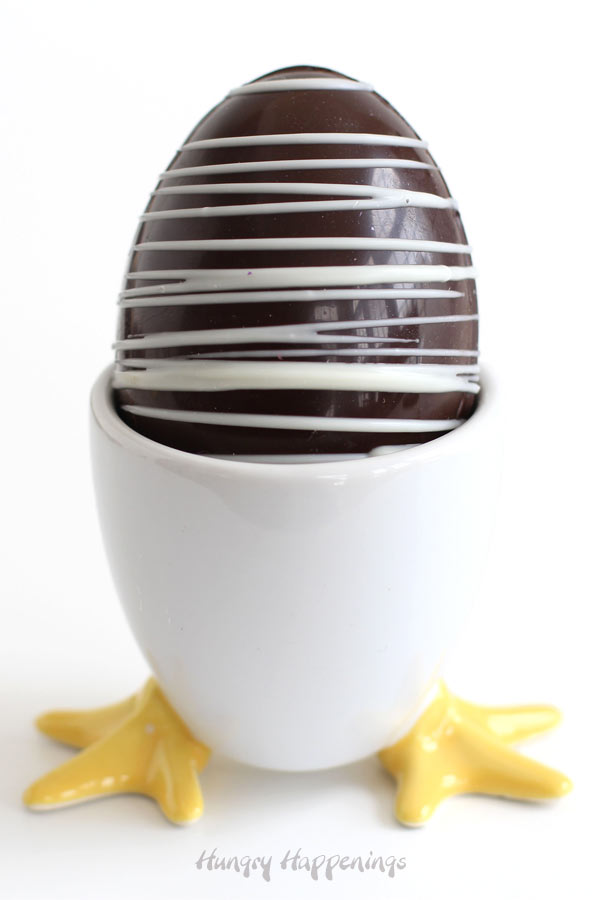
They'd also be so fun to place at everyone's place setting at the Easter dinner table. How cute does this candy-filled chocolate egg look in a Hatching Chick Egg cup?
Chocolate Making Classes
If you'd like to learn more about the art of making chocolate, be sure to check out my online video chocolate-making classes at The Sugar Academy.
Save 20% off any class using coupon code HUNGRYBLOG20.
Printable Recipe

Make hollow chocolate eggs and fill them with your favorite Easter candy. Then hide them in Easter baskets or use them to decorate your dinner table. Break them open to find a surprise inside.
- 8-14 ounces melted and tempered pure chocolate or melted compound chocolate (candy melts, almond bark, melting wafers, etc.) (see notes)
- optional, sprinkles
- ½-3/4 cup Easter candy
-
If using polycarbonate egg molds or plastic egg ornament molds, fill each egg cavity completely with chocolate then tap the mold to allow air bubbles to come to the surface and pop.
-
Turn the mold upside down over your bowl of chocolate and allow the excess chocolate to drip out, leaving a thin shell of chocolate in the mold.
-
Scrape off the excess chocolate, cleaning the top surface of the mold.
-
If using a plastic hobby-grade mold or silicone mold, brush a thin layer of chocolate over the bottom and up the sides of each egg cavity.
-
If using pure chocolate, chill the eggs in the refrigerator until hardened, about 20 minutes. If using compound chocolate (candy melts, almond bark, melting wafers, etc.) chill the eggs in the freezer for about 5 minutes until hardened.
-
Remove and unmold the chocolates.
-
Fill half of the eggshells with candy.
-
Heat a skillet on low heat for about 20-30 seconds. Remove it from the heat.
-
Set an empty chocolate egg, open side down, in the pan, and allow the edge to melt slightly.
-
Gently press that eggshell half over a candy-filled chocolate eggshell to seal the two halves together.
-
Repeat.
-
If desired, drizzle chocolate over the top of each egg and add sprinkles, or you can pipe chocolate letters to personalize your eggs or you can add decorations to create bunnies, chicks, etc.
- You will need between ½-ounce and 1-ounce of chocolate per egg, depending on the size egg mold you use. You will need to have extra chocolate if you are using the pour, dump, and scrape method to make your eggs. You will need less chocolate if you simply paint the chocolate into your egg molds.
- Store your candy-filled chocolate eggs at room temperature for up to 4 months (best if eaten within 2 months).
- The calories listed are for the hollow chocolate eggs only because the calories in the candy inside each egg will vary.
More chocolate egg ideas...
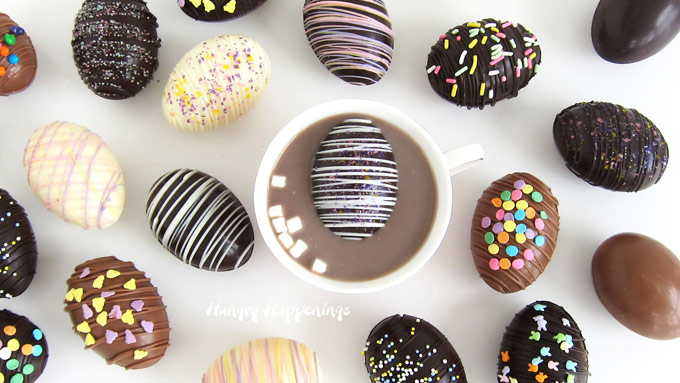
You can also fill your hollow chocolate eggs with hot cocoa mix and marshmallows. Click this link to see my tutorial for making Easter Egg Hot Chocolate Bombs.
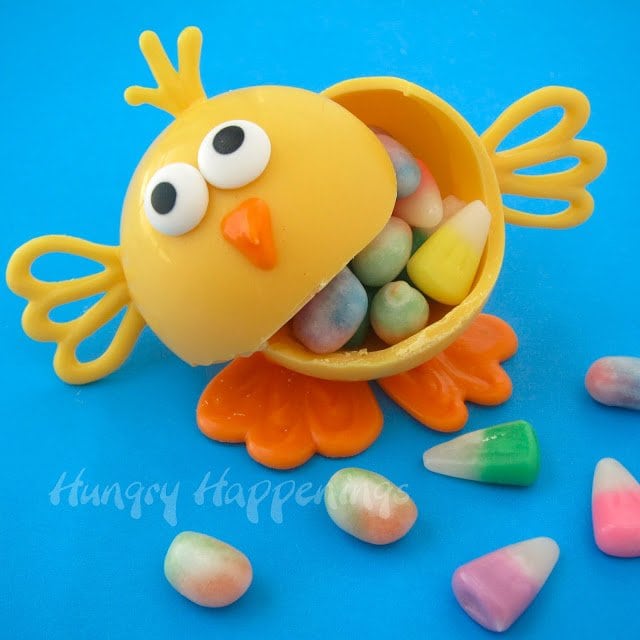
You can have fun decorating hollow white chocolate eggs or spheres to look like cute baby chicks. Click here to see the tutorial to make these cute white chocolate chicks filled with candy.
Decorated Chocolate Eggs
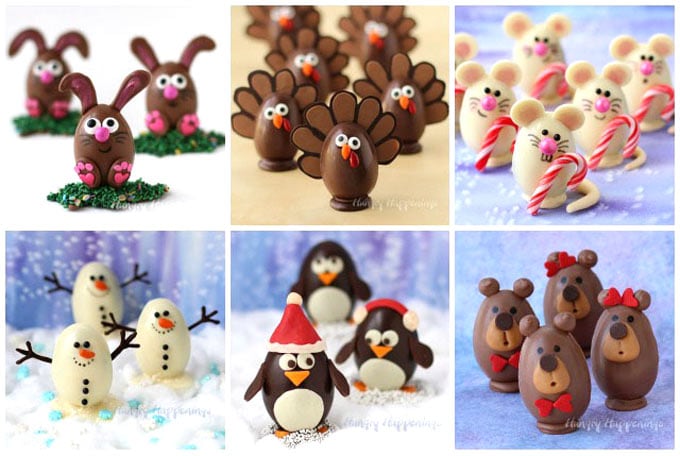
Chocolate eggs don't have to be made only at Easter. How cute are these Christmas, Thanksgiving, and Valentine's Day eggs?
All of these adorably decorated chocolate eggs are made using only half of an egg, each is filled with peanut butter fudge or chocolate ganache. But you can use the same decorating techniques to decorate hollow, breakable chocolate eggs too.
- Milk Chocolate Easter Egg Bunnies filled with my favorite peanut butter fudge
- Milk Chocolate Egg Turkeys filled with pumpkin ganache
- White Chocolate Egg Mice filled with cashew milk ganache
- White Chocolate Egg Snowmen filled with chocolate hazelnut coffee ganache
- Dark Chocolate Egg Penguin filled with
- Milk Chocolate Egg Bears filled with peanut butter buckeye filling
![]()
Did you make this Breakable Chocolate Easter Egg recipe or do you just think they are really fun? Let me know by leaving a comment and rating the recipe below. If you love the recipe, please give it a 5-star rating.

I love making fun food for parties and special occasions and sharing my creative ideas with you.
If you make this recipe and share it online be sure to link back to this post.
Thanks and have a sweet day! -
Beth
- How to make peanut butter? - February 15, 2024
- OREO Penguins - December 20, 2023
- OREO Snowmen - December 20, 2023



Maria Stiles
Wow, your instructions are so clear, and being able to watch you make these in the video was so helpful. My daughter and I made these breakable chocolate Easter eggs for a church bake sale and they sold out! We plan to make more to put in the kid's Easter baskets. Thank you for the wonderful recipe.
Beth
I'm glad to know you found the step-by-step instructions and video helpful and I'm super happy to hear your eggs sold out at the bake sale. Have fun making more chocolate eggs for your baskets. I hope the kids love them too. Happy Easter!