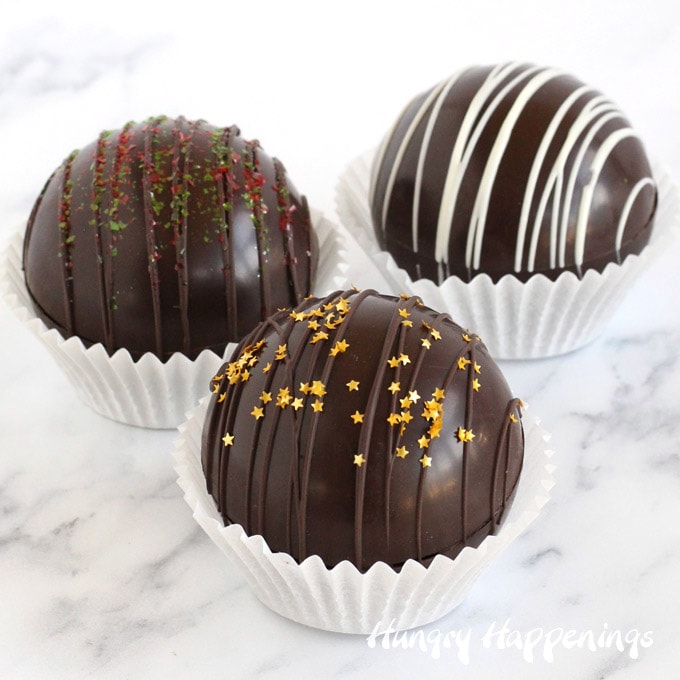
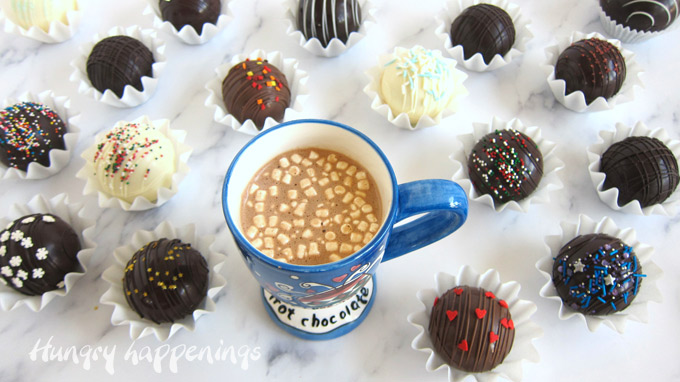
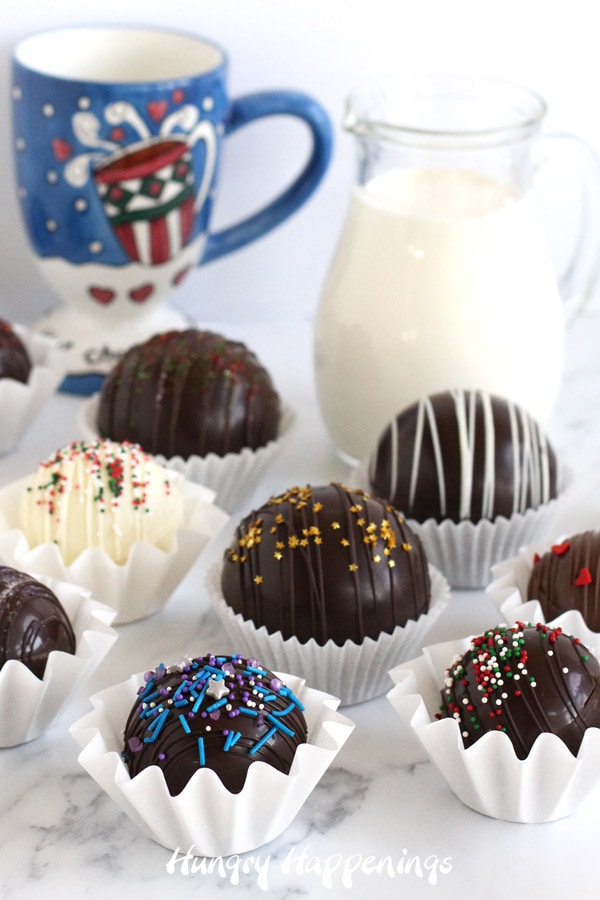
Hot chocolate bombs are decorated chocolate spheres filled with hot cocoa mix or chocolate ganache and lots of mini marshmallows. You drop them into a mug of hot milk, and they melt into delicious hot chocolate.
What's more wonderful than a mug of hot chocolate on a cold winter's day?
Perhaps if that hot chocolate comes in a delicious and beautifully decorated little package like a hot chocolate bomb, it could be more wonderful!
What are hot chocolate bombs?
- They are hollow chocolate spheres filled with either powdered hot cocoa mix or chocolate ganache and marshmallows.
- You add them to a mug of hot milk or water, allow them to melt, and stir them into a delicious hot chocolate.
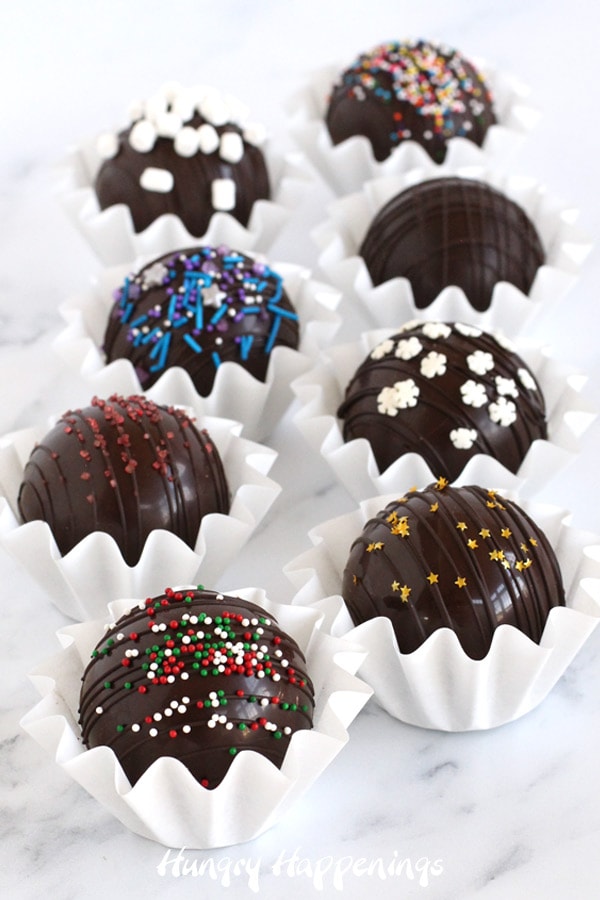
These balls of chocolate goodness are seriously amazing. They look festive and fun and make hot milk taste delicious.
Who invented hot chocolate bombs?
I have no idea who made the very first hot cocoa bomb, or I'd give them credit here. But a reader wrote asking how to make hot chocolate bombs recently so I got into the kitchen to experiment.
I spent days trying out various methods for making the chocolate shells using three different molds. Then I experimented with a variety of fillings, and I decided to share all of them with you so you can choose the best and easiest method to make these trendy chocolates.
So, grab yourself a cup of hot cocoa and settle in for a while. This tutorial is very detailed!
Let's start by talking about chocolate.

Best chocolate to use to make your hot chocolate bombs.
Pure Chocolate
- Pure chocolate contains cocoa butter, which melts at body temperature so it gives the chocolate a luxuriously smooth texture when it melts on your tongue.
- The flavor is decadently rich and delicious.
- When pure chocolate is in temper, it has a wonderful snap and shine.
I highly recommend using pure chocolate to make your hot chocolate bombs; however, pure chocolate must be tempered. You cannot simply melt it and hope for the best. That will not work.
Why do you need to temper pure chocolate?
- Cocoa butter contains crystals that are stabilized at certain temperatures. When you temper the chocolate, you need to either heat the chocolate slowly so that it never goes out of temper, or you need to heat it to a temperature where all the crystals break apart before cooling to get the crystals to form the proper type of crystal structure.
- Chocolate bars, callets, or chips that you purchase from the store are already in temper, but once you melt them, they need to be tempered again.
- When tempered chocolate is poured into a mold, it shrinks slightly as it cools and hardens, so it's easy to remove from the molds.
- If you do not properly temper your chocolate, it will NOT harden properly, and it will not retract from the mold, meaning it will stick to the mold and you won't be able to remove it.
- Also, untempered chocolate will develop bloom, which means it will become streaky or spotty.
Tempering chocolate doesn't have to be hard, but it can take a bit of practice. I'm going to share the two easiest methods for tempering chocolate below.
See the recipe to make Valentine's Day Hot Chocolate Bombs, here.
Can you make hot chocolate bombs with chocolate chips?
- Yes, but be sure to check the ingredients label. If they contain cocoa butter, chocolate chips must be tempered in order to make hot cocoa bombs.
- Be aware that chocolate chips are made with emulsifiers to keep them from melting in cookies. They do not melt as quickly or as easily as other chocolates, so not only will they melt more slowly in the microwave or on your stovetop, but they will also melt more slowly in your mugs of hot milk when you make your hot chocolate.
How to temper chocolate the easy way in the microwave.
- Finely chop or grate 16 ounces of chocolate and place it in a microwave-safe bowl. You want tiny uniform pieces of chocolate for this tempering method.
- Heat on high at 10-15 second increments, stirring after each, until melted. As you get close to melting, cut the heat to 50% power.
- You need the chocolate to melt and stay within the tempering range of:
- 88-91 degrees Fahrenheit for dark chocolate
- 86-88 degrees Fahrenheit for milk chocolate
- 82-84 degrees Fahrenheit for white chocolate
- If the temperature of your chocolate goes above these numbers, you will have to heat it up to 110-120 degrees and use the seeding method below.
You can use this method with any chocolate bar that you purchase from the grocery store, but I recommend using either Callebaut semi-sweet chocolate bars or Peter's Burgundy Chocolate Bars. Both come in large 10 or 11-pound blocks.
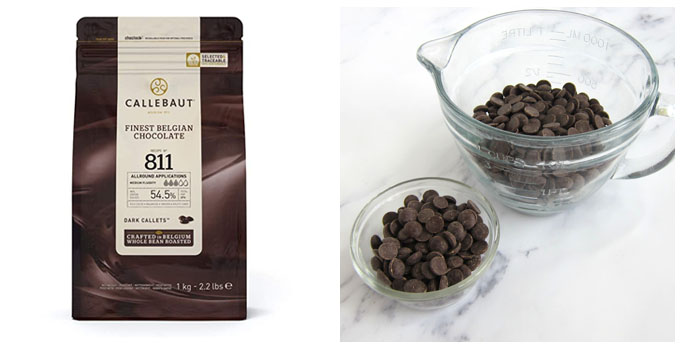
Couverture Chocolate Callets
I use Callebaut Couverture Chocolate Callets to make my chocolate bombs and temper them using the seeding method.
If you have never tempered chocolate, I highly recommend purchasing these chocolate callets. I have taught dozens of students how to temper chocolate using Callebaut callets, and every single student has had success tempering their chocolate the very first time.
The callets may look like chocolate chips, but they are not. These little chocolate wafers are meant to melt easily, unlike chocolate chips, which contain stabilizers so that the chips hold their shape when baked in cookies.
Plus, they are made with the most delicious Belgium chocolate.
Seeding Method of Tempering Chocolate
- Melt 12 ounces of dark chocolate to 115°-120° F (46°-49° C) , milk chocolate to 110°-115° F (43°-46° C), or white chocolate to 105-110° F (40°-43° C).
- Begin to cool the chocolate by stirring in about 2 ounces of chocolate. Continue to stir, scraping down the sides of the bowl until all of those chocolate pieces have melted.
- Check the temperature of the chocolate.
- Continue to sprinkle in small amounts of the chocolate callets and stir to cool the bowl of chocolate.
- Be sure to always scrape the sides of the bowl. You do not want the chocolate to harden around the edge of the bowl.
- Your goal is to get the chocolate to 88-91 °F (31°-33° C) for dark chocolate; 86-88°F (30°-31° C) for milk, and 82-84°F (28°-29° C) for white.
- Once the chocolate reaches that temperature, remove any unmelted chocolate pieces. If there aren't many pieces, you can also just dissolve them using an immersion blender. If there are too many, however, you don't want to do that, as you will run the risk of cooling the chocolate too much.
Can you melt chocolate without a microwave?
- Yes.
- Alternatively, you can melt your chocolate in a double boiler set over low heat.
- Fill a pot with 1 inch of water and set a tight-fitting bowl over the opening of the pan.
- Fill the bowl with chocolate and heat on low, stirring often until melted.
- Continue to heat until the chocolate reaches the appropriate temperature.
- Then remove from the heat and follow the instructions above.
How to know if chocolate is in temper?
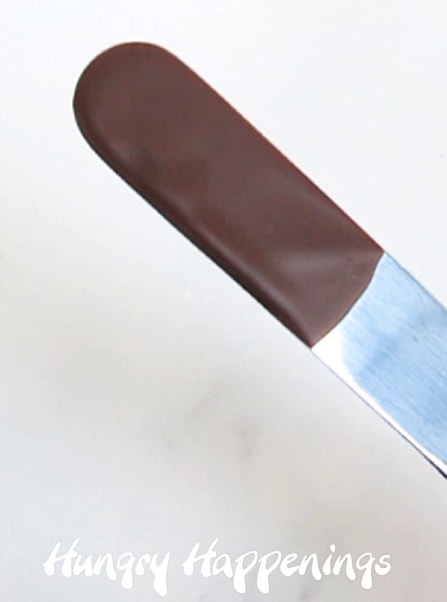
- Test the temper of the chocolate by dipping a metal spatula, spoon, or knife into the chocolate.
- Shake it to remove the excess chocolate, then set it aside at room temperature.
- In 3-5 minutes, the chocolate should harden and look shiny.
- Alternatively, you can spread a small amount of chocolate on a piece of parchment paper and allow it to air dry for 3-5 minutes. It should peel off the paper and snap when broken.
- While you are waiting, be sure to stir your bowl of chocolate to make sure it doesn't cool too much around the edge.
- If your test chocolate has hardened and looks shiny, be sure to check the temperature of your bowl of chocolate before proceeding to make your chocolate balls.
- The chocolate will have cooled slightly and will need to be warmed slightly!
- Heat it in the microwave for about 5 seconds, then remove and stir and check the temperature. Do not let it go above temper temperature (91° dark, 88° milk, or 84° white). If it does, you have to start this whole process over again.
- You are now ready to fill your molds with chocolate.
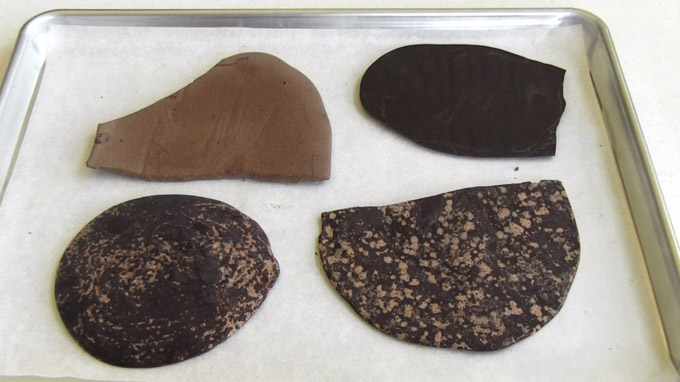
Can I skip tempering pure chocolate?
- NO!
- If you do not temper your pure chocolate, the chocolate will be soft, streaky, spotty, or even chalky.
- The chocolate that is pictured above is all out of temper. The bloom (white spots and streaks) did not develop right away, however. The chocolate looked fine the first day, but bloomed later the next day.
- Also, as I mentioned above, chocolate that is not in temper will not harden properly, and it will stick inside your molds.
- If you are using silicone molds, you will still be able to remove the chocolate from the molds, but know that your chocolates will eventually develop bloom.
- If you are using polycarbonate or plastic molds, you will not be able to get the chocolate out of the molds. You will need to wash it out using hot water.
Can I use compound chocolate (candy melts) to make hot cocoa bombs?
- Yes, compound chocolate, also known as confectionery coating, candy melts, melting wafers, or almond bark, can be used to make hot chocolate bombs.
- Compound chocolate contains vegetable oil, typically palm kernel oil instead of cocoa butter, so it does not need to be tempered.
- This type of chocolate is easy to melt, and it hardens beautifully without any fuss.
- The flavor is not nearly as nice as pure chocolate made with cocoa butter, but it does have an acceptable chocolate flavor. I particularly like using white compound chocolate to make many of my treats, including my Candy Cane Chocolate Cups.
- Some popular brands of compound chocolate are Wilton Candy Melts, Ghirardelli Melting Wafers, Merckens Confectionery Coating, and Great Value Almond Bark. I particularly enjoy the flavor of Peter's White Caps, but they are more difficult to find unless you are able to find them at a cake/candy decorating store or are willing to purchase a 25-pound case (which I do often).

How to melt candy melts.
- Pour your candy melts into a microwave-safe bowl and heat on high power for 30 seconds then remove and stir.
- Repeat this process until most of the chocolate is melted.
- Then heat at high power for 15-second increments, stirring after each, until completely melted.
- Alternatively, you can melt your chocolate in a double boiler set over low heat.
- Fill a pot with 1 inch of water and set a tight-fitting bowl over the opening of the pan.
- Fill the bowl with chocolate and heat on low, stirring often until melted.
Check out my chocolate-making tips page for a more detailed tutorial discussing the differences between the types of chocolates and their melting methods.
Can I use colored candy melts?
- Absolutely! You can use any colored Candy Melts wafers to create your chocolate bombs.
- If you want to color white candy melts, be sure to use oil-based candy color, not water-based icing coloring.
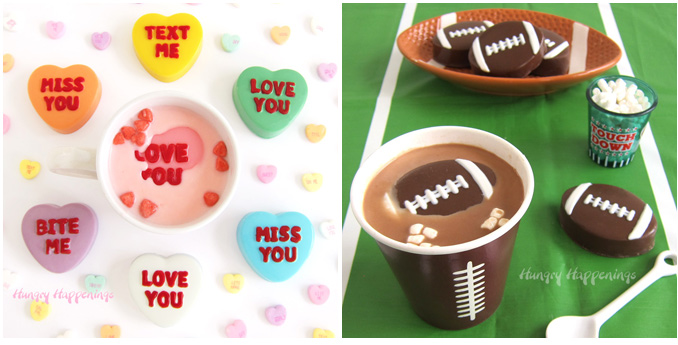
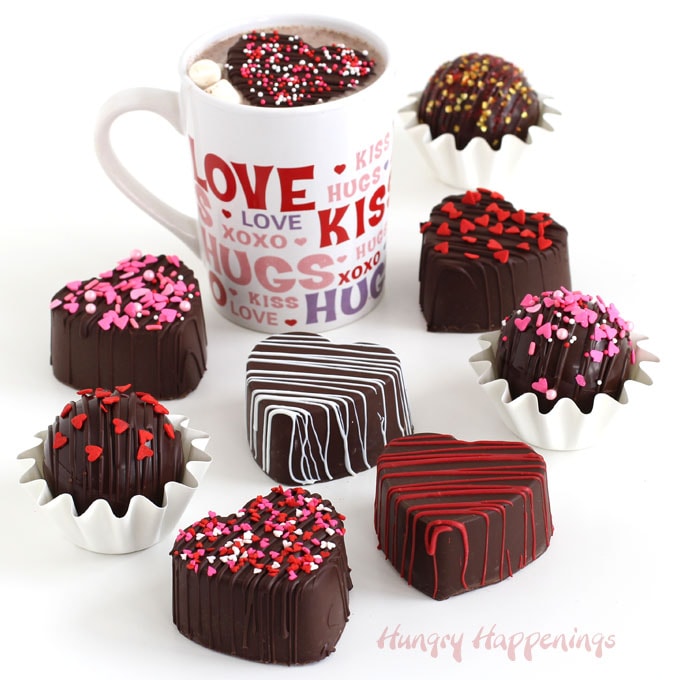
You can use compound chocolate (candy melts) to make these colorful Conversation Heart Hot Chocolate Bombs for Valentine's Day.
For the big game, you can use pure milk and white chocolate or light cocoa and white candy melts to make Football Hot Chocolate Bombs.
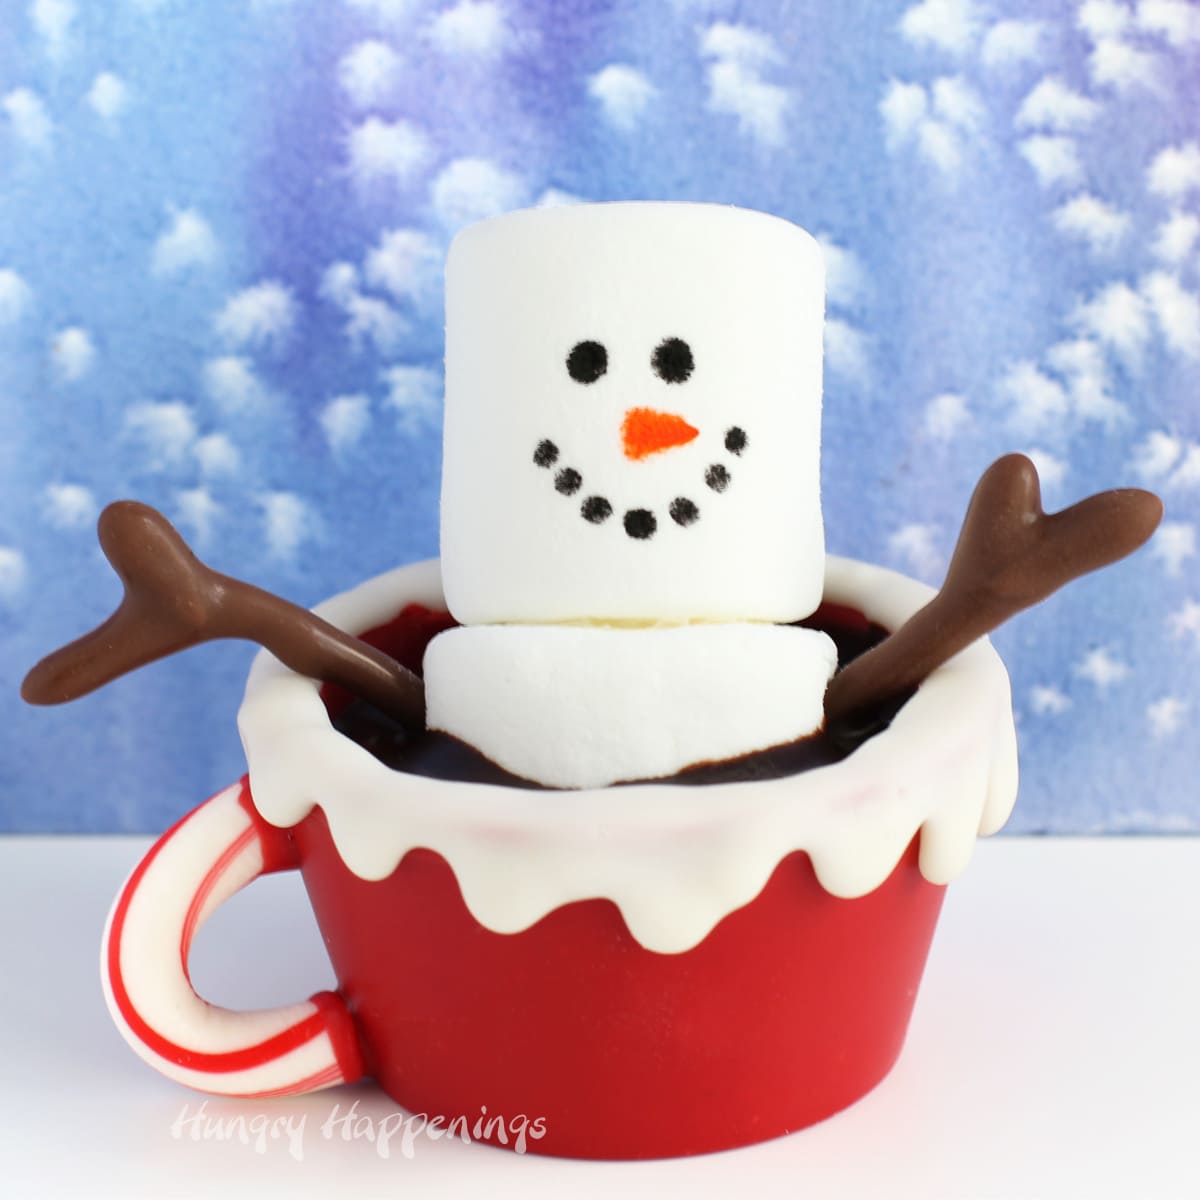
Traditionally, hot chocolate bombs are round, but they can be made in fun shapes too!
What mold should I use to make hot cocoa bombs?
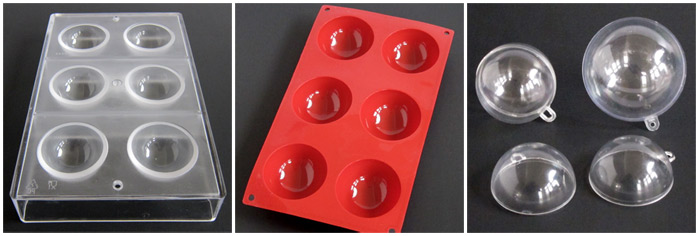
You have three choices when it comes to molds to make your hot cocoa bombs.
polycarbonate half-sphere molds
- This is my absolute favorite mold to use to make chocolate bombs.
- The molds are made of durable FDA-approved plastic and have a beautiful, smooth finish and a flat surface.
- You simply fill the cavities in the mold with chocolate, dump out the excess chocolate, scrape the excess chocolate off the mold, and allow the chocolate to harden. It takes seconds to make 6 half-spheres of chocolate.
- These molds are an investment as they are a little more pricey than the other options; however, they will last for years.
- I have polycarbonate chocolate molds in my candy studio that are almost 30 years old, and they look as beautiful today as they did when I purchased them. If you plan to make and sell your hot cocoa bombs, I would highly recommend getting these molds. They will save you so much time that they are totally worth the investment.
- The 6-cavity mold that I used creates chocolate bombs that are 2 ¼ inches in diameter. They are the perfect size to fit into a traditional coffee mug.
- The polycarbonate molds are available in many different sizes, though. You can find 2.5-inch molds or smaller 2-inch molds.
silicone half-sphere molds
- You will get a nice shiny surface on your chocolate spheres when you use silicone molds.
- They are a bit more tedious to fill, however. You need to "paint" the chocolate into the molds.
- I have seen more people fill the entire mold and dump out the chocolate, but it is a huge mess, so I prefer the painting method when using a silicone mold.
- You can cut the mold into individual molds, however, making it far easier to fill and dump.
- The nice thing about silicone molds is that you can easily remove the chocolate spheres from the molds. They will not stick.
- I used Freshware silicone half-sphere molds, which make 2.8-inch chocolate bombs. You can find silicone molds that make smaller 2.04-inch chocolate bombs.
- NOTE: DO NOT spray the molds with baking spray.
plastic ornament balls
- Use FDA-approved plastic ornament balls as molds to create your chocolate hot cocoa bombs.
- They are plastic balls that come apart so you can fill each half of the ball with chocolate.
- They are cheap and really easy to use.
- The challenge with using these plastic ornaments is that the plastic is relatively thin, and it shrinks in the freezer as it cools, and it can shrink faster than the compound chocolate, which makes the chocolate crack. Be sure to set your timer when using these molds. You will want to get them out of the freezer as soon as the chocolate hardens. No worries when using pure chocolate, as you will refrigerate the molds unless, of course, your chocolate is not properly tempered, then it will stick inside the molds.
hot chocolate bomb fillings
- hot cocoa mix
- You can use a store-bought hot cocoa mix, or you can make homemade. How cocoa mix is the typical filling for your hot chocolate bomb. Easy to use and has a great shelf life. I share a recipe to make a homemade hot chocolate mix in the post below.
- chocolate ganache
- If you want your hot chocolate bombs to taste decadently delicious, then fill them with chocolate ganache instead of hot cocoa mix.
- Chocolate ganache is simple to make using chocolate and heavy whipping cream, and will give your hot chocolate a far superior flavor.
- The only disadvantage to using chocolate ganache is its shelf life. Ganache will stay fresh for two weeks if stored at room temperature. So, if you fill your chocolate spheres with ganache, be sure to let your recipients know they should be consumed within two weeks of the date you made them. I bet they disappear much sooner!
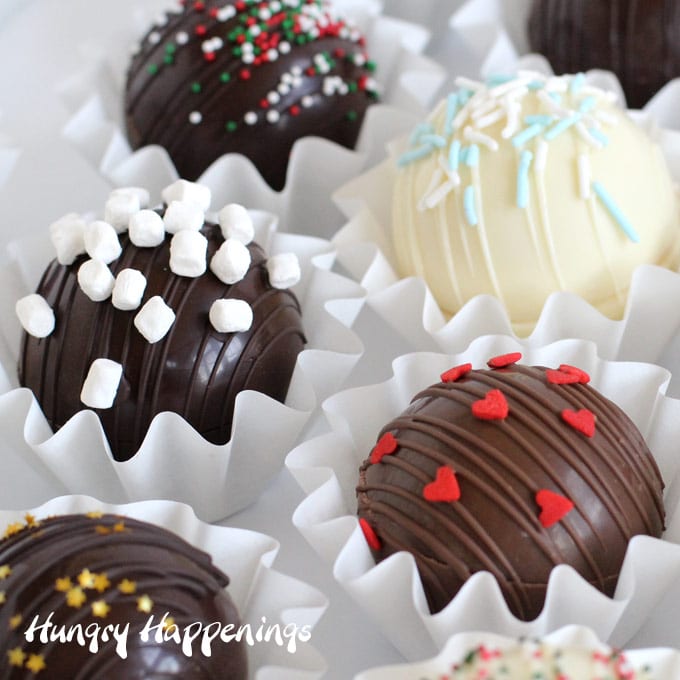
- marshmallows
- Depending on the size of your chocolate bombs, you can use tiny dehydrated marshmallows, mini marshmallows, or homemade marshmallows cut into small squares (see my recipe for homemade marshmallows, here).
- You can even find those fun, brightly colored fruit-flavored dehydrated marshmallows that they use in cereal.
- coffee
- You can opt to make mocha bombs by filling them with your favorite instant coffee, or you can blend the coffee with hot cocoa mix.
- booze
- If you want to make boozy hot cocoa bombs, you'll want to mix your favorite liquor into the chocolate ganache to create a deliciously boozy chocolate filling. Be sure to check out my Boozy Hot Chocolate Bombs recipe post and video.
- flavorings
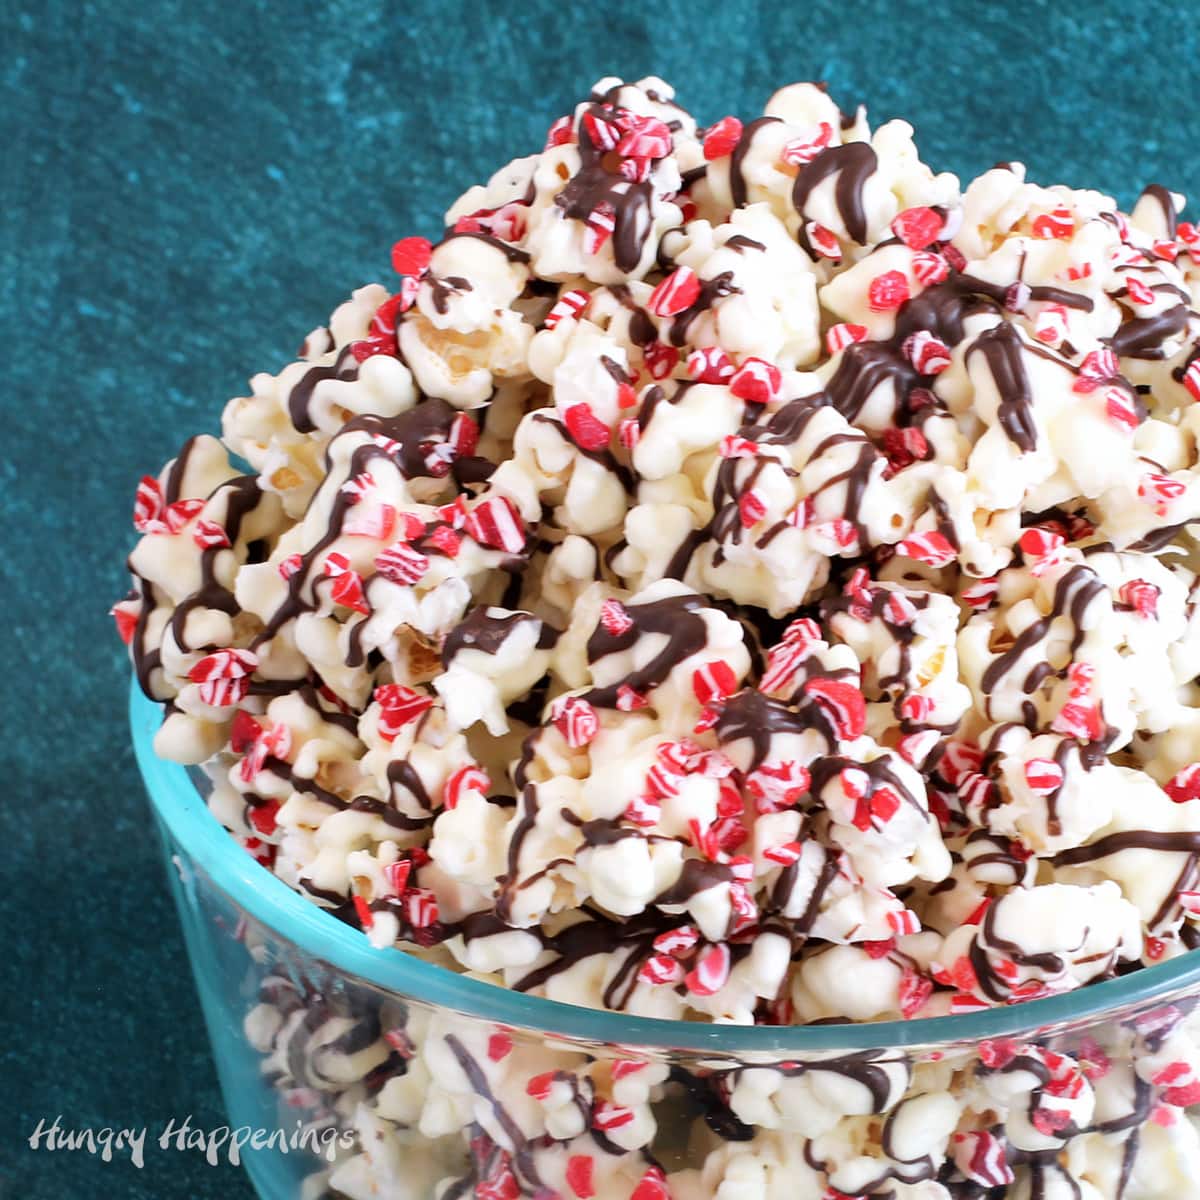
- Peppermint - Grind candy canes into a fine powder using a food processor and stir into your hot cocoa mix, or add peppermint extract to your chocolate ganache filling.
- Gingerbread - Add gingerbread spices to your hot cocoa mix.
- Pumpkin Spice - Fill your dark chocolate or white chocolate shells with pumpkin spice ganache.
- S'mores - Grind up graham crackers into a fine powder and add to your hot cocoa mix. Be sure to use lots of marshmallows. Top the chocolate bomb with graham cracker crumbs and some tiny dehydrated marshmallows.
- Mexican Hot Chocolate - Add a pinch of cayenne pepper and cinnamon to your hot chocolate mix.
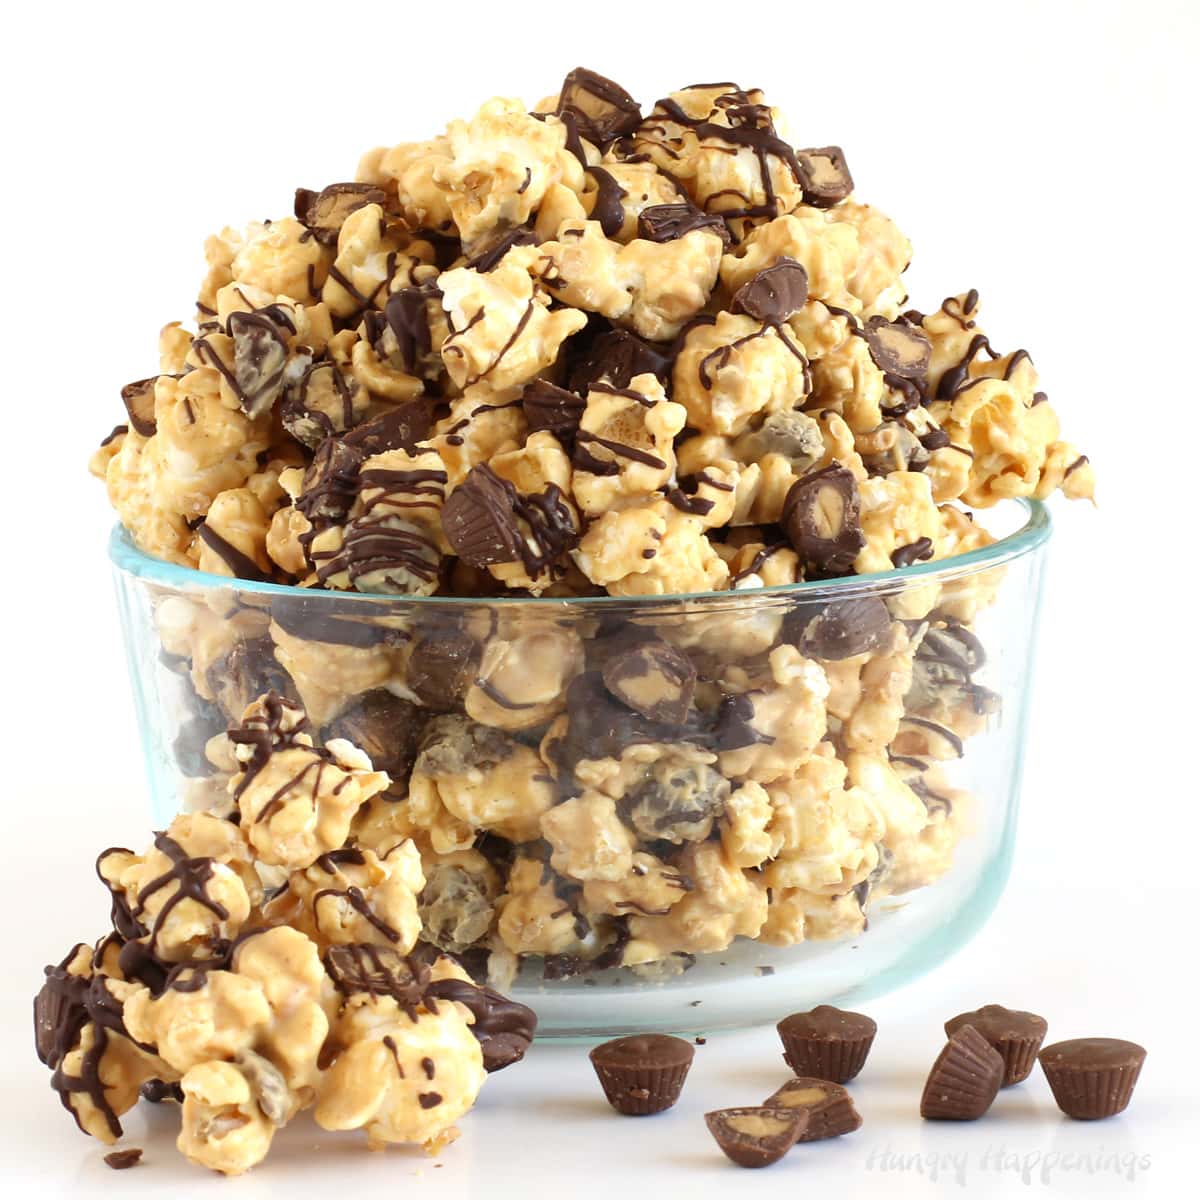
- Peanut Butter Hot Chocolate Bombs - Blend together 50% Reese's Peanut Butter Chips with 50% white candy melts to create your shells, then fill them with hot cocoa mix and marshmallows.
- Eggnog - You can either use powdered eggnog mix, or you can fill your chocolate shells with white chocolate eggnog ganache.
- Chocolate Hazelnut - Simply fill your chocolate bombs with Nutella or other chocolate hazelnut spread.
- Biscoff - Make delicious white chocolate ganache using Biscoff spread and use it to fill your chocolates.
- coffee creamers - You can add your favorite powdered coffee creamer to your hot cocoa mix or add liquid coffee creamers to your chocolate ganache to add dozens of different flavors to your fillings.
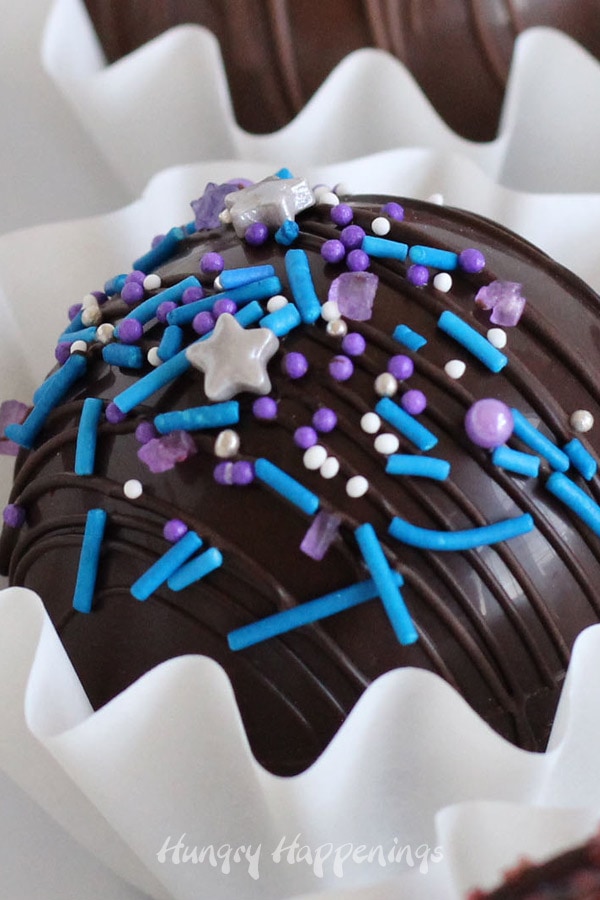
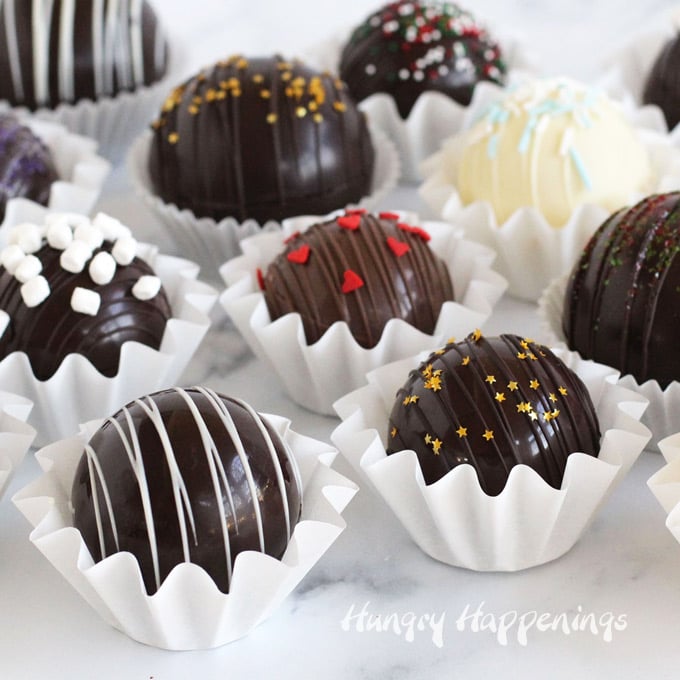
sprinkles and toppings
- Make your chocolate bombs look festive and fun by drizzling chocolate over the top and adding sprinkles, colored sugar, edible glitter stars, or other toppings like cookie crumbs or crushed candy canes.
- Don't go overboard with the toppings, as they will just sink to the bottom of your mug of hot chocolate.
Other supplies you'll need to make your chocolate bombs:
- microwave-safe bowls or a double boiler
- silicone spatula
- offset metal spatula
- metal bench scraper (or use a putty knife that's only used for chocolate work)
- optional, food-use only paintbrush if you plan to use silicone molds
- food handling gloves are imperative when working with chocolate that you wear gloves so that you
- disposable pastry bags or parchment paper cones
- parchment paper or wax paper set on cookie sheets or cutting boards
- an instant-read thermometer is a must if you plan to temper pure chocolate (my favorite is a Thermapen)
Where can I buy hot chocolate bomb molds?
You can find the supplies needed to make these hot cocoa bombs on Amazon. I earn a small commission at no extra cost to you when you use any of the affiliate links in this post.
 Callebaut No 811 Finest Bel...Shop on Amazon
  Peter's Gourmet Burgundy Di...Shop on Amazon
 ") Callebaut Chocolate Block S...Shop on Amazon
Callebaut Chocolate Block S...Shop on Amazon  Wilton Light Cocoa and Brig...Shop on Amazon
 ") Merckens White Coating Melt...Shop on Amazon
Merckens White Coating Melt...Shop on Amazon ") Vanilla Almond Bark, 24 Oun...Shop on Amazon
Vanilla Almond Bark, 24 Oun...Shop on Amazon ") Large Half Ball Chocolate M...Shop on Amazon
Large Half Ball Chocolate M...Shop on Amazon  homEdge Semi Sphere Silicon...Shop on Amazon
  Sarahs Candy Factory Vanill...Shop on Amazon
  Twang Café Zuca Dehydrated...Shop on Amazon
  Sarah's Candy Factory Assor...Shop on Amazon
 ") Kraft Jet Puffed Mini Marsh...Shop on Amazon
Kraft Jet Puffed Mini Marsh...Shop on Amazon  ALLTOP Bench Scraper & Chop...Shop on Amazon
 ") DEKEones Putty Knife Scrape...Shop on Amazon
DEKEones Putty Knife Scrape...Shop on Amazon  Dre Health Synthetic Nitril...Shop on Amazon
  Wilton 12-Inch Disposable C...Shop on Amazon
  Betty Crocker 6-Cell Sprink...Shop on Amazon
  Wilton Edible Gold Glitter ...Shop on Amazon
  Wilton Holiday Sprinkles As...Shop on Amazon
  Abilly Mega Sprinkles 4-Pac...Shop on Amazon
  Wave White Cupcake Liners -...Shop on Amazon
  Wilton 3-Pack 4 Cavity Cupc...Shop on Amazon
  ONE MORE Cupcake Boxes with...Shop on Amazon
  Davinqi Clear Domed Individ...Shop on Amazon
  4-Compartment Disposable Cu...Shop on Amazon
  ONE MORE Clear Cupcake Boxe...Shop on Amazon
  Total Indulgence DIY Hot Ch...Shop on Amazon
Let's get started.
Watch the video to see the step-by-step process for making these hot cocoa bombs using the various methods and a variety of chocolates.
I've also tried to include some step-by-step photos below, but you'll get a much better visual of the process by watching the video.
Hot Chocolate Bombs Molds
In this tutorial, I will show you how to use several hot chocolate bomb molds. You can use a polycarbonate mold, a silicone mold, and even a plastic ornament mold to make round hot chocolate bombs.
I can't wait to share more fun hot chocolate bomb mold ideas in future posts.
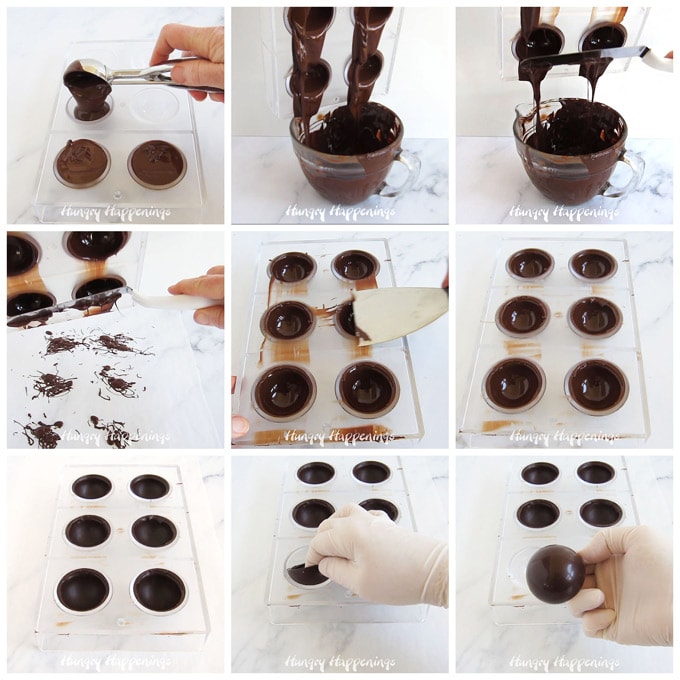
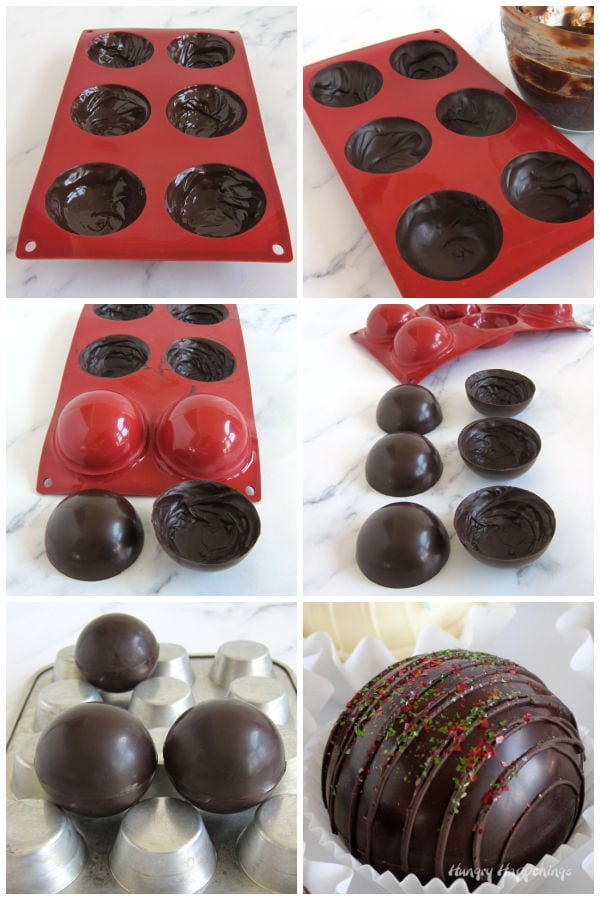
Making chocolate spheres using a polycarbonate mold.
- Fill the half-sphere cavities in your mold completely with chocolate.
- Turn the mold upside down over your bowl of chocolate and allow the excess chocolate to drip out.
- If the bowl is large enough, you can completely invert the mold over the top. If not, then move it over a piece of parchment paper.
- Tap the side of the mold a few times to encourage all of the excess chocolate to drip out of the mold.
- Use an offset spatula to scrape off the excess chocolate.
- Set the mold upright and use a metal bench scraper or putty knife to scrape over the mold to ensure all of the excess chocolate has been removed.
- If your room is cool at about 68-70 degrees Fahrenheit (20-21° C) you can leave your chocolate sitting on your table until the chocolate hardens. If not, just pop it into the refrigerator until the chocolate hardens. That will take about 10-15 minutes.
- To check to see if your chocolate has retracted from the mold, look on the underside of the mold to see if the chocolate looks all one color.
- You will notice in the video that I turn the mold upside down. I actually suggest you do not do that, as the chocolate can fall out of the mold. It was easier for me to film it by turning it over.
- You should lift the mold up over your head to look for dark spots. If you see dark spots, the chocolate is still wet in those areas. Chill it for a few more minutes.
- To remove the chocolate from the molds, you can simply slide them out of the cavities, or you can place a cutting board or cookie sheet on top of the mold, flip it over, and allow the chocolates to fall out.
- If the chocolates won't come out of the mold, place the mold back in the refrigerator for a few more minutes and try again.
- After waiting for a while for the chocolate to harden, if it just won't come out of the mold, that means your chocolate was not in temper. You will have to wash the chocolate out of the mold using hot water and try again!
Tips for ensuring shiny chocolates.
- Make sure your molds are clean and dry before using them.
- I recommend brushing the inside with a soft cotton ball. This will ensure they are completely clean, and it will make your chocolates really shiny.
Can I use compound chocolate (candy melts) in a polycarbonate mold?
- Yes, you can.
- If your candy melts are too thick, they will be tricky to mold using this method. You can thin out thick candy melts using Paramount Crystals or Wilton EZ Thin. See more detailed information on my chocolate-making tips page.
- If they are too thin, you will need to add a second layer to your chocolate spheres.
- If you use compound chocolate, be sure to chill the chocolates in the freezer.
Use a silicone mold to make hot chocolate bombs.
- Fill the mold about ⅓ full with tempered pure chocolate or melted compound chocolate (candy melts, etc.)
- Use a paintbrush to brush the chocolate up the sides of the mold.
- If the chocolate pools in the bottom of the mold, continue to brush it up around the sides until the edges are well coated.
- If your chocolate is thick, you can just leave the mold upright and pop it into the refrigerator (or freezer, if using compound chocolate/candy melts) until hardened.
- Always allow pure chocolate to harden at room temperature (if your room is cool) or in the refrigerator.
- Always put compound chocolates (candy melts) into the freezer to harden.
- If you are using candy melts or thin chocolate, I recommend flipping the mold upside down and setting it on a parchment paper-lined baking sheet before chilling.
- Allow the mold to chill for about 10 minutes, just until the chocolate hardens, then remove the mold and, if needed, brush another coat of chocolate around the top edge of the mold.
- Chill again until the chocolate hardens.
- To remove from the mold, tug on the silicone mold right around the chocolate you want to remove, and the chocolate will pop out.
Can I pour the chocolate into the silicone mold, then dump it out instead of painting it in?
- Yes, you can, but you may find it easier to cut your silicone mold so that you have six individual molds.
- Then you can easily fill one mold with chocolate before turning it upside down to allow the excess chocolate to drip out.
- I've seen people do this method with the entire mold filled, and it is a huge mess.
NOTES regarding compound chocolate (candy melts)
- Work quickly and get your mold into the freezer quickly. If candy melts are allowed to air-dry, they can become spotty or streaky. If you see the candy melts starting to harden, get the mold in the freezer.
- If you are using compound chocolate, do not allow the spheres to be in the freezer for too long. If the chocolate becomes too cold, it may crack.
Make your chocolate spheres using a plastic ornament.
- Pull the two pieces of your plastic ornament apart. Make sure they have been washed and dried fully before using. I also recommend brushing the inside with a soft cotton ball. This will ensure they are completely clean, and it will make your chocolates really shiny.
- Pour chocolate into one half of the mold, filling it completely.
- Tap the mold a few times to remove air bubbles.
- Turn the mold upside down over your bowl of melted chocolate and use the end of your spatula to tap the mold, allowing the excess chocolate to drip out.
- Use your metal spatula to scrape away any excess chocolate around the edges of the mold.
- Place the mold, open side down, onto a piece of parchment paper. This will allow the chocolate to cool towards the edge and not towards the bottom of the mold.
- Repeat filling the second half of the ornament mold.
- If using candy melts, immediately place the chocolate half-spheres into the freezer for about 5 minutes. If you are using pure chocolate, you can continue to fill your molds and allow your chocolate to harden at room temperature, or you may place the chocolate in the refrigerator.
- If using candy melts and chocolate spheres look thin, I would suggest adding a second layer.
- You can repeat the process by filling the mold with chocolate, inverting it, and allowing excess to drip out, or you can paint chocolate around the top edge just to fill in the thin area.
- If you are using pure chocolate or thicker candy melts, the second layer will not be necessary.
NOTES:
- Once the chocolate has hardened, you will notice that there are no dark spots on the underside of the mold, and you should easily be able to slide the chocolate out of the mold.
- If it sticks, place the mold back in the refrigerator or freezer to harden for a minute, then try again.
- Be cautious of the timing, as the compound chocolate may crack if it is left in the freezer for too long.

Add fillings.
- As I mentioned, you can fill your chocolate spheres with hot cocoa mix or chocolate ganache.
- The amount of filling you can use will be completely dependent on the size of the chocolate balls.
- I used 2-4 tablespoons of homemade hot cocoa mix or chocolate ganache in each ball. See the recipes below.
- Smaller chocolate bombs will hold less hot chocolate mix or ganache, but they will also go into smaller coffee mugs and have less hot milk poured over them, so they should taste great with less filling.
Make homemade hot chocolate mix by sifting together:
- 1 cup Dutch-processed cocoa powder
- 2 cups powdered sugar
- 2 teaspoons corn starch
- 1 teaspoon vanilla powder (optional)
- 2 ½ cups dry milk powder
- 1 cup finely grated dark chocolate (you don't need to sift this, just mix it in using a whisk)
- You could skip the grated chocolate altogether (but I wouldn't) or use mini chocolate chips instead.
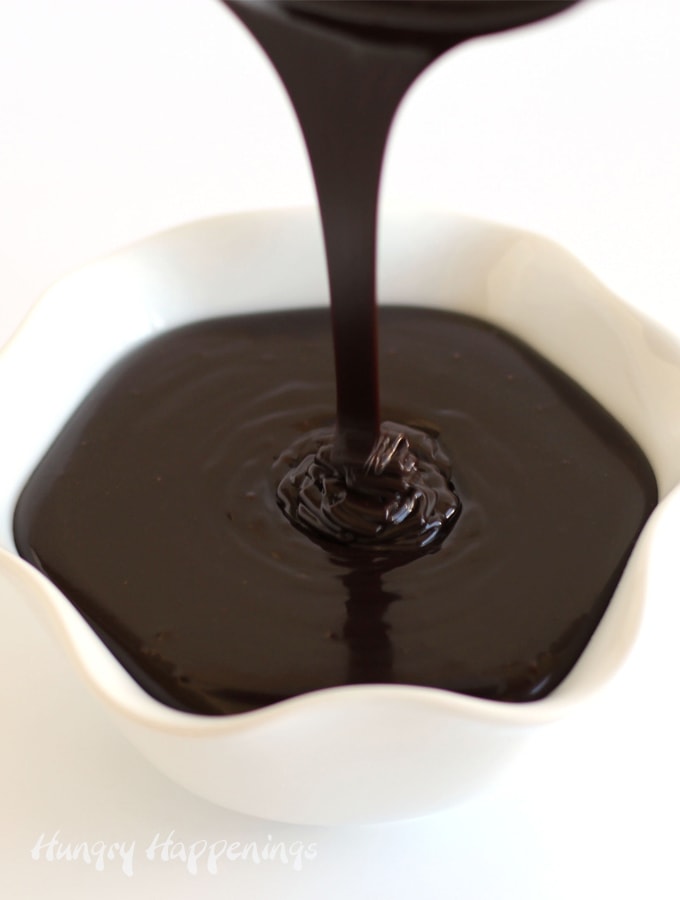
Make the chocolate ganache:
- Bring 1 cup of heavy cream to a simmer over medium heat.
- Pour it over 16 ounces of finely chopped chocolate and allow it to rest for about 3 minutes.
- Stir to create an emulsion (stir in small circles in the center of the bowl, then slowly open up the circle, incorporating all the chocolate into the cream) until the chocolate and cream come together.
- Allow the ganache to cool until it's cool to the touch before spooning or piping it into the chocolate spheres.
Hot Chocolate Bombs with Marshmallows
- Sprinkle as many marshmallows as you can fit on top of a hot cocoa mix or chocolate ganache.

How to seal hot chocolate bombs?
- Heat a skillet on low heat for 20 to 30 seconds (just long enough to warm up the pan)
- Pick up one of the empty chocolates and hold it with the open side down.
- Set it in the warm pan, and allow it to melt slightly.
- Lift the chocolate sphere out of the pan, then set it over one of the filled chocolates, pressing the two halves together gently to seal them together.
- Repeat.
- Once the pan cools too much to melt the edges of your chocolates, then clean the pan and reheat it. Do not heat the pan filled with any chocolate as it will burn.
- Watch the video to see how this is done.
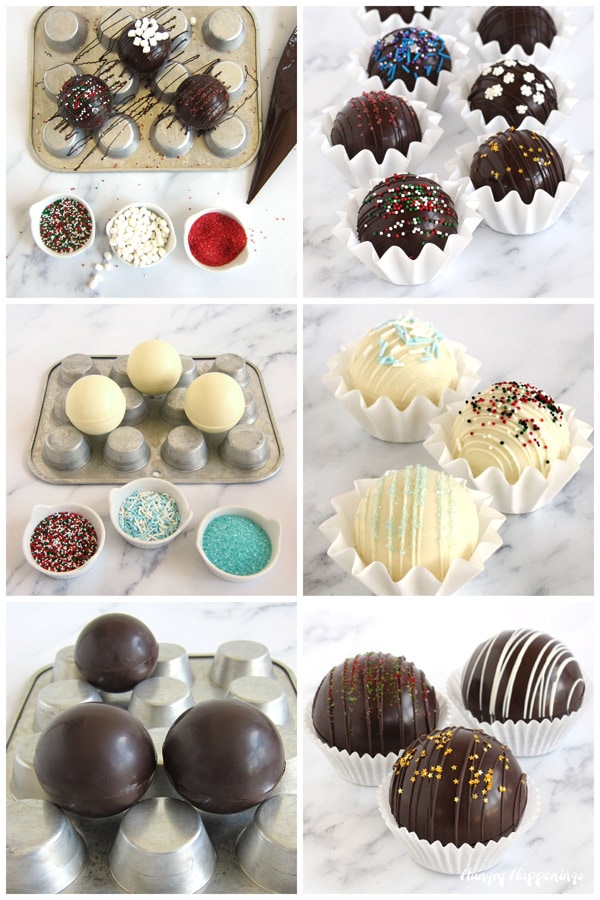
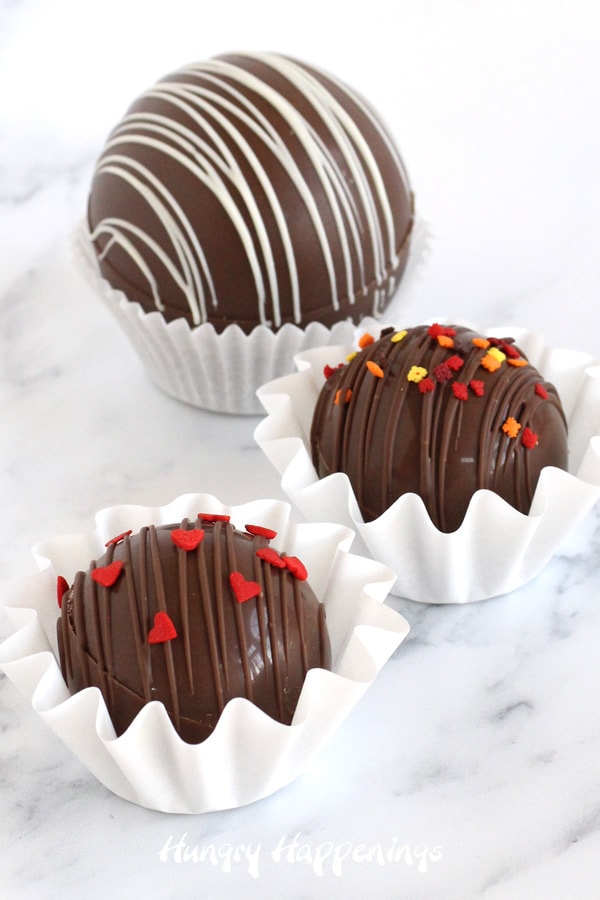
Decorating your chocolate balls.
- Pipe a thin drizzle of chocolate over the top of the chocolate balls, then immediately add sprinkles, edible glitter, nuts, cookie crumbs, or marshmallows.
- You can really have fun decorating chocolate bombs, and I can't wait to show you lots of fun ideas soon.
How to store hot chocolate bombs?
- Chocolate bombs filled with hot cocoa mix will stay fresh if stored at room temperature for up to 2 months.
- If your chocolates are filled with chocolate ganache, they should be consumed within 2 weeks.
- Chocolate will stay freshest if stored in an airtight container, but it can definitely be stored in boxes or cellophane, too.
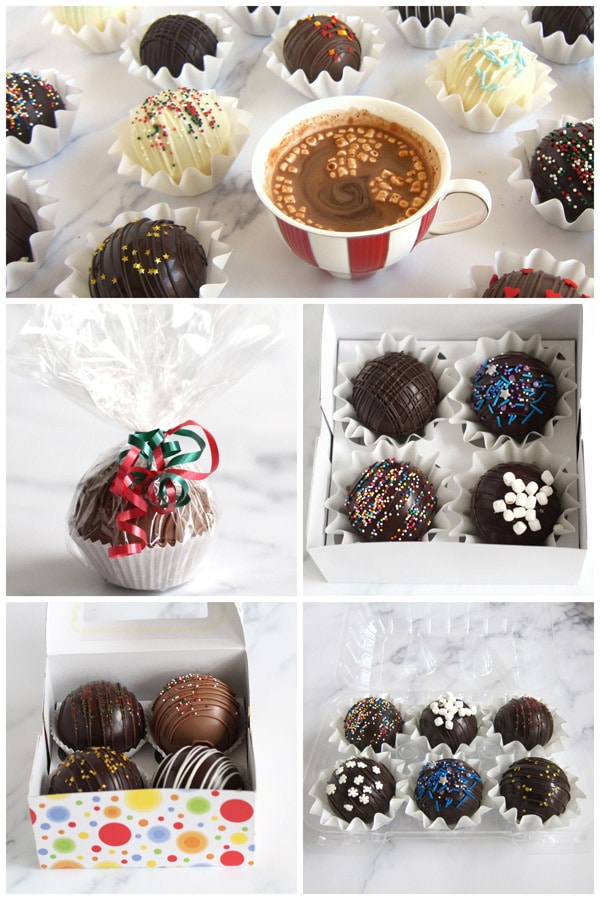
How to package hot chocolate bombs?
- Set your chocolate bombs into cupcake wrappers. This will give them a nice flat bottom so they do not roll around.
- For chocolate bombs that are 2 - 2 ¼ inches in diameter, I prefer to use these pretty wave cupcake wrappers.
- For larger chocolate bombs, traditional cupcake wrappers work best.
- Then you can individually wrap them using clear cellophane or printed cellophane bags.
- If you want to give them as gifts or sell them in a grouping, you can package them in cupcake boxes that have cardboard inserts to keep them separated or in clamshell cupcake boxes.
Can you ship hot chocolate bombs?
- Yes, but be aware that they are very delicate and need to be wrapped and packaged well.
- I would recommend packaging them in plastic clamshell boxes.
- You will want to wrap them in a piece of plastic wrap before fitting them into the cavities in the box. The plastic wrap will keep them from moving around as the plastic wrap will "stick" a bit to the plastic, holding them in place.
- Then be sure to set some bubble wrap or foam packaging over the top of the chocolate spheres if there is space in between the tops of the chocolate bombs and inside the lid of the box. The food-safe plastic wrap will keep the chocolate from touching the bubble wrap or foam.
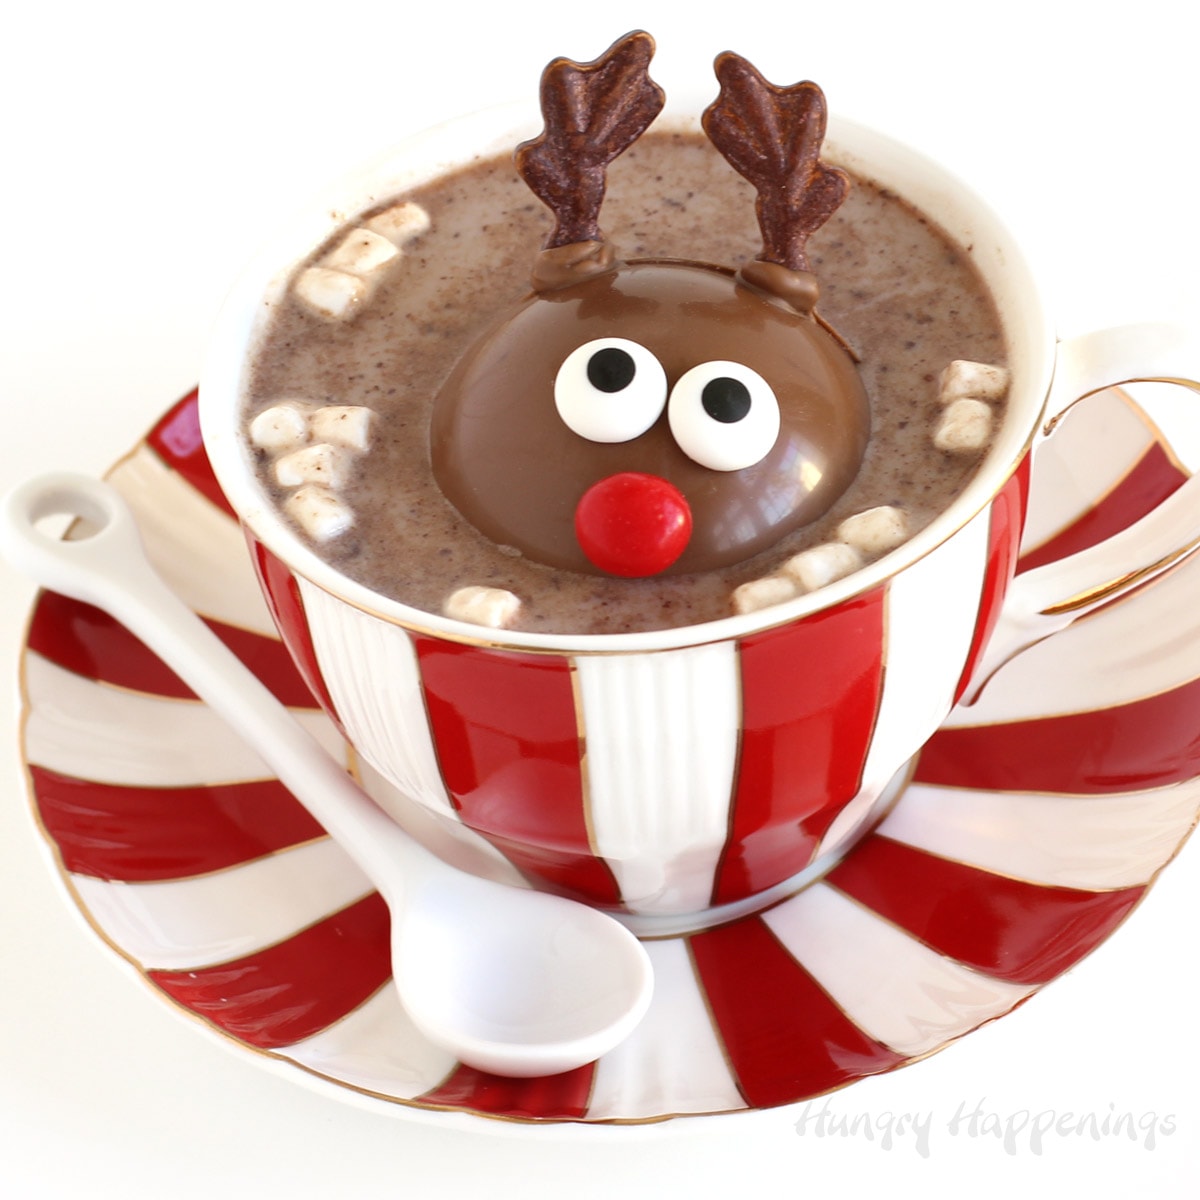
How to use hot chocolate bombs?
- Fill a coffee mug or hot cocoa mug halfway with steaming hot milk.
- To heat your milk, you can use the microwave or a pan on the stove. Bring it to a simmer, where it just begins to bubble. Then remove and pour into your cups.
- Then gently drop a hot cocoa bomb into the milk.
- Pour a little more hot milk over the top and allow the chocolate to melt.
- Stir, then enjoy a delicious cup of hot chocolate.
- If using a small 2 ¼ inch chocolate bomb, you'll use 8-10 ounces of milk.
- If you use larger chocolate bombs, I recommend using 12-16 ounces of milk.
Will hot chocolate bombs work with water?
- Yes, you can serve your hot chocolate bombs in a cup of very hot water instead of milk, but your hot chocolate will have a richer, creamier flavor if you use milk.
- To make your hot chocolate using water, bring your water to a boil, then pour the water over a hot chocolate bomb and allow the chocolate to melt, then stir until well blended.
- If you are melting your hot chocolate bombs in water because you need the hot beverage to be dairy-free, then be sure to use dairy-free hot cocoa mix or chocolate ganache made with water or fruit puree instead of heavy whipping cream.
- I'd recommend making the chocolate shell a bit thicker if you plan to use water instead of milk, so that your hot chocolate has a richer, more chocolatey flavor.
Are hot chocolate bombs good in coffee?
- Absolutely! You can melt hot chocolate bombs in a cup of coffee to add a chocolatey flavor.
- Simply skip adding creamer and instead add a hot chocolate bomb to your coffee.
- If you make homemade hot chocolate bombs, you can even fill them with your favorite coffee creamer instead of the hot cocoa mix.
- I gave hot chocolate bombs filled with chocolate ganache to my parents for Christmas, and they melted them in their coffee every morning for a week. They loved it and requested I make more!

If you'd like to learn more about the art of making chocolate, be sure to check out my online video chocolate-making classes at The Sugar Academy. Save 20% off any class using the coupon code HUNGRYBLOG20.
Hot Chocolate Bombs Recipe
See more tips and FAQs below the recipe.

Fill hollow chocolate spheres with either hot cocoa mix or chocolate ganache and lots of mini marshmallows. Then pop them into a mug of hot milk and stir to create delicious hot chocolate.
- 18-24 ounces melted and tempered pure chocolate or melted compound chocolate (candy melts, almond bark, melting wafers)
- 12-24 tablespoons hot cocoa mix or chocolate ganache
- 6-12 tablespoons mini marshmallows or tiny dehydrated marshmallows
- optional, sprinkles, colored sugar, edible glitter, or other toppings
-
If using a polycarbonate half-sphere mold, a single cavity silicone mold, or a plastic ornament mold, fill the mold with chocolate.
-
Tap the mold a few times to allow air bubbles to come to the surface and pop.
-
Invert the mold over a bowl of chocolate and tap the side of the mold allowing the excess chocolate to drain out of the cavities.
-
Scrape off the excess chocolate using a metal spatula or bench scraper to clean the edges of the chocolate.
-
If the chocolate is thick you can leave the molds upright to chill. If the chocolate is thin it's best to turn the mold upside down and set it on a parchment paper-lined baking sheet.
-
If using pure chocolate and your room is cool you can allow your chocolate to air dry or you can chill it in the refrigerator until hardened, about 10-15 minutes. If using compound chocolate (candy melts) place the mold in the freezer for 5-10 minutes until the chocolate hardens.
-
If using a silicone mold with multiple cavities, fill about ⅓rd of a cavity with chocolate, and use a brush to paint the chocolate up the sides of the mold. Chill and if needed add a second coat of chocolate around the top edge.
-
Make a total of 12 chocolate half-spheres and reserve the remaining chocolate for drizzling.
-
Fill 6 of the chocolate half-spheres with 2-4 tablespoons of hot cocoa mix or chocolate ganache.
-
Sprinkle mini marshmallows over top.
-
Heat a skillet over low heat for 20-30 seconds.
-
Melt the top edge of one of the empty chocolates and place it over top of a filled chocolate. Press gently to seal the two pieces together.
-
Drizzle chocolate over top of your hot chocolate bombs and decorate with sprinkles or other fun toppings.
Recipe Video
- The quantities needed will depend on the size of your molds.
- You will get 6 hot cocoa bombs that are 2 ¼ inches in diameter made and decorated using 18 ounces of chocolate. You'll need more chocolate for larger hot chocolate bombs.
- You can fill your chocolate bombs with as little as 2 tablespoons of hot cocoa mix or chocolate ganache but I prefer 3-4 tablespoons for a richer hot chocolate drink.
- Store your hot cocoa bombs at room temperature for up to 2 weeks if filled with chocolate ganache or up to 2 months if filled with hot cocoa mix.
- To serve the hot chocolate bombs fill a coffee mug halfway with very hot milk.
- Add the chocolate bomb then pour a little more hot milk over top.
- Allow the chocolate to melt then stir into the milk to create a delicious cup of hot chocolate.
How long will hot chocolate bombs last?
- If you have used pure melted and tempered chocolate to make your bombs and filled them with powdered hot cocoa mix, they will stay fresh until the expiry date of the hot cocoa mix. They could essentially last for 6-12 months, but I recommend you use them within 2 months for the best flavor and texture.
- If you make your hot cocoa bombs using candy melts, almond bark, or melting wafers, they should be eaten within two months. Once the candy melts have been melted and molded, they tend to begin to lose their flavor. They won't be bad or moldy, but they will begin to be less flavorful over time.
Are hot chocolate bombs gluten-free?
- They can be if you use gluten-free chocolate and gluten-free hot cocoa mix.
- Vanilla can have gluten in it, which will be the problem with most chocolates, so be sure to use gluten-free chocolate if needed.
- Cocoa powder is gluten-free, but many powdered hot cocoa mixes are not. Swiss Miss does make a gluten-free hot cocoa mix, as do several other brands. Just be sure to check the label.
- Plus, sprinkles and many toppings may not be gluten-free either. Be sure to look for sprinkles that are labeled as gluten-free.
- Dandies Marshmallows are gluten-free, vegan, and dairy-free, plus they are really delicious!
Are hot chocolate bombs dairy-free?
- They can be if you use dairy-free chocolate and fill them with dairy-free hot cocoa mix.
- Typically, they are not dairy-free, as they are made with hot chocolate mix that contains dairy, like my recipe, which includes powdered milk.
Can hot chocolate bombs be frozen or refrigerated?
- I do not recommend freezing or refrigerating any chocolate, as freezing affects the texture of chocolate and both freezing and refrigerating can cause condensation (beads of water on the outside of your chocolate spheres), but if you absolutely need to freeze your hot chocolate bombs you will need to wrap each chocolate sphere in plastic wrap then overwrap them in paper towels (which will help to wick up any condensation) and place them in an airtight container.
- Thaw them overnight in the refrigerator, then set them on your counter and let them come to room temperature for at least a few hours before opening the container and unwrapping the chocolates.
- I have seen other bloggers who are making their chocolate bombs by simply melting chocolate (not tempering it properly), so their chocolate is soft and will never set up properly. They are telling their audience to refrigerate their hot chocolate bombs and to use them within 24 hours, but if you temper the chocolate properly or use candy melts, you should not refrigerate your chocolates, and you don't need to.
Help! My hot chocolate bombs keep breaking.
- If your hot cocoa bombs keep breaking the chocolate shell, it was either too thin or you did not get them sealed properly.
- When making hot chocolate bombs, you can get the chocolate shell pretty thick. The more chocolate, the better! Am I right? Thicker chocolate shells may take longer to melt, but it's better to have the shell thick so it doesn't break.
- If your chocolate balls keep falling apart at the seam, you can always pipe a line of chocolate around the seam. I suggest you make sure to melt the top edge of one half of the chocolate sphere well, then seal the two half-spheres together. The ball should hold together once the chocolate hardens.
- If you are selling them, you certainly don't want them to break when your customers take them out of the box.
How to sell hot chocolate bombs?
- The price you can charge for a hot chocolate bomb will depend on where you live. Here in Ohio, where the cost of living is very cheap compared to other parts of the country, stores are selling hot chocolate bombs for $4-$5 each, and home-based bakers are selling them for $3-$5.
- You may be able to charge up to $8 per hot chocolate bomb if you live in a big city.
- Just be sure to use really good pure chocolate if you plan to charge for them, especially if you can charge $5 or more. I've heard complaints from friends who purchased hot chocolate bombs from stores and home-based businesses and were really disappointed with the flavor, and they felt ripped off based on the price.
Can I make hot chocolate bombs at home and sell them?
- It depends on where you live. You must check the local laws before selling any food items from your home.
- In Ohio, we have cottage industry laws that allow us to sell certain food items out of our homes, but in many other states, the law prohibits the sale of food from your home. In those states, you must have a certified commercial kitchen either inside (separate from your home kitchen) or outside your home. Your commercial must be inspected every year.
- Some states do not allow you to have a commercial kitchen within your home at all, and many states prohibit you from having a commercial kitchen in your home if you have pets of any kind.
- If you live in one of the states that require a separate commercial kitchen, do NOT make homemade hot chocolate bombs and sell them. You can get fined and shut down.
- When I started my first cookie/candy business in Kentucky back in the '80s, I rented space in a donut shop (they closed at 1 p.m.) so that I could make my products to sell to customers. Kentucky has pretty strict laws regarding making and selling food items.
- Their kitchen was inspected twice a year.
- The kitchen was required to have a commercial sink, with three bays, one for washing, one for rinsing, and one for sanitizing.
- The refrigerator/freezer could only be used to store food used in the processing of the products you were selling. You had to have a separate fridge to store food you would personally eat for lunch, for instance.
- Also, be sure you know the laws regarding selling food across state lines! In Ohio, we are not allowed to make food in our homes and sell it across state lines, so we cannot ship our homemade hot chocolate bombs outside of Ohio.
More Fun Chocolate Recipe Ideas
If you like these homemade chocolates, you might also like these other recipes.
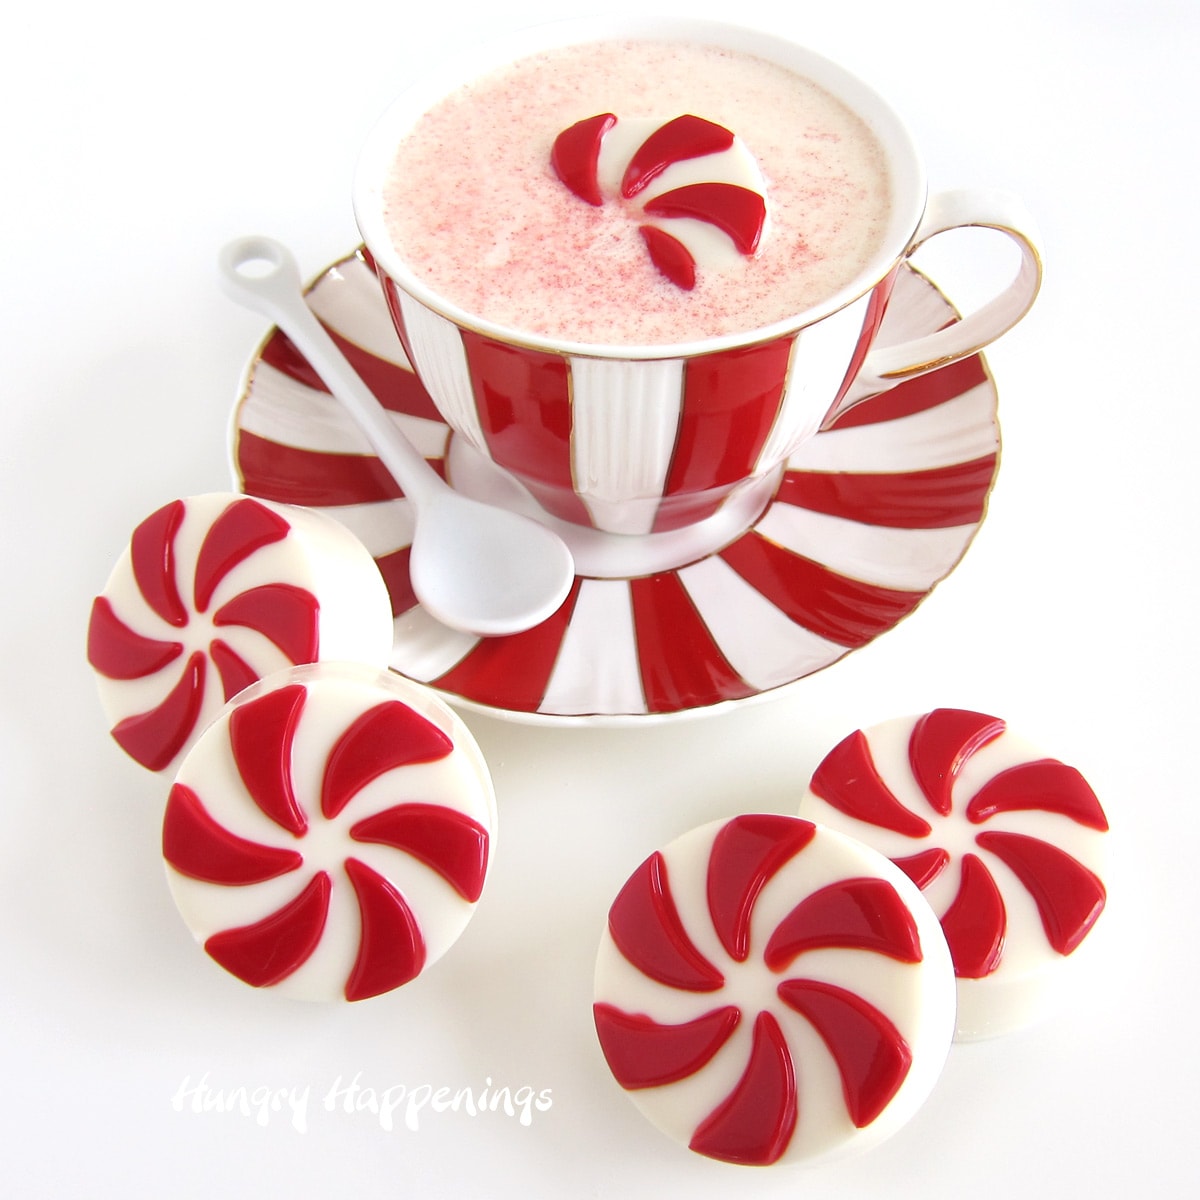
Starlight Mint Hot Chocolate Bombs
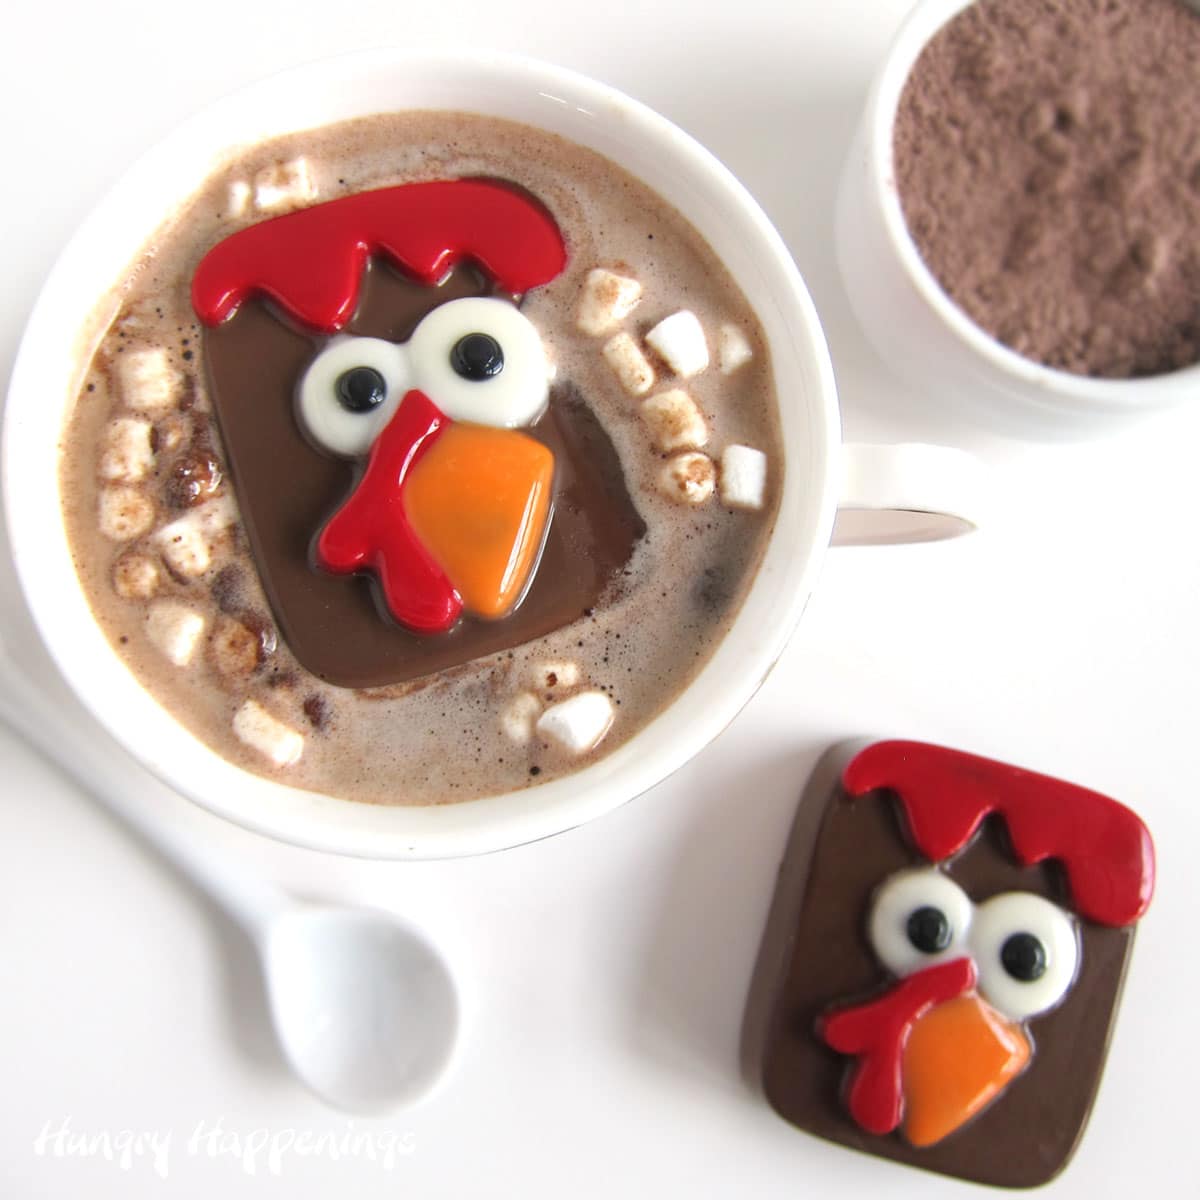
Thanksgiving Hot Chocolate Bomb Turkeys
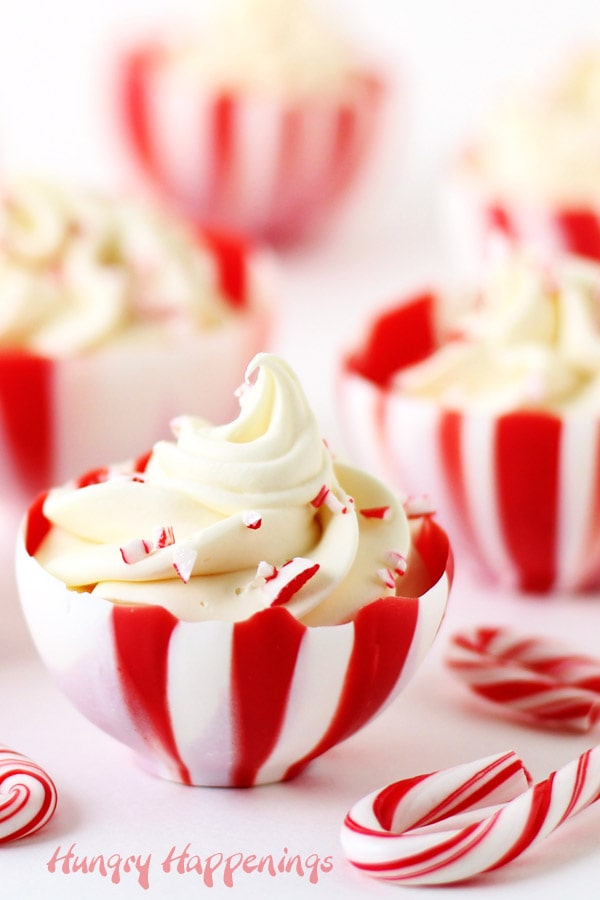
Candy Cane White Chocolate Cups
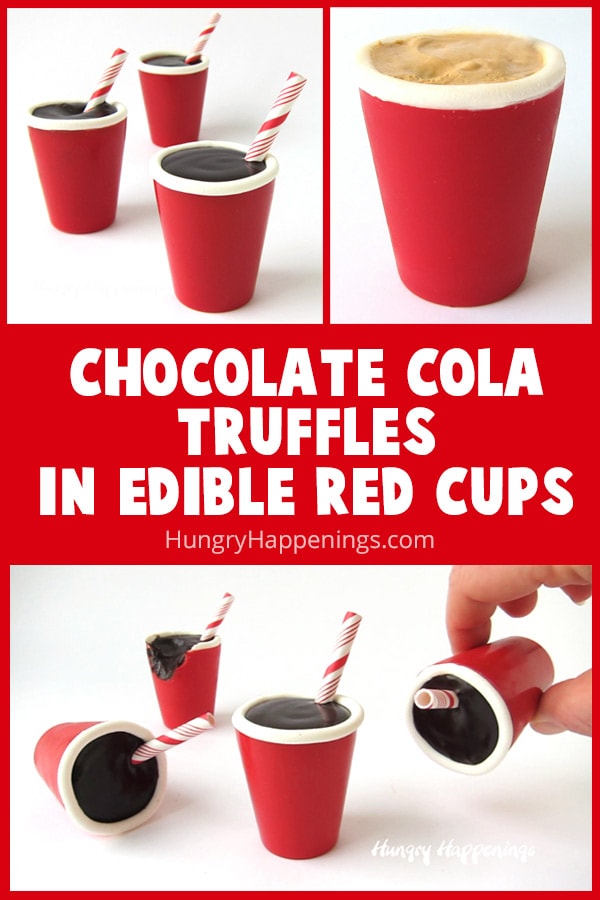
Red Solo Candy Cups filled with Chocolate Cola Ganache
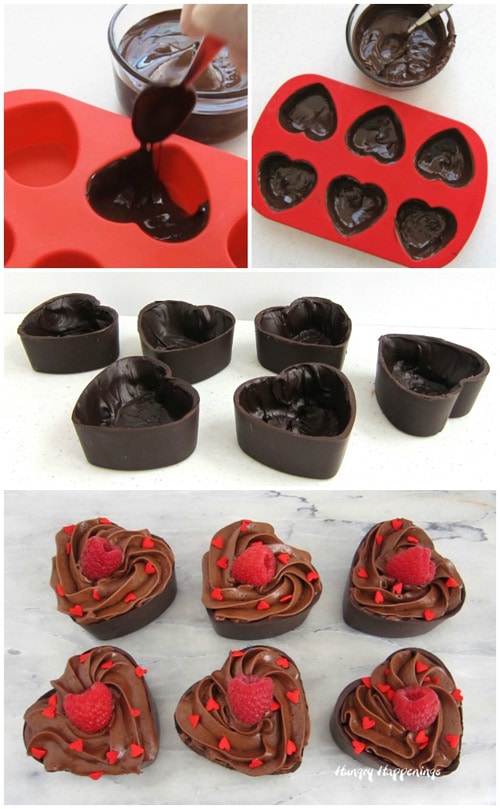
Chocolate Heart Cups fille with decadent Chocolate Mousse
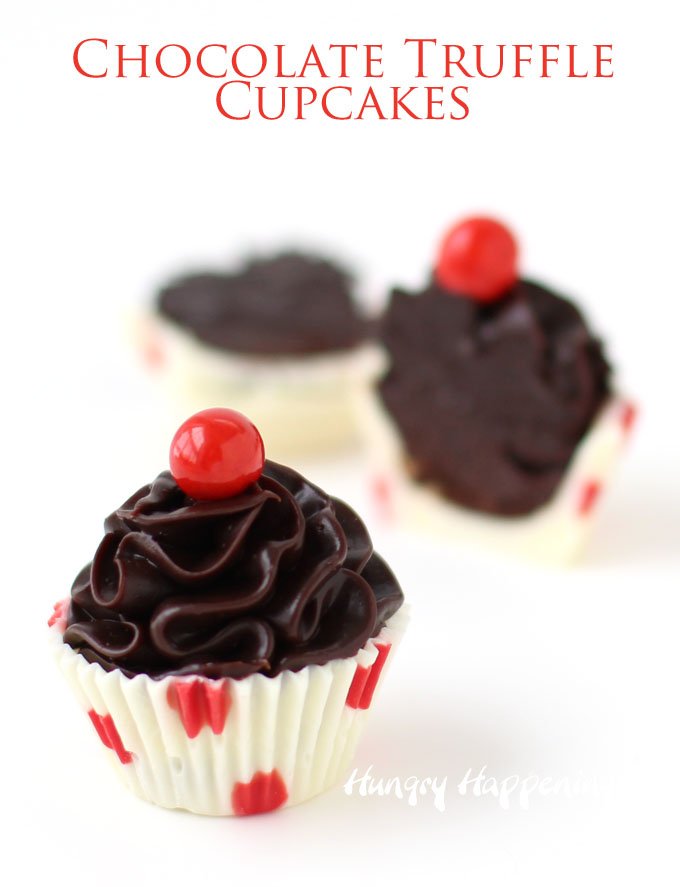
Mini Chocolate Truffle Cupcakes

- Banana Split Bars – A Fun and Easy Summer Dessert - March 4, 2026
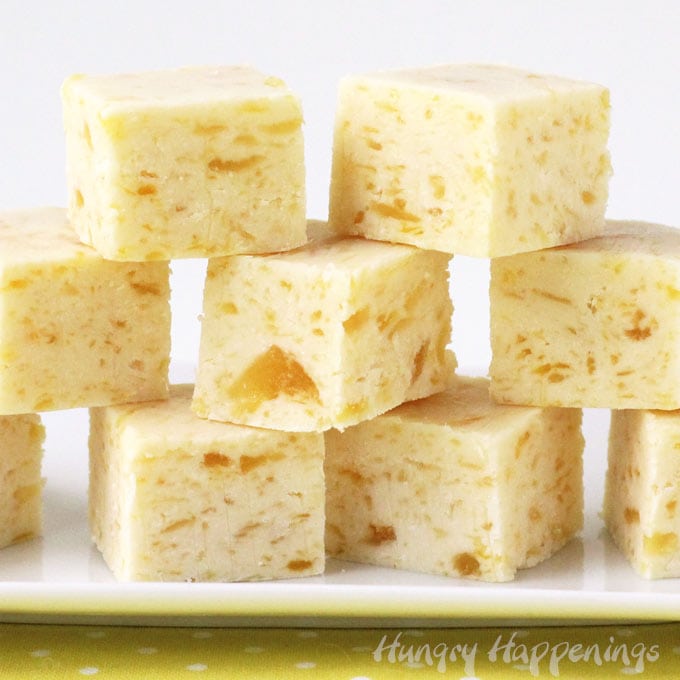
- Pineapple Fudge (No Candy Thermometer Needed!) - March 4, 2026
- No-Bake Peanut Butter Pie Recipe - March 3, 2026
Denise R says
Thank you for your great lesson, it'e everything I need in one place! I really like your instructions for tempering chocolate, it has always intimidated me. Love the box your kit comes it, a perfect gift and so cute!
Beth says
Tempering chocolate takes practice, but if you follow the instructions, you'll get the feel for it. Once you get it to work, every time after that becomes easier.
Shelly Martin says
I just made my first batch of hot chocolate bombs and they came out perfectly!!! Your instructions were so incredibly helpful. I bought the Callebaut chocolate and YUM! I was able to temper the chocolate thanks to your instructions. My chocolate spheres are so shiny. They look amazing. I can't wait to make more to give as Christmas gifts.
Beth says
I'm happy to hear your hot chocolate bombs turned out so well. I hope you have lots of fun making your Christmas gifts!
Karen says
Hi Beth,
Can you please tell me what kind of dark grated chocolate you use in your homemade recipe.
Thank you
Beth says
I personally use Peter's Burgundy Chocolate. I grated it using a cheese grater to add to the hot cocoa mix. You can grate any chocolate bars you like including Ghiradelli Chocolate Bars, Hershey's Special Dark Bars, or Lindt Chocolate Bars. Any of these will work well and taste great.
Dawn Meyer says
I love your site. I've tried lots of your ideas. Have always wanted to try to make these hot cocoa bombs. Would love to win your giveaway to give it a try for this coming holiday season. Have a wonderful baking season!!
Beth says
That makes me so happy! I hope you have a joyful baking season too.
Melinda Decorby says
Hi there, I am wondering how you would put a back onto bomb molds that aren’t spheres, like the football and heart ones you have in a photo closer to the beginning of your tutorial?
Beth says
Hi Melinda,
I fill the heart-shaped or football-shaped chocolate shell with marshmallows and hot chocolate mix so that there is about 1/16-1/8 inch of space between the hot chocolate and the top edge of the chocolate shell, then I pipe chocolate over top. You can watch a video of me making the conversation heart hot chocolate bombs here - https://hungryhappenings.com/conversation-heart-hot-chocolate-bombs/ and you can see a step-by-step tutorial with pictures of the process to make the football hot chocolate bombs here - https://hungryhappenings.com/football-hot-chocolate-bombs/.
Rachel says
Excited to try. I've had my molds since last year 😳
Beth says
They are so much fun to make. Enjoy!
Lorinda Krhut says
I’ve never made hot chocolate bombs but am looking forward to trying them. Your instructions are very detailed which are so helpful for a novice like me. I’m hosting a bridal shower and the bride-to-be has asked for a hot chocolate bar. This looks like a great way to make the bar very special. Off to the Kitchen Store I go! I’m so glad I stumbled across your site.
Beth says
What a fun idea for a bridal shower. Making hot chocolate bombs will be perfect! Have fun.
Gina says
I love all of your tutorials. You come up with some really fun ideas! This one in particular is so informative and I appreciate how you break everything down. I’ve been wanting to make hot chocolate bombs but could not get the molds last year! Definitely going to try them this winter.
Beth says
Thank you, I'm so glad you love my tutorials! It was difficult finding the molds last year, but there are plenty available this year. I hope you have fun making your first batch of hot chocolate bombs.
Lisa Mills says
I would love to have a go at making these, the perfect Christmas eve gift for the whole family, we can all sit and enjoy them together with own favourite flavours.
Beth says
I do hope you give them a try! It's fun.
Yo lande beaudoin says
Thank you for all of the wonderful tips!!
Beth says
You are welcome.
Sherri Mullenix says
Thank you Beth I have been wanting to try to make these and with your detailed directions hopefully it will go smoothly.
I appreciate everything you do in sharing your passion with us I know it takes a lot of work.
Thank you
Beth says
Thank you so much! I want to make sure you have all the information you need so your hot chocolate bombs turn out great! I hope you give them a try.
Jason Delevar says
This recipe is great. I love baking them and my family likes the product. Moreover, molds are cheap. I found it only for 6.99 USD
Zoe says
Hey! Thank you for such detailed recipe! I used dark chocolate compound for the shells but it doesn't fully dissolve in milk. Any tip for that?
Beth says
Hi Zoe, I'm glad you had success making your hot chocolate bombs. Compound chocolate will take a bit longer to melt than pure chocolate. I was able to melt my pure chocolate bombs using hot milk but you might need to actually bring your milk to a simmer (just beginning to boil) in order to melt the compound chocolate. If your compound chocolate is really thick when you are making the chocolate shells, I would suggest you stir in some Paramount Crystals or Wilton EZ Thin, which are solid flakes of the same fat that is used to make the candy melts. Add a pinch of them then stir, and watch the candy melts thin out. Add more until you get the desired fluidity. Candy Melts (compound chocolate) can become thick for several reasons (age, temperature changes in storage, and condensation) and that can affect how it melts, so stirring in some of the crystals of fat will help to thin it out.
I hope this helps.
Susan says
This is a wonderful and detailed tutorial. This will be my first year attempting to make for friends and family. Definitely using your post as my guide. Thank you!
Beth says
Enjoy making your hot chocolate bombs. If you have any questions, don't hesitate to ask!
Andrea says
Hello,
How do I keep the chocolate from cracking at the edge? I just can’t get it to be a nice straight edge. I’m using silicon spheres. Thanks!
Beth says
If the edges are cracking then you need to add a second coat of chocolate around the top edge. You need to get that top edge thick enough that it won't break when you remove them chocolates from the mold.
Tammie says
Thank you for this information filled post! I'm using candy melts and having a problem with my gloved fingers leaving smudgy marks on the molded chocolate. Any suggestions?
Beth says
Hi Tammie,
First, you want to make sure you are using powder-free gloves. Second, you need to change your gloves if your hands tend to get too hot. I know it's wasteful, but it's best to swap them out for a new pair once your hands begin to really heat up. If your hands don't feel too hot, and you are still leaving smudges, you can wipe the gloves using a damp paper towel. Then be sure to dry them before handling the chocolate.
Victoria Truong says
Hi,
I just want to know, after you take off the excess chocolate after filling the molds, do I let it harden on parchment and then save the chocolate to retemper for next time?
Beth says
Hi Victoria,
Yes, any excess chocolate that is clean, meaning it doesn't have hot cocoa mix or sprinkles on it, can be re-melted and tempered again. Just let it harden, then break it into small pieces and add it to the bowl and melt it again.
Sofia says
Thanks Beth
Can not wait to give this a go.
Can i ask the white chocolate you use for the bombs is that a special sort? Iv just used your amazon link for the callebaut 811.
Beth says
Hi Sofia, I personally use Peter's Icecap white compound chocolate. I don't have an affiliate link for it but you can find the wafers here - https://www.countrykitchensa.com/shop/chocolate/peters-white-vanilla-flavored-candy/49/588/564/626837/
I also like using Ghirardelli White Melting Wafers which are available at most grocery stores.
Sofia says
Hi Beth,
Could i ask how you make the biscoff ganache? What measurements do you use?
Thank you
Beth says
Hi Sofia, you can find the recipe for my Biscoff ganache and truffles here - https://hungryhappenings.com/biscoff-truffles-cookie-butter-candy/
Kristi Challgren says
My third attempt went much better. No need to reply.
Beth says
I'm so happy to hear it went better! Have fun making lots of hot chocolate bombs. 🙂
Kristi Challgren says
I’ve made two unsuccessful attempts at hot chocolate bombs. I purchased the poly mold and Callabaut chocolate you recommended above. Could the humidity play a role? I live in Florida. This morning it was 85% humidity outside and 72 degrees inside. Besides that, I reused chocolate from the previous failed attempt. It was dry and brittle. Wonder if I burned it the first time. I have since bought a digital thermometer. I do put it in the fridge to temper but it won’t stay hard for long once I remove it from the fridge. I appreciate your input. Thanks!
Beth says
Hi Kristi,
Tempering chocolate can take some practice and it is vitally important to use an accurate thermometer to check the temperature. If the chocolate is not tempered and is too hot it will set up soft. It won't ever harden properly and as it ages it will streak, spot, and become dry and brittle.
Now that you have a thermometer, give it another try. You can definitely, retemper the untempered chocolate but be sure to seed it with tempered chocolate (the Callebaut callets). If you burn the chocolate you will smell it and you'll notice that it's burnt in the middle of the bowl. You do need to throw the entire bowl out if this happens. You may have overheated the chocolate (beyond 120 degrees F). Once again, with your new thermometer you should be able to check the temperature to avoid this.
Let me know if you have any more questions. Good luck! I hope you get it to work.
Joni Theurer says
If you wanted to add Baileys to the Ganache how much would you use to have the right consistency?
Beth says
Hi Joni,
If you plan to use the ganache to fill your hot chocolate bombs you can simply add 2 tablespoons of Baileys to the ganache recipe and have thinner ganache in your chocolate shells. That will be fine. If you plan to scoop and roll the chocolate ganache into balls then I would recommend removing 2 tablespoons of the heavy whipping cream from the recipe and replacing it with 2 tablespoons of Baileys. Enjoy!
Victoria O'Mara says
Hi Beth,
Happy New Year! My grand daughter and I made some chocolate bombs last night . The molds were only 2” diameter and could we only get 1 tablespoon of the powder into it and some marshmallows. Haven’t tried them yet. What size mold did you use that holds 3-4 tablespoons? Will mine just use less hot milk? Smaller cup? We used a brush so there wasn’t a lot of thickness with 2 layers so more room for filling. Thanks for this very informed tutorial! Didn’t realize there was so much to chocolates!
Beth says
Hi Victoria, I'm happy to hear that you and your granddaughter made some homemade hot chocolate bombs. What a fun activity to do together. I used a 2.8-inch silicone mold to make the larger chocolate bombs and was able to get 4 tablespoons of hot cocoa mix in them. The smaller bombs were made using a 2.5-inch mold. Those held about 2 tablespoons of mix. So, I would assume a 2-inch mold would probably only fit about a tablespoonful of hot cocoa mix. I didn't give specific amounts for the milk because I know that the size of the hot chocolate bombs will really make a big difference in the amount of milk to use. I filled my mug with 8 ounces of milk for my 2.5-inch chocolate bombs and it was perfect. I would guess that 6 ounces of milk will work great for a 2-inch chocolate bomb. Enjoy!
MaryAnne Sugai says
I got silicone molds for Christmas and have never used before. What do you use to brush the chocolate in the larger molds?
Beth says
I used a 1-inch paintbrush which worked perfectly to brush the chocolate up the sides of the silicone mold. You can also use the backside of a spoon. Be sure your paintbrush is new or has only been used for food purposes. I like buying plastic handle brushes to use for chocolate making. They are easy to wash and unlike wood handles, they won't splinter over time. Have fun making your hot chocolate bombs!
Monica Kocon says
This blog is so timely (I'm making some today) and offer the best guide on making hot chocolate bombs. I picked up Ghirardelli semi-sweet chocolate chips the other day. Can I use the chocolate chips for the shell and do I temper or just melt the chocolate chips? Thanks!
Beth says
Hi Monica, sorry for the delay in responding. You must temper chocolate chips as they contain cocoa butter. Chocolate chips do have stabilizers in them so that they keep their shape at high temperatures which can make tempering a bit tricky. I recommend using chocolate bars instead.
Antoinette Vitrano says
Thank you so much for this excellent, very detailed tutorial on Hot Chocolate Bombs. I have been wanting to make these, but they looked daunting. Now I feel confident. Thanks! Happy Holidays!
Beth says
I am so happy you feel confident now! Have fun making your hot chocolate bombs. Don't hesitate to reach out with any questions you have during the process.
Barbara Lash says
I’m a bit confused about what kind of frosting you used to pipe on the outside.... as swirls. Can you please advise? Thank you!
Beth says
Hi Barbara,
I drizzled more chocolate on the outside of the hot chocolate bombs then added sprinkles to the wet chocolate. If you are using pure chocolate be sure to drizzle melted and tempered chocolate over top. If you are using candy melts you can drizzle your hot cocoa bombs with any colored candy melt you like.
The Partiologist says
The cocoa bombs turned out so pretty and all the flavorings sound delicious. I made cocoa bombs a few weeks ago and now all I want to do is make cocoa bombs!
Beth says
I've spent the past few days making hot chocolate bombs for everyone I know! Everyone wants them this year. A good cup of hot chocolate can make you feel warm and cozy inside.
Lisa says
Cocoa bombs sound like a fun project for getting friends together!
Beth says
It is a great project to do with friends. My friends always get together in December to make chocolate to give as gifts. This year, we'll be making hot chocolate bombs. I'm excited to share my tips with all my friends.
Allison Kirkland says
What a great tutorial! I can't wait to make these hot chocolate bombs. I love all the tips and tricks that you included. I wasn't aware that there was FDA food approved plastic ornament balls. I thought I could just buy the regular ornament and use only when making chocolate, just like the putty knife for the molds or tweezers, etc.
Beth says
Thanks, I'm glad you found the tutorial helpful. Honestly, I don't worry too much about using FDA-approved plastic when making treats for my family, but if I'm going to sell them, then I do. The chocolate won't be in a plastic mold long enough for it to have any ill effects. I have used all sorts of containers to make chocolate sculptures and have never had any issues.