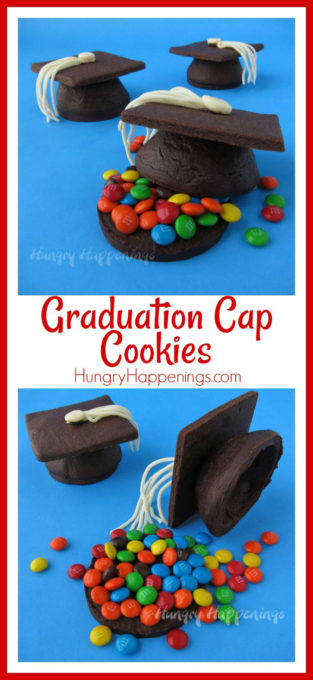
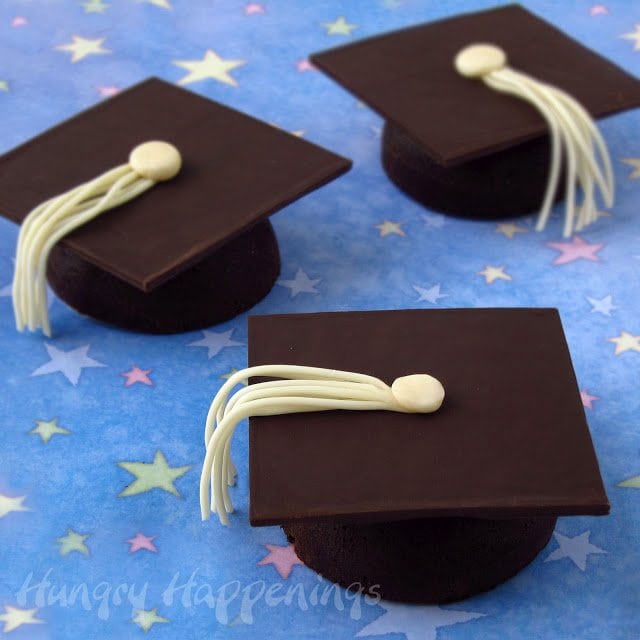
Fill 3-D grad cap cookies with candies then surprise your graduate with this special treat.
These Candy Filled Chocolate Graduation Cap Cookies are fun to make and can be filled with your graduate's favorite candy or snack.
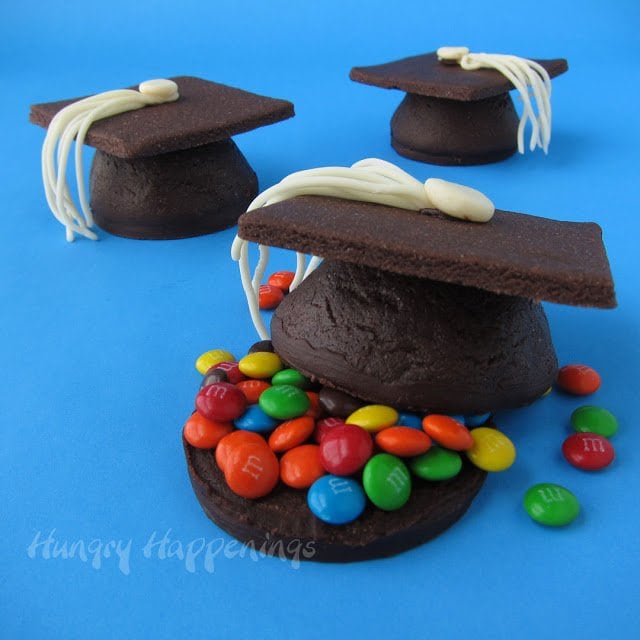
Graduation season is upon us. It's time to make some special desserts that will get an A+ with your graduate.
These candy-filled cookies are sure to impress.
I had so much fun creating these clever graduation cookies. My experimentation with the recipe was quick and easy, I got the result I had hoped for in my first attempt. That doesn't always happen, so I was thrilled.
See more graduation party recipes, here.
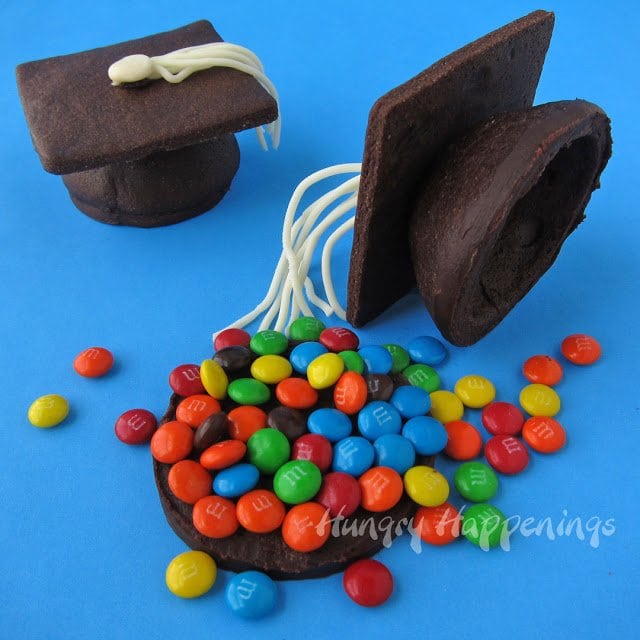
Each three-dimensional grad cap piñata cookie is created by baking a batch of chocolate cookies over a cake ball pan. Additional round and square cookies are then attached to the domed cookie to create the cap.
You'll fill the inside of the grad cap cookie with candies, attach the cookies together, then add a tassel on top.
They do take a bit of time to make, but the reaction you will get from family and friends is totally worth the effort.
NOTE: I opted to make traditional black graduation caps using chocolate cookie dough, but if you prefer, you could create your caps in school colors. Just make a plain cut-out cookie recipe and add color to the dough. You can color the modeling chocolate tassels, as well.
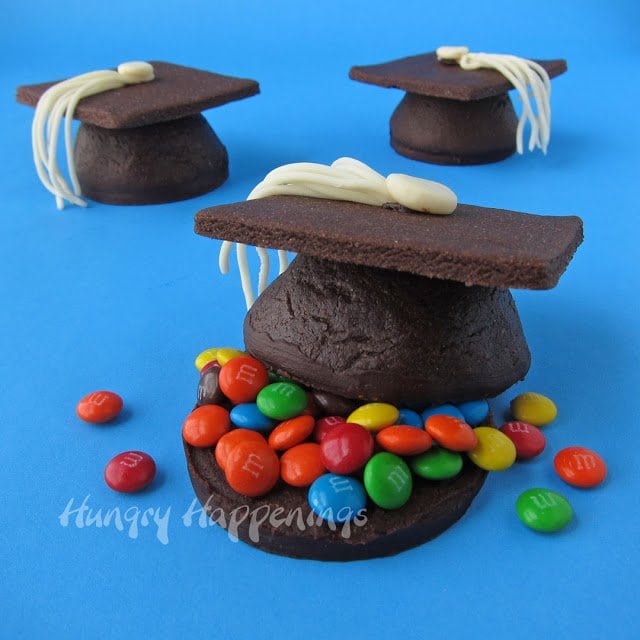
Chocolate Graduation Cap Cookies
(makes 12)
Ingredients:
(chocolate cookie recipe adapted from Lili Loa)
- butter
- granulated sugar
- egg
- vanilla
- cocoa powder
- baking powder
- salt
- flour
- ¼ batch of white modeling chocolate, recipe here
- chocolate frosting
- small candies like M&M Mini's
Supplies:
- parchment paper
- rolling pin
- 2 ¼ inch round cookie cutters
- 2 ½ inch square cookie cutters
- optional: clay extruder or new garlic press
Instructions:
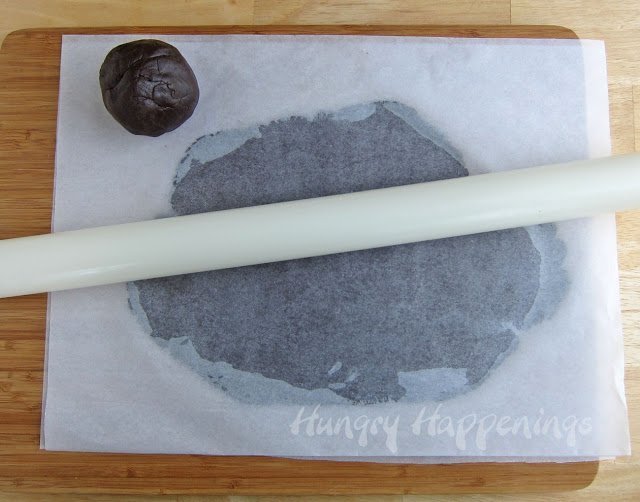
Roll out dough.
- Make chocolate cookie dough using the recipe below.
- Roll out the dough in between two sheets of parchment paper. You'll want the dough to be about ⅛th of an inch thick.
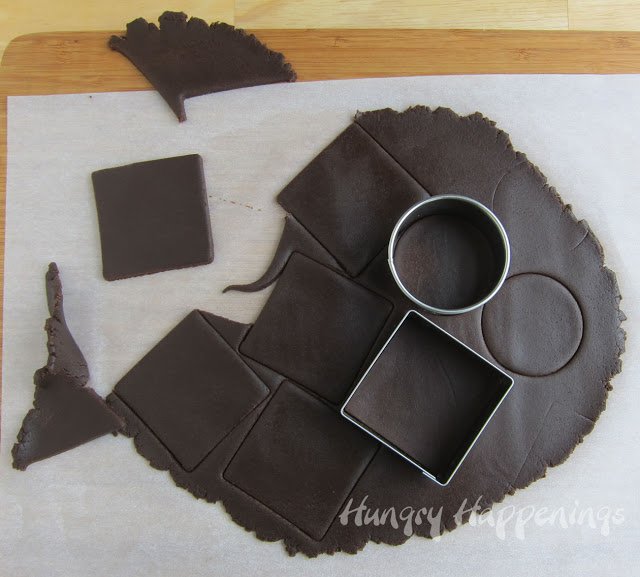
Cut dough squares and circles.
- Cut out twelve 2 ¼ inch circles and twelve 2 ½ inch squares, re-rolling dough as needed.
- Place on a baking sheet lined with parchment paper and bake for 8-10 minutes.
- Allow to cool completely.
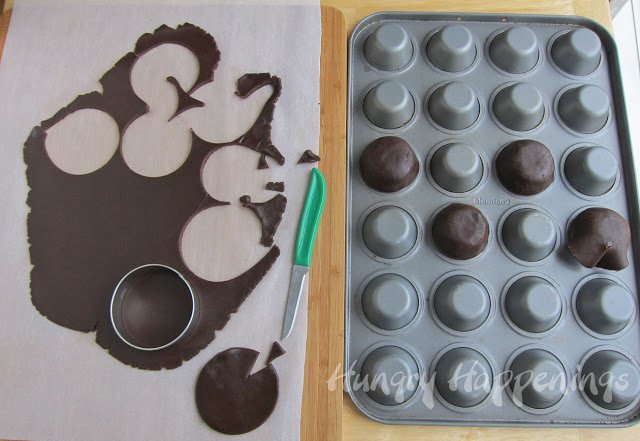
Mold dough into domes.
- Roll out the remaining dough and cut twelve more circles.
- Cut a pie piece out of each circle of dough.
- Turn mini muffin tin upside down.
- Set a round of dough over a muffin cup, press it down, wrapping it around the cup.
- Cut off any excess dough at the cut and press the seam together.
- Repeat, creating a total of 12 cookie cups.
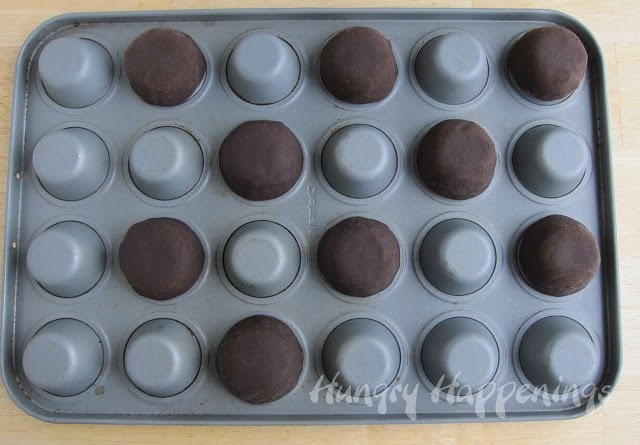
Freeze.
- Freeze cookie cups for 15 minutes, to ensure they will hold their shape well.
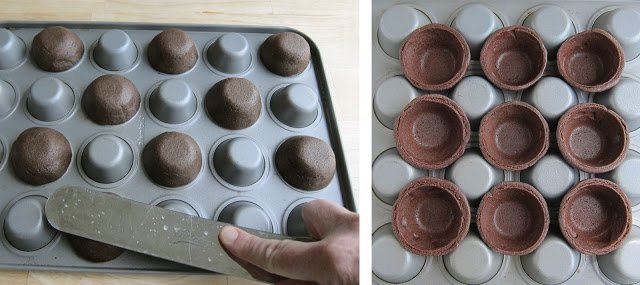
Bake
- Bake for 8-10 minutes. As soon as you remove the cookie cups from the oven, press down on the top of the cookie cups to create a flat top.
- Allow cookies to cool completely, then pull up on them and remove them from the muffin tin.
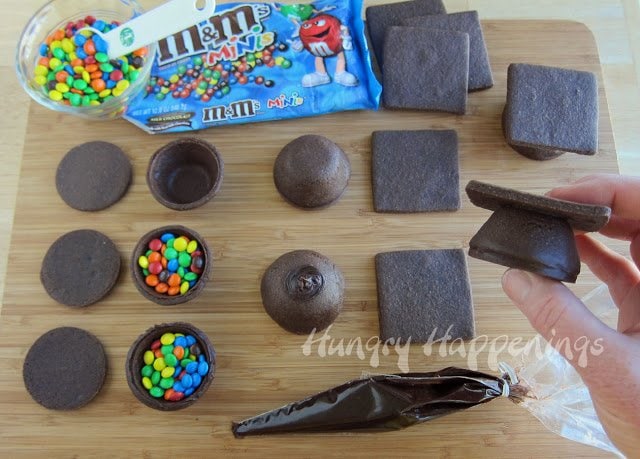
Assemble the chocolate cookie graduation cups.
- Fill cookie cups with candies.
- Pipe a thin line of chocolate frosting around the edge of the cup.
- Press one round cookie onto the cookie cup and set it on the counter, flat cookie side down.
- Pipe a small amount of chocolate frosting on the top of the cookie cup. Press one chocolate cookie square on top, creating the shape of a graduation cap.
- Allow the cookies to dry for at least 15 minutes so that all the pieces stay together.
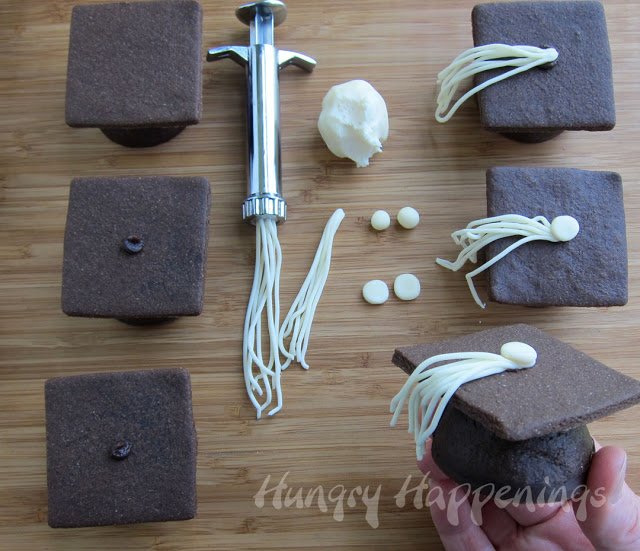
Make modeling chocolate tassels.
I prefer to use modeling chocolate to decorate my treats. I think it tastes better than fondant and it's easy to make. See the white modeling chocolate recipe, here.
If you do use fondant, I suggest adding some tylose powder to it so that it will firm up.
- Knead a small amount of white modeling chocolate and roll it into a thin log.
- Insert the log into a clay extruder fitted with a multi-hole plate.
- Press the modeling chocolate through the extruder, creating tassels.
- Cut the tassels about 1 ½ inches long. You can also use a new garlic press or just roll very thin logs of the modeling chocolate by hand.
- Pipe a small dab of chocolate frosting in the center of the square cookie on your graduation cap.
- Press the tassels onto the frosting.
- Pinch off a pea-size piece of modeling chocolate, roll it into a ball, flatten it into a disc, and press it down onto the center of the cookie on top of the tassels.
Items used to create this project are available on Amazon.com. I earn a small commission when you use the links below at no extra cost to you.)
 Ateco Plain Edge Round Cutt...Shop on Amazon
 Fox Run, 1 x 2.75 x 2.75 in...Shop on Amazon
 Baker's Secret Basics Nonst...Shop on Amazon
 M&M's Milk Chocolate Mini M...Shop on Amazon
Printable Recipe
Three-dimensional chocolate graduation cap-shaped cookies can be filled with your favorite candies.
- 10 tablespoons butter softened slightly
- ¾ cups granulated sugar
- 1 egg
- ½ teaspoon vanilla
- ⅓ cup cocoa powder
- ¼ teaspoon baking powder
- ½ teaspoon salt
- 1 ¾ cup flour
- 4 ounces white modeling chocolate or fondant
- ½ -¾ cup chocolate frosting
- 12 scoops about a tablespoon each of small candies like M&M Mini's
-
Pre-heat oven to 375 degrees Fahrenheit.
-
In a large mixing bowl, combine butter and sugar.
-
Cream until light and fluffy.
-
Mix in eggs and vanilla.
-
Combine cocoa powder, baking powder, and salt in a small bowl.
-
Stir into wet ingredients.
-
Add flour and mix just until incorporated.
-
Roll out the dough in between two sheets of parchment paper. You'll want the dough to be about ⅛th of an inch thick.
-
Cut out twelve 2 ¼ inch circles and twelve 2 ½ inch squares, re-rolling dough as needed.
-
Place on a baking sheet lined with parchment paper and bake for 8-10 minutes.
-
Allow to cool completely.
-
Roll out the remaining dough and cut twelve more circles.
-
Cut a pie piece out of each circle of dough.
-
Turn mini muffin tin upside down.
-
Set a round of dough over a muffin cup, press it down, wrapping it around the cup.
-
Cut off any excess dough at the cut and press the seam together.
-
Repeat, creating a total of 12 cookie cups.
-
Freeze cookie cups for 15 minutes, to ensure they will hold their shape well.
-
Bake for 8-10 minutes. As soon as you remove the cookie cups from the oven, press down on the top of the cookie cups to create a flat top.
-
Allow cookies to cool completely, then pull up on them and remove them from the muffin tin.
-
Fill cookie cups with candies.
-
Pipe a thin line of chocolate frosting around the edge of the cup.
-
Press one round cookie onto the cookie cup and set it on the counter, flat cookie side down.
-
Pipe a small amount of chocolate frosting on the top of the cookie cup. Press one chocolate cookie square on top, creating the shape of a graduation cap.
-
Allow the cookies to dry for at least 15 minutes so that all the pieces stay together.
-
Knead a small amount of white modeling chocolate and roll it into a thin log.
-
Insert the log into a clay extruder fitted with a multi-hole plate.
-
Press the modeling chocolate through the extruder, creating tassels.
-
Cut the tassels about 1 ½ inches long. You can also use a new garlic press or just roll very thin logs of the modeling chocolate by hand.
-
Pipe a small dab of chocolate frosting in the center of the square cookie on your graduation cap.
-
Press the tassels onto the frosting.
-
Pinch off a pea-size piece of modeling chocolate, roll it into a ball, flatten it into a disc, and press it down onto the center of the cookie on top of the tassels.
- Store in an airtight container for up to a week.
- Each cookie can be served as dessert or wrapped in cellophane bags and used as party favors or graduation gifts.
- The calories listed are for the cookie only and are an estimate based on the ingredients I used to make the grad cap cookies.
This recipe was originally published on May 14, 2013.
More graduation party recipes.
You might also like these other graduation party recipes...

Smiley Face Graduation Cookies
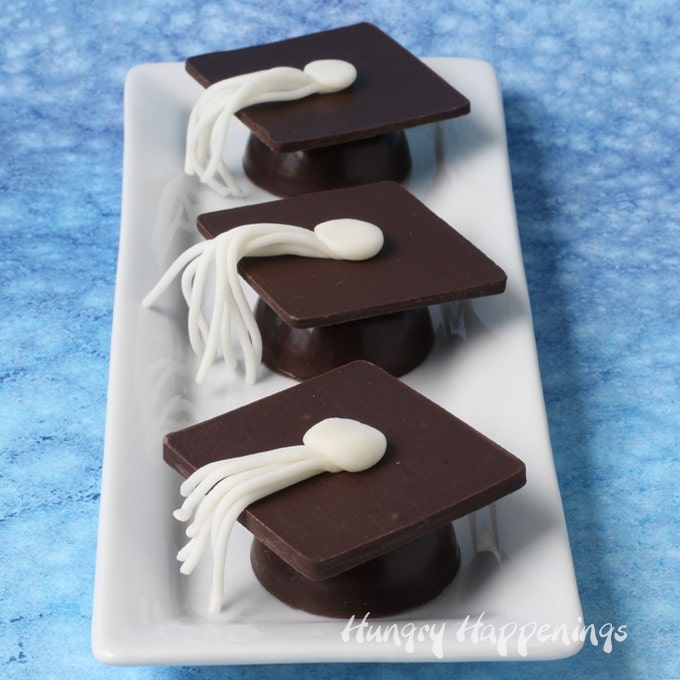
Peanut Butter Fudge-filled Chocolate Grad Caps
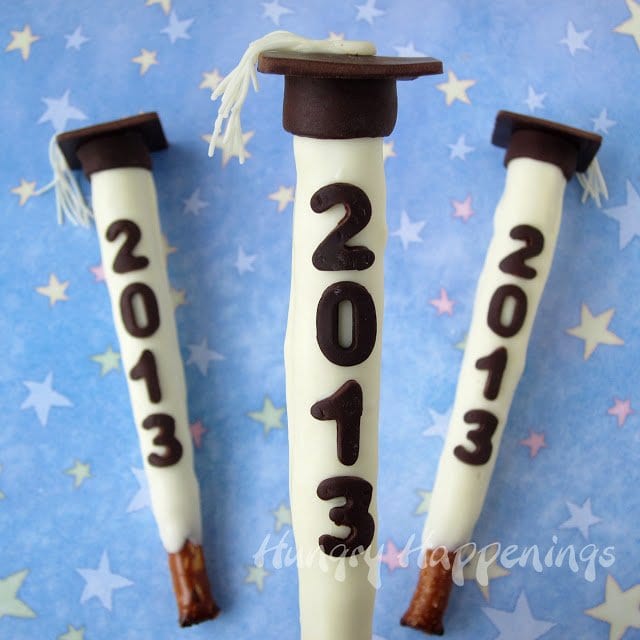
Graduation Pretzel Pops topped with modeling chocolate grad caps
![]()
Did you make this recipe or do you just think it is super cute? Let me know by leaving a comment and rating the recipe below. If you love the recipe, please give it a 5-star rating.

I love making fun food for parties and special occasions and sharing my creative ideas with you.
If you make this recipe and share it online be sure to link back to this post.
Thanks and have a sweet day! -
Beth
- How to make peanut butter? - February 15, 2024
- OREO Penguins - December 20, 2023
- OREO Snowmen - December 20, 2023


Lisa
This is an adorable idea! I'd like to make a slightly larger version (maybe using a regular cupcake pan, not mini) as a cake topper for my son's graduation cake. It's a large half sheet cake, so I think a larger size might look best. Do you think that would work? Do you know what size cookie cutter I'd need to use (round and square)? And would the cooking time change?
Beth
Thanks, Lisa. I've not made them using the regular cupcake pan, but just measured one and I believe you will need to cut 4 inch rounds to go over top of the cupcake pans, then need to cut 3 1/4 inch squares for on top. Being the cookies will be larger, I'd start by adding 3 minutes to the baking time, then check them, and bake longer if needed. I'd love to see pictures of your caps if you make them! Have fun.
Lisa
Thank you, Beth! I appreciate the tech support 🙂 I am going to try this on Saturday, and I'll send a photo! Wish me luck...
Beth
Have fun. I hope they turn out great!
Lisa
The cake topper came out really well. Is there a way to upload a pic here?
Beth
Sadly, no, but you can send the picture to me at beth@hungryhappenings.com and I'll be sure to share it!