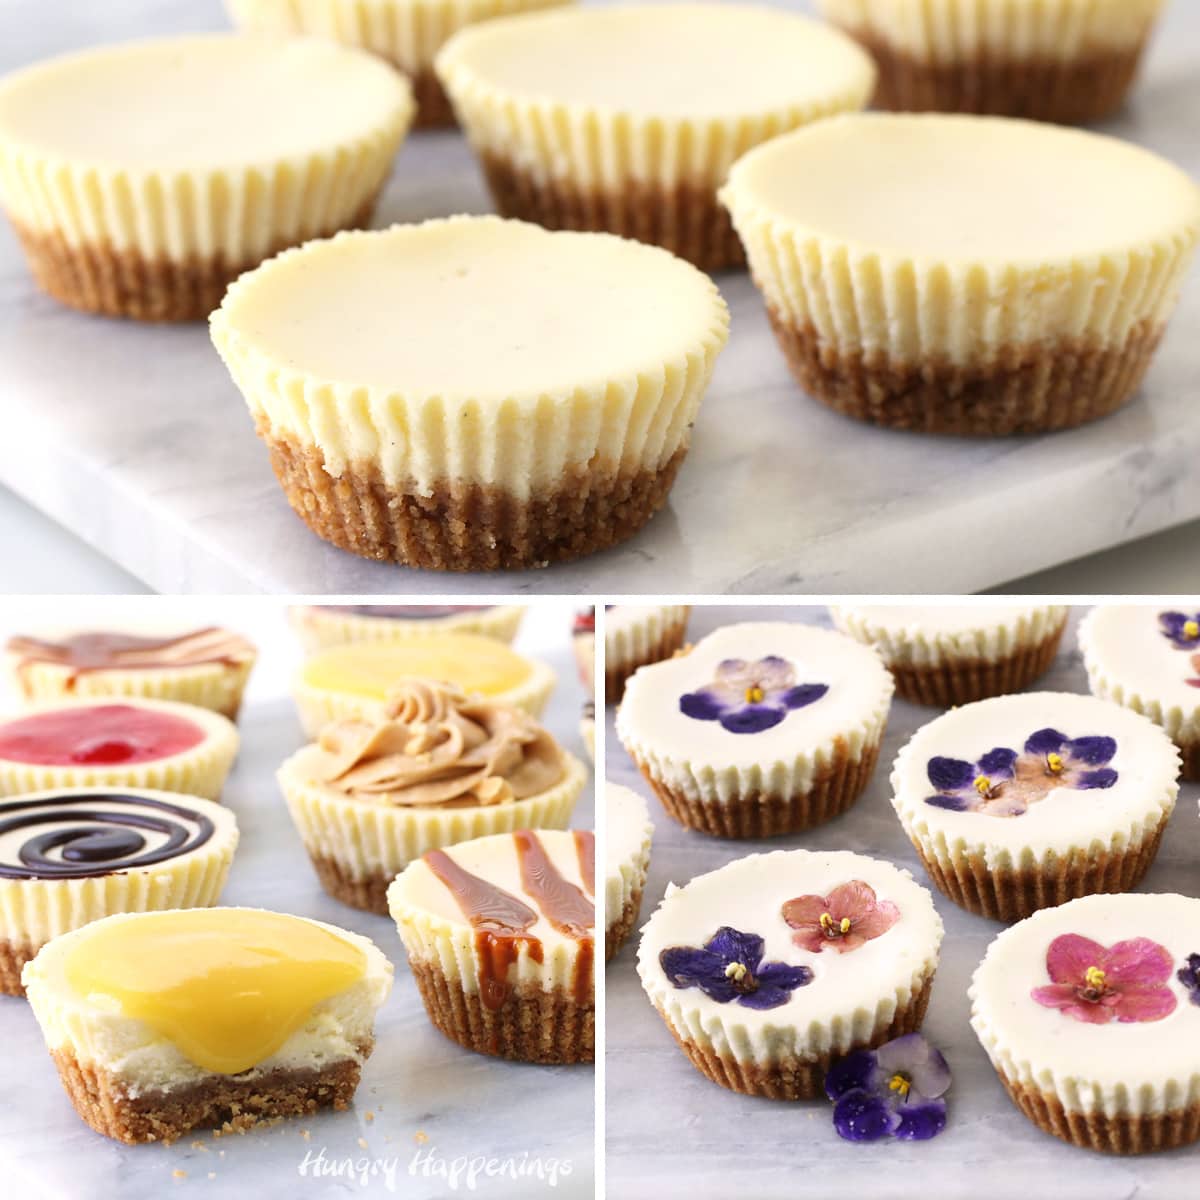
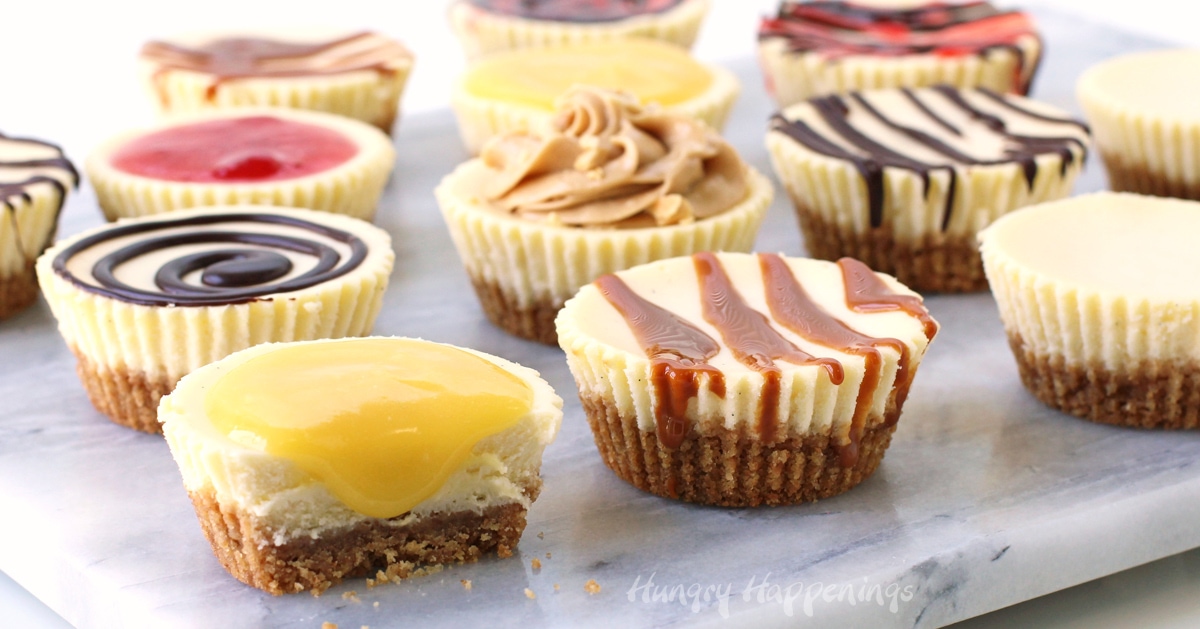
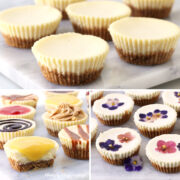
Enjoy decadently rich, luxuriously creamy mini cheesecakes for dessert tonight or at your next party. Each individual cheesecake is baked in a muffin cup and can be served plain or topped with chocolate ganache, soft caramel, strawberry sauce, lemon curd, peanut butter frosting, or even edible flowers.
Oooh, cheesecake. Isn't it absolutely fabulous? It's silky and smooth, sweet and tangy, and crispy and creamy all in one bite. I've had a lot of cheesecakes in my lifetime and spent years searching for the best cheesecake recipe. I believe I have found it! I hope you love it as much as I do.
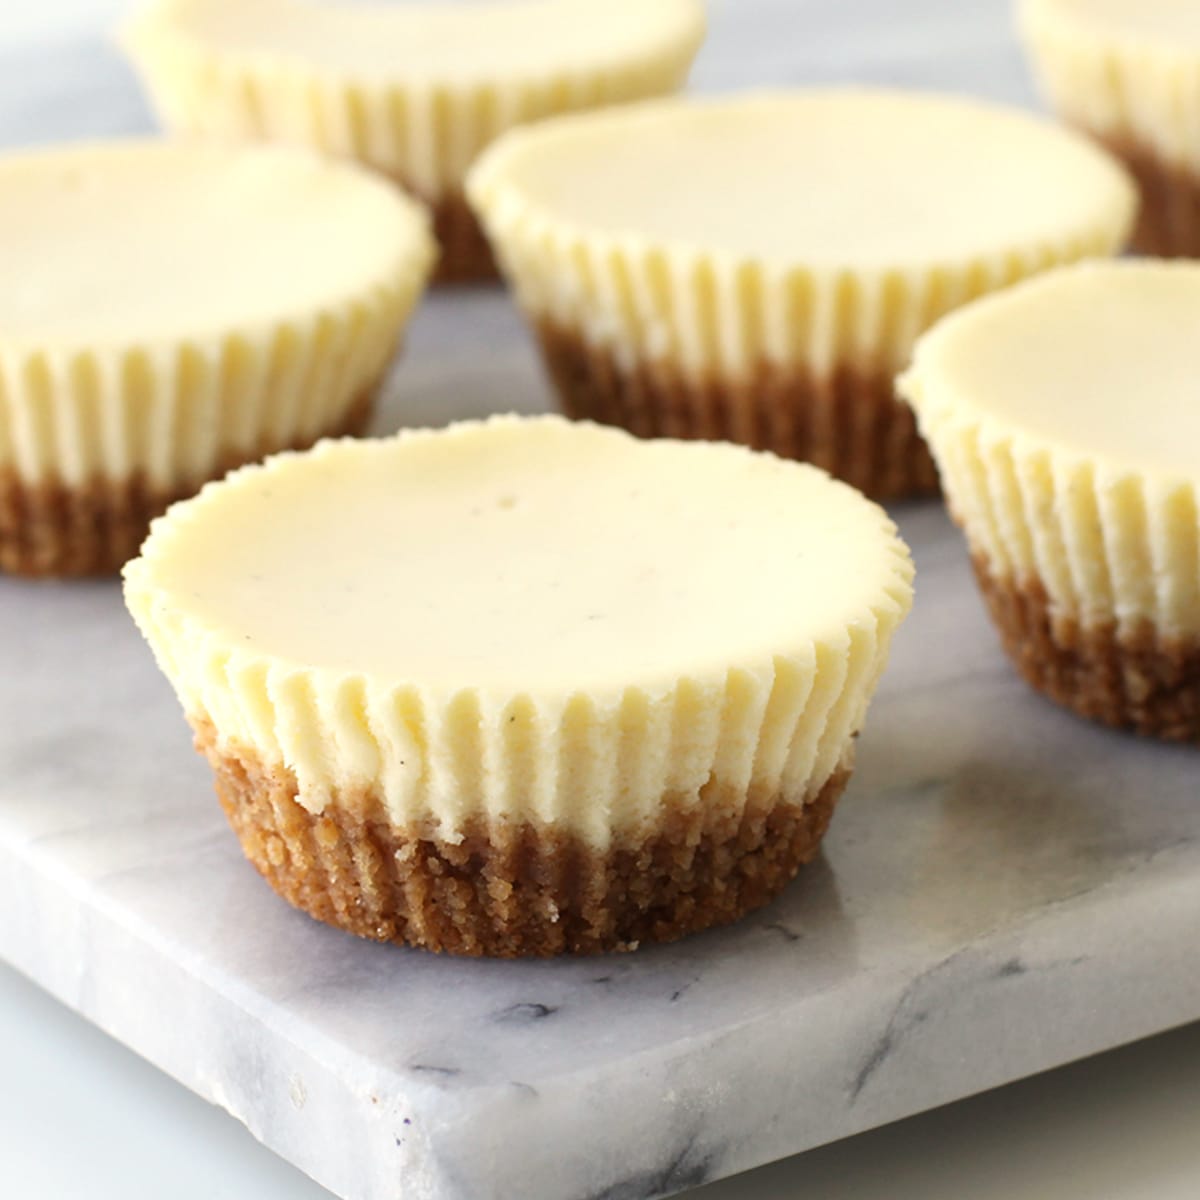
Over the years, I have used that recipe to create many decorated cheesecakes, most of which are baked in large springform pans. When I'm hosting a party, I prefer to serve individual-sized desserts, so I've adjusted the recipe to make these cheesecakes in muffin tins.
Each cupcake-sized cheesecake has a wonderful ratio of crust to filling and is so creamy that it practically melts in your mouth. The flavor of sugar-sweetened cream cheese and sour cream with hints of vanilla really comes through in this dessert.
👩🍳Why You'll Love This Recipe
- Mini Cheesecakes are easy to make in a muffin tin (bake in paper wrappers for easy removal).
- They don't require baking in a water bath.
- They won't crack on top because they bake quickly.
- They can be eaten by hand, with a spoon, or with a fork.
- Mini Cheesecakes are the perfect size for after a meal or to serve at a party.
- They can be topped or decorated to make them festive for any occasion.
- They can be transformed into many different flavors.
So, let's get baking.
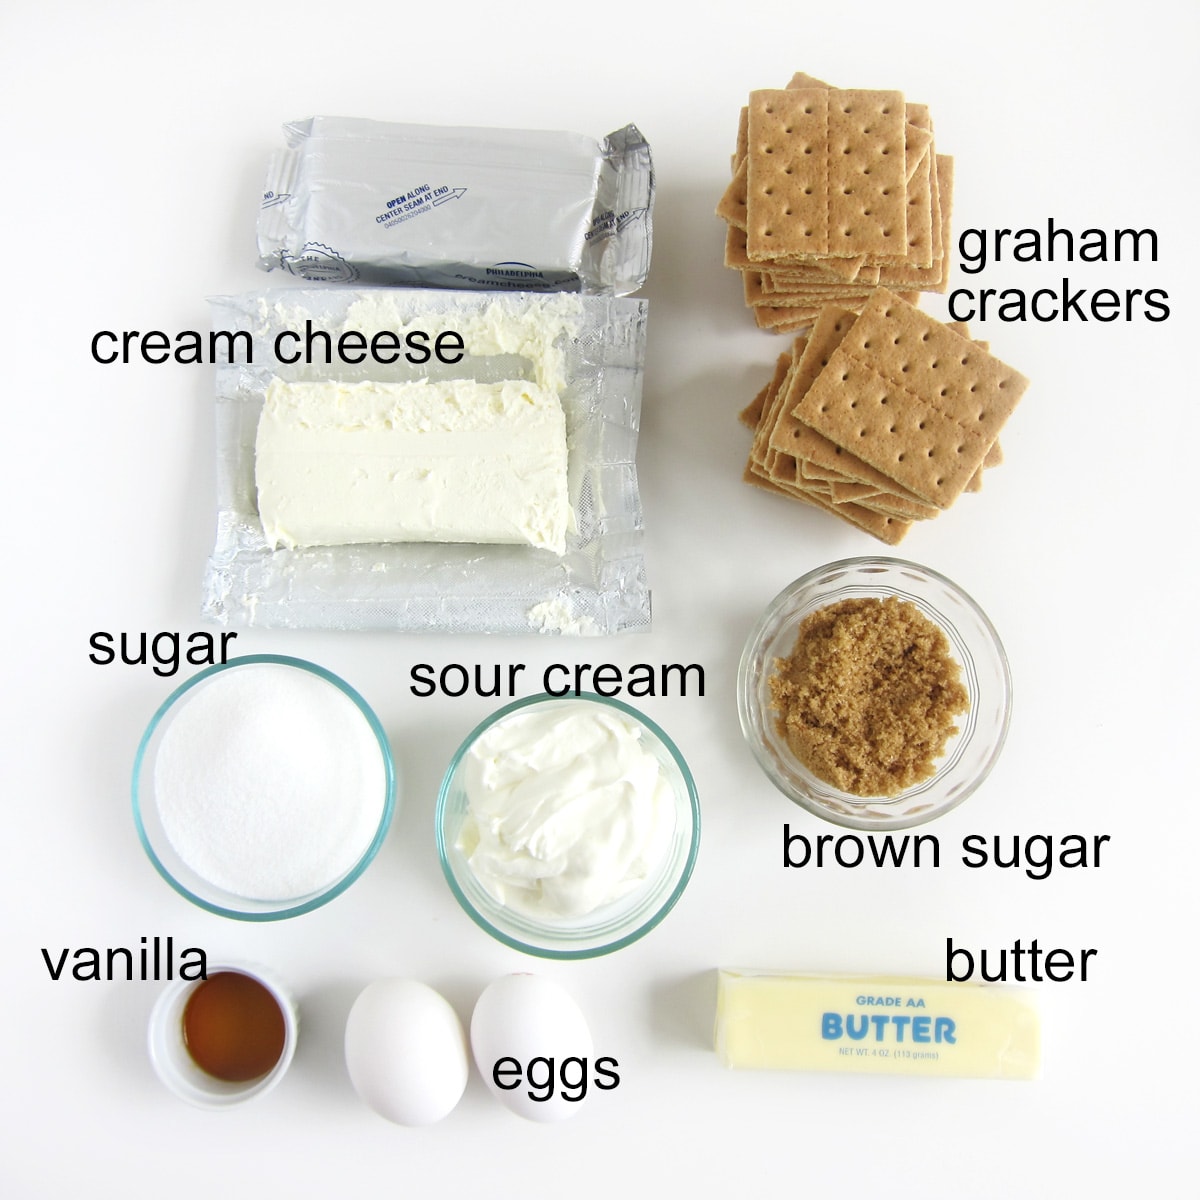
🍥Ingredients
The ingredients listed below will make the best mini cheesecakes with a luxuriously smooth texture and slightly tangy flavor.
- cream cheese - Use softened, full-fat cream cheese. I recommend using Philadelphia Cream Cheese and allowing it to sit out at room temperature for at least 4 hours or up to overnight so that it is very soft.
- granulated sugar
- eggs - Use room temperature eggs.
- vanilla - If you like little flecks of vanilla in your cheesecakes, use vanilla bean paste.
- sour cream - This will add a slightly tangy flavor and will make your cheesecakes velvety smooth.
- Graham crackers - You can use plain, honey, cinnamon, or chocolate graham crackers to make a delicious crust.
- brown sugar - I like to add a little brown sugar to the graham crackers to give it a slight caramel flavor.
- butter - You can use unsalted or salted butter to make the crust. I prefer the flavor of unsalted butter in my crust, but either will work fine.
🥣Instructions

🥄Create the Crusts
- Crush graham crackers into fine crumbs using a food processor. Or, place the crackers in a large zip-top bag and smash them using a rolling pin, a meat mallet, or the bottom of a pan.
- Stir some brown sugar into the graham cracker crumbs.
- Then, stir melted butter into the crumbs until it resembles wet sand. When you squeeze a small handful of the wet crumbs, they should hold together.
- Scoop out 2 tablespoons of the crumbs, spoon them into a paper-lined muffin cup.
- Then, press down on the crumbs to compact them into an even layer. I like using a wooden tart tamper, but your fingers work well too.
🥄Make the plain cheesecake filling.
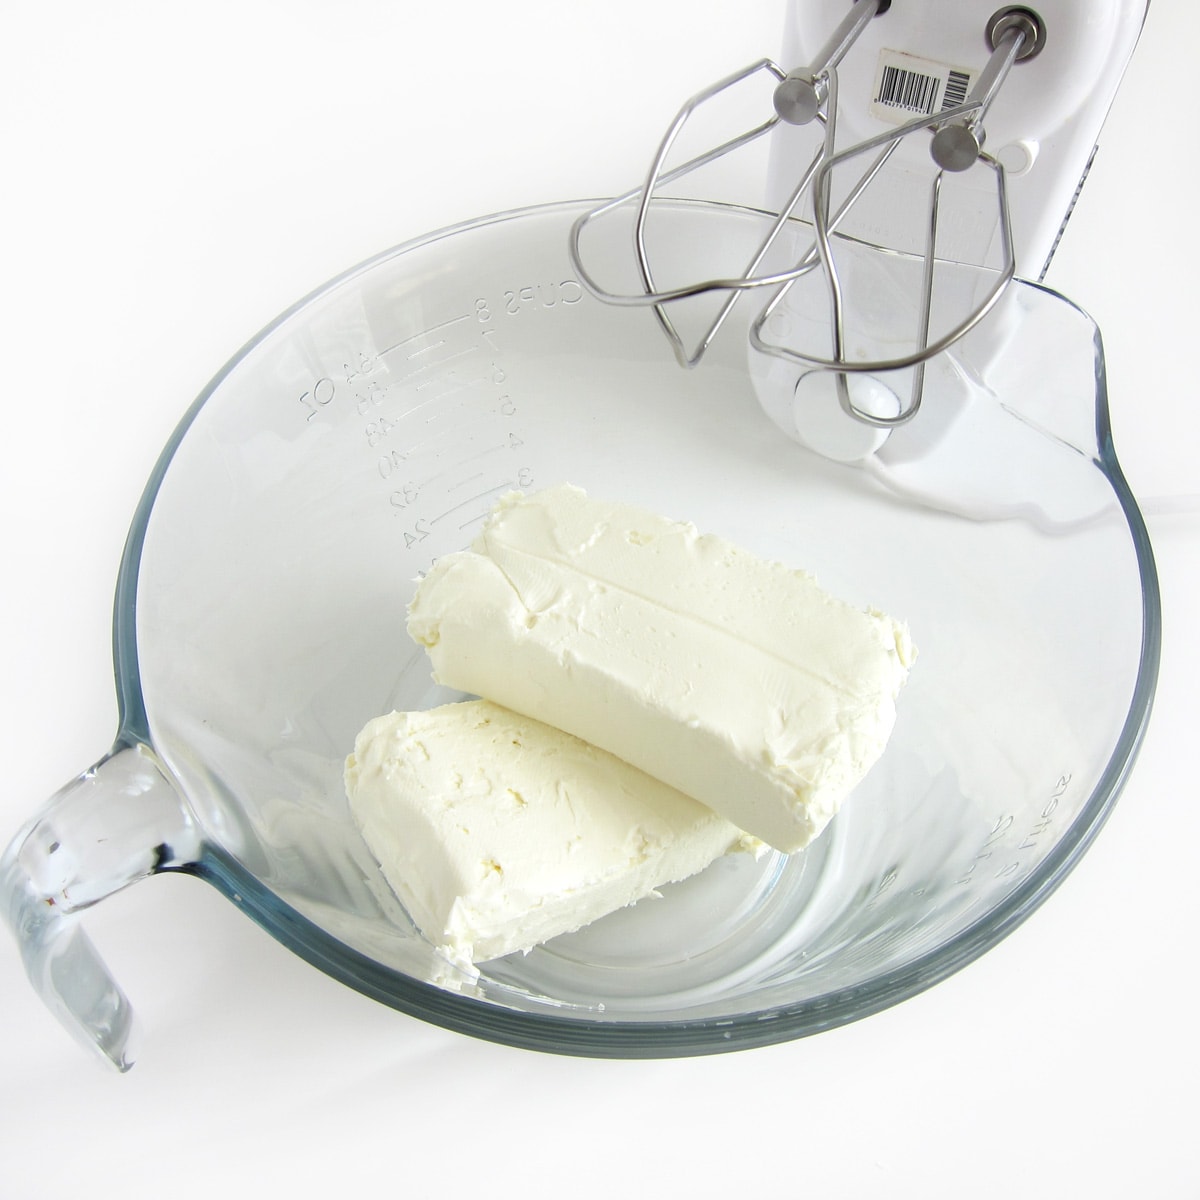
Place two blocks of softened cream cheese into a mixing bowl.
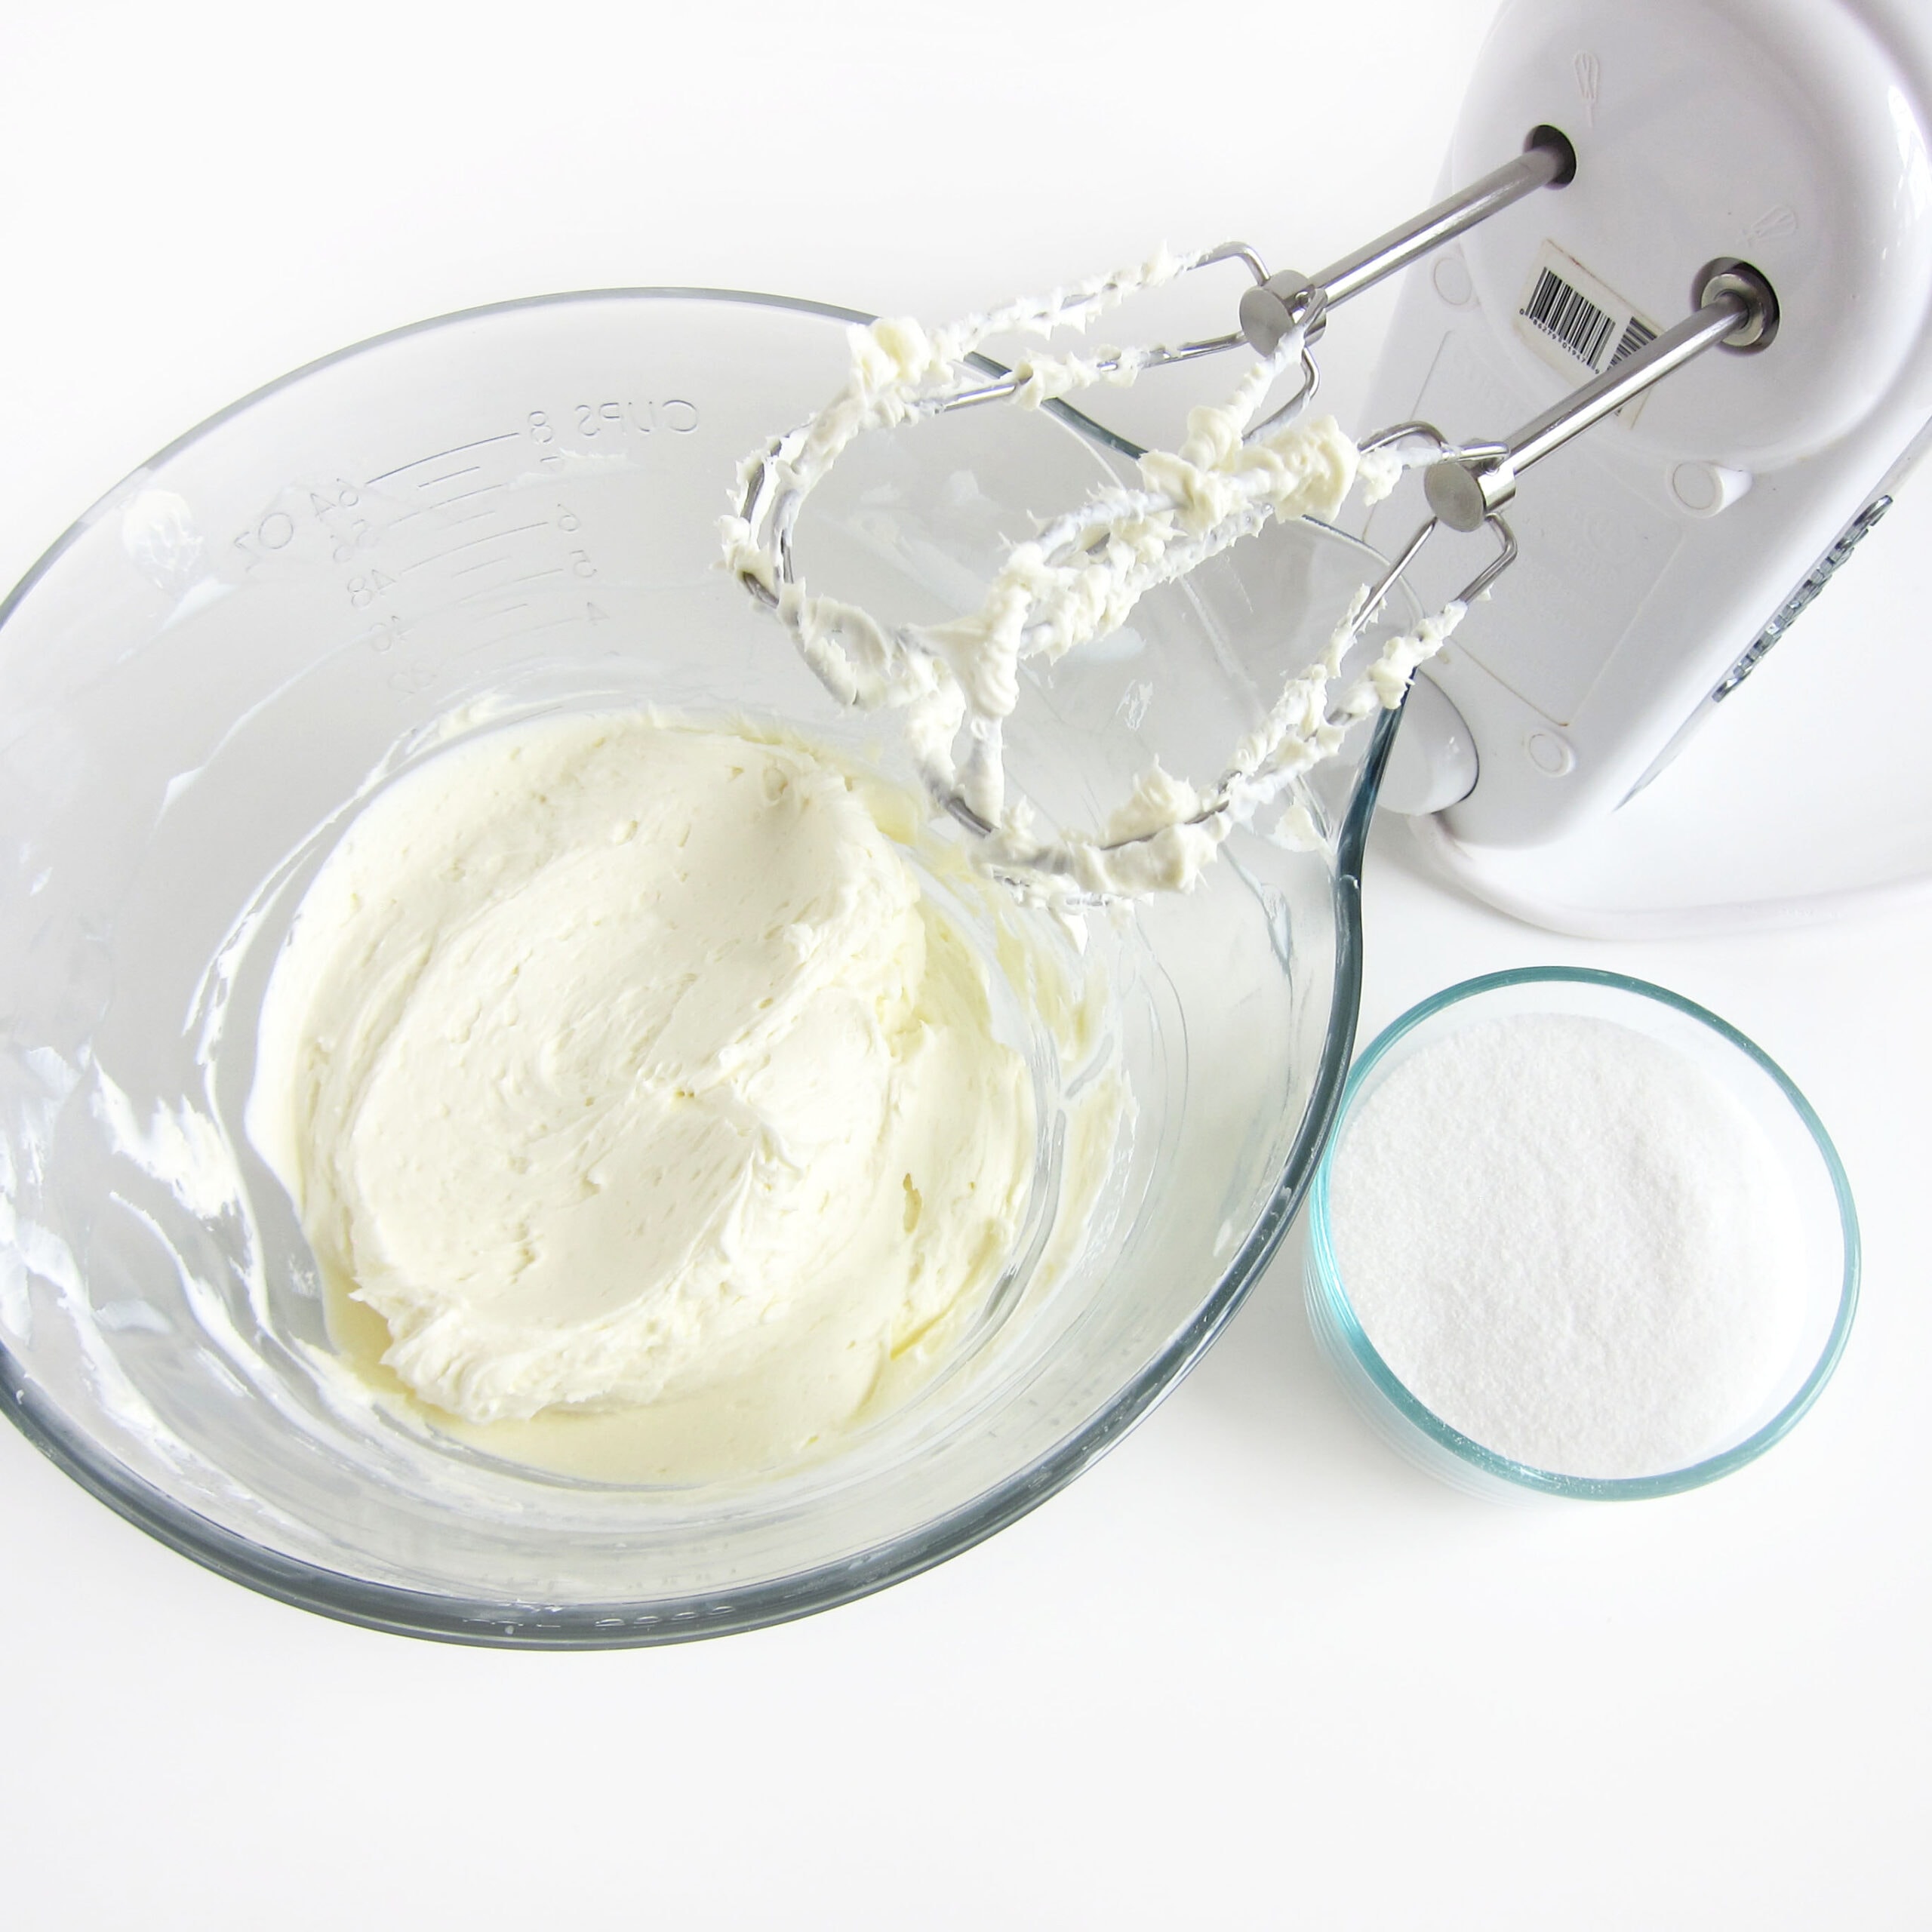
Beat on low speed if using a mixer until smooth. Scrape down the bowl and beat again in order to remove all the lumps.
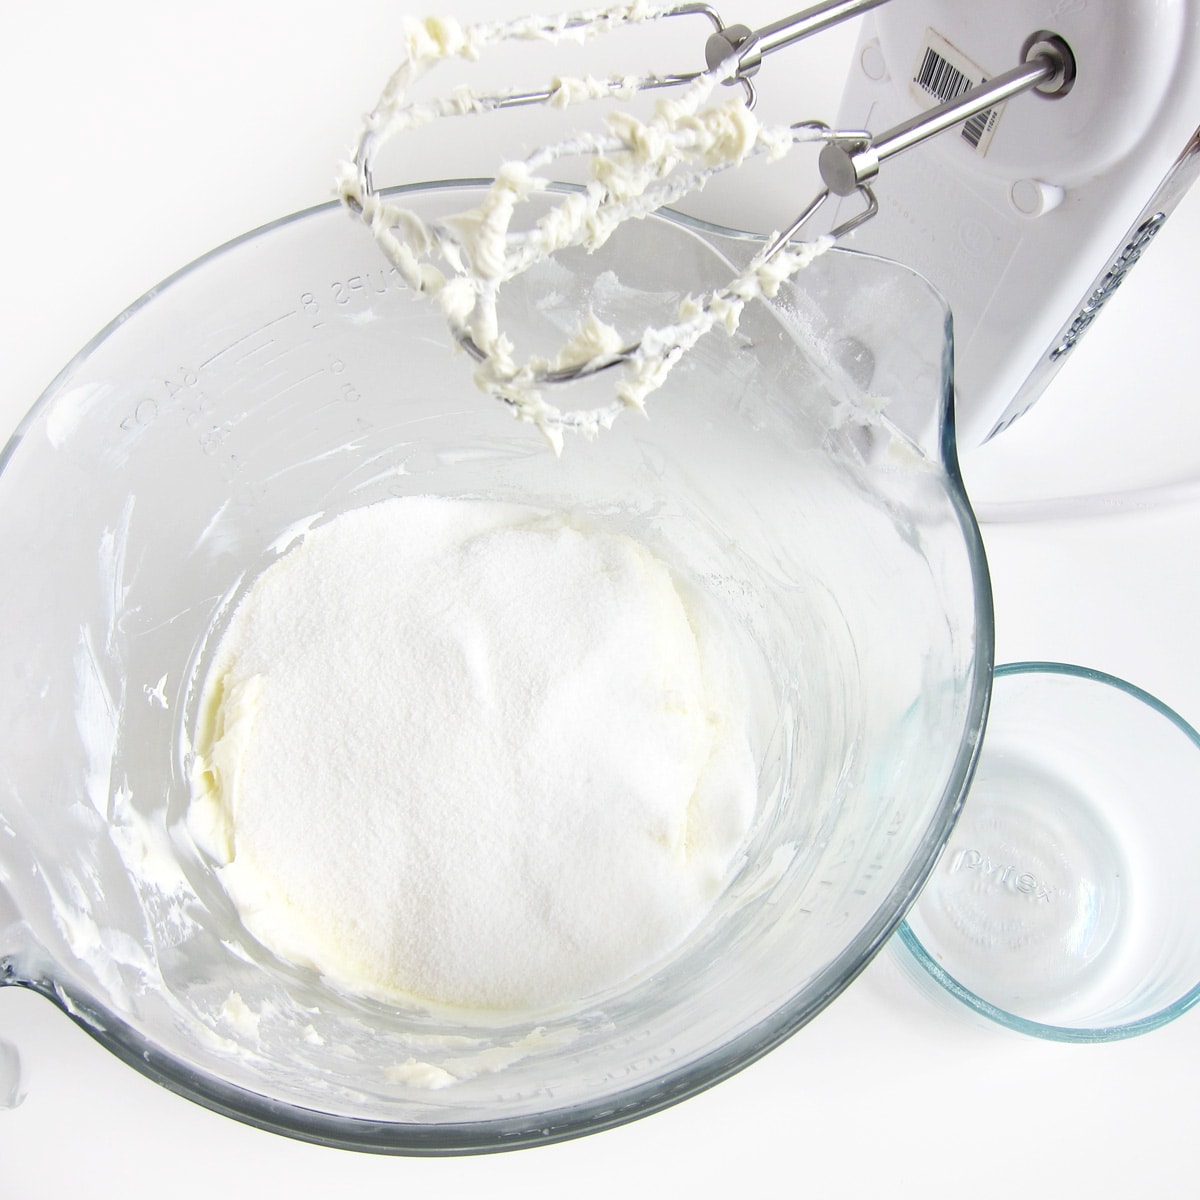
Add the sugar.
Beat on low speed until creamy.

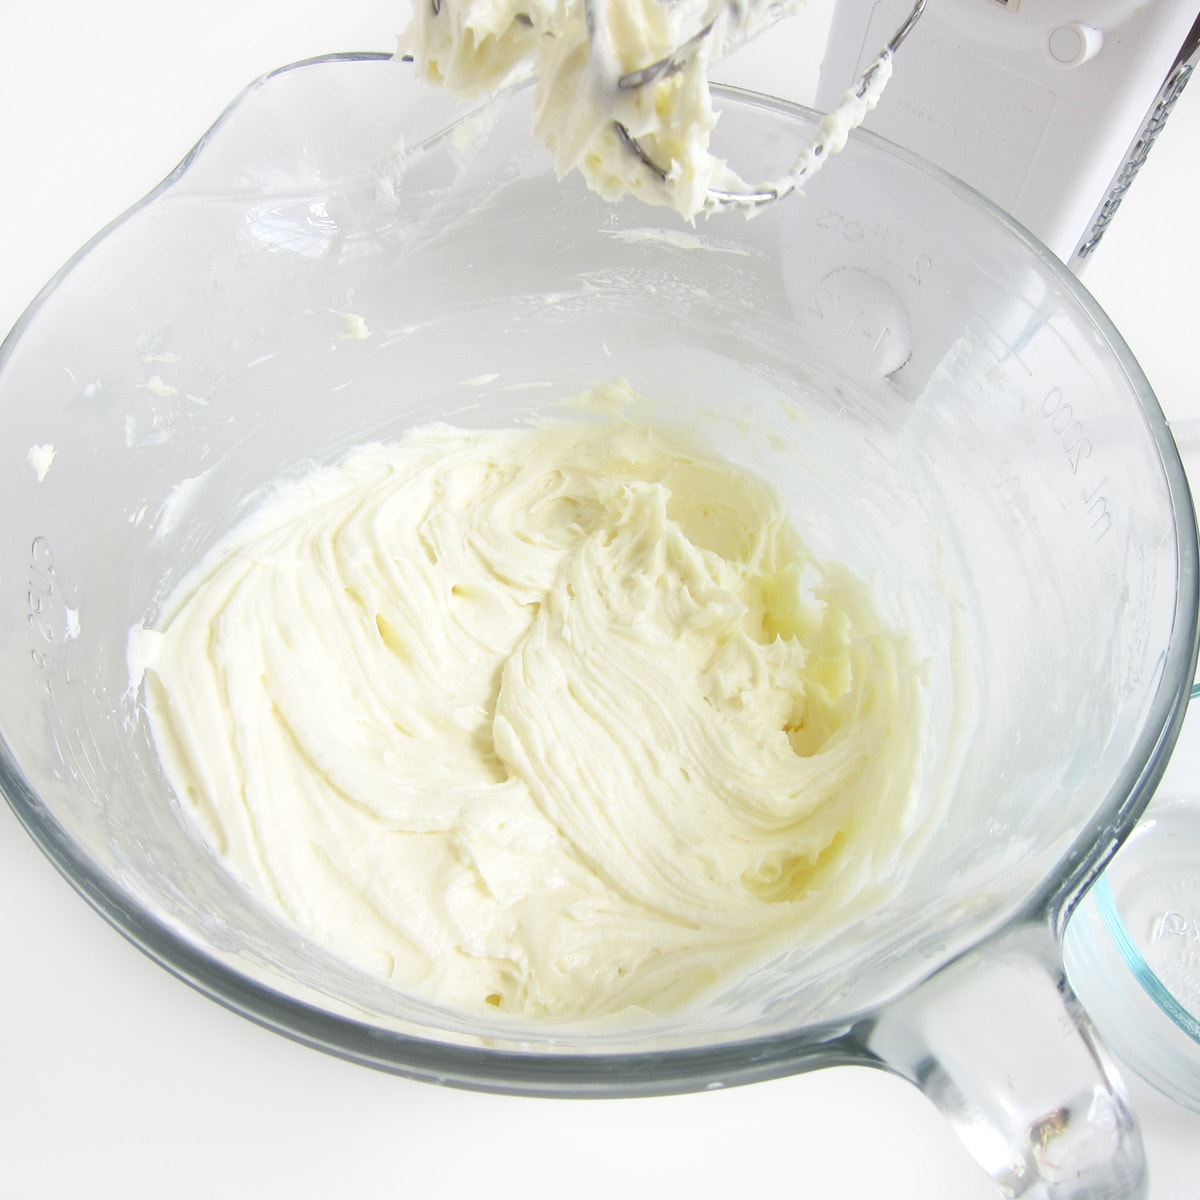
Add the eggs and vanilla.
Beat on low speed just until blended.
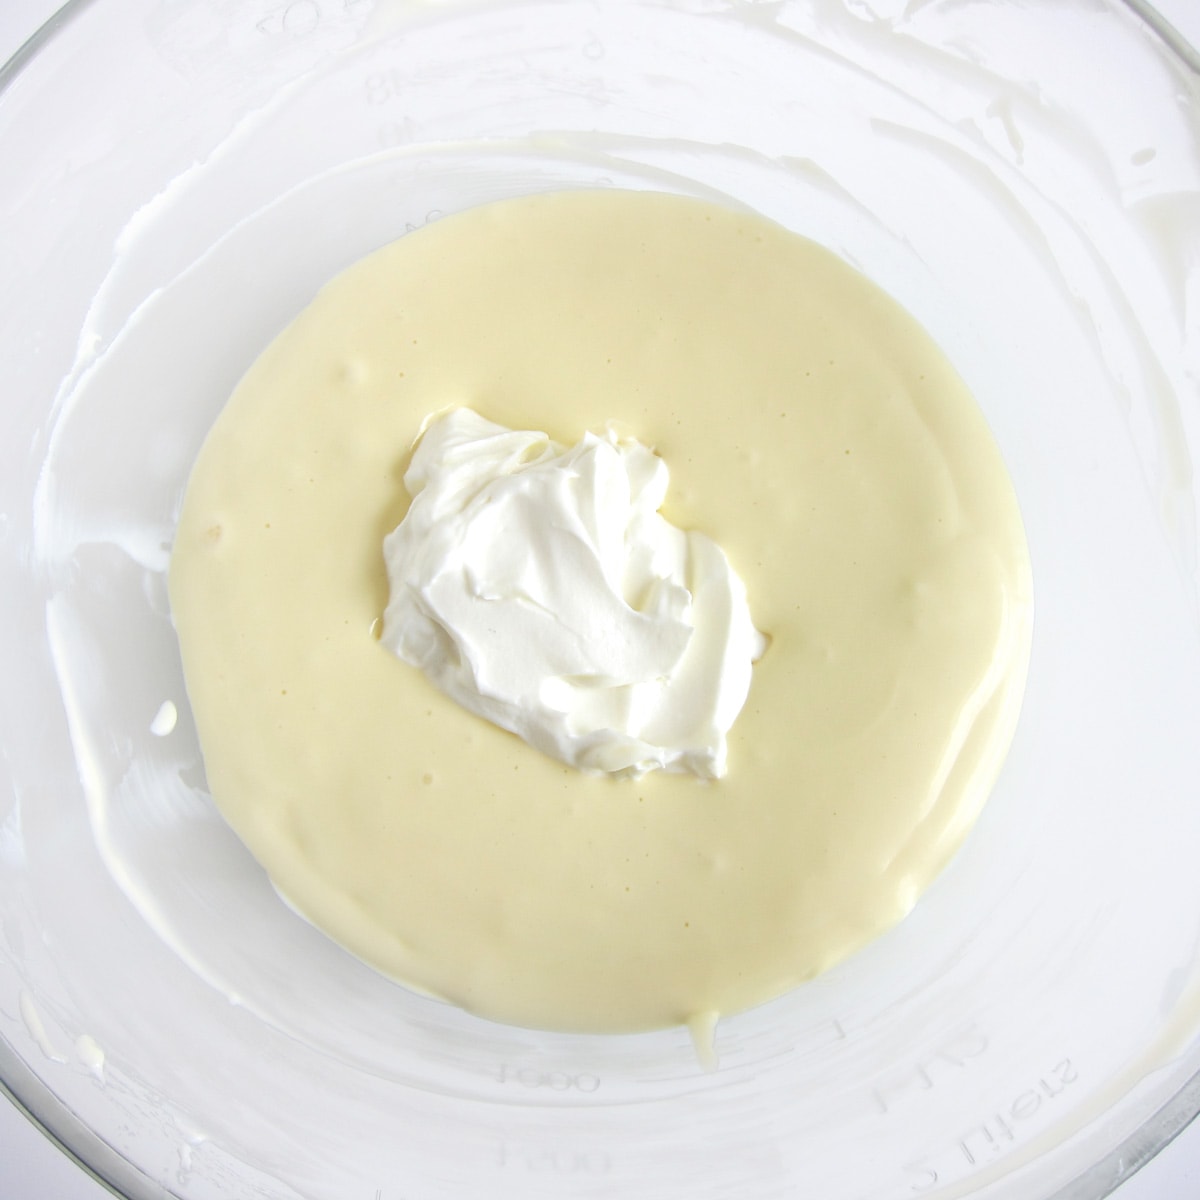
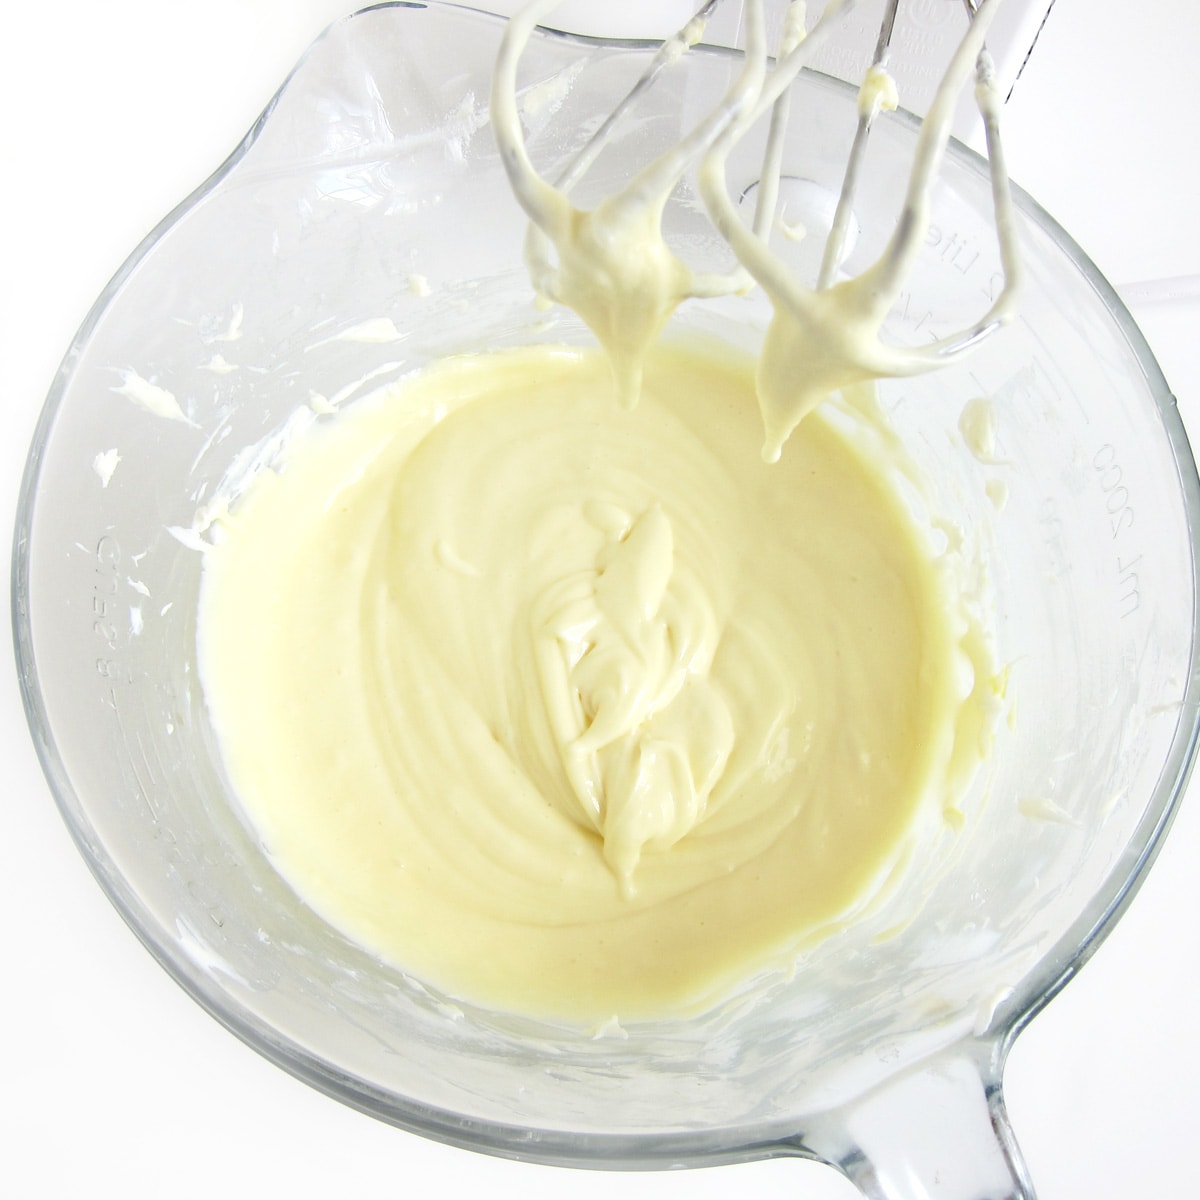
Add the sour cream.
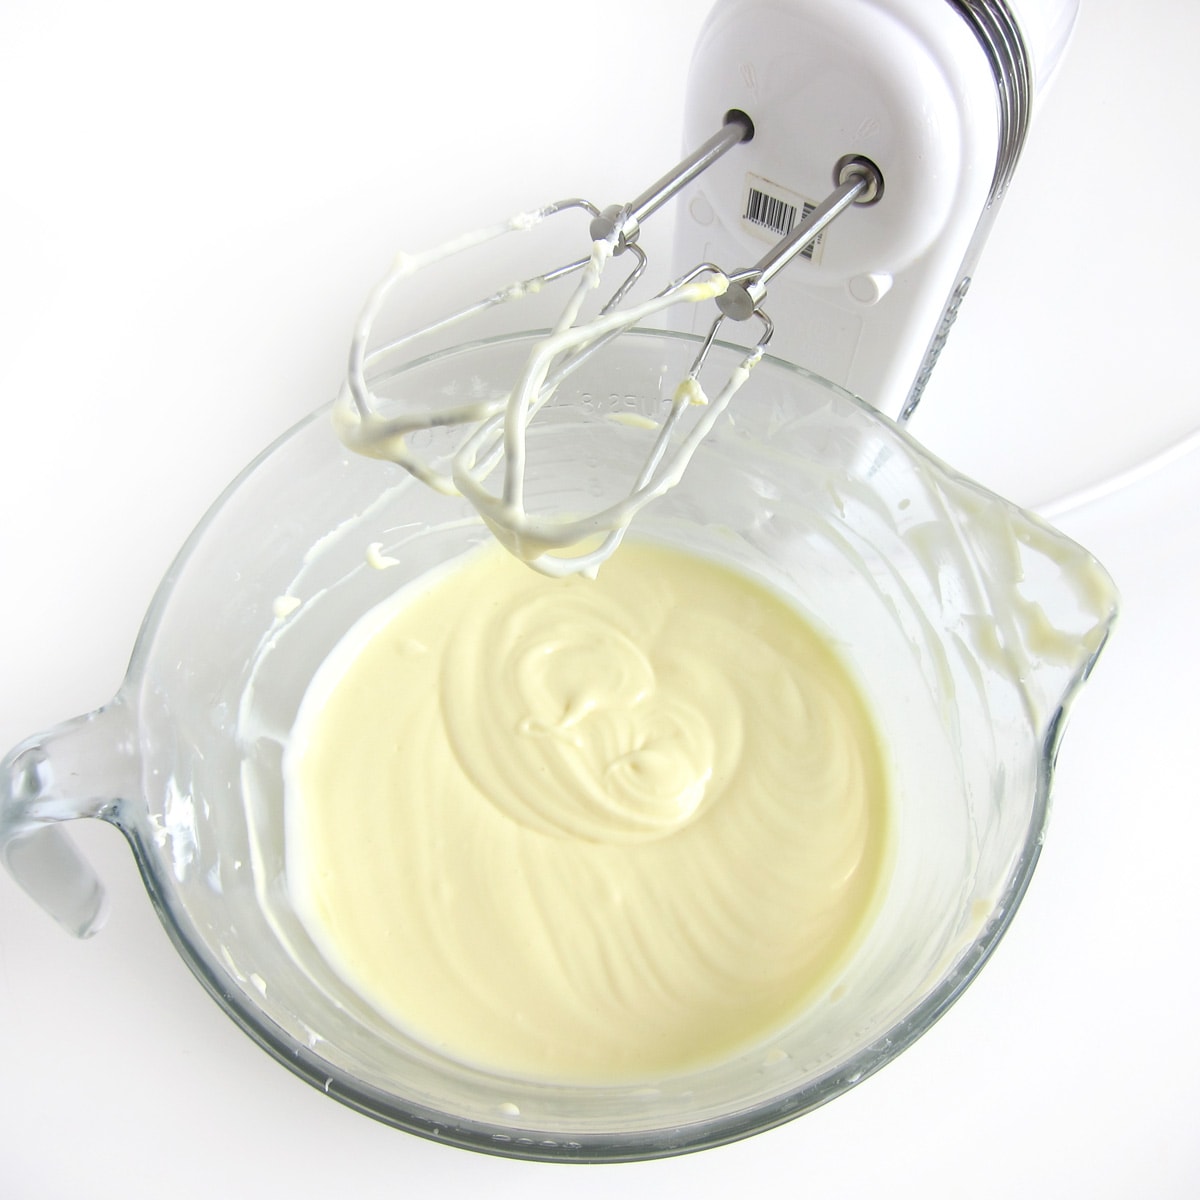
Mix just until combined.
Do not overmix, or you will incorporate too many air bubbles into the filling.
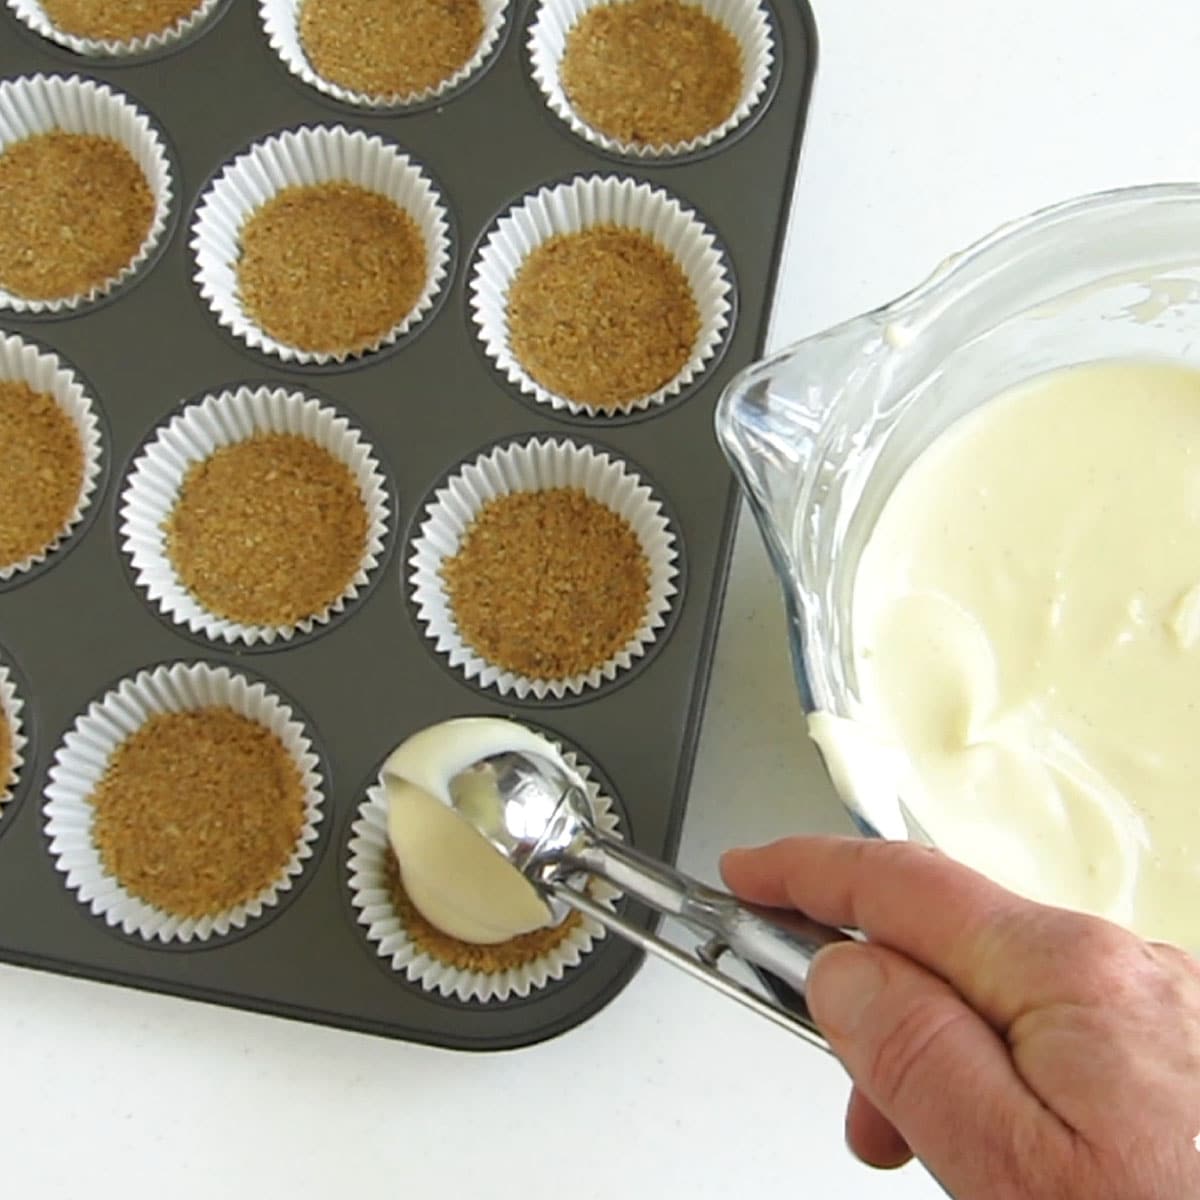
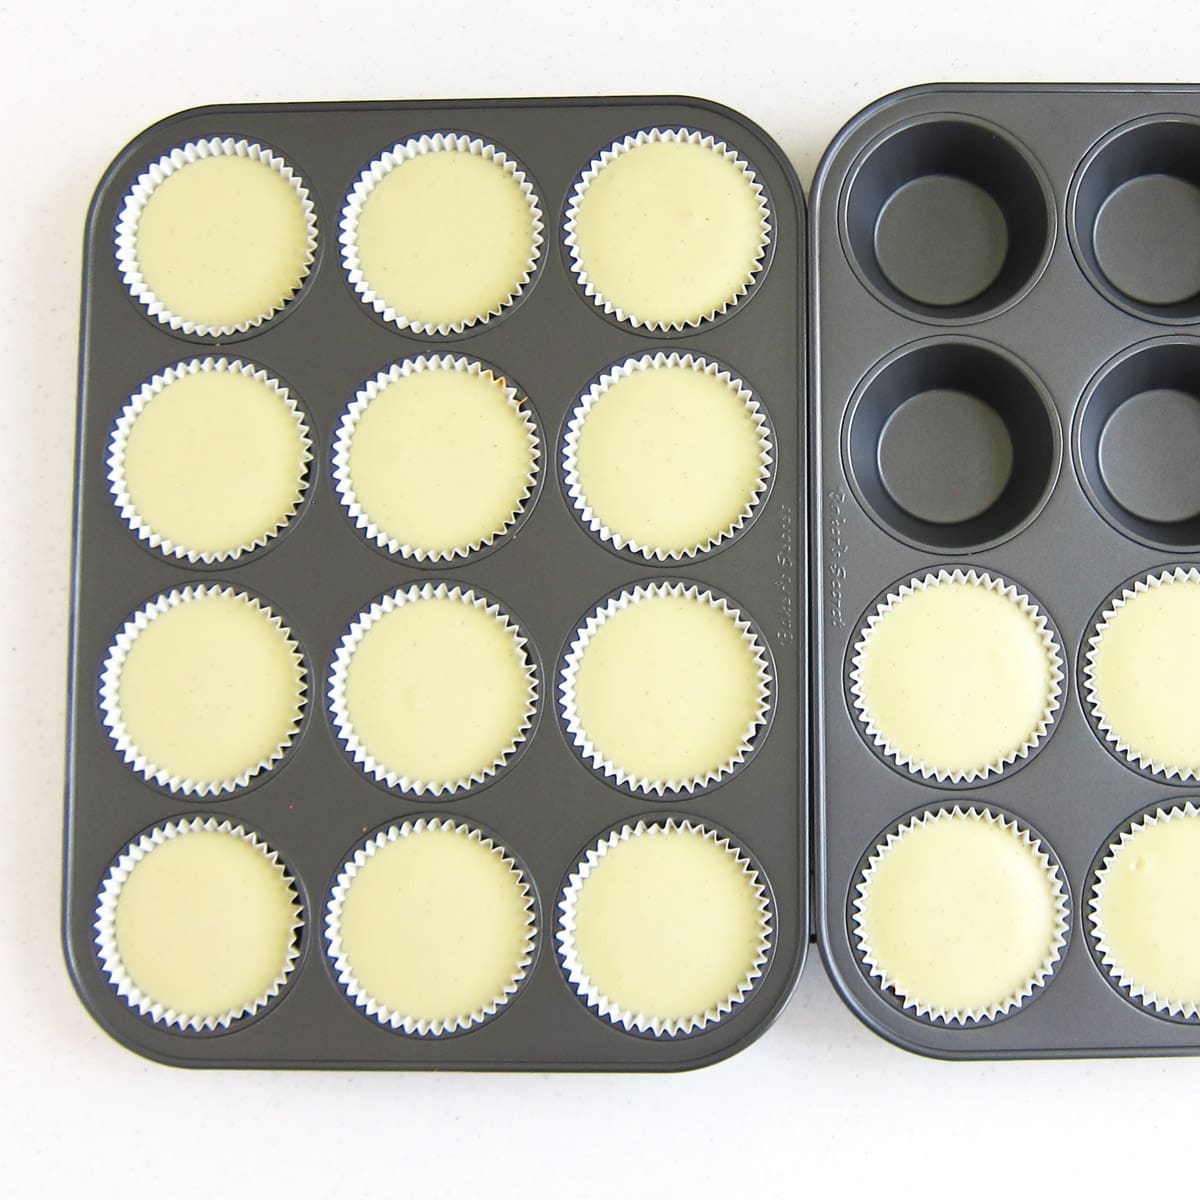
Spoon about 2 tablespoons of cheesecake filling over each mini graham cracker crust.
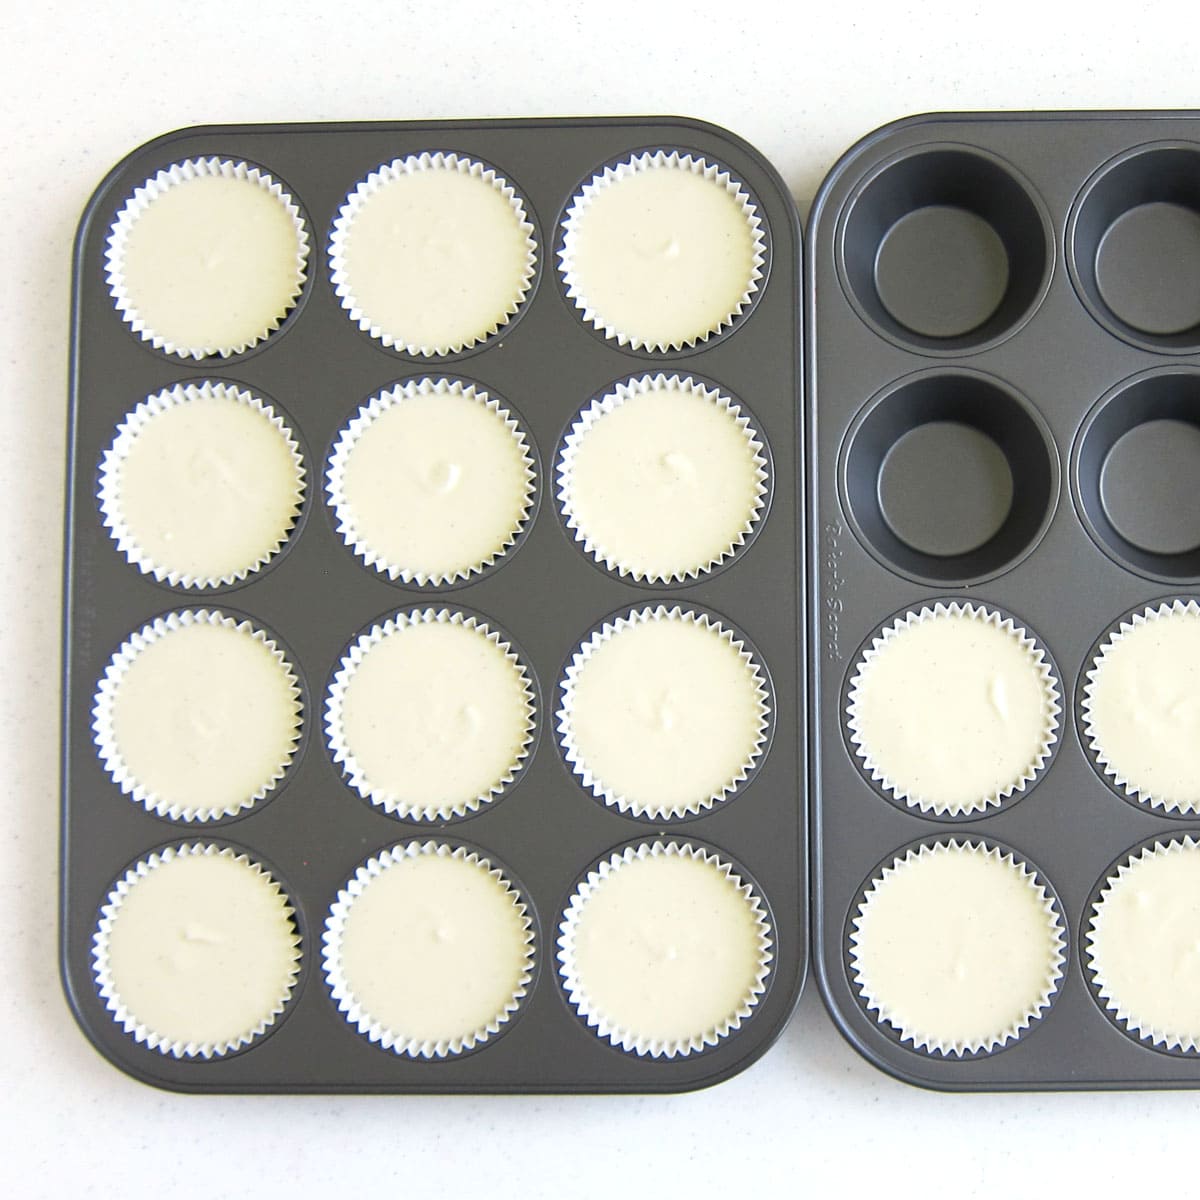
Gently tap the cupcake pans on the counter a few times to allow air bubbles to come to the surface and pop. Then, bake at 350 degrees Fahrenheit for 15-18 minutes.
Allow the cheesecakes to cool completely for about 45 minutes in the pan. Then, refrigerate them for at least 2 hours so they firm up enough to easily remove them from the pan.
Lift them out of the cupcake pan using the paper wrappers. Peel the papers off the cheesecake cups to reveal the layers of filling on top of the graham cracker crusts.
🧀 Pro Tips for the Creamiest Mini Cheesecakes
The secret to a professional-grade cheesecake is all in the texture. Follow these tips to ensure your mini cheesecakes are velvety smooth every single time.
1. The Temperature Rule
For the ingredients to emulsify properly, everything must be at room temperature. Cold ingredients will cause the batter to "seize" and create tiny lumps that are impossible to beat out later.
- Cream Cheese: Ideally, set it out at room temperature for 4 hours.
- In a hurry? Use the DEFROST setting on your microwave for 10 seconds, flip the block, and heat for another 10 seconds. Let it rest for 15 minutes before mixing.
- Eggs: Set them out on your counter a few hours ahead, or to warm them quickly, place whole eggs (in their shells) in a bowl of hot tap water for 5 minutes.
- Sour Cream: Place your measured sour cream in a small bowl, and set it on your counter for at least one hour. To speed up this process, set the bowl of sour cream inside a larger dish of warm water (making sure no water gets into the sour cream). Stir occasionally until it reaches roughly 72°F.
2. The "No-Lump" Mixing Method
The most important step in the entire recipe happens before you add the other ingredients.
- Start Slow: Beat the cream cheese alone on low speed until it is completely smooth.
- Scrape the Bowl: Use a silicone spatula to scrape the bottom and sides of the bowl (and the beaters!) frequently. If you see a lump now, it will be there in the finished cheesecake.
- Avoid the Bubbles: Never use high speed. Whipping the batter incorporates too much air, which can cause your cheesecakes to puff up and then crack or sink as they cool.
3. The Egg Freshness Test
While you are warming your eggs in that bowl of water, take a look at how they behave!
- Very Fresh: The egg sinks to the bottom and stays flat on its side.
- Getting Older: The egg stands up on one end at the bottom. (Still safe to eat, but use them soon!)
- The "Floater": If the egg floats to the surface, the air pocket inside has grown too large. This is a sign that the egg is past its prime and should be tossed.
⏲️ Baking, Storing, and Freezing Your Mini Cheesecakes
How to Tell When They’re Done
Bake at 350°F for 15–18 minutes, rotating the pan at the 10-minute mark for an even bake.
- The Jiggle Test: Check them at 15 minutes. If the edges are set but the center still has a slight "jiggle" (like Jell-O), they are perfect!
- Avoid Overbaking: If the centers look wet or liquid, give them 2–3 more minutes. You want to pull them out before they look completely solid to ensure a creamy, decadent texture.
Storage: Keeping the Crust Crisp
You can store plain mini cheesecakes in the refrigerator for up to 3 days in an airtight container.
💡 The Paper Towel Trick: To prevent a soggy graham cracker crust, place a layer of paper towels at the bottom of your container before adding the cheesecakes. Place another layer across the top of the cheesecakes before sealing the lid. This wicks away condensation so your cheesecakes stay beautiful and dry!
Can You Freeze Mini Cheesecakes?
Absolutely! These are a fantastic make-ahead dessert that can be frozen for up to 2 months.
- To Freeze: Place them in a single layer in an airtight container (using the paper towel trick mentioned above).
- To Thaw: Simply remove the container from the freezer and let it sit at room temperature for about 15 minutes before opening and serving.
Serving at a Party
Cheesecakes are dairy-based, so they should only sit out at room temperature for a maximum of 2 hours.
Hostess Hack for Dessert Tables: If you want your cheesecakes to stay fresh and cold during a long event, try these two tricks:
- The Frozen Start: Set the cheesecakes out while they are still frozen, just as guests arrive. They will thaw in about 15–20 minutes, but stay chilled much longer than room-temperature cakes.
- The Ice Bed: Place your serving platter on top of a larger tray filled with ice cubes or flat ice packs to keep them at a safe, delicious temperature throughout the party.
Variations
These plain cheesecake cupcakes are so amazingly good, but can be elevated to new heights with the addition of delicious toppings.
Cheesecake topping ideas:
- chocolate ganache
- lemon curd
- fruit sauces (cherry, strawberry, blueberry)
- Dulce de Leche or caramel sauce
- ice cream toppings (strawberry, pineapple, hot fudge, butterscotch)
- whipped cream
- peanut butter mousse
Related Recipes
You can also make different types of cheesecakes. There are lots of delicious flavor options like these...
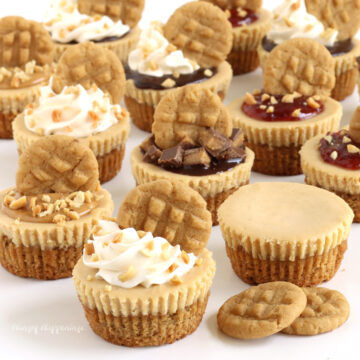


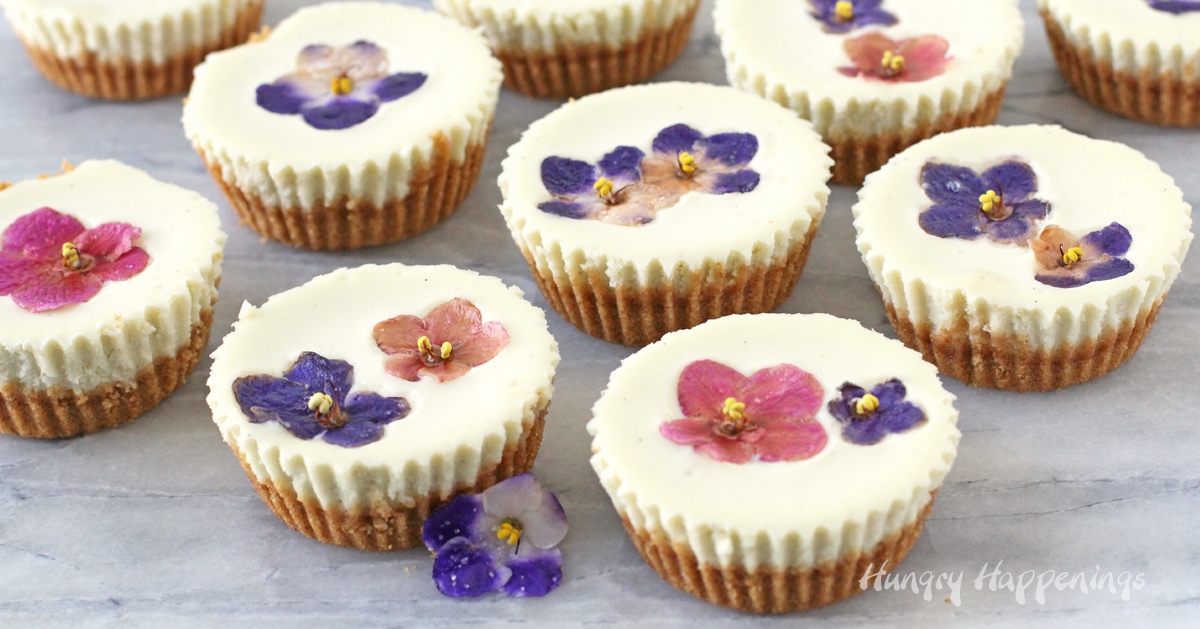
Decorating Ideas:
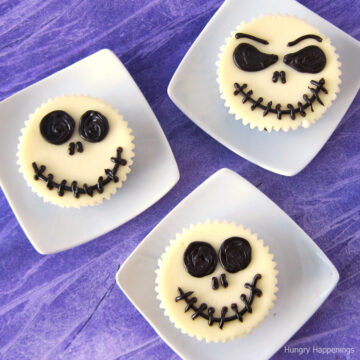
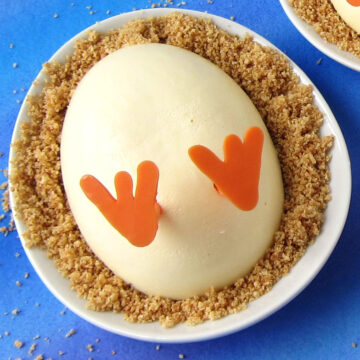
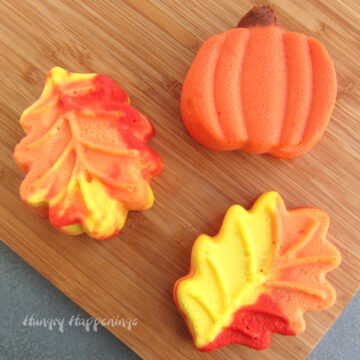
These little desserts can be decorated for holidays and special occasions.
- Add edible flowers on top of the cheesecakes before or after you bake them.
- Pipe colored cheesecake filling over the top to make fun designs.
- Swirl colored cheesecake batter together to make cool tie-dye designs.
- Add edible decorations like cookies, candy, and marshmallows to create cute cheesecakes for a holiday.
See some ideas below.


🛠️ Troubleshooting: Perfecting Your Mini Cheesecakes
Cheesecake can be a little finicky, but most issues come down to two things: temperature and air. Here is how to fix the most common "mini" mishaps!
Why did my cheesecakes sink in the middle?
It is normal for these mini cheesecakes to sink slightly—in fact, I actually like the little "well" it creates for holding extra caramel sauce and toffee bits! However, if they cave in deeply, it’s usually due to overmixing.
- The Air Trap: If your ingredients (especially the cream cheese) are too cold, you’ll be tempted to beat the batter longer to get the lumps out. This incorporates too much air. In the oven, that air expands and lifts the cheesecake, but as soon as it hits the cool air outside, it collapses.
- The Fix: Always use room-temperature ingredients and keep your mixer on LOW speed. Stop as soon as the ingredients are combined!
Why did my cheesecake cups crack?
Cracks are almost always a sign of overbaking or a hot oven.
- The Jiggle Test: Remember to pull them out while the centers still have a slight jiggle. They will continue to firm up as they cool. If they look "solid" in the oven, they are already overbaked.
- Check Your Temp: Oven dials can be lying to you! If you find your cheesecakes are consistently cracking, your oven might be running hot. I highly recommend using an inexpensive oven thermometer to verify the actual temperature.
💡 Pro Tip: The Water Bath Option
If you want perfectly level tops with zero sinking, you can use a water bath (or bain-marie). This keeps the edges of the cheesecakes from baking faster than the centers. See my Conversation Heart Cheesecake Recipe for instructions.
Printable Recipe
Rich and creamy cheesecakes on graham cracker or cookie crusts baked in muffin tins can be served plain or topped with chocolate ganache, soft caramel, strawberry sauce, lemon curd, peanut butter frosting, and even edible flowers.
- 2 cups graham cracker crumbs (from 28 square graham crackers)
- 5 tablespoons light brown sugar
- 8 tablespoons butter, melted
- 16 ounces (2 blocks) cream cheese, softened at room temperature
- ⅔ cup sugar
- 2 large eggs, room temperature
- ⅔ cup sour cream, room temperature
- 1 teaspoon vanilla extract or vanilla bean paste
- optional toppings: chocolate ganache, caramel sauce, strawberry sauce, blueberry sauce, lemon curd, peanut butter frosting
-
Set your ingredients (cream cheese, eggs, sour cream) out on the counter to come to room temperature at least 1 hour, preferably 2 hours, before you plan to bake your mini cheeseccakes.
-
Preheat your oven to 350 Fahrenheit.
-
Stir together the graham cracker crumbs, brown sugar, and melted butter.
-
Press about 2 tablespoons of the crumbs into 18 paper-lined muffin cups.
-
Beat cream cheese on low speed, scraping down the bowl, as needed, until smooth.
-
Add sugar and beat until smooth.
-
Add eggs and vanilla just until combined. Do not overmix at this point.
-
Stir in the sour cream.
-
Equally divide cheesecake filling among the 18 muffin cups, spooning about 2 tablespoons of filling into each.
-
Bake on the middle rack in the oven for 15-18 minutes until the cheesecakes no longer look wet, but the center still jiggles.
-
Remove and set on a cooling rack.
-
Allow to cool for about 45 minutes, then refrigerate for at least 2 hours.
-
Before serving, pop the cheesecakes into the freezer for 15 minutes.
-
Remove and immediately peel away the paper liners.
-
Set on a serving dish or individual dessert plates and serve plain or add your favorite topping.
Recipe Video
🌡️The Golden Rule: Room Temperature Ingredients. It is vital that your cream cheese, sour cream, and eggs are at room temperature before mixing. Cold ingredients require longer mixing, which adds too much air. This causes air bubbles on the surface or causes the centers to sink.
🥣How to Soften Ingredients Quickly: Cream Cheese: Slice into small cubes and spread them out to soften faster. Or, microwave on 50% power for 15-30 seconds. Do not let it get hot, or the batter may curdle. Eggs: Place whole eggs (in shells) in a bowl of warm water for 5-10 minutes. Sour Cream: Spread into a thin layer in a wide, shallow bowl to take the chill off quickly.
🍥How to Tell When They Are Done: Do not overbake! Your cheesecakes are ready when the edges are set but the centers still jiggle slightly (like set gelatin) when the pan is tapped. They should not look "wet" or liquid in the middle.
❄️Storage and Freezing: Refrigerate: Store in an airtight container for up to 1 week. Freeze: These freeze beautifully for up to 2 months.
🎉Hostess Pro-Tip: If bringing these to a party, transport them frozen. Set them on the dessert table 20 minutes before serving. They will thaw quickly but stay perfectly chilled and food-safe much longer than refrigerated cakes.

- Banana Split Bars – A Fun and Easy Summer Dessert - March 4, 2026
- Pineapple Fudge (No Candy Thermometer Needed!) - March 4, 2026
- No-Bake Peanut Butter Pie Recipe - March 3, 2026


Joanne Jones says
I have been asked to make 100 of these cheesecake bites for my bosses daughter's graduation. Can I leave the wrapper on and let the guest remove it when they want one. The graduation is on a Sunday I am making these Friday.
Beth Klosterboer says
Hi Joanne,
You can leave the paper wrapper on the cheesecakes, but the cheesecakes will soften as they warm up to room temperature making them stick to the paper wrapper. Once the cheesecakes get soft, peeling a paper wrapper off can be challenging. The party guests can just use a spoon to scoop the cheesecake out of the paper. Most people won't mind doing that. You could use foil cupcake wrappers or even mini tin foil cups instead of paper wrappers. They will hold up better once the cheesecakes soften.
I definitely would recommend freezing the cheesecakes, and placing them on the dessert table frozen if you plan to serve them after a meal but want them on display beforehand. That way they'll stay chilled longer. They should that in 20-30 minutes.
Enjoy making the cheesecakes. I hope the party is a success.
Lisa says
Is it possible to replace the graham crackers with ginger snaps to make it gluten free? If so, would i still use
2 cups of the snaps ? With or without the brown sugar- due to the taste of ginger in the snaps.
Thank you!
Beth Klosterboer says
Hi Lisa,
Yes, you can swap out 2 cups of ginger snap cookie crumbs for the graham cracker crumbs, and mix them with the brown sugar and butter.
Enjoy!
Cheryl says
Hi Beth, thank you for the recipe and all your helpful tips. I made these and the recipe works beautifully. Very easy to remove the paper liners too. But, I found crumb mixture too sweet. Wonder if you could suggest a suitable lesser amount of sugar that would work??
Beth Klosterboer says
I'm so glad you enjoyed this mini cheesecake recipe. You can make the crust with as little as 1 tablespoon of sugar if you feel it is too sweet. It shouldn't impact the texture. You'll just have a little less crumb mixture to put into each cup, which will be fine.
Antoinette Hastings says
I'm giving this 5 stars, but I haven't tasted them yet. One important note: These are made in standard-size cupcake pans, NOT MINI cupcake pans!
Beth Klosterboer says
Thanks for the 5 star rating. I hope you enjoy your cheesecakes. Yes, they are made in a standard-size cupcake pan. The name mini refers to the size compared to a whole cheesecake. You could make them in mini cupcake pans if you prefer them to be really small.