Colorful Tie-Dye Cheesecake Easter Eggs will brighten up your dessert table this holiday. Each lusciously creamy homemade egg shaped cheesecake has a graham cracker crust topped with bright pink, purple, blue and yellow swirled cheesecake filling.
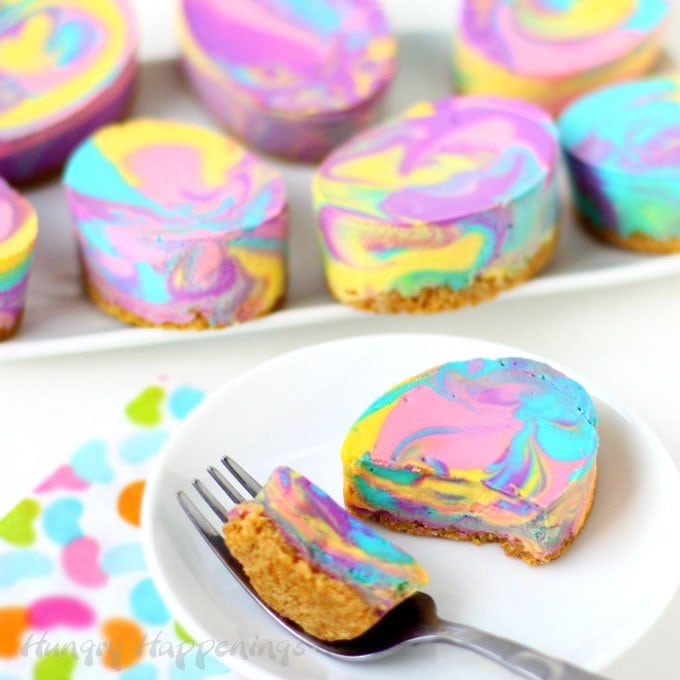
Do you love cheesecake as much as I do?
I could make it every week and if you've been a reader here at Hungry Happenings for a while, you might think I actually do.
Over the year's I've had so much fun sharing my ideas for making festively decorated cheesecakes and even showed you how to make hand-painted Easter Egg Cheesecakes back in 2013. A year before that I shared a technique for creating swirled fall leaf cheesecakes and I can't believe it has taken me this long to use that same method to make these Tie-Dye Cheesecake Easter Eggs.
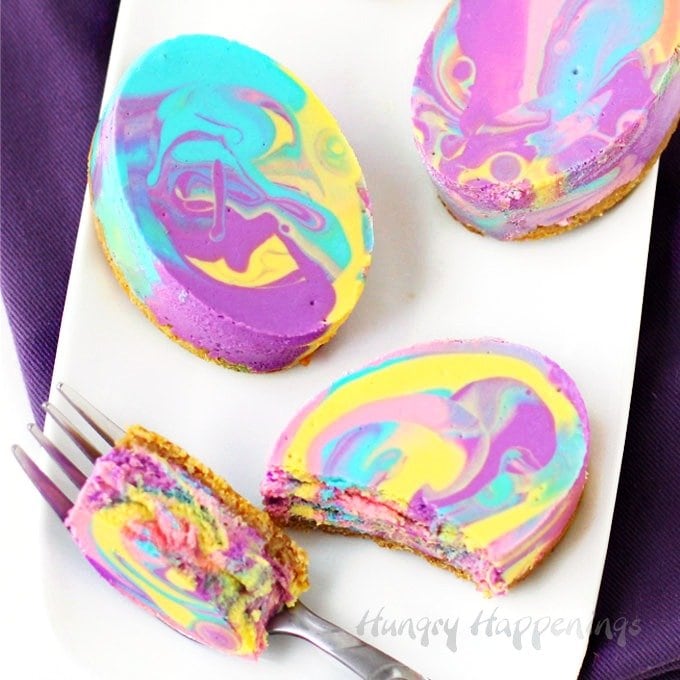
I colored my cheesecake filling purple, pink, blue, and yellow then swirled them together to make these pretty eggs.
You can use any colors you like and no matter how you pour the filling into the egg shaped mold, you wont get two eggs that look exactly alike.
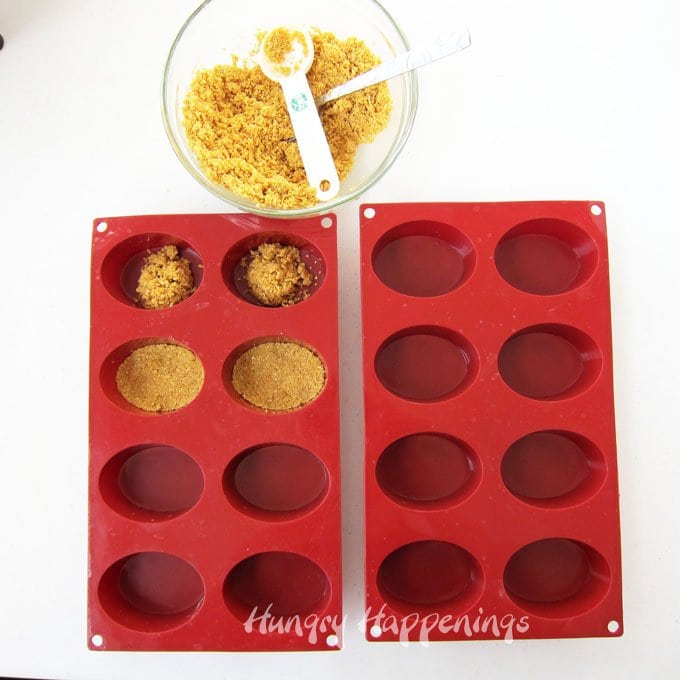
You will need to use silicone molds with oval cavities in order to make these cheesecake Easter eggs.
If you want a traditional graham cracker crust, start by pressing crumbs mixed with melted butter into the bottom of the mold. You could also use a vanilla wafer or chocolate cookie crust, if you prefer.
Bake the crust for about 10 minutes until fragrant then allow the mold to cool completely while you are preparing your cheesecake filling.
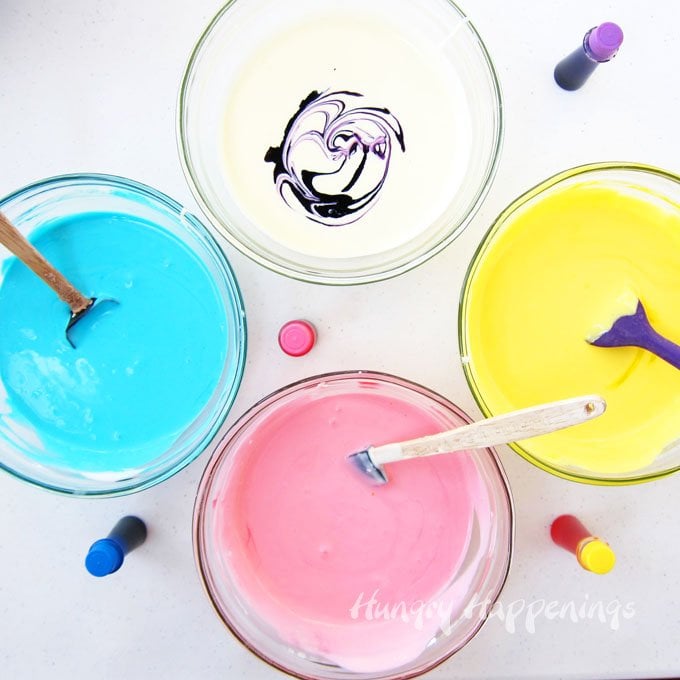
Divide the filling into four bowls, coloring one pink, and another blue, yellow, and purple. Store bought liquid color works fine for this.
You can create as many colors as you'd like, just don't try to mix too many of them into one egg. The colors will get too muddy.
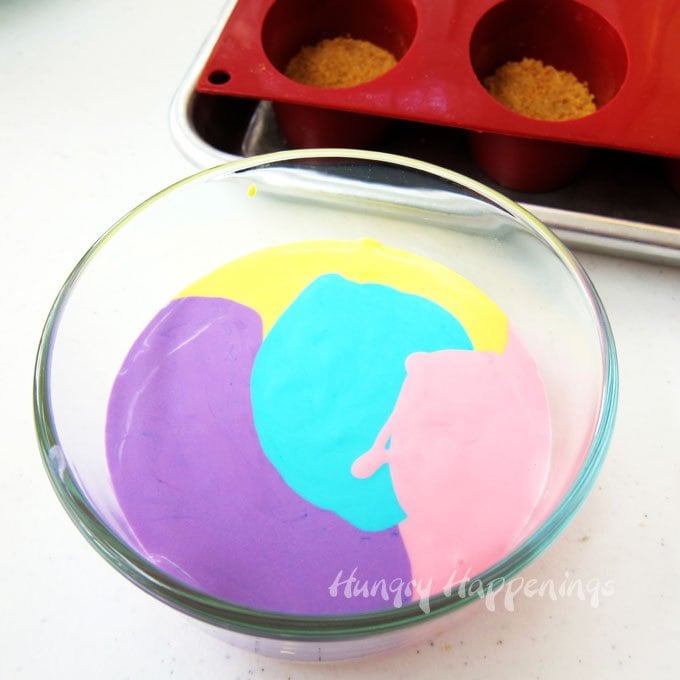
Spoon some of the four colors into a small bowl. You don't want to swirl them together at this point, just pour them next to each other in the bowl.
Use a small bowl because it's best to add fresh color to the bowl often so your eggs are vibrantly colored. The more the colors swirl together the muddier they will become.
Before you fill the silicone molds, set them in a shallow baking pan. This will help stabilize your mold and will allow you to bake the cheesecakes in a water bath.
Then dip a big spoon into the colorful cheesecake filling and pour it into over one of the graham cracker crusts.
I am so sorry, but I got so excited about how pretty my eggs where looking, as I made them, that I didn't even realize I hadn't snapped pictures of my process. I'll have to show you how I did it with my fall leaves.
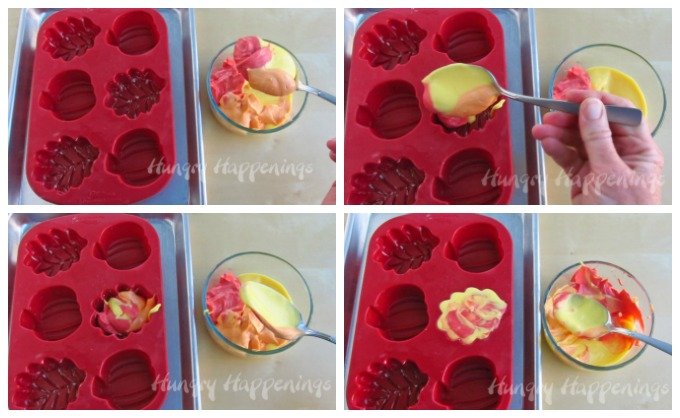
The trick to getting nice swirls of color all throughout the thick cheesecake is to allow the colors to blend together while you are pouring them into the mold, not before. So dip your spoon into the bowl, lift up some of the colors and pour them into the mold. Repeat until each oval shaped cavity is filled to about ⅛th of an inch from the top.
You don't have to pick up every color in every spoonful.
By using a small bowl of filling, you can keep adding nice bright colored filling to the bowl. As you get to the bottom of the bowl, and the colors will have blended together, use that filling directly on top of the crust. Then you can re-fill your bowl, and use the brighter colors on top of each cheesecake.
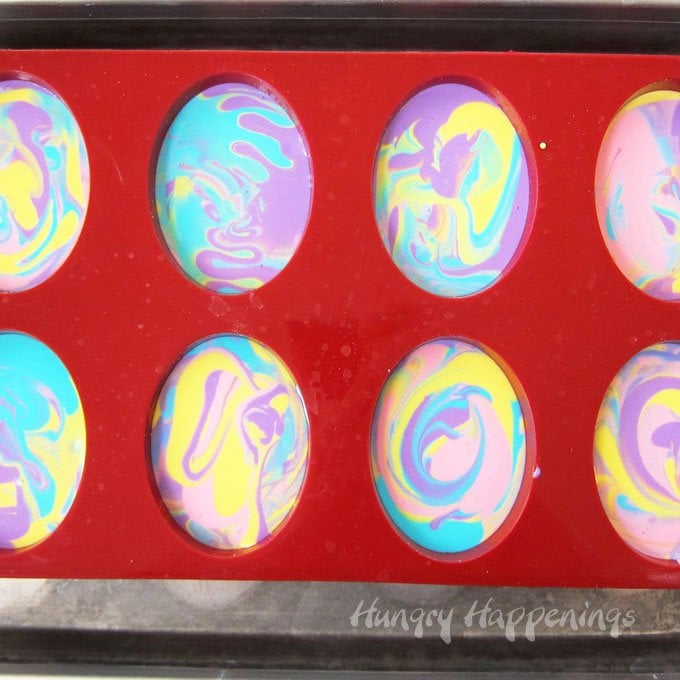
Don't you just love how each Easter egg cheesecake has a different pattern on top?
If you don't like a particular pattern, you can add small drops of color and use a toothpick to swirl them together.
Once your molds are filled, place the pans in a 325 degree oven and very carefully pour boiling water into the baking pan, being sure you don't splash any water onto the cheesecakes. You need just enough water to go half way up the sides of the silicone molds.
This step is not mandatory, but your cheesecakes will be creamier if you bake them in a water bath. Without it, they are more likely to crack, as well.
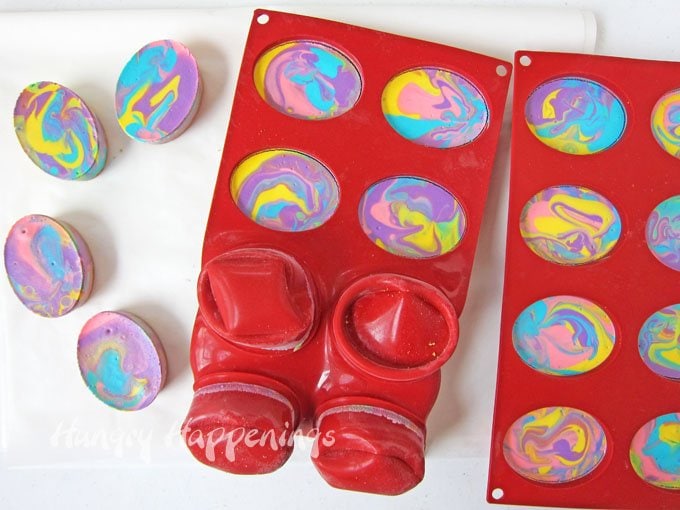
Once the cheesecakes are baked for 18-22 minutes, they should still be slightly jiggly in the center. Lift the mold out of the water bath, set it on a cooling rack, and allow them to cool for 30 minutes.
At this point, I find is easiest to freeze them for a few hours until they are really firm. It makes removing them from the mold super easy. All you have to do is press on the backside of the mold and they pop right out.
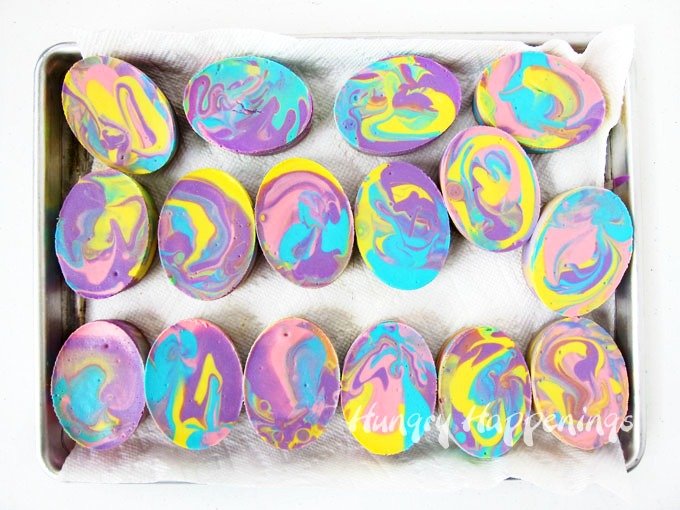
Set the cheesecakes on a paper towel lined baking sheet and cover them with a paper towel, to absorb condensation, and place them in the refrigerator until ready to serve.
I find the paper towel really helps to wick up any moisture.
You can keep these cheesecakes in an airtight container in the refrigerator for several days or in the freezer for up to a few months.
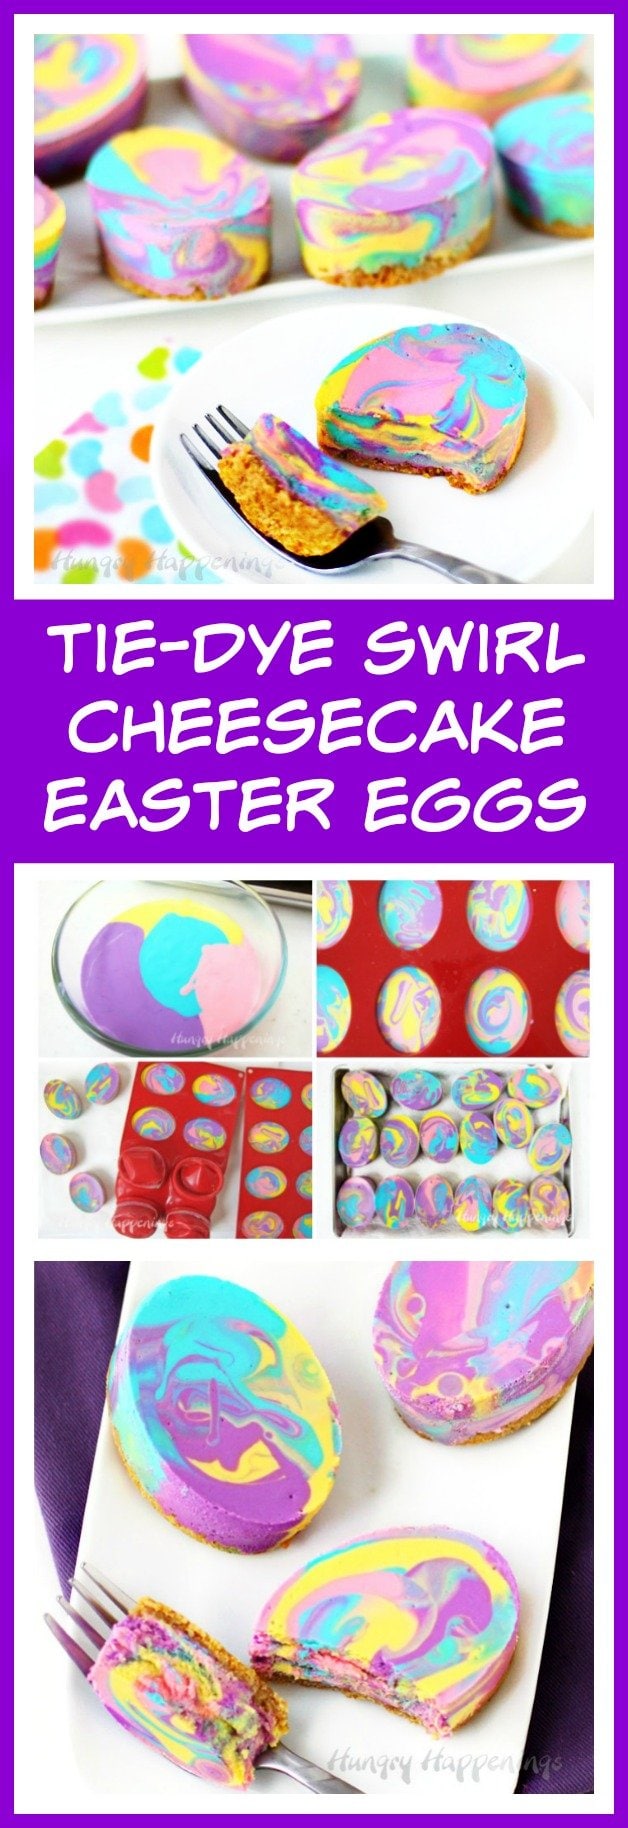
TIE-DYE CHEESECAKE EASTER EGGS
You can find the items needed to make these cheesecakes on Amazon.com (affiliate links)
![Silicone Molds [Oval, 8 Cup] Cupcake Baking Pan - Free Paper Muffin Cups - Non Stick, BPA Free, 100% Silicon & Dishwasher Safe Silicon Bakeware Tin - Kitchen Rubber Tray & Soap Molds](https://m.media-amazon.com/images/I/41TAoPs460L._AC_AC_SR98,95_.jpg) Silicone Molds [Oval, 8 Cup...Shop on Amazon
Silicone Molds [Oval, 8 Cup...Shop on Amazon
- 1 cup graham cracker crumbs
- ¼ cup ½ stick butter, melted
- 3 8 oz. blocks cream cheese, softened
- 1 cup sugar
- 3 large eggs
- ½ cup heavy whipping cream
- 1 teaspoon vanilla
- pink. blue yellow, and purple food coloring
-
Preheat oven to 325 degrees Fahrenheit.
-
Stir together graham cracker crumbs and melted butter.
-
Spoon about a tablespoon of crumbs into each of 16 oval shaped cavities in 2 silicone molds.
-
Press crumbs into an even layer.
-
Bake for 8-12 minutes until fragrant and golden brown.
-
Remove and cool completely.
-
Set molds on baking pans.
-
Bring a pot of water to a boil.
-
Beat cream cheese until light and fluffy.
-
Add sugar, eggs, heavy whipping cream, and vanilla and beat just to combine.
-
Equally diving filling into 4 bowls.
-
Tap the bowls on the counter several times to remove air bubbles.
-
Color one bowl pink, one blue, one yellow, and one purple using food coloring.
-
Pour about ¼ cup of one colored filing into a small bowl. Pour another color next to it, then another and another.
-
Scoop out some filling from the bowl and pour it over one of the graham cracker crusts.
-
Repeat filling the mold up to about ⅛ of an inch from the top.
-
Refill bowl as needed and repeat filling all 16 cheesecake Easter eggs.
-
Set pans in oven.
-
Pour water into the pan, being careful not to pour any onto the cheesecake filling.
-
Bake for 18-22 minutes until the edges of the cheesecake look set. The center will still be jiggly.
-
Remove molds from water bath, set on a cooling rack, and cool for 30 minutes .
-
Freeze for at least 3 hours.
-
Remove and push cheesecakes out of silicone molds.
-
Cover with paper towels and refrigerate until ready to serve.
If this Easter Recipe interests you, then you should go and check out all these other delicious ideas.
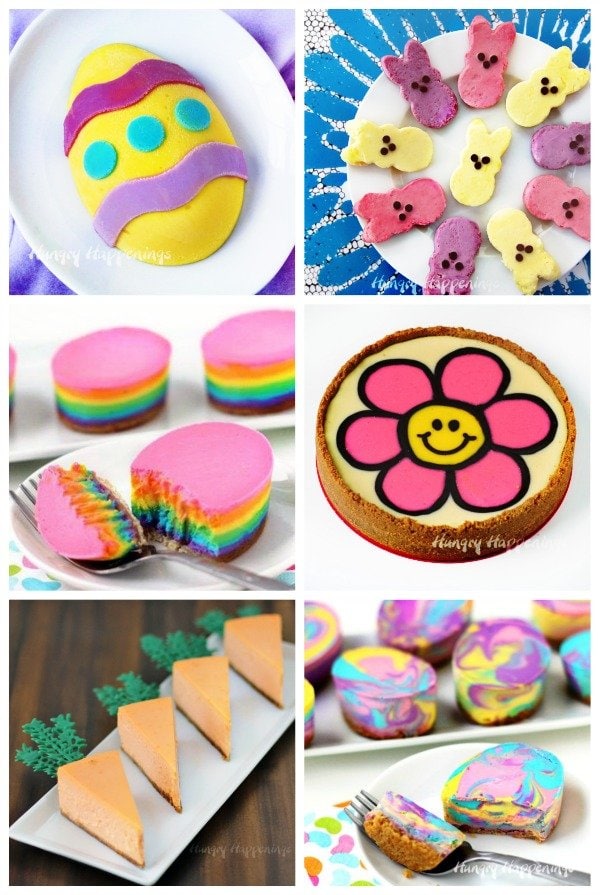
Hand Painted Easter Egg Cheesecakes • Naturally Colored Cheesecake Peeps
Rainbow Cheesecake Easter Eggs • Decorated Daisy Cheesecake
Naturally Colored Cheesecake Carrots
If you recreate these Tie-Dye Swirl Cheesecake Easter Eggs
be sure to link to this tutorial and send a picture to beth@hungryhappenings.com,
so I can share it in my Readers' Gallery.
- How to make peanut butter? - February 15, 2024
- OREO Penguins - December 20, 2023
- OREO Snowmen - December 20, 2023

Onolae
Do I need to grease the silicone first
Beth
No you do not need to grease the silicone mold. The frozen cheesecakes will push right out. Enjoy!
Jessica Coleman
Love these cheesecakes. What a way to give fun in eating such a yummy treat.
Beth
Thanks, Jessie. 🙂
Kate | HappyForks.com
I really like the idea of bite (or two) size cheesecakes for Easter table although I am not a fan of using coloring agents. However just by looking at the shape of your molds one brilliant idea just came through my mind. How about leaving the majority of the cheese filling in natural white color and dying a small part with mango puree or turmeric powder and making round blobs in the middle. Wouldn't it look like hard boiled egg cut lengthwise?
Beth
I love using natural coloring too and last year made tiny Cheesecake Peeps and some Cheesecake Carrots for Easter and Naturally Colored Conversation Heart Cheesecakes for Valentine's Day using fruits and veggies. It's a wonderful idea. You just have to spend a bit more time making the fruit and veggie purees, but it's worth it. Each cheesecake has a nice flavor too.
You can see how to make naturally colored cheesecakes here - https://hungryhappenings.com/2014/02/naturally-colored-conversation-heart-cheesecakes.html/
and here - https://hungryhappenings.com/2014/03/orange-cheesecake-carrots.html/
and here - https://hungryhappenings.com/2015/03/raspberry-blueberry-lemon-cheesecake-peeps.html/
Have fun!
Kate | HappyForks.com
Thanks for inspirations! It's amazing that natural colorings give also so many possibilities!
Beth
🙂
The Partiologist
They look just like the tie dye boiled eggs we have colored, so pretty! Only I think I'd go for one of these for dessert, I love cheesecake too! 🙂
Beth
That is exactly what I was trying to recreate. I was so happy they turned out that way. I'd be happy to share them with you.
The Bearfoot Baker
I've never seen tie dye cheesecake before. This is brilliant for Easter eggs! You are so SMART!!
Beth
Thanks, Lisa. I had so much fun making these.
Thalia @ butter and brioche
this is such a cool recipe, love tye dyed foods! and i bet these cheesecake eggs taste amazing too.
Beth
Thanks, so much Thalia. I love the flavor of these cheesecakes so much. I hope you give them a try!