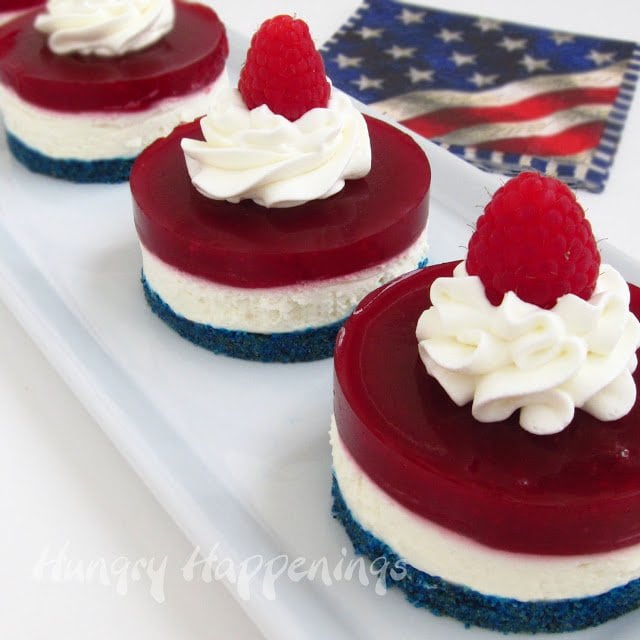
Celebrate your upcoming patriotic holiday by making these patriotic, red, white, and blue, no-bake cheesecakes topped with raspberry gelée and fresh berries! This beautiful dessert is so tasty and is sure not to disappoint your party guests!
If you are a regular reader here, I'm sure you've noticed the large arsenal of kitchen gadgets and supplies I use to create my themed cuisine. I hate to admit it, but you've only seen a fraction of my collection.
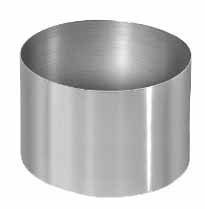
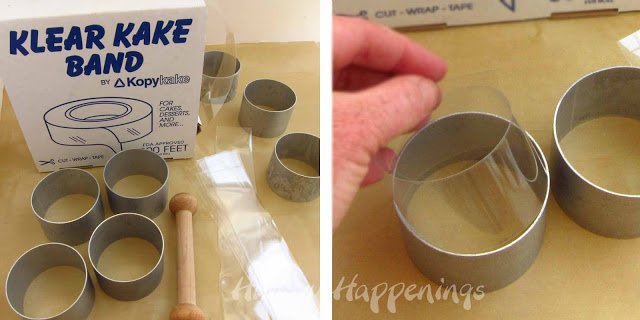
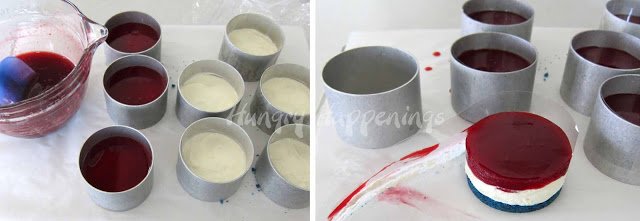
Today I decided to share a recipe that you can easily make using a single large springform pan, but I just love serving beautiful individual-sized desserts, so I chose to make these no-bake cheesecakes using my set of 3" round cake rings.
You can find round, square, triangular, oval, and hexagonal-shaped metal cake rings in a large variety of sizes. Someday I hope to add more to my collection.
Cake rings can go into the oven, but this recipe requires no baking, so I lined each ring with a clear acetate cake band which makes removing the desserts super easy.
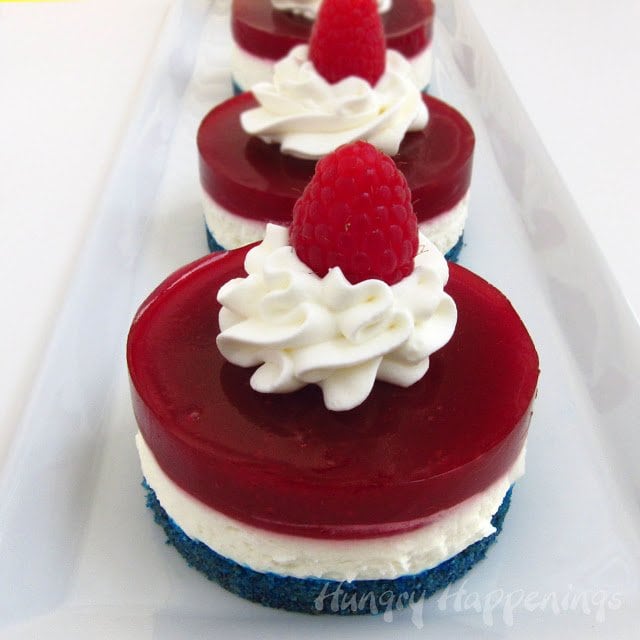
You can see in the picture above how pretty each dessert looks on the plate. I think it is a much nicer presentation than a slice of cake, don't you?
With the Fourth of July coming up, I couldn't resist coloring these sweet little cakes red, white, and blue. Of course, I don't know of any blue cookies out there, so I had to get creative and color some myself.
It was simple; I just ground up vanilla wafer cookies and added some blue food coloring. Instead of just adding white granulated sugar to make the crust, I grabbed some blue sanding sugar which helped to really intensify the color. These desserts don't have to be red, white, and blue.
You could leave the crust plain or turn it green and serve it at Christmas or for an Italian-themed event. Don't want red on top, swap out another fruit in place of the raspberries. Each cake is a rainbow of possibilities.
This fancy-looking dessert is simpler than you might think; it's a no-bake cheesecake topped with raspberry gelée (homemade gelatin using frozen raspberries.)
Let's make some red, white, and blue cheesecakes.
Ingredients:
crust-
30 vanilla wafer cookies
3 tablespoons blue sanding sugar or white granulated sugar
blue food coloring
3 tablespoons melted butter
no-bake cheesecake filling-
8 ounces cream cheese, softened
¼ cup granulated sugar
½ teaspoon pure vanilla extract
1 cup heavy whipping cream (or use 2 cups Cool Whip)
raspberry gelée-
1 tablespoon clear gelatin powder
⅓ cup water
2 ½ cups frozen raspberries (12 oz. bag)
½ cup sugar
1 ½ teaspoons fresh lemon juice
optional garnish-
whipped cream
fresh raspberries
Supplies:
8 - 3" x 2" metal cake rings or an 8" springform pan
if using metal cake rings, you'll need:
clear acetate cake bands or cut strips of acetate to fit rings
baking sheet lined with parchment or wax paper
food processor or large zip-top bag and rolling pin or pan
mixing bowls
electric mixer and/or a whisk
saucepan
fine mesh sieve
optional: disposable pastry bag (16" will work best, but 12" will work too)
tart shaper/tamper
Instructions:
Prep your cake rings...
- If using metal cake rings, cut your cake bands or clear acetate sheets to fit inside making sure you have about an inch overlapping. Line the metal rings with acetate.
- Set rings on a baking sheet that is lined with parchment paper.
- Otherwise, turn the bottom of your springform pan upside down and clamp it in (this makes for easier cutting of the cake.)
Make blue cookie crust.
- Pulse vanilla wafers in a food processor until you have fine crumbs.
- Add blue sanding sugar or granulated sugar and some drops of blue food coloring.
- Pulse to combine.
- Add more blue coloring, if desired.
- Add the butter and pulse to combine.
If you don't have a food processor, you can...
- put cookies in a large zip-top bag and use a rolling pin or the bottom of a pan to smash your cookies.
- add sugar and color and shake the bag. Stir in butter.
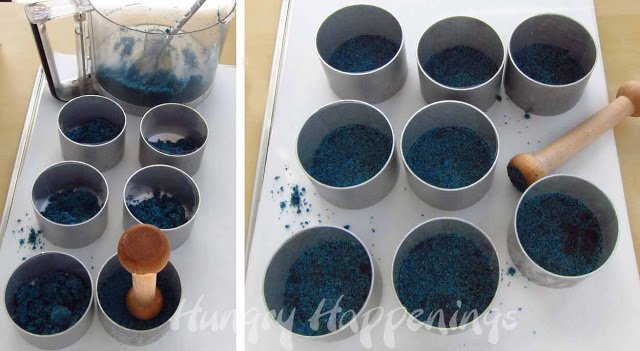
Press the crust into the cake rings.
- Divide crumbs evenly and press into the bottom of your cake rings or springform pan.
- I used a handy little tart shaper/tamper to make nice even crusts. Refrigerate crusts until needed.
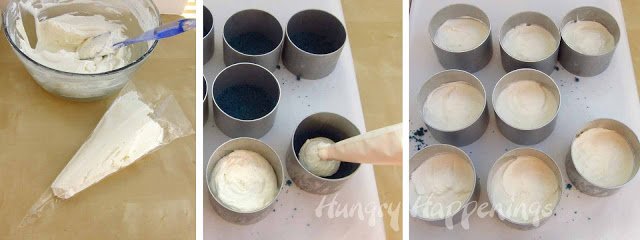
No-bake Cheesecake Filling
- Using an electric mixer, beat cream cheese and sugar until light and fluffy.
- Add vanilla and beat to combine. In another mixing bowl beat or whisk heavy whipping cream to stiff peaks.
- Combine the whipped cream and cream cheese mixture and beat to combine.
- Pour on top of blue crusts, evenly dividing among cake rings.
- I found it easiest to fill a pastry bag with the filling and pipe it on top of the crusts.
- Spread filling out in an even layer, smoothing out the surface.
- Clean any filling that has stuck to the sides of your cake rings.
- Refrigerate until your gelée is ready.

Raspberry Gelée Recipe
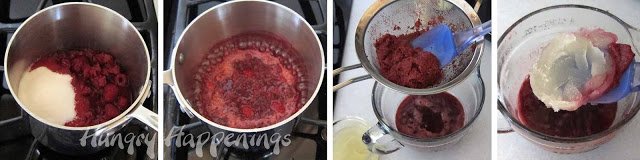
- Sprinkle gelatin over ⅓ cup water and allow it to bloom for 5 minutes.
- Place frozen raspberries and sugar in a saucepan and bring to a boil over medium heat, stirring often.
- Remove from heat and pour into a fine-mesh sieve set over a bowl.
- Press down on the raspberries allowing the juice to drain into the bowl. Discard seeds.
- Add the bloomed gelatin to the bowl, stirring to dissolve.
- Stir in lemon juice. Allow it to cool until it is slightly thickened but still pourable.
- To speed up this process, fill the sink or large bowl with ice water.
- Set the bowl of raspberry gelatin into water, not allowing any water to get into the bowl of gelatin. Stir frequently until thickened.
- Pour raspberry gelée on top of your cheesecakes.
- Refrigerate until set, at least 2 hours.
- To serve, lift the metal ring off each of the cakes and peel away the acetate strip.

Serve cakes as is or top with fresh whipped cream and a raspberry. Store in an airtight container in the refrigerator for several days.
Printable Recipe
This recipe was originally published on June 18, 2012.
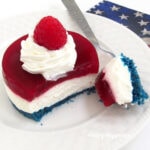
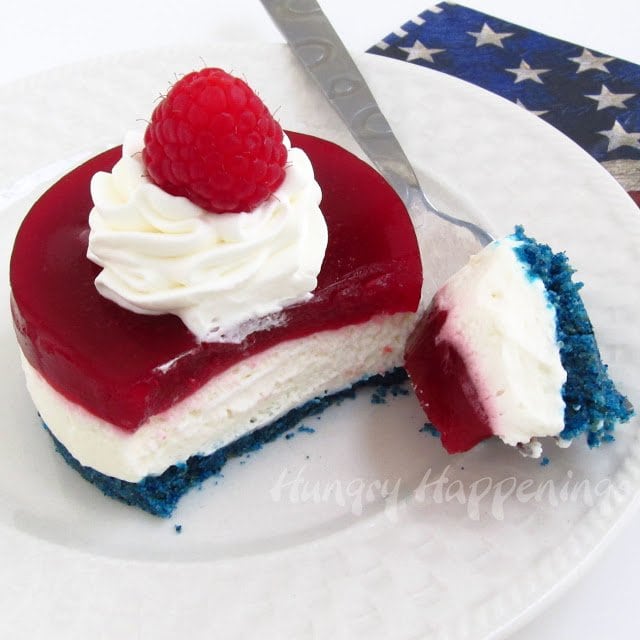
Blue cookie crust topped with white no-bake cheesecake filling and a layer of red raspberry gelee make an elegant dessert for the 4th of July, Memorial Day, or even Presidents Day celebrations.
- 30 vanilla wafer cookies
- 3 tablespoons blue sanding sugar
- 3 tablespoons melted butter
- 8 ounces cream cheese, softened
- ¼ cup granulated sugar
- ½ teaspoon pure vanilla extract
- 1 cup heavy whipping cream (or use 2 cups Cool Whip)
- 1 tablespoon clear gelatin powder
- ⅓ cup water
- 2 ½ cups frozen raspberries (approximately one 12 oz. bag)
- ½ cup sugar
- 1 ½ teaspoons fresh lemon juice
- whipped cream
- fresh raspberries
-
Line rings with acetate.
-
Set rings on a baking sheet that is lined with parchment paper. Otherwise, turn the bottom of your springform pan upside down and clamp it in (this makes for easier cutting of the cake.)
-
Pulse vanilla wafers in food processor until you have fine crumbs.
-
Add blue sanding sugar (OR granulated sugar and some drops of blue food coloring).
-
Pulse to combine.
-
Add more blue coloring, if desired.
-
Add the butter and pulse to combine.
-
Divide crumbs evenly and press into the bottom of your cake rings or springform pan.
-
Refrigerate crusts until needed.
-
Using an electric mixer, beat cream cheese and sugar until light and fluffy.
-
Add vanilla and beat to combine.
-
In another mixing bowl beat or whisk heavy whipping cream to stiff peaks.
-
Fold the whipped cream into the cream cheese mixture. If using frozen whipped topping, like Cool Whip, you can beat it in using an electric mixer.
-
Pour on top of blue crusts, evenly dividing among cake rings.
-
Spread filling out in an even layer, smoothing out the surface.
-
Clean any filling that has stuck to the sides of your cake rings.
-
Refrigerate until your gelée is ready.
-
Sprinkle gelatin over ⅓ cup water and allow to bloom for 5 minutes.
-
Place frozen raspberries and sugar in a saucepan and bring to a boil over medium heat, stirring often.
-
Remove from heat and pour into a fine-mesh sieve set over a bowl.
-
Press down on the raspberries allowing the juice to drain into the bowl.
-
Discard seeds.
-
Add the bloomed gelatin to the bowl, stirring to dissolve.
-
Stir in lemon juice.
-
Allow it to cool until it is slightly thickened but still pourable.
-
Pour raspberry gelée on top of your cheesecakes.
-
Refrigerate until set, at least 2 hours.
To serve, lift the metal ring off each of the cakes and peel away the acetate strip.
Serve cakes as is or top with fresh whipped cream and a raspberry.
Store in an airtight container in the refrigerator for several days.
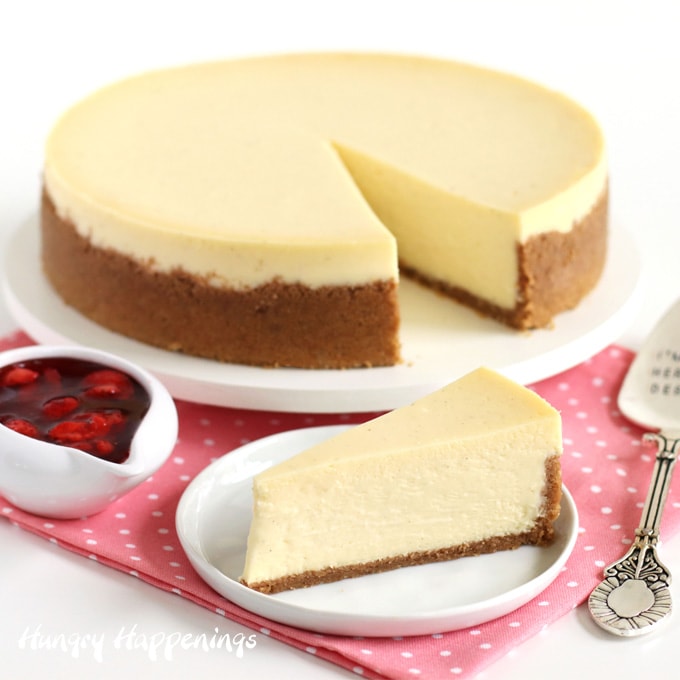
If you love cheesecake, be sure to check out my Classic Cheesecake Recipe. I share tips for making the creamiest cheesecake ever!
More 4th of July Recipes
If you're looking for other 4th of July Recipes, click the link and explore all my other Independence Day-inspired food.
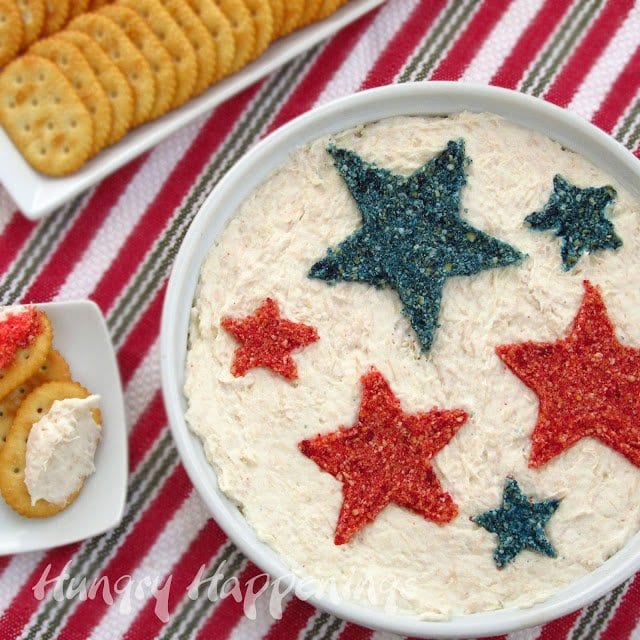
If you are looking for something savory to make for the 4th of July, give this Red, White, and Blue Hot Chicken Dip recipe. It's my family's favorite appetizer!
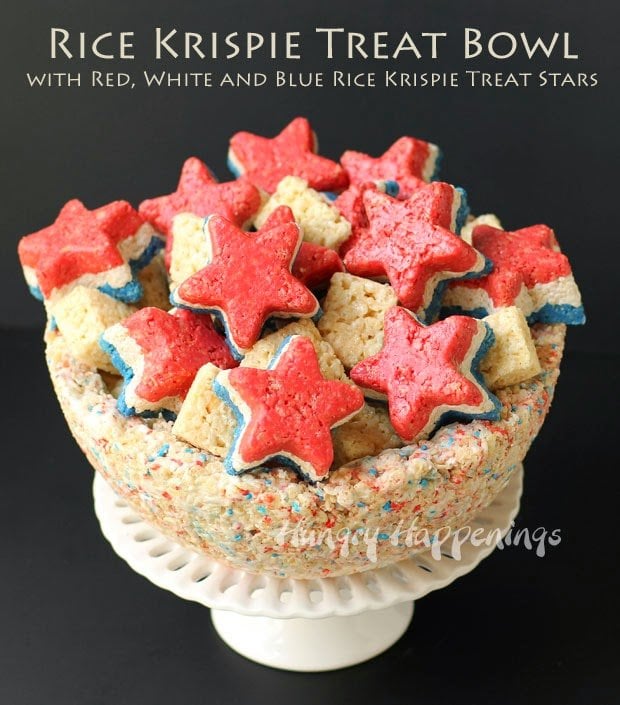
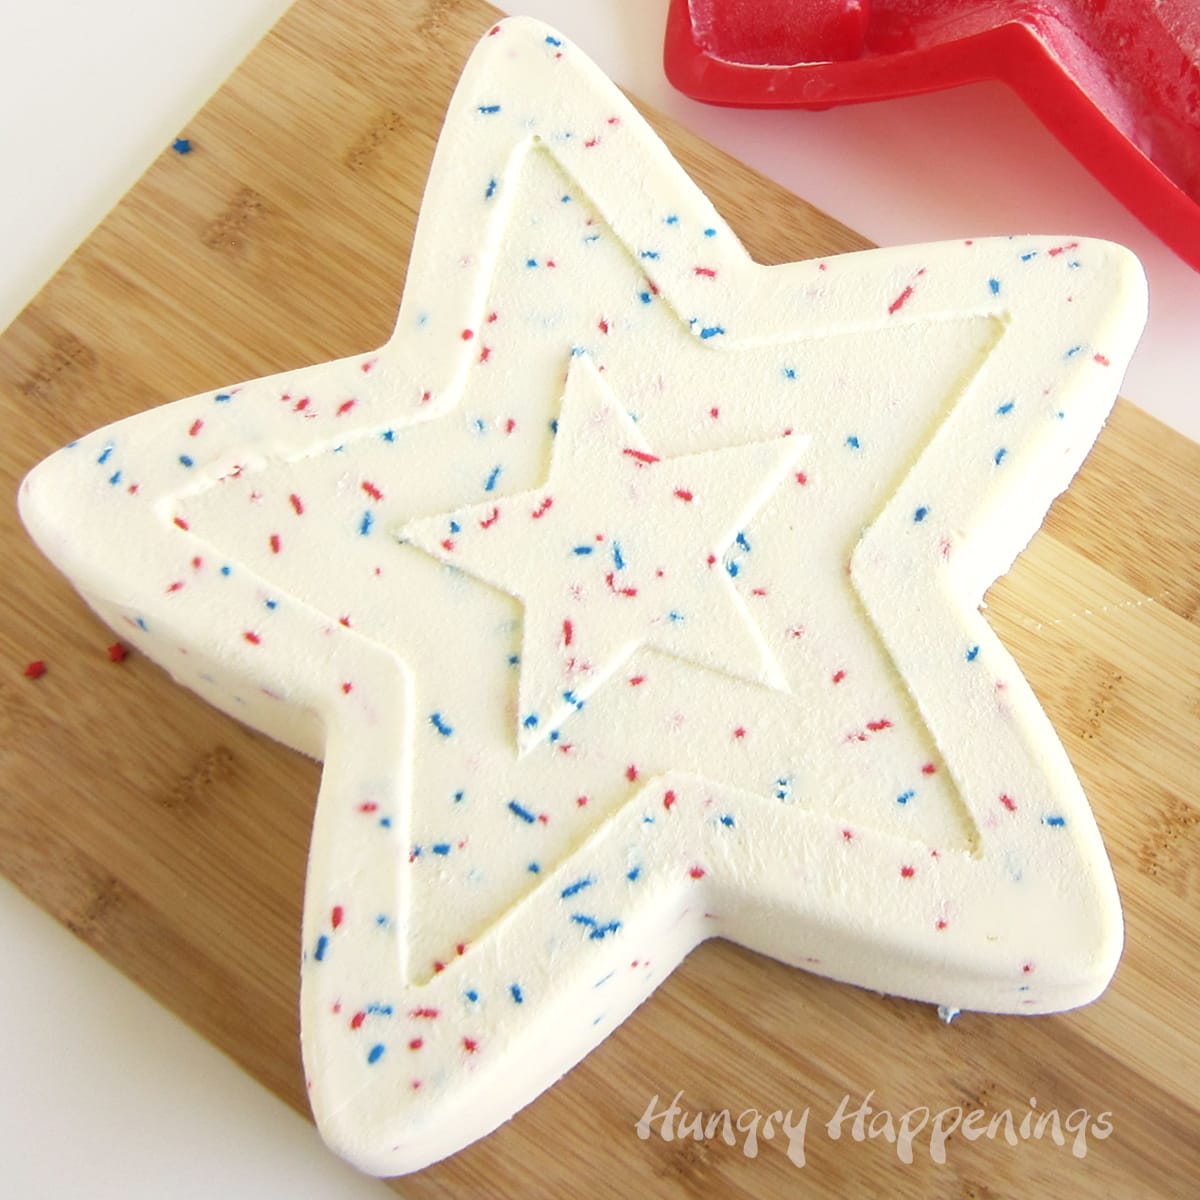
You can really wow your family and friends this 4th of July by serving Rice Krispie Treat stars in a Red, White, and Blue Rice Krispie Treat Bowl.

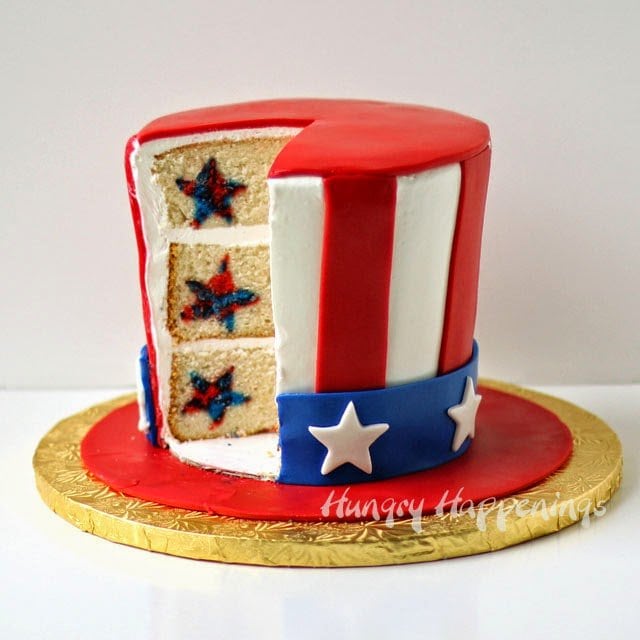
Or you can surprise them with this 4th of July cake. When you cut into the cake you'll reveal swirls of red, white, and blue. This tie-dye cake is fun to make and tastes great.
![]()
Did you make this recipe or do you have any questions about it? Let me know by leaving a comment and rating the recipe below. If you love the recipe, please give it a 5-star rating.

- Banana Split Bars – A Fun and Easy Summer Dessert - March 4, 2026
- Pineapple Fudge (No Candy Thermometer Needed!) - March 4, 2026
- No-Bake Peanut Butter Pie Recipe - March 3, 2026

Jess @ Spool and Spoon says
These are so stinkin perfect!! From the picture I assumed you just used jello on each side and it's nice to see that you did something so much better.
I've done a few patriotic projects lately and I'd love if you checked my posts out. http://www.spoolandspoonblog.com
Beth (www.livinglifeintentionally.blogspot.com) says
GORGEOUS!! I am totally going to try these!! I bet they are so yummy too!! Thanks for linking up to TGIF - I always look forward to seeing what amazing creations you come up with =-) If you have a moment I'd love your vote in Circle of Moms Top 25 Homeschooling blogs (http://www.circleofmoms.com/top25/Top-25-Homeschooling-Moms-2012) - Thanks!!
Beth
www.livinglifeintentionally.blogspot.com
Beth Jackson Klosterboer says
Thanks Beth. Gotcha up to 214. Good luck!
Winnie says
Super beautiful, and it looks sooooooooo tempting
CuteEverything.com says
These turned out absolutely stunning! I love them and I'll bet these were completely delicious!
Art By ASM says
Absolutely amazing! I will have to make this soon! Thank you for also posting all the links to buy the items! That is so helpful!
Warmest Regards,
Annamaria
www.ArtByASM.BlogSpot.com
www.Facebook.com/ArtistaASM
Princess Kate says
These are too cute. I just had a flag day party and these would have been great. I'll file this away for the 4th. I'm a new follower from mommy on a timeout.
Lindy@Itsy Bitsy Paper says
Amazing as always! I love how festive they are. I hope you'll add this one to my Patriotic Project Parade.
http://www.itsybitsypaperblog.com/2012/06/patriotic-project-parade-linky-party.html
Rosa Marie says
LOVE IT, looks so pretty. Not sure about raspberries though. Wonder if we could use strawberries????
Thanks,
Beth Jackson Klosterboer says
Thanks Rosa. Yes, you can swap out strawberries, if you prefer.
Jocelyn says
What a great idea to dye your crust!!! These are such a fun idea for the 4th...pinning this for sure! I'm thinking I need to add to my baking collection with some of those cute rings:-)
cheapcraftymama says
Wow, those look wonderful! I would love for you to share this (and any other creations) at Pin It and Win It Wednesday @ www.cheapcraftymama.com!
The Partiologist says
I was waiting for these! I knew you would do "cheesecake" patriotic style and they are better than I imagined! Deserving of another 50,000 comments!
AnneRose says
love the colour !
suzyhomemaker says
These are truly stunning. And the picture tutorial is great. I am hosting a patriotic link-up party, if you would like another place to show off your work here is the link:
http://www.suzyhomemaker.net/2012/05/lets-party-like-its-1776.html
Thanks
Deb@CookingOnTheFrontBurner says
Wow... I am speechless... and I'm normally not 🙂
Blossomedge says
What a great idea to color the crust! 🙂
Nicola says
Gorgeous! I can't believe I've never thought of using food colouring in a crust before.
ThisGirlBlogs says
I love the versatility of cheesecake. These look fab!! 🙂
Eleonora says
Delicious 🙂
Dorothy @ Crazy for Crust says
Blue crust? Genius! These are beautiful!
overtimecook.com says
What an absolutely brilliant dessert recipe for the 4th of July! Love it.