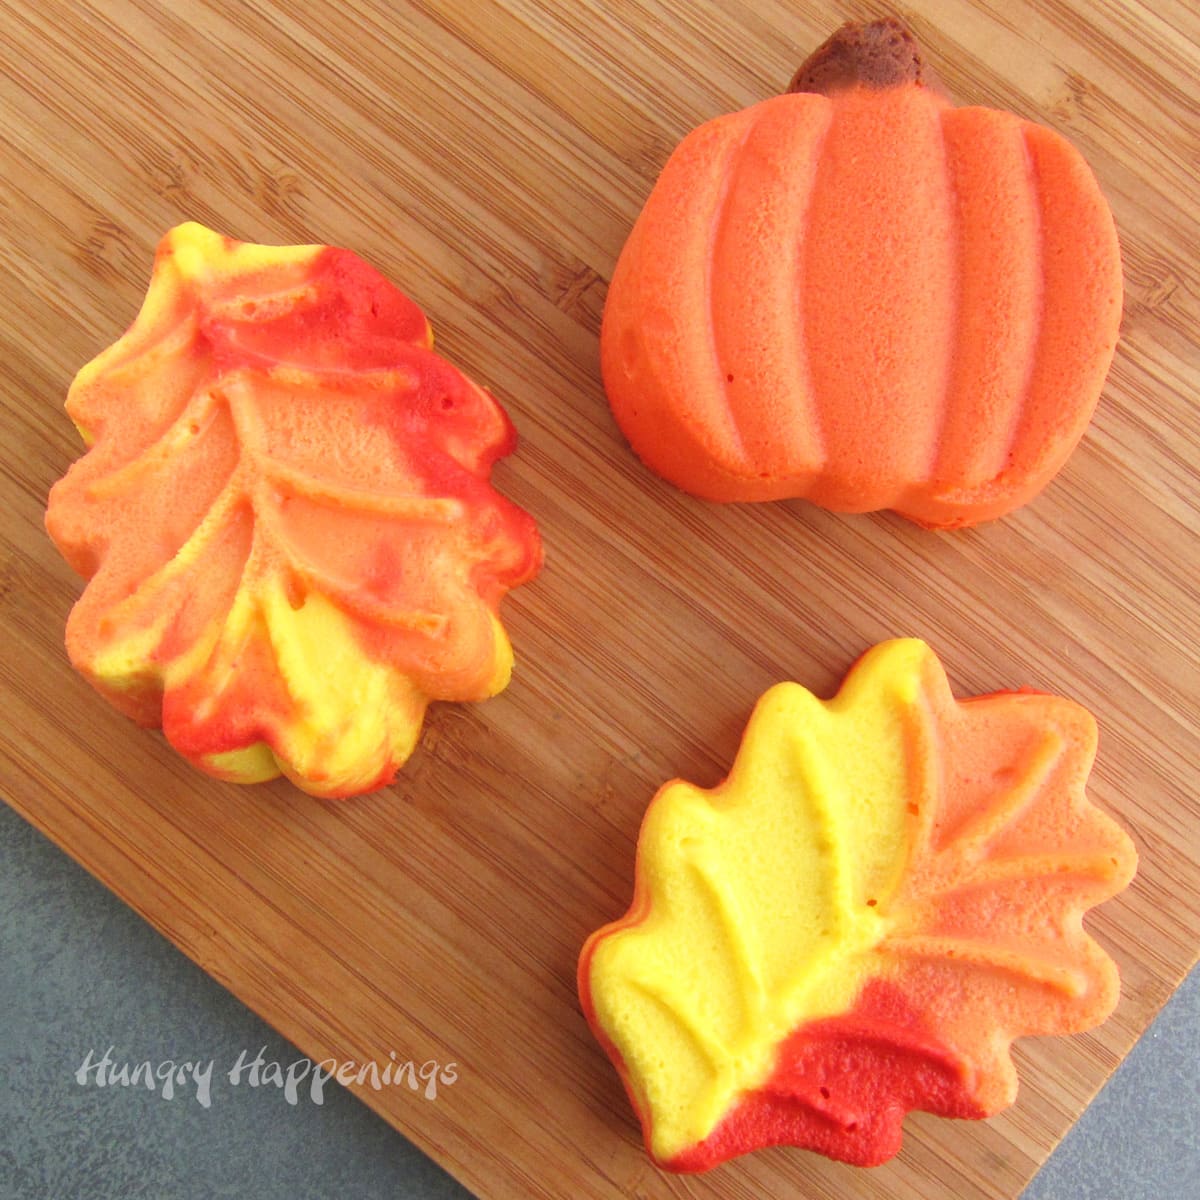
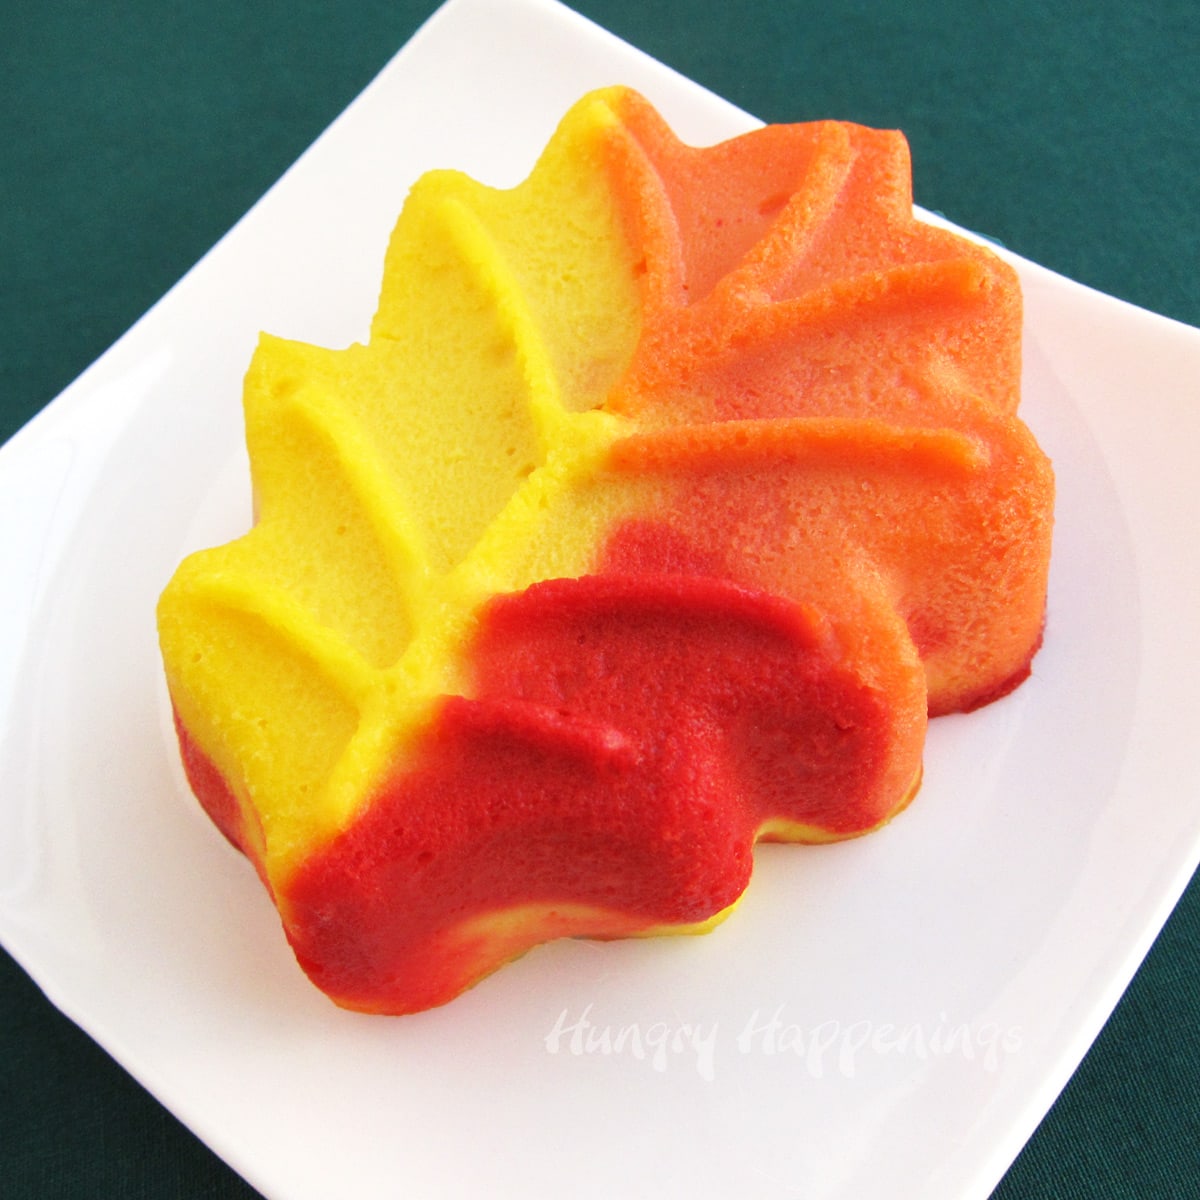
This fall create beautiful Cheesecake Leaves and Pumpkins to celebrate the season. Each individually sized dessert is colorfully decorated using brilliant autumn colors.
How much do you love the colors of fall leaves? Fall is my favorite time of year. I love the vibrant hues on the trees at this time of year.
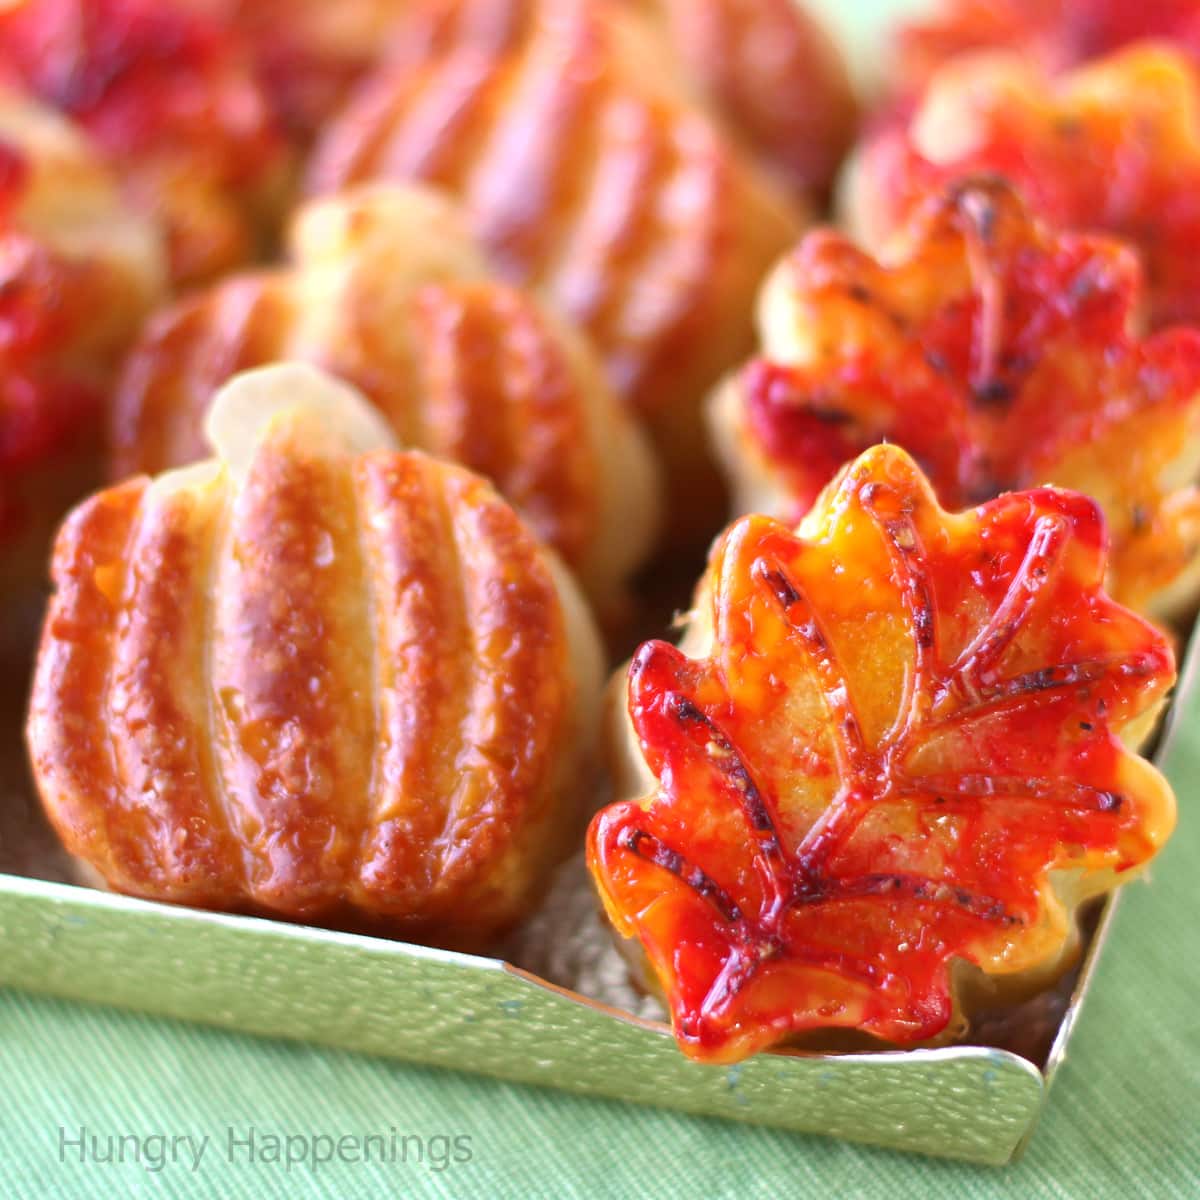
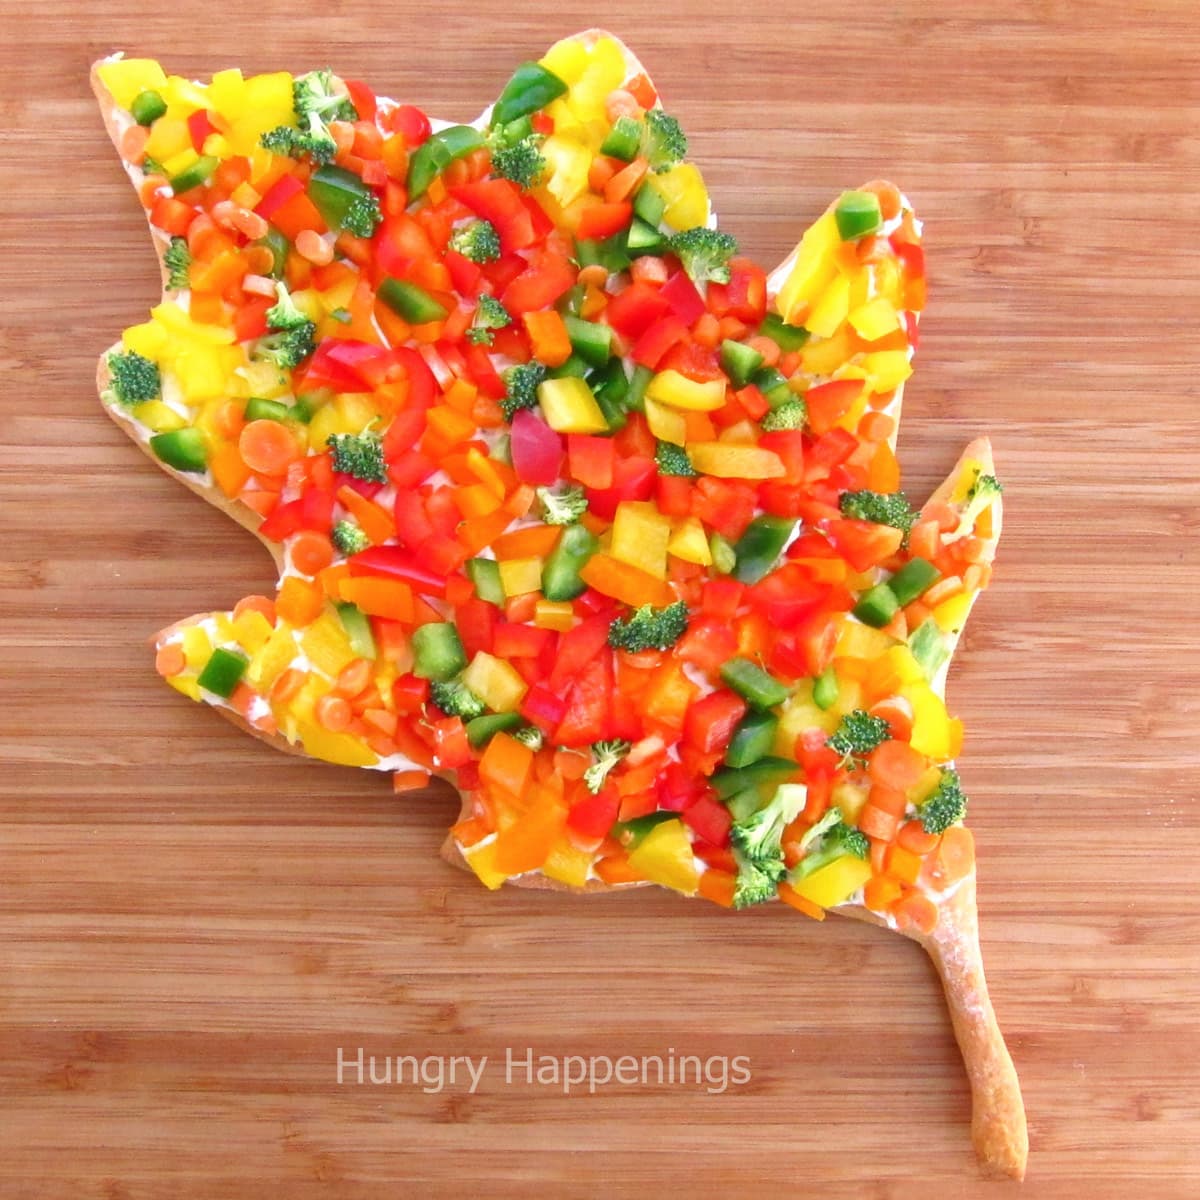
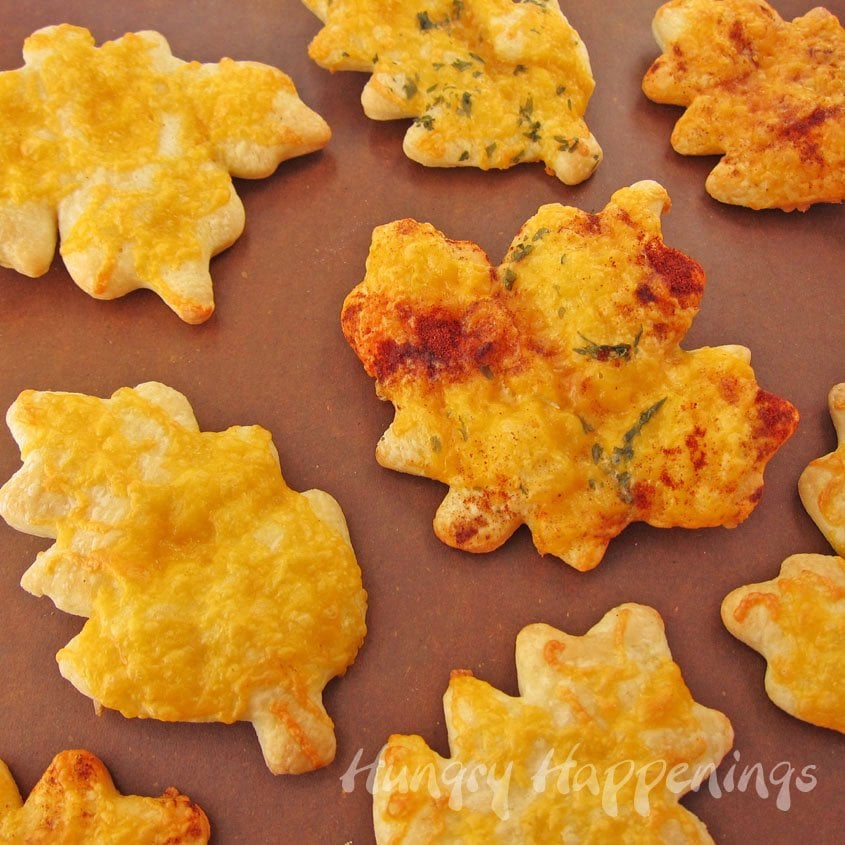
The red, yellow, and orange leaves have once again inspired me to create a fun food craft. I've enjoyed making Cheese Bread Leaves, Fall Leaf Cakes, and even Veggie Pizza Leaves.
This year, I was inspired to create these pretty cheesecake leaves and pumpkins to serve at our Thanksgiving dinner.
I've made decorated cheesecakes using colored cheesecake batter before and knew I could swirl colors together to make pretty fall leaves. The process is pretty easy and the results are impressive.
Your family will be amazed when you serve these for dessert.
Ingredients
- cream cheese - Use full-fat cream cheese for the best flavor and texture. Be sure to set it out on the counter several hours before you plan to make your cheesecakes. You want it to be very soft so it beats up into a creamy filling without lumps.
- sugar - Granulated sugar will add sweetness to your cheesecakes.
- heavy whipping cream - I typically use sour cream to make my favorite cheesecake but this filling needs to be a bit thinner so cream works best.
- eggs - Set your eggs on the counter with the cream cheese. It's best to use room-temperature eggs. Cold eggs will cause the cream cheese to firm up and form lumps.
- vanilla - I like to use pure vanilla extract.
- food coloring - You'll want red, yellow, and orange. You could also use green or brown too.
Supplies
food processor or a mixing spoon
baking sheets
2 or 3 Wilton leaf and pumpkin silicone molds (you'll get 8 cheesecakes, so if you want all leaves you'll need 3 molds, otherwise you can make a few pumpkins)
UPDATE: This Wilton Mold has been discontinued, but you can get a similar mold on Amazon.com. I earn a small commission when you make a purchase using the links below at no extra cost to you.
 ONLYKXY 1 Piece Pumpkin Lea...Shop on Amazon
  FasterS Autumn Fall Decorat...Shop on Amazon
 ") X-Haibei Autumn Fall Decora...Shop on Amazon
X-Haibei Autumn Fall Decora...Shop on Amazon  India Tree, Natural Decorat...Shop on Amazon
") Watkins Assorted Food Color...Shop on Amazon
Watkins Assorted Food Color...Shop on AmazonInstructions
Preheat oven to 325 degrees Fahrenheit.
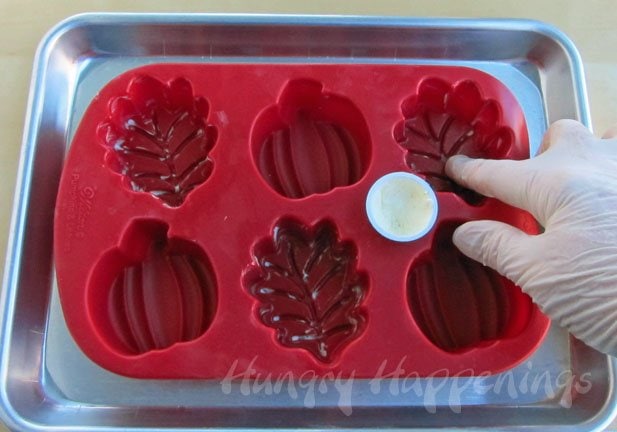
- Butter your leaf molds. For stability, I always set my silicone molds on a baking sheet before filling them.
Make cheesecake filling:
- Beat the cream cheese on low speed until smooth.
- Add sugar and beat until creamy.
- Add whipping cream, eggs, and vanilla, and mix just until combined.
- DO NOT overmix the ingredients. You don't want a lot of air bubbles in this cheesecake batter.

- Divide the cheesecake mixture into three or more bowls, depending on how many colors you'd like in your leaves.
- Color each small amount with food coloring.
- To create orange, make yellow then add a bit of red coloring.
- To deepen the red color, you can add one small drop of green food coloring.
- In a bowl, pour in about a ¼ cup of two of your cheesecake colors side by side, leaving room for the third color. Add the third color.
NOTE: You do not want to swirl your colors in the bowl nor do you want to fill one big bowl with all of the colored fillings. They will get swirled as you pour them into the leaf mold. If you were to swirl them while they were in the bowl, by the time you made a few leaves, the color would look muddy.
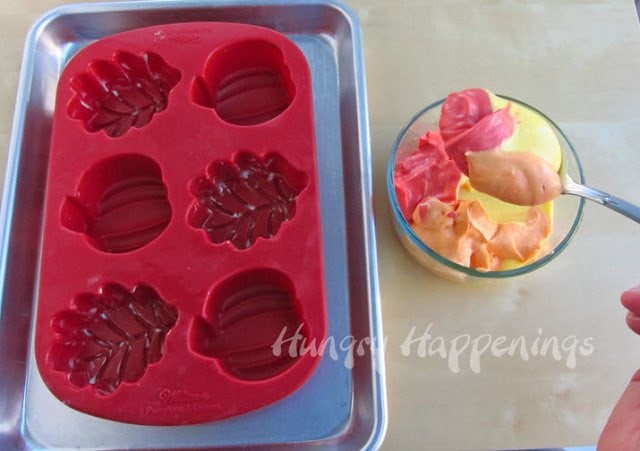
- Use a spoon to scoop out some of your cheesecake colors from the center of the bowl.
See how each of the colors is still pretty separate?
Note: I made this cheesecake filling using sour cream and it was very thick. I've adjusted the recipe to use heavy whipping cream which is thinner. I've used this recipe to make Tie-Dye Cheesecake Easter Eggs too. It tastes great!
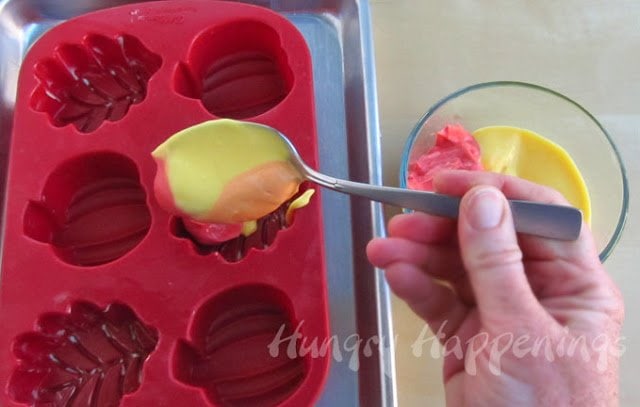
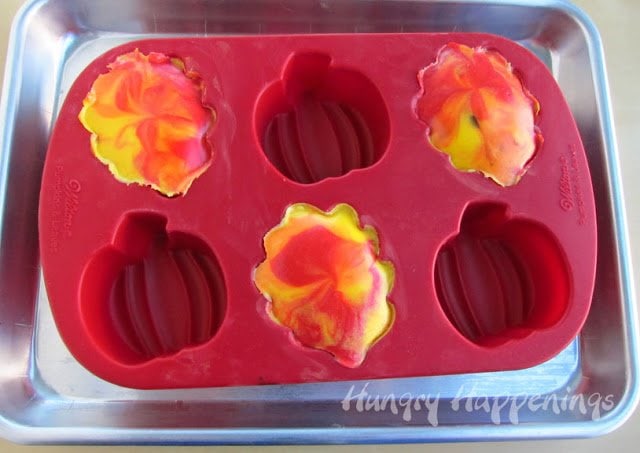
- As you spoon the filling into the silicone leaf molds, the colors will swirl.
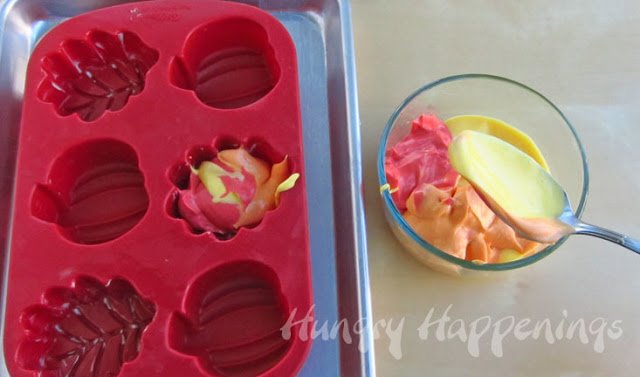
- Tap the mold several times to remove excess air bubbles after each scoop of cheesecake filling you add.
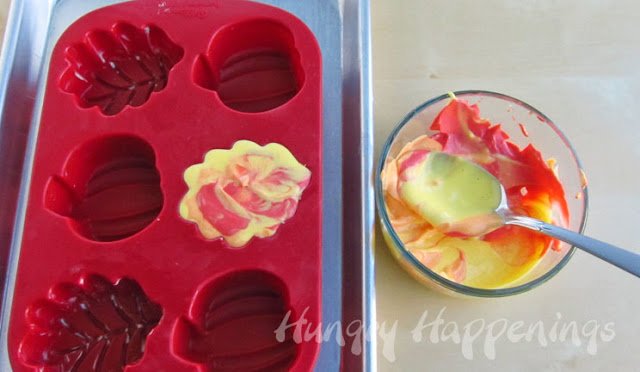
- Fill the mold so that it isn't completely full, so there is room for the cheesecake leaves to expand while baking. I filled this one too full and ended up scooping some out.
- You can see that I don't have a lot of cheesecake filling left in the bowl and that is good, as it gets swirled as the spoon goes in and out of the bowl and will start to blend all together.
- Top it off with your three cheesecake colors and repeat the process.
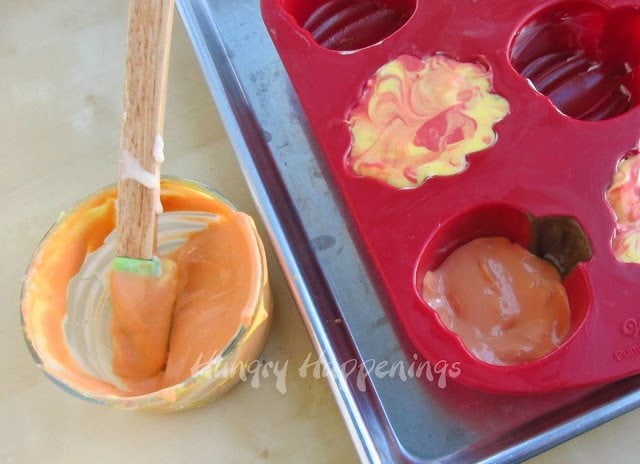
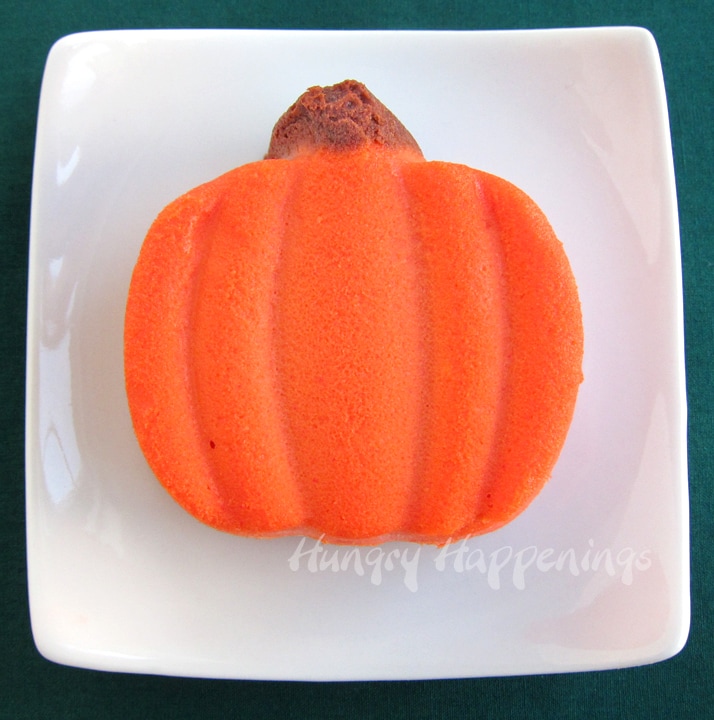
If you have two molds and want to make some pumpkins with excess cheesecake filling, mix what you have remaining. You should get an orange color. Adjust the color using food coloring if desired.
Remove a teaspoonful and put in another bowl. Add a small drop of red and a small drop of green. Mix to get brown. Use a spoon to paint the brown cheesecake filling into the stem area of the pumpkin cavity. Pour the orange cheesecake filling into the pumpkin cavity.
You should have enough cheesecake filling to make 6 leaves and two pumpkins, or any combination, you choose.
- Bake your cheesecakes for 20-24 minutes until the top forms a smooth film and the center is still giggly but not wet.
- Allow your cheesecakes to cool for an hour then freeze for at least 3 hours.
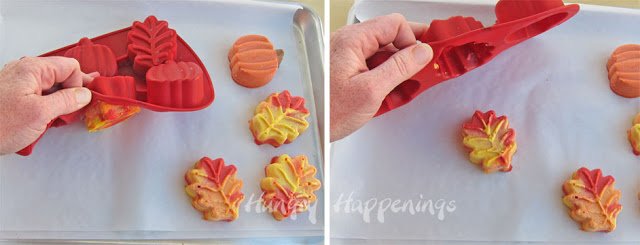
- Carefully turn the silicone mold upside down and set it over a baking sheet lined with parchment paper or a cutting board and gently tug at the mold pulling it away from the cheesecake, allowing the cheesecake leaf to fall out of the mold.
- You will want the cheesecakes cold in order to move them onto dessert plates, so do it now, or refrigerate the tray of cheesecakes and plate them later.
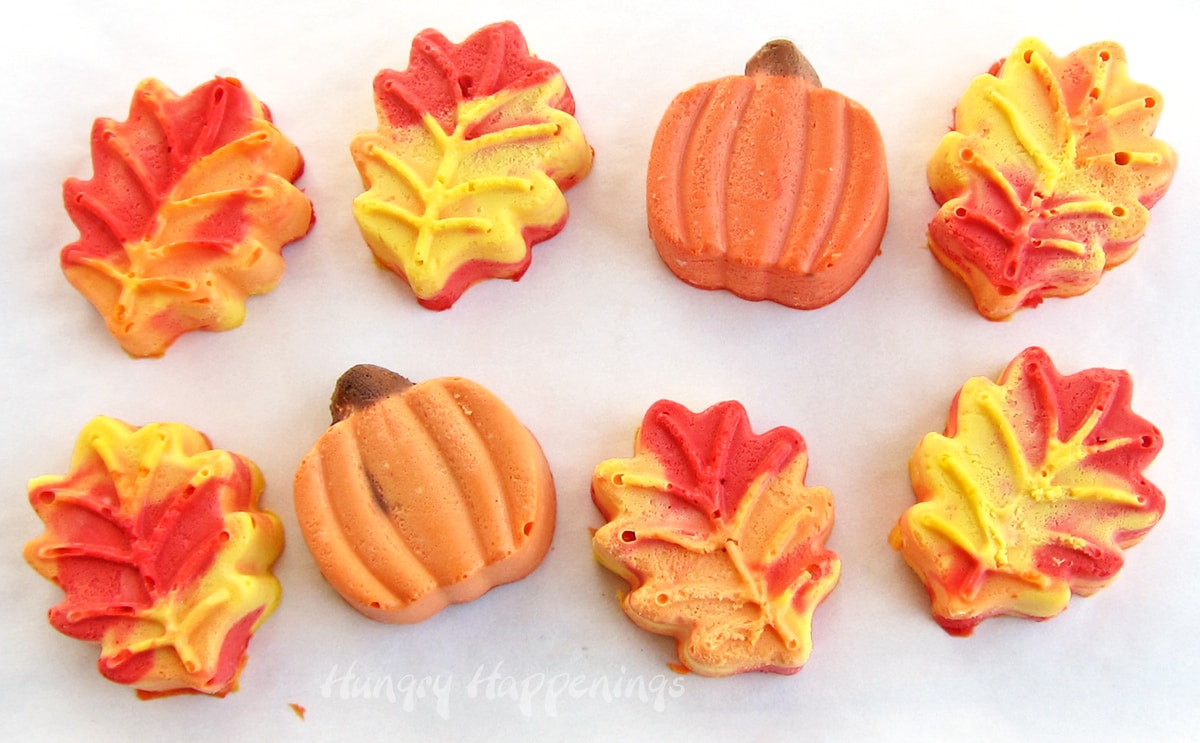
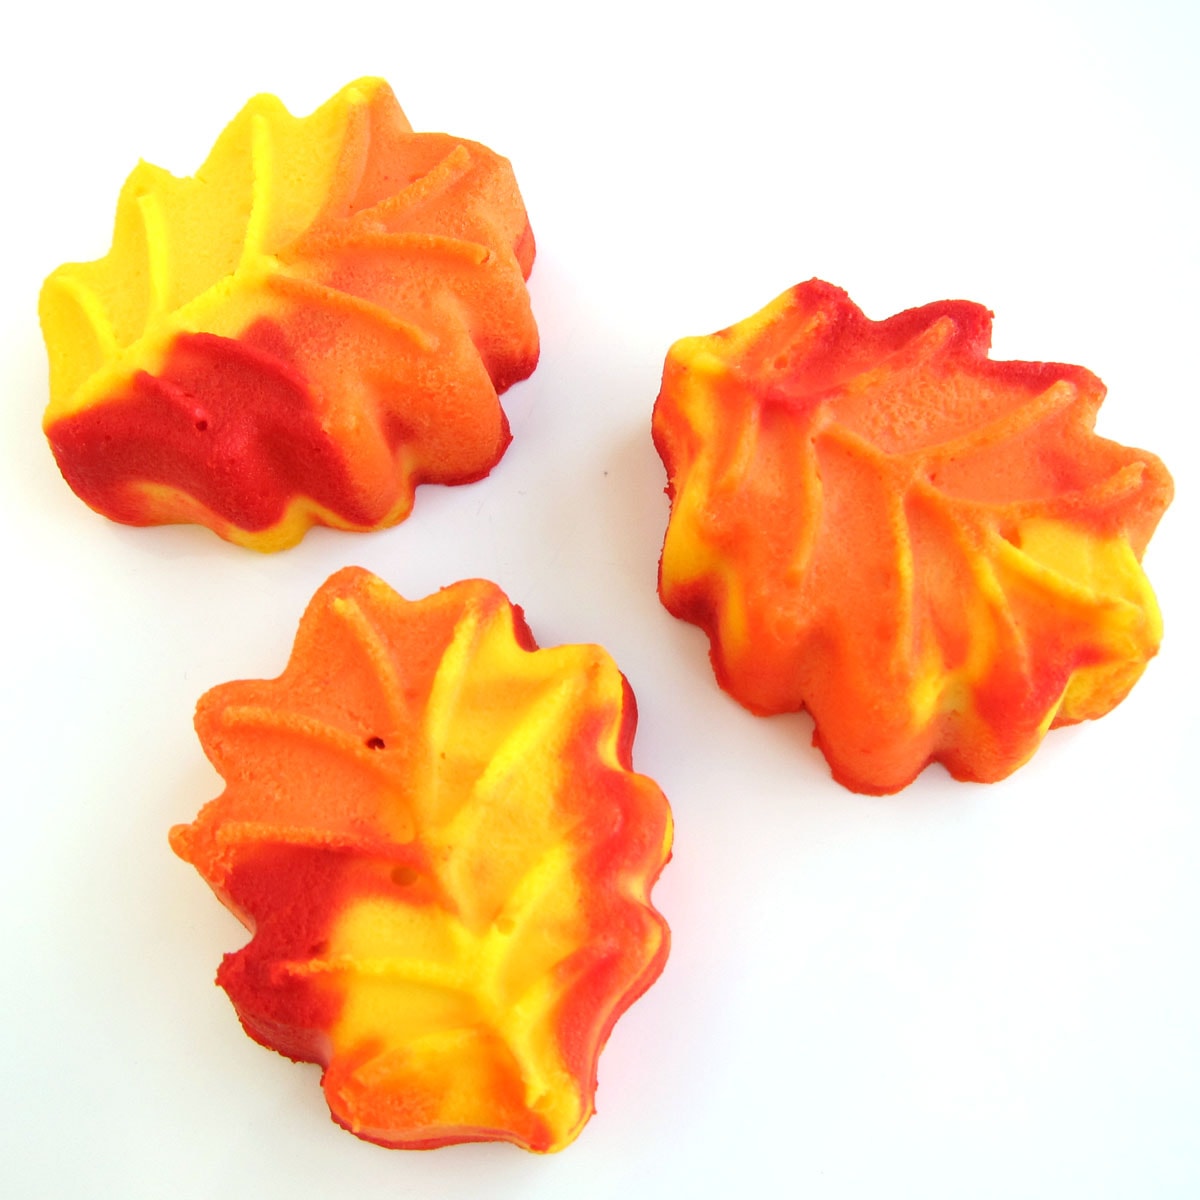
NOTE: I made these leaf and pumpkin-shaped cheesecakes twice while developing this project.
The picture above was my first batch of cheesecake leaves and pumpkins. I wasn't happy with all of the air bubbles and the texture of the cheesecakes, but I had taken all of my step-by-step pictures during this process, so I wanted you to see the first batch.
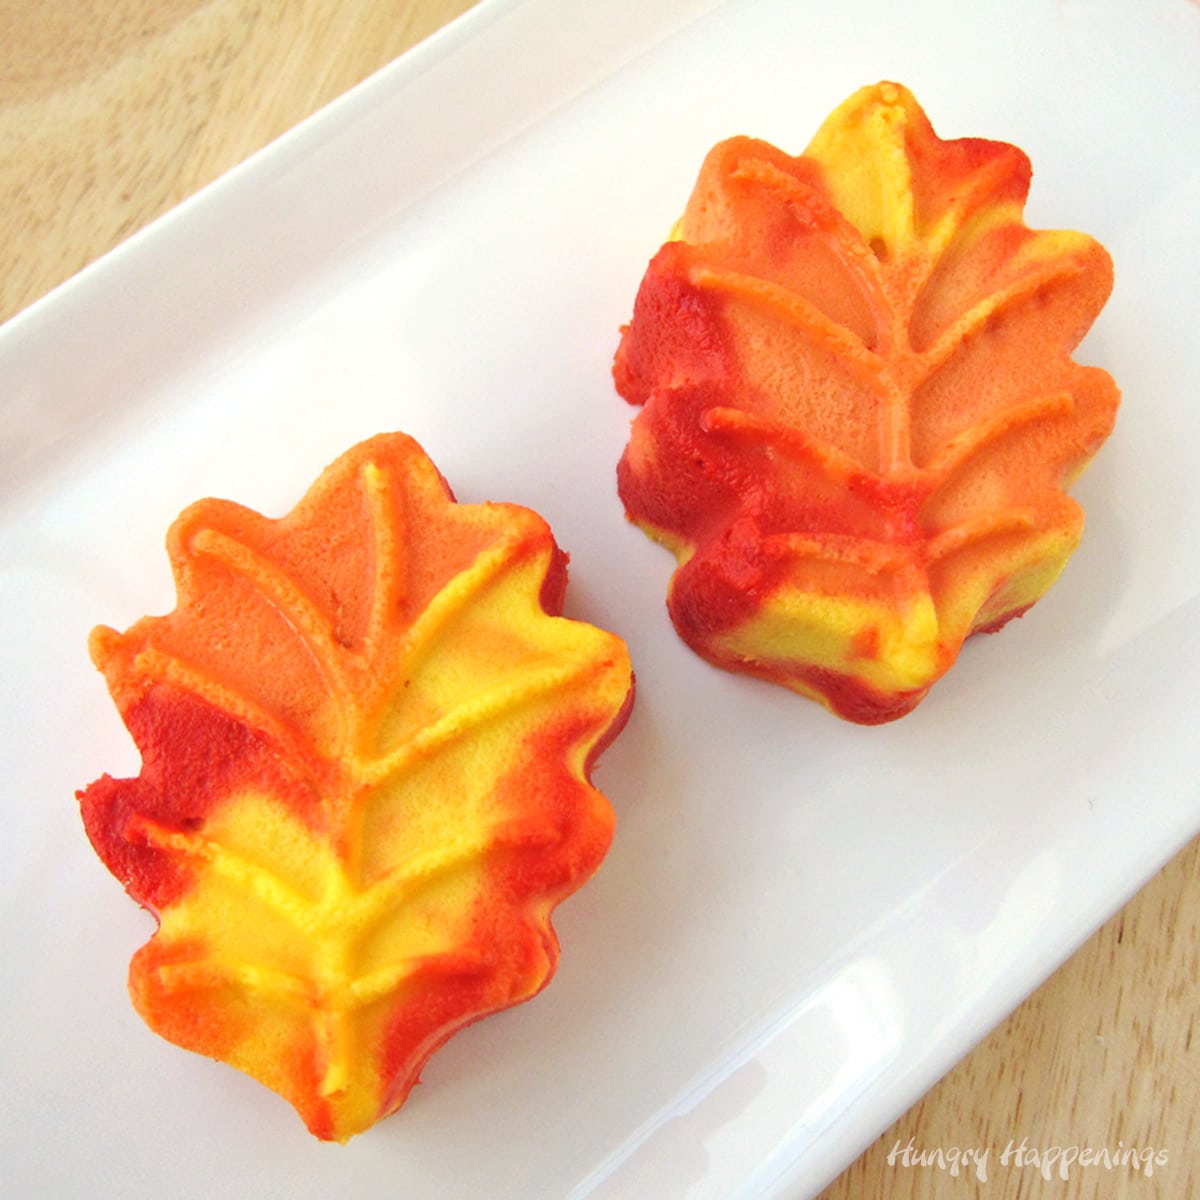
When I made the second batch, I added whipping cream to the recipe, which made the cheesecake filling thinner.
I also intensified the colors a bit, shortened the baking time, and really tapped my molds to remove all the air bubbles.
Storage
They are ready to serve but can be kept in the refrigerator for several days.
Place them in an airtight container.
To keep moisture from forming on your cheesecakes you can use this trick - place a piece of paper towel over the opening of your container and set the lid on top.
Seal the container leaving a paper towel showing all around the outside edge. Don't lay the paper towel directly on the cheesecakes.
Allow cheesecakes to sit at room temperature for about 30 minutes before serving.
Related Recipes
If you enjoy making these cheesecake leaves, you might also like to make these other leaf-shaped recipes. Be sure to check out all of my Thanksgiving recipes too.

Printable Recipe

- butter to coat the inside of your leaf mold
- 16 ounces cream cheese softened
- ⅔ cup sugar
- ⅓ cup heavy whipping cream
- 2 large eggs
- 1 teaspoon pure vanilla extract
- red yellow, green food coloring (orange, optional) - you can use natural food coloring, if you prefer
-
Preheat oven to 325 degrees Fahrenheit.
-
Butter leaf molds.
-
Combine cream cheese, sugar, heavy whipping cream, eggs, and vanilla in the bowl of a food processor, pulse until smooth.
-
Divide cheesecake mixture into three or more bowls.
-
Color one bowl orange, red, and yellow.
-
Fill each leaf mold with a swirl of orange, red, and yellow filling.
-
Tap the mold several times to remove excess air bubbles after each scoop of cheesecake filling you add.
-
Bake your cheesecakes for 20-24 minutes until the top forms a smooth film and the center is still giggly but not wet.
-
Allow your cheesecakes to cool for an hour then freeze for at least 3 hours.
-
Un-mold cheesecakes directly onto a serving dish.
-
Allow to defrost in the refrigerator for a few hours before serving.
Store your cheesecake pumpkins and leaves in an airtight container in the refrigerator for up to 5 days. You can also freeze them for up to 3 months.

- Banana Split Bars – A Fun and Easy Summer Dessert - March 4, 2026
- Pineapple Fudge (No Candy Thermometer Needed!) - March 4, 2026
- No-Bake Peanut Butter Pie Recipe - March 3, 2026


Art By ASM says
These look great! Please come by and post on our blog party! Thank you! Please help spread the word!
http://artbyasm.blogspot.com/search/label/Blog%20Party
Warmest Regards,
Annamaria
Gina@Cateror says
What a *fantastic* idea! With different molds and colors there's unlimited potential. A perfect treat for any event, thank you for the awesome ideas!
4 You With Love says
These are amazing. I pinned and tweeted this so I can find it again later...also too good not to share!
Emily says
cheesecake???? Yum, and yes, please! I came over from ginger snap crafts to invite you to join my month long Thanksgiving link party. It will be open for one more week, with fabulous features on Thanksgiving day! I would love for you to join us!
http://www.nap-timecreations.com/2012/11/some-fall-baking-tasteful-tuesday-party.html
Dorothy @ Crazy for Crust says
Those are so cute! I love the leaf time of year - but my husband hates it for all the raking, lol!
Beth Jackson Klosterboer says
Our last house had lots of trees and we spent days raking, so I can sympathize with your hubby. We only have one small tree now, so I can totally enjoy the leaves of fall with no work at all!
Walking on Sunshine says
These look amazing!!! I love how the colors mix together so beautifully. Would love for you to link up with our Foodie Friends Friday linky party tomorrow night! I'm your latest follower!
HungryLittleGirl says
This is one of the most beautiful ideas I've seen in a while!
I would love to have you share this, or any other recipe of your at Wednesday Extravaganza - my Foodie Link Party with the chance to get a lifetime feature on my Wall of Fame. Here is the link:
http://www.hungrylittlegirl.com/1/post/2012/11/wednesday-extravaganza-4.html
Can't wait to see you there!
Winnie says
These are simply amazing!!
They look super difficult to make but actually it's quite easy
Fabulous !
Emma Green says
I love this idea so much! I think I will make them next week when my family is in town for thanksgiving. My question is about adding a crust.. Do you think that you could add some sort of crumbled graham cracker crust to the tops of the molds after they are filled (so that when you flip them out, the crust is on the bottom?) I just can't decide if things would cook evenly if that happened. I may try doing it though when I make mine and I will let you know how it goes!
Beth Jackson Klosterboer says
Hi Emma,
I thought about adding a crust, but worried that the crumbs would just sink into the cheesecake. I even toyed with the idea of baking cookies that would be cut into the leaf shape and setting them on the top in order to form a crust. In the end, I just opted for no crust at all, but I do love a crust on my cheesecake. I would love to hear if adding a crust works for you, so please let me know!
CuteEverything.com says
Wow, these are gorgeous! They look like something I could actually make, too. I love how easily they seem to pop out of the silicone molds.
Megan@Whimsically Homemade says
Oh, I love these! Very festive and the colors are awesome. The cheesecake recipe look super simple too! I would love for you to stop and link this up at Whimsically Homemade's Mixer Monday! http://whimsicallyhomemade.blogspot.com/2012/11/mixer-monday-9.html
tumbleweed-contessa says
How pretty! I am pinning these right now. I hope that you will share them at my holiday cookie exchange: http://www.tumbleweedcontessa.com/blog/2012-cookie-exchange-cookies-and-memories/ I am so glad to have seen these at Crazy for Crust. Have a great week!
Beth Jackson Klosterboer says
I'd love to join in your link party, but I feel strange adding these as they aren't cookies!
Lindsay Ann says
So cute, Beth. The little pumpkins are my favorite!
Diana - FreeStyleMama says
Brilliant is right. I love how you blended the colors. Thanks for linking up to Pin Me! I've pinned it!
beth says
Thanks for the pin, Diana.
Brenda says
Colorful cute cheesecakes ... simply wonderful!
Jill @ KitchenFunWithMy3Sons.com says
These are so pretty!
Michelle | Creative Food says
This is brilliant!! I love these 🙂 They look beautiful!
beth says
Thanks, Michelle.
Janine (sugarkissed.net) says
I gotta get me some silicone molds! I love how easy this is!
beth says
Yes, you do. I love using them.
The Partiologist says
What wonderful little cheesecakes - I just love the swirl, just perfect!
Mamma Cass says
Those look delicious but have you ever tried using some kind of food coloring that wasn't artificial? Have any tips?
Beth Jackson Klosterboer says
Oh, thanks for reminding me. I meant to add a comment about that in the post. Yes, there are natural food coloring you can use instead. They are pricey, but do a good job at coloring food naturally.