Cakesicles are a fun twist on a traditional cake pop. Crafted in popsicle molds, cakesicles are an easy-to-make version of the ever-popular treat with a chocolate shell surrounding a blend of cake and frosting.
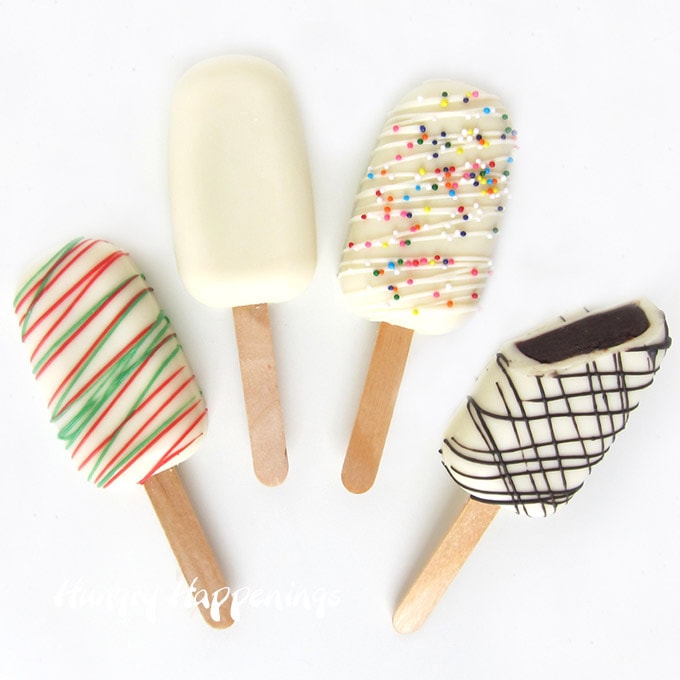
If you have ever struggled to dip a cake pop or had them crack or fall off the stick, you are going to be so happy to discover the cakesicle.
Unlike a cake pop, which is made by rolling a cake and frosting combo into a ball (or another shape) and then dipping it in chocolate or candy melts, a cakesicle is created by painting the chocolate into a popsicle mold, then filling the hardened candy shell with the cake/frosting mixture.
The candy shell is thick enough that it won't crack but thin enough to bite into. It's also smooth and shiny and perfectly shaped.
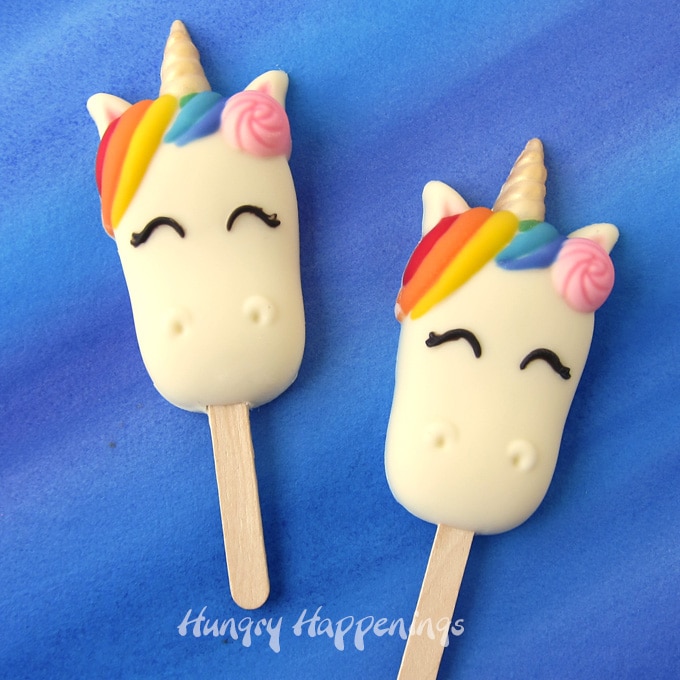
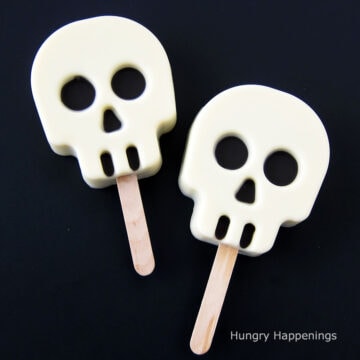
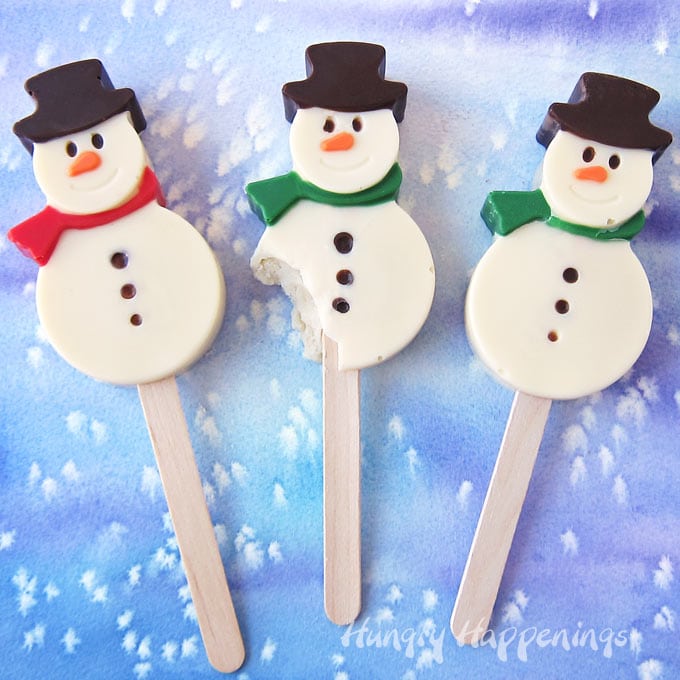
You can make simple popsicle shapes or you can make shaped pops like Unicorn Cakesicles, Skull Cakesicles, or Snowman Cakesicles.
You can even make cakesicles shaped like Hot Chocolate Bombs.
Video
Be sure to watch the "How to make Cakesicles" Video. If it's not shown below it will be either at the top of the post or in the sidebar.
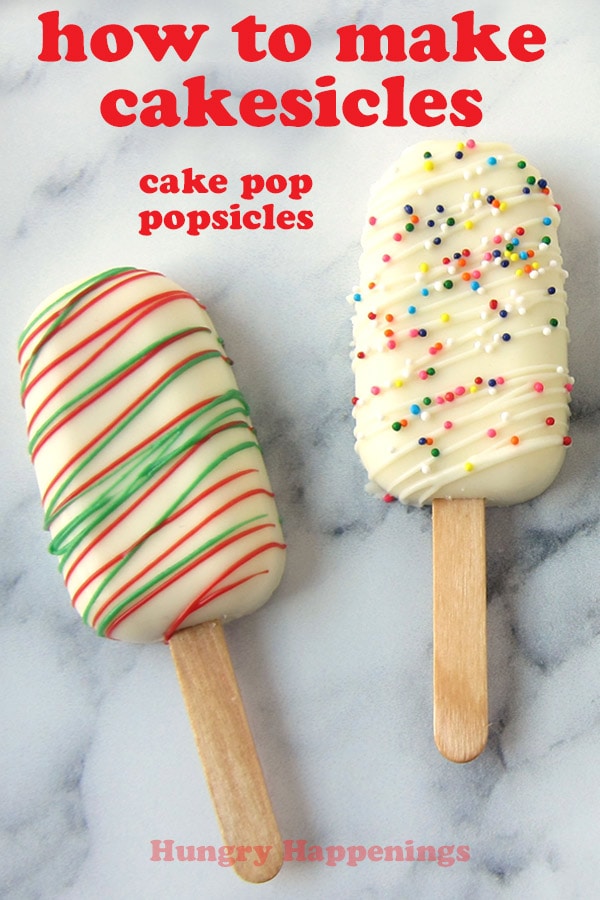
In this tutorial, I will show you how to make cakesicles using white chocolate or white candy melts. You can use the technique to create dark or milk chocolate cakesicles too.
If you plan to make cakesicles for a holiday or special occasion, you can even use colored candy melts.
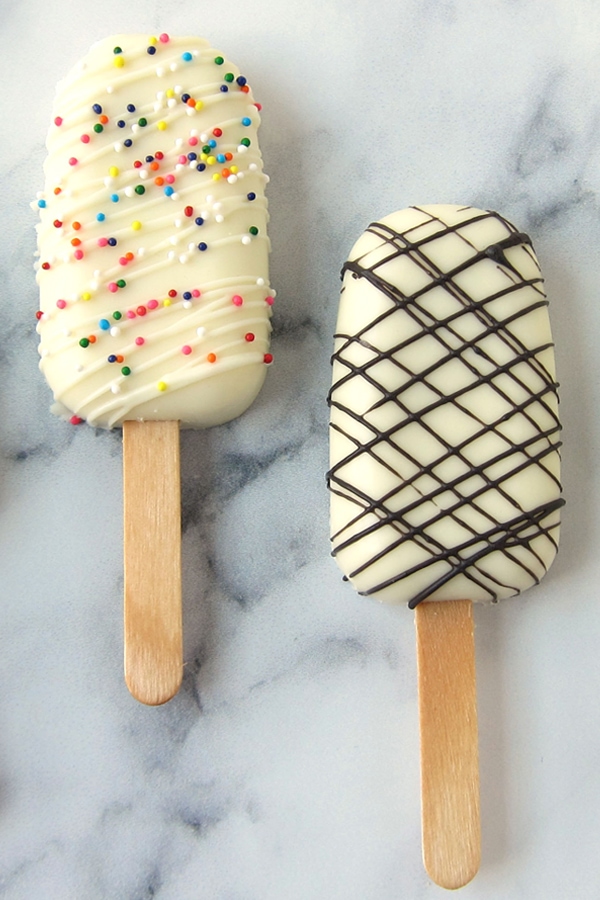
Cakesicles look great plain, in one solid color or shade of chocolate, but they look even better when decorated.
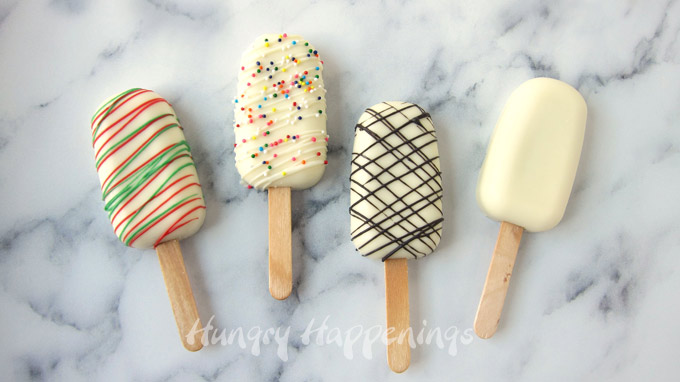
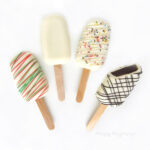
You can simply add a drizzle of chocolate or colored candy melts to add a festive touch. Christmas cakesicles drizzled with red and green candy melts or birthday cakesicles topped with rainbow sprinkles make fun desserts, party favors, or gifts.
Ingredients
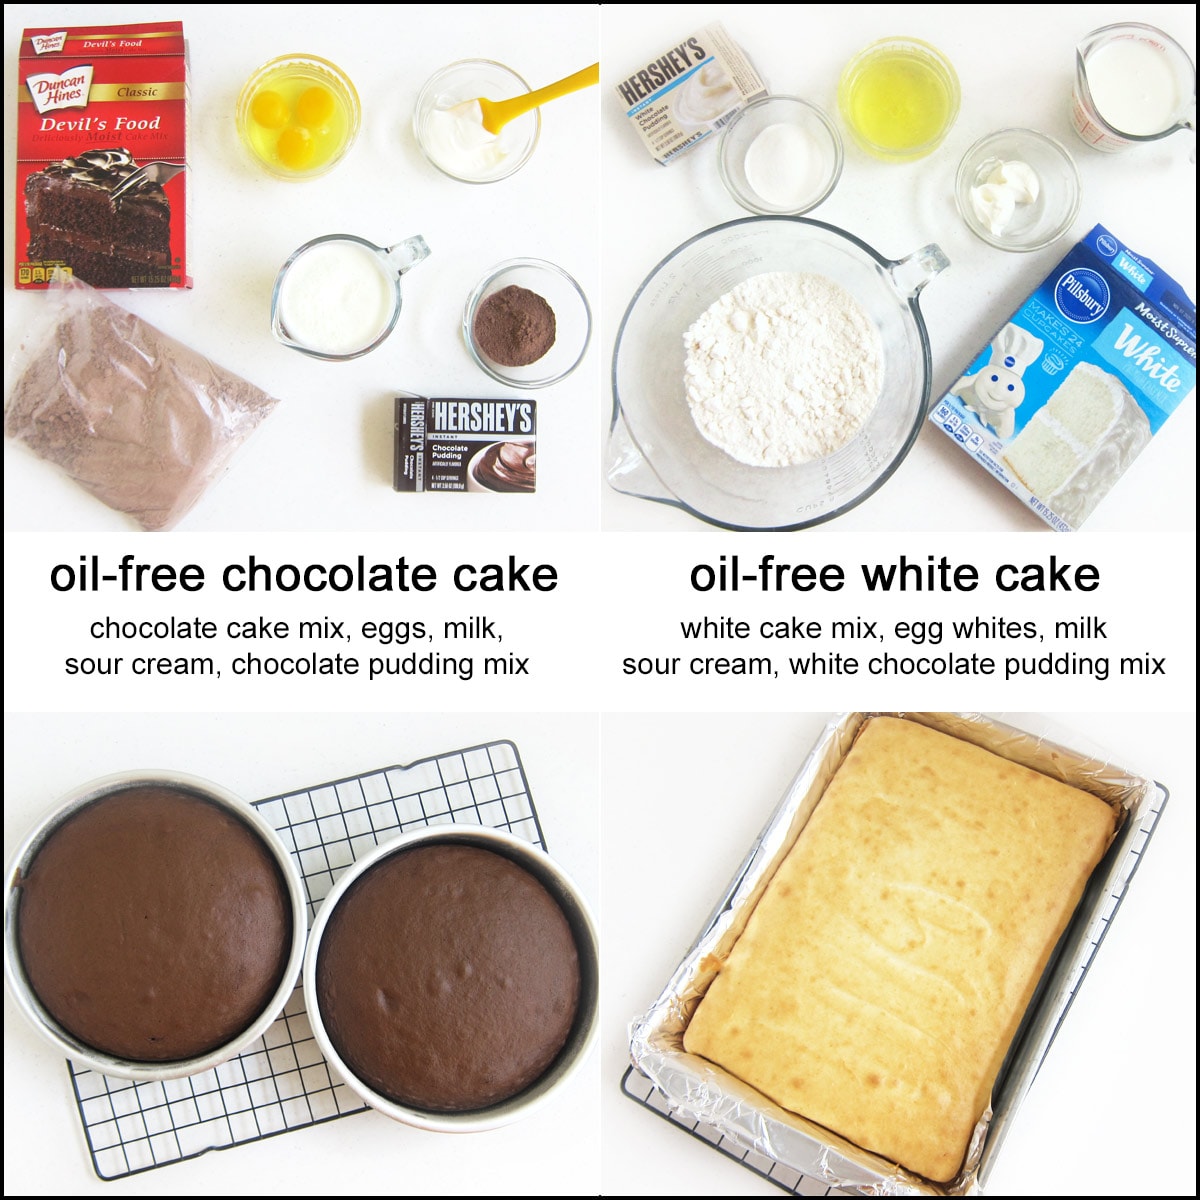
Oil-Free Cake
- cake mix - Use any flavor you like.
- eggs or egg whites - Use what is called for on the box.
- milk or water - Use milk for a richer flavor.
- sour cream - Add moisture to the cake.
- pudding mix (to match the flavor of your cake mix) - Adds flavor and enhances the texture of the cake.
You'll notice in the recipe and video that I didn't add oil to the cake mix. I wanted to experiment with this, as so many people complain about having oily cake pops.
The cake baked without oil baked up beautifully and was only slightly dryer than a cake baked with oil. Once the frosting was mixed in you couldn't even tell the difference in flavor, but the filling was not greasy at all.
Instructions
Make a cake.
- To make an oil-free cake using a cake mix, just skip the oil, use the number of eggs and water (or use milk) listed on the box then add 3 tablespoons of instant pudding mix and 3 tablespoons of sour cream. This makes a really delicious cake!
- Bake a cake either in a 9x13 pan or two 8-inch round pans according to the package instructions.

Mix cake with frosting.
- Crumble the cake into a bowl or preferably into the bowl of a stand mixer (my favorite method for getting super smooth cake ball filling.)
- Add some frosting and mix using a stand mixer or your hands. The amount of frosting may vary depending on your cake. Start by adding ⅓ cup of frosting, then add more if desired. If you like your filling to be really gooey you can add up to 16 ounces of frosting.
You don't have to dip these so it won't matter if the cake ball filling is soft. That's one of the benefits of this method of making cake balls.
- If using a stand mixer to combine the frosting and cake, beat on medium speed until well blended and smooth. Your cake ball filling will be really smooth and creamy!
- If mixing by hand, use your hands to blend the cake and frosting together. This will help you achieve a better texture.
You'll notice in the video below that I only crumbled one cake and added a few tablespoons of frosting. This recipe will make about 48 cakesicles with ½ ounce of filling in each. I didn't need that many, so I used one of my 8-inch round cakes for another purpose. The picture above shows the full amount of frosting and a whole cake.
Create a chocolate shell.
You can use melted and tempered pure chocolate or melted compound chocolate (confectionery coating). I've shared detailed information regarding the differences between the two on my Chocolate Making Tips page but here's a short recap.
I'm going to use white chocolate to make my cakesicles, but you can use dark or milk chocolate if you prefer.
What type of chocolate to use?
Pure White Chocolate
- Pure white chocolate made with cocoa butter has a wonderful flavor and creamy texture and tastes amazing as a coating for cakesicles or cake balls.
- You can buy bars, blocks, chips, or wafers (also called callets).
- Pure white chocolate will need to be melted and then tempered in order for the white chocolate to set hard and be free of any fat or sugar bloom (white streaks or spots).
- Callebaut and Lindt make really nice white chocolate.
White Compound Chocolate (also known as Confectionery Coating, White Candy Melts, White Melting Candy, or White Almond Bark)
- Compound chocolates are similar to white chocolate but are made using a form of vegetable oil, typically palm kernel oil, instead of cocoa butter.
- If you like the flavor of the candy straight out of the package then you will also enjoy it as a coating on your cakesicles.
- I actually prefer the flavor of some white confectionery coating to pure white chocolate and it's so much easier to work with being it doesn't require tempering.
- I usually use Peter's IceCaps for my candy making and used it to make these cakesicles but you can use Merckens, Girardelli, or Wilton's Candy Melts. You can even purchase Nestle Premier White Morsels or white almond bark from the grocery store and use those. They are also compound chocolates (confectionery coating) and can simply be melted to make the candy shell around your cakesicles.
NOTES:
- If you want to learn more about working with compound chocolates be sure to check out my Chocolate Making Basics video lesson at TheSugarAcademy.com.
You can find white chocolate and white confectionery coating on Amazon (commission earned for sales at no extra cost to you)
 OliveNation Callebaut 25% W...Shop on Amazon
 Lindt CLASSIC RECIPE White ...Shop on Amazon
 ZUNKOM Peter's White Caps C...Shop on Amazon
 Nestle Premier White Chocol...Shop on Amazon
 Merckens Coating Melting Wa...Shop on Amazon
 Ghirardelli Chocolate White...Shop on Amazon
  Popsicle Molds Set of 3, 12...Shop on Amazon
  Ouddy Life Popsicle Molds S...Shop on Amazon
 How to melt confectionery coating?
You need to heat your confectionery coating so that it registers between 100° and 120° Fahrenheit. If you get it too hot, it will thicken and may burn.
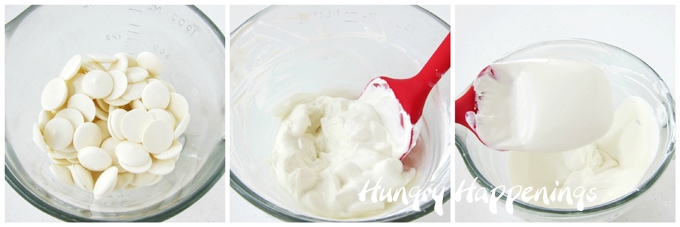
- Pour your compound chocolates (confectionery coating/candy melts) wafers into a microwave-safe bowl.
- Heat on high power for 30-second increments, stirring after each, until about 75% melted.
- Then let the candy rest for 3 minutes before stirring until melted.
- It's best to allow the residual heat of the melted candy to melt the remaining wafers so that the candy does not get too hot.
How to temper pure chocolate?
- Chop ¾ of your white chocolate into really fine pieces if using bars or blocks.
- Heat the chopped white chocolate in the microwave at 50% power for 15-second increments, stirring after each, and allowing the chocolate to rest for a minute, then stirring again.
- Heat until about 75% of the white chocolate is melted.
- Remove and continue to stir until all the chocolate is melted.
- Check the temperature of the chocolate.
- If it hasn't gone above 88-89 degrees Fahrenheit then your chocolate will still be in temper and it's ready to use and you can skip the rest of these steps.
- If it has gone over 88-89 degrees, then you'll need to continue to heat the chocolate until the temperature reaches 110 degrees Fahrenheit.
- Then stir in the remaining chunk of white chocolate and stir continuously until the chocolate cools to 88 degrees F.
- Remove the chocolate chunk and test the temper of the chocolate by dipping the tip of a knife into the melted chocolate and setting it on your counter. If the chocolate hardens within a few minutes and is shiny the chocolate is tempered and ready to work with.
- If needed you can return the chocolate to the microwave and heat at 50% power for 5 seconds to keep it warm.
NOTE:
- If you simply melt pure white chocolate and use it to create the outer shell of your cakesicles the white chocolate will not set up hard, may be difficult to remove from the mold, and may bloom a day or so afterward, leaving streaks and spots on the exterior of the cakesicle.
- If you are really interested in learning more about tempering chocolate, be sure to check out my Chocolate Making Basics video lesson.
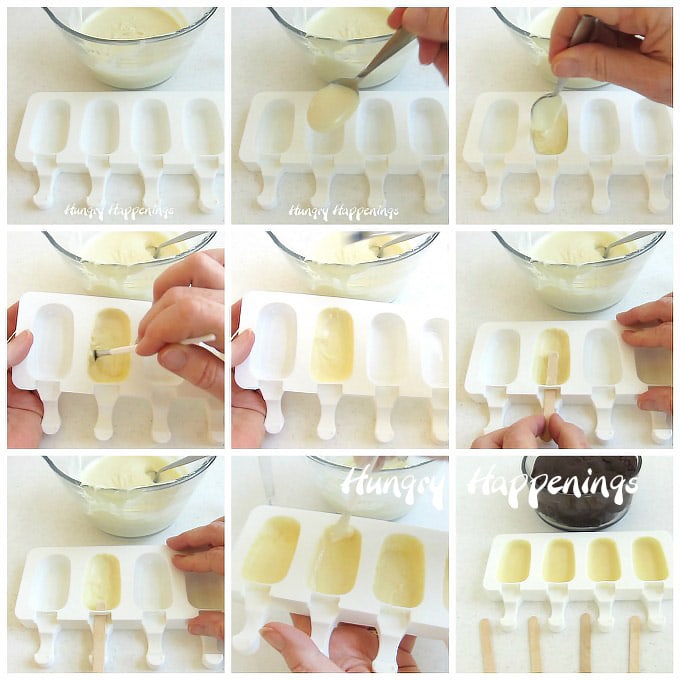
Paint White Chocolate Into Popsicle Molds
You will need some silicone popsicle molds to make your cakesicles. You can find molds that have popsicle cavities that are 1 ½ - 2 inches wide, 2 ½ - 3 ½ inches long, and ½ - 1 inch deep.
- I used a 4-cavity silicone popsicle mold to create my cakesicles.
- I love the size of this mold. The pops are 1 ½ x 2 ½ x ½ inch which is a great size. It's about twice as big as a typical cake pop. I've always thought cake pops were a bit too small. These treats are perfect!
The quantities listed below are for this particular popsicle mold. If you use a different-sized mold then your quantities will change.
- Spoon 1 tablespoonful of white chocolate or white confectionery coating into one cavity in the popsicle mold.
- Brush the chocolate up the sides of the mold.
- Immediately, while the chocolate is still wet, insert a popsicle stick, then remove it. This will keep the hole for the popsicle stick free of white chocolate. You might want to do this twice just to ensure none of the wet chocolate covers the hole.
- Repeat, creating all the candy shells in the 4-cavity mold.*
- Pop the mold into the refrigerator if using pure white chocolate or into the freezer if using confectionery coating.
- Let the candy shell chill for 3-5 minutes, just until hardened.
- Remove and allow the mold to sit at room temperature for 10 minutes.
- Then paint a second layer of white chocolate just around the edges of each popsicle cavity.
- Chill for about 2 minutes just until the chocolate hardens.
*If using confectionery coating and painting into a larger, 10-cavity silicone popsicle mold just paint 5 of the cavities, then chill, then repeat with the remaining cavities. If your candy dries at room temperature it may streak.
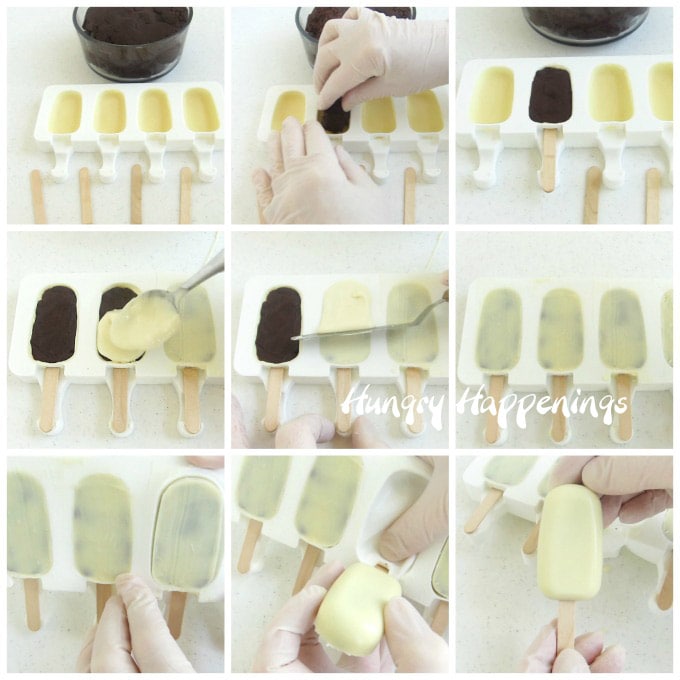
Fill the chocolate shell.
- Pinch off a tablespoonful (½ ounce) of cake ball filling and press it into the candy shell, leaving about 1/16 of an inch space on top to add more white chocolate.
- Insert the popsicle stick.
- Make sure the cake ball filling is still touching the candy shell in all places. You don't want any big gaps to fill up with chocolate.
- Spoon about 1 teaspoon of white chocolate over the filling then spread it into a thin layer.
- For a nice flat surface, scrape off any excess chocolate using an offset metal spatula.
- Pop the cakesicles into the refrigerator (pure white chocolate) or into the freezer (for white confectionery coating) for 3-5 minutes until the chocolate hardens.
NOTE: You may see some of the darker chocolate cake through the white chocolate on top, but as long as the candy is at least 1/16 of an inch thick over the top of the filling, the cake filling won't come through. If you scrape, and you actually see cake ball filling sticking through, then cover it again, and just leave it a bit thicker on top.
Un-mold Cakesicles
- Press the pops out of the silicone mold.
- Use a sharp thin knife to remove any excess chocolate around the outer edges of the cakesicles after they have come to room temperature. If you try to shave off bits of cold chocolate, the pieces will stick to the outer shell of the cakesicles.
Tips
The shelf life of a cakesicle is 7-10 days if using fresh cake. Count the days based on when your cake was baked. If you use fresh frosting made with butter, you might want to consume them within 3-5 days.
NOTE: Mold will develop on the filling if you keep them longer than that and the problem is that you won't notice the mold until you bite into your cakesicle.
I know this from experience. Thankfully I cut into, instead of biting into, a 14-day-old cakesicle just to see what it looked like. When I saw the fuzzy white mold, I was so happy I used a knife instead of my teeth. Yuk!
Yes, but be aware that the white chocolate or white confectionery shell will attract moisture from the refrigerator and may become sticky or wet.
To store them in the chill box, wrap each pop well in plastic wrap then place them in zip-top bags. Then place them in a cardboard shipping box before placing them in the refrigerator. The box will wick up most of the moisture.
To thaw the cakesicles, remove the box and remove the zip-top bag. Allow the bag of cakesicles to sit, unopened for at least one hour to allow the cake pops to come to room temperature. This will keep them from cracking due to the temperature change.
Then remove and unwrap each cakesicle.
Yes, you may keep the cakesicles in the refrigerator for up to 2 weeks.
You may store your cakesicles in the freezer for up to 3 months.
There are so many ways to create festive-looking cakesicles and you can watch the video below to see how you can drizzle chocolate or colored candy melts over top. You can even add sprinkles.
I am so excited to show you how to make more elaborate cakesicles. Stop back soon to see more fun cakesicle designs.
If you love cake balls or cake pops be sure to check out these other recipes.
- Chocolate Cherry Bombs - chocolate cake balls with a maraschino cherry center
- Cake Ball Buckeyes - peanut butter cake balls dipped partially in dark chocolate to look like peanut butter fudge buckeyes
- Funfetti Cake Pops - white cake pops decorated with rainbow sprinkles
Printable Recipe
Popsicle-shaped cake pops that are fun to make for any occasion, and won't crack, leak, or fall off the stick.
- 1 baked 9-inch by 13-inch sheet cake (or two 8-inch round or square cakes)
- ⅓ cup frosting, plus more if desired
- 32 ounces melted and tempered white chocolate or melted white confectionery coating
-
Crumble the cake and blend it together with the frosting.
-
Add more frosting if desired until the cake ball filling has a nice chocolate truffle-style texture.
-
Spoon 1 tablespoonful of white chocolate into one popsicle cavity.
-
Paint it into a thin layer on the bottom and up the sides of the mold.
-
Immediately insert then remove a popsicle stick into the mold, to remove any white chocolate from that area.
-
Repeat creating 4 white chocolate shells in your popsicle mold.
-
Pop the mold into the refrigerator, if using pure white chocolate, and into the freezer if using confectionery coating (Candy Melts).
-
Chill for 3-5 minutes until the candy hardens.
-
Scoop out 1 tablespoonful of the cake ball filling and press it into the candy shell, leaving at least 1/16 of an inch of space at the top for the additional layer of chocolate.
-
Repeat filling all the popsicles.
-
Spoon about a teaspoon of white chocolate over top and spread it out thin.
-
Use an offset spatula to scrape off any excess white chocolate.
-
Repeat covering all the cakesicles.
-
Chill for about 2 minutes until the candy layer hardens.
-
Unmold the cakesicles and they are ready to serve.
- If you are using a cake mix, just skip adding the oil and use the number of eggs and water (or use milk) listed on the box then add 3 tablespoons of instant pudding mix and 3 tablespoons of sour cream. This makes a really delicious cake!
- I used Duncan Hines cake mixes so I added 3 whole eggs, 1 cup of milk, 3 tablespoons of the dry pudding mix, and 3 tablespoons sour cream.
- You can add the oil if you prefer. When making cakesicles the addition of the oil isn't too bad. For cake pops it can make the filling a bit greasy making balls difficult to dip.
This recipe was originally published on September 30, 2019.
- How to make peanut butter? - February 15, 2024
- OREO Penguins - December 20, 2023
- OREO Snowmen - December 20, 2023

Sophie
Thank you for the great recipe! So excited to try many different things. One question- could you store them in the fridge? Or do they need to stay in the refrigerator?
Beth
You are welcome, Sophie. It is best to store your cakesicles in a cool dry place in an airtight container. If it's too warm in your house then you might need to refrigerate them which is not ideal because the candy coating may develop condensation becoming sticky and wet. The best thing to do is wrap the cakesicles well in plastic wrap then put them in a zip-top bag and place that in a cardboard box and put it in the refrigerator. The cardboard will wick up most of the moisture from the refrigerator. When you bring the cakesicles out of the refrigerator, remove the zip-top bag but allow the cakesicles to sit, in the bag, on your counter for about one hour before opening and unwrapping. That will keep them from getting shocked by the temperature difference, which can cause cracks. I hope this helps! Enjoy your cakesicles.
Laura
Thanks so much for this tutorial! Are you just constantly reheating the candy melts as you make these? My bowls of candy melts firm up in the bowl while these are going back and forth from the freezer, and I have to keep sticking the bowl in the freezer.
Beth
You are so welcome, Laura. I have a two ways of keeping the candy melts melted for long periods of time.
My favorite method is to place jars of the melted candy coating in a water bath in an electric skillet. I've been doing this for almost 40 years and it works great. I can keep my candy melted all day long. You can see a tutorial on working with candy melts to paint lollipops using this method here - https://hungryhappenings.com/chocolate-making-tips/how-to-color-white-chocolate-paint-candy-molds/
Some people use a crockpot but a skillet is shallow and much easier to use.
You can also use chocolate warmers. Wilton makes a nice Melting Pot with a silicone bowl. My tip when using them is to keep them on LOW power. They can get a bit too hot on HIGH. You can find them on Amazon here (ad) - https://amzn.to/3ig3Y4f
If you don't use either of these methods then you will definitely be spending a lot of time reheating the candy especially if your home is cool.
María Elena Garza
Hi Beth,
Can you give me the amounts for pudding and sour cream for the cake mix?
Thank you!
Love the tutorial!❤️
Beth
Hi Marie,
I add 3 tablespoons of sour cream and 3 tablespoons of instant pudding mix to my cake mix. I typically use Duncan Hines chocolate mixes and Pillsbury White Cake mixes but I've used the same amounts using Betty Crocker Cake mixes too.
You can see my doctored cake mix recipe/video on my Easter Bunny Cake post here - https://hungryhappenings.com/easter-bunny-cake/
Nila cuadros
What kind of pudding do you use?
Thank you !
Beth
I typically use Hershey's White Chocolate Pudding Mix (for white cakesicles) or Hershey's Special Dark Pudding Mix (for chocolate cakesicles) but Jell-O Pudding or Godiva Pudding Mix work great too.
Kriste
I don’t see the measurements for the ingredients to make the cake?!? Where am I missing them?
Beth
I used a cake mix. I like to doctor my cake mixes by adding 3 tablespoons of sour cream and 3 tablespoons of instant pudding mix (vanilla or white chocolate for white cake and chocolate for chocolate cake.)
You can see my doctored cake mix recipe/video on my Easter Bunny Cake post here - https://hungryhappenings.com/easter-bunny-cake/
You can use any homemade cake if you prefer.
Jacqueline
Mrs Beth, excuse me. So I see you take out the oil. Mo oil then you used the cake mix add 3 eggs 3 table spoons of sour cream and 3 table spoons on instant pudding mix powder. How much water and how much milk so you add? I didn't even see water now that I'm thinking. Please I am a beginner teaching my babies.
Beth
Hi Jacqueline, If you are using a cake mix, just skip adding the oil and use the number of eggs and water (or use milk) listed on the box then add 3 tablespoons of instant pudding mix and 3 tablespoons of sour cream. This makes a really delicious cake!
I used Duncan Hines cake mixes so I added 3 whole eggs, 1 cup of milk, 3 tablespoons of the dry pudding mix, and 3 tablespoons sour cream.
You can add the oil if you prefer. When making cakesicles the addition of the oil isn't too bad. For cake pops it can make the filling a bit greasy making balls difficult to dip.
Have fun!
B. Kay
Hey! Was wondering if i could omit the pudding?
Beth
Yes, you can omit the pudding but I'd also reduce the sour cream to one tablespoon otherwise your cake might be a bit too dense. The pudding does add a nice amount of flavor and it enhances the texture.
Laura
Great tutorial! I have just discovered these and am so excited. Do you use regular popsicle sticks for them? Thank you!
Beth
Thanks, Laura. All of the molds I have purchased have come with short popsicle sticks. Regular popsicle sticks are a bit too long to fit in the molds.
Brine
What type of frosting do you use?
Beth
I like to use Wilton Decorator Icing. I enjoy the flavor and it's convenient. Any tub of frosting will work or you can use your favorite homemade frosting.
Jennifer
Very informative explanations. Love it.
How many cakescicles did this make?
Beth
The recipe makes 48 cakesicles. I'm glad you found the information helpful. Enjoy making your cakesicles.
Jennifer
Thank you! My molds I ordered say “each oval is about 3.6'' X 1.9'' x 0.5'' —is that bigger than yours? If so, Would u agree it’d make more like 36 or so?
Beth
I can only estimate on the number of cakesicles you'd get out of a larger mold but I think estimating 36 from one 9"X13" cake sounds pretty good.
Jill l Bragg
Hi there,
I was wondering if you could use these molds to make the filling with ice cream?
Beth
Yes, you definitely can use ice cream with these molds.
Arielle
Hello!
Would I be able to use anything besides white chocolate for a white coating? I hate the taste of white chocolate
Beth
Absolutely! You can use dark or milk chocolate as well, just be sure you temper the chocolate if you are using pure chocolate (made with cocoa butter). If you use cocoa Candy Melts, almond bark, Ghirardelli Melting Wafers, or any brand of confectionery coating (Merckens, Peter's, Guittard, etc.) you will simply melt and use. You can read all about the differences between types of chocolates here - https://hungryhappenings.com/chocolate-making-tips/
Jackie Burton
My molds are arriving today. Super excited. I have never made cake pops or cakesicles- before. So I will be going through your tutorial again, when I am ready to make them. Wish me luck !
Beth
I hope you have fun making your first batch of cake pops. Let me know if you have any questions!
Lauren Morse
Hi there! I’m new to cakesicles and I love your tutorials! Quick question: is there a reason you paint the chocolate into the molds first rather than press the cake mixture into the mold and then dipping it in chocolate?
Beth
Hi Lauren,
By painting the chocolate into the mold you get a nice smooth surface plus you eliminate the most problematic issues when creating cake balls which include cracking, sticks falling out, and oil seeping. Many people freeze their cake balls before dipping them into the chocolate which causes cracking. The cake ball mixture can be room temperature when pressed into the mold so there won't' be a big temperature variation. The flat popsicle stick is held in place by the candy coating so it won't fall out like the round sticks do. And the layer of chocolate you paint into the molds is thick enough that oils won't seep through it.
I hope you enjoy making cakesicles!
Ashley Lee
Thank you so much for this! I have been following your technique for about a month and I’m loving it but I keep finding that my cakesicles are getting cracks in them. I use Crisco or Paramount Crystals to thin them for the right consistency of my candy melts. What am I doing wrong to keep causing this? Should my candy melts be allowed to come to room temperature before I insert the cake batter? Any help would be greatly appreciated.
Beth
Hi Ashley, I'm glad the technique is working for you for the most part. I highly recommend using Paramount Crystals as apposed to Crisco for thinning out the candy melts. The candy coating will harden properly when you use Paramount Crystals. Crisco can make the coating too soft.
Cracking can happen for a few reasons. If your candy coating is too thin, when you push the cake ball mixture into it you can crack the coating without even realizing it. If you freeze the candy shell for too long it can crack so freeze just long enough for the candy shell to harden. Also, temperature does matter. It's best to allow the candy shell to sit at room temperature for a while before filling it so that the top layer of candy coating can adhere to the bottom part. If your candy shell is super cold and you pour warm chocolate over top that extreme temperature variation can cause cracking.
I hope this helps! Have fun making lots of cakesicles.
Stephanie
Hello!
I am anxious to try make these recipe. If I want to make strawberry ones, would I follow the same recipe? Sour cream, pudding etc.
Thanks!
Beth
Yes, Stephanie, this doctored cake mix recipe will work for any flavor of cake mix. If you can find strawberry pudding mix, you can use that, if not, then just use white chocolate or vanilla pudding mix. Enjoy!
Kirsten
This is by far the best cakesicle tutorial I have seen - thank you! With that being said I have tried it twice with not quite perfect results YET! Maybe you can help me problem solve. At the very end, when I am taking the cakesicle out of the mold, the popsicle stick often falls out. It doesn’t seem to fit snug, nor is the melted chocolate keeping it secure in the cake part. Any thoughts? My other problem is sometimes I see a crack along the top edge of the shell. It seems to be the part where the top coat of chocolate should bond/connect/adhere to the first/inner coating step of chocolate. Thoughts? I am not giving up yet as these things are just adorable!!
Beth
Thank you, Kirsten. I'm glad you found my instructions helpful. To address your issue with the sticks falling out, it sounds like you need to pack the cake ball mixture a bit more firmly into the mold. Be sure, if there is space under the stick that you fill that up. Each mold I have used is a bit different. If you go and watch the video I made for my Unicorn Cakesicles you will see that I push cake ball filling under the stick. When I made the plain cakesicles, the stick touched the chocolate so it wasn't really necessary to do that, but I have used other molds where there was room under the stick and I did need to add filling under them. You will also notice in the video that after I insert the stick I brush more chocolate around the hole where the stick is inserted. Be sure to make that a little thicker the next time you make cakesicles. You can also brush some of the chocolate onto the stick around the hole. That should also help. If all of this fails, try brushing more chocolate onto the top of the stick then immediately pack the cake fall filling over the wet chocolate into the mold.
In regards to the issue where the cakesicle is cracking at the seam, it sounds like the chocolate around the edges is too thin. I put two coats of chocolate mine. Be sure to brush the chocolate up around the top edge. If you are using candy melts and they are really thin and the chocolate keeps sinking down into the mold, then pop the mold into the freezer for a few minutes, then pull it out and add the second layer of chocolate right away. That way it will begin to harden immediately and won't fall down the sides of the mold. It won't look pretty, but it will be on the inside of your cakesicle so no one will ever see it.
I hope this helps. Be sure to let me know how your next batch turns out. Have fun!
Mari
If we need cakesicle for a Friday how long in advance can we make them and if we use cream cheese frosting to bind the cake together do we have to refrigerate after dipping them
Beth
Typically a cake frosted with cream cheese frosting can be left at room temperature overnight but otherwise should be refrigerated. If the frosting is mixed into the cake ball mixture then sealed in chocolate it would be alright if left at room temperature for a little over a day, but it's safest if refrigerated. If you plan to refrigerate your cakesicles made using cream cheese frosting, you could make them up to 4 days ahead.
Venus Stinson
I been trying to perfect the cakesicles but my chocolate sometimes stick to the side of the mold when I'm removing the cakesicles. Please help
Beth
To help you resolve this problem I have a few questions.
Are you using pure chocolate (made with cocoa butter) and are you tempering that chocolate (melting it to 115 degrees F then seeding it with more chocolate and stirring it until it cools down to 90-91 degrees F) before painting it into your molds? If your chocolate is not in temper then it will not release from the mold. It will be soft and will stick to the sides of the mold. If it is tempered properly then the chocolate will harden, will shrink away from the sides of the mold, and will easily release.
Or are you using Candy Melts (also knowns as compound chocolate, confectionery coating, almond bark, or melting wafers all of which do NOT contain cocoa butter, but rather a vegetable fat like palm kernel oil)? If this is the case, then you have either not allowed the candy melts to dry long enough or you've left them in the freezer for too long which gives them time to develop condensation and get sticky.
Mei
Hello Beth,
Thank you for this great tutorial. The cakesicle is such a cute idea. I just have one question...is the mold heat resistant, like can I use it to bake the cake using the mold and then dip the baked cake in chocolate?
Beth
Thanks! The molds do say they are heat resistant and you can typically bake in silicone molds, but I have not tried it with these popsicle molds. When you buy the molds, look for BPA free heat resistant molds. If you give it a try, I'd love to hear how they turn out.
Alison
Hi,
Great tutorial. Would love to see the video of decorating the cakesicles as I'm not to good with drizzling.
Thanks
Beth
Hi Alison, the cakesicle video tutorial is posted just above the recipe. Were you not able to view it?
Karen @ Sugartown Sweets
I love that you have given us this fun alternative to cake pops! I used to make them but I did struggle with the cracking and falling off the stick! These are perfect and look so yummy!
Beth
Thanks Karen. I've struggled with cake pops too and I love this alternative.
Rachel Quesada
Another brilliant idea!!
Beth
Thanks, Rachel!
The Partiologist
I love the cakesicle idea, seems so much sturdier than a cake pop and not to mention the cute factor is a 10!
Beth
Yes, cakesicles are definitely sturdier than a cake pop and they look so clean and neat. Plus they won't fall off the stick!
Ayesha
I tried the cakesicle and OMG, couldn't get enough of them. I am planning on storing them in the fridge. How long will they last after I take them out from the fridge at room temperature.
Beth
I'm so glad you enjoyed the cakesicles. They should keep for several days at room temperature depending on the type of frosting you use. If you use store-bought frosting they should keep a few days longer than those made with homemade frosting.
Ayesha
I used store bought frosting and made these cakesicles. I followed your interactions and wrapped the undecorated cakesicles individually and kept them in an Amazon box in the fridge for about 10days. Not a single cakesicles cracked after defrosting them for almost 2 hrs at room temperature 🥰. I did all the candy melt floral decorations after the cakesicles defrosted. Thank you soo much for including such a helpful storage hint with the recipe 😃
Beth
I am so happy to hear your cakesicles turned out so well and I am glad that you found my instructions and tips to be helpful. I hope everyone enjoys their treats.