Learn how to make chocolate at home using these chocolate-making tips.
Once you learn the basics, you'll be able to make delicious homemade chocolates that look amazing too.
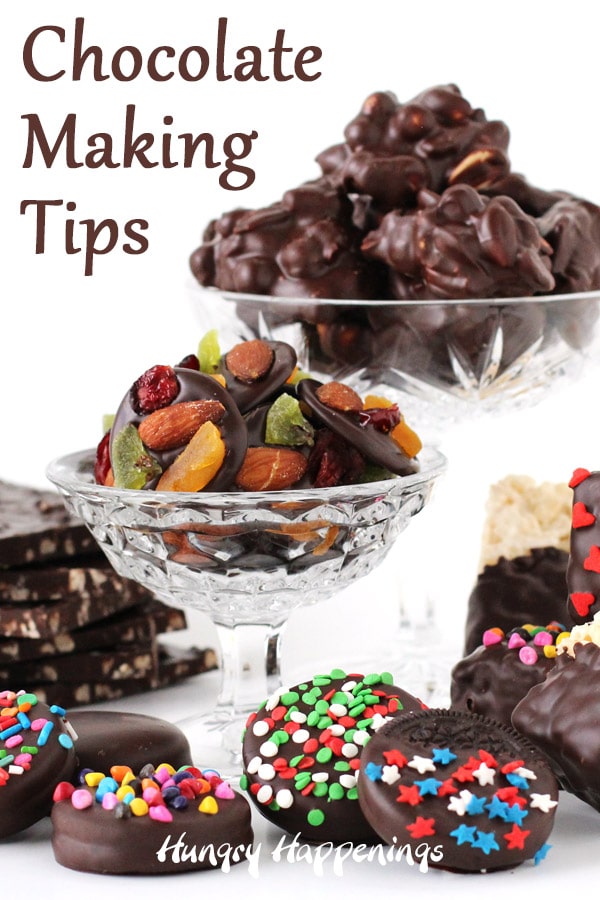
Thanks for stopping by to learn how to make homemade chocolates. I have been a chocolatier for over 30 years and am so excited to share these chocolate-making tips with you. I have been blogging since 2010 and have shared hundreds of chocolate recipes here on this blog.
Once you learn the basics, you can create amazing chocolate candies and desserts to share with family and friends.
If you prefer to learn visually, check out my Chocolate Making Course video series from The Sugar Academy.
In this tutorial you will learn:
- the difference between pure chocolate and compound chocolate
- how to melt and temper pure chocolate
- how to melt compound chocolate (also known as confectionery coating, candy melts,
almond bark, or melting wafers)
- how to melt compound chocolate (also known as confectionery coating, candy melts,
See these other tutorials for more information:
- how to color white chocolate and white confectionery coating
- how to paint candy molds using colored chocolate
- how to make and use modeling chocolate (candy clay)
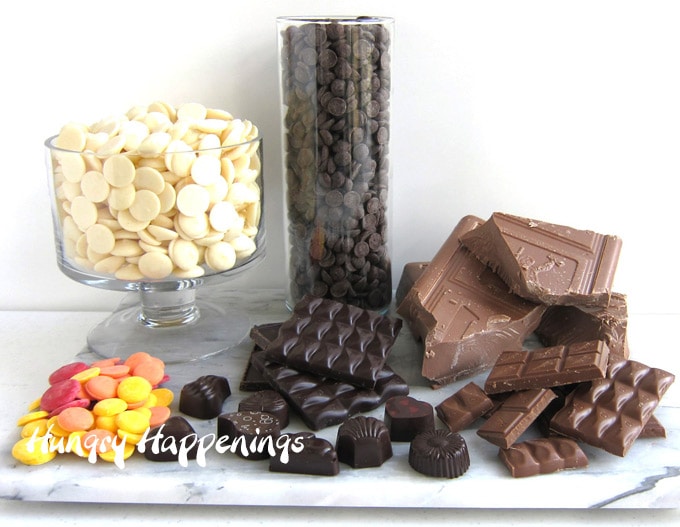
Let's start with the basics.
TYPES OF CHOCOLATE
There are several different types of chocolate that are available to the home cook for use in candy making:
Pure chocolate (real chocolate)
- contain cocoa butter
- has a luxuriously creamy texture and rich flavor
- must be properly tempered in order to set up correctly
- can be purchased in bars, blocks, wafers, pistoles (bean-shaped wafers), callets (slightly smaller wafers), and chips
- is available as:
- unsweetened (no sugar added)
- bittersweet (small amount of sugar added)
- semi-sweet (more sugar added)
- milk chocolate (milk powder and sugar added)
- white chocolate which can also contain cocoa butter but it doesn't contain any cocoa liquor, so technically it is not considered chocolate (But that is what it is called, so that's what we'll call it too!)
You can use pure chocolate to make:
- Hot Chocolate Bombs
- Artisan Chocolates decorated with Chocolate Transfer Sheets
- Chocolate Truffles
- Chocolate Cups filled with Chocolate Mousse
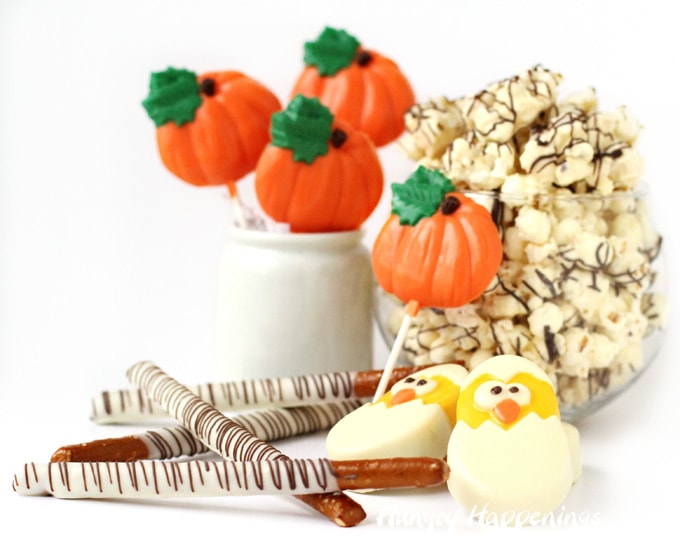
Compound Chocolate (also known as confectionery coating, Candy Melts, almond bark, or melting wafers)
- contain vegetable oil, typically palm kernel oil
- will melt and set up easily with little effort
- is not as creamy or as rich as pure chocolate, but it’s easy to use and has a very pleasant flavor
- is available in dark, light, white, and flavors like peanut butter, mint, and butterscotch
- can be colored using candy coloring but is also available in colored wafers
- is typically less expensive than pure chocolate
NOTE about compound chocolate and wax
- The melting point of compound chocolate is higher than that of pure chocolate which means that it will take longer to melt on your tongue which can give it a waxy feel in your mouth.
- However, there is no wax in compound chocolate, candy melts, or almond bark, as some people believe. What you are feeling on your tongue is palm kernel oil, not wax.
- Being cocoa butter melts at a lower temperature and melts quickly as soon as it hits your tongue, you will not feel this waxy sensation when eating pure chocolate.
You can use compound chocolate to make:
- White Chocolate Popcorn and a White Chocolate Popcorn Bowl
- Hand-painted Easter chocolates and lollipops
- Pretzel Pops
- Sprinkle Coated Chocolate Cups filled with ice cream or candy
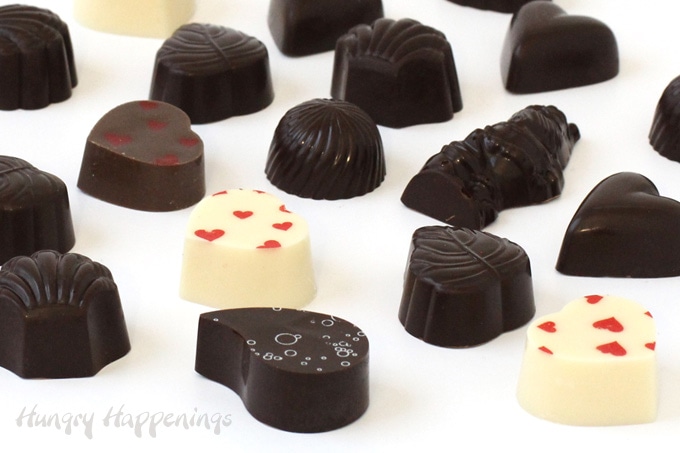
Buying chocolate for candy making.
I personally use Peters Burgundy (semi-sweet), Peter's Ultra (milk chocolate), and Callebaut dark, milk, and white chocolate callets for my chocolate making, but there are many other delicious brands of chocolate.
Choose the chocolate you like to eat. Everyone enjoys different flavors so you need to find your favorite.
my favorite pure chocolate brands
Some brands of chocolate I recommend using are available on Amazon.com.
I earn a small commission when you use the links below at NO extra cost to you.
 Peter's Gourmet Burgundy Di...Shop on Amazon
  Peter’s Ultra 125 Milk Ch...Shop on Amazon
  Callebaut No 811 Finest Bel...Shop on Amazon
  Belgian Milk Chocolate Baki...Shop on Amazon
  Callebaut W2 28% White Choc...Shop on Amazon
popular brands of compound chocolate
I have created hundreds of recipes here on Hungry Happenings using compound chocolates (candy melts). I personally prefer the taste of Peter's Eastchester (dark), Westchester (milk), and Whitecaps, but they are not readily available unless you live near a cake & candy decorating store, so I often use Wilton Candy Melts for my projects.
You can find Wilton Candy Melts at most craft stores, at discount stores like Walmart, and at some grocery stores. You can also find Ghirardelli Melting Wafers and CandiQuik (or other brands of almond bark) at many grocery stores.
 Wilton Red Candy Melts® Ca...Shop on Amazon
  Merkens Super White 1 lb Ba...Shop on Amazon
  Light Blue Vanilla Flavored...Shop on Amazon
  Log House CandiQuik Candy C...Shop on Amazon
  Ghirardelli Chocolate Melti...Shop on Amazon
Store chocolates in a cool dry place away from direct sunlight. Pure chocolates have a shelf life of at least 18 months from the date of manufacturing and confectionery coating can last up to 12 months if stored properly.
Once you open the package, seal it well or place the chocolate in an airtight container.
I don't suggest refrigerating or freezing chocolate.
If chocolate or confectionery coating is kept in the refrigerator or freezer for too long it will become wet and sticky and might develop white spots.
If you do freeze or refrigerate your chocolates, you need to wrap them well and keep them wrapped as they thaw to avoid excessive condensation.
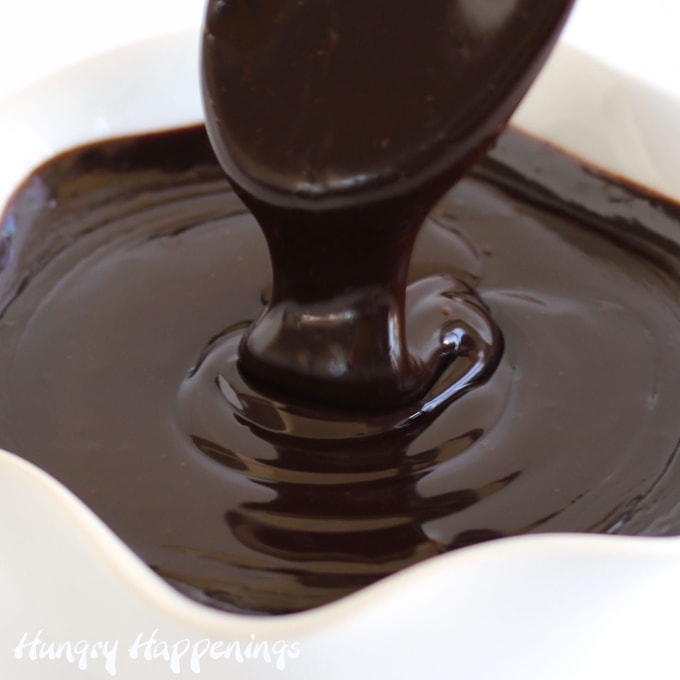
Learn how to melt chocolate.
First, you need to get your chocolate into small uniform-size pieces.
How to chop chocolate?
- If you are using a large block of chocolate or a candy bar, chop your chocolate into small uniform pieces. The best way to do this is to use a serrated knife to shave off small bits of chocolate.
- Place the knife blade on the edge of the chocolate block, and press down on the top of the knife while shaving off a small amount of chocolate. Then just chop any larger bits before using.
- You can also use a food processor to chop your chocolate. Add small chunks of chocolate to the bowl of the food processor and pulse until you have fine crumbs
- You can also grate the chocolate using a grating wheel in your food processor.
Melting chocolate in a double boiler.

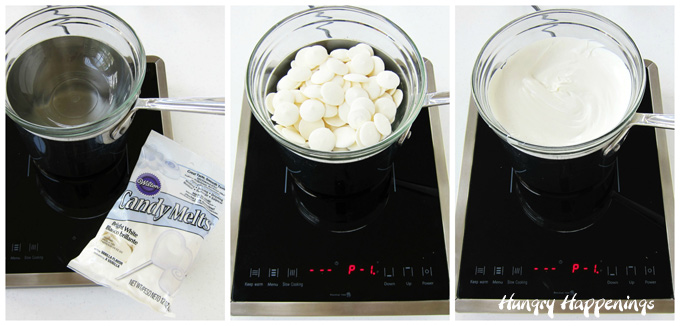
- Heat 1” of water over low heat in a saucepan.
- Place a bowl over the saucepan, being sure the bottom doesn't touch the water.
- Put chopped chocolate, wafers, or chips in the bowl and stir occasionally until melted.
- This process is slow. Do not raise the temperature to speed things up. If you do, you can burn your chocolate.
It is very important that you do not allow any water to come in contact with the chocolate. Chocolate mixed with a drop or a few drops of water will seize (stiffen or harden).
If this happens your only option is to add more liquid in order to get the chocolate smooth again. However, you can not use this thinned batch of chocolate for tempering or dipping as it will never harden properly.
All is not lost as you can turn it into a delicious chocolate ganache or use it for baking.
Melting chocolate in the microwave.
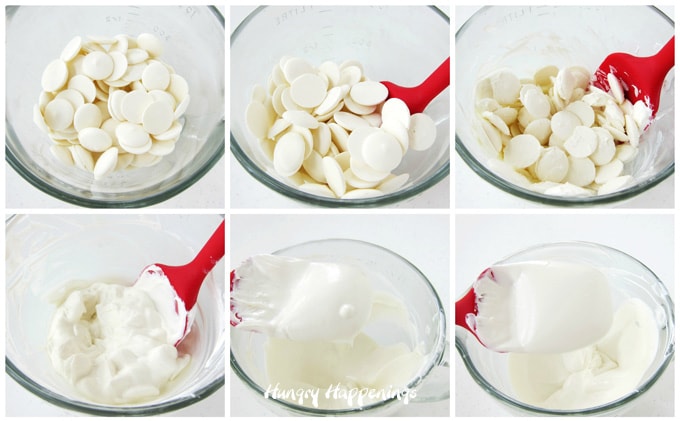
Every microwave is different so this is just a guideline, but it is safest to go slow and stir often. I always use high power for short bursts of time.
The amount of time needed to melt your chocolate will depend on how much chocolate you need to melt. The instructions below are based on 16 ounces of chocolate or confectionery coating wafers.
- Pour finely chopped chocolate, Candy Melt wafers, chocolate callets, or chocolate chips into a microwave-safe bowl.
- Heat on high power for 30 seconds, remove from microwave and stir. Your chocolate won't look melted much at all at this point, but if you don't stir it, you may burn the chocolate in the center of the bowl.
- Return to the microwave and heat for 30 seconds. At this point, the chocolate will look only slightly melted around the edges.
- Continue to stir and the chunks will indeed start to become liquid.
- Continue to heat for 30 seconds. Now your chocolate will look more liquid, but you will have chunks remaining.
- Allow the chocolate to sit for 1-2 minutes, preferably in the microwave, then stir vigorously and the heat from the melted chocolate will melt the chunks.
- If, after stirring for a while you still have chunks of chocolate remaining, heat for 10-15 second intervals, stirring in between each until melted.
- Do not rush this process. Chocolate burns easily. If you do burn the chocolate, throw it away and start over in a clean bowl. To melt more than 16 ounces, you can increase your times by 10-15 seconds per interval. For 2 lbs. (45 seconds, 35, 25, 10). For 3 lbs. (60 seconds, 45, 30, 20). If your microwave is less powerful, increase the times, but go slowly.
Melting candy melts in a melting pot.
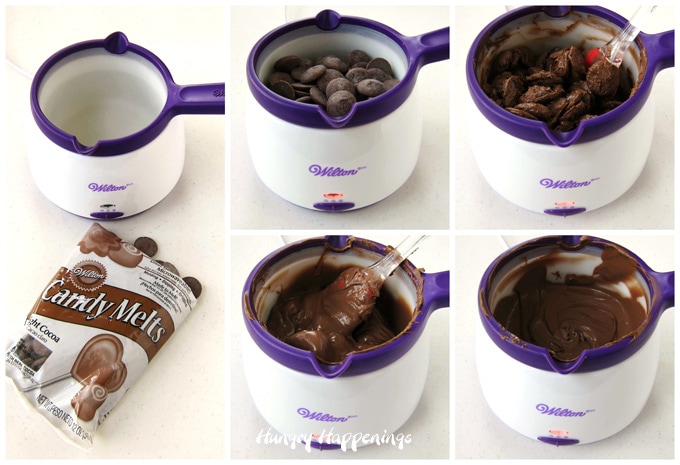
- Fill the silicone bowl in a Wilton Melting Pot with candy melts.
- Turn on low heat.
- Stir often, until the chocolate melts.
- If you use the high heat setting to melt the chocolate, be sure to stir it more frequently, then turn it down to low once the chocolate is melted.
- You can keep compound chocolate (candy melts) melted for hours using a melter.
Melting candy melts using an electric skillet.
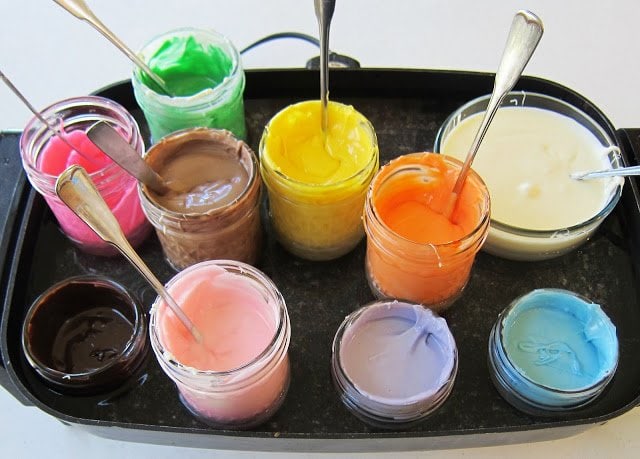
- Fill glass jars or coffee mugs with candy melts wafers.
- Set the jars into an electric skillet.
- Fill the skillet with an inch or two of hot water.
- Turn the skillet to the lowest setting. My skillet has a warm setting which works great.
- Allow the water to warm up and the candy melts to melt, stirring often.
- You can also melt the candy melts using the microwave then place the jars in the water bath in the skillet to keep them melted all day. Be sure to replenish the water as it evaporates.
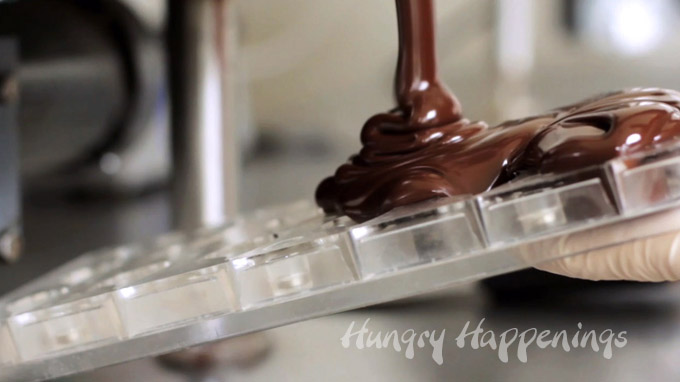
How to Temper Pure Chocolate?
Pure chocolate contains cocoa butter and when melted, the crystals in the cocoa butter lose their structure. In order to get that crystal structure back in alignment, you have to heat and cool the chocolate properly, so that the chocolate sets up properly.
Any chocolate that you purchase from the store that contains cocoa butter is already in temper but once you melt it, it can go out of temper if it gets too hot.
What does tempering mean?
Tempering refers to a process of heating and cooling pure chocolate to ensure that the cocoa butter in the chocolate hardens in a uniform crystal structure. When you buy pure chocolate, it is in temper. When you melt the chocolate to reuse it, you take it out of temper and need to bring it back.
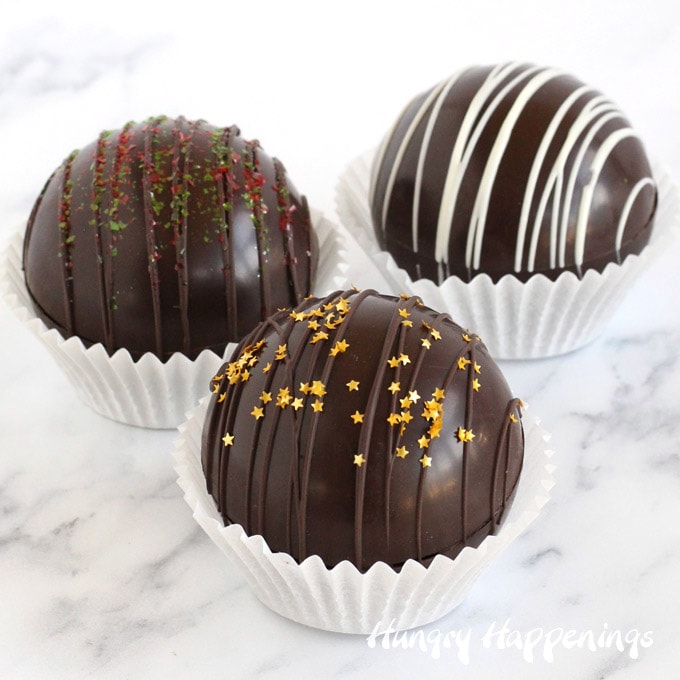
Chocolate that is tempered has:
- a smooth texture
- a glossy shine (like the hot chocolate bombs pictured above)
- snaps when broken
Chocolate that is not tempered correctly might be:
- cloudy
- gray
- sticky
- soft
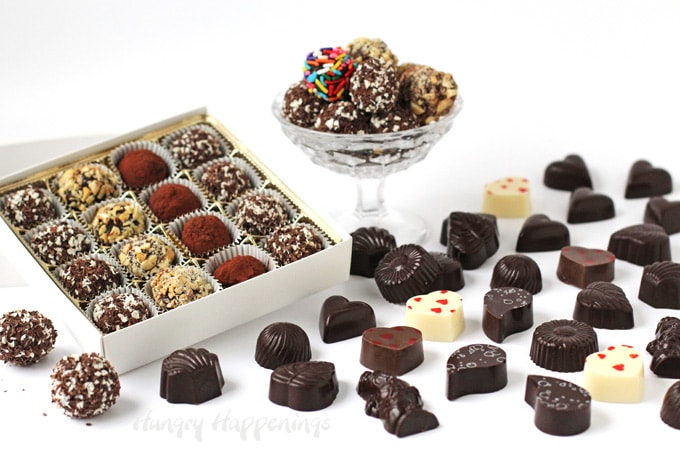
Learn to make these gorgeous truffles in my Chocolate Making Course
Easy Microwave Chocolate Tempering
If you are very careful, you can melt pure chocolate without taking it out of temper.
- Finely chop or grate your chocolate and place it in a microwave-safe bowl.
- Heat on high for 15 seconds, then remove the bowl and stir. Note: if using more than 12 ounces, you can start by heating it for 30 seconds.
- Then heat on high for 10 to 15-second increments, stirring after each, until melted. As you get close to melting, cut the heat to 50% power or the time to 5 seconds.
- When using this tempering method you want to be very careful not to get your chocolate too hot. You want the melted chocolate to be between:
- 88° F - 91° F (31° C - 32° C) for Dark Chocolate
- 86° F - 88° (30° C - 31° C) for Milk Chocolate
- 84° F - 86° (29° C - 30° C) for White Chocolate
- If the temperature of your chocolate goes above these numbers and you still have pieces of chocolate remaining in the bowl, continue to stir and allow that chocolate to melt. Check the temperature once all of the chocolate melts. If it is within the ranges listed above, your chocolate should be in temper.
- If the temperature of the melted chocolate is above the range, then you must use another method to temper the chocolate. I recommend the seeding method listed below.
Seeding Method of Tempering Chocolate
- Chop your chocolate into really fine pieces.
- Divide the chocolate and reserve 25% (¼) of it to seed the melted chocolate.
- Heat 74% (¾) of the chopped chocolate in the microwave on high power for 15 to 30-second increments, stirring after each.
- The heat in the bowl of melted chocolate will continue to help melt the solid pieces so as you get close to having all your chocolate melted, allow the chocolate to rest in the bowl for a minute before stirring.
- Heat until the chocolate melts and reaches:
- 115°-120° F (46°-49° degrees C) for dark chocolate
- 110°-115° degrees F (43°-46° C) for milk chocolate
- 110° F (43° C) for white chocolate
- Add about half of the reserved chocolate to the melted chocolate and stir until melted.
- Check the temperature of the chocolate. The goal is the get the chocolate to:
- 88° F - 90° F (31° C - 32° C) for Dark Chocolate
- 86° F - 88° (30° C - 31° C) for Milk Chocolate
- 84° F - 86° (29° C - 30° C) for White Chocolate
- Note that these temperatures can vary depending on the brand of chocolate.
- Continue to add a small amount of the remaining chocolate into the melted chocolate and stir until either all of the chocolate melts or your chocolate reaches the desired temperature.
- It’s best to stop at the upper end of the temperature range because the chocolate will continue to cool slightly as you are checking the temper.
- To check the temper, dip the end of a metal spatula or knife into the chocolate and allow all the excess chocolate to drip off. You want a really thin coating of chocolate on the spatula. If the chocolate dries hard and looks shiny, within 3-5 minutes, then the chocolate is in temper.
VIDEO
Watch the video to see how to temper chocolate using the seeding method.
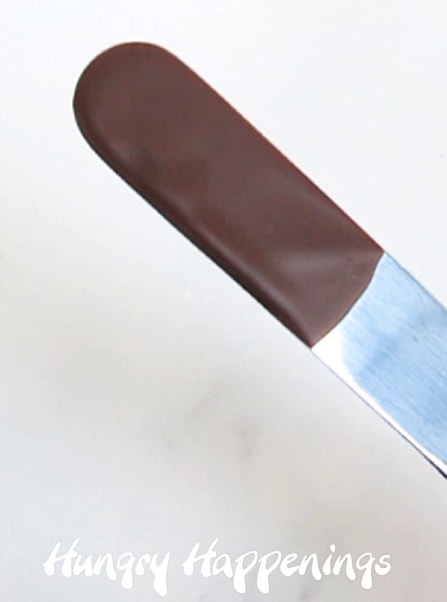
How to know if chocolate is in temper?
- Test the temper of the chocolate by dipping a metal spatula, spoon, or knife into the chocolate.
- Shake it, to remove the excess chocolate then set it aside at room temperature.
- In 3-5 minutes, the chocolate should harden and look shiny.
- Alternatively, you can spread a small amount of chocolate on a piece of parchment paper and allow it to air dry for 3-5 minutes. It should peel off the paper and snap when broken.
- While you are waiting, be sure to stir your bowl of chocolate, to make sure it doesn't cool too much around the edge.
- If your test chocolate has hardened and looks shiny be sure to check the temperature of your bowl of chocolate before proceeding to make your chocolate balls.
- The chocolate will have cooled slightly and will need to be warmed slightly!
- Heat it in the microwave for about 5 seconds then remove and stir and check the temperature. Do not let it go above temper temperature (88° milk or 84° white). If it does, you have to start this whole process over again.
- You are now ready to fill your molds with chocolate.
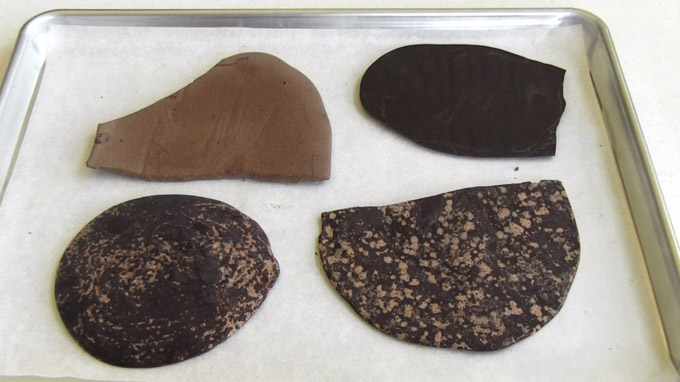
Can I skip tempering pure chocolate?
- NO. Do not skip tempering pure chocolate!
- Chocolate that is not tempered properly will be soft, streaky, spotty, or even chalky. The chocolate that is pictured above is all out of temper.
- Chocolate that is not properly tempered will not harden and retract from a mold.
How to keep chocolate in temper?
- To keep the chocolate in temper, you can heat the chocolate in the microwave for 3-5 seconds which is just long enough to warm it slightly.
- Or you can use a hot blow dryer, to heat up the bowl of chocolate, by blowing the hot air on the outside of the bowl.
- Keep an eye on the temperature of the chocolate. You don't want it to go above the temperatures listed above. If it does, then you'll need to start the tempering process again by raising the temperature to 115° F (46° C), seeing it with more tempered chocolate, and lowering the temperature to those listed above.
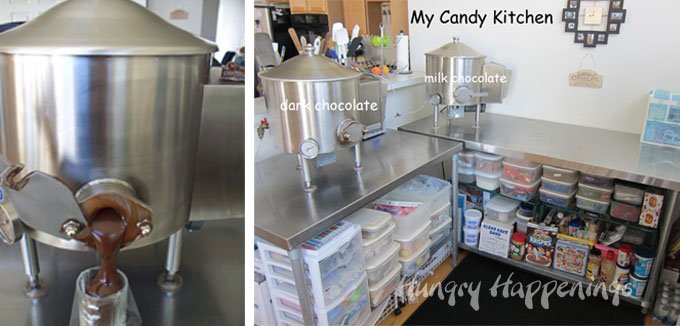
Chocolate Tempering Machines
If you are serious about making a lot of chocolate, you might want to consider buying some chocolate tempering machines.
I own two Savage Brothers melters and love them. I don't have to hand temper my chocolates. The machines do the work for me. It's great. I leave melted chocolate in my machines 365 days a year. I temper it as needed.
Each of my machines holds 50 pounds of chocolate, which is the smallest Savage Bros. makes, but other companies make smaller tabletop tempering machines. You can even get a machine that will temper just one or two pounds of chocolate at a time.
 ChocoVision Revolation Delt...Shop on Amazon
  ChocoVision Revolation 2 Ch...Shop on Amazon
  CHOCOLATE TEMPERING MACHINEShop on Amazon
  ChocoVision Mini Rev Chocol...Shop on Amazon
I prefer to use pure (real) chocolate to make my confections because the flavor is far superior to any other chocolate product.
I have made some really fun holiday treats using pure chocolate and shared the recipes and tutorials here on Hungry Happenings.

Using pure chocolate, you can make:
Buckeye Bears • Chocolate Cauldrons • Chocolate Heart Boxes • Chocolate Pilgrim Hats • Chocolate Penguin Truffles

Using Confectionery Coating, you can make lollipops, cake pops, filled candies, dipped cookies, Rice Krispie treats, and more including:
Chocolate Bunny Silhouettes, Candy Filled Chicks, Cake Ball Brains, Snowman Rice Krispies Treats, Animal Print Mickey Pops
If you prefer learning via video then be sure to check out my
Chocolate Making Courses at The Sugar Academy
Save 20% off using coupon code HUNGRYBLOG20
The videos feature 3 ½ hours of instructions and are broken down into 3 separate courses or one full-length bundle.
Can I use chocolate chips to make homemade chocolate?
Yes, but you need to know how to use them properly.
- Chocolate Chips can be pure chocolate or compound chocolate. You need to look at the ingredients to determine the type of chocolate.
- Pure chocolate chips will have cocoa butter listed in the ingredients and will need to be tempered.
- Most dark and milk chocolate chips are pure chocolate, but many white chocolate chips, like Nestle Premier White Morsels, are not, they are compound chocolates.
Chocolate Chips are:
- made to keep their shape in high heat
- melt very slowly
- have to be tempered if they contain cocoa butter
- come in semi-sweet, bittersweet, milk, white, peanut butter, butterscotch, and more flavors
- can be used as decoration on edible crafts
Should I add wax to chocolate chips when making homemade chocolate?
NO!
It is common practice in old candy-making recipes to add paraffin (wax) to melted chocolate chips so that the chocolate will set up properly. I don't advise this, as it adds a terrible mouthfeel and taste to the finished chocolates. Plus, who wants to eat wax? Not me.
If you use chocolate chips to make candies, you have to temper the chocolate in order for it to set properly. If you don't want to go through that much effort, then you are better off using confectionery coatings to make your candies.

You can use variations of chocolate chips and peanut butter chips to make sweet treats including:
Peanut Butter Starfish, Mini Pumpkin Cheesecake, Polar Bear Ice Cream Cones, Chocolate Chip Cookie Serving Bowl, Happy Chocolate Chip Cookies
Troubleshooting Tips
When making homemade chocolate things can go wrong. Let's talk about how to fix the problems.
my chocolate is too soft and it melts too easily
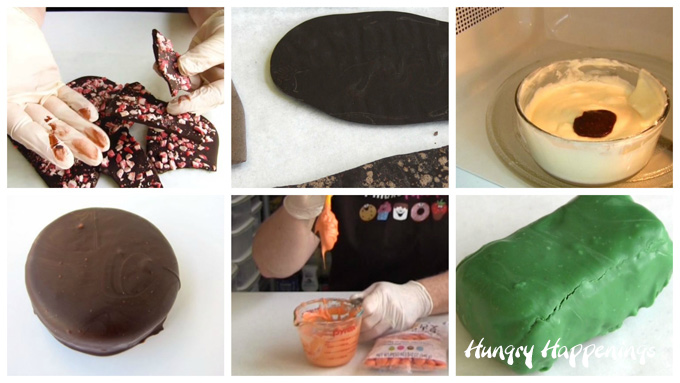
- If your chocolate is too soft, like the peppermint bark shown above, it is not in temper. You must temper pure chocolate so that it hardens properly and has a good snap when broken.
- See the tempering instructions above.
my chocolate pieces have white spots or streaks
- Chocolate that has not been tempered properly or that has not been stored properly will develop white streaks and spots (fat bloom or sugar bloom). These spots are actually cocoa butter crystals that have separated from the cocoa solids.
- White spots and streaks in untempered chocolate may appear hours or days after your chocolate sets.
- See the tempering instructions above.
my chocolate is burnt
- If you overheat your chocolate in the microwave or on the stove it will burn.
- You cannot salvage burnt chocolate. It is ruined.
- Even if only a small portion of the chocolate looks like, like in the image above, the entire bowl of chocolate will taste burnt. Throw it all away, and start over.
- That's why I suggest using short bursts of power, stirring after each, when melting chocolate or candy melts in the microwave.
my chocolate is sticky and wet
- Chocolates that have been stored in the freezer or refrigerator will develop condensation (beads of water).
- To ensure your chocolate candies do not become sticky, store them at room temperature.
- If you do refrigerate or freeze your chocolate candies, wrap them well in plastic wrap, wax paper, or tin foil, then place them in a zip-top bag or airtight container. Thaw at room temperature in the packaging for several hours before unwrapping.
- If you are making homemade chocolates and they are left in the freezer or refrigerator for too long, they can become sticky too. So, be sure to remove your chocolate as soon as it hardens.
my melted candy melts are too thick
Compound chocolates (candy melts) can become thick for several reasons:
- they are heated to too high a temperature
- they have been stored improperly (in moist damp areas, in direct sunlight, near a heat vent, in the refrigerator or freezer)
- they are old (the older they get, the thicker they get)
- they have gone through drastic temperature changes (from hot to cold or cold to hot)
- they are exposed to moisture (even one drop of water or condensation can thicken your candy melts or chocolate)
To thin out thick candy melts:
- If once melted, your confectionery coating is really thick, add Paramount Crystals or Wilton Easy Thin which are flakes of palm kernel oil, to thin out the coating.
- Simply add a small pinch of the flakes and stir. If the candy melts are not thin enough, then add another small amount of the crystals and stir.
- You can use Crisco or vegetable oil instead, but your candy coating may be a bit soft once hardened.
You can thin pure chocolate or chocolate chips by adding some cocoa butter.
 Wilton EZ Thin Dipping Aid ...Shop on Amazon
  CK Products Paramount Cryst...Shop on Amazon
  Raw Cocoa Butter-16 oz. - N...Shop on Amazon
 my chocolate is cracked
- Chocolate will crack when it's too cold.
- If you dip something into the chocolate and it's cold, the chocolate coating can crack. So be sure anything you dip in chocolate, like cake balls, or chocolate truffles, is at room temperature.
- If you are chilling compound chocolates (candy melts) in the freezer, be sure to remove the candy as soon as it has hardened. If candies are frozen for too long, they will crack.
BE SURE TO CHECK OUT THESE OTHER CHOCOLATE-MAKING TIPS TUTORIALS.
- How to Color White Chocolate or Confectionery Coating
- How to Use Colored White Chocolate to Paint Candy Molds to make Lollipops and more
- How to make Modeling Chocolate (chocolate clay) - Modeling Chocolate Recipe
- How to fix greasy, oily, dry, crumbly, or soft modeling chocolate (candy clay)
- How to roll out modeling chocolate
- How to Cut Modeling chocolate
- How to make Hot Chocolate Bombs
- How to make Chocolate Truffles
Learn more at The Sugar Academy
Save 20% off the chocolate making courses at The Sugar Academy using coupon code HUNGRYBLOG20
Now that you know the chocolate making basics you are ready to learn more.
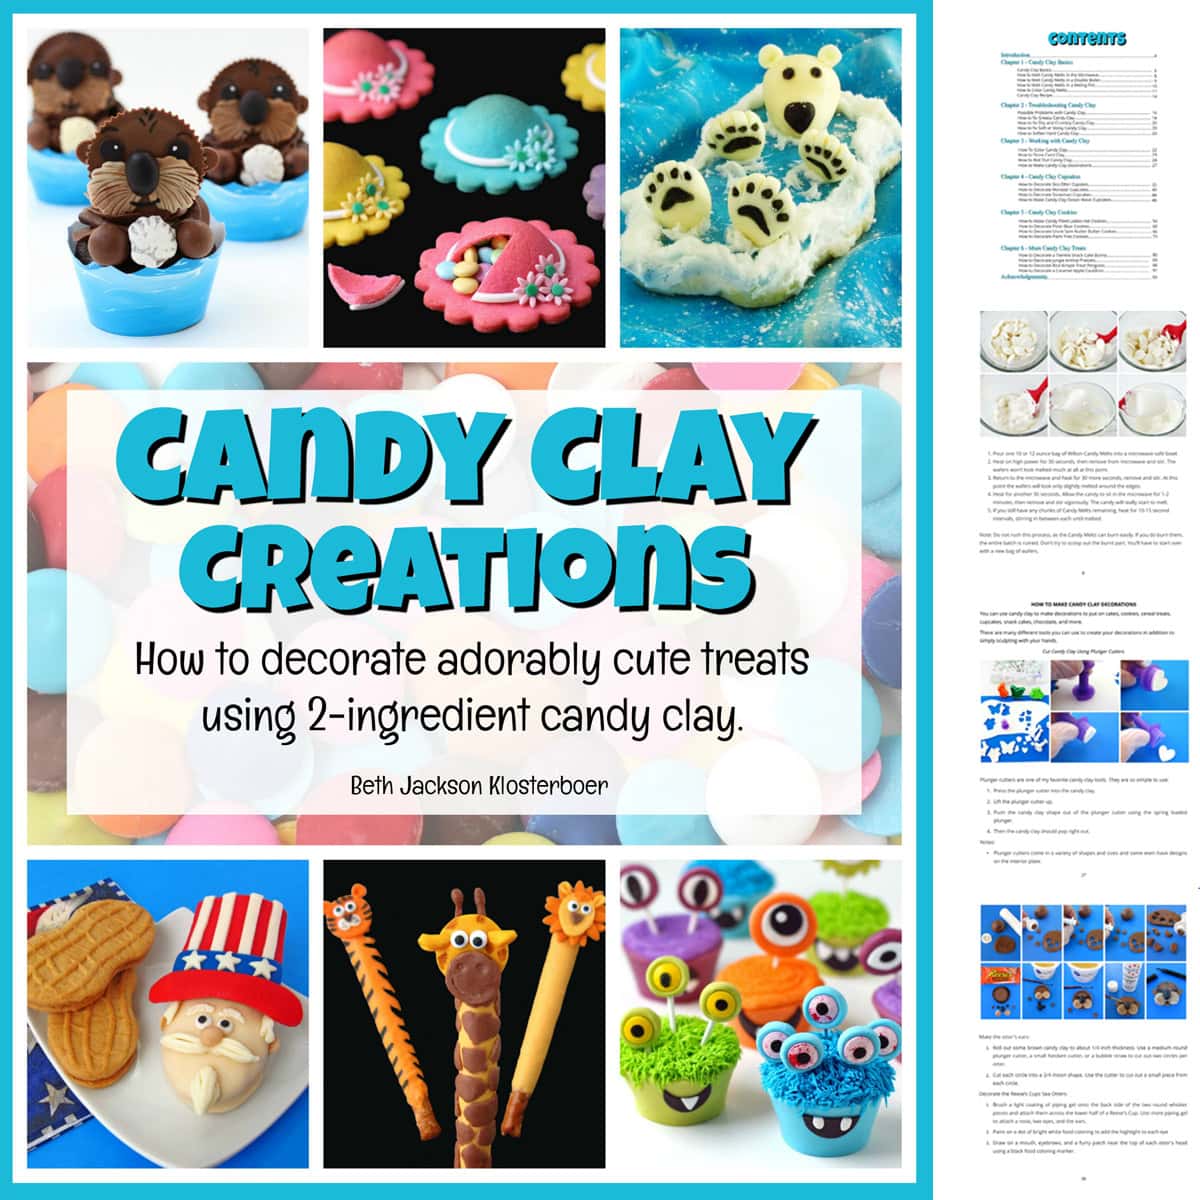
Candy Clay Creations
If you want to learn all about making modeling chocolate (candy clay) be sure to also check out my book, Candy Clay Creations.
- How to make peanut butter? - February 15, 2024
- OREO Penguins - December 20, 2023
- OREO Snowmen - December 20, 2023



Anonymous
Hi Beth, just loved all your explanation, I want to make a cake pop Flounder, Sebastian i'm going to buy a silicone mold of those characters, my questions is since the mold doesn't have a place to put the lollypop stick do you have any idea how should i do, cause i looked every where for some tutorial on how to make that cute fish and i didn't find it, and the mold will look very cute.I'm located in Brazil ,here i can find somethings that i need but the price is sky-high, and my passion is to bake, create things and it's a way to make my living.Thanks a lot.Best regards from Klaudia Amaral
beth
I have seen where people cut a very small hole in bottom of the candy coated cake pop using a sharp knife, then they dip a lollipop stick in the melted candy and insert it into the pop. I've not done this but many people get it to work nicely. That way you can paint the mold with candy coating, create a shell using the candy coating, fill it with cake ball mixture, then top it off with more melted candy coating. You can see how I did that in my Cake Ball Brains post (https://hungryhappenings.com/2012/10/creepy-halloween-sweets-cake-ball.html) After you pop them out of the molds, allow them to come to room temperature. Then cut the small hole in the bottoms and insert the stick. Good luck. Let me know how they turn out.
Anonymous
Love the modeling chocolate thanks for the reciepe
Anonymous
How do I fix modeling chocolate that is too sticky to work with?
Beth Jackson Klosterboer
The easiest thing to do is to flatten the modeling chocolate into a disc, and allow it to sit at room temperature for about an hour. It should dry out and be easier to use. Depending on how sticky it is, it might need to be re-shaped and dried a bit longer. If you are really in a hurry you can add some powdered sugar or cocoa powder to the modeling chocolate, but use it sparingly.
Hani Bacova
wow, you are a wealth of information, I will be referring to this a lot! Thanks for putting all this together Beth
Beth Jackson Klosterboer
Thank you! Yes, I usually freeze the candy coating for about 15 minutes, then allow it to sit for about an hour, then put the lid on it and just keep it at room temperature until I need to use it again. Then I just reheat it and use it.
Anonymous
This site is wonderful! Thank you for sharing it with us! If I have left over melted candy in the jars in the skillet, can I save it and reheat to use another time?
Aditi Bhatia
We're will I get candy colour in India?
Beth Jackson Klosterboer
Hi Aditi,
I usually order mine from Amazon.com. If you have access to their site, then they have everything. I'm not familiar with the types of stores you have in India, but here I could buy the candy color from a cake decorating store or a craft store, but I still will usually just buy it on-line.
soft_rose
hi, i am trying to make a molding chocolate using milk chocolate. the mold is soft enough as i knead it with my hands. as i work it, there's a bit of oil on my hands. i am trying to make small roses, i can form the mold into petals but moments later it would crack. i already tried adding more syrup drop by drop, it still cracked. so i tried adding a few drops of honey to make it smooth, still the same problem. any idea how i can make it smooth, without making the mold too soft and oily? thanks in advance.
Beth Jackson Klosterboer
If it's cracking then it is too dry. I suggest you wrap it up and let it sit at room temperature for about an hour. Then try to knead in some more corn syrup. The oil is seeping because it is too warm. If you hand are hot or your room is just too warm, it will be hard to keep it from doing that. Wash your hands in really cold water before kneading the modeling chocolate. If you have a marble or granite slab, try to knead it on the slab using a spatula. Once you get the right amount of corn syrup in the mixture, it should work perfectly without cracking.
Srikanth Gurram
Hi. I read this tutorial. Its very informative I'm from India. Pls help in sharing one how u have made chocolate popcorn. N what u have used inside the glass pot of lili flowers.
Beth Jackson Klosterboer
Hi Srikanth,
Here is a tutorial on making the white chocolate popcorn. - https://hungryhappenings.com/2011/09/do-you-think-you-can-handle-eating.html
The calla lilies are made out of modeling chocolate. The flowers are attached to lollipop sticks that I painted with green candy melts. The leaves are created from the same. The bowl is filled with sugar, so that the flowers stand up nicely.
Anonymous
How can I pin this to Pinterest? It will only let me pin all of your pinterest and not just this how-to. Any help will be appreciated.
Thanks!
Beth Jackson Klosterboer
If you click on the Pinterest button (a red "P"), that is just below the blog post, above the comments, and in a row with Facebook and Twitter buttons, you will go to Pinterest. There you can just click on the picture that is most relevant to what you want to pin. I just checked it out and pinned the picture of the electric skillet filled with jars of colored candy melts. Once I clicked on the picture, I was able to select the board I wanted it pinned to, which was my Edible Crafts Board. I then wrote a description and clicked on the pin button. I hope this helps.
Cornelia
My first attempt to make modeling chocolate turned outto be a nightmare. My batch is oily AND dry 🙁 i have no cold work surface to knead on an i have no clue how to fix this. I used white chocolate for baking. It would be great if you can help me find a solution.
Thank you
Cornelia
Beth @ Hungry Happenings
Hi Cornelia,
Your modeling chocolate is greasy and dry because the melted chocolate was too hot and it needs more corn syrup. If you don't have a marble or granite slab you can also use a metal cookie sheet to help cool it down.
I suggest you wrap the modeling chocolate in plastic wrap, let it sit an hour or so, then try to knead in some corn syrup. Letting it rest often times helps it cool down so you can continue kneading it. You may end up with small chunks of hardened chocolate or even tiny bits of hardened chocolate in your modeling chocolate, but they can be picked out. It's time consuming but at least you can save the batch.
Cornelia Sabrina
Thanks for the tip. I had the same issue today again but i made dark and white chocolate this time. It only happenes to my white batch 🙁 i could save it last time with kneading it inside a metal bowl that i cooled in the freezer. But good to know that its because i used the chocolate too warm.
Beth Jackson Klosterboer
I'm glad you have found inspiration and will put your cutters and molds to good use. Yes, you can cover marshmallows in ganache. You'll need to make the ganache pretty firm so it sets up and wont be sticky. A pound of semi sweet chocolate to a cup of heavy whipping cream should work.
Anonymous
Beth I've been collecting cookie cutters and molds for more than 50 years. Now thanks to you're great ideas and wonderfull examples (yours to Nina) I have been so inspired to make chocolate suckers and what ever. Can marhmellow be covered in ganache? Thanks -A - Bunch MLM
Beth Jackson Klosterboer
You might try using shortening instead of oil. I have not tried this, but being shortening is solid at room temperature, like the Paramount Crystals, so it should help to keep your candy coating more firm.
As far as working with the candy melts, be sure they don't get overheated, that can also cause it to thicken. Try melting the wafers just until about 2/3 of them are melted. Then stir until everything is melted.
If you are making cake balls you could dip them in icing, but they wont have the same taste. But, if you are having such difficulty with the candy melts, you might want to give it a try.
Anonymous
Hi Beth, thank you so much for the fast reply. The thing is I live in Indonesia so we dont have that Peter Brand, even Wilton Candymelt cant be found here, I order them from some baking supplier, I have 5packs and they're all giving me the same result. I'm so frustrated with them. As for Paramount Crytals, we dont have them for sure:( Do you maybe can suggest any other coating besides candymelt? Chocolate is fine but i need to color them, and i think white chocolate just doesnt taste that nice,or are they? Or maybe coating with icing? Is that okay?
Thanks again,
Ike
Beth Jackson Klosterboer
Hi,
Often I find that Wilton candy melts do seem to be thicker than many other confectionery coatings, but other times they seem to be normal. I think some packages of the coating end up thicker when melted because of improper storage. If candy coating is not stored in a cool dry place the texture of the melted candy will be effected. I think that often happens with candy coating that is purchased at craft stores.
I use Peter's chocolates and confectionery coatings and rarely have any trouble with them, but realize they are harder to find. You need to buy them at a cake/candy decorating supply store or on-line.
I highly recommend buying a package of Paramount Crystals to use instead of vegetable oil to thin your confectionery coating. The crystals are solid fat that melt easily in the candy coating. Your coating will set better if you use the crystals verses the oil. Oil can make your coating soft.
I don't ever store chocolate or confectionery coating in the refrigerator as it will develop condensation and can bloom or develop white spots. As far as oil seeping from your cake pops it is coming from the actual cake. If your candy coating doesn't seal well around the cake ball you will have this problem, so be sure to coat them really well and make sure there are no holes or air bubbles. If I make cake pops I store them in an airtight container on my counter.
Anonymous
Hi Beth, I'm so lucky to stumbled upon your site and read all this useful information. I have a huge problem with my wilton candymelts,they don't melt properly,I've followed the instruction carefully and still couldn't get them to the coating consistency,unless I add a lot of vegetable oil to it,I mean a lottt. But then the problem is after they have set on the fridge and I took them out,the oil seems to be melted and dripping down the sticks,oh nooo....such a horror. What should i do? Another question,after they're fully set,they're not supposed to be kept in the fridge?or can they? My cakepop is quite soft,if i keep them in room temperature they can get way too soft,so what's the best way to store them since i need to make them and decorate them at least 1day before. Thanks Beth!
Beth Jackson Klosterboer
You are welcome, Tina. Yes, if you use white chocolate or confectionery coating (pink candy buttons) then it will be softer than modeling chocolate made with dark chocolate or even milk chocolate for that matter. This is why my recipe is only a guide. Every brand and type of chocolate or coating is different. I usually ere on the dry side adding less honey to begin with, then add more corn syrup or honey as needed. It's much more difficult to add melted chocolate to excessively soft modeling chocolate. I've done it before, but it is even harder to work with as the chocolate can harden in tiny pellets throughout the modeling chocolate.
Anonymous
Hi Beth,
Thank you so much for your swift and detailed reply. Much appreciated. It's indeed scary to salvage MC by reheating or adding more honey not knowing what the consquences might be. But your explanation is so clear I feel I can attempt to save my batch.
Also one further point I used pink coloured button chocolate for melting to cover cakes - not any particular brand, would this therefore determine the amount of honey I needed to use as it might be softer chocolate and therefore I needed more honey?
Ones again Thank you very much!
I absolutely love your creations!
Tina
Anonymous
Hi,
I used your Honey recipe to make chocolate modelling. When I added the honey to the chocolate and stirring it in gently to incorporate it well the mixture came along fine i.e. leaving the edge of the bowl. At this point I put the dough in a Ziploc bag as a ball and put placed it in airtight container as a nice soft ball on my counter top. About an hour later I could see honey/oil rising up – I still left it to set. But in when I checked in the morning it is ROCK Hard. This was my second attempt the first one I used golden syrup as I cannot find glucose or corn syrup in any of my local stores. With this my MC was crumbly mess. With the honey I get a rock hard ball. Why can this be? What am I doing wrong and is it wasted or can I fix it?
Another question is if MC becomes very hard would the figures / shapes / 3D art stay soft looking on a cake and would it be soft enough to be eaten. I am desperately trying to be creative with my baking and decorating as I enjoy it and at the moment want to get it right as I’d like to make and decorate my daughter’s 6th Birthday cake.
Any help and guidance will be hugely appreciated.
Tina
tinatinu01@gmail.com
Beth Jackson Klosterboer
Hi Tina,
Modeling chocolate will harden and can be kneaded until soft enough to use to sculpt. I often want really hard modeling chocolate to create boxes and things that need a lot of structure. It can still be eaten and softens in your mouth immediately. If you want it softer, you can add more honey to the mixture. At this point, your modeling chocolate can be salvaged. Cut it into pieces and try to knead it. If you can't, put it all in the microwave and heat it on defrost for 5-10 seconds. Then remove it and try to knead it again. Don't over heat it or the oils will come out. Once you get it soft and pliable, add some more honey, a small amount at a time. At first it will be very sticky, and you may need to scrape and wash your hands before continuing to knead. You will be able to salvage it! Get it soft enough to work with, but not so soft that it wont hold it's shape. I make and store my modeling chocolate and re-work it all the time. The white usually stays softer than dark modeling chocolate. I break off what I think I'll need and go through this process.
Once you do sculpt with the modeling chocolate, anything made out of white or milk chocolate will look very much like fondant. Dark chocolate can harden a bit more stiff, so you can just make it a bit softer with more honey if you want. But no matter how hard the pieces get, just like with regular chocolate, once they get into your mouth they melt.
Oh, yes, and your dry crumbly modeling chocolate can be fixed as well by doing the exact same thing as listed above. It needs more honey or golden syrup. Use your hands as much as possible to knead and soften it. Use the microwave cautiously. If you get a really hot melted spot, just cut it off, set it aside and let it cool before kneading it and go about kneading the rest.
I hope this helps. I really have not had to throw any modeling chocolate out since I figured out how to fix every batch, no matter the issue. Once you feel like you've mastered it, there will still be times when you have a botched batch that you have to fix. It all comes together in the end.
Good luck!