Learn how to make Handmade Chocolates decorated with chocolate transfer sheets and filled with lusciously creamy peanut butter fudge by watching the video tutorial.
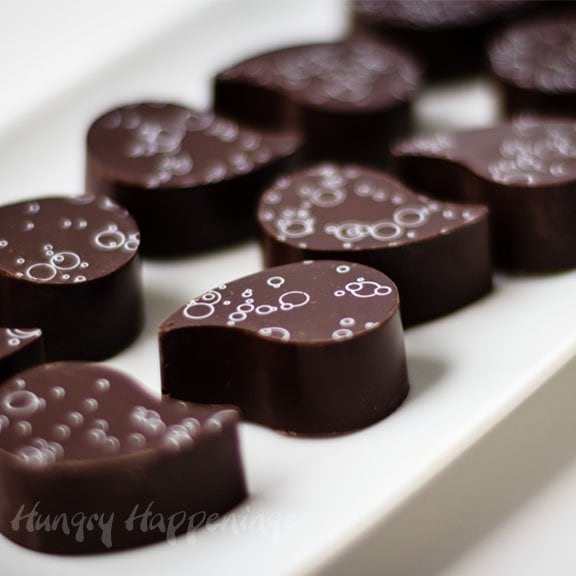
I often get asked how I created the artisan-style chocolates that are featured in My Chocolate Gallery on my Chocolate Making Tips page. Many of you have requested I create a tutorial showing how I use chocolate transfer sheets to create such pretty pieces of candy.
Fortunately this summer I had the opportunity to create a video on the subject. I have no experience with making or editing videos. None. So, I enlisted the help of one of my former exchange students who was visiting last month.

Dima has taken up photography and videography as a hobby and he is extremely talented. Lucky me! He not only showed me how to use my new DSLR camera but he also took the time to film a video of me making artisan style chocolates. That's Dima, pictured above, hanging out on a sailboat watching the sunset over Lake Erie.
The video, Dima created for me, is beautifully filmed. I can't say the same for voice-over, which I recorded in one take, but I think you'll find it very detailed and helpful.
[adthrive-in-post-video-player video-id="hAAsDz1J" upload-date="2016-10-27T17:33:13.000Z" name="How to Make Artisan Chocolates" description="How to use chocolate transfer sheets to make artisan style chocolates filled with peanut buttter fudge." player-type="default" override-embed="default"]
What did you think of the video? I'm very pleased with how it turned out. I do hope you can view it easily. If not, please let me know. You can also view the How to Make Chocolates Using Transfer Sheets (here) on YouTube, if you prefer.
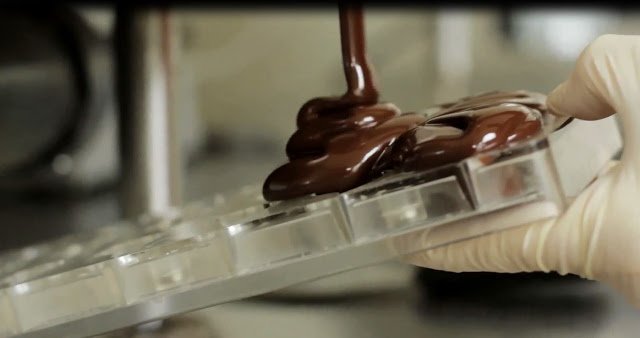
Wouldn't you like to have a chocolate machine like that in your kitchen? I love it! Of course, you don't need a big tempering machine to make these chocolate.
You can just as easily work from a bowl of tempered pure chocolate or a bowl of melted confectionery coating/candy melts.
Making artisan-style chocolate using this method is not an inexpensive endeavor.
The magnetic molds will cost you between $35 and $75 apiece but are worth the investment if you plan to make chocolate often.
They are really well made and will last many years.
I purchased my molds from Tomric and I've been using the same molds for almost 10 years now and am so happy that I bought them.
These types of molds are manufactured by several companies, and I've added some links at the end of this post.
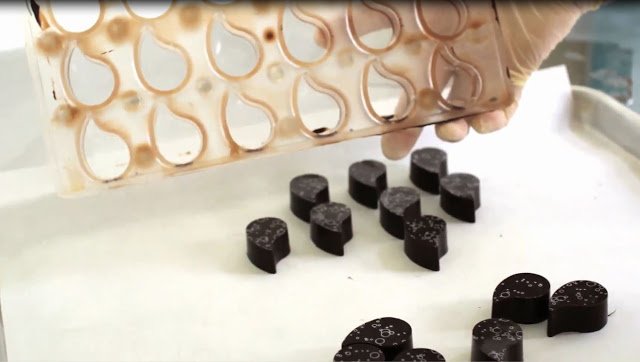
The molds come in many shapes and sizes and you can buy transfer sheets in so many beautiful designs.
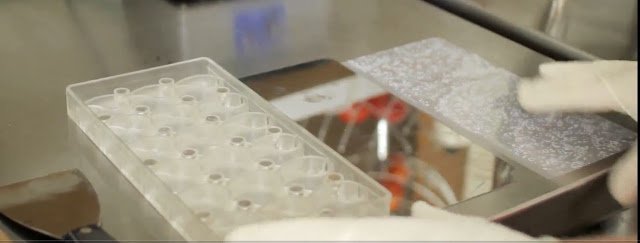
If you've never used or seen chocolate transfer sheets, you may not realize that they are pieces of acetate that have colored cocoa butter printed on them.
Once you pour warm melted chocolate over the cocoa butter artwork, it melts off the acetate and hardens as the chocolate hardens, adhering to the chocolate.
These sheets come in hundreds of different designs. This assortment pictured above is available from Chef Rubber. Buying an assortment is a great way to get started.
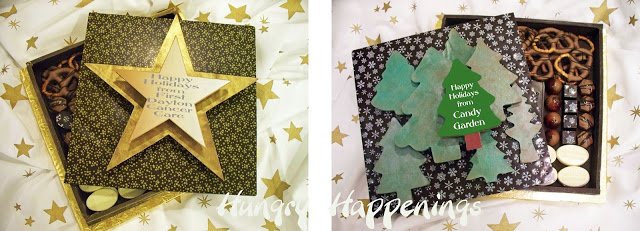
I have used chocolate transfer sheets so many times, but oddly I've rarely taken pictures of my creations. I did snap some pictures of a few chocolate boxes that I created about 6 years ago.
They were created using transfer sheets in two different ways.
The small pieces of candy inside the boxes were made using the technique I showed in the video.
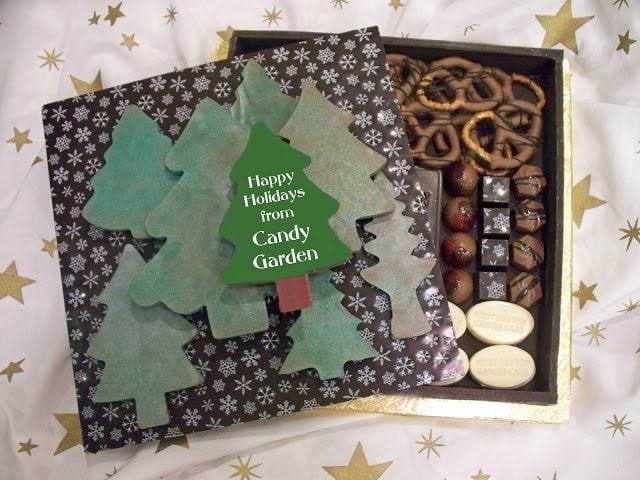
The top of the chocolate box was created by laying a transfer sheet, cocoa butter image side up, on a baking sheet, then pour melted chocolate over top, spreading it into an even thickness, allowing it to dry slightly, then cut it into a square.
Once the chocolate dried completely I peeled off the acetate and had pretty chocolate box lids. I used printed frosting sheets to create the message on the boxes.
If you give this is a try, and have any questions, just let me know. I'm here to help.
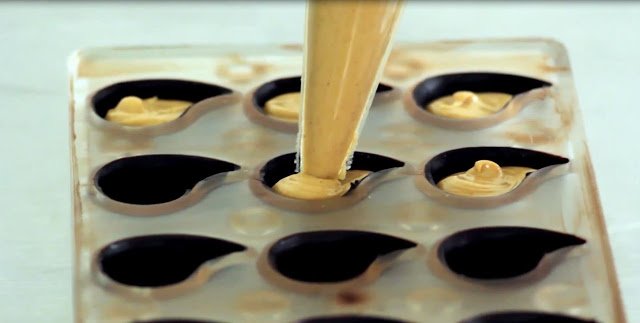
Below is the recipe for the peanut butter fudge filling that I used in the video.
The peanut butter fudge filling will harden as it cools and will have the consistency of fudge. If you want your filling to be softer, just add more peanut butter to the recipe.
If you are working on several batches of chocolate and your filling becomes too stiff to pipe, simply re-heat it in the microwave in 10-15 second increments until you can easily pour it. Be sure the filling is not hot when you pipe it into the chocolate shells.

Fill Handmade Chocolates with this creamy Peanut Butter Fudge Filling
You can find the chocolate mold and decorative chocolate transfer sheets from Amazon. I earn a small commission for sales at NO extra cost to you.
") Chocolate Transfer Sheet Mo...Shop on Amazon
Chocolate Transfer Sheet Mo...Shop on Amazon Mix 10 Chocolate Transfer S...Shop on Amazon
 ") Colorful DIY Chocolate Tran...Shop on Amazon
Colorful DIY Chocolate Tran...Shop on Amazon- 16 ounces white confectionery coating
- 1 - 10 ounce bag Reese's Peanut Butter Chips
- 16 ounces 2 cups creamy peanut butter (I suggest Jif Peanut Butter)
- a pinch of salt
-
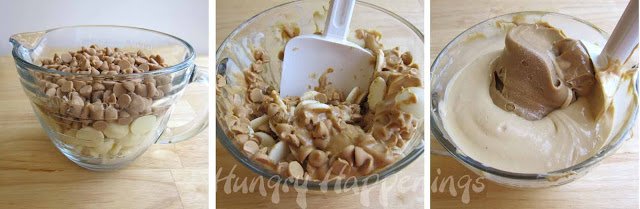
Place white confectionery coating wafers and peanut butter chips in a microwave safe mixing bowl. Heat on high power for 45 seconds.
-
Remove and stir the chips around or they will burn.
-
Heat for 30 more seconds, then stir.
-
Heat for 25 seconds, then let it sit in the microwave for 2-3 minutes, then stir vigorously.
-
If all of the chips are not melted, heat at ten second intervals, stirring in between each, until completely melted.
-
Stir in peanut butter and salt.
-
NOTES: Make sure to mix really well, scraping the bottom of the bowl. If you don't stir the peanut butter into the candy, you'll end up with clumps of hardened candy coating in your filling.Allow it to cool a bit before piping it into your chocolate shells.
Be sure to check out all my fun Christmas Recipes!


- Banana Split Bars – A Fun and Easy Summer Dessert - March 4, 2026
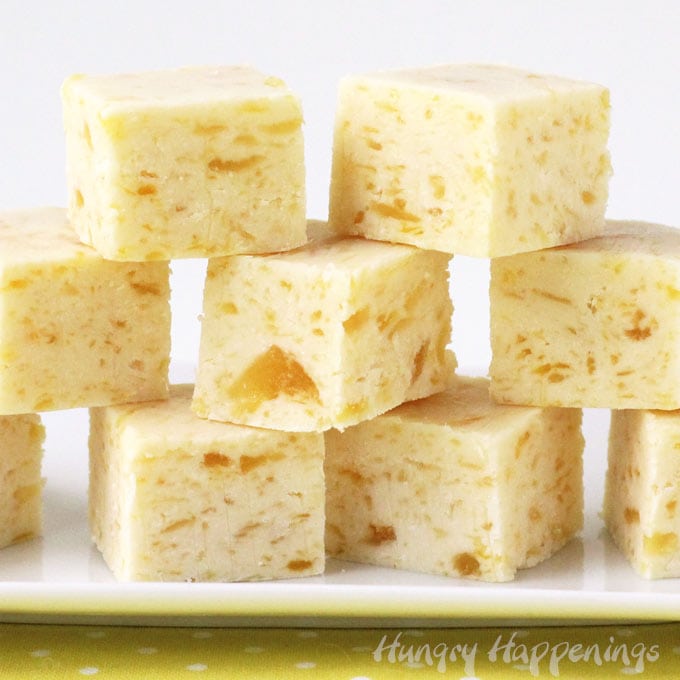
- Pineapple Fudge (No Candy Thermometer Needed!) - March 4, 2026
- No-Bake Peanut Butter Pie Recipe - March 3, 2026
TJ says
Hello
I couldn’t find any videos. Would it be possible for you to email it to me?
Thanks
Beth says
If you are not able to view the video here, you can watch it on YouTube here - https://youtu.be/FSvI9rQksww
Anonymous says
Your video was terrific! I wish I had discovered it a week ago--before making my sad, lumpish little amateur chocolates for Christmas. Ah, well--next year, my chocolates will _KICK BOOTY_!
beth says
Thanks, I do hope it helps you next year when you are making your Christmas chocolates.
Cindy says
Wow, you are a true artist! Your video makes it look so easy and I've done chocolate before, I know it's not easy! What tempering machine do you have and do you recommend it?
beth says
Thanks, Cindy. I have two Savage Bros. machines and I love them. They have been in operation for almost 20 years and are in great shape. I had some squeaking issues for a while, but the company was able to fix it. They are a great company to work with. I highly recommend them, although they are pricey! I paid about $3000 in 1995. I have no idea what they cost these days.
Malika Bourne says
You are inspiring me to start making my own candy again. I started a new wish list on Amazon.
handmade chocolates says
OMG! These look delicious! Love your blog! Amazing chocolate gallery and video. Now i just want to pick up some chocolate.
Betty Taylor says
I really enjoyed your video. I used to mold chocolate pretty often. I wish I would have known about the paint scraper then. If I make some now I will be prepared. Thanks so much. I liked you on facebook and I am going to follow you on Pinterest. Also Pinning this for future reference.
beth says
Thanks Betty. I learned about using the paint scraper when I took a class with Ewald Notter. He used lots of things from the hardware store! They work great. Thanks for the pin.
Anonymous says
family is too worried about calories to eat one lol. i guess i am too, well more carb conscious.
beth says
I'm hungry after watching the video too! I'm glad you enjoyed the video and hope you do try your hand at making these chocolates for you family. I'm sure they will love them.
Anonymous says
You are truly blessed. It seems no matter what you try, you are great at it. The video was great and I learned a lot. I have had a reacurring dream since I was little that I find a door in my home and I open it to find the same room every time. This room has a kitchen to the left and I am always so happy to have two kitchens. This door can be in the basement, another floor or in the atic, but it is always the same when I open it. Maybe I will have two kitchens someday. lol Trish Butler
beth says
I do love having two kitchen, except when it comes time to clean them. I dream about having a kitchen fairy come and clean my kitchens at night while I'm sleeping! Now, that would be nice:)
iluvlace says
Awesome tutorial! Thank you for sharing as always. Enjoyed it very much. Now if I could just get the tempering thing down! Beautiful chocolates. You are blessed with many gifts!
Mari
beth says
Thanks, Mari. Tempering is challenging. I'm really lucky to have the machines to do the work for me. I do often wish I had more practice at hand tempering, though, just so I could teach others how to do it.
The Bearfoot Baker says
Oh my goodness!! I LOVE the video! Dima is extremely talented!! I could watch it all day!!
Thanks for taking the time to show us your amazing chocolate talent.
beth says
Thanks, I agree. Dima's videos are really artistic. He has a natural talent for it!
Sweet Lucy says
Excellent video! Thank you for sharing. I've never really thought much about molds or transfer sheets - but have always wonder how they work. I'm still in the dark ages of rolling every thing by hand. Haha.
beth says
Thank you Lucy. I still enjoy making things by hand too!
The Partiologist says
I think I deleted my comment, so here it is again! I love love loved watching
you work with chocolate! You make it look so easy, and youwould laugh out loud
if you saw me working with chocolate! I have used transfer sheets in the
past and seeing these chocolates transform before my eyes was amazing!
beth says
Thanks, Kim. I love working with transfer sheets. They turn a plain piece of chocolate into a work of art. Maybe someday we'll get to meet and you can come make chocolate with me!
Hani Bacova says
You are simply amazing! I loved he video, the way you handle chocolate, I'd have it all over
Beautiful!
beth says
That's so nice to hear, especially from someone who has done so many wonderful videos. It was fun making the video. Too bad when it was compressed to put on this blog the quality was diminished. It is really a beautifully filmed video. I was sad to see it look so pixelated. I have so much to learn about videos!
Eleise says
Where do I buy the molds ...... can’t seem to find the link
Beth says
Hi Eleise, you can get one of the magnetic teardrop molds here - https://amzn.to/3bNoYhd
Have fun making your chocolates!