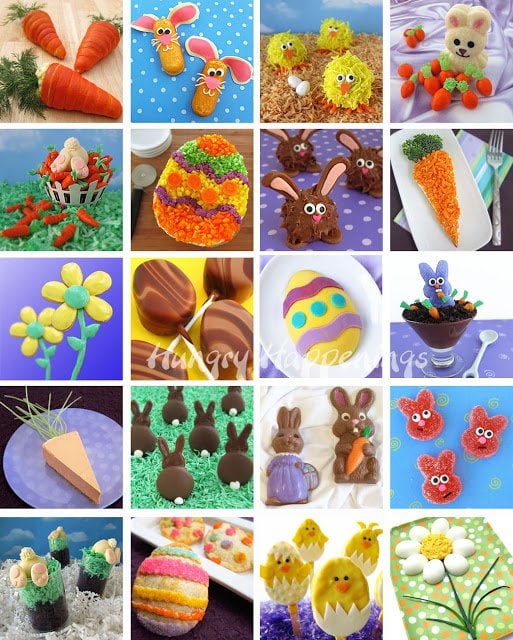
Fill your Easter baskets with these adorable Chocolate Bunny Cookies. They are simple to make using chocolate-dipped vanilla wafer cookies and fluffy marshmallow tails.
 to put into your Easter baskets. See how at HungryHappenings.com. #chocolate #easterchocolate #eastercandy")
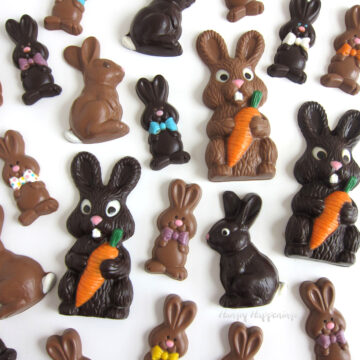
The chocolate-dipped bunny cookies will look so cute nestled in among homemade Chocolate Easter Bunnies, homemade chocolate eggs, hand-painted Easter lollipops, and sour Gummy Bunnies in your Easter baskets.
If you prefer, you can serve them for dessert on a platter filled with edible Easter grass or even use them to top cupcakes.
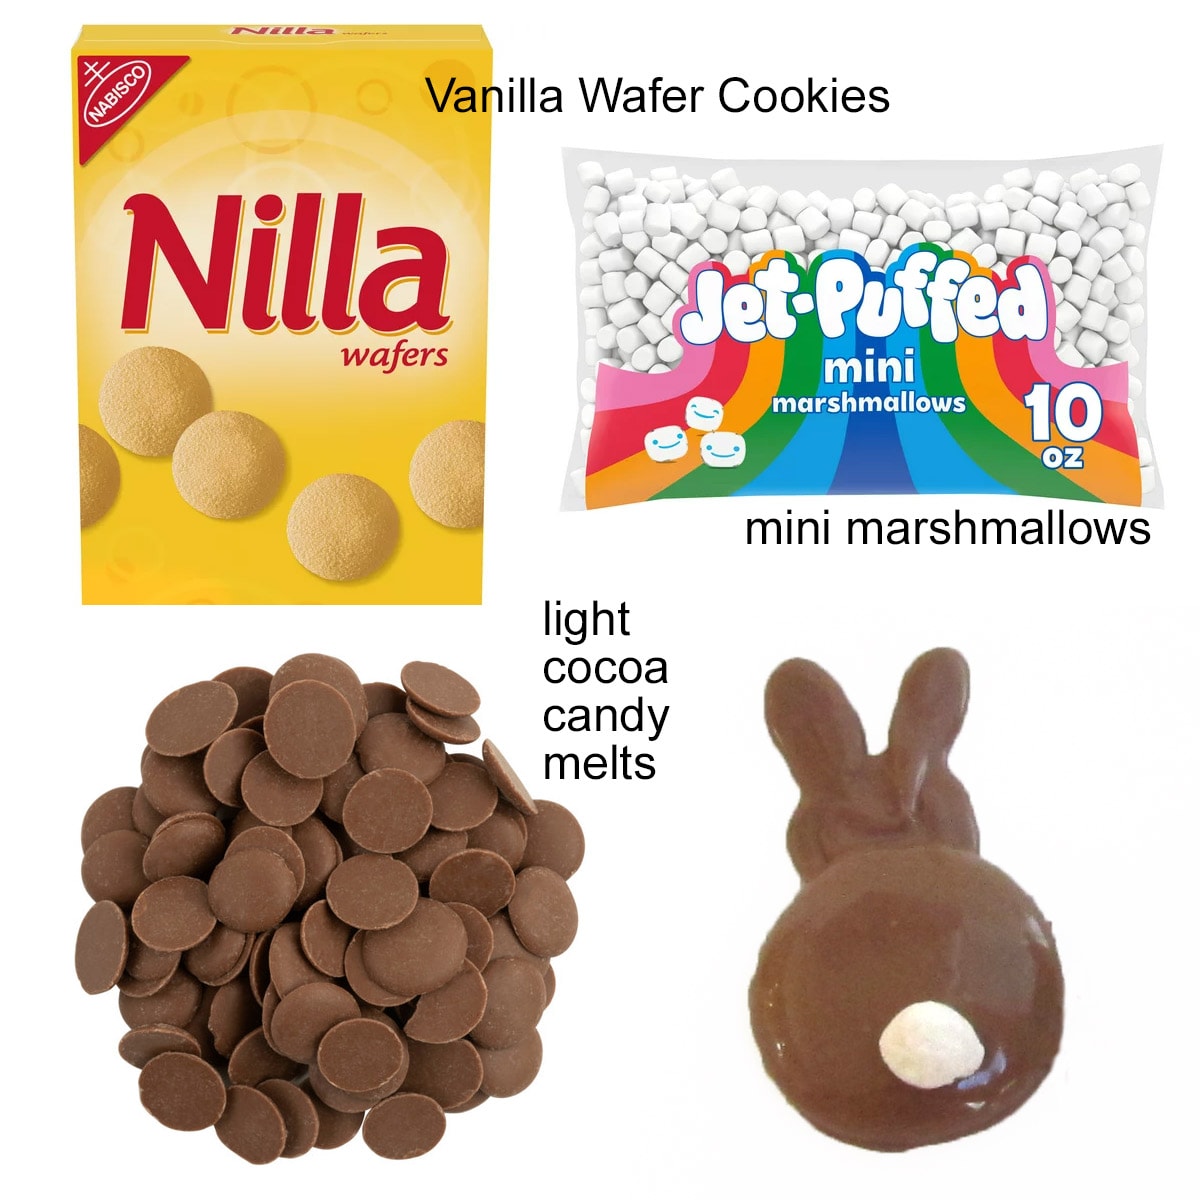
They are super easy to make using just three ingredients: vanilla wafers, chocolate or candy melts, and mini marshmallows.
So, let's make some chocolate bunny cookies!
Ingredients
This recipe makes 54 chocolate-dipped bunny cookies.
light cocoa candy melts or pure milk chocolate (see notes below)*
vanilla wafer cookies
mini marshmallows
*What chocolate should I use to make these bunnies?
You can use candy melts (compound chocolate) or pure milk chocolate to make these bunnies.
- Compound chocolate/confectionery coating contains vegetable oil (usually palm kernel oil) and can simply be melted. There are many different brands of confectionery coating including Wilton Candy Melts, Ghirardelli Melting Wafers, Merckens Wafers, Peter's Westchester Caps, Candi-Quik, and even almond bark.
- Pure milk chocolate contains cocoa butter and will require tempering (melting and cooling the chocolate so that the cocoa butter crystals come back together). See my Chocolate Making Tips page for details.
- Read my Chocolate Making Tips page for detailed information regarding the types of chocolate and how to melt each of them.
Supplies
disposable pastry bag, a zip-top bag,
or a squeeze bottle fitted with a small round pastry tip
parchment paper
baking sheets
fork or a chocolate dipping fork
You can find supplies needed to make these cookies at Amazon. I earn a small commission when you use the links below at NO extra cost to you.
 Wilton Light Cocoa Candy Me...Shop on Amazon
 Callebaut Chocolate Block M...Shop on Amazon
 Fasmov 500 Count Parchment ...Shop on Amazon
") Kraft Jet Puffed Mini Marsh...Shop on Amazon
Kraft Jet Puffed Mini Marsh...Shop on AmazonInstructions
Make marshmallow bunny tails.
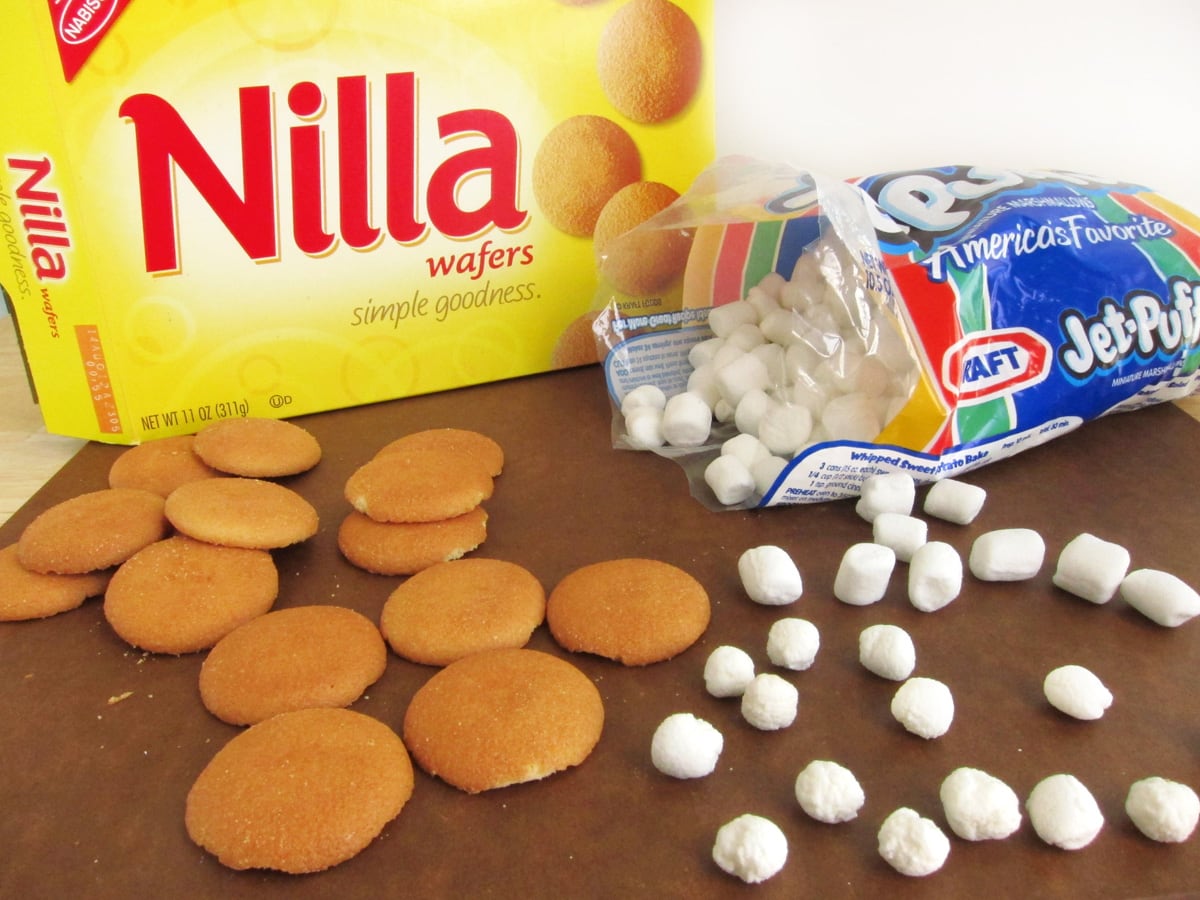
- Take one marshmallow and roll it in the palms of your hands to make them more round and wrinkled looking, like a bunny tail (see the marshmallows at the bottom of the picture.)
- Count out 54 whole vanilla wafer cookies and brush off the excess crumbs if needed.
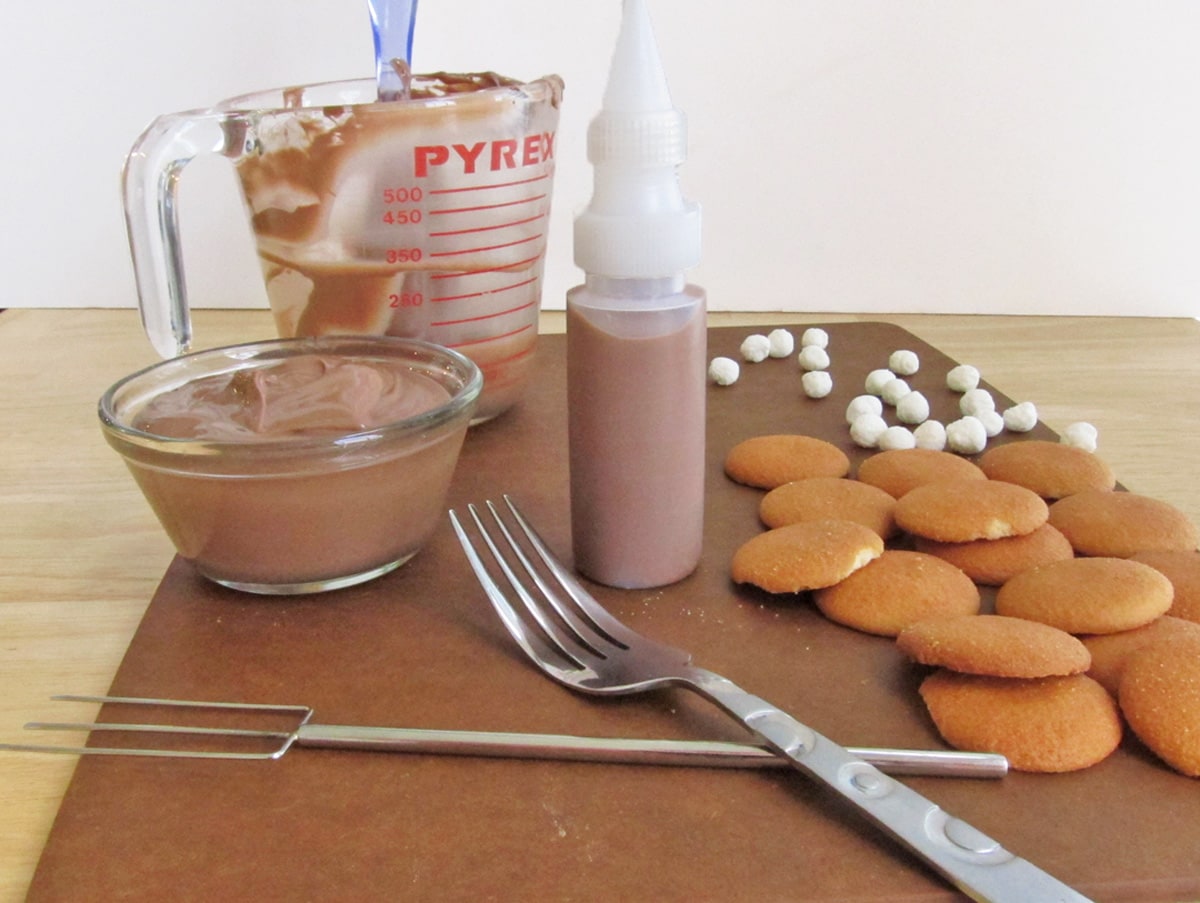
Get the chocolate ready.
- Pour some of your melted and tempered milk chocolate or melted confectionery coating/candy melts into a small bowl.
- Pour some of the chocolate or candy coating into a squeeze bottle fitted with a small round pastry tip (or use a disposable pastry bag, or a zip-top bag with one tip snipped off.)
- Have your cookies, marshmallows, and dipping fork or kitchen fork ready to go.
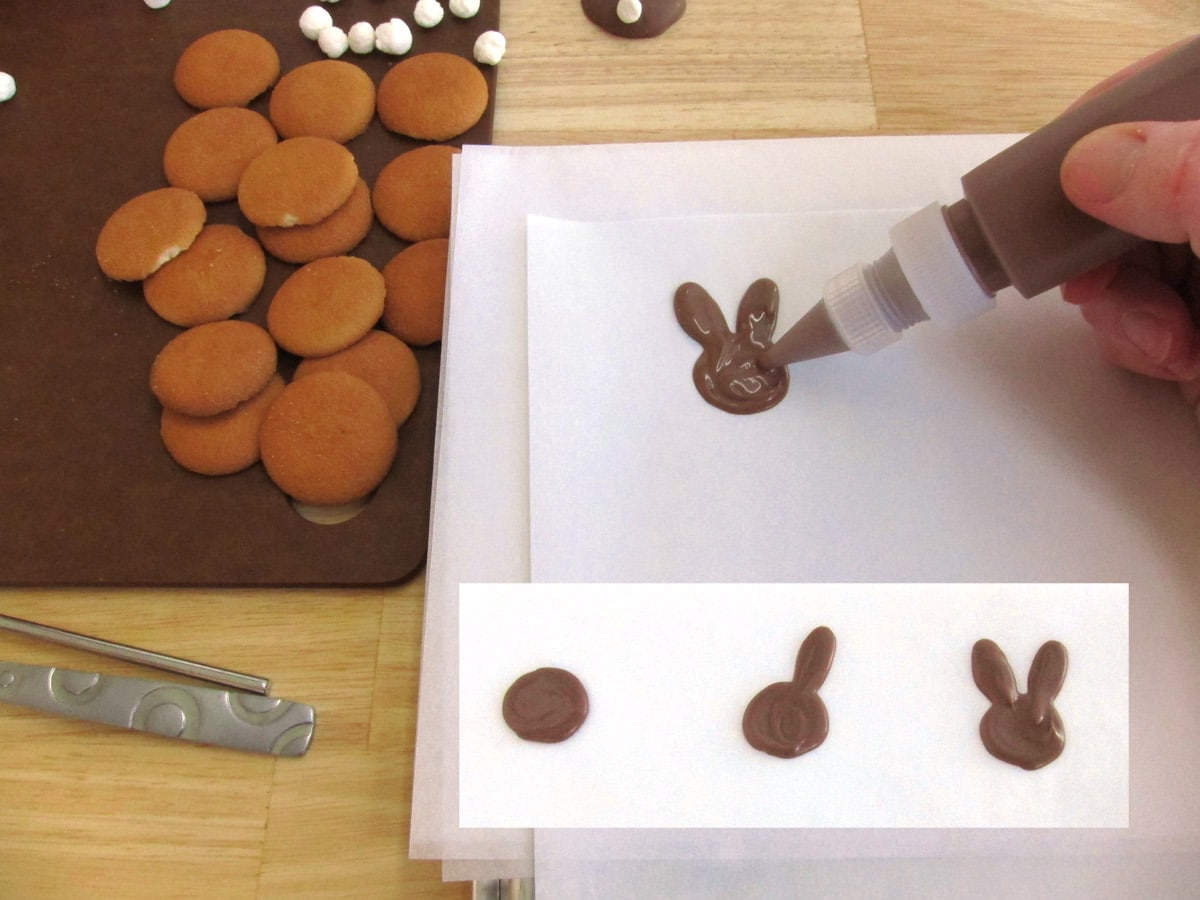
Pipe chocolate bunny heads.
- Pipe out a round circle about half the size of a vanilla wafer.
- Add two ears.
- Go to the next step immediately, while your chocolate is still wet.
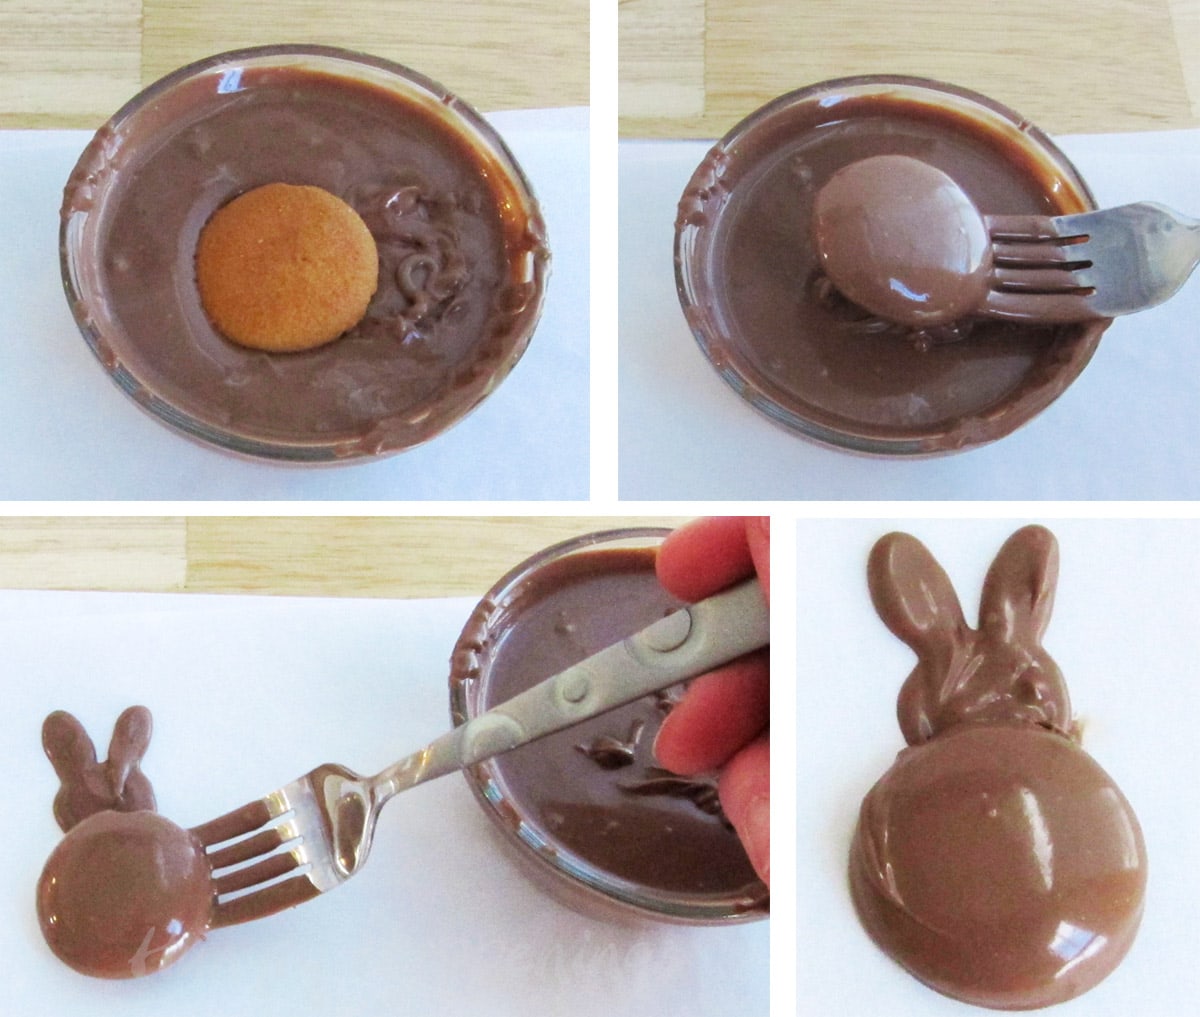
Dip vanilla wafer cookies in chocolate.
- Dip one vanilla wafer cookie into the chocolate submerging it completely.
- Use a fork or dipping fork to lift the cookie out of the chocolate.
- Tap the fork on the edge of the bowl, allowing any excess chocolate to drip back into the bowl.
- Set the chocolate-covered cookie just below your piped bunny head.
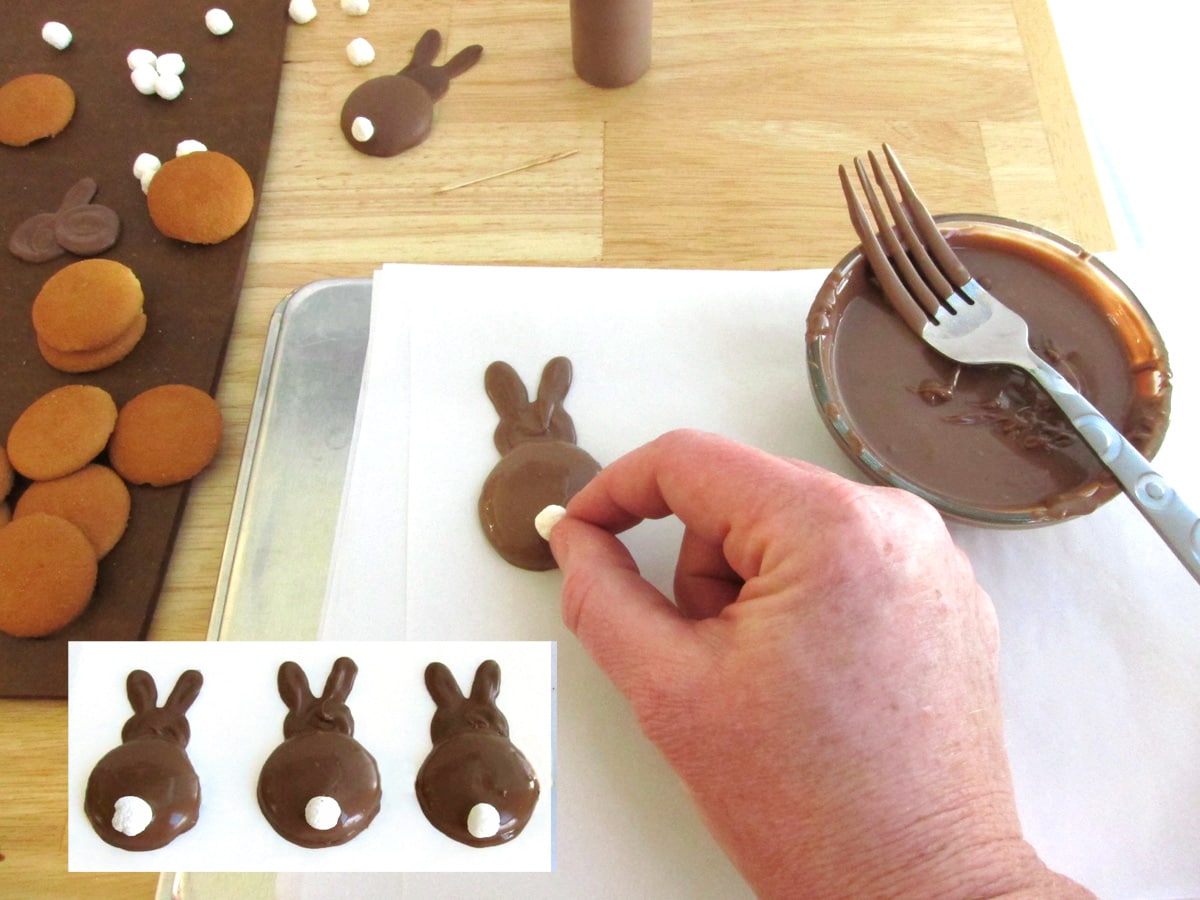
Add a marshmallow tail.
- Press a little marshmallow onto the bottom of the chocolate-covered cookie.
- Make about 10 bunnies, then place your baking sheet in the refrigerator for 5-10 minutes until the chocolate bunnies harden.
- Continue to make a total of 48-60 chocolate bunnies.
- This number will depend on the size of your cookies, the thickness of your candy coating, and how many cookies you can coat when you get to the bottom of the bowl - that gets a bit tricky.
Tips
- As you work, you will probably need to reheat your candy coating.
- Place it in the microwave and heat it for 10 seconds, then stir.
- If needed, heat for 10 more seconds, but don't overheat or you could burn the candy coating.
- If using pure chocolate you will need to temper it as needed.
- I like using the plastic squeeze bottle for projects like this because the entire bottle (as long as you use a plastic decorating tip) can go into the microwave.
- Heat the entire bottle for 10-15 second increments as needed.
- You may need to poke a toothpick into the pastry tip to remove any hardened candy.
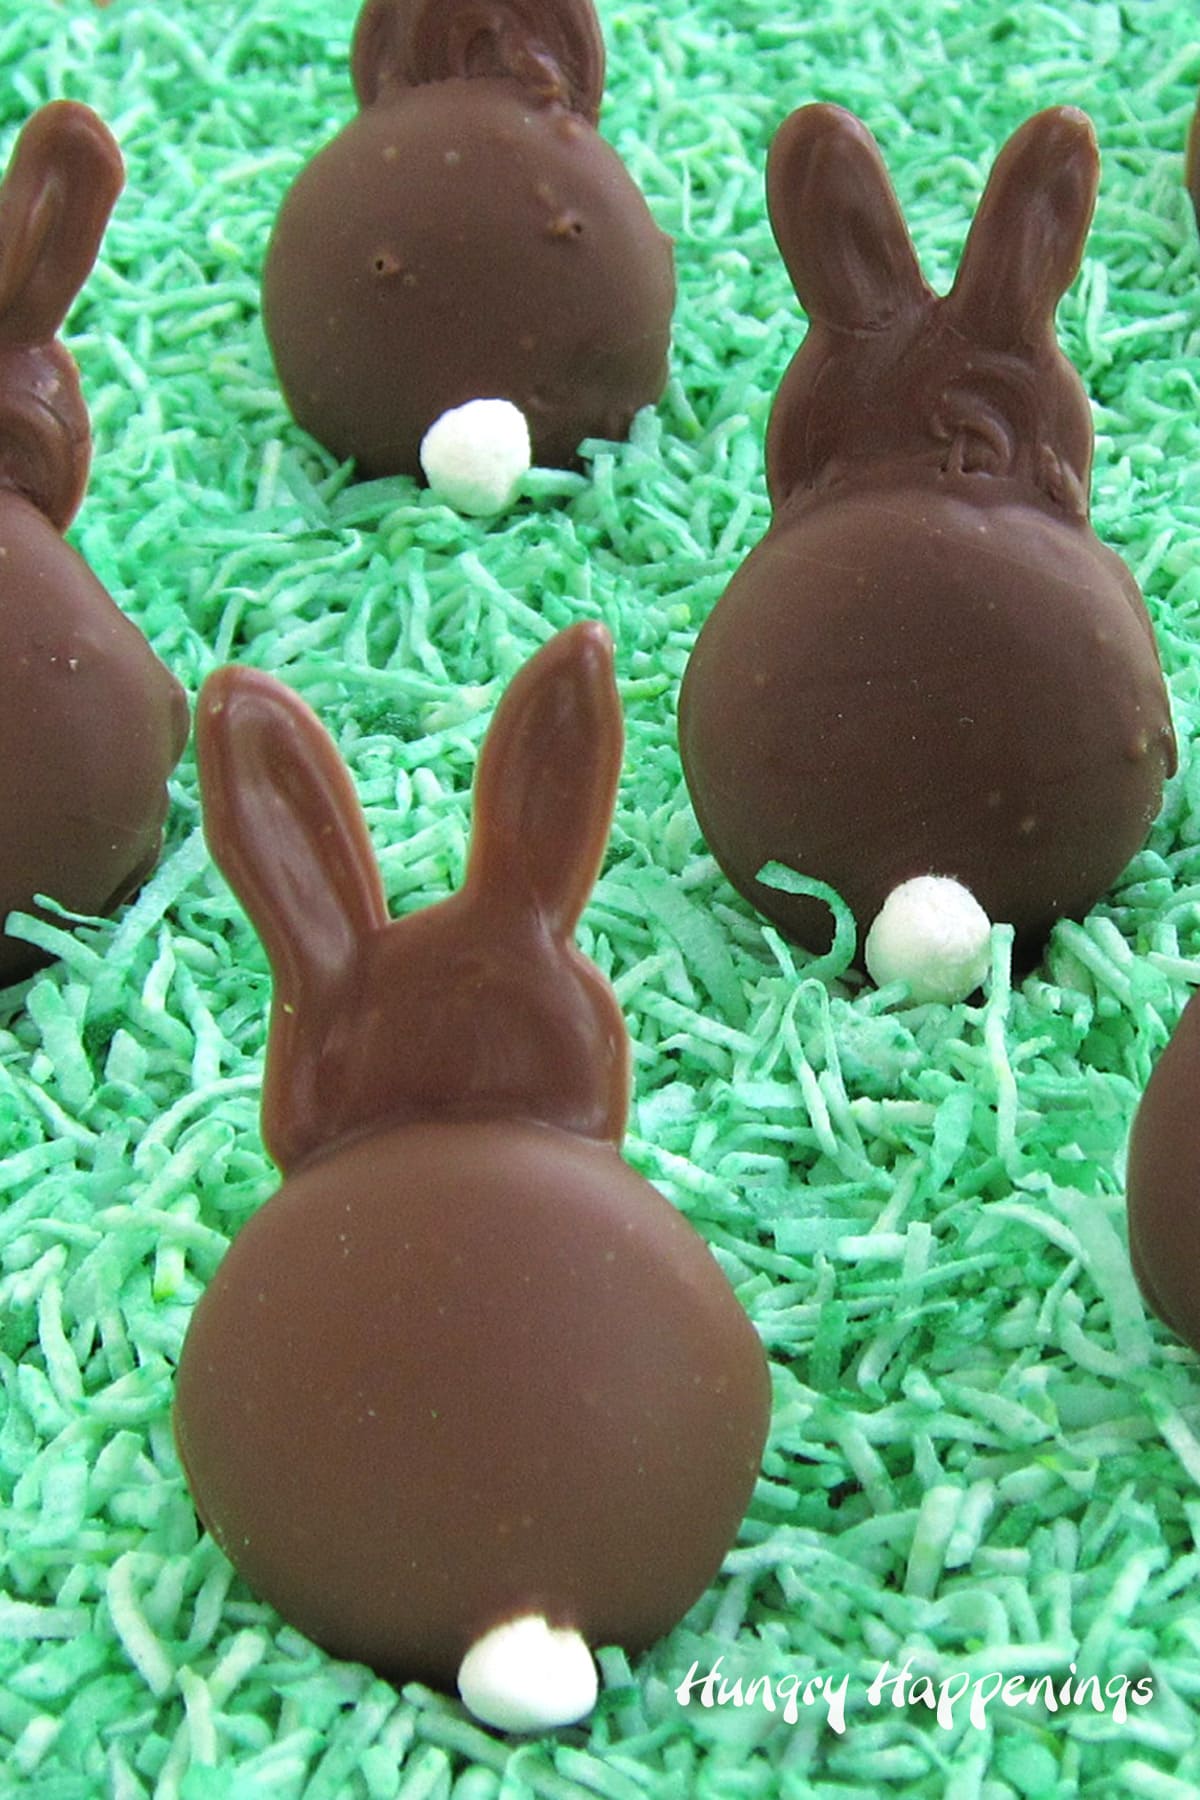
To use these chocolate Easter bunnies as a centerpiece on your table sprinkle green-colored coconut onto a serving tray or plate.
- To color the coconut green, place your coconut in a zip-top bag, add a few drops of green liquid food coloring, shake the bag vigorously, and knead the coconut in the bag as needed, until the coconut turns green, adding more coloring as needed.
- Pour the coconut out onto your tray.
- Make balls or wedges using modeling chocolate and set them on the flat side of each chocolate bunny in order to prop them up in the coconut grass.
Variations
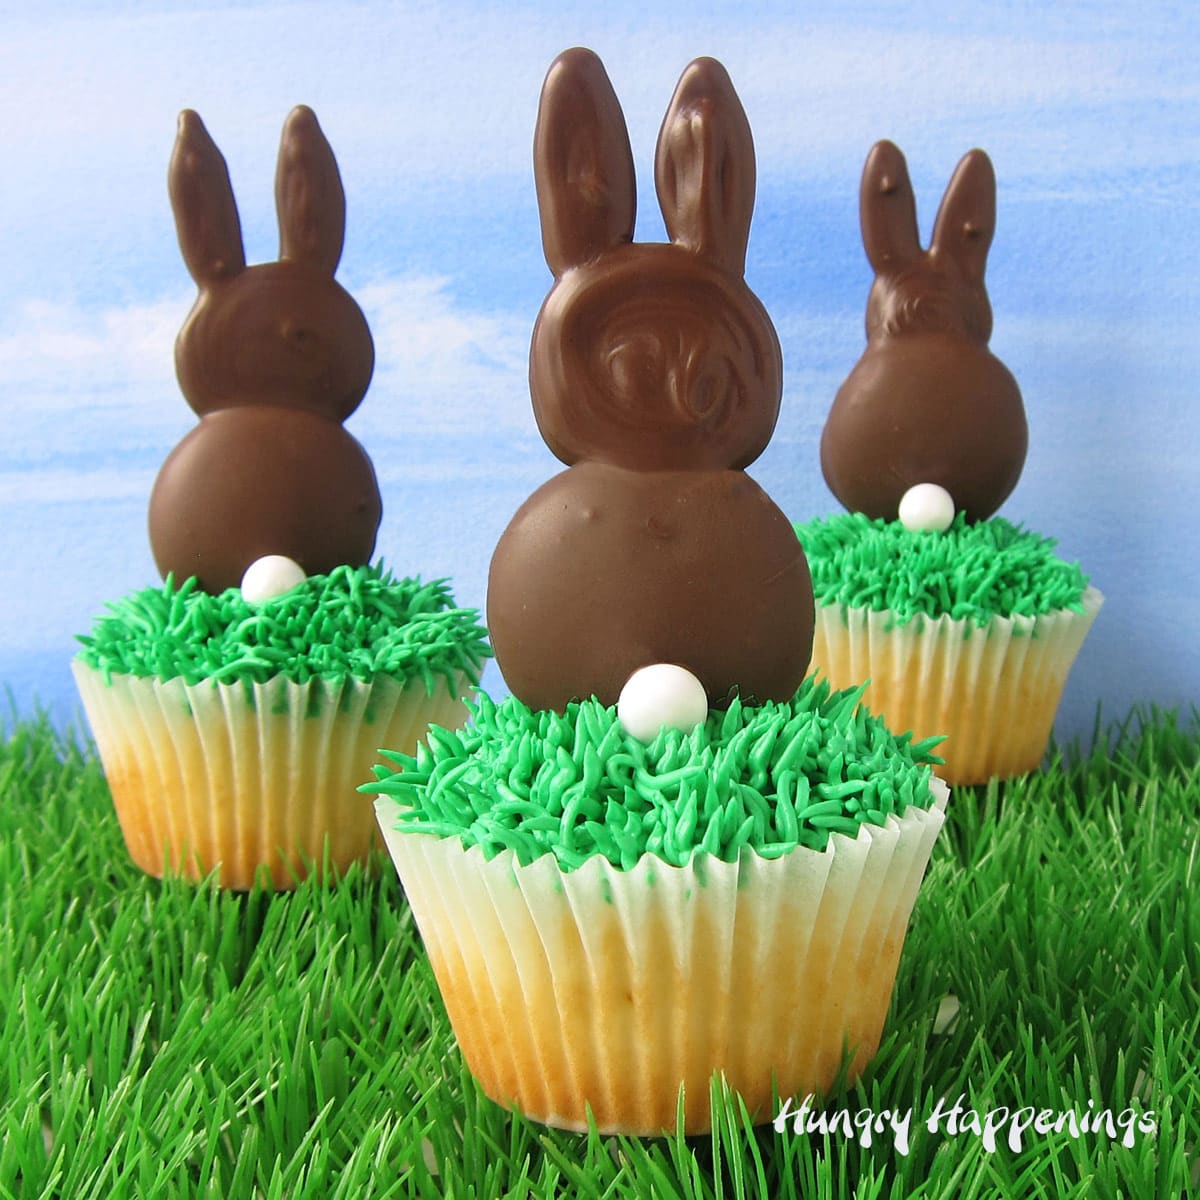
You can use white Sixlets instead of mini marshmallows to make the bunny tails. These bunny cookies will look so cute on cupcakes. See my Bunny Cupcakes recipe for details.
Related Recipes
See all of my Easter recipes, here.
Recipe
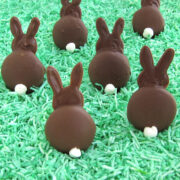
Vanilla wafer cookies dipped in chocolate or candy melts are decorated with bunny ears and a fuzzy marshmallow tail to look like Chocolate Bunny Silhouettes.
- 54 mini marshmallows
- 8 ounces light cocoa candy melts, melted
- 54 vanilla wafer cookies
-
Roll mini marshmallows in the palm of your hands until they shape into fluffy bunny tails.
-
Pipe one small chocolate bunny head (a little smaller than a vanilla wafer) and two ears onto a parchment paper-lined baking sheet.
-
Dip a vanilla wafer cookie into a small bowl of melted chocolate.
-
Remove the cookie from the bowl and set it right next to the chocolate head/ears creating the body for the bunny.
-
Immediately attach one marshmallow bunny tail along the bottom edge of the chocolate dipped cookie.
-
Chill the chocolate bunny cookies in the freezer for 5-10 minutes just until the chocolate hardens.
-
Repeat creating a total of 54 chocolate bunnies.
Chocolate
You can use pure milk chocolate to make your bunny cookies if you'd like but you must melt and temper it (heat and cool it to exact temperatures) in order for the chocolate to harden properly. Candy melts can simply be melted. See the Hungry Happenings' Chocolate Making Tips Page for details.
Storage
Store your chocolate-dipped bunnies in an airtight container at room temperature for up to 2 months depending on the best-buy date marked on the cookies.

- Banana Split Bars – A Fun and Easy Summer Dessert - March 4, 2026
- Pineapple Fudge (No Candy Thermometer Needed!) - March 4, 2026
- No-Bake Peanut Butter Pie Recipe - March 3, 2026
odetoinspiration says
Super cute idea!! LOVE them!
Mandy says
I LOVE your bunny butts!!! Oh my goodness these cookies are so darn cute.
Great job!
First time visiting your blog and I will definitely be back.
sugarswings says
adorable, so simple but perfect!
Randi~Dukes and Duchesses says
I love that ... they look awesome but it's also something that anyone could make and have success. Great idea - thanks for sharing!
Susan Crabtree says
Super Cute-I am so making these!
Teach1 says
I love this idea...so simple. I just bought a box of vanilla wafers, and I can't wait to do these. Love your blog!
Sue says
I really love these! Simple and cute:) You are so creative!
Laura Maria says
Sorry please remove prior comment I didn't notice it was for the face, clearly I need more sleep.
Laura Maria says
Couldn't you just dip the cookies in chocolate and then pipe the ears on to save time or is there a special reason you piped a chocolate circle down first that I'm not seeing?
Rita says
These are so cute. Found you on Tip Junkie. Thanks for the share.
Meg@MegaCrafty says
These are absolutely adorable- such a clever idea I love it!
Jenny@daysofchalkandchocolate says
These are adorable!! I love them! I'm so glad I found your idea!
Blythe says
So cute. Amazing blog! Found you on Ginger Snap Crafts.
Blythe
www.thedesperatecraftwives.blogspot.com
Linda says
Cute as can be. You never cease to amaze me with your sweets.
Jocelyn says
Those are the cutest little bunny butts:-) Love how easy these are to do!!!
Jill @ KitchenFunWithMy3Sons.com says
Wow...these are really cute Beth! Love them!
The Partiologist says
I Love your little bunny butt - covered in chocolate - YUM!
The BearFoot Baker says
Brilliant!!! These are amazing!!
grendelskin says
You can do as many bunny butts as you want! Let's face it, very few animals have cute tushes, never mind cute enough to depict in FOOD!
Beth Jackson Klosterboer says
I agree!
MissCandiquik says
I MUST make these - if I do, I'll be sure to link back to you! Love your ideas 🙂
Beth Jackson Klosterboer says
I'd love to see your recreation of these bunnies!