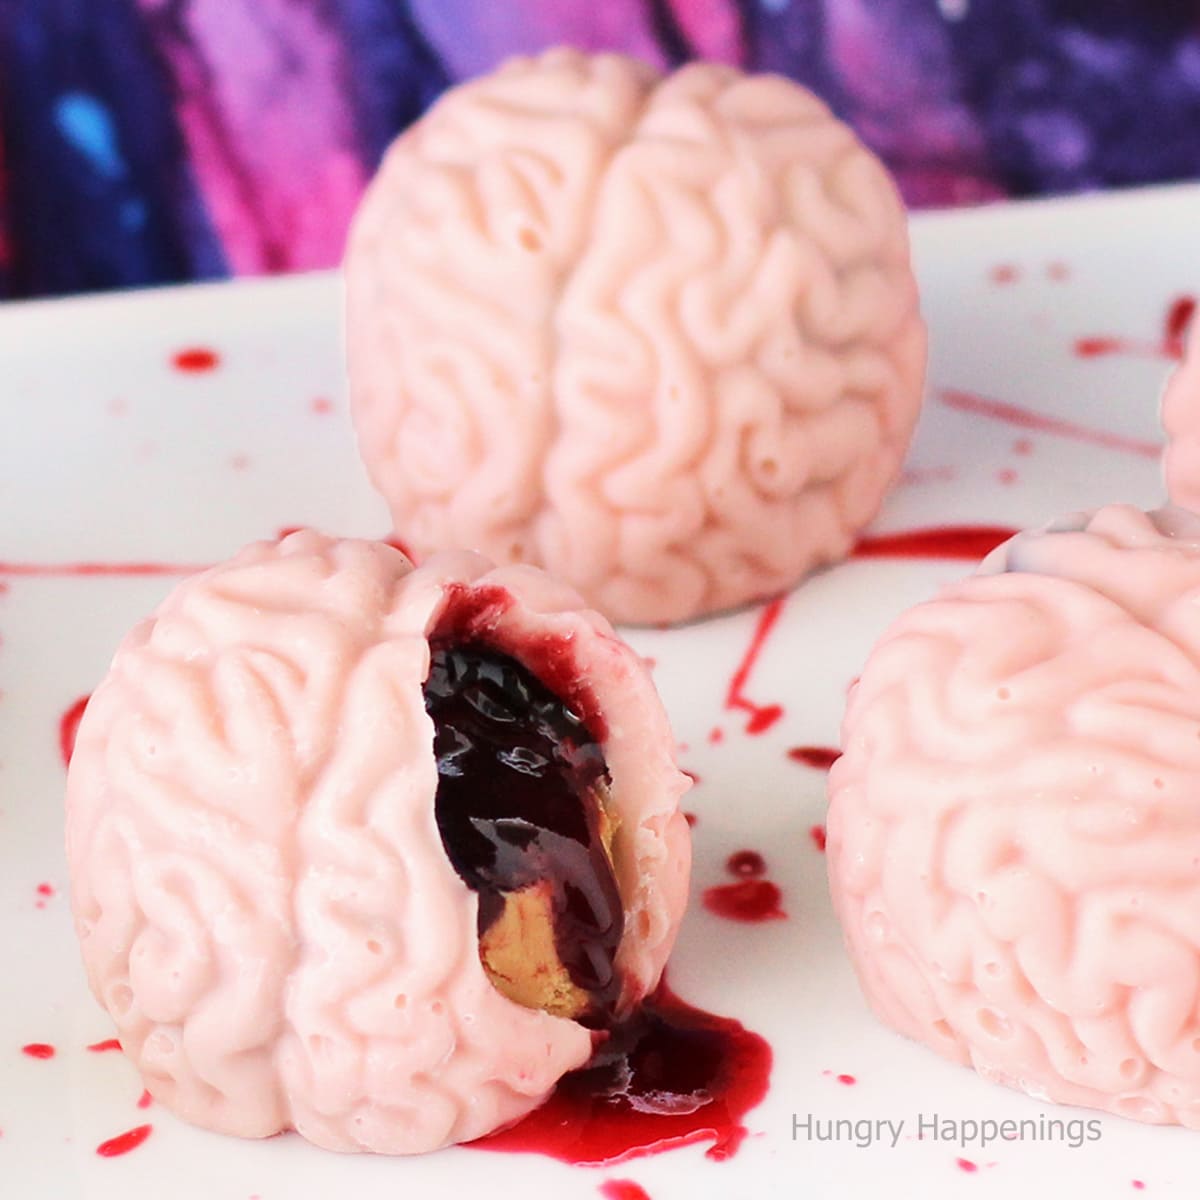
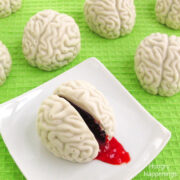
These Cake Ball Brains oozing cherry blood are to die for. The white chocolate-covered chocolate cake balls filled with cherry sauce will be a huge hit at your Halloween party or zombie-themed event.

Transform an ordinary cake ball into something a bit gruesome for Halloween this year. These cake ball brains are filled with a blend of chocolate cake and vanilla frosting with some bloody-looking cherry sauce.
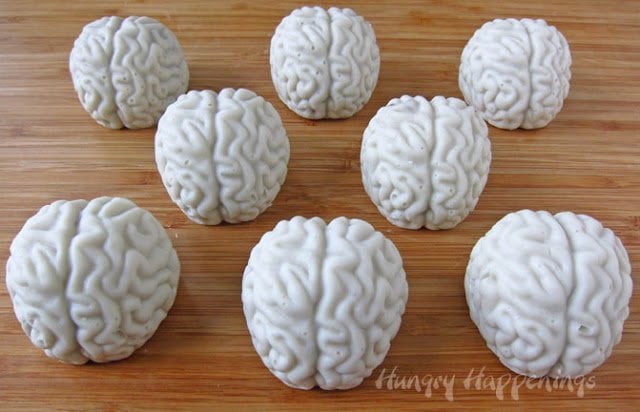
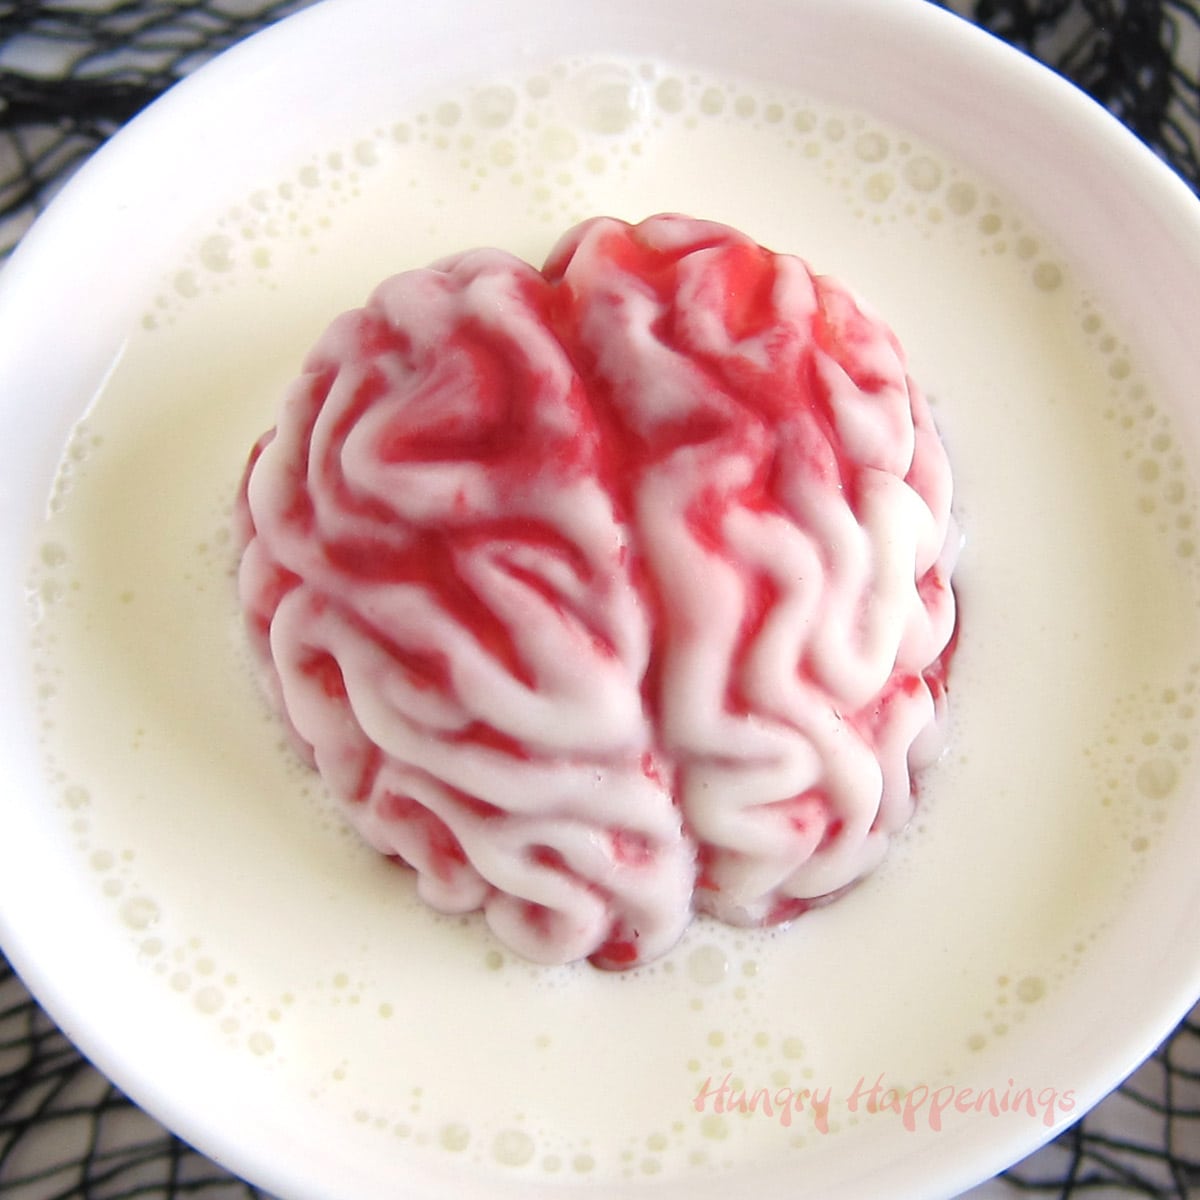
The white chocolate brains look so real and taste so good!
They would make a great dessert for a zombie-themed Halloween party.
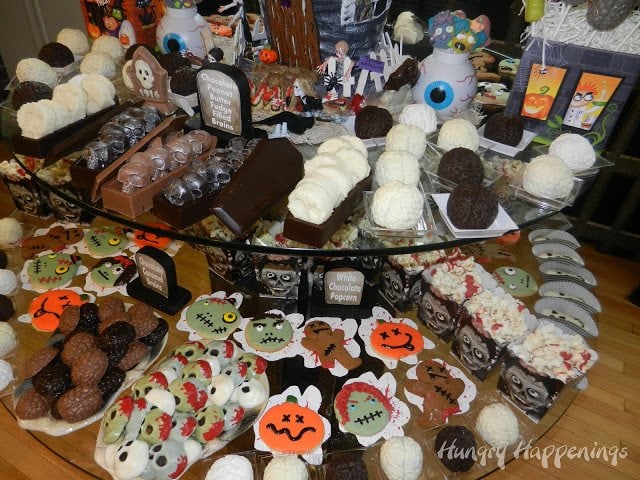
I served them at our party alongside other zombie-themed desserts and chocolates.
Actually, these creepy Halloween desserts have been so popular with my party guests over the years that I've served them at several of our Halloween parties.
More recently, I filled my white chocolate brains with peanut butter fudge and jelly. You can see the recipe and video tutorial to make PB&J Candy Brains here.
My guests always comment on how real the brains look. To get the realistic brain shape, you'll need to use some silicone brain molds.
Cake Ball Brains
(makes 28-36)
Ingredients
- 1 baked chocolate cake
- ¼ - ½ cup vanilla frosting
- 30-38 ounces melted white candy melts or melted and tempered pure white chocolate*
- black candy coloring (if you want your brains to be grey)
- cherry, raspberry, or strawberry preserves, dessert sauce, or ice cream topping (¾ teaspoon per brain)
- red food coloring (if you want to intensify the color or the fruit spread to make it look more like blood)
Update
- I made these and used about one ounce of candy melts per brain and about 2 tablespoons of the cake ball mixture, but I just had some friends over helping me get brains done for our party, and after making 20 brains, had used all the white candy melts but had cake leftover.
- Their candy coating was thicker than what I made. So by the end, they made 36 brains and used much more of the white candy melts.
- So, your quantities will depend a lot on your skill level using candy coating. I added more candy melts to the quantities just to be sure you have enough to make all your brains.
*If you don't have experience working with or melting candy melts, or you would like to use melted and tempered pure white chocolate, read my detailed Chocolate Making Tips page for instructions.
Supplies
- silicone brain molds
You can find silicone brain molds and some of the ingredients needed to make these cake ball brains on Amazon. I earn a small commission when you make a purchase using the affiliate links at no extra cost to you.
 Household Cold Whiskey Kitc...Shop on Amazon
  3Pcs 4 Holes Brain Ice,Ice ...Shop on Amazon
  Wilton Melting Chocolate Br...Shop on Amazon
 ") LaetaFood Wafers Super Whit...Shop on Amazon
LaetaFood Wafers Super Whit...Shop on Amazon Instructions
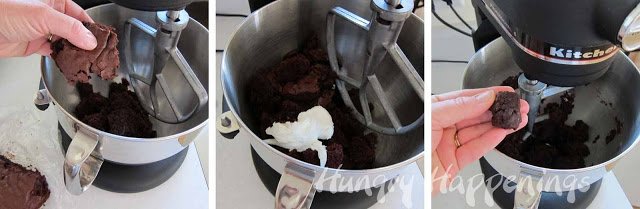
Make the cake ball filling.
- Remove any hard edges from the cake. This will give you a softer cake ball filling.
- Break up the center of the cake into a mixing bowl or the bowl of a stand mixer (my preferred method**) or a food processor.
- Add ¼ cup white frosting.
- Mix to combine.
- If the mixture holds together well and you can easily form balls, then stop; if it crumbles, add up to another ¼ cup of frosting.
- Set aside.
**By using a stand mixer, your cake balls will have a smooth truffle-like consistency. If you do this by hand, you will probably want to mix it with your actual hands to get it smooth.
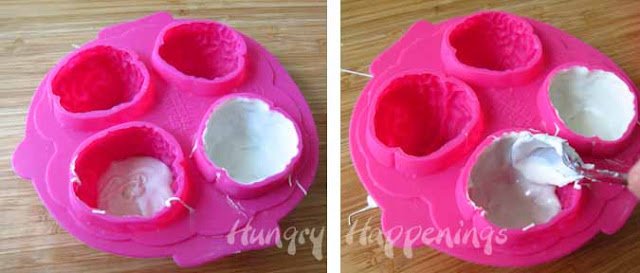
Create white chocolate shells in the brain molds.
- If you'd like your brains to be gray, stir drops of black candy coloring into your melted white confectionery coating until you get the desired shade.
- I made mine a pale gray, but you could go much darker if you prefer.
- You can also make your candy brains pink or green. Just be sure to use oil-based candy colors to color your candy melts or white chocolate.
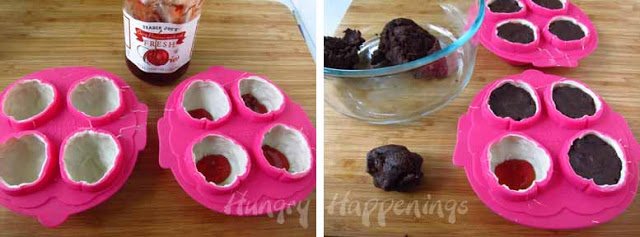
- Spoon some melted white candy coating into one of the brain mold cavities. Use a spoon or a pastry brush to paint the coating in a thin layer all around the inside of the mold. Be sure you can't see any pink (the color of the mold) through the white. Paint all four brain cavities in your mold.
- Wipe off any candy coating around the edges of the mold.
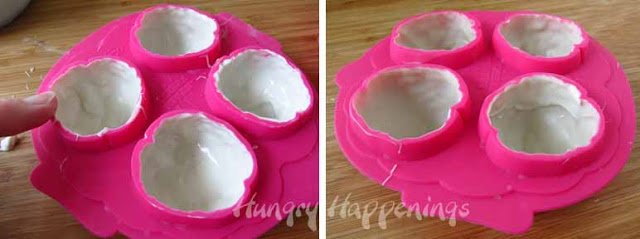
- Freeze for 5 minutes if you are using candy melts or refrigerate for 15 minutes if using pure white chocolate.
- Don't leave them in any longer, or you may get cracks and condensation on your brains, and you wouldn't want that now, would you?
Fill candy brains with cake ball filling and "blood."
- Remove the molds from the freezer.
- If you want your cherry filling to be brighter red, add a few drops of red food coloring.
- Spoon ¾ teaspoon of the cherry filling into each brain cavity.
- Scoop out about 2 tablespoons of the cake ball mixture and press it into a brain cavity, leaving enough room to add a layer of candy coating on top.
How to make the fruity "blood"?
- You can use cherry, raspberry, or strawberry preserves or dessert sauce (ice cream topping) to make your fruit-flavored blood.
- You'll want it to be thin enough to ooze but thick enough that it won't get absorbed into the cake ball filling.
- When I made these back in 2012, I used Trader Joe's Cherry Preserves. I added red food coloring to make them really vibrantly red. By adding the liquid food coloring and stirring the preserves, it became thin enough that it oozed nicely when the cake ball brains were cracked open.
- Raspberry sauce would work beautifully here, too. Just be sure to use seedless sauce or strain out the seeds.
Add more white chocolate.
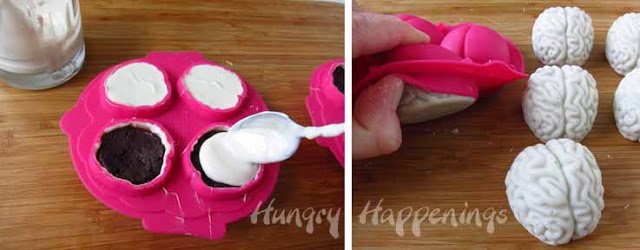
- Spoon some more white candy coating on top of each cake ball and smooth it out.
- Be sure to wipe off any excess coating around the edge of the mold.
- Freeze for 5 minutes if you used candy melts or refrigerate for about 10 minutes if you used pure white chocolate.
- Remove the cake ball brains from the fridge, turn the mold upside down, then press and pull on the mold until your brains pop out.
- These molds curve inward toward the opening so the candy brains will not just fall out. You need to pull on the molds around the edges to get them out.
Storage
- Store the candy-coated brains in an airtight container for up to a week.
- Just know that the longer they sit, the more likely it is that the cherry jam or sauce will soak into the cake.
- Thin sauces will soak in faster.
- If that happens, just serve them with a bit of extra sauce.
Can I freeze the chocolate brains?
- I don't recommend freezing or storing these in the refrigerator, as the moisture in the fridge will cause beads of condensation on your cake ball brains.
- But if you absolutely do need to make them ahead, wrap each brain in plastic wrap, then place them in a large zip-top bag or airtight container.
- Freeze for up to 3 months.
- To thaw, remove the bag and set it on the counter overnight.
- Then in the morning, you can open the bag and unwrap the brains.
- This should help to eliminate some of the moisture on the outside of the chocolate.
- Just know that the chilled brains might crack if frozen.
Related Recipes
If you plan to host a zombie-themed party or movie night, you might also like to make these other brain-shaped snacks.
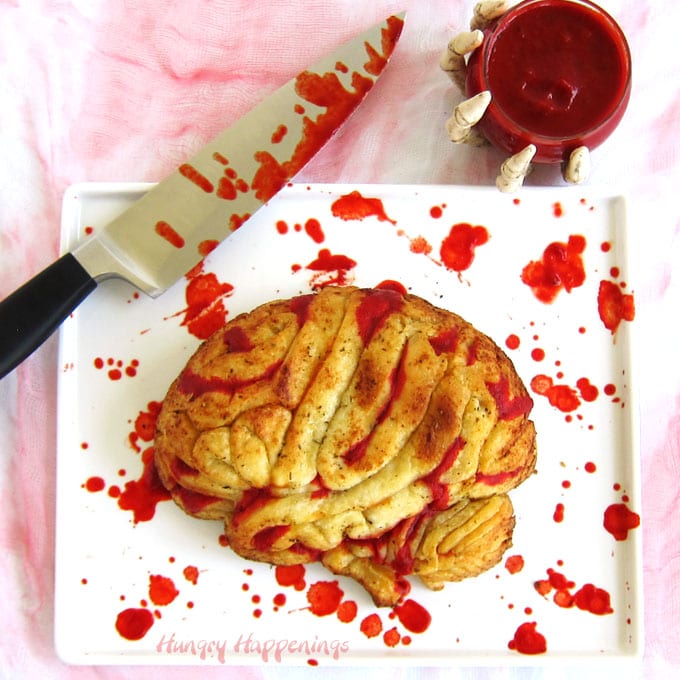
Be sure to check out all the Halloween recipes here on Hungry Happenings.
Recipe
This recipe was originally published on October 11, 2012.
White chocolate brains filled with a blend of chocolate cake, vanilla frosting, and oozing fruit-flavored blood (cherry or raspberry preserves or dessert sauce.)
- 1 baked chocolate cake (use either a 9 x 13-inch sheet cake or 2 8-inch round cakes)
- ¼ - ½ cup vanilla frosting
- 30-38 ounces melted white candy melts or melted and tempered pure white chocolate
- optional: black pink, or green oil-based candy coloring
- ⅔ cup cherry, raspberry, or strawberry preserves or dessert sauce (about ¾ teaspoon per brain)
- red liquid food coloring
-
Cut the edges off the chocolate cake and discard.
-
Break up the center of the cake into a mixing bowl or the bowl of a stand mixer.
-
Add ¼ cup white frosting.
-
Mix until it holds together in a soft ball.
-
Add more frosting if needed.
-
Set aside.
-
If desired, stir in drops of oil-based candy coloring to add color to your white chocolate brains.
-
Spoon some melted white chocolate into one of the brain mold cavities.
-
Spread the chocolate around to create a nice, evenly coated, thin shell.
-
Repeat.
-
Wipe off any candy coating around the edges of the mold.
-
Freeze for 5 minutes, if you are using candy melts, or refrigerate for 15 minutes, if using pure white chocolate.
-
Remove the molds from the freezer.
-
Stir a few drops of liquid food coloring into the fruit preserves.
-
Strain out any pieces of fruit or seeds.
-
Spoon ¾ teaspoons of the fruit filling into each brain cavity.
-
Scoop out about 2 tablespoons of the cake ball mixture and press it into a brain cavity leaving enough room to add a layer of candy coating on top.
-
Spoon some more white candy coating on top of each cake ball and smooth it out.
-
Be sure to wipe off any excess coating around the edge of the mold.
-
Freeze for 5 minutes if you used candy melts or refrigerate for about 10 minutes, if you used pure white chocolate.
-
Unmold the candies.
Store the candy-coated brains in an airtight container for up to a week.

- Banana Split Bars – A Fun and Easy Summer Dessert - March 4, 2026
- Pineapple Fudge (No Candy Thermometer Needed!) - March 4, 2026
- No-Bake Peanut Butter Pie Recipe - March 3, 2026


Angela says
Do you think these would work with caramel instead of jam? 🙂
Beth Jackson Klosterboer says
Absolutely, as a matter of fact we have made the cake ball brains plus some filled with caramel and marshmallow and even some filled with peanut butter fudge. They all work great.
Angela says
Excellent! I'll be trying the caramel jack-o-lanterns next weekend as a trial and I'll let you know how it went 🙂
Nicole @ WonkyWonderful says
These are Amazing! I almost bought that brain mold a couple months back - Now I wish I had 🙂
Nicole Smith says
Those turned out so well! Very awesome!
Sondra says
Absolutely the best creative idea I have seen in ages. I just ordered the molds as well. Can't wait to make these and see everyone's reaction
Beth Jackson Klosterboer says
Thanks, Sondra. I'm sure you'll have fun making your brains and watching as people eat them. Some of my friends where here yesterday baking for our party and they really got a huge kick out of the brains.
sugarswings says
awesome! i am also getting quite the collection of ice cube molds (and really never using them for ice!) my kids would love these bloody brains!
Beth Jackson Klosterboer says
Thanks. I know what you mean, I haven't used any of my molds for ice either. Maybe I'll actually make some ice cube brains for our party, if I find the time.
Patricia Calef says
I just bought these molds. I loved the instructions: "until your brains pop out." LOL
Beth Jackson Klosterboer says
As I wrote it I couldn't help but laugh. I didn't mean for it to be funny, but it just is!
Kalamity Kelli says
Amazing! Love it - My grandson is going to love these, one day. Today it will be my husband! 🙂 Great job!!
Angela says
What a fantastic idea! I've got jack-o-lantern molds, so I'm thinking of doing something similar. 🙂 Inspiration!
The Partiologist says
These are soooo gross but in a GREAT way!! 🙂 Good luck with your party - I ca't wait to see all the pics!!
Jo and Sue says
I have a foot mold and a hand mold but have not been able to find a brain mold. After seeing these I want...no...NEED a brain mold. I may have to start shopping on Amazon.:) These are sooooo cool! P.S. - Good luck with your party! Can't wait to see your spooktacular spread this year!
Beth Jackson Klosterboer says
I bought my brain molds from Amazon. I couldn't find them in any stores around here. I am so excited about our party. We baked and made chocolate all day today, but have so much more to do.
pra_az says
Found this mold at Costplus World Market
Cozyflier says
Oh wow! I LOVE this!! I too have about 100 kids showing up for a party on the 27th!! I'll have to run around town tomorrow and see if I can find this mold.
thanks for sharing this great idea!
Carrie
Beth Jackson Klosterboer says
Wow,100 kids, you are a brave woman. We have about 30-35 kids. I have so much fun with them. We are playing outdoor games this year and know the kids will have a ball.
I found my brain molds on Amazon.com. I haven't seen them in any stores around here. I would suggest going to the Fred & Friends website to see if they have a list of stores they sell to before driving all over town. I hope you have fun making brains and have a great party.
Marinica says
It's amazing 🙂 And it sounds delicious!
Glory says
That completely creeps me out, but I have to admit it's a genius idea. Good work.
It's Sooo Fluffy! says
These are freakin awesome!
MissCandiquik says
These are great!!! 🙂 I might do a Halloween treat roundup - could I link to these?
Beth Jackson Klosterboer says
Absolutely! Thanks;)
Dina says
😀 hahha, so crazy, but I like it! 😀
Jen says
I have a big brain jello mold. do yo think this would work in the big brain mold or would I need to have the smaller ones?
Beth Jackson Klosterboer says
It would work, just be sure to paint the chocolate onto the mold making sure you can't see through it. You don't want any spots where the cherry filling can leak through. Have fun making your cake and be sure to snap a picture and send it to me so I can share it!
Jill @ KitchenFunWithMy3Sons.com says
This is awesome...love it!
Vanessa says
What a fun idea! My son would love this.
Michelle | Creative Food says
hahaah SUPER creepy! I don't know if I could eat it haha but I do appreciate the awesomeness of it!
Anonymous says
It's just cake...
Prairie Echoes says
Lol no shit...lady, chill.
Anonymous says
Attitude not necesary