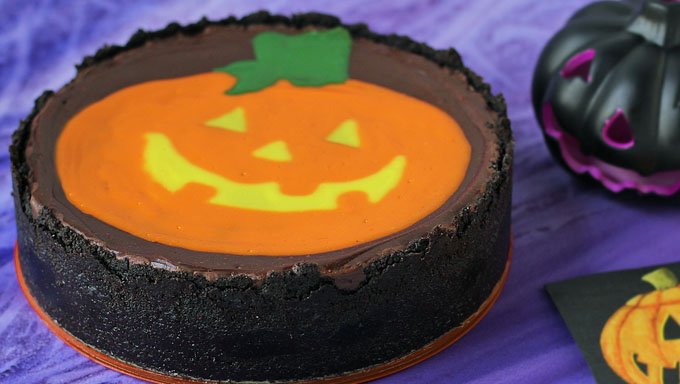
Dress up your Halloween Cheesecake by adding a fun Jack-O-Lantern design on top. It's easy to do using naturally colored cheesecake filling.

We hosted a pumpkin carving party for Halloween and my guests went nuts over this decorated Halloween Cheesecake.
This creamy vanilla cheesecake made with real vanilla beans had a chocolate graham cracker crust and a cute design on top.
Making decorated cheesecakes is my new thing. I've made a pretty pink Daisy Cheesecake, a red, white, and blue Flag Cheesecake, a rainbow Birthday Cheesecake, a Mickey Mouse Cheesecake, and even a Cheesecake Baby. but I have to say that this one for Halloween is by far my favorite.

All of the cheesecakes were made using my favorite cheesecake recipe but all of the others were colored using food coloring. For this cheesecake, I decided to use natural colors instead.
This pumpkin design only required two colors. The brown was easy to make by adding cocoa powder to the cheesecake filling.
The orange color was achieved using carrot puree. Earlier this year when I made my Naturally Colored Conversation Heart Cheesecakes I discovered that carrot puree makes the perfect orange color. The puree adds a nice sweet flavor but does not taste at all like carrots. I used it again to make some Cheesecake Carrots and knew it would work great here, as well.
So, let's bake a cheesecake.

Happy Jack-O-Lantern Cheesecake
Ingredients
- chocolate graham cracker crumbs
- butter - You can use salted or unsalted butter to make the chocolate graham cracker crust.
- cream cheese - Be sure to set your cream cheese out at room temperature for about 3 hours before making your cheesecake so that it is nice and soft and easy to cream.
- sugar - Use granulated sugar to sweeten the cheesecake.
- eggs - Use room temperature eggs. You can set them out at room temperature when you set out the cream cheese or you can place the eggs in their shells in a bowl of hot tap water for five minutes.
- sour cream - Adding this will make your cheesecake super creamy and will add a little tang to the flavor.
- 1 vanilla bean, split and scrape out the seeds to use in filling (you can also use 1 teaspoon vanilla bean paste or vanilla extract)
Natural Coloring
- cocoa powder
- heavy whipping cream or milk - Use this to thin out the cheesecake filling that you mix with cocoa powder.
- carrot puree (I used Beachnut Just Carrot baby food. It's just carrot puree.)
Supplies
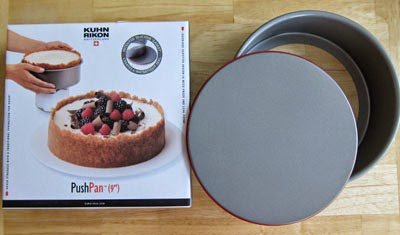
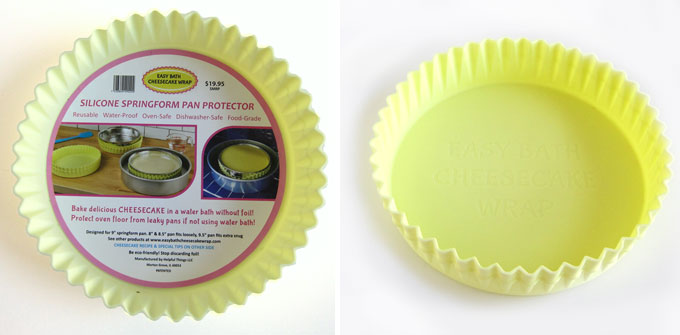
9-inch springform pan, a push pan, or a round pan with a removable bottom - I used a Push Pan to make this particular cheesecake. It has a removable bottom with a leak-proof gasket. I have more recently found an Easy Bath Cheesecake Wrap that keeps the water out of a regular springform pan. It's amazing!
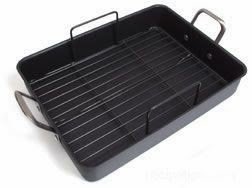
roasting pan or round pan that is large enough to hold the springform pan - You will make a water bath to bake the cheesecake and need a pan that is larger than the cheesecake pan to hold the water.
tin foil or silicone cheesecake pan liner - I didn't need to use these with the Push Pan, but you may want to wrap your springform pan with tin foil or set it down into a silicone cheesecake wrap.
Items used to create this project are available on Amazon.com (commission earned for sales)
I actually used zip-top bags to pipe on my colored cheesecake filling, but squeeze bottles work great too.
 EASY BATH CHEESECAKE WRAP- ...Shop on Amazon
  Fat Daddio's PCC-93 Anodize...Shop on Amazon
  Rodelle Vanilla Beans, 2 Co...Shop on Amazon
  Calphalon Simply Calphalon ...Shop on Amazon
  Large Clear Squeeze Bottle, Condiment Squeeze Bottle, Open-Tip, Screw-On Spout, Polyethylene Durable Plastic, Diner Style") SET OF 2 -- 24 Oz. (Ounce) ...Shop on Amazon
SET OF 2 -- 24 Oz. (Ounce) ...Shop on Amazon
Instructions
Bake the crust.
- Preheat your oven to 325 degrees F.
- Combine the chocolate graham cracker crumbs with the melted butter, stirring until it looks like sand. Press the mixture into the bottom and up the sides of the springform pan.
- Bake for 10 minutes until fragrant. Allow to cool completely.
Create a water bath.
You will need a water bath to bake your cheesecake.
You can either bring a large pot of water to a boil and pour it in the pan after you add the cheesecake, or you can fill your pan now with enough hot water so that it will come ½ way up the sides of your springform pan. Place that in the hot oven until ready to bake the cheesecake.
I like using a roasting pan with a flat rack inside. When the cheesecake has been baked, I can lift the entire rack out of the pan.

Make the cheesecake filling.
- Beat the cream cheese on low speed until smooth for about 1 minute.
- Scrape down the sides of the bowl and the beater then beat for another 30 seconds and scrape again.
- Add the sugar and beat until creamy.
- Scrape the bowl well again.
- Add the sour cream and vanilla bean seeds and beat until combined.
- Scrape one final time, making sure all the lumps are gone.
- Lightly whisk the eggs with a fork just to break them up.
- With the mixer running, slowly stream in the eggs just until they are incorporated.
- Do not overmix the batter once the eggs are added or you will incorporate too many air bubbles.

Color cheesecake filling.
- Scoop out 2 tablespoons of batter and stir in the cocoa powder and whipping cream.
- Then spoon out 3 tablespoons of batter and stir in the carrot puree. You can simply color the filling with orange food coloring if you prefer.
- Pour the remaining filling over the baked crust and pour the colored filling into small zip-top bags or squeeze bottles.
I used zip-top bags this time, but I have to say I prefer the control I have when using a squeeze bottle.

Piping the outline of the Jack-O-Lantern.
- Pipe a pumpkin design onto the cheesecake. Pipe the outline first then fill in the smile, eyes, and stem with the chocolate cheesecake filling.
These pumpkins are one of the few things I can draw freehand without looking at something. I've been drawing them for years. I modeled them after some stickers I purchased years ago.

Add orange cheesecake filling.
- Fill in the design using the orange-colored cheesecake.
- Stay within the outline. You want to see the brown outline.

Bake the cheesecake.
- Bake in a water bath.
- I used a leak-proof (mostly leak-proof, anyway) Push-Pan.
- If you use a springform pan, you will need to wrap it in several layers of heavy-duty tin foil.
- Or you can use an Easy Bath Cheesecake Wrapper. It's amazing! Check out my Classic Cheesecake Recipe post for details.
- Set the pan in the oven in a water bath.
- Bake for 50 minutes. The center will still look giggly, but not wet.
- Turn the oven off and crack open the oven door.
- Allow the cheesecake to sit in a water bath as the oven cools down for 1 hour.
- Then remove cheesecake from the water bath and allow it to cool at room temperature for an hour.

Chill the cheesecake.
- Refrigerate for at least four hours.
- When you place the cheesecake in the refrigerator, I recommend draping a piece of paper towel over the pan and wrapping it in foil or plastic wrap. This will keep condensation from forming on the cheesecake.
- Before serving remove from refrigerator and un-mold from springform pan or PushPan.
Storage
Store in the refrigerator for up to 4 days or freeze for up to a month.
I wrapped my pan, froze the cake, removed the cake, wrapped it well in plastic wrap, and popped it back in the freezer. Oh, and once it's frozen, you can get it off the metal ring, so you can bake another cheesecake. I think I'm going to make a few more for our party, so my guests don't have to fight over it.
Variations
I made a chocolate cheesecake to share on the Tablespoon website. I added a traditional Jack-O-Lantern on top using cheesecake filling that was colored using orange, yellow, and green food coloring.

You can also see this painted pumpkin cheesecake over on the Tablespoon site. It is decorated with a simple black cat silhouette.
Get creative and add your favorite design to a cheesecake for Halloween.
Related Recipes
If you plan to host a pumpkin-themed party, you might also like these other Halloween Recipes.
Recipe
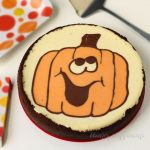
Decorate a delicious cheesecake with a smiling Jack-O-Lantern using naturally-colored cheesecake batter.
- 1 ¼ cup chocolate graham cracker crumbs (from about 18 squares)
- 4 tablespoons (½ stick) butter, melted
- 24 ounces cream cheese, softened
- 1 cup sugar
- 3 large eggs (room temperature)
- 1 cup sour cream (room temperature)
- 1 vanilla bean split and scrape out the seeds to use in filling (you can also use 1 teaspoon vanilla bean paste or vanilla extract)
- 2 teaspoons cocoa powder
- 2 teaspoons heavy whipping cream or milk
- 1 tablespoon carrot puree or pure carrot baby food
-
Set your cream cheese, sour cream, and eggs out at room temperature for a minimum of 1 hour before making your cheesecake batter.
-
Preheat oven to 325 degrees.
-
Wrap your springform pan with a few layers of tin foil or set it in a silicone cheesecake wrap.
-
Combine graham cracker crumbs with the melted butter, stirring until it looks like sand.
-
Press the mixture into the bottom and up the sides of the springform pan.
-
Bake for 10 minutes until fragrant. Allow to cool completely.
-
Beat the cream cheese on low speed until smooth for about 1 minute.
-
Scrape down the sides of the bowl and the beater then beat for another 30 seconds and scrape again.
-
Add the sugar and beat until creamy.
-
Scrape the bowl well again.
-
Add the sour cream and vanilla bean seeds and beat until combined.
-
Scrape one final time, making sure all the lumps are gone.
-
Lightly whisk the eggs with a fork just to break them up.
-
With the mixer running, slowly stream in the eggs just until they are incorporated.
-
Do not overmix.
-
Scoop out 2 tablespoons of batter and stir in the cocoa powder and whipping cream (or milk).
-
Then spoon out 3 tablespoons of batter and stir in the carrot puree.
-
Pour the remaining filling over the baked crust and pour the colored filling into small zip-top bags or squeeze bottles.
-
Pipe a pumpkin design using the chocolate cheesecake filling onto the top of the cheesecake.
-
Fill in the design using the orange colored cheesecake.
-
Set the cheesecake into a large roasting pan or 12-inch round cake pan.
-
Bring a pot of water to a boil. Pour the water into the roasting pan so that it comes halfway up the side of your cheesecake pan. Carefully place the pan in the oven.
-
Bake the cheesecake for 50 minutes.
-
Turn off the oven and crack open the oven door about 1 inch.
-
Allow the cheesecake to sit in the oven as it cools down for 1 hour.
-
Then remove the cheesecake from the water bath and allow it to cool at room temperature for an hour.
-
Refrigerate for at least four hours before removing from the pan and serving.
Store in the refrigerator for up to 4 days or freeze for up to a month.

- Banana Split Bars – A Fun and Easy Summer Dessert - March 4, 2026
- Pineapple Fudge (No Candy Thermometer Needed!) - March 4, 2026
- No-Bake Peanut Butter Pie Recipe - March 3, 2026


Vickie says
Oh, YUM!!! Can I have a slice?
Anonymous says
So cute and so yummy!
Stacy says
Oh, this cheesecake sounds amazing. I love using vanilla beans in my desserts and have to give the ones from Rodelle a try. I saw a jar of them at Kroger last week. I'll need to grab one on my next shopping trip so I can make a cheesecake for Halloween. I also think it's amazing that the carrot puree gave your pumpkin such a wonderful orange color.I would never have imagined that. Can I just puree my own carrots?
beth says
Hi Stacy, this recipe is really great and I do highly recommend making a cheesecake for yourself. You'll love it, I'm sure. Yes, you can puree your own carrots. I've done that before when I made my naturally colored conversation heart cheesecakes. I did find using the baby food was just easier. It's hard to puree such a small amount of carrots.
Karen @ Sugartown Sweets says
This pumpkin cheesecake turned out so darn cute!! If I were more of an artist, I'd give this a try.
As for the vanilla bean, I can relate how excited you were to try it. I've just ordered some vanilla bean crush and can't wait to use it. Plus I'm googling the blogger conference; sounds like lots of fun!
beth says
I've never heard of vanilla bean crush. I need to check that out.
Jill @ KitchenFunWithMy3Sons.com says
I am definitely trying this...who knew carrots would give such a fantastic color to cheesecake...love it!
beth says
I know, it really is amazing at how vibrant the color turns out.
The Partiologist says
I have to say, seeing all your cheesecake desserts, I have decided that you should now open a cheesecake restaurant, featuring that adorable pumpkin!
beth says
LOL! That's never going to happen. I much prefer making one at a time for my blog =)
Lynn@Happier Than a Pig in Mud says
Your pumpkin looks great and I love the natural colors! Everyone will love it:@)
beth says
Thanks, Lynn. I'm not opposed to using food coloring, but it is nice to be able to use natural products to color things like this cheesecake, instead.