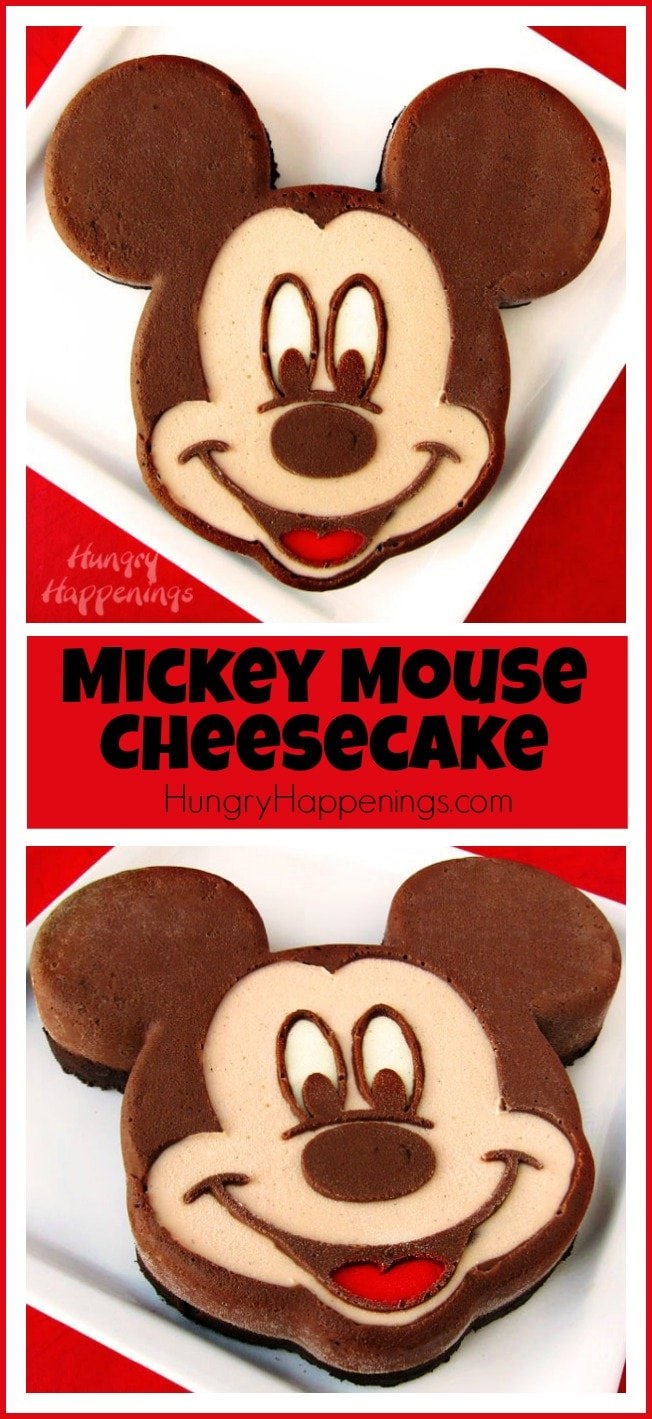
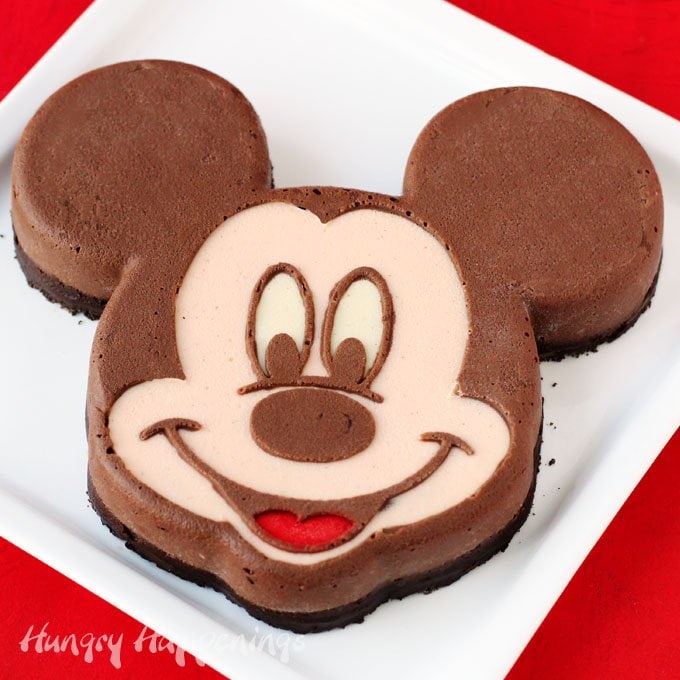
Decorate a decadent chocolate cheesecake with a double chocolate cookie crust to look like an iconic cartoon character. This Mickey Mouse Cheesecake will make a really cool dessert for any Disney-themed party.
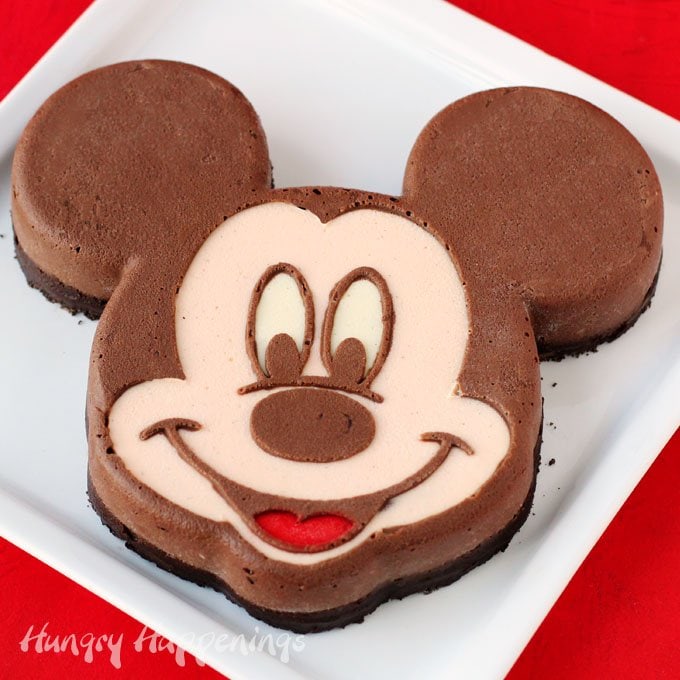
This festively decorated cheesecake was inspired by a recent trip we took to Walt Disney World Resort in Orlando, Florida.
Well, recent is a relative term, being we took this trip back in early December. I've just been too busy creating food crafts for Christmas, New Years', Super Bowl, Valentine's Day, and Easter to actually tell you much about it.
This was our second trip to the parks in one year. We just had to go back after my husband got sick during our first trip. We still had two unused 5-day park hopper passes that couldn't go to waste. Plus we had accumulated enough SPG points for a free, 6-night stay, at Disney's Swan Hotel and enough Southwest Rapid Rewards points for both of us to fly for free.
Being all we had to pay for, out of pocket, was food, we indulged. I'll share more about all the amazing places to eat at Disney in a post later this week. For now, let's talk sweet treats.
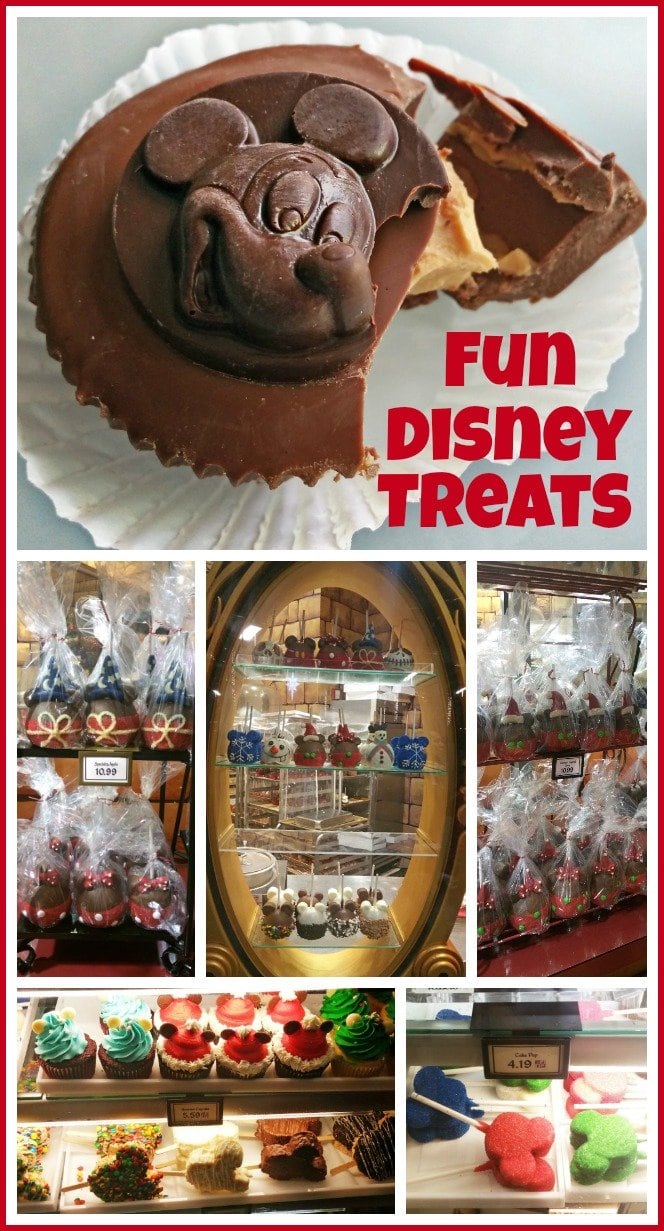
One of my favorite things to do while at the parks is to visit all the candy shops. There are plenty to choose from and I love that Disney has really gotten into the spirit of making food crafts.
It's as much fun for me to see all the hand-decorated caramel apples, cupcakes, rice Krispies, cake pops, cookies, and chocolates, as it is for most people to see Mickey Mouse, Donald Duck, and Goofy. Of course, I love that too.
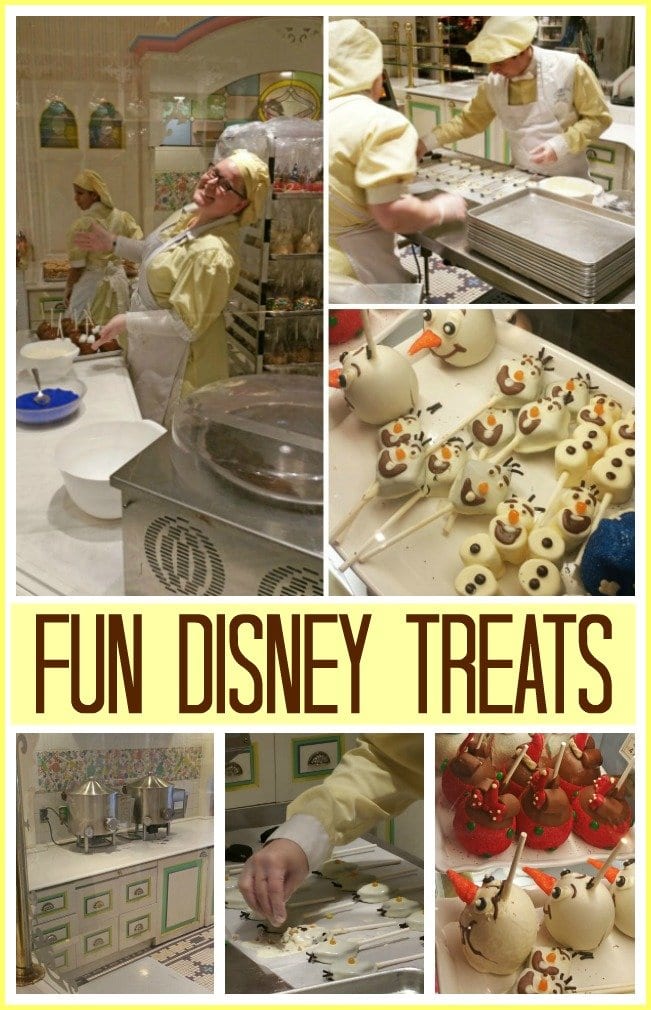
Getting to watch the treats being made is even more exciting for me. My husband had to go find a bench to sit on more than once because I spent so much time chatting with the candy makers.
I thought it was so cool to see two Savage Brothers chocolate tempering machines, just like the two I have in my candy kitchen, on the kitchen counter in the Main Street Confectionery shop. It's nice to know they use pure chocolate to make most of their sweet treats.
We enjoyed a peanut butter fudge-filled Mickey Mouse chocolate, a big Mickey Mouse cookie, and a Mickey Mouse caramel apple during our stay. I really had intended to try more of their sweet treats, but we ate so many huge meals, that we just didn't have room in our very full bellies. I'll just have to go back to try more.
Watching the workers inspired me to come home and make my own Disney treats like Animal Print Mickey Mouse Pops, Mickey and Minnie Mouse Chocolate Bark, Frozen Inspired Winter Wonderland Popcorn, and Cheesy Snowgie Snacks.
![]()
The dessert I was most excited to make was this cheesecake. When I found this Mickey Mouse silicone cake mold in the confectionery shop, I instantly knew I'd use it to make a cheesecake.
So, why did it take me almost 5 months to get around to it?
Why? Seriously, why?
Not only does this cheesecake look unbelievably amazing, better than I even envisioned, but the flavor is off the charts too.
The cheesecake is so smooth and creamy and decadently chocolate. The flavor of the chocolate cheesecake is enhanced by the addition of a double chocolate crust made with Mega Stuffed Oreo Cookies and homemade chocolate ganache. It is definitely not your typical cheesecake crust.
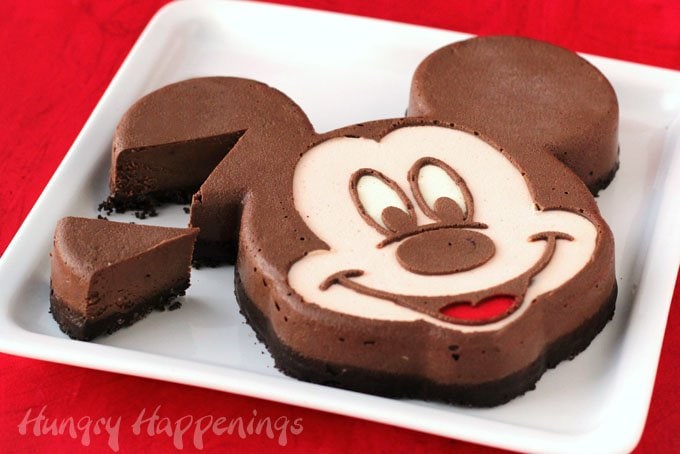
Being this cheesecake is baked without a crust, I had to come up with a way to attach one after it was baked. I poured chocolate ganache over the cooled cake then topped it with a mixture of cookie crumbs and some more chocolate ganache.
It stuck, just as I had hoped, makes a nice solid base for the cheesecake, and tastes incredible.
Oh, boy!
If you want to make one of these Mickey Mouse Cheesecakes then you are going to need to get the silicone mold.
You can find them at many of the gift shops in Disney, or you can get them from Amazon. You'll also need peach and red food coloring, some food use only paint brushes or some squeeze-it mold painter (squeeze bottles) fitted with a small round pastry tip, and a roasting pan, preferably with a flat removable rack. (Commission earned for sales from affiliate links.)
 Disney Parks Exclusive Mick...Shop on Amazon
  DisneyParks Mickey Mouse Ic...Shop on Amazon
  PEACH SOFT GEL PASTE 4.5 OZ...Shop on Amazon
  AmeriColor Super Red Soft G...Shop on Amazon
  Testors 20-Pack Economy Pai...Shop on Amazon
 Simply Calphalon Nonstick R...Shop on Amazon
 CK Products Squeeze Bottle ...Shop on Amazon
Mickey Mouse Cheesecake
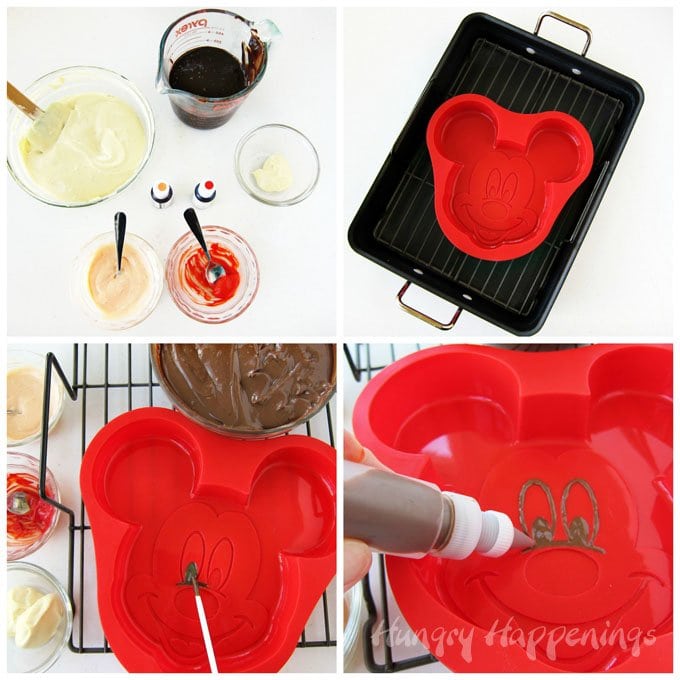
- Start by creating a water bath for the cheesecake to bake in. I suggest using a roasting pan with a flat removable rack. Set the mold on the rack then fill the pan with enough water to come halfway up the sides of the mold. Remove the rack and mold, and set the pan in the oven. Heat the oven to 325 degrees while you make the cheesecake.
- The rack will give your silicone mold nice support and later when it's filled you can simply lower it into the water bath using the handles.
- Now you can make the cheesecake filling and the chocolate ganache using the recipes below.
- Pour ¼ cup of the filling into a bowl and color it peach. Color 2 teaspoons of the filling red and leave 1 tablespoon white.
- Reserve ⅔ cup of the chocolate ganache for the crust, then mix the remainder into the bowl of cheesecake filling.
- Then use the chocolate cheesecake filling to color the outer eyes, nose, and mouth of the Mickey Mouse silicone mold.
- You can use a paintbrush or if you prefer, a Squeeze-It Mold Painter. I actually found it easier to use the squeeze bottle because the outline around the eyes is quite thin. Piping the chocolate filling into those thin indentations was easier than painting it in.
![]()
- Once you have the outline of the eyes, the pupils, nose, and mouth done, pop the mold in the freezer for 5 minutes.
- Remove and paint the whites of Mickey's eyes and the red tongue, then freeze again for 10 minutes before painting the peach face.
- Freeze the mold for 15 minutes then remove and let sit at room temperature for 5 minutes.
- Pipe chocolate filling around the peach-colored face, then pour the rest over top.
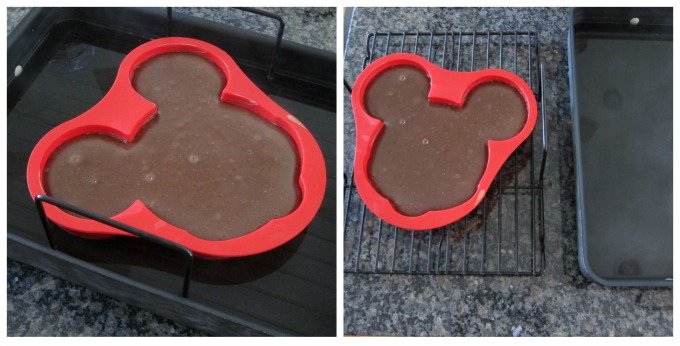
- Bake the cheesecake for 38-42 minutes then remove it from the oven and water bath. The outer edges should look set, but the center will still be jiggly, but not look sloshy or wet.
- If you are unsure if it is done, you can turn off the oven, and crack the door open about an inch and leave the cheesecake inside for 15 minutes.
- Lift the cheesecake out of the roasting pan. The rack worked perfectly to keep the silicone mold flat. It also worked as a cooling rack!
- Let the cheesecake cool at room temperature for an hour.
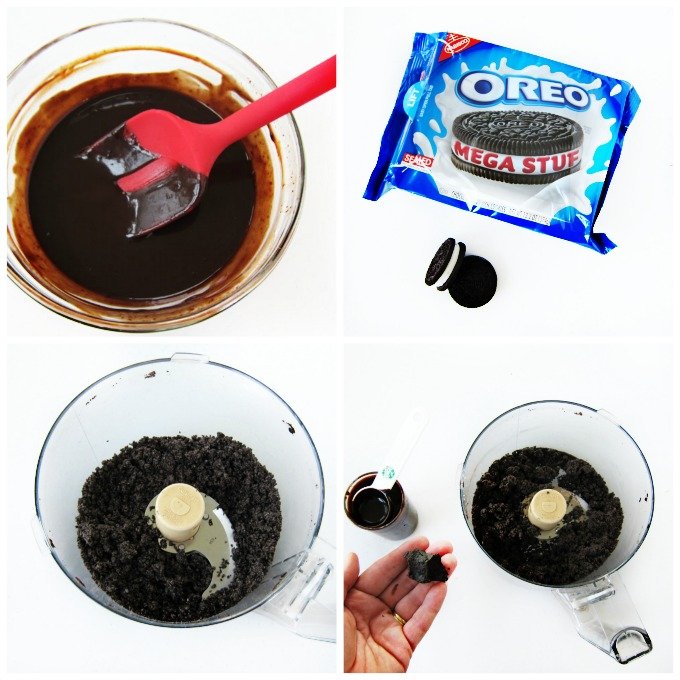
- To make the crust, you may need to reheat the chocolate ganache if it has firmed up too much. Just microwave it for 10 seconds, then stir.
- I used Mega Stuffed Oreos to make this crust because I wanted a lot of filling so the crust would hold together well.
- Crush them up into fine crumbs.
- Then add 1 ½ tablespoons of the chocolate ganache.
- When you pinch off some of the crumbs, you should be able to squeeze them into a ball.
- You want it to be crumbly, yet hold together, when pressed into the crust.
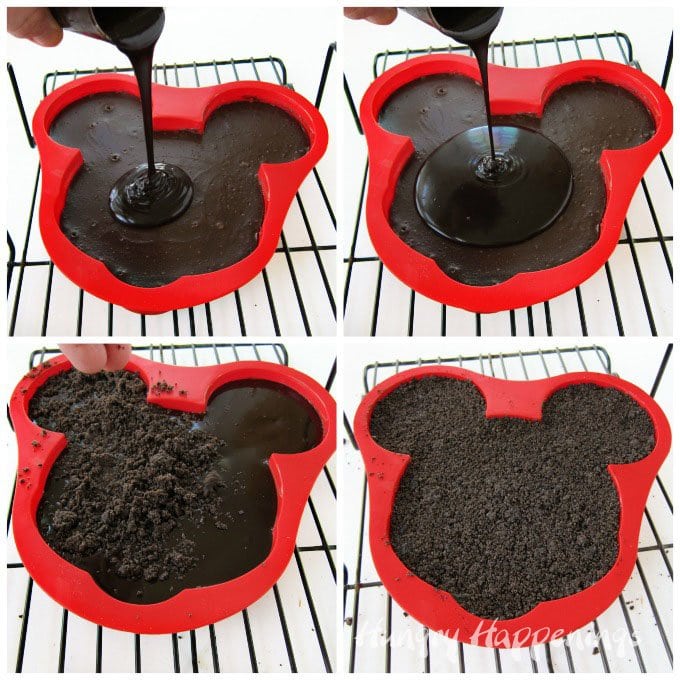
- Pour the remaining chocolate ganache over the cooled cheesecake and spread it into an even layer.
- Sprinkle the cookie crumbs over top then gently pat them into an even layer.
- Cover the Mickey Mouse Cheesecake in plastic wrap and tin foil and freeze it for at least 4 hours or up to a month.
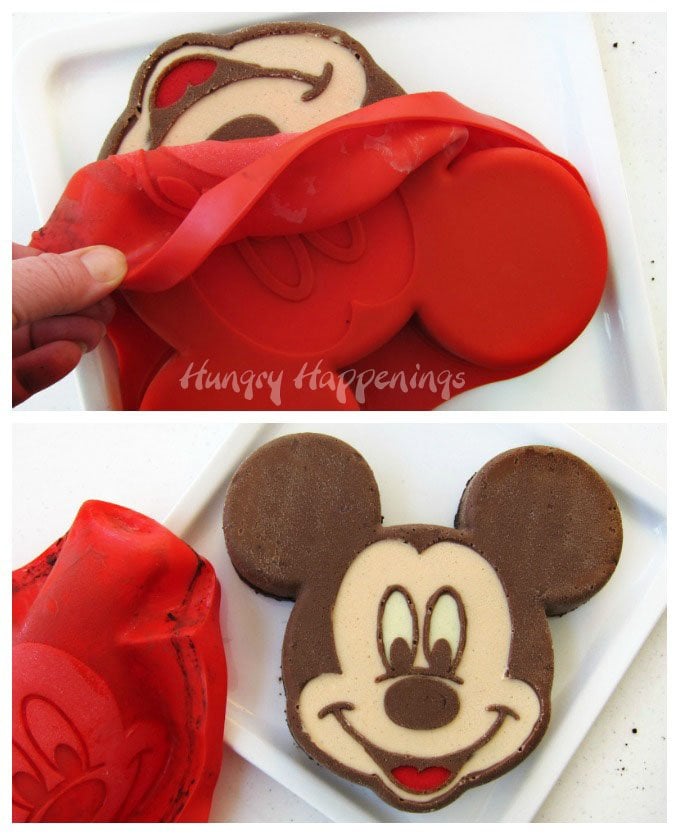
- You need the cheesecake frozen solid in order to easily un-mold it.
- To do so, set the cheesecake on a serving platter and peel the silicone mold away from the cheesecake.
- Place the cheesecake in the refrigerator and allow it to thaw. If you want to take it with you to a party, you can bring it frozen and just allow it to thaw at room temperature, which will happen in less than an hour.
Printable Recipe
- 1 cup heavy whipping cream
- 12 ounces semi-sweet chocolate finely chopped
- 16 ounces 2 blocks cream cheese, softened
- ⅔ cup sugar
- 2 large eggs
- ¼ cup heavy whipping cream
- 1 teaspoon vanilla extract or vanilla bean paste
- peach and red food coloring
- 7 Mega Stuff Oreo Cookies
-
Place a roasting pan filled with enough water to reach halfway up the side of a silicone Mickey Mouse mold.
-
Place roasting pan in oven and heat to 325 degrees Fahrenheit.
-
Combine heavy whipping cream and finely chopped semi-sweet chocolate in a microwave-safe bowl.
-
Heat on high power for 1 minute.
-
Remove and stir.
-
Let sit for 3 minutes then stir again.
-
If needed, heat for 15-second increments, stirring after each until melted.
-
Set aside to cool.
-
Pour ⅔ cup ganache into a bowl and reserve for the crust.
-
Either use a food processor or an electric mixer and beat cream cheese until really light and fluffy.
-
Be sure all the lumps of cream cheese are gone.
-
Add sugar and beat until combined.
-
Add eggs, heavy whipping cream, and vanilla and beat just until incorporated.
-
Pour ¼ cup of filling into one small bowl and color peach.
-
Pour ¾ teaspoon into another bowl and color bright red.
-
Pour 2 teaspoons of filling into a final bowl and leave white.
-
Pour the cooled chocolate ganache into the remaining cheesecake filling.
-
Use some food use only paint brushes or squeeze-it mold painter (squeeze bottles) to paint or pipe chocolate cheesecake filling into a Mickey Mouse silicone mold. Paint the nose, pupils, and outlines around the eyes and mouth.
-
Pop the mold in the freezer for 5 minutes.
-
Remove and paint the red tongue and white eyes.
-
Freeze for 10 minutes.
-
Remove and paint the peach face being sure to make it thick.
-
Freeze for 15 minutes.
-
Remove and pipe or paint chocolate filling around the face then pour the remaining chocolate filling over top.
-
Place the mold in the hot water in the roasting pan in the oven.
-
Bake for 38-42 minutes until the edges look set.
-
The center will still be jiggly, but should not look wet.
-
Remove from oven and water bath and set on a cooling rack to cool for one hour.
-
Reheat the reserved chocolate ganache in the microwave for 10-15 seconds until it is fluid.
-
Crush Oreo Cookies in a food processor.
-
Add 1 ½ tablespoons of the chocolate ganache and pulse to combine.
-
Pour the remaining chocolate ganache over the cooled cheesecake.
-
Sprinkle the cookie crumbs over the ganache and pat into an even layer.
-
Cover with plastic wrap and tin foil and freeze for at least 4 hours.
-
Remove and un-mold the cheesecake.
-
Allow to thaw before serving.
If you are hosting a Disney themed party or are surprising your family with a trip to Disney,
you might also like to make some of these other treats...
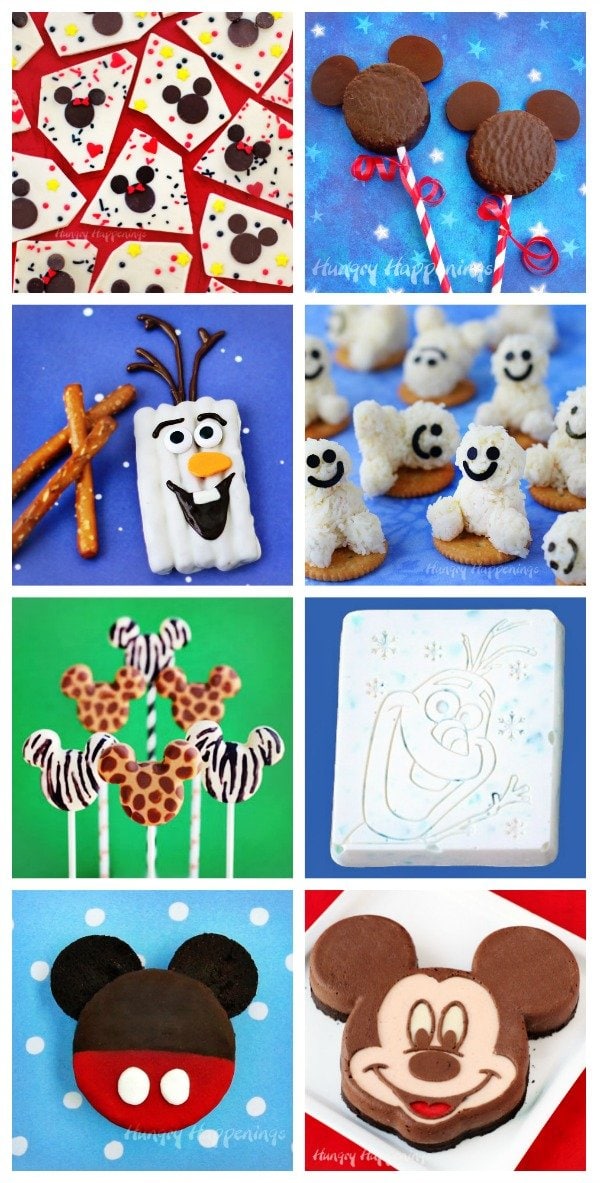
Minnie and Mickey Mouse Chocolate Bark • Snack Cake Mickey Pops
White Chocolate Pretzel Olaf • Snowgie Cheese Snacks
Animal Print Mickey Mouse Pops • Olaf Candy Bars
Mickey Mouse Snack Cakes • Mickey Mouse Cheesecake
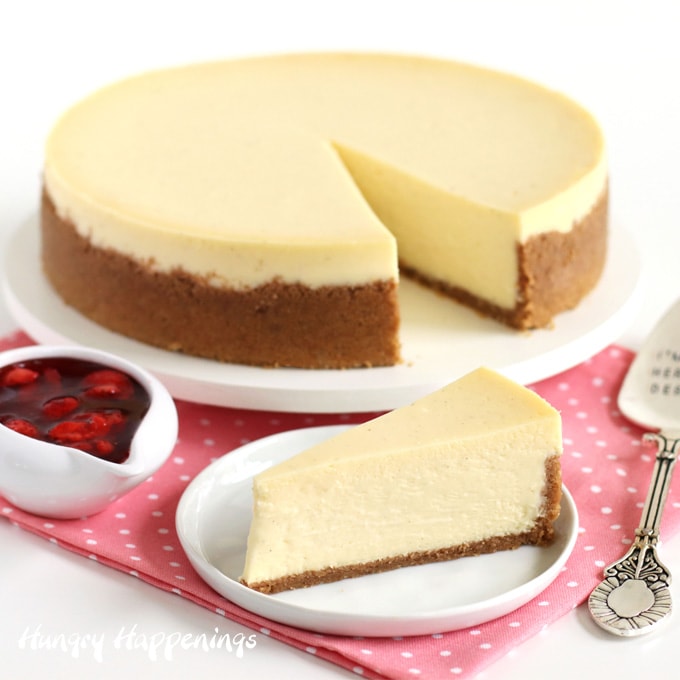
If you love cheesecake, be sure to check out my classic cheesecake recipe. I share tips for making the creamiest, best-tasting cheesecake ever.
![]()
Did you make this recipe or do you just think it is super cute? Let me know by leaving a comment and rating the recipe below. If you love the recipe, please give it a 5-star rating.

I love making fun food for parties and special occasions and sharing my creative ideas with you.
If you make this recipe and share it online be sure to link back to this post.
Thanks and have a sweet day! -
Beth
- How to make peanut butter? - February 15, 2024
- OREO Penguins - December 20, 2023
- OREO Snowmen - December 20, 2023

Regina Turner
I’m in the middle of making one of these right now! Fingers crossed that it turns out well! I don’t have a very steady hand, so I’m not sure how great the face will look, and I couldn’t find peach, so I had to use ivory for the face, which is pretty yellow, but we shall see! I’ll let you know how it turned out tomorrow!
Beth
Hi Regina,
I hope your cheesecake turns out great! I look forward to hearing about it!
Jennifer
I'm planning to make this for my daughter's 2nd birthday and did a trial run today. Other than sticking on a few places it turned out great! Any suggestions to keep this from happening?
Beth
I'm happy to hear you are making this cheesecake. If it's sticking, it needs to be frozen a bit longer. Once it's frozen solid, it should come out pretty clean. If it does stick, you can wet your finger and run it over the spot to smooth it out a bit. I hope your party guests enjoy the fun dessert!
Jennifer
Thanks for the tip! It turned out great for her party and everyone love it!
Beth
That is great to hear!
Karen @ Sugartown Sweets
I love it Beth, you have outdone yourself with this amazing cheesecake! Like you, the #1 thing i must do on every visit to Mickey Mouse~land, is to watch the incredible treats being made and chatting with the treat makers! It's the best part of the trip.
I've mentioned to my husband (more than once), how awesome it would be to retire to Florida and work/play in the Disney candy kitchens.
Your recipe sounds divine and I love how you made the Oreo crust! 🙂
Beth
It's nice to know I'm not the only person who finds joy in watching the Disney treats being made. We stood in line for 45 minutes to get popcorn at the Werther's shop and I didn't even notice how long we stood there because I was having fun watching them make treats. Retiring at Disney would be cool!
Karen @ Sugartown Sweets
YES! I'm happy that hubby has a sweet tooth. We have gone to Epcot just so we can get the chocolate dipped caramel apples at Karamell-Kuche! Can't wait to hear more about your trip. :o)
lisa@hooplapalooza
if Minnie never met Mickey i am sure she would be hanging on to this instead! talk about a perfect man for her...errr i guess i should say perfect mouse! aww heck this is perfect for anyone! 🙂
Beth
Thanks, Lisa. 🙂
Karen
This is so cool.
The Partiologist
I love your Mickey Mouse cheesecake, it brings such wonderful memories of the magical place and the thought of continuing the magic at home with the cheesecake is fantastic!
Beth
Thanks, Kim. As I was making it, I was reliving our time together at the parks. I had so much fun making this. Not quite as much fun as I did at the parks though!