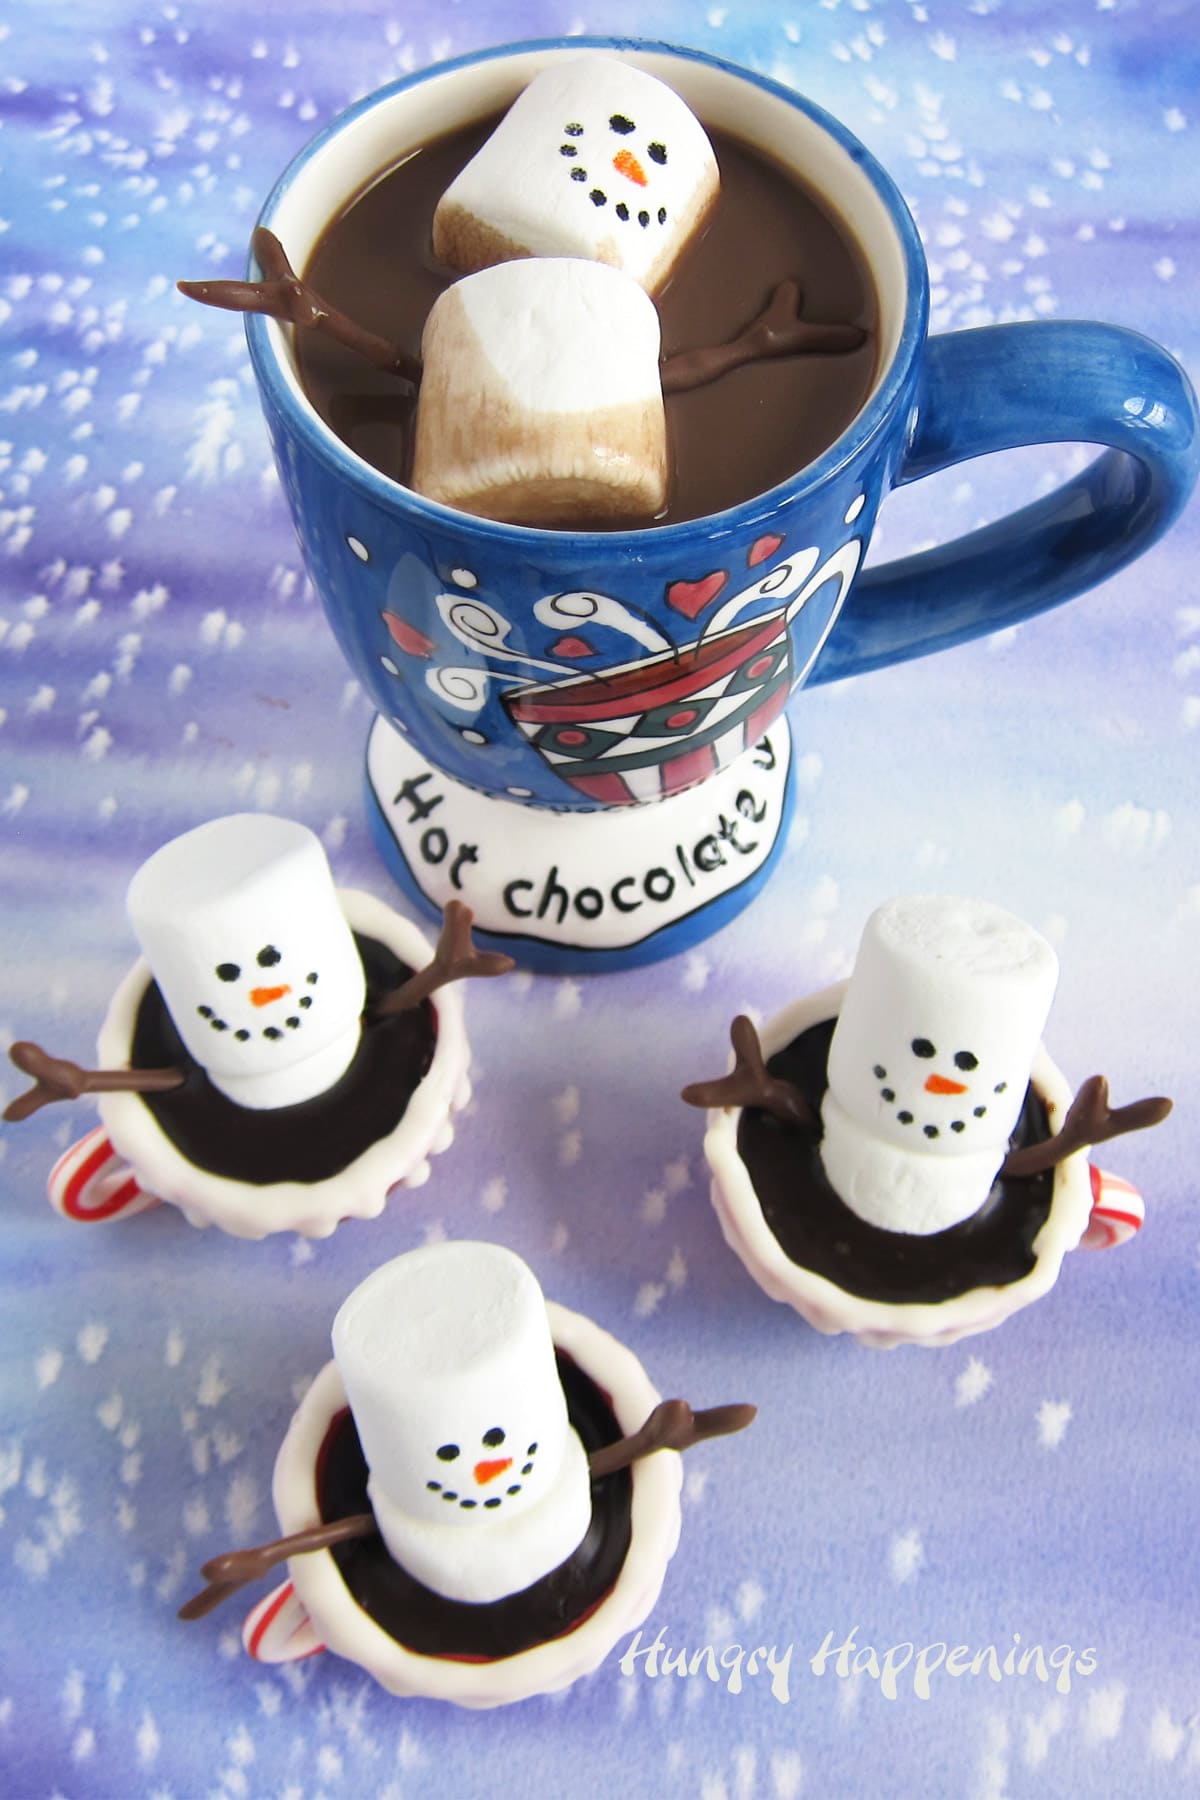
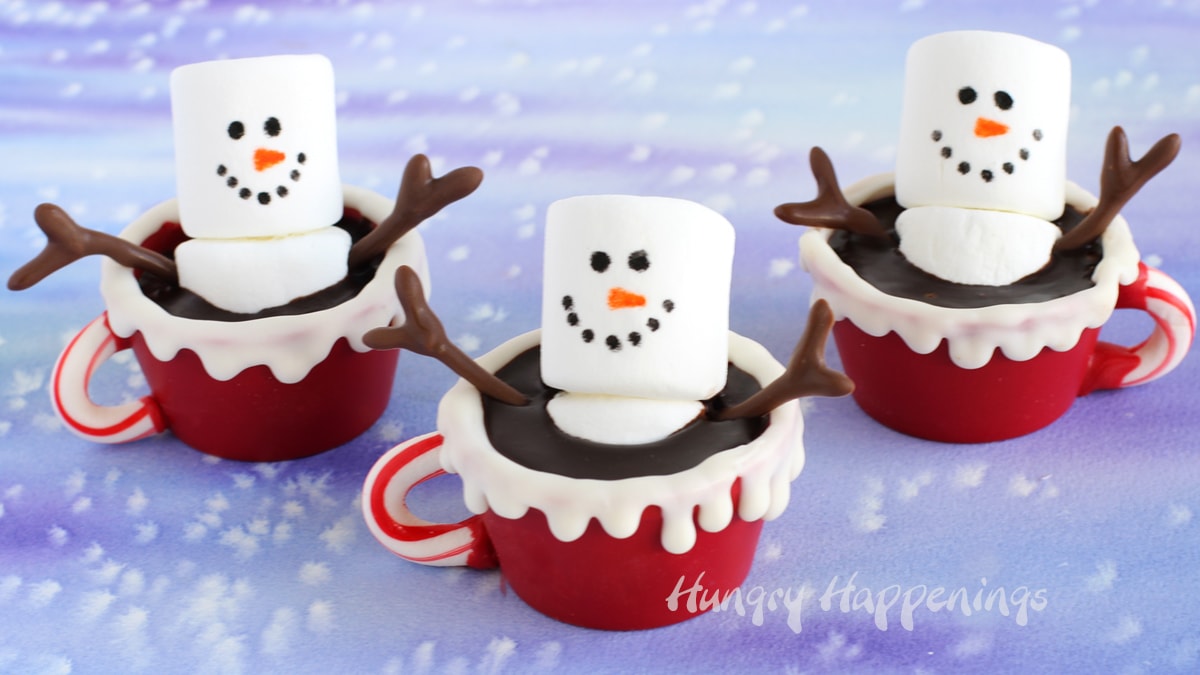
These are the cutest Christmas Hot Chocolate Bombs ever! Each marshmallow snowmen is melting an edible mug of hot cocoa (chocolate ganache). You can melt these in a mug of milk or serve them as Christmas dessert.
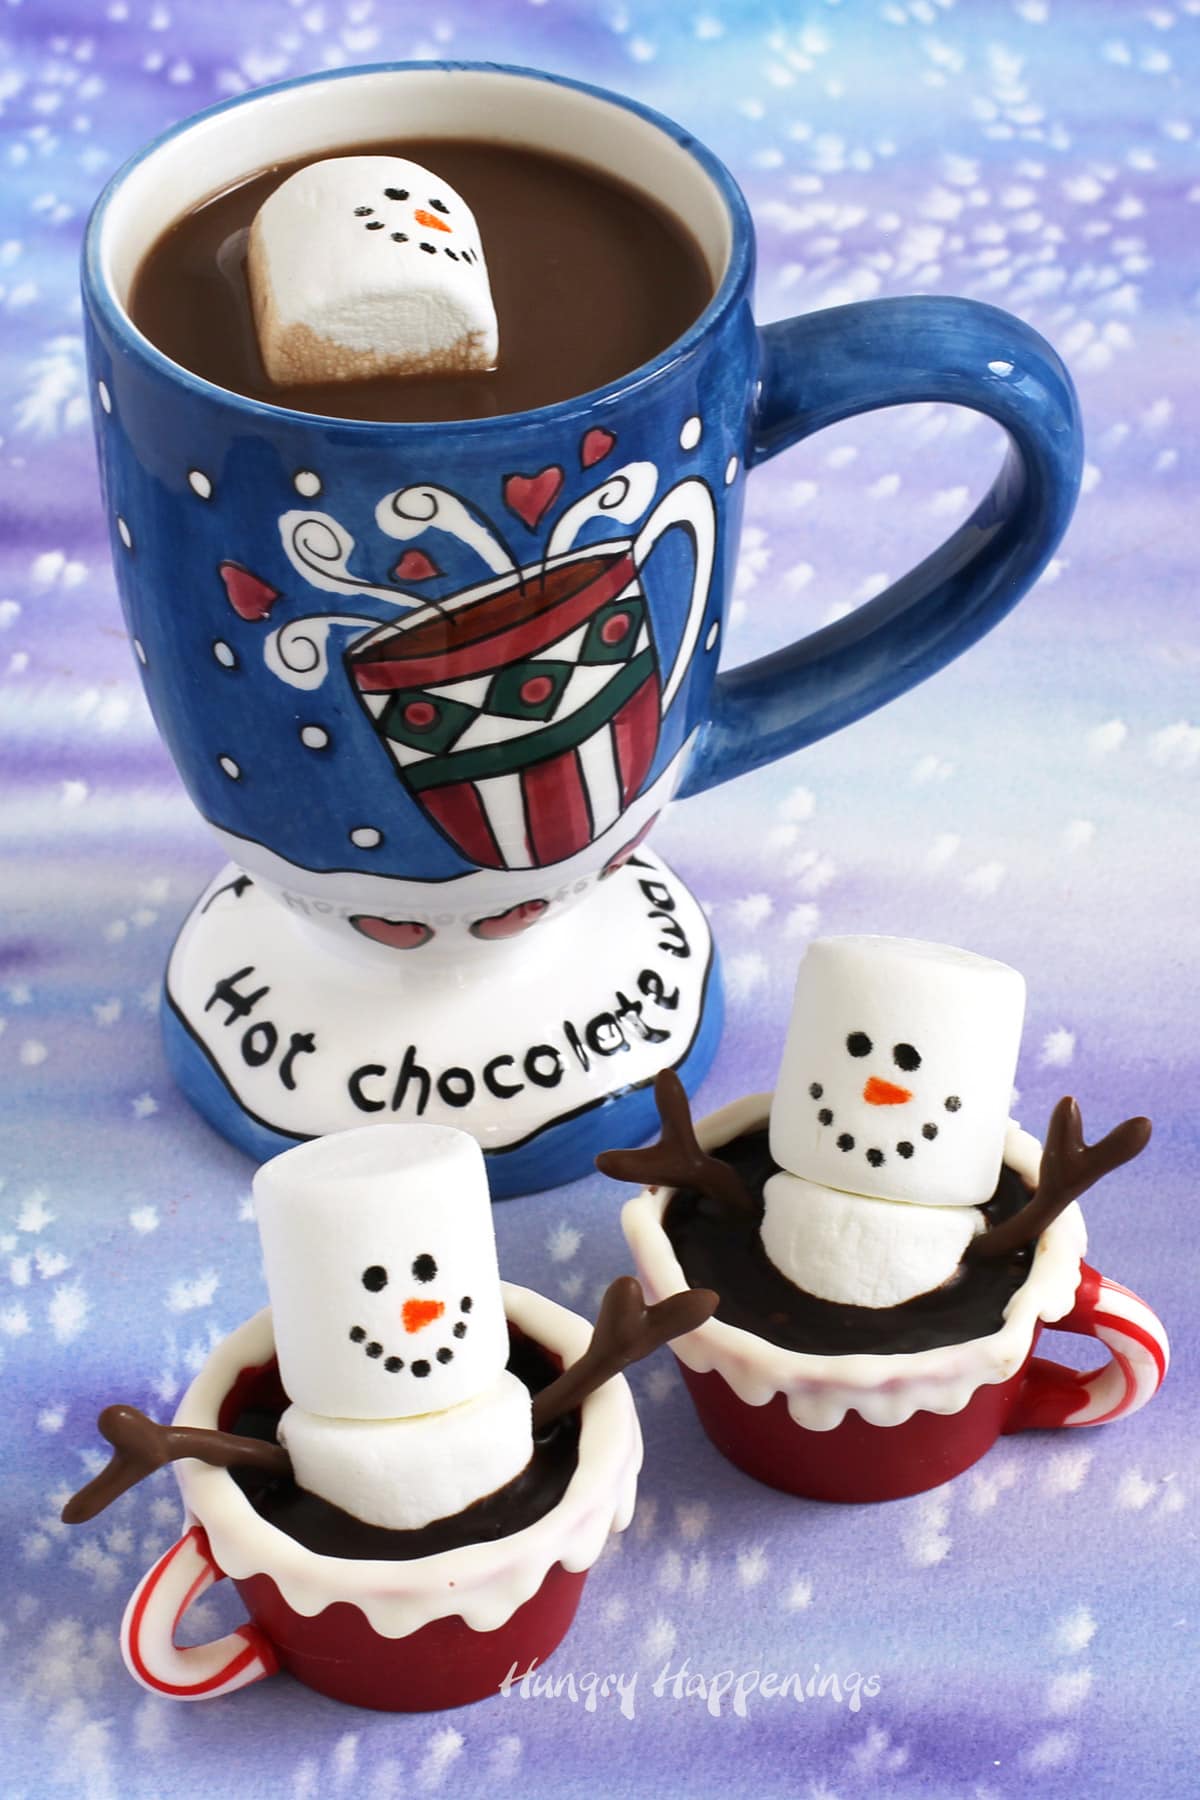
I am so excited to share these cute snowman hot cocoa bombs with you! I have not had this much fun creating a new recipe in a very long time.
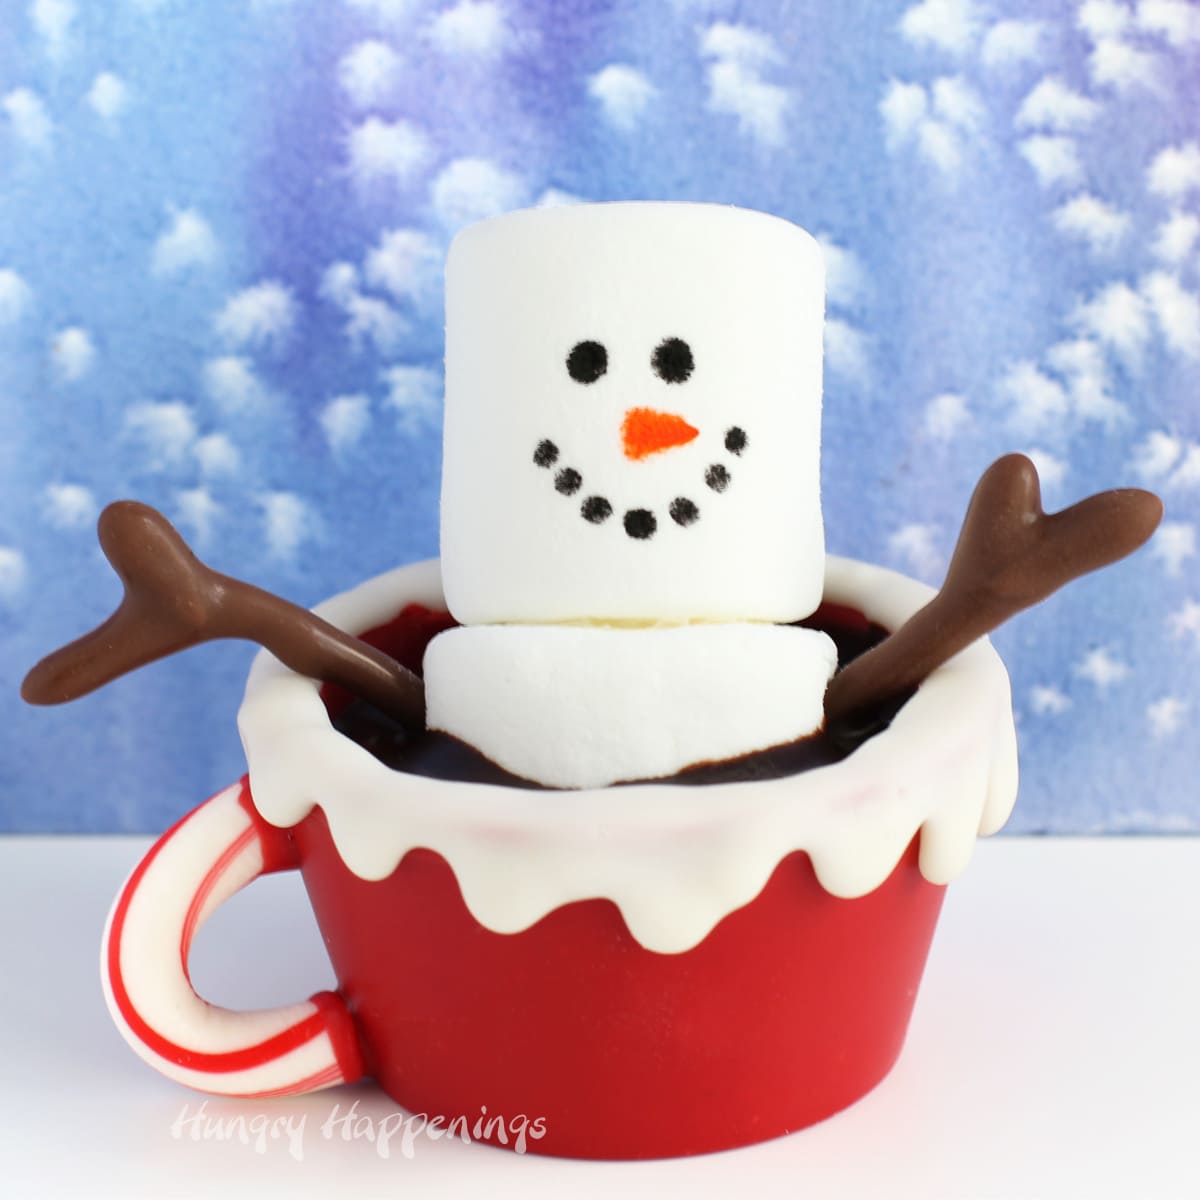
Each of these Christmas treats is made with a white chocolate mug filled with chocolate ganache and topped with a marshmallow snowman.
They will make really fun hot chocolate bombs but are so good on their own that they could be served as dessert for Christmas.
How to make hot chocolate bomb cocoa mugs?
If you haven't ever made hot chocolate bombs, you might want to check out my How To Make Hot Chocolate Bombs recipe post for tips from a professional chocolatier (me!)
You'll need:
- 2-ounce portion cups (also known as jello-shot cups, condiment cups, and sample cups) - These plastic cups made the perfect molds to create the red candy melts mugs.
- I tried to create these using a sphere-shaped hot chocolate bomb mold but really didn't like how they looked.
- I wanted the white chocolate hot cocoa mugs to have a flat bottom, be tall enough to fill with chocolate ganache, and be just wide enough for my marshmallow snowman.
- You could use plastic teacups from a kid's tea set if you have one.
- red, white, and light cocoa candy melts - You will make your edible hot chocolate mugs out of red and white candy melts (or any other colors you like) then you'll create the snowman's arms using light cocoa candy melts.
- If you prefer, you can use pure white and milk chocolate, just be sure to temper the chocolate and color it using oil-based candy coloring. See my chocolate-making tips page for melting and coloring instructions.
- When you add the chocolate ganache (made using pure dark chocolate) to the candy melts mugs, your hot chocolate will taste amazing.
- mini candy canes - You will break the canes so you can attach just the curved part of the candy to the edible mug.
- It was amazingly easy to cut the candy canes that I purchased using scissors.
- chocolate ganache - Chocolate ganache is made using heavy whipping cream and chocolate. It tastes delicious all on its own, but it also makes incredible hot chocolate.
- Head on over to my chocolate ganache recipe post to read the step-by-step instructions for making perfectly creamy chocolate ganache.
- Chocolate ganache has a shelf life of about 2 weeks if stored at room temperature. If you need to make these in advance and keep them for more than two weeks, so you can sell them, just use melted chocolate instead. It will harden but will still melt (a bit more slowly) in a mug of hot milk.
- marshmallows - Use two marshmallows to make each snowman.
- The marshmallows will dry out a bit as they are exposed to air which is fine if you are using these at hot chocolate bombs as they will soften in hot milk.
- If you serve them as dessert, I suggest assembling these the day you plan to serve them. You could make them a day ahead and store them in an airtight container.
- food coloring markers - You will add the faces to your snowmen marshmallows using black and orange food coloring pens. Be sure to check out my "how to use food coloring markers" post for tips if your pens dry out.
- If you don't have food coloring markers, you could use a paintbrush and black and orange food coloring instead.
- zip-top or pastry bags or squeeze bottles - You'll use these in a few steps while making these Christmas hot chocolate bombs.
- skewer or toothpick - These will be poked into the marshmallows to create holes for the chocolate arms.
- parchment paper-lined baking sheets - It's always best to use parchment paper-lined pans when making chocolate. Hardened chocolate peels right off the parchment paper.
step 1 - make the edible hot cocoa cups
You will need melted candy melts to create these hot chocolate bombs. If you don't have experience melting candy melts, be sure to read my Chocolate-Making Tips for melting instructions.
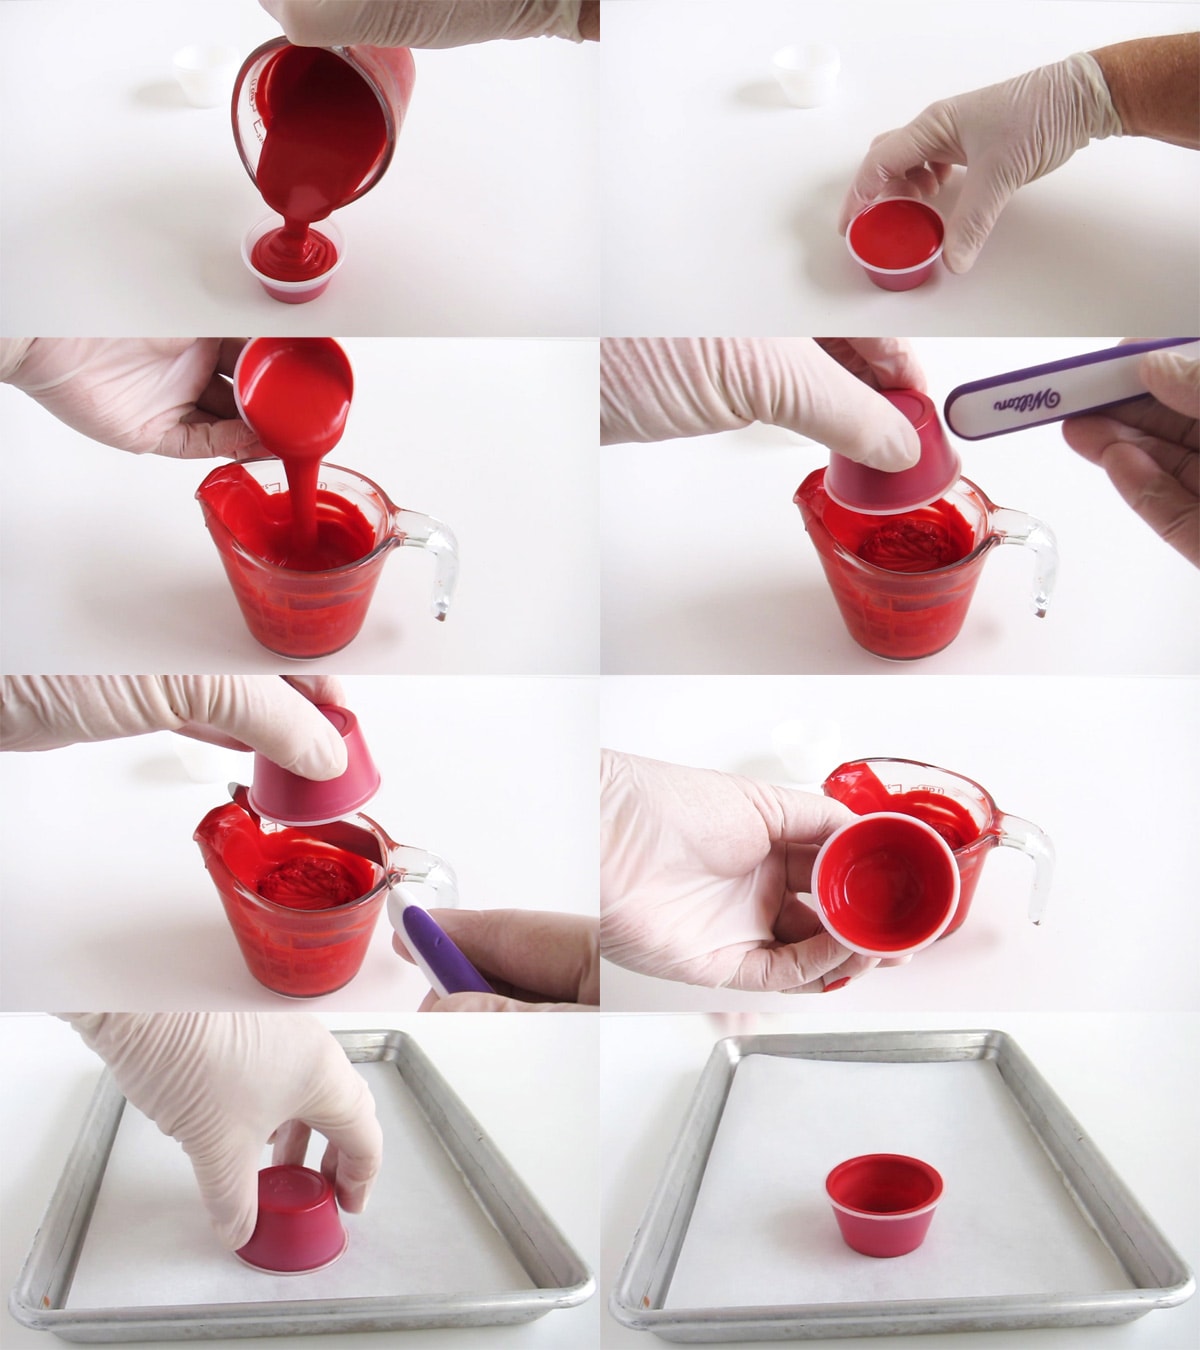
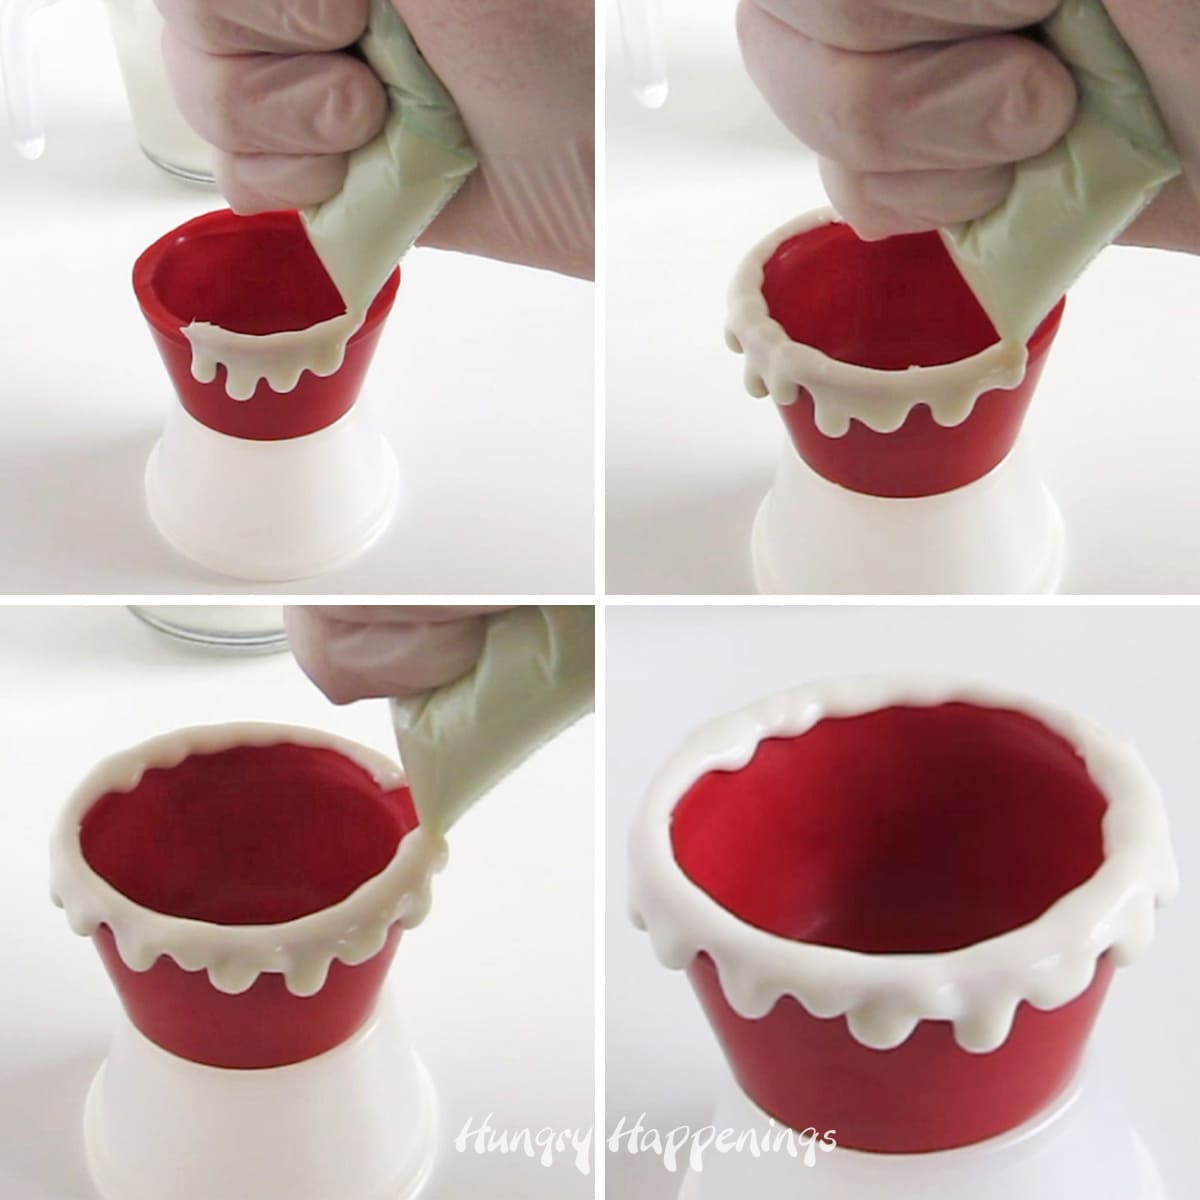
- Pour melted red candy melts into a 2-ounce plastic portion cup, filling it completely.
- Turn the cup upside down over your bowl of candy melts and allow the excess chocolate to drip back into the bowl.
- Tap the bottom of the plastic cup to encourage the chocolate to drip out.
- Use a metal spatula to scrape across the top edge of the cup to remove any drips of chocolate.
- Turn the cup right-side up, then wipe any chocolate off the top edge of the cup.
- Set the cup upside down on a parchment paper-lined baking sheet.
- Freeze for 2-4 minutes until hardened.
- Remove from the freezer and set right-side up.
PRO TIPS:
- DO NOT let your red candy melts air dry. It's important that you get the cups into the freezer just after you make them so you get nice shiny red cups. If they air dry, they might become spotty or streaky.
step 2 - add a second layer of chocolate to the cups
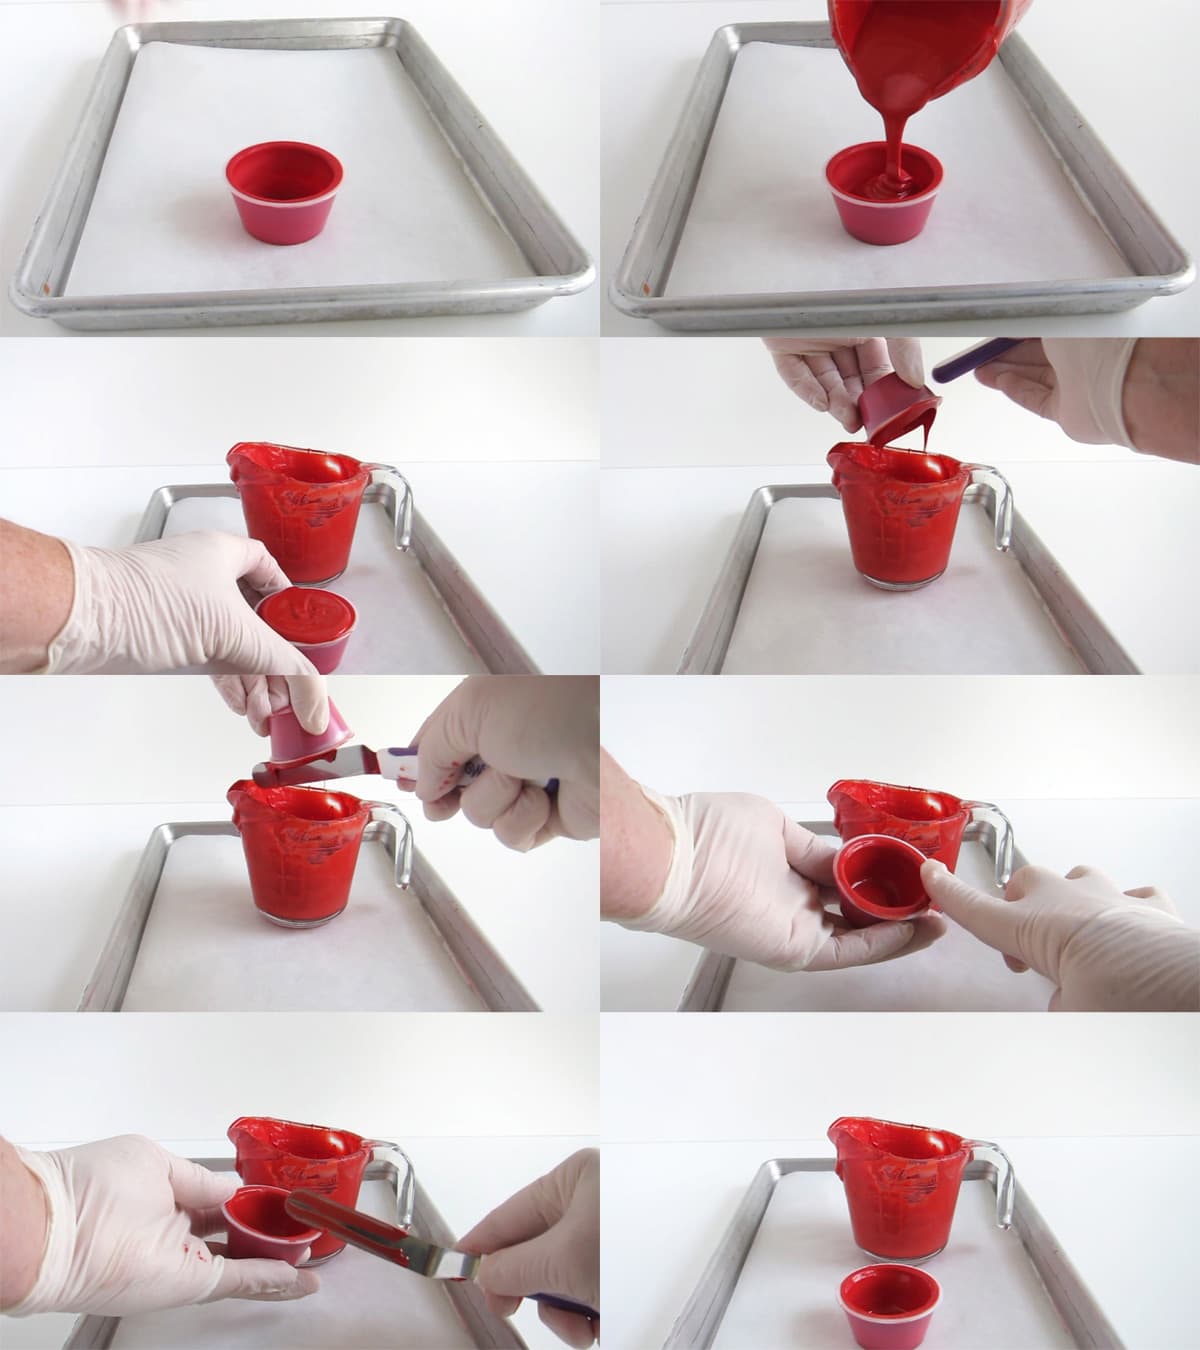
- Then repeat this process, adding a second layer to each cup.
- This time, be sure to wipe any excess chocolate off the top edge.
- Scrape it to make sure the surface is flat.
- Freeze the chocolate cups right-side-up for 3-5 minutes until hardened.
- If you look at the cups in the freezer and you see dark spots, that's wet chocolate. Keep them in the freezer for another minute or two.
- Do not forget about them. If they get too cold, the cups can crack.
- Remove the candy cups from the freezer then pull the chocolate cups out of the plastic cups.
- If they don't easily come out, they may not be completely hardened. Freeze for another minute and try again.
PRO TIPS:
- You will need to reheat your red candy melts in the microwave before making the second layer and possibly while you are making them. You want the candy melts to be really warm when making the second layer. If the chocolate cools too much it will get thick making it difficult to pour into and out of your cups.
- Also, if the candy melts get too cool and you pour them into a cup, the candy may harden with white streaks or spots.
step 3 - decorate your edible mugs
- Let your chocolate mugs sit at room temperature until they no longer feel cold.
- Pipe melted white candy melts over the top edge of the edible mugs allowing it to drip down to look like melting snow.
- This step is optional, but the mugs look really cute when decorated this way.
Fun decorating ideas:
- Pipe snowflakes onto the mugs.
- Personalize the mugs with names.
- Paint white stripes inside the plastic mold, allow them to harden, then pour in the red candy melts to make candy cane striped cups.
- Drizzle some white candy melts inside the cup, then pour in red candy melts. Rotate the cup allowing the colors to swirl together.
step 4 - make marshmallow snowmen bodies
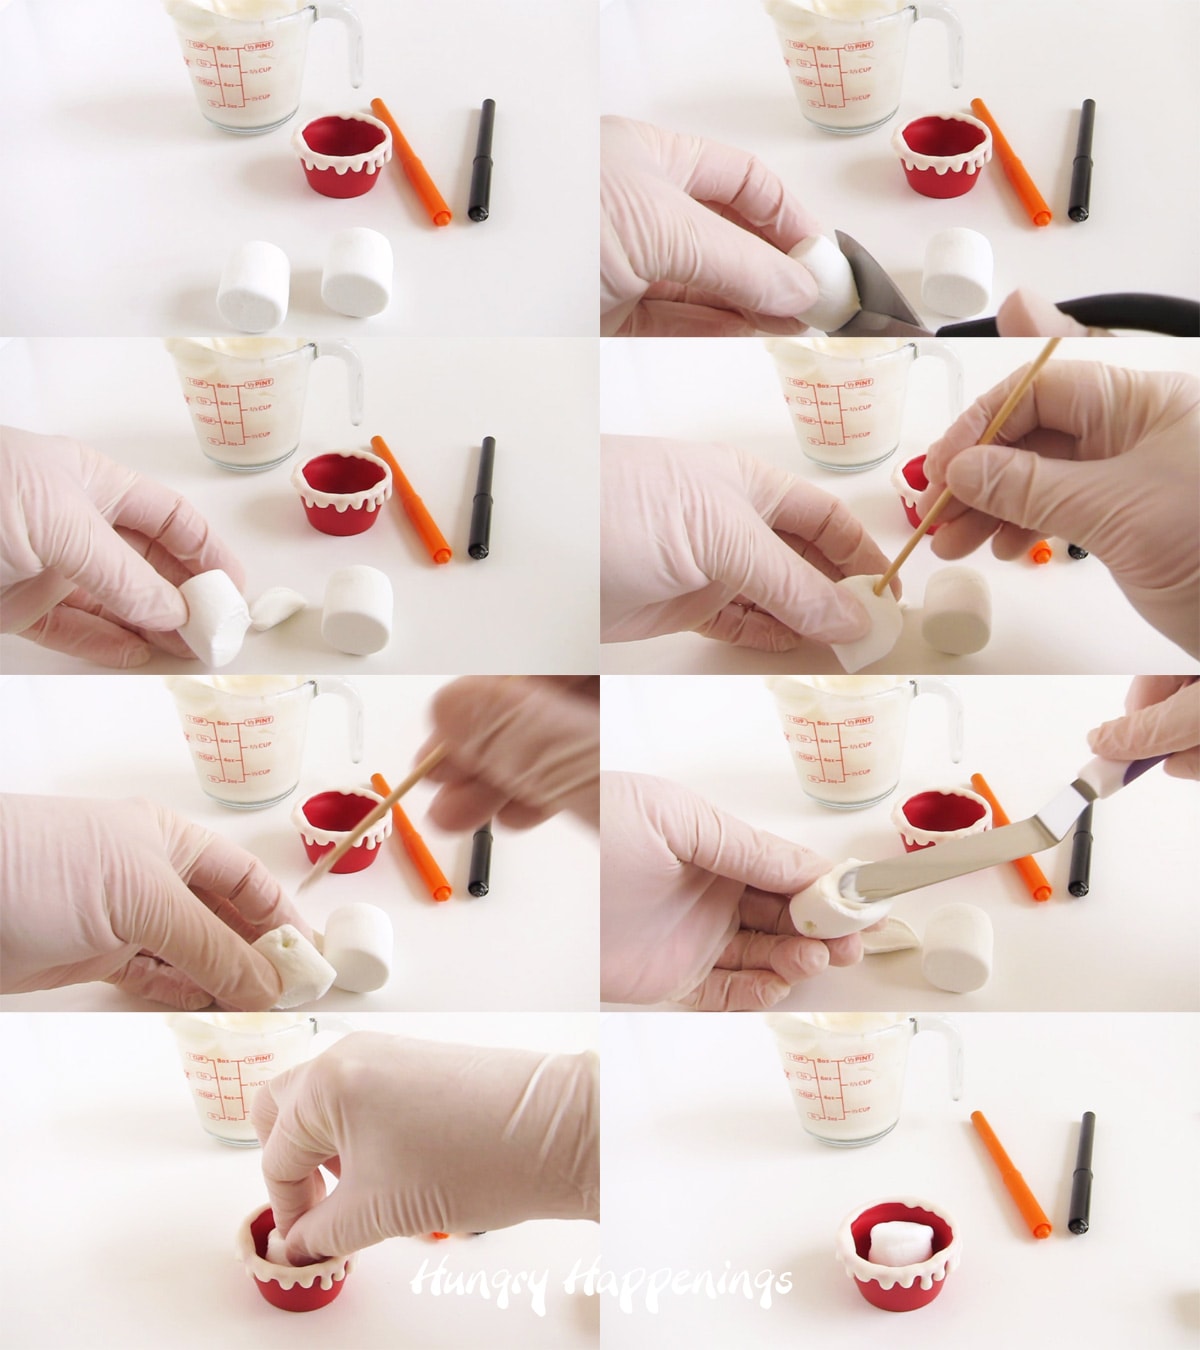
- Cut the bottom of half of your marshmallows at a slight angle using scissors that have been sprayed with baking spray or brushed with butter.
- Poke two holes using a skewer on opposite sides near the top of each of those marshmallows.
- The chocolate twigs (arms) will go in the holes later.
- Attach those marshmallows to the bottom of your chocolate mugs using melted candy melts.
- Make sure they are sitting so that your snowman will lean back slightly.
step 5 - decorate marshmallow snowmen heads
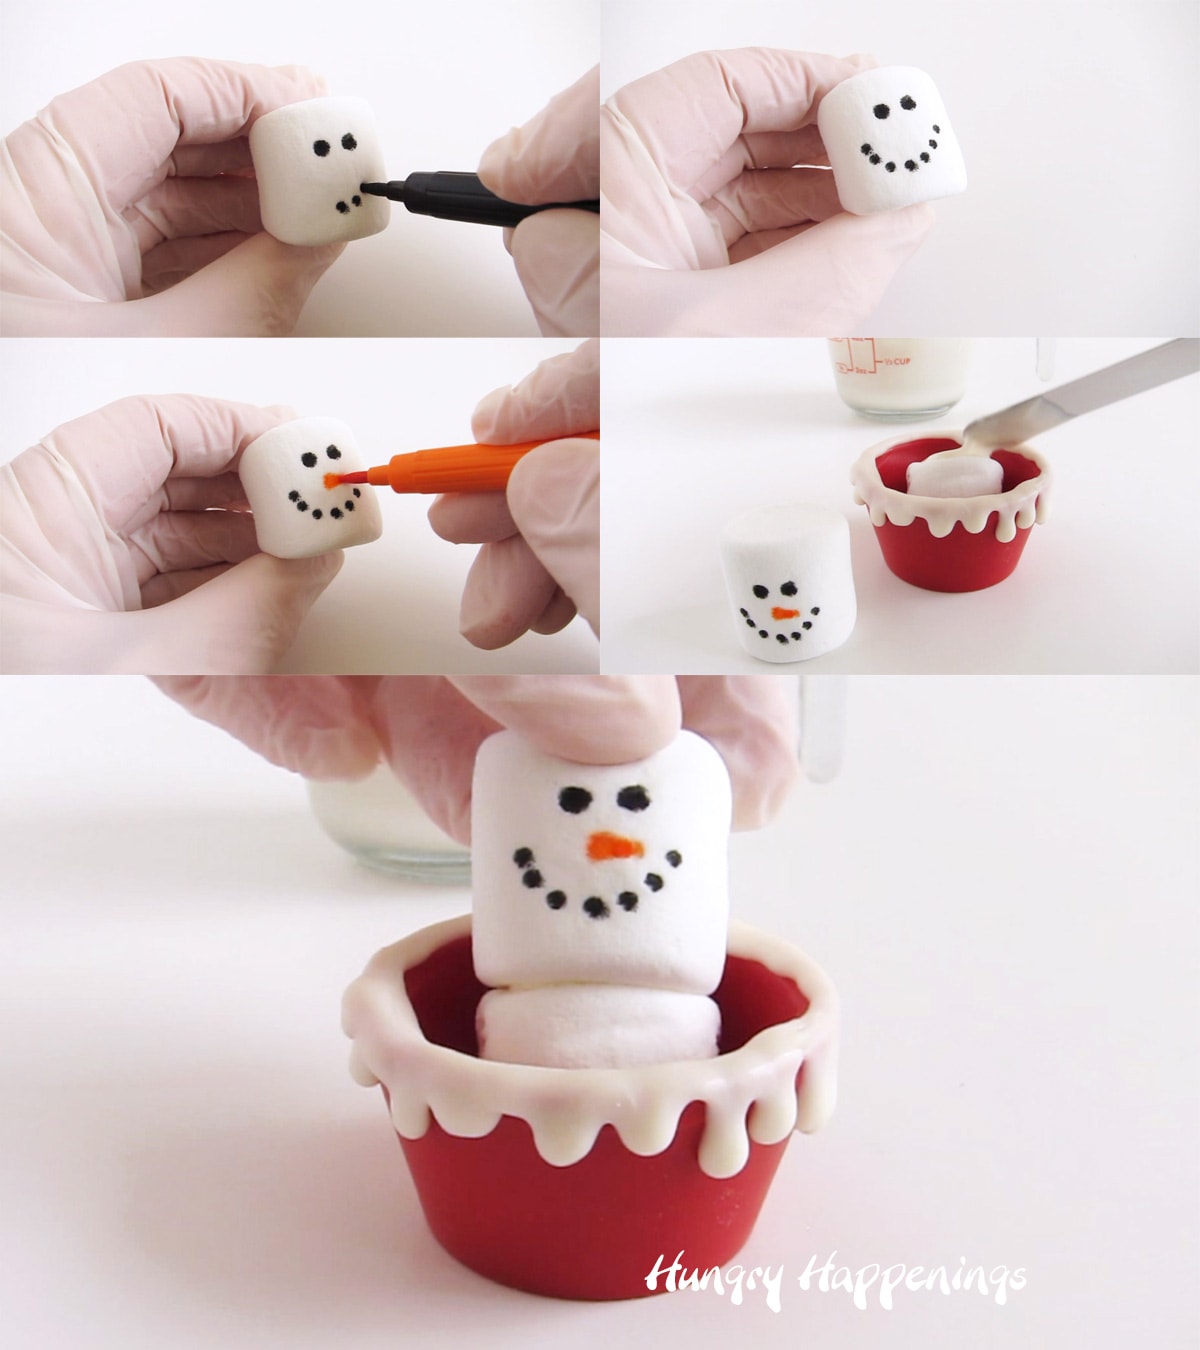
- Draw two eyes and a smile onto the remaining marshmallows using a black food coloring marker.
- Then, draw a carrot nose onto each snowman.
- Attach the marshmallow heads to the marshmallow bodies using melted white candy melts.
- Hold the head in place for a few seconds until the candy melts harden and the marshmallow stays put.
step 6 - make candy cane handles
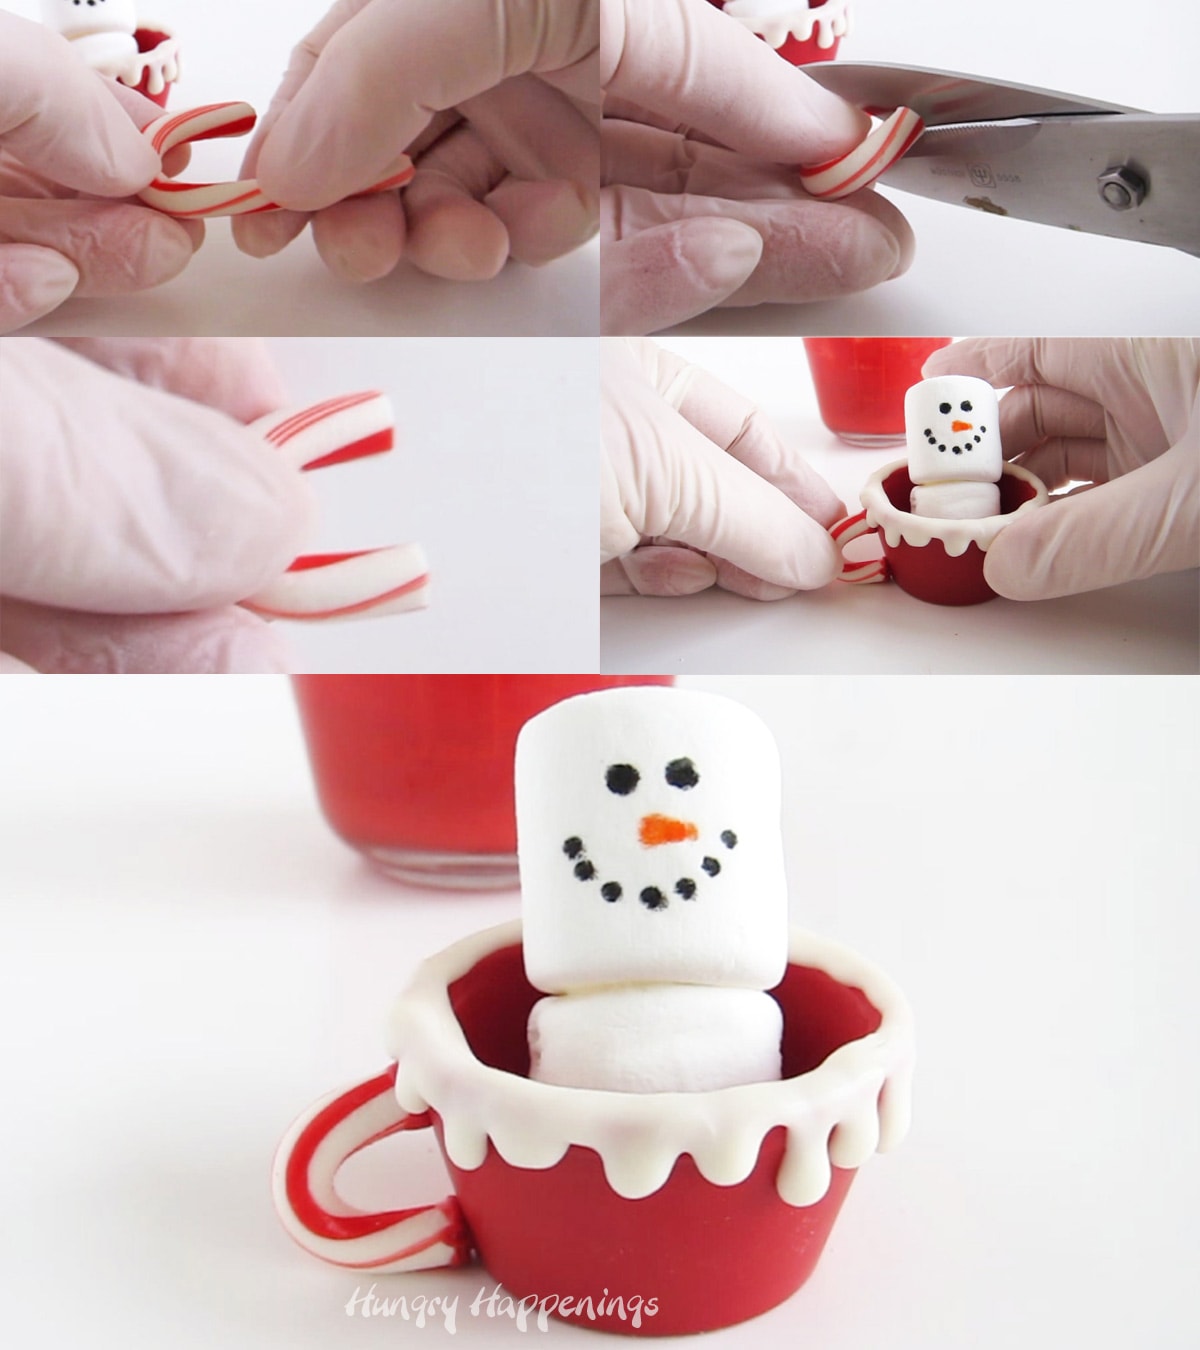
- Break the candy cane so you just have the curved end.
- Use scissors to cut the curved part of the candy cane into a short handle.
- Attach the candy cane handle to your chocolate mugs using melted red candy melts.
NOTE:
If your white chocolate snow drips are too long and your handles won't fit in between two of them, you can break one drip off using a sharp knife, then attach the candy cane where the broken drip was.
step 7 - fill the mugs with chocolate ganache
- Make chocolate ganache and allow it to cool slightly.
- You do not want the ganache to be hot or it will melt the chocolate mugs.
- Pour the chocolate ganache into a pastry bag, then pipe ganache around the marshmallow snowmen in each mug.
Alternative:
If you need to keep these hot chocolate bomb snowmen for more than two weeks, you can carefully fill around the snowmen with powdered hot cocoa mix, then pipe dark cocoa candy melts over the top sealing the cocoa mix inside.
I suggest you cut a corner off a zip-top bag and use it as a funnel to pour the hot cocoa mix into the mugs.
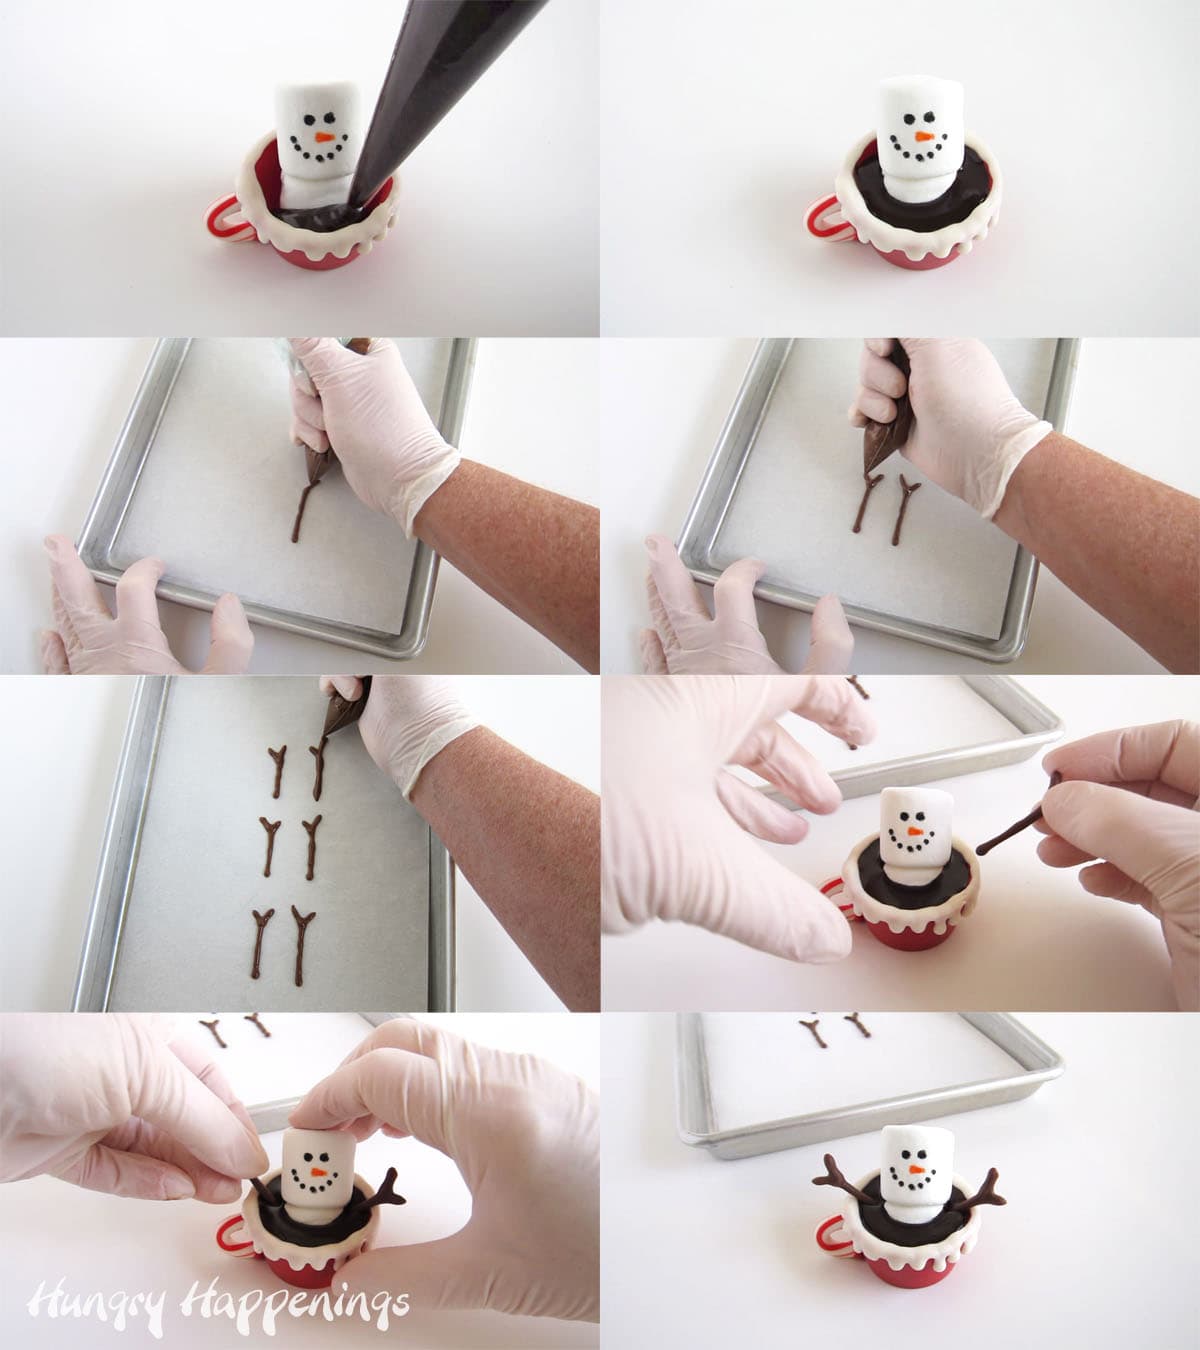
step 7 - make chocolate twigs (arms)
- Pipe chocolate twigs onto a parchment paper-lined baking sheet.
- Freeze for 2-4 minutes just until the chocolate hardens.
- Insert one arm into each hole on either side of the marshmallow snowman's body.
PRO TIP:
Make more chocolate arms than you need. Some will break as you are sticking them into the marshmallow snowmen.
step 6 - serve as hot chocolate bombs or as dessert
- To serve as hot chocolate bombs use a 12-ounce mug.
- Heat 8 ounces of milk until it just begins to boil.
- Place the hot cocoa bomb snowman into your mug.
- Pour the hot milk over the top and let the heat from the milk begin to melt the chocolate.
- Stir, and enjoy a decadently chocolate hot beverage.
Snowmen Hot Cocoa Bombs Recipe

Serve these Snowman Hot Chocolate Bombs made with marshmallow snowmen soaking in a chocolate ganache-filled candy cup for Christmas dessert or in a mug of hot milk as a delicious hot cocoa beverage.
- 16 ounces red candy melts, melted
- 4 ounces white candy melts, melted
- 24 marshmallows
- black and orange food coloring markers
- ½ cup chocolate ganache (see recipe in notes)
- 2 ounces light cocoa candy melts
-
Fill a 2-ounce plastic portion cup with red candy melts, then turn upside down and allow the excess chocolate to drip out.
-
Wipe the top edge, turn the cup upside down, and set on a parchment paper-lined pan, then freeze for 2-4 minutes.
-
Remove from the freezer and fill with more red candy melts.
-
Turn upside down and allow the excess candy melts to drip out.
-
Scrape the top edge clean, set the cup right-side-up, and freeze for 3-5 minutes until hardened.
-
Pull the red candy cup out of the plastic cup and set it aside to warm to room temperature.
-
Then, pipe drips of white candy melts snow over the rim and freeze for 2-4 minutes until hardened.
-
To make a snowman, cut one marshmallow at an angle, then poke armholes on either side near the top edge.
-
Attach this marshmallow cut side down to the bottom of a red candy cup using candy melts. You want the marshmallow to be leaning toward the backside of the chocolate cup.
-
Draw a face onto another marshmallow using black (eyes and smile) and orange (carrot nose) food coloring markers.
-
Attach the snowman's head to the marshmallow body using melted candy melts.
-
Cut a candy cane into a hot cocoa mug handle using scissors.
-
Attach the handle to the candy cup using melted red candy melts.
-
Hold it in place until the red candy melts harden.
-
Pipe chocolate ganache into the red candy cup around the marshmallow snowman.
-
Pipe melted light cocoa candy melts twigs onto a parchment paper-lined baking sheet. Be sure to make extras in case you have breakage.
-
Freeze for 2-3 minutes
-
Remove and peel off the baking sheet.
-
Insert one chocolate arm into the holes in the marshmallows so that they stick out the sides of the marshmallow snowman body.
These snowman hot chocolate bombs can be served as-is for dessert or can be melted in a mug of hot milk.
To serve as hot chocolate bombs:
- Place the hot chocolate bomb in a 12-ounce mug.
- Pour 8 ounces of really hot milk over top.
- Let the chocolate melt for about two minutes, then stir to dissolve.
Storage and Shelf Life
- Store at room temperature for up to 2 weeks. These hot chocolate bombs MUST be consumed within 2 weeks. The chocolate ganache will get moldy when it's no longer fresh.
- You can make the chocolate mugs and marshmallow snowmen ahead and put them together then fill them with chocolate ganache closer to the time you plan to give them as gifts or to serve them.
- If you need to make them further ahead, you can use melted chocolate instead of the ganache. It will harden but will still melt (a bit more slowly) in your mug of hot milk.
Chocolate Ganache Recipe
- Heat ⅔ cup of heavy whipping cream in a small saucepan set over medium heat until it just beings to bubble.
- Pour over 8 ounces of finely chopped chocolate.
- Let it sit for a few minutes to allow the hot cream to melt the chocolate, then stir until creamy and smooth.
- Use a food processor or an immersion blender to blend the ganache more efficiently. This makes really smooth ganache!
- You can serve any remaining ganache in mugs of hot milk. It makes amazing hot chocolate.
More Christmas Hot Chocolate Bomb Ideas
If you love these marshmallow snowmen floating in a chocolate mug of hot cocoa, you might also like making these other hot chocolate bombs for Christmas.
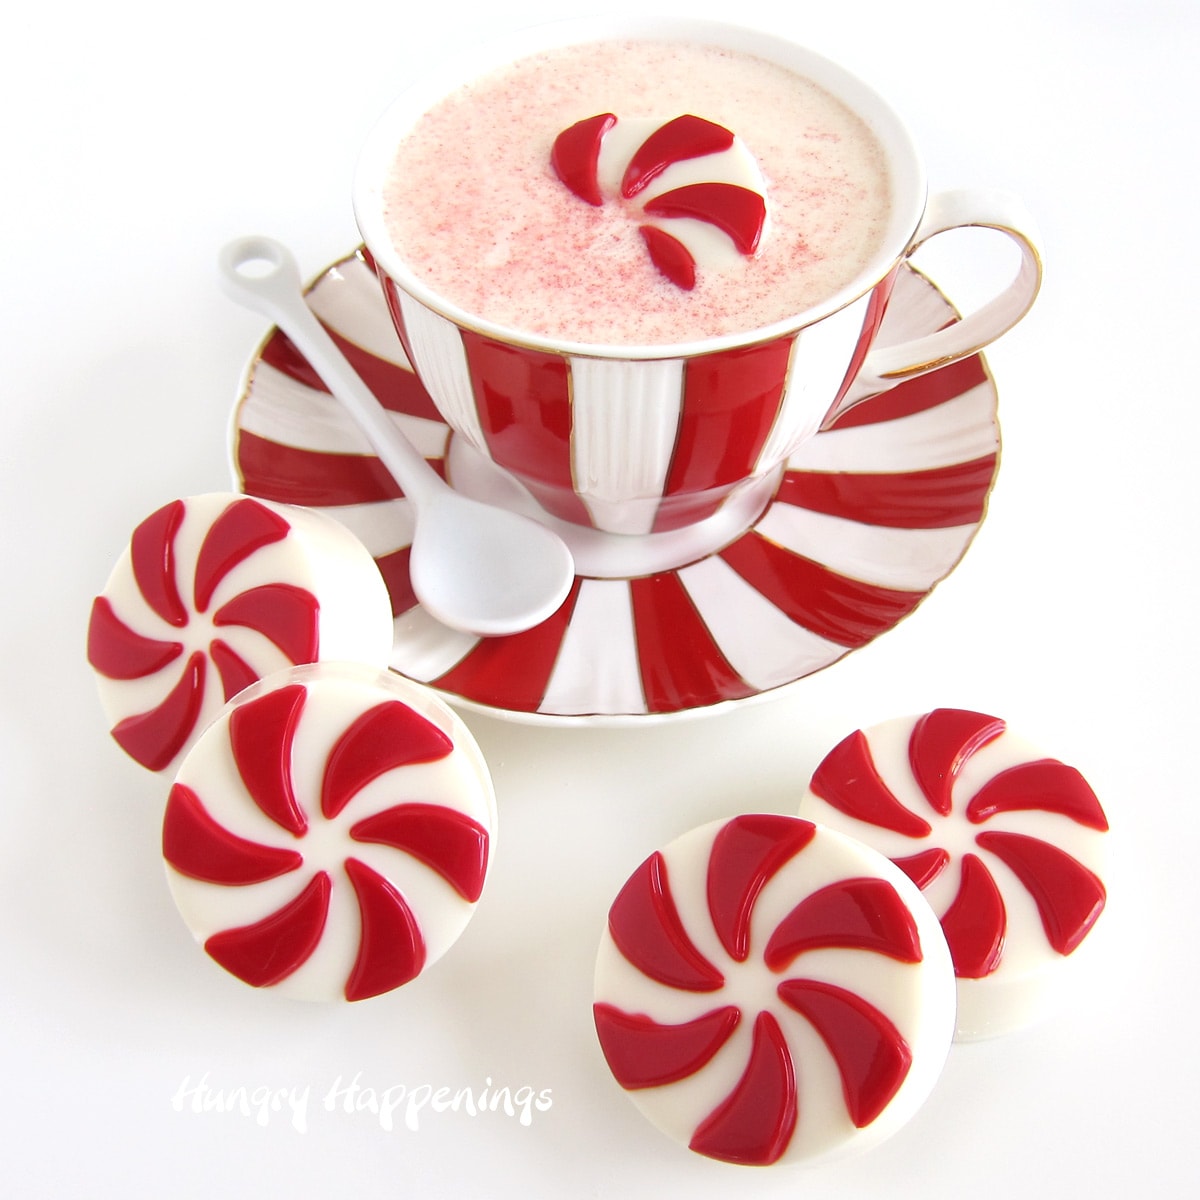
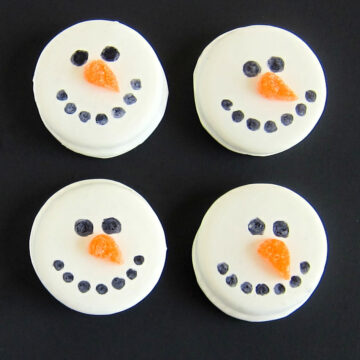
These white chocolate starlight mint hot chocolate bombs are filled with peppermint hot cocoa mix.
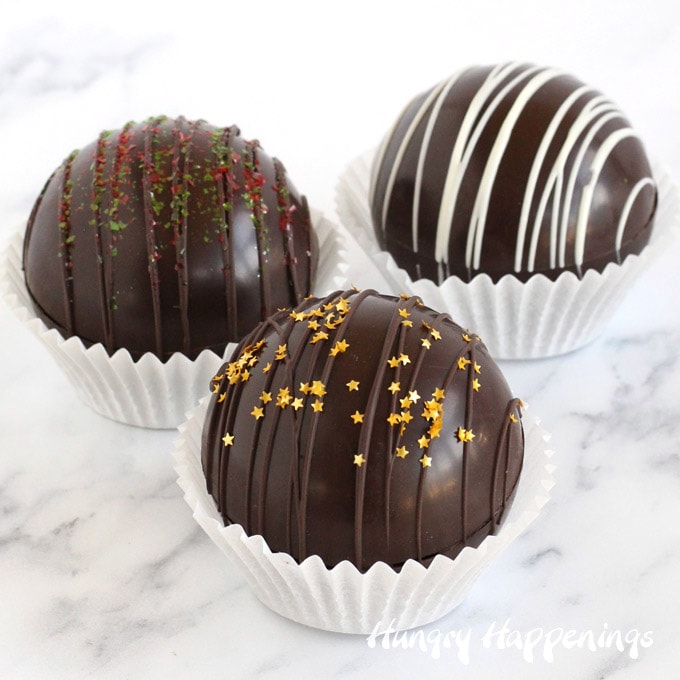
These round hot chocolate bombs can be decorated with edible gold star glitter, edible red and green glitter, or Christmas sprinkles. This How To Make Hot Chocolate Bomb tutorial is the most comprehensive guide to making beautiful and delicious hot chocolate bombs.
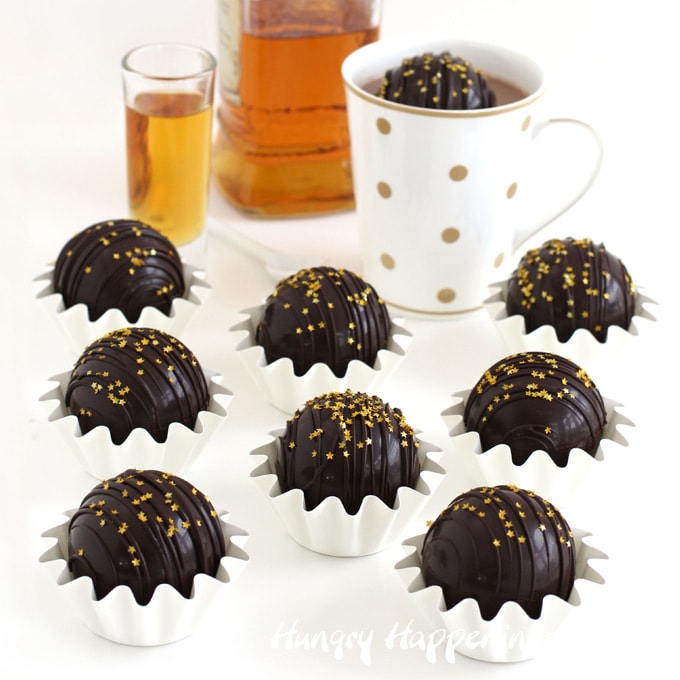
If you are making hot chocolate bombs for adults, you might like making these Boozy Hot Chocolate Bombs. They are filled with chocolate ganache infused with liquor.
![]()
Did you make this recipe or do you just think it is super cute? Let me know by leaving a comment and rating the recipe below. If you love the recipe, please give it a 5-star rating.

I love making fun food for parties and special occasions and sharing my creative ideas with you.
If you make this recipe and share it online be sure to link back to this post and use #hungryhappenings.
Thanks and have a sweet day! -
Beth

- Banana Split Bars – A Fun and Easy Summer Dessert - March 4, 2026
- Pineapple Fudge (No Candy Thermometer Needed!) - March 4, 2026
- No-Bake Peanut Butter Pie Recipe - March 3, 2026

The Partiologist says
Oh what fun! These little guys are so cute, I don't know if I could let them melt!
Beth says
I know! I have a feeling some of these will end up on shelves because they are so cute! I have a friend who saves everything I have made for her. She loves keeping them on her shelves every day.