Learn how to make a chocolate jar. You can decorate the edible jars for holidays and special occasions and fill them with chocolate-dipped pretzels, chocolate popcorn, or your favorite candy.
Back in 2006, I had a customer who was looking for a unique gift to give to his customers for the holidays. He wanted something that would really impress his customers, something that they would have never seen before.
I spent days handcrafting chocolate gifts but nothing had the wow factor that I knew he was looking for. Finally, an idea struck me. I had made chocolate cups and chocolate bowls before and wondered if I supersize them.
I grabbed a plastic bucket, filled it with about 5 pounds of melted and tempered pure dark chocolate, turned it upside down, allowed all but a thick shell of chocolate to remain, and let it harden. It worked! Once I removed the chocolate from the plastic bucket, I had a beautiful chocolate bucket that I could fill with white chocolate popcorn.
My new creation was a big hit with the client and an even bigger hit with their customers. Never before had my client received so many thank you cards and phone calls from gift recipients.
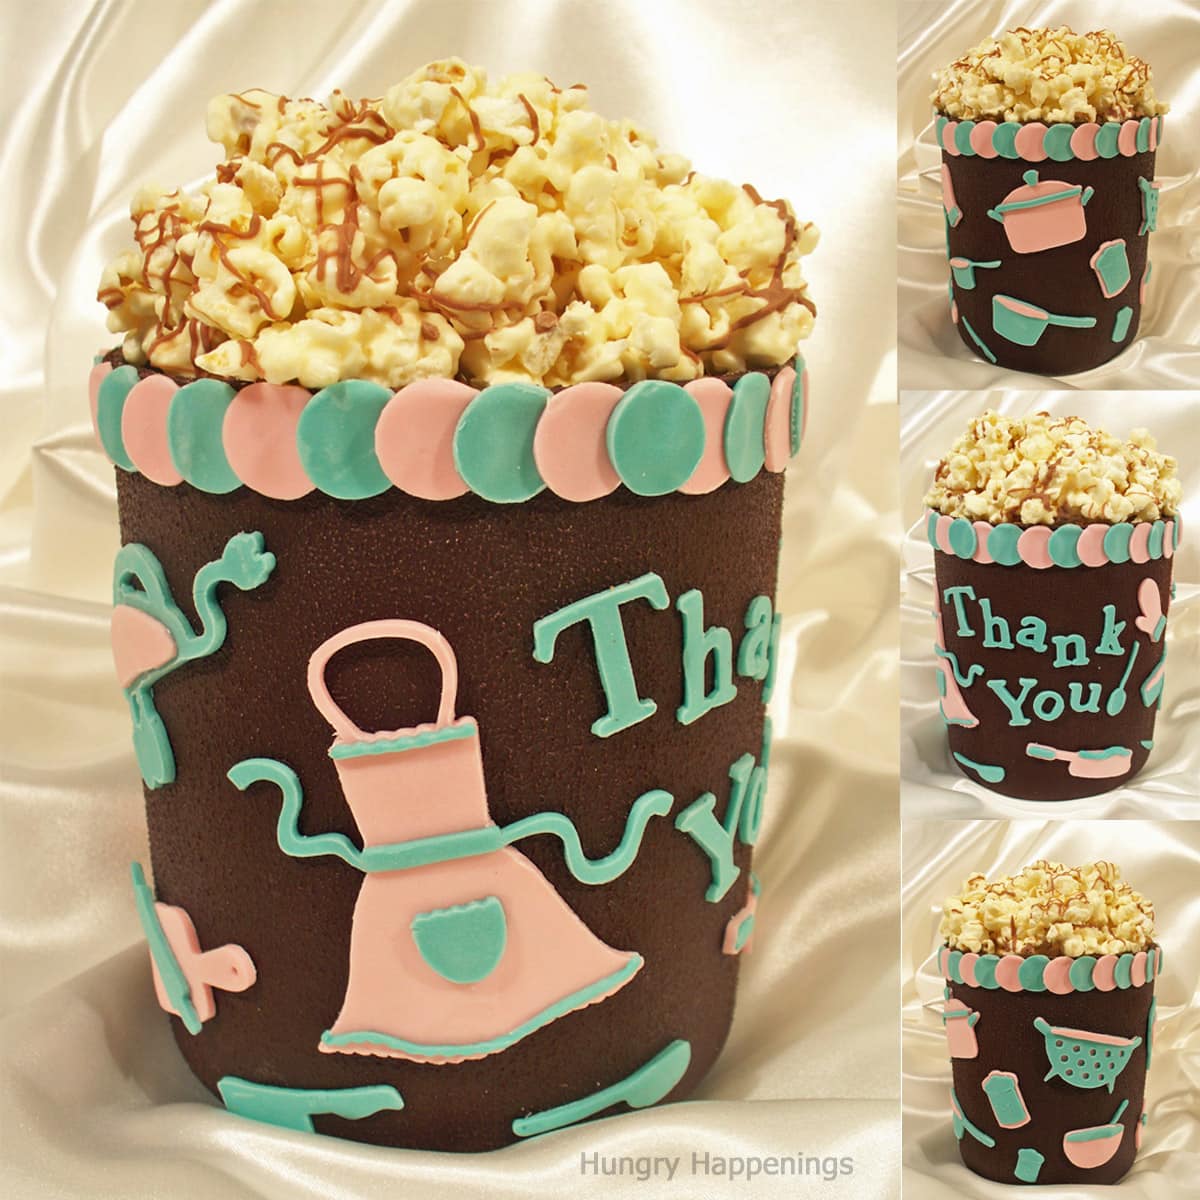
As soon as we delivered the gifts, the phone started ringing. His customers wanted to buy them to give as gifts too. I made lots of popcorn buckets and some smaller chocolate jars filled with chocolate pretzels that year and for many years to come.
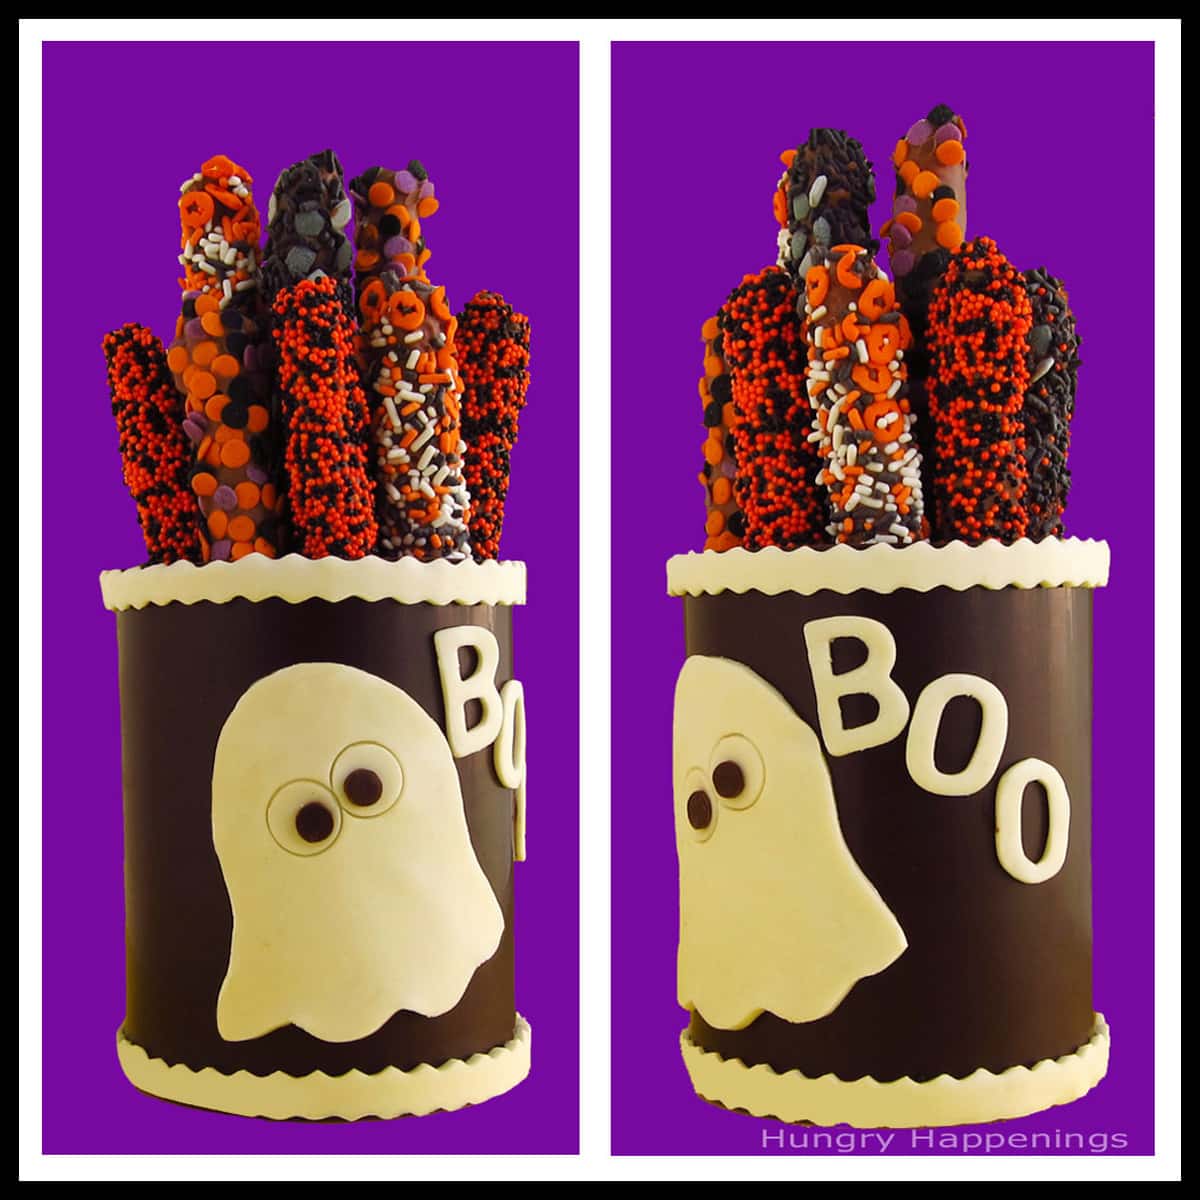
I had fun this week making a chocolate jar for Halloween and am excited to show you how to make one yourself.
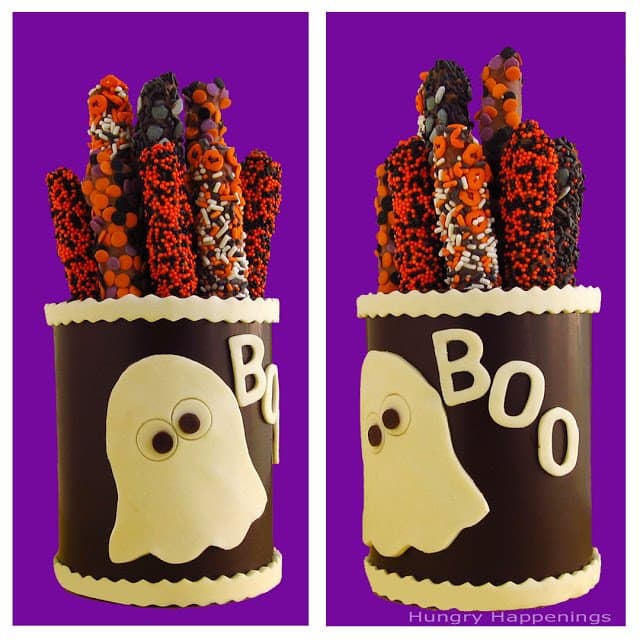
Handmade Dark Chocolate Canister decorated for Halloween
Ingredients
melted and tempered semi-sweet chocolate (I used about 2 pounds) - You can use compound chocolate (candy melts, melting wafers, almond bark) but you may have to add 2-3 layers of chocolate to make it work.
white modeling chocolate (I used ¼ recipe of white chocolate)
dark modeling chocolate (or add black food coloring to a small amount of the white)
powdered sugar to dust work surface
Supplies
a plastic canister with very smooth sides (if it has a lip it is difficult to remove the chocolate)
parchment paper
offset spatula
rolling pin
pasta/pizza wheel, cookie cutters (ghost, mini round, and alphabet), or knife to create decorations
# 12 round pastry tip to create the pupils
Instructions
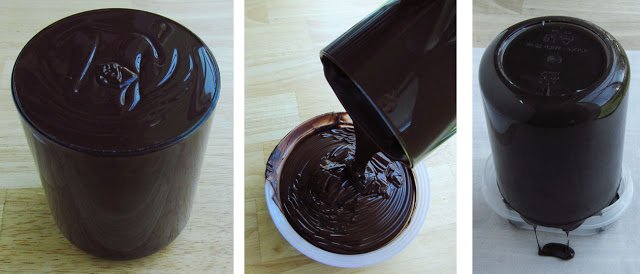
Fill a plastic jar with chocolate.
Completely fill your canister with tempered chocolate. Let the canister sit, filled, at room temperature for 15-20 minutes. Depending on how thick your tempered chocolate is, will determine how long you should leave it to sit.
Turn the canister upside down over your bowl of melted and tempered chocolate, allowing chocolate to flow out, leaving behind a nice thick coating of chocolate all around the sides and bottom of the canister.
Set a piece of parchment paper on your work surface. Set a rectangle (or oval) plastic container (like Rubbermaid) on the parchment. You want the top edges of the canister to be able to sit on the top edges of the plastic container so the chocolate can drip off. Set the canister upside down on the container.
Allow any excess chocolate to drip out of the canister for about 5 minutes. Alternatively, you could set the canister upside down on a cooling rack. Just don't leave it there too long or it might stick making it messy to remove.
The excess chocolate that is poured back into the bowl will have to be retempered as it will be too cool now. See my chocolate making tips page for detailed information about working with chocolate.
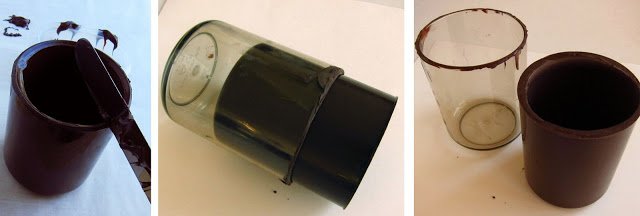
Chill and unmold.
With the canister upside down, use an offset spatula to scrape around the edge removing any excess chocolate. If the chocolate is still liquid, return it to the container it was sitting on, and allow more excess chocolate to drip out. Scrape around the edge once the chocolate has begun to harden.
Set it upside down on a sheet of parchment paper in your refrigerator until set. My plastic canister is clear which makes it easy to tell when the chocolate is set. As it sets it will retract from the sides of the canister in sections and you will notice a change of color on the outside of the clear canister. Dark spots indicate the chocolate is still wet.
Once completely set, gently pull the chocolate out of the canister. It should slide right out (If your chocolate was not properly tempered, it won't release.)
Allow it to come to room temperature before decorating.
Using compound chocolates (candy melts).
If you use compound chocolate, you will need to add more layers otherwise the walls of the jar will be too thin.
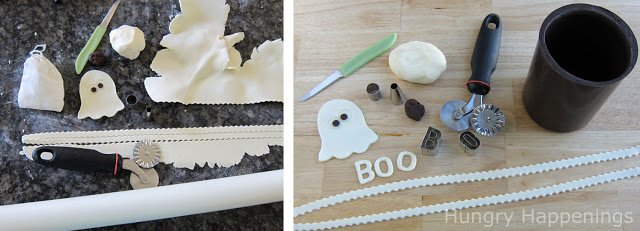
Making modeling chocolate decorations.
Dust your work surface with powdered sugar. I fill a tea/spice bag with powdered sugar and tap it on the counter to get a nice light dusting.
Update: I have realized over the years, that you can roll your modeling chocolate out on a silcone mat without needing to dust it with powdered sugar.
Use a rolling pin to roll out your modeling chocolate to 1/16th of an inch thickness. Use a cookie cutter or knife to cut out a ghost shape, being sure to make it about an inch shorter than your canister.
Use a ½" round cookie cutter to make the outline of the ghost's eyes. Gently press the cutter about halfway into the ghost-shaped cutout, being sure not to cut all the way through. To create the pupils roll out a small amount of dark modeling chocolate and cut out circles using the top of a #12 pastry tip. Attach the pupils to the ghost with a small dab of water.
For the borders, use a pasta/pizza wheel to cut out ¼" wide strips long enough to wrap around the canister. Cut out the word "boo" using alphabet cutters.
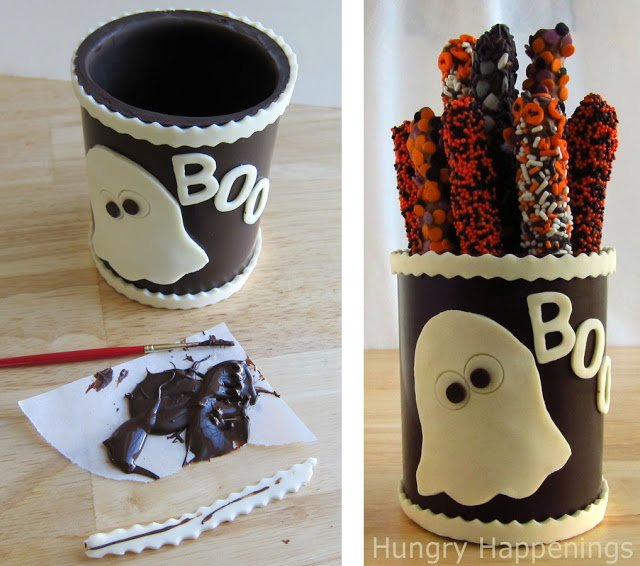
Decorating a chocolate Halloween jar.
Use melted chocolate to glue decorations onto the chocolate canister. For the border, I paint a very thin line of chocolate all along a strip of modeling chocolate and wrap the strip around the chocolate canister, cutting it to the right length and pressing the seams together. If you paint on too much melted chocolate it will ooze out around your decorations, so apply the chocolate sparingly.
Fill your canister with candy, chocolate, nuts, etc. I dipped pretzel rods in milk chocolate and covered them with Halloween sprinkles.
Variations
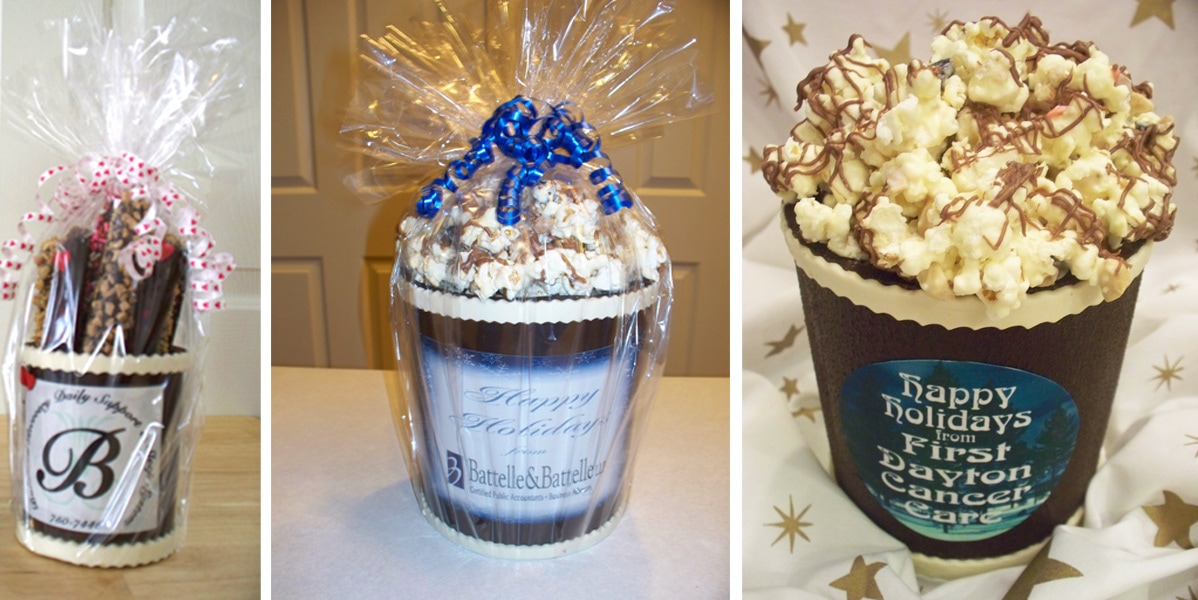
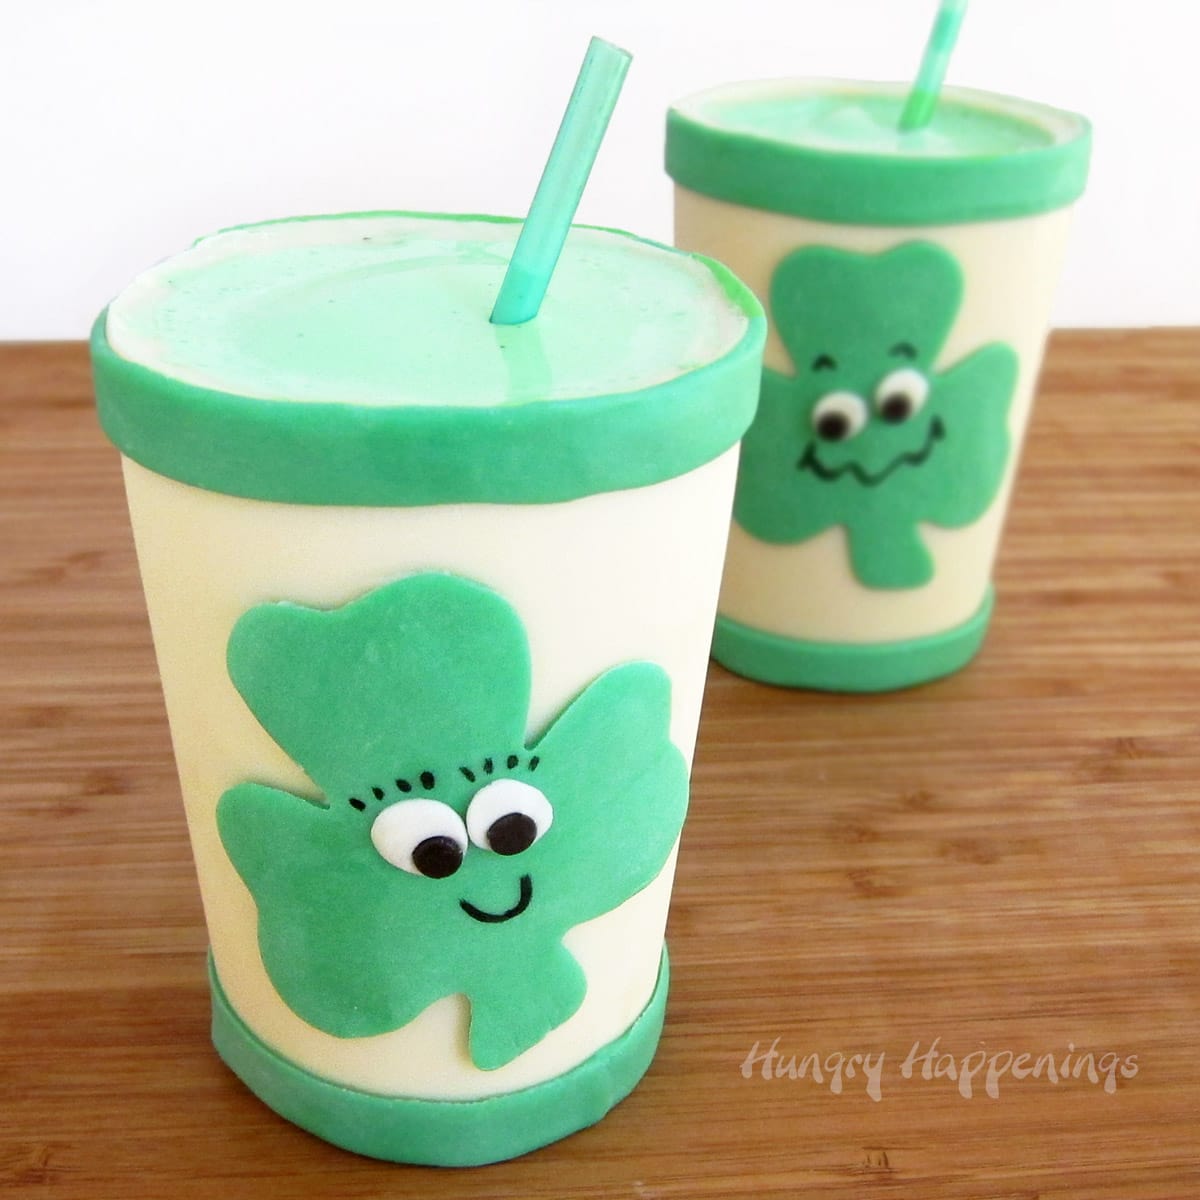
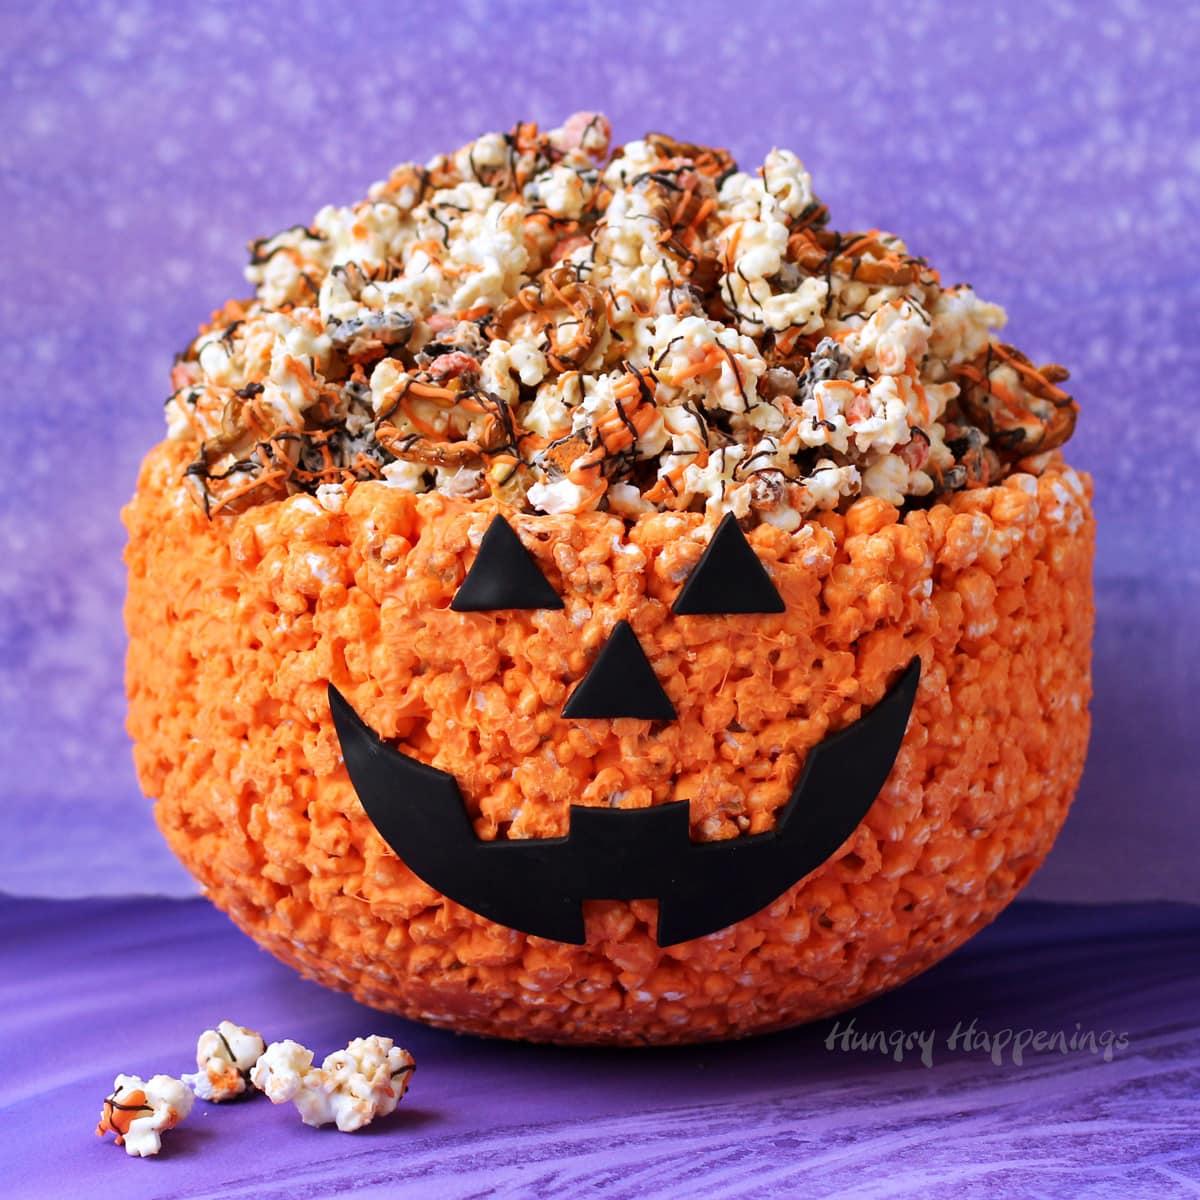
Here are a few of the other chocolate jars and buckets that I have created.
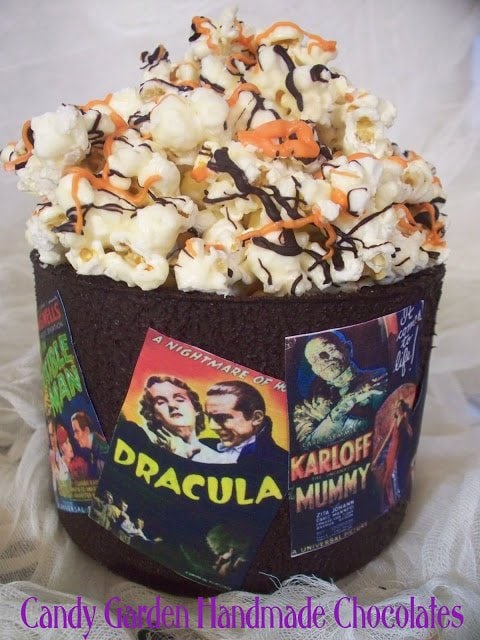
I created this chocolate Halloween popcorn bucket decorated with printed frosting sheets to give as a prize at one of our Halloween parties. The winner was so excited!
This is a chocolate bucket I created to give as a thank-you gift to Food Network Star, Sara Moulton.
I was fortunate enough several years ago to take a cooking class from her while she was on her latest book signing tour. She has been one of the most influential teachers (live and on television) that I've had over the years.
I use her recipes all the time and the techniques she has taught me have been invaluable in the kitchen. I wanted to let her know what an inspiration she had been to me, so I created this bucket and presented it to her.
I used a Cricket Cake machine to cut out all of the decorations. I just loved how it turned out and Sarah was delighted to receive it. She was so generous to me - she even wrote a wonderful review of my book on her website. I am so grateful to have met her and to have had her as a teacher.
Related Recipes
Have fun making your own chocolate jars.

- Banana Split Bars – A Fun and Easy Summer Dessert - March 4, 2026
- Pineapple Fudge (No Candy Thermometer Needed!) - March 4, 2026
- No-Bake Peanut Butter Pie Recipe - March 3, 2026


Paulette says
I want to try making these bucket.. Just a little confuse. Once I pour the chocolate in the cup do I let it sit for a while then pour the excess chocolate out?
Beth says
Yes, it's best to let the chocolate sit in the bucket until the chocolate begins to harden around the edge of the bucket. If you pour it out and the chocolate is too thin, pour chocolate back in and wait a little longer.
Beth Jackson Klosterboer says
HI Ann,
Yes, if you let the modeling chocolate owl set up and harden it will sit up on top of a cup of snack mix. The dark modeling chocolate will harden a bit more than the white or milk, but even the white will dry enough to become stiff. Modeling chocolate is very similar in texture to fondant, but I believe it dries harder than fondant. Both can easily be eaten once hard. The modeling chocolate will be much like a Tootsie Roll.
If you have any problems or questions just let me know. I'll be happy to help.
Anonymous says
I haven't had a chance to search modleing chocolate yet but wanted to ask this...I want to make an owl shape cout out to sit on top of a cup of snack mix for an owl themed baby shower. Would this modeling chocolate cutout stand up when set? Or possibly could I melt candy melts and when firm cut the shape out then? What I've seen was probably made of fondant and laid flat on top of a cupcake but so cute and appropriate for theme of shower. Help! Thanks, Ann
rebecca @ beurrista says
Thanks for stopping by my spiderrific cupcakes!
I wished I lived near Kentucky so I could witness first hand your amazing creations- how wonderful and fun your parties must be!
And these canisters- amazing!
Meg@MegaCrafty says
What a fantastic idea! I love that popcorn bag- so impressive.
Jacki @ Crafting Mom says
Wow! These are so cute! And I looove the popcorn too!
Jenn Erickson says
Wow! Absolutely beautifully done!