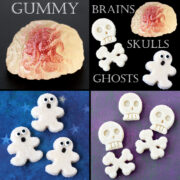
Creep out your friends this Halloween by serving them homemade gummy brains, skulls, or ghosts. These homemade Halloween candies are fun to make in your favorite flavors and shapes.

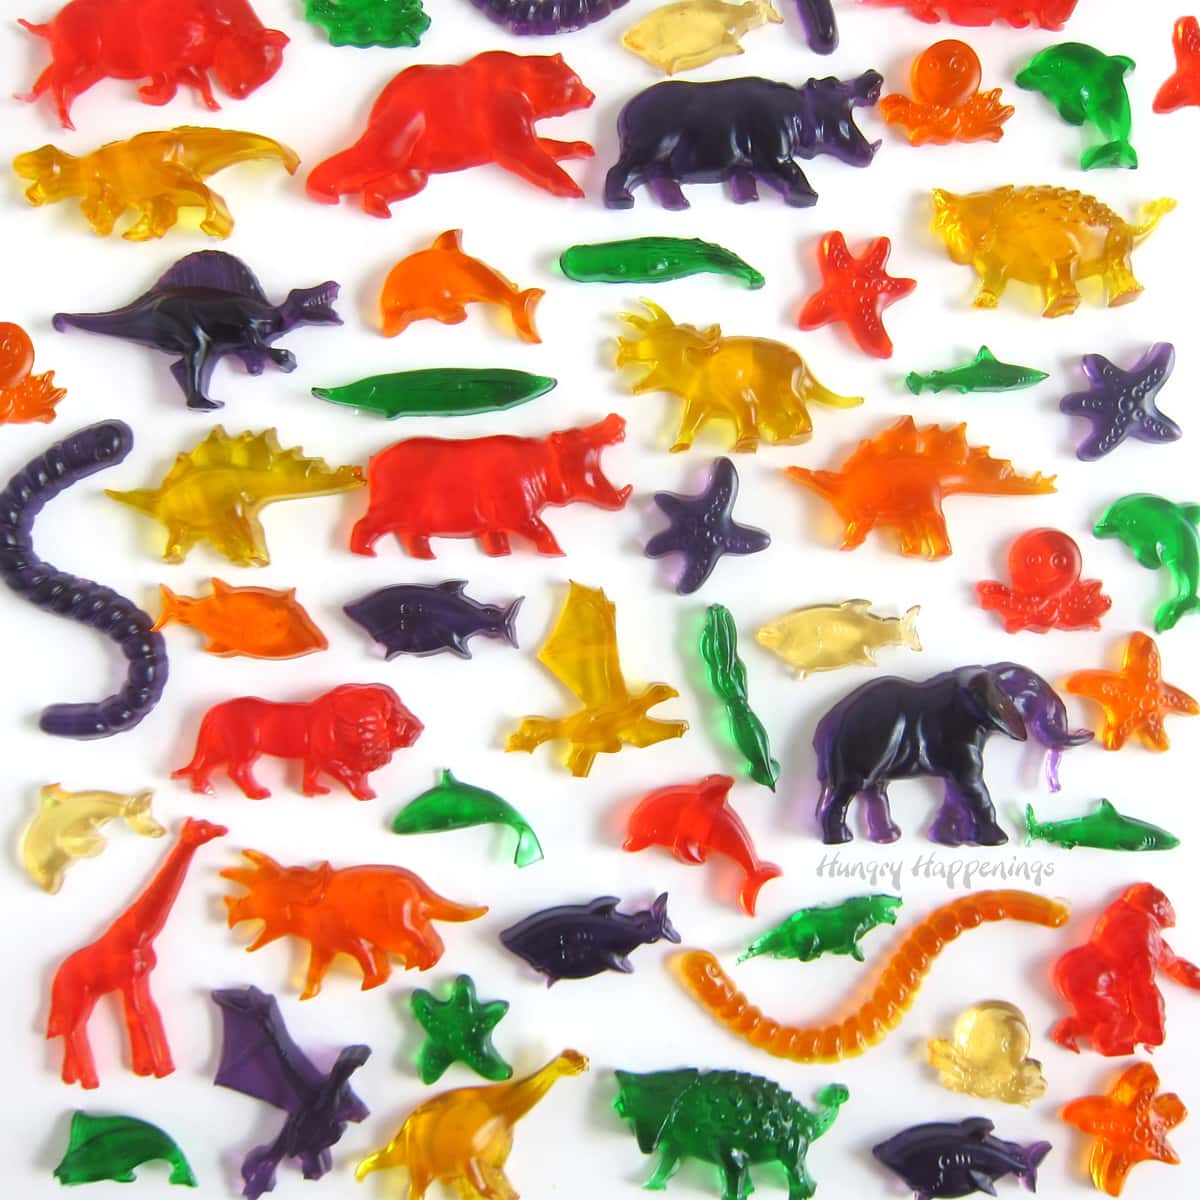
Making homemade gummy candies and gumdrops is so much fun. You can add your favorite flavors like green apple, raspberry, pineapple, cherry, grape, etc. There are so many options.
You can also make homemade gummies using a variety of silicone molds.
I'm going to show you how to create Brain Memorrahage Gumdrops that look like they have blood inside, white Gumdrop Ghosts, and skull-shaped gumdrops. They all use the same recipe but are made in different molds.
Let's make some Halloween gummy candies.
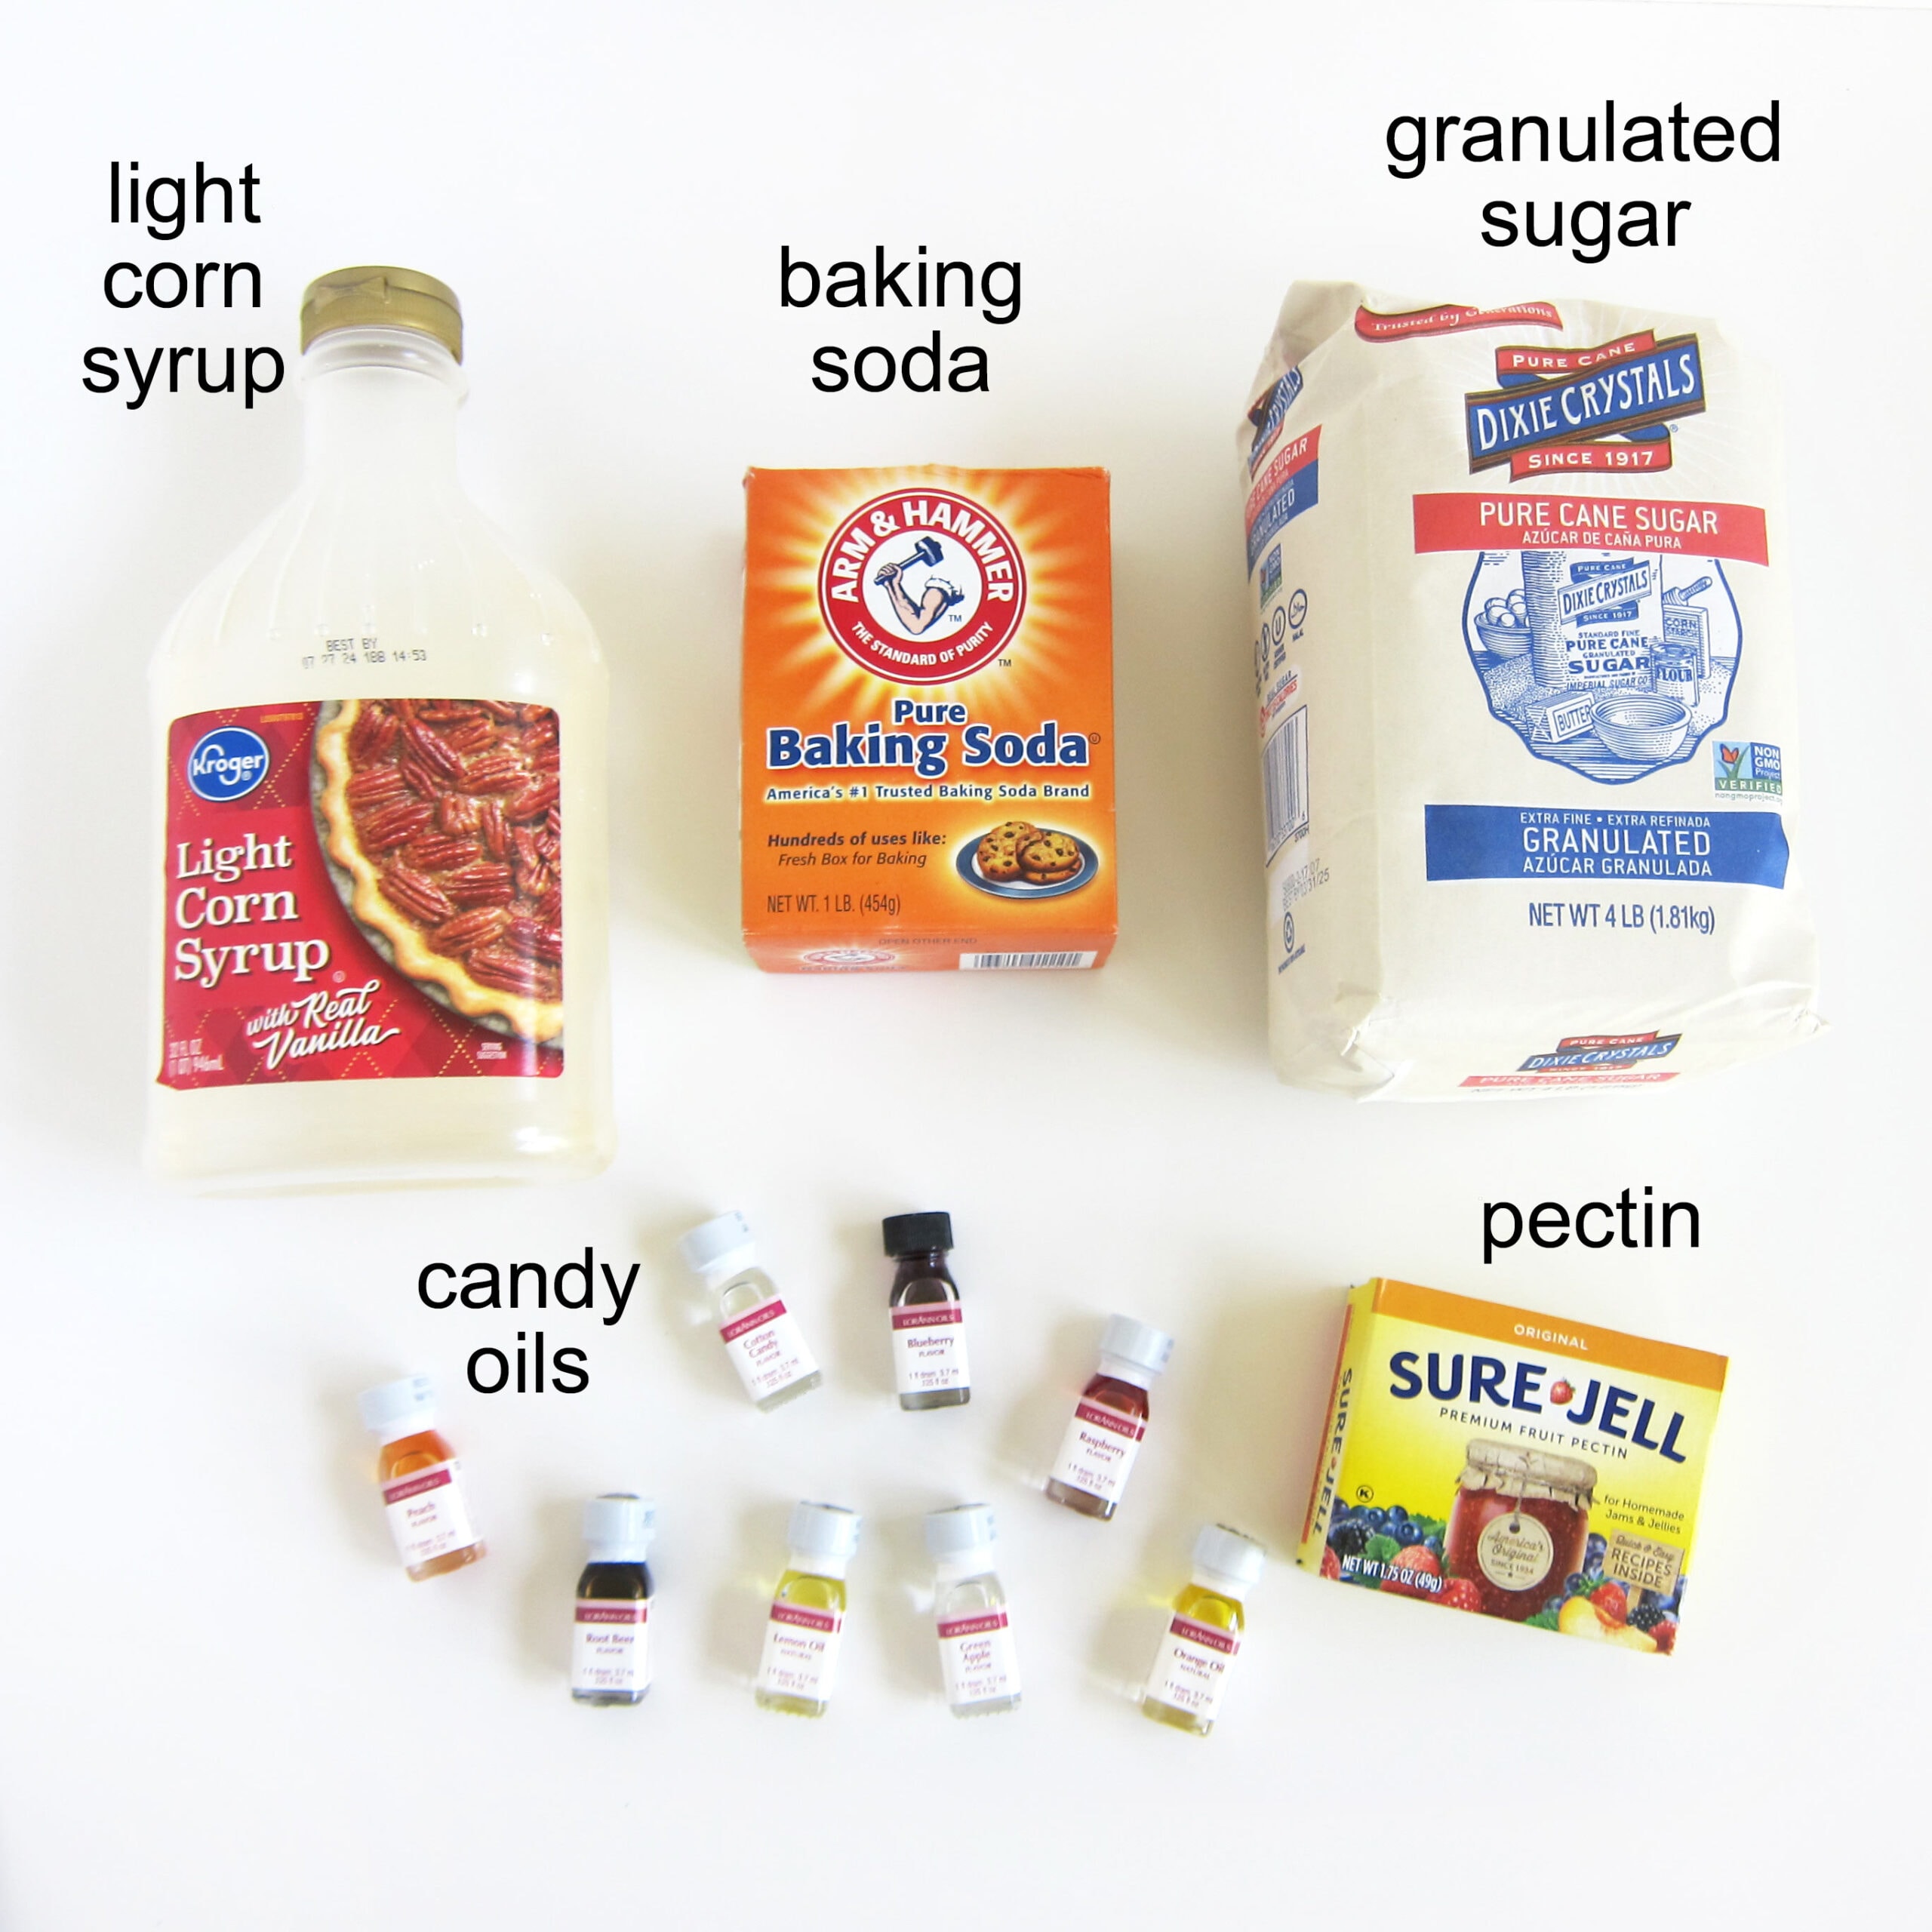
Ingredients
powdered fruit pectin (not low or no sugar pectin) - I used Sure-Gel pectin. Some pectins, like Ball Pectin, have a brownish tint. You really want to use clear pectin when making these gumdrop brains and Sure-Gel pectin is nice and clear.
baking soda - Baking soda will provide lift to the candies so they are airy and light. These gumdrops have the most amazing texture. They are softer than store-bought gumdrops.
sugar - Use granulated sugar to make your candy sweet. You will also coat your gumdrops in sugar to keep them from sticking.
light corn syrup - Not only does corn syrup add sweetness, but it also prevents your gumdrops from crystallizing and adds the perfect chew to the candies.
flavored candy oil - I use candy oils to flavor my homemade gumdrops. Start by adding ¼ teaspoon of the candy oil to the hot gumdrop mixture. To test the flavor, fill a glass with ice cubes, then pour in some water. Dip a metal spoon into the hot gumdrop candy mixture then set that spoonful of candy into the ice water to cool for one minute. Once the candy cools, you can taste it to see if you want to add more flavoring.
liquid food coloring - You will add a drop of liquid red food coloring to each gumdrop brain to make them look bloody inside. To make the ghosts and skulls white, add some white food coloring. Or you can simply leave them clear. They look great either way.
Supplies
Brain Freeze Molds (4 molds with four brain cavities) to make gummy brains
Gingerbread men silicone molds to make gumdrop ghosts
Skull and crossbones molds to make skull gumdrops
optional, food handling glove to help with greasing your molds
1 ½ or 2-quart saucepan, preferably a good quality stainless steel pan
2 or 3-quart saucepan
candy thermometer
glass bowl with a spout or a glass mixing bowl
skewer or toothpick
You can find the supplies needed to make Halloween gummies on Amazon.com. I earn a small commission when you make a purchase using the links in this post at no extra cost to you.
 3Pcs 4 Holes Brain Ice,Ice ...Shop on Amazon
  Genuine Fred BRRRAINS Silic...Shop on Amazon
 ") HENGSONG Silicone Ice Tray ...Shop on Amazon
HENGSONG Silicone Ice Tray ...Shop on Amazon ") Sure Jell Premium Fruit Pec...Shop on Amazon
Sure Jell Premium Fruit Pec...Shop on Amazon  Karo Light Corn Syrup 32 Fl...Shop on Amazon
  All-Clad D3 Stainless Steel...Shop on Amazon
 Taylor Stainless Steel Cand...Shop on Amazon
  Fairly Odd Novelties Bone C...Shop on Amazon
  2 Pcs Halloween Silicone Ba...Shop on Amazon
  Wilton 24 Cavity Silicone G...Shop on Amazon
Let's start with the brains.
These bleeding candy brains will make a killer addition to a food table at your Zombie party, Serve them alongside Cake Ball Brains, Hot Chocolate Bomb Brains, Stuffed Pizza Brains, and Zombie Candy Cups.
I have a bit of an obsession with bleeding brains for Halloween. Although I love creating cute party food, when it comes to Halloween the more gruesome the better. These are definitely in the creepy Halloween food category.
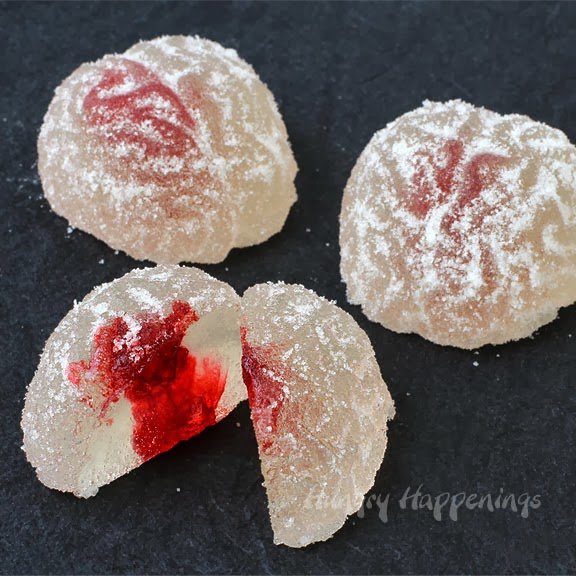
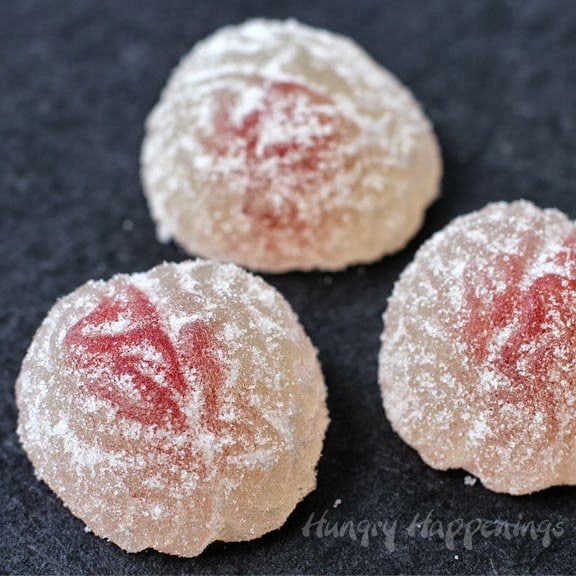
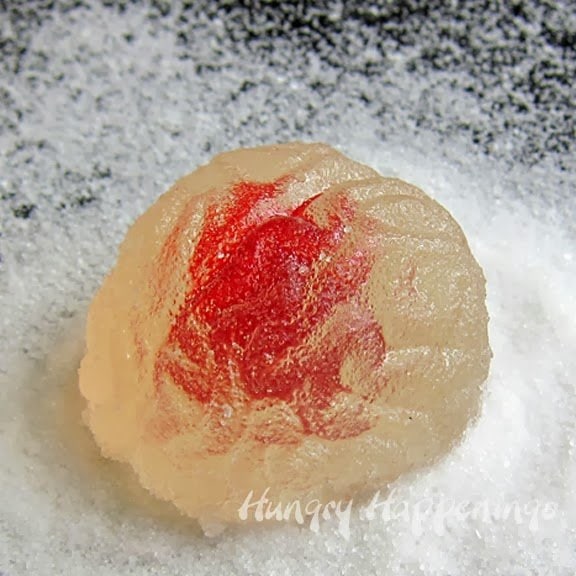
I think it's really cool how you can see the ruby-red blood inside the clear gummy brain. Don't worry, the blood is just red food coloring.
Instructions
Step 1 - Grease your silicone brain molds.
Butter your silicone brain molds before you make your batch of gumdrops. I recommend using butter because the cooking spray will leave a film on your silicone molds.
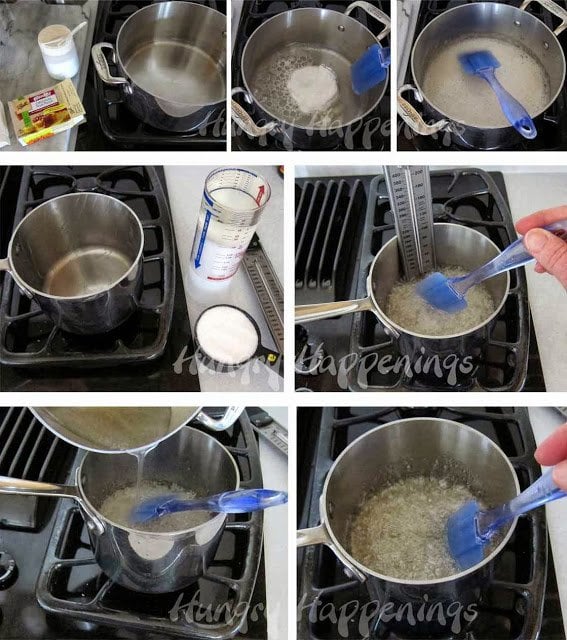
Step 2 - Make homemade gumdrops.
- Pour corn syrup and sugar into a buttered 3-quart saucepan set over medium-high heat.
- Cook until a candy thermometer reaches 280 degrees Fahrenheit.
- Meanwhile, in another saucepan bring water, pectin, and baking soda to a boil, stirring constantly.
- Once the sugar syrup reaches 280 degrees, pour in the pectin syrup.
- Stir constantly for one minute then remove it from the heat.
- Stir in the flavoring.
These candies have a wonderfully soft gummy texture. If you prefer a firmer gummy candy, you can use my Gummies Recipe instead.
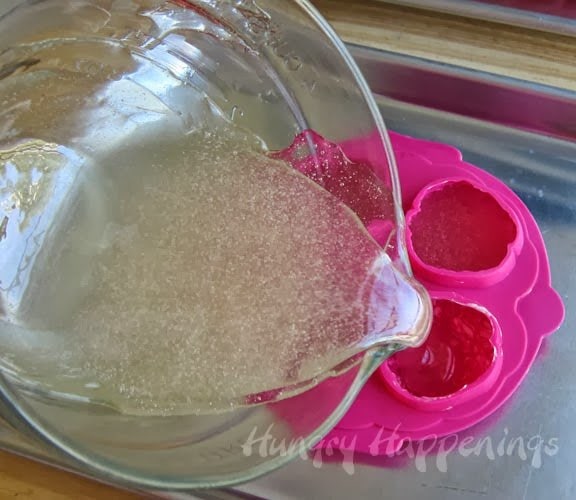
Step 3 - Fill brain molds with the hot syrup.
- Set your silicone brain molds on a baking pan or cutting board that will fit into your freezer.
- Pour the gumdrop mixture into the brain molds, filling them about ¾ full.
- You can top them off after you fill up all 8 brains. You won't have enough to completely fill the mold.
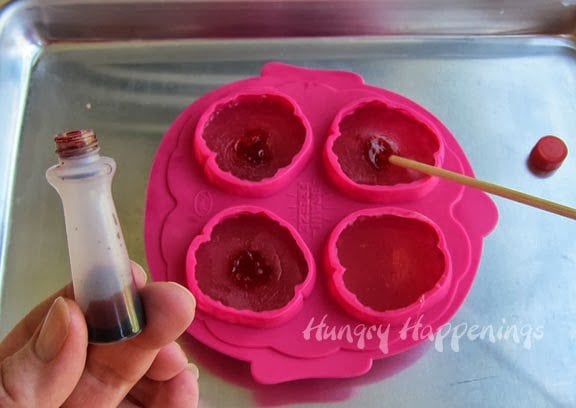
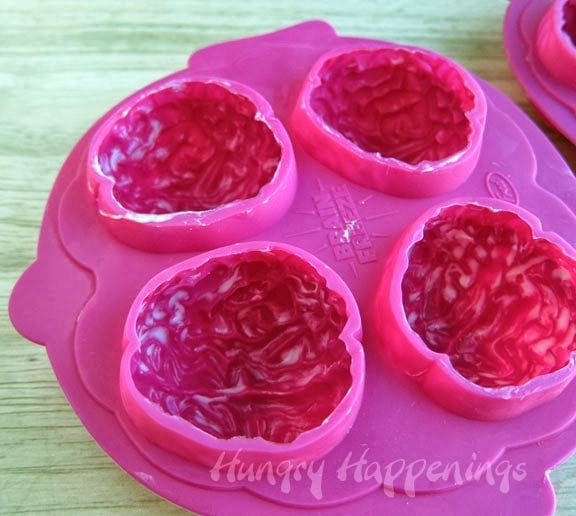
Step 4 - Make the brains look bloody!
- Immediately, poke a hole in each brain using a skewer or toothpick that has been dipped in red food coloring.
- Swirl the skewer around a bit, spreading the red coloring around inside the brains.
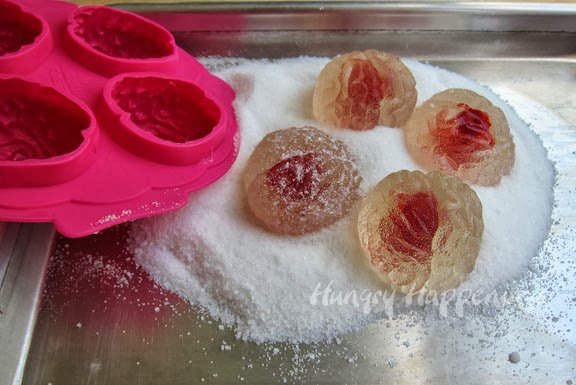
Step 5 - Cool the gumdrop brains.
- Allow the gumdrops to cool at room temperature for 1 hour.
- Then, pop the molds into the freezer for an hour.
- Remove, and un-mold the brains onto some sugar.
- Coat all the gumdrop brains in sugar.
The brains look eerily transparent without sugar, but they are pretty sticky, so I do recommend coating them.
Step 6 - Storing your homemade gumdrop brains.
- Store in an airtight container for up to a month.
- Do not refrigerate. They will become sticky.
What do you think? Could you eat a candy brain?
If not, how about a candy ghost instead?
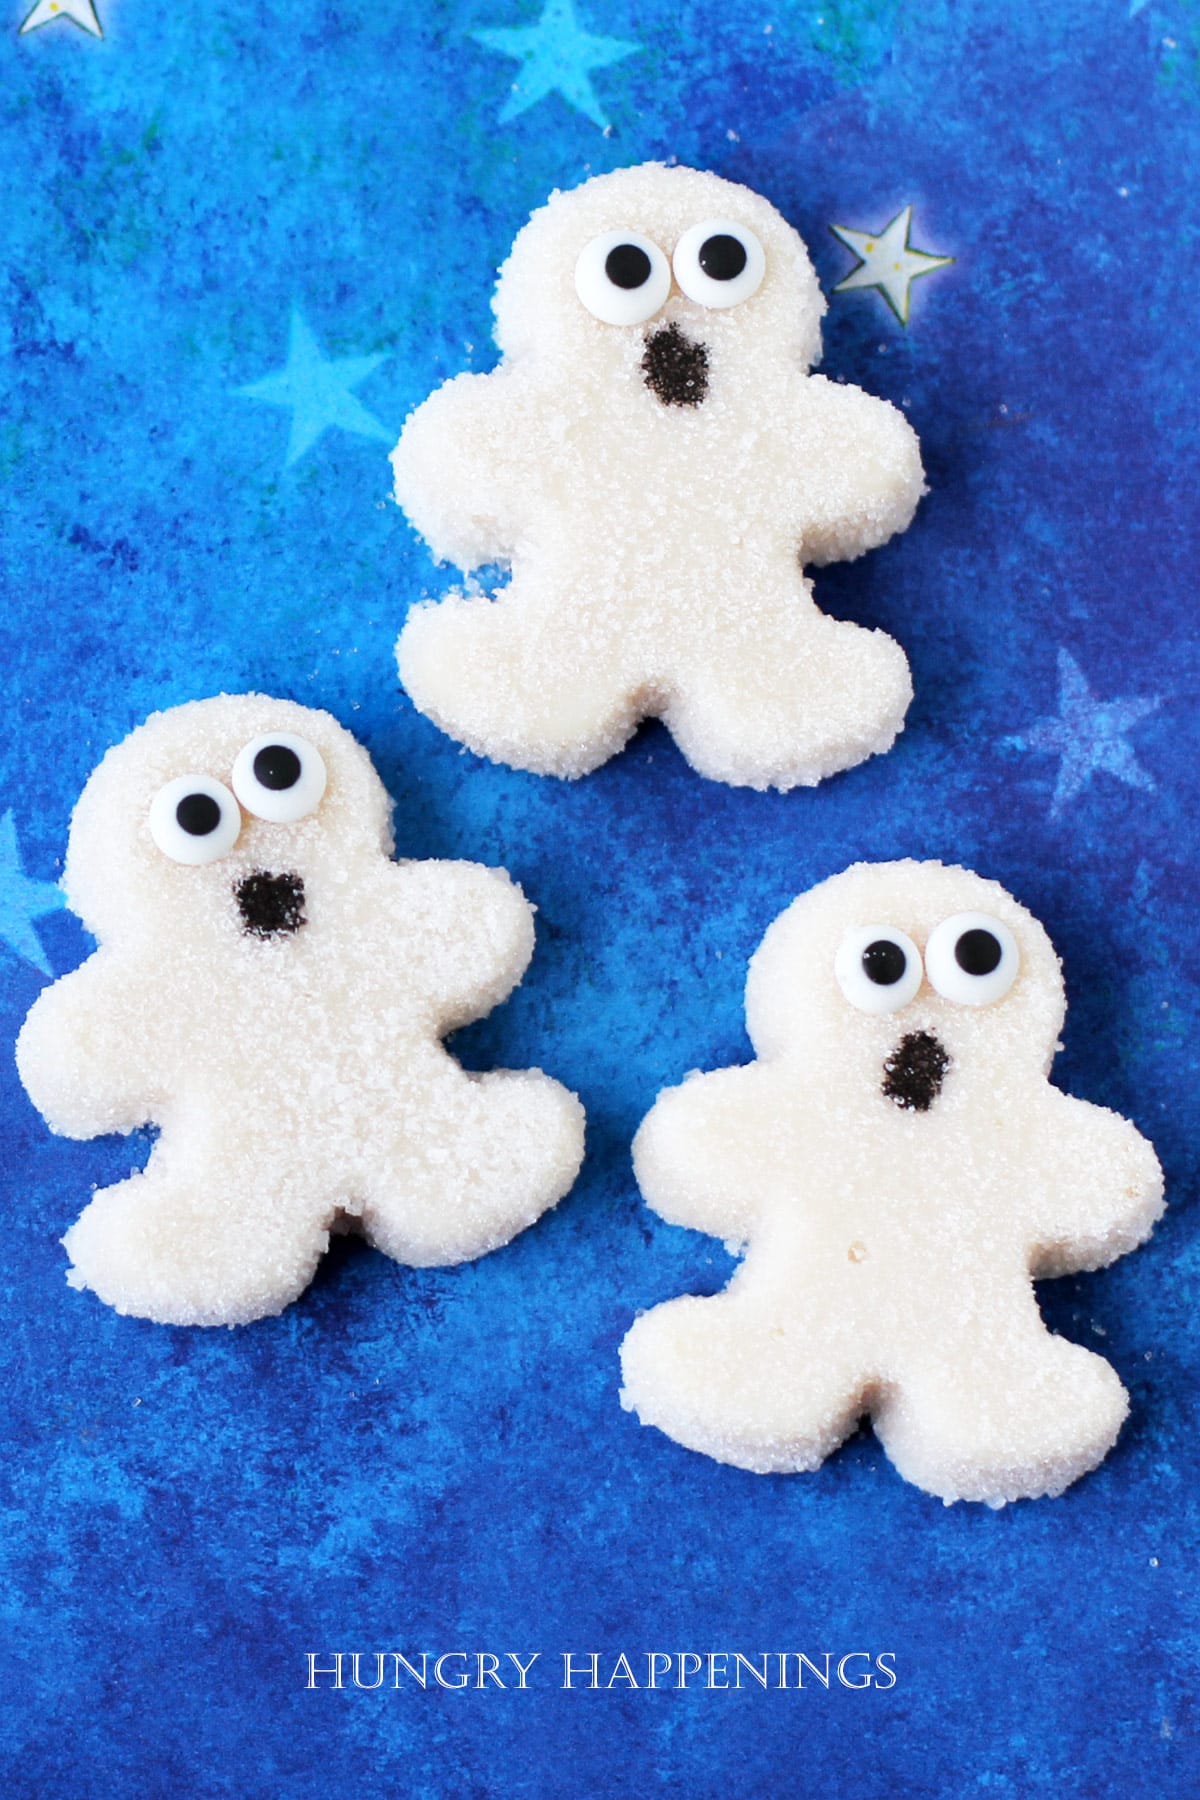
Making gumdrop ghosts.
To make these gummy ghosts, start by greasing a silicone Gingerbread Man mold with butter.
Then, make the gumdrop syrup and stir in a few drops of white food coloring if you want them to be opaque white. Otherwise, they will look clear.
I actually used pectin that had a brown tint to it so my ghosts are not pure white. If you use clear pectin, your ghosts will look brighter.

Pour the white gumdrop syrup into the buttered mold. Let the candy cool at room temperature for about 8 hours until the candy firms up or cool at room temperature for 1 hour then freeze for 30 minutes.
Un-mold the candy ghosts directly into granulated sugar. Coat the candies completely in the sugar.
Use light corn syrup to attach two small candy eyes to each ghost. They are ready to serve.
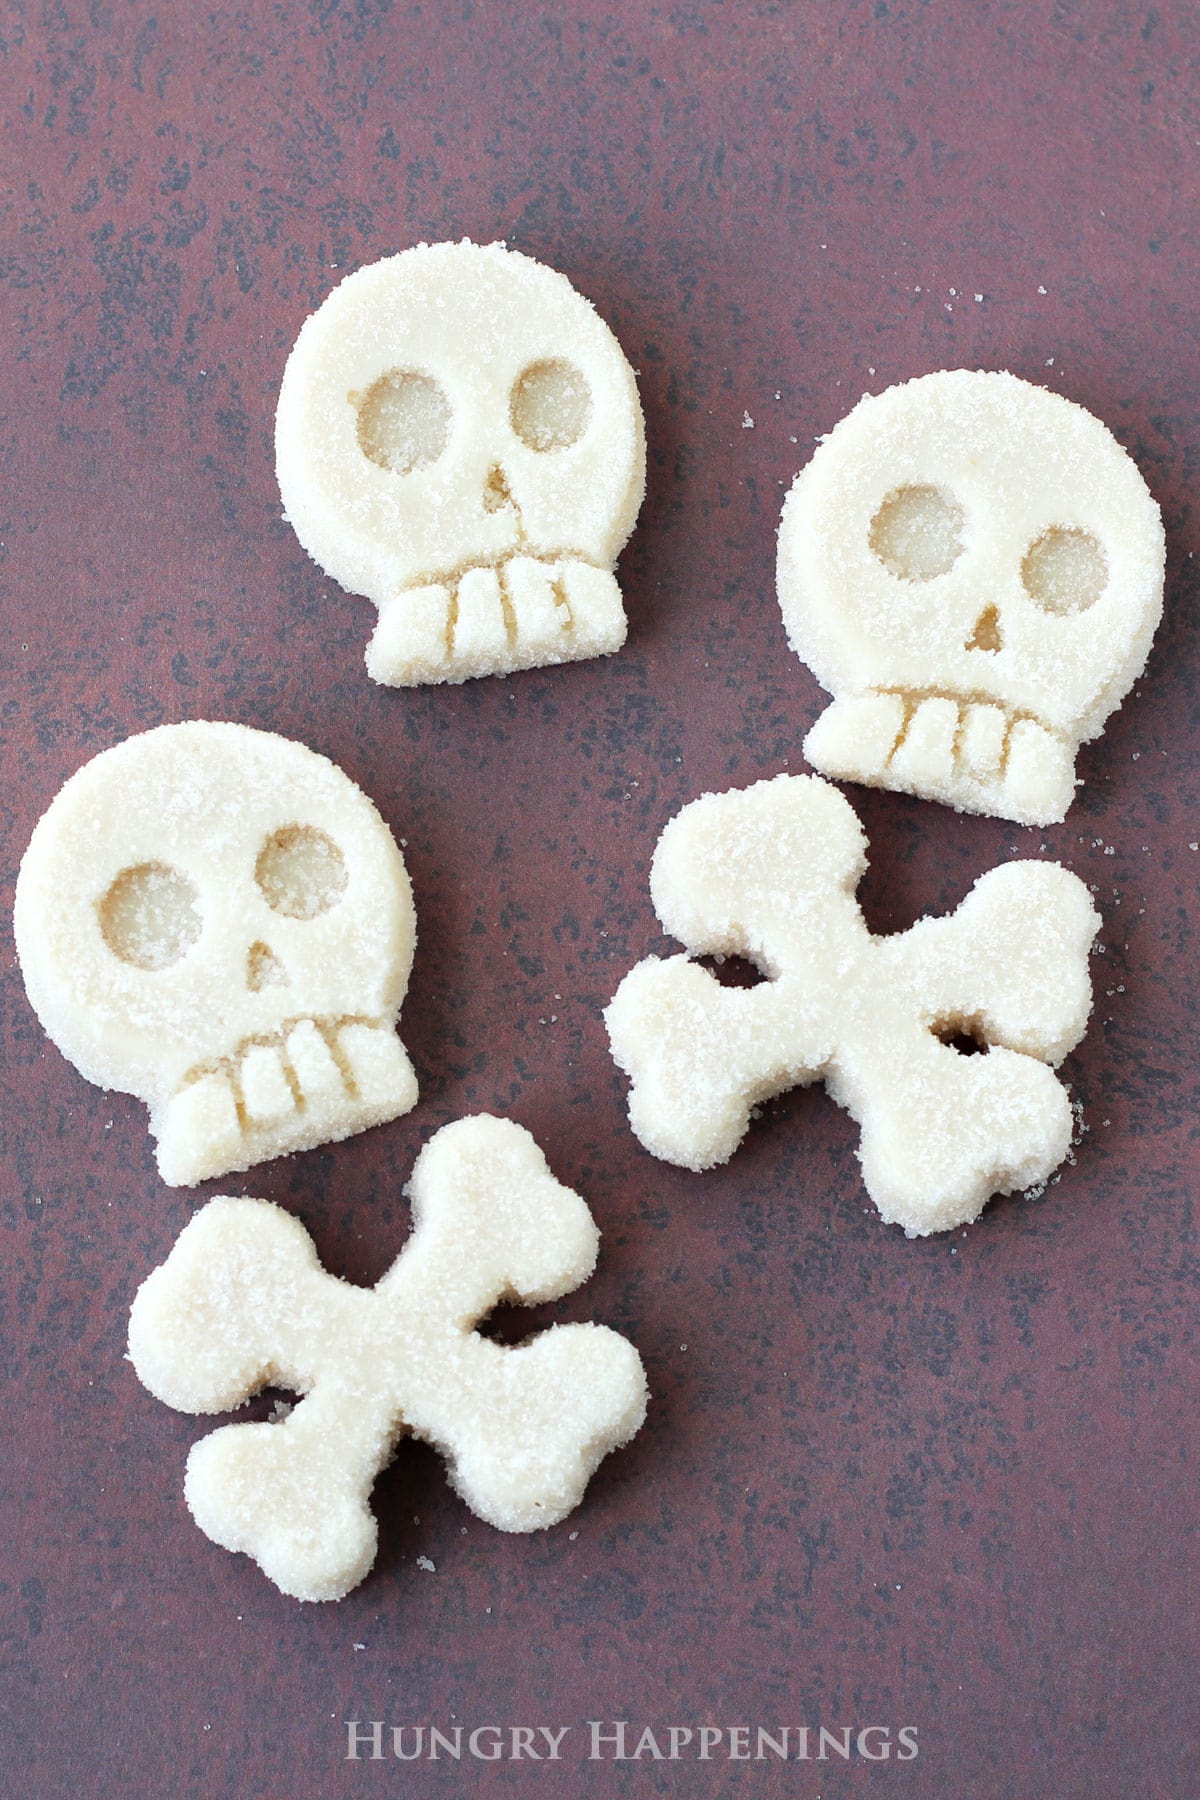
Making gumdrop skulls.
You'll do the same thing to make skull and crossbones gummies.
Start by making the gumdrop syrup using the recipe below and then add white food coloring.
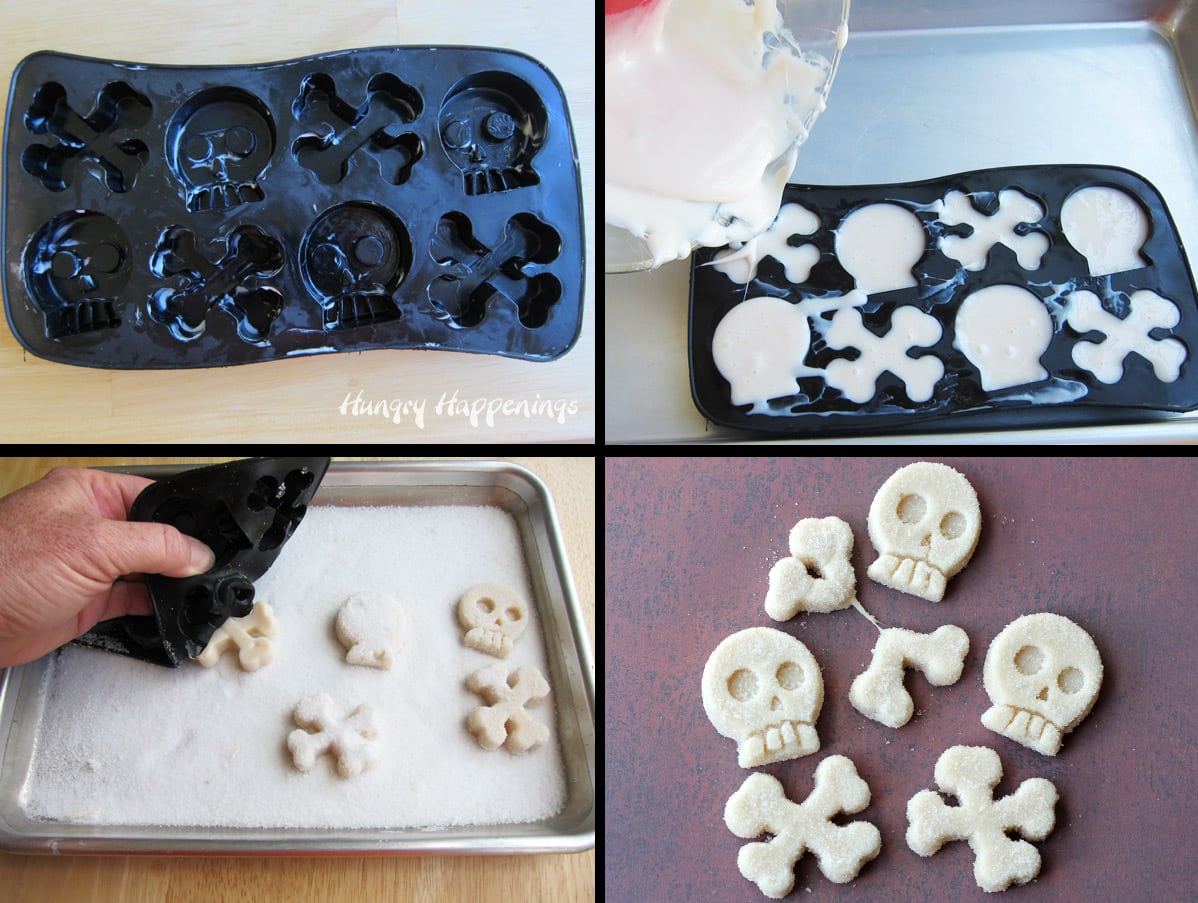
Pour the hot gumdrop syrup into a well-buttered skull and crossbones ice cube tray.
Let the gummy candy harden for 8 hours at room temperature or speed up the process by freezing the candy after 1 hour.
Unmold into granulated sugar and coat the entire surface of the candy.
Substitutions
You can use gelatin if you want your candies to be chewier. Check out my Gummies Recipe where I use fruit juice and clear gelatin to make gummy candies or my Homemade Gummy Candy Recipe where I use boxes of flavored Jell-O to make flavored gummy candies.
Variations
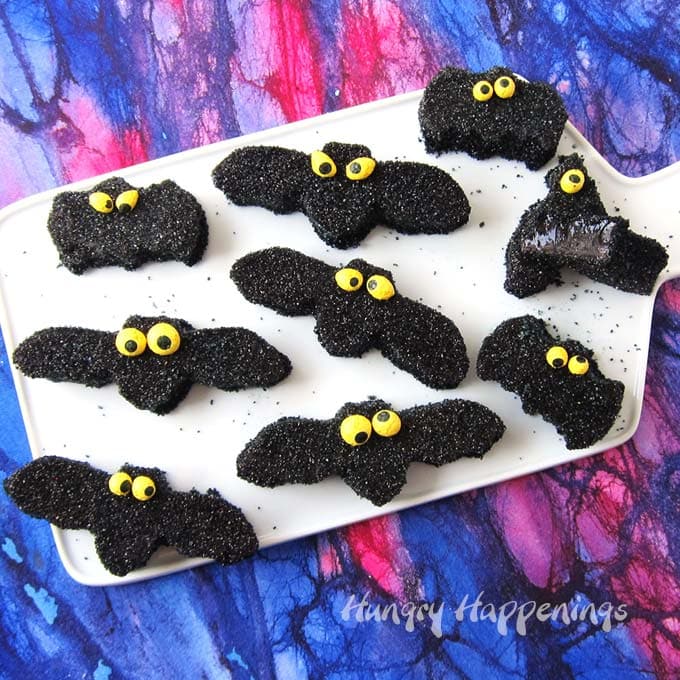
You can make grape gummy bats using grape gelatin.
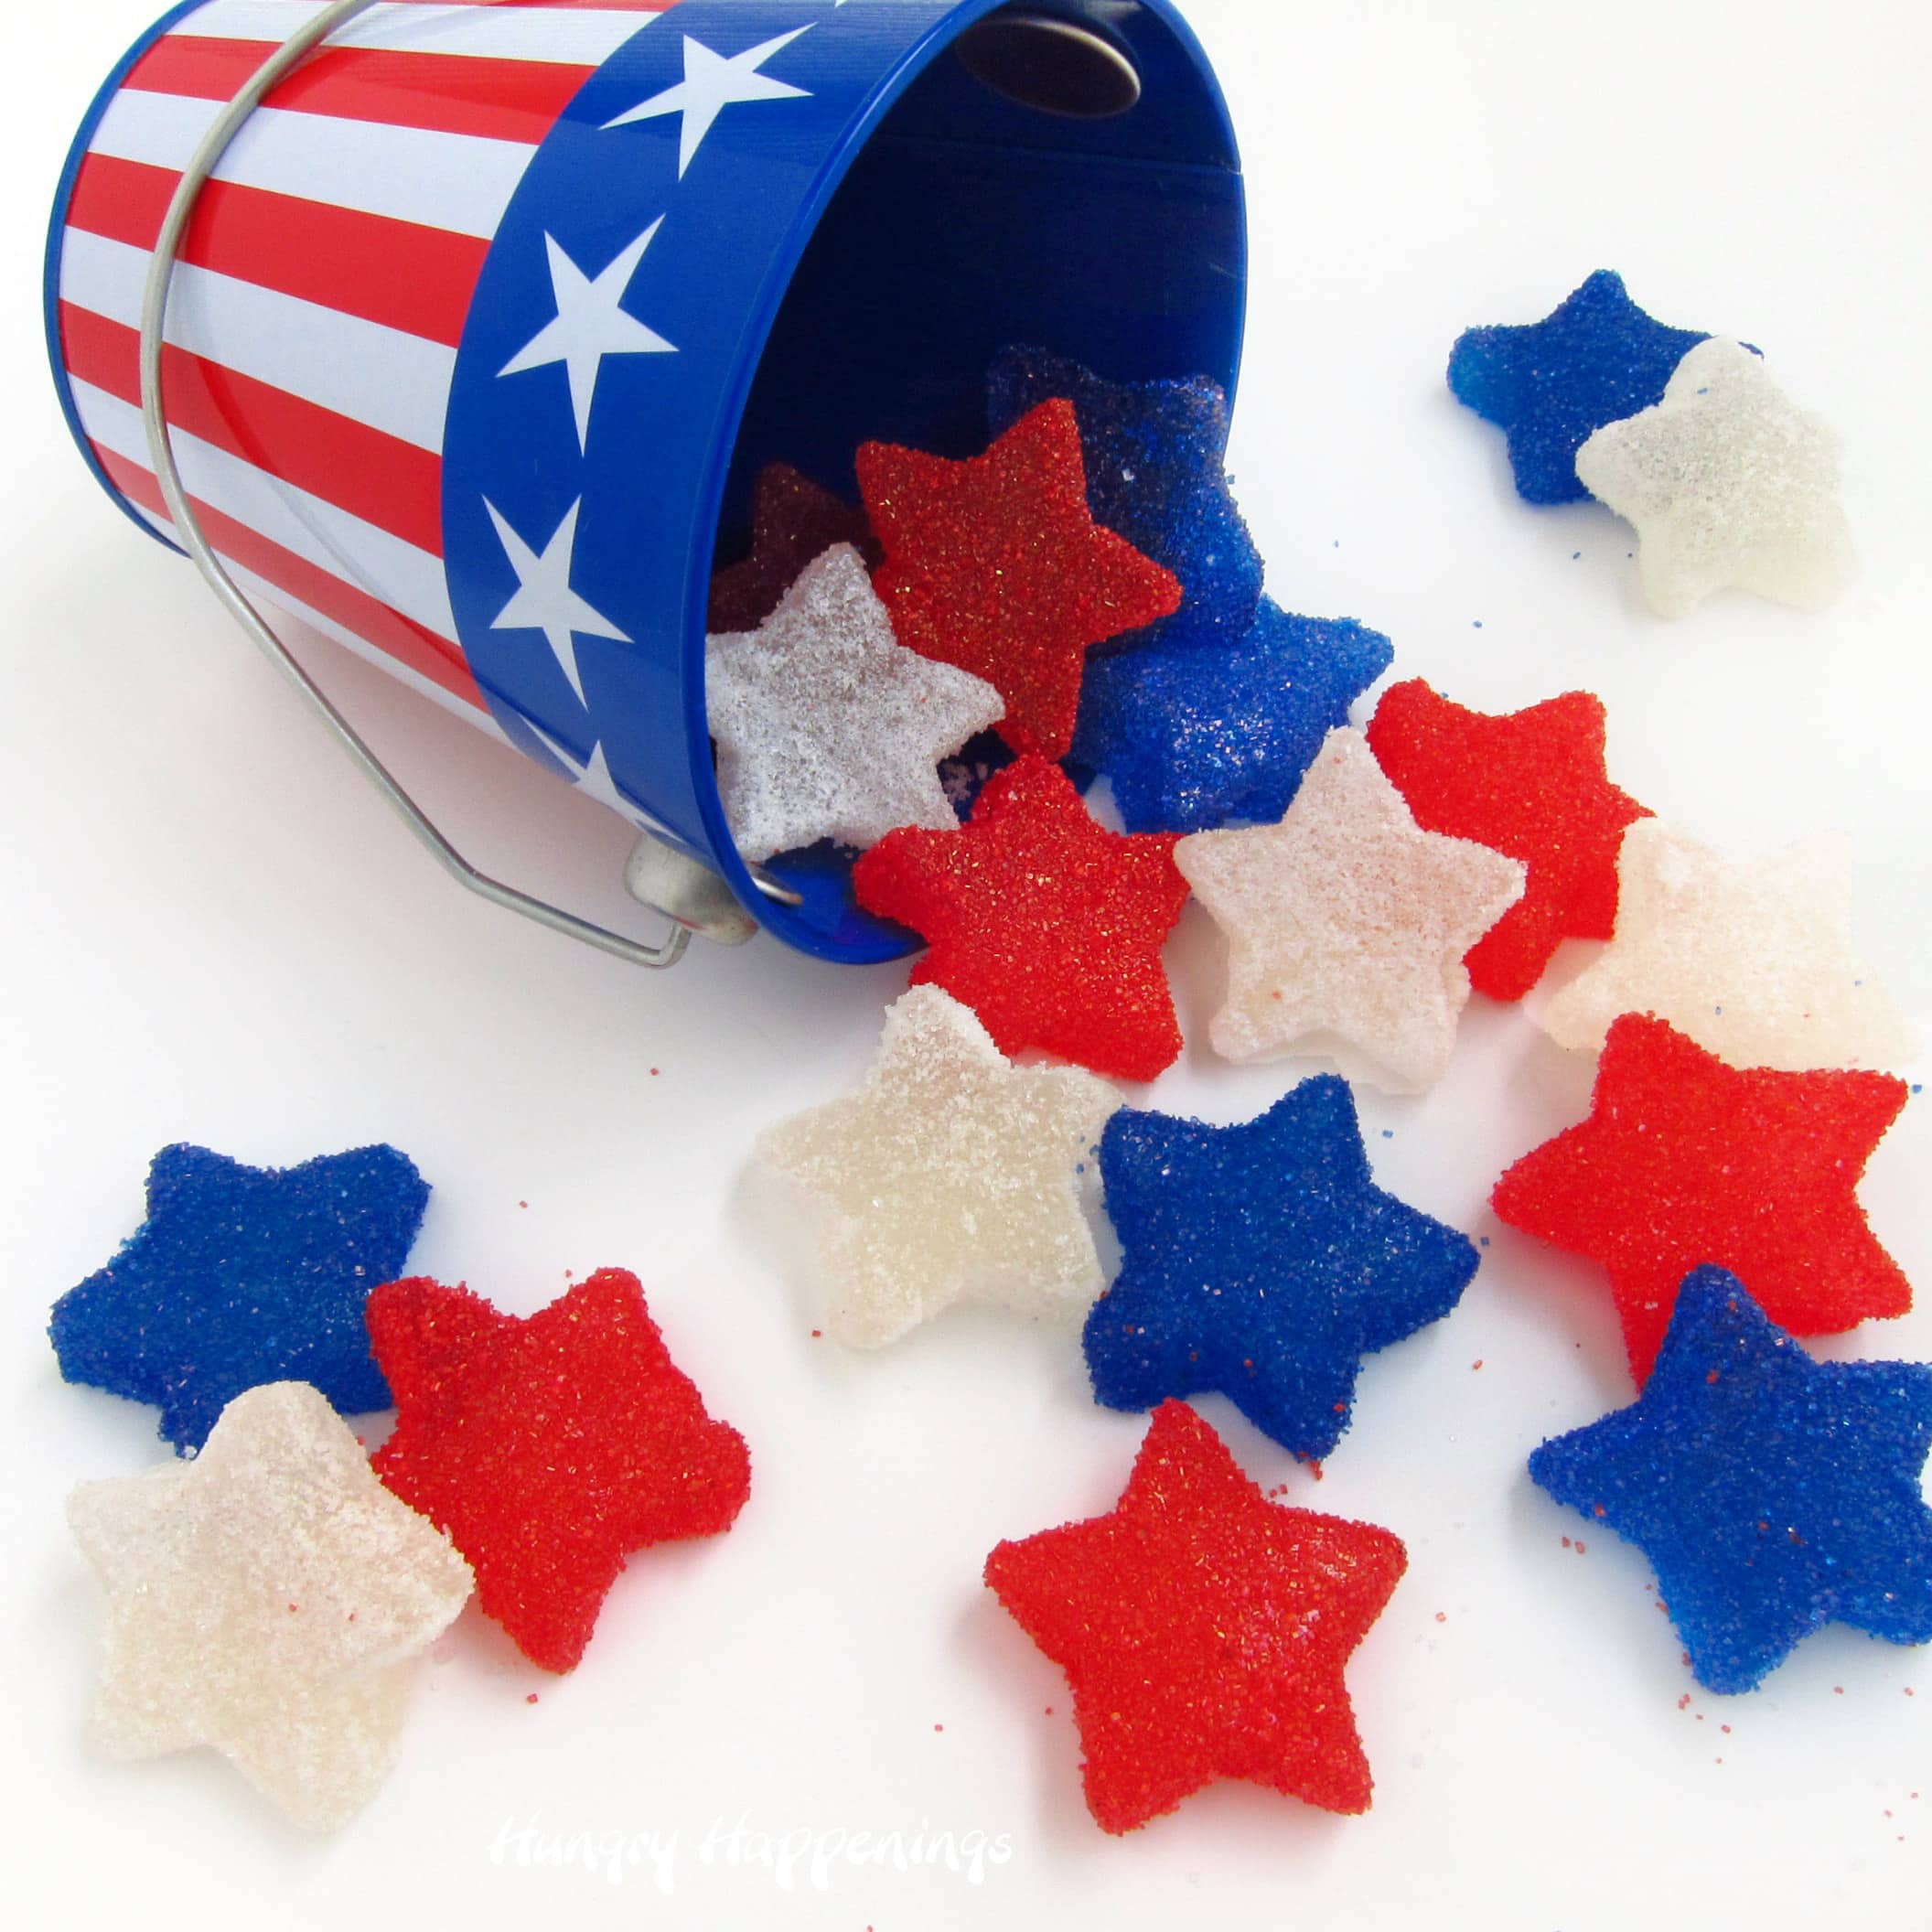
Make gumdrop stars by coating clear gumdrops in colored sugar.
Add citric acid to the sugar to make Sour Gummies.
Be sure to check out all the Halloween recipes here on Hungry Happenings.
Recipe
This recipe was originally published on October 3, 2013.
- butter, to grease pan and brain mold
- ¾ cup water
- 1.75 ounces original powdered fruit pectin (not low or no sugar pectin)
- ½ teaspoon baking soda
- 1 cup sugar
- 1 cup light corn syrup
- ¼ -½ teaspoon flavored oil, I used LorAnn Sour Apple oil
- granulated sugar to coat gumdrops
- red liquid food coloring
- white food coloring
- 40 small candy eyes
-
Butter your brain molds before you make your batch of gumdrops.
-
Pour corn syrup and sugar into a buttered 3-quart saucepan set over medium-high heat.
-
Cook until a candy thermometer reaches 280 degrees Fahrenheit.
-
Meanwhile, in another saucepan bring water, pectin, and baking soda to a boil, stirring constantly.
-
Once the sugar syrup reaches 280 degrees, pour in the pectin syrup. Stir constantly for one minute then remove it from the heat.
-
Stir in the flavoring.
-
As soon as your gumdrop mixture is ready, pour it into a glass bowl, preferably with a spout.
-
Pour the gumdrop mixture into your brain molds, filling them ¾ full.
-
Immediately, poke a hole in each brain using a skewer or toothpick that has been dipped in red food coloring.
-
Swirl the skewer around a bit, spreading the red coloring around inside the brains.
-
Allow the gumdrops to cool for 1 hour then pop the molds into the freezer for an hour.
-
Remove, and un-mold the brains onto some sugar.
-
Coat all the gumdrop brains in sugar.
-
Store in an airtight container for up to a month.
-
To make ghost or skull gumdrops, color the sugar syrup with white food coloring after it has been cooked to the right temperature.
-
Pour the syrup into greased silicone molds.
-
Let the candy cool and harden at room temperature for about 8 hours or at room temperature for 1 hour then 30 minutes in the freezer.
-
When firm, unmold the candies into granulated sugar. Toss to coat them completely.
-
For the ghosts, you can add two small candy eyes using corn syrup as edible glue. Once recipe should make about 20 ghosts so you'll need 40 candy eyes.
Use Clear Pectin
You want pectin that is white or clear-looking. I used Sure-Jell for this recipe. Ball pectin has a brown hue to it so I don't suggest it for this project.
Storage
Store your candies in an airtight container for up to a month.

- Banana Split Bars – A Fun and Easy Summer Dessert - March 4, 2026
- Pineapple Fudge (No Candy Thermometer Needed!) - March 4, 2026
- No-Bake Peanut Butter Pie Recipe - March 3, 2026


Nami says
I love creepy food! I make witch fingers cookies, bloody stump and all, that have been turned down based on looks alone, lol.
beth says
It always cracks me up when people wont eat a treat because it looks like fingers or a brain. It's food! I know people who wont eat a teddy bear cake too.
Nami says
I love creepy Halloween food! I always make witch finger cookies, bloody stump and all, every year. I've had people shy away from them based on looks alone!
Anonymous says
I love making creepy and oddball treats to share for Halloween! So much fun!! =)
Karey says
Sara Moulton wrote a review for your book - cool!!
beth says
It was totally cool. I learned to cook by watching her show on Food Network. I got the chance to meet her a few years ago and she is an amazingly talented and sweet lady.
Karey says
I love creepy food for Halloween! I just need to throw a party now so I can make some!!
petoskystone says
These are awesome!!! Just say your link on Craftgossip.com. Def. being pinned & shared on FB 🙂
beth says
Thanks for stopping by from Craftgossip and thanks for the pin and share:) I really appreciate it.
Katie @ Horrific Knits says
Those are so cool! My name is Katie and I host Fall Into the Holidays, open Saturdays! I'd love to have you link up!
http://redcrowgreencrow.wordpress.com/2013/10/05/fall-into-the-holidays-3/
Christina C. says
Sarah Moulton! 🙂
Christina C. says
I think Halloween foods are super fun. The creepier, the better! 🙂
Chriss says
Sara moulton
Chriss says
I'm more of the cute Halloween type instead o the creepy.
colleen says
You have the best Halloween ideas... I love making monster-esque looking food for costume parties ..so fun
beth says
Thanks, Colleen.
Tiffany@Fizzy Party! says
If I won your book I would make every recipe in it and post it on social media telling everyone they too can make your fabulous treats. Love your creations.
beth says
You are so sweet! Thanks.
ray majoros says
This is awesome! Me and my buddy leo came up with the same idea about a year ago, heres the link to our facebook page https://www.facebook.com/pages/Gummy-brains/258643624214307
ray majoros says
This is awesome! On a side, me and my buddy leo came up with the same idea about a year ago, heres the link to our facebook page https://www.facebook.com/pages/Gummy-brains/258643624214307
beth says
Your brains are great. They look like the are glowing. Is that just a light behind them or do they actually glow?
walmart_gal2001 says
love Halloween ideas so over the edge
Shamene Medeiros says
Wow these are awesome! So cool for a Halloween party
Shamene@sayitwithcake
618mom says
Yes and I have 3 boys that do as well!
Rodney Jackson says
sara moulton
Rodney Jackson says
creepy is fun