Zombie Candy Cups filled with blood-stained candy bones or hot and spicy blood-red candies make ghoulish treats for Halloween.
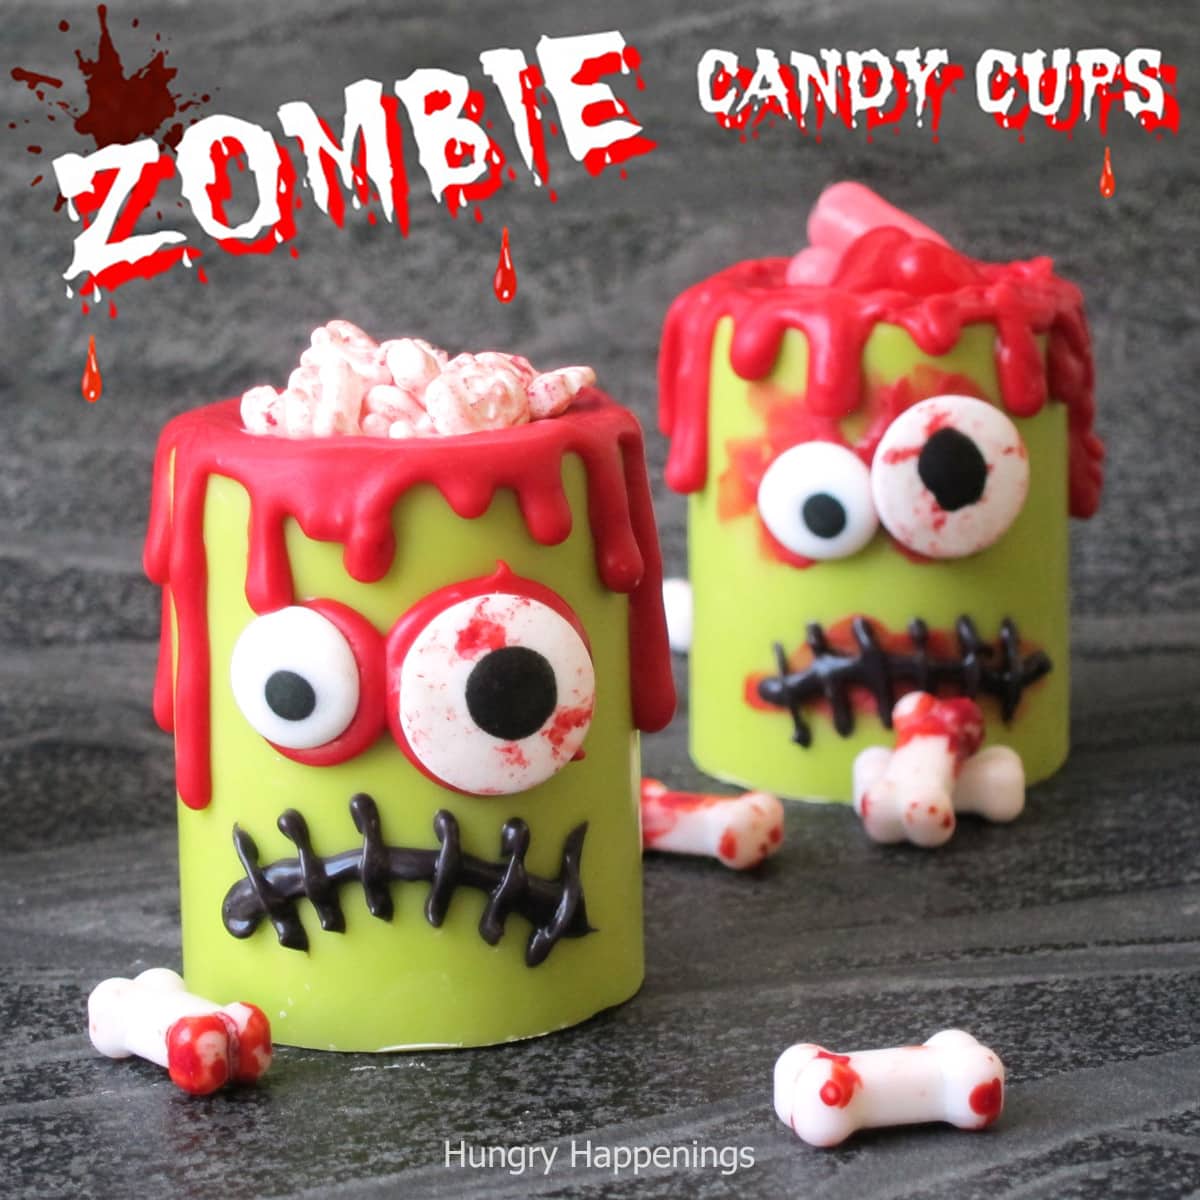
Whether you are into zombies or not, these creepy, yet cute, Zombie Candy Cups would make a fun treat for a Halloween party or zombie-themed party.
I personally don't have a fascination with zombies but there is a blood-stained, one-armed zombie in my kitchen right now. Our house is completely decked out for our Halloween party.
This year we have zombies breaking into our house through our windows, taking tickets and ushering guests into our catacomb cinemas movie theater, and breaking out of graves on our food table.
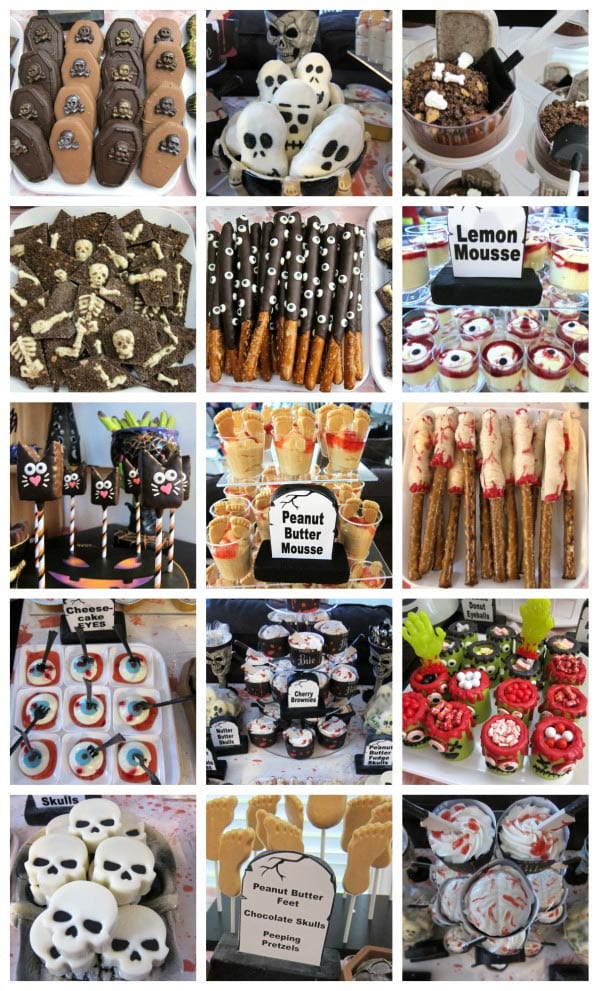
Be sure to check out my Zombie Party post to see decorating ideas and dessert and food ideas too.
These zombie candy cups are just one of the creepy Halloween desserts we will serve to our guests.
They are super easy to make using vibrant green candy melts, red and black candy melts, and bloodshot candy eyes. The best part about this project is that the messier you are while decorating, the better.
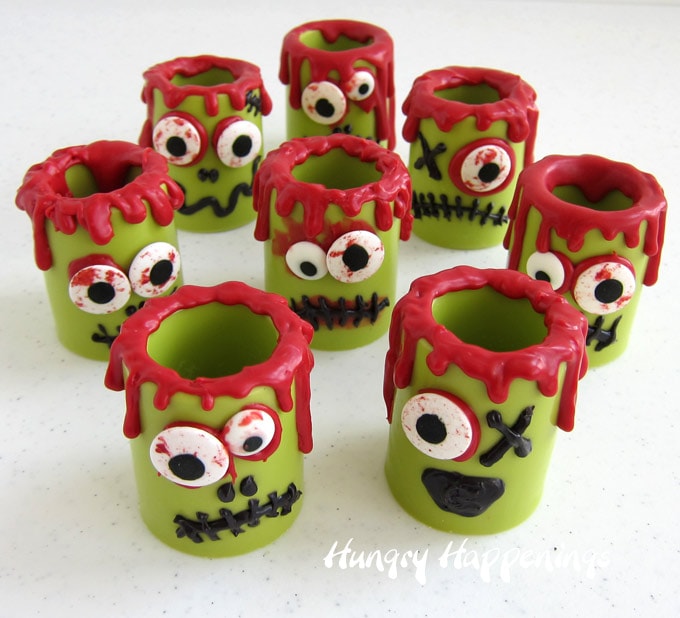
Let's make some zombies!
Ingredients
- Vibrant Green, red, and black Candy Melts
- bloodshot candy eyes
- ½-inch candy eyes
- candy to fill your cups
Supplies
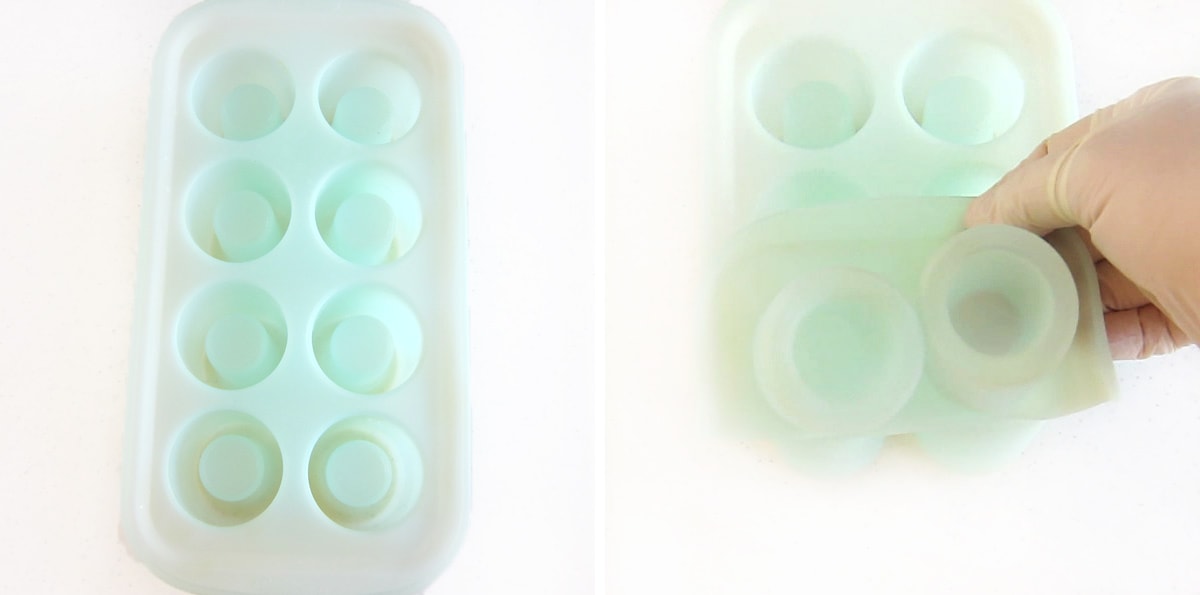
- silicone shot glass candy mold
- pastry bag, squeeze bottle, or zip-top bag
To make these Zombie Candy Cups you'll need the following supplies which can be found on Amazon.com. I earn a small commission when you use any Amazon affiliate links on this site to make a purchase at no extra cost to you.
 Wilton Round Shot Glass Sil...Shop on Amazon
 Wilton 1911-421 Candy Melts...Shop on Amazon
 Wilton 710-0167 Red Vein Ca...Shop on Amazon
 White And Black ½-Inch Ca...Shop on Amazon
 Candy By The Pound - 1 Poun...Shop on Amazon
 Wilton Black Vanilla Candy ...Shop on Amazon
 Wilton Red Candy Melts Cand...Shop on Amazon
Instructions
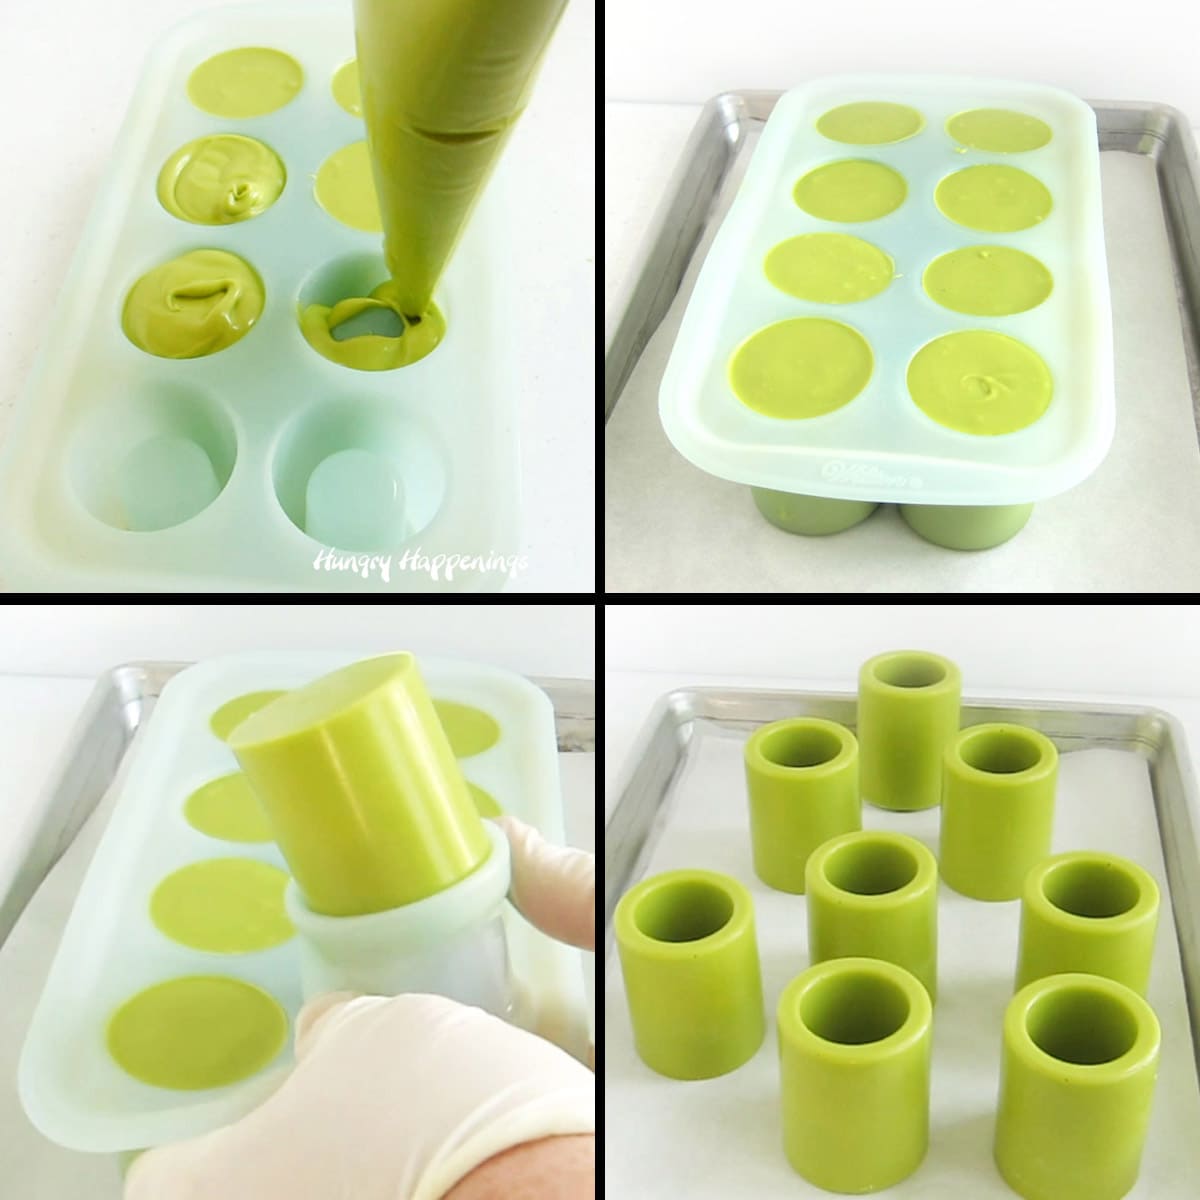
Make green candy cups.
- Pour the vibrant green candy melts into a disposable pastry bag.
- Pipe the green candy melts into 8 shot glass cavities in your silicone mold.
- Tap the mold a few times to remove any air bubbles.
- Freeze for 12-15 minutes until the candy is hardened.
- Let sit at room temperature for 5 minutes then un-mold.
- Push the candy out of the silicone mold to remove.
- Set aside for 10 minutes before decorating.
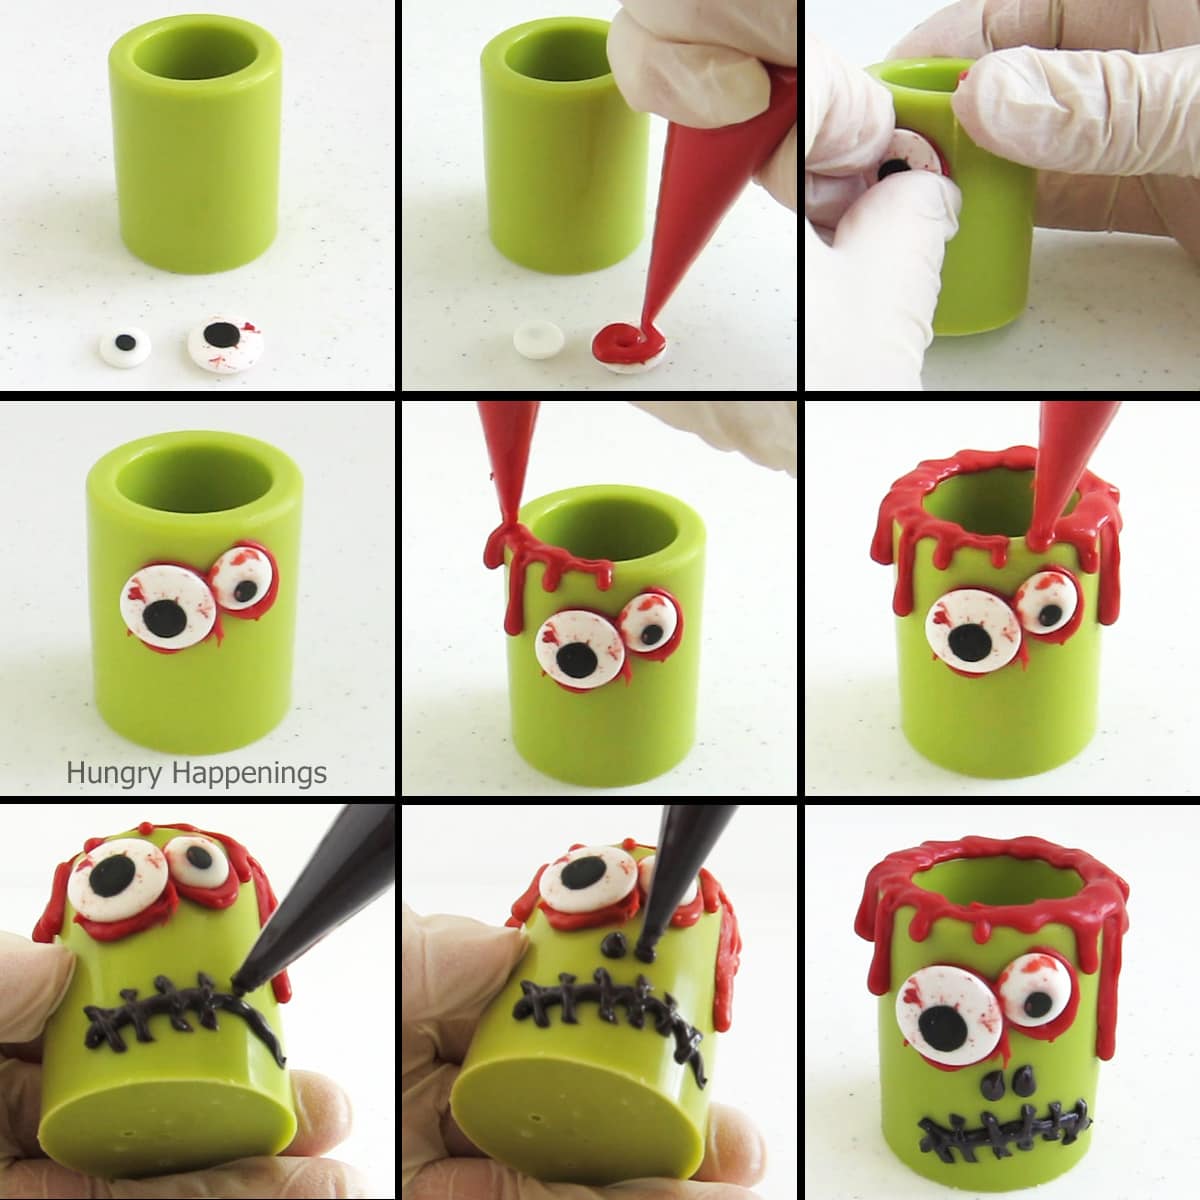
Decorate the zombie candy cups.
- Pipe some red candy melts onto the back of a candy eye and press the eye onto the candy cup being sure to smear some of the red candy around the edge of the candy eye.
- Add another eye, if desired.
- Pipe drips of blood-red candy melts over the top edge of the candy cup.
- Pop the candy cup in the freezer for 2-3 minutes until the red candy melts harden.
- Remove and allow the candy cup to sit at room temperature for a few minutes before piping on a black mouth, nose, and scars, as desired.
- Let the black candy melts dry.
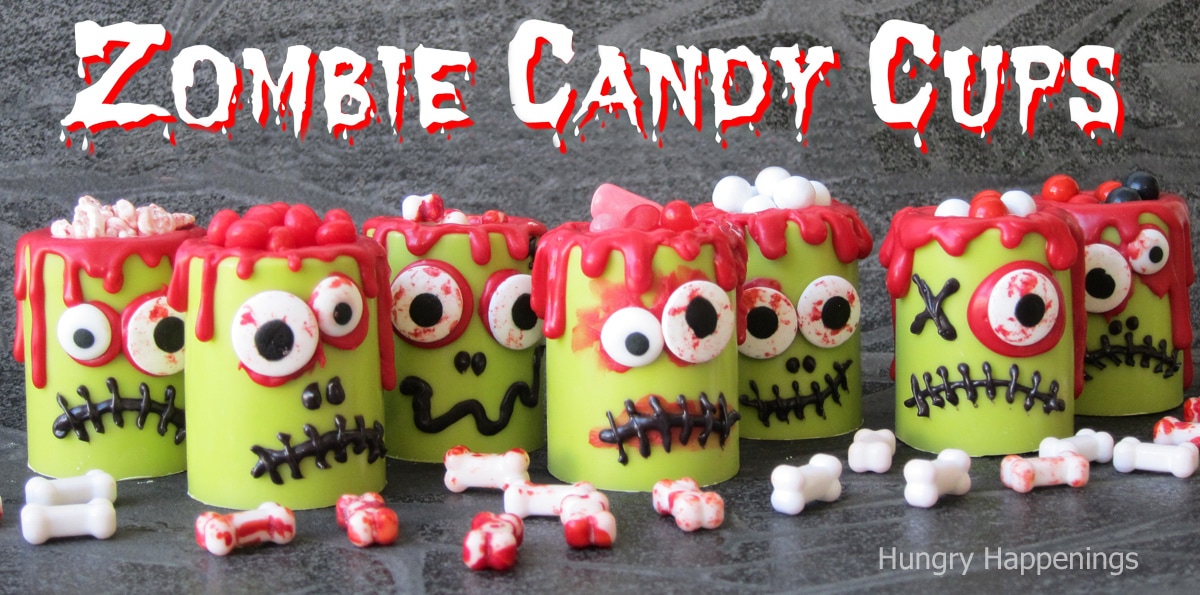
Fill the chocolate zombie cups with your favorite Halloween candy. I used candy bones, Hot Tamales, and Mike and Ikes.
You could also fill them with chocolate mousse or homemade no-churn chocolate ice cream. Or, serve a shot of booze in your zombie cups.
Related Recipes
I think my guests are going to go nuts over these edible cups as well as these other festive Halloween chocolate cups and bowls.
Recipe
Be sure to watch the video tutorial in the recipe card below to see how you can make your own set of Zombie Candy Cups.
- 24 ounces Vibrant Green Candy Melts, melted
- 4 ounces red Candy Melts, melted
- 2 ounces black Candy Melts, melted
- red veined candy eyes
- candy eyes
- candy to fill your cups
-
Pour the vibrant green candy melts into a disposable pastry bag.
-
Pipe the green candy melts into 8 shot glass cavities in your silicone mold.
-
Tap the mold a few times to remove any air bubbles.
-
Freeze for 12-15 minutes until the candy is hardened.
-
Let sit at room temperature for 5 minutes then un-mold.
-
Push the candy out of the silicone mold to remove.
-
Set aside for 10 minutes before decorating.
-
Pour red candy melts into a disposable pastry bag.
-
Pipe some red candy melts onto the back of a candy eye and press the eye onto the candy cup being sure to smear some of the red candy around the edge of the candy eye.
-
Add another eye, if desired.
-
Pipe drips of blood red candy melts over the top edge of the candy cup.
-
Pop the candy cup in the freezer for 2-3 minutes until the red candy melts harden.
-
Remove and allow the candy cup to sit at room temperature for a few minutes before piping on a black mouth, nose, and scars, as desired.
-
Let the black candy melts dry.
-
Fill the candy cups with candy, pudding, or chocolate mousse.
Recipe Video
Store your zombie candy cups at room temperature for up to a month. If you store them in a metal cookie tin, they'll keep for up to 2 months.
- How to make peanut butter? - February 15, 2024
- OREO Penguins - December 20, 2023
- OREO Snowmen - December 20, 2023

Bridgette Foster
Jeff brought these to work today and shared your website! You are awesome! I love love love these!!
Beth
I am so happy you stopped by to check out the website and am glad you enjoyed all the treats I sent in with Jeff. Have a Happy Halloween!!!
Jessie
These are amazing an fun!
Beth
Thank you! I'm glad you like them.