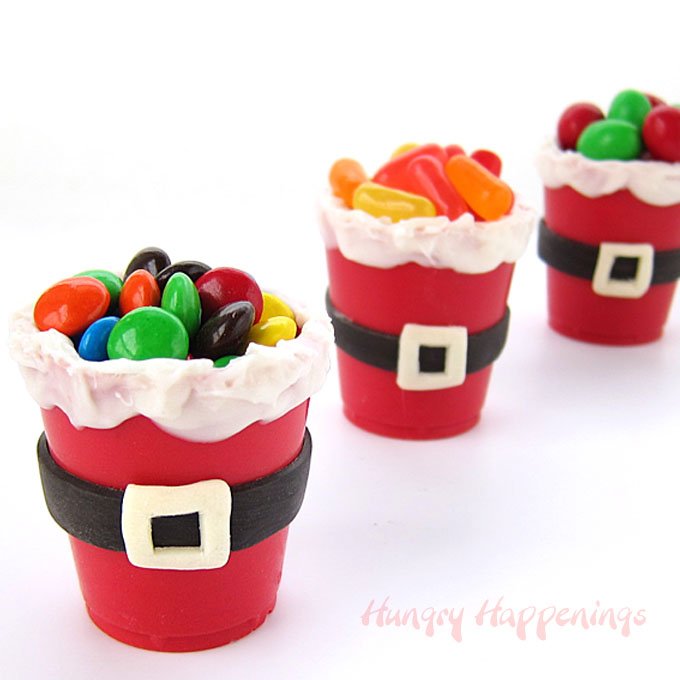
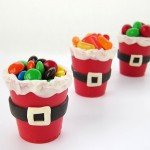
Add a touch of whimsy to your Christmas treats this holiday by making Chocolate Santa Suit Candy Cups. You can fill them with candies, pudding, chocolate mousse, or nuts.
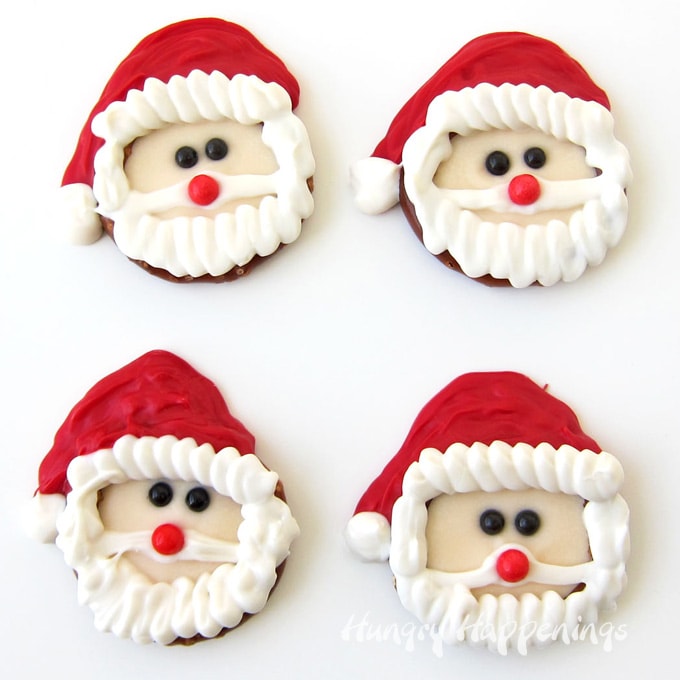
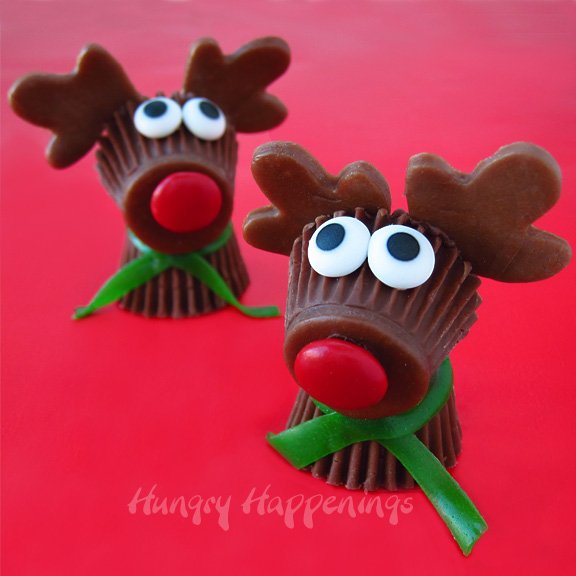
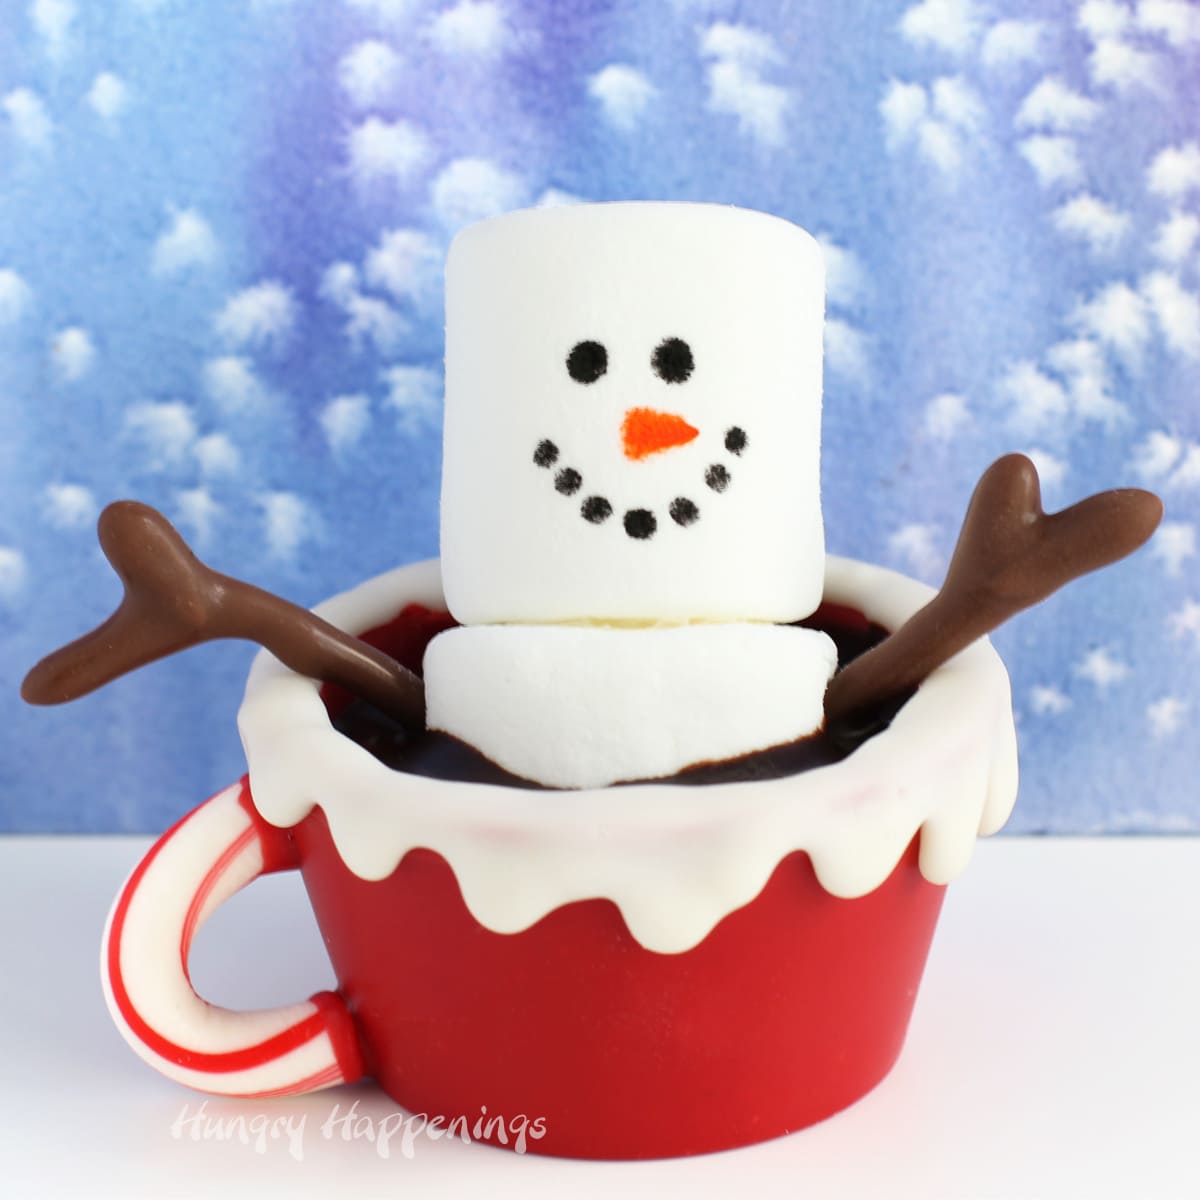
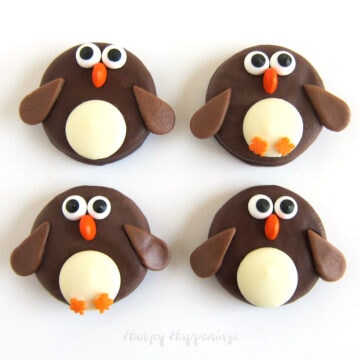
Last week, during a few free hours, I had some fun experimenting in the kitchen and created some festive Christmas recipes including Sugar Cone Santa Hats, Rudolph Candy Bars, M&M Candy Christmas lights, and these completely edible Santa Suit Candy Cups.
It was a fun week in the kitchen and I hope you enjoy making some of these cute Christmas treats.
Today, I'm going to show you a step-by-step tutorial (and NEW VIDEO) so you can make these sweet treats at home.
These white chocolate candy cups decorated to look like Santa suits can be filled with candies to use for party favors or they can be filled with chocolate mousse, cheesecake mousse, or even homemade no-churn vanilla ice cream and served as a dessert.
Edible Santa Suit Candy Cups
Ingredients
- red candy melts
- white candy melts
Supplies
- microwave-safe measuring cups with spouts for easy pouring
- small plastic cups - I used small Hefty bathroom cups. You can also use plastic shot glasses.
- metal spatula
- food-use-only
- ruler
- pizza wheel or knife
- small square cutter, X-Acto knife, or sharp knife
Products used to make this project are available on Amazon.com. I earn a small commission when you make a purchase using any of the Amazon affiliate links on this blog at no extra cost to you.
 Wilton Red Candy Melts® Ca...Shop on Amazon
 Hefty White Plastic Bathroo...Shop on Amazon
 Wilton Candy Melts, Bright ...Shop on Amazon
Before you begin, if you don't have experience working with confectionery coatings or modeling chocolate, read my detailed Chocolate Making Tips page (here.) If you work with pure chocolate, you can use them here instead of the confectionery coating/candy melts.
Instructions
Make red candy cups.
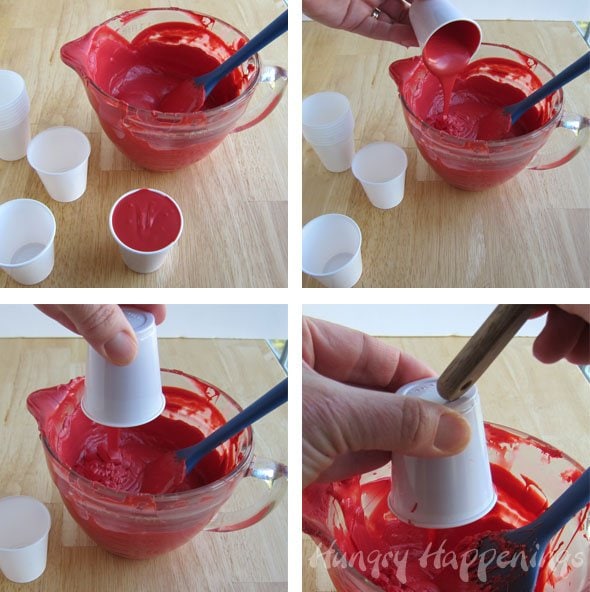
Melt red candy melts in the microwave on high power using 30-second bursts of power, stirring after each.
Allow the candy melts to cool enough that you can still pour it easily, but thick enough that it will coat your plastic cups with a thick layer.
Pour the red candy melts into a small plastic cup, filling it to the top.
Let it sit at room temperature for 3-5 minutes. Turn it upside down and allow the candy coating to drip out. Tap the cup a few times to help remove the excess candy coating.
If your candy coating is really thin, you will need to do this process twice, creating two layers of candy coating for your cups.
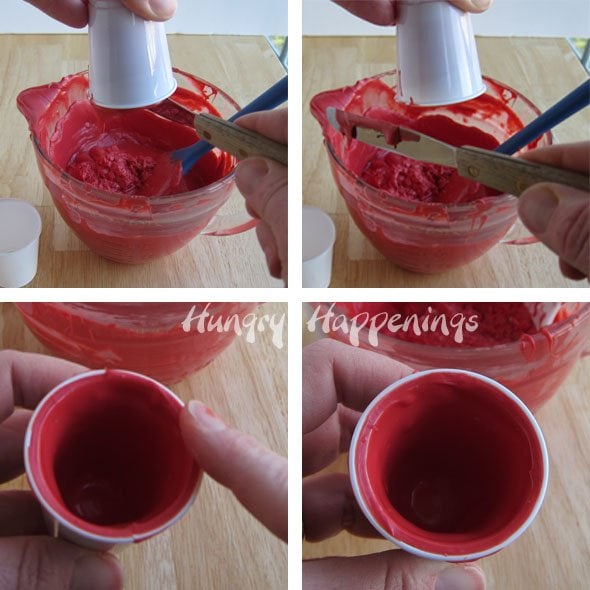
Clean off the top edge of the cup.
Use a spatula or knife to scrape across the open edge of the cup to remove the dripping candy.
Wipe the edge of the cup clean using your finger.
Place the cup in the freezer for 4-5 minutes until your candy hardens. Do not leave the cups in longer than 5 minutes or your candy may crack.
Repeat to create as many cups as you want. You will have to re-heat your candy coating during this process to keep it at a pourable consistency.
Tips
Do not allow the candy cups to air dry as they can become spotted or streaky.
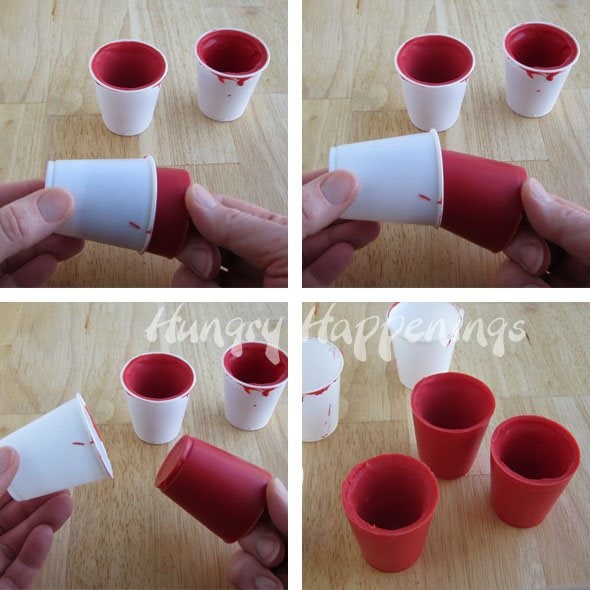
Unmold candy cups.
To remove the candy cups from the plastic cups, tug on them carefully and just slide them out. If they won't come out, push on the bottom of the cup allowing the suction to release then pull the candy cup out.
If you didn't do a great job of cleaning the edge of your candy cups, you may have to break the seal around the edge by running a small sharp knife around the edge to remove excess candy.
Allow your edible candy cups to come to room temperature before decorating.
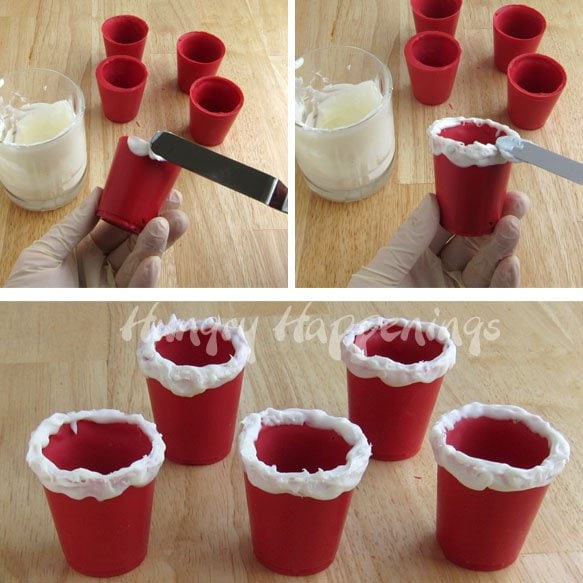
Adding the white candy fur to the cups.
Allow your melted white confectionery coating to cool slightly so that it thickens a bit.
Use a spatula or paintbrush to frost just the top edge of each candy cup with the white candy coating. You want to create the look of fur.
Freeze the cup for 1-2 minutes after adding the fur or just let the candy air dry.
Decorate your candy cups.
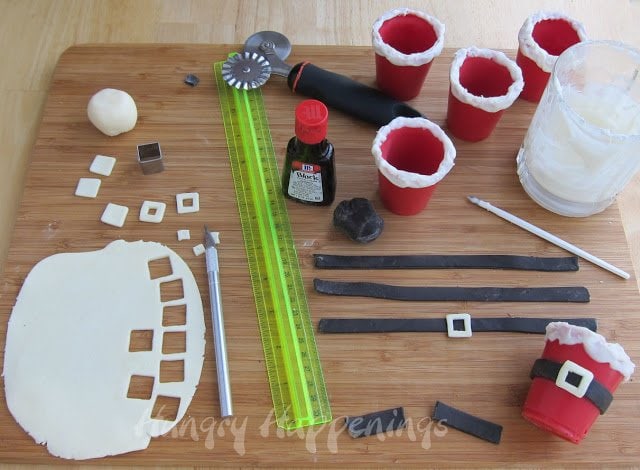
Dust a cutting board lightly with powdered sugar.
Roll out white modeling chocolate and some black modeling chocolate to 1/16" thickness.
Cut small squares from the white (I used a small square fondant cutter in the video I used square plunger cutters) and ⅜ inch by 6 inch bands from the black using a knife or pizza wheel. Cut a smaller square out from the inside of each small white square creating a buckle.
Lightly brush some water on the back side of the buckle and attach it to the belt.
Lightly brush some melted confectionery coating on the back side of a black belt and wrap it around the middle of your candy cup, cutting off any excess modeling chocolate.
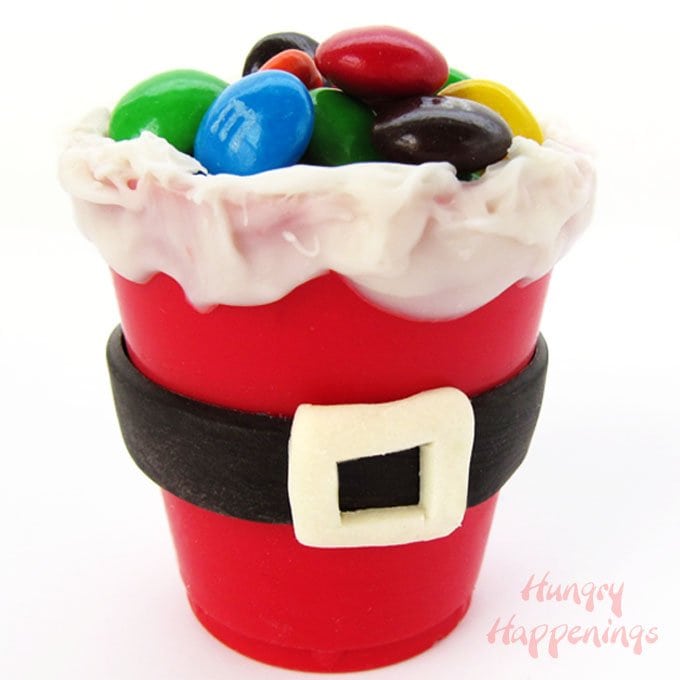
To serve, fill your candy cups with candy or your favorite dessert like Cookies and Cream Mousse, Peppermint Mousse, or Raspberry Chocolate Mousse.
Storage
You can store the empty or candy-filled Santa Suit Candy Cups in an airtight container at room temperature for up to a month. Do not fill with mousse until just before serving.
Video
Related Recipes
If you enjoy making these cute Santa Candy Cups, you might also have fun making these other Christmas treats.
Recipe
- 12 ounces melted red colored confectionery coating/candy melts
- 3 ounces melted white confectionery coating
- 3 ounces black and white modeling chocolate/candy clay
- powdered sugar to dust cutting board
- candies nuts, trail mix, dried fruit, mini cookies, chocolate mousse, pudding, ice cream, etc.
-
Fill a small plastic cup with melted red candy melts.
-
Let the candy filled cup sit at room temperature for about 5 minutes.
-
Pour wet candy out of the cup, leaving just the outer shell of candy melts in the cup.
-
Set cup, upside down, on a parchment paper lined baking sheet.
-
Freeze for 4-5 minutes.
-
Remove and pull candy cup out of plastic cup.
-
Allow white candy melts to cool slightly.
-
Brush white candy melts over the top edge of the candy cup so that it looks like fur.
-
Roll out black candy clay.
-
Cut into ⅜ inch by 6 inch long belts.
-
Roll out white candy clay.
-
Cut out small square buckles.
-
Lightly brush water on the back of the candy clay buckle.
-
Press the candy buckle onto a black candy clay belt.
-
Brush candy melts onto the back of the candy belt.
-
Immediately wrap the candy belt around a candy cup and cut off the excess.
-
Fill cups with candy, trail mix, dried fruit, mini cookies, chocolate mousse, pudding, or ice cream.

- Banana Split Bars – A Fun and Easy Summer Dessert - March 4, 2026
- Pineapple Fudge (No Candy Thermometer Needed!) - March 4, 2026
- No-Bake Peanut Butter Pie Recipe - March 3, 2026

sandalloons40 says
love those cups. wow. I bake a lot for the holidays and giveaway, white chocolate peanut butter fudge, peanut butter fudge, peppermint creme fudge, apple, and cinnamon raisin breads, I bake for 16 years aleast twice a year for our Priest and Deacons, generally bread, but for last christmas and this Christmas will be Cinnamon rolls. Wowza.
HungryLittleGirl says
Oh my, what a lovely idea!
Thank you for sharing this at Wednesday Extravaganza - I hope I see you there again this week 🙂
DJ PlatinumPartyEvents says
Wow...simply amazing! I wish I had half of your creative thought & talent!!
Diana - FreeStyleMama says
So adorable Beth!
Dorothy @ Crazy for Crust says
These are adorable!!!!
Unknown says
i'd love to win
Unknown says
i'd love to win
Andrew's Mom says
I follow you on Pinterest
Andrew's Mom says
I follow you on twitter @icywit
Andrew's Mom says
I am a fan on Facebook.
Andrew's Mom says
Sweet and spicy nuts - that idea is so cute!
Carmen Nuland says
I Follow Hungry Happenings on Pinterest
Carmen Nuland says
I Follow Hungry Happenings on Twitter
Carmen Nuland says
I Like Hungry Happenings on Facebook
Sherry Lykins says
So cute! Thanks for the giveaway!! sharoo1975@yahoo.com
Lisa Joy says
the santa cups are so cute.
Food Done Light says
Your cups are so cute. I saw them on Lady Behind the Curtain. Would love for you to share tonight on Thursdays Treasures. Will open at 8pm
Amy says
Following Hungry Happenings on Pinterest
amy [at] utry [dot] it
Amy says
Following Hungry Happenings on Twitter
amy [at] utry [dot] it
Amy says
Liked Hungry Happenings on Facebook
amy [at] utry [dot] it