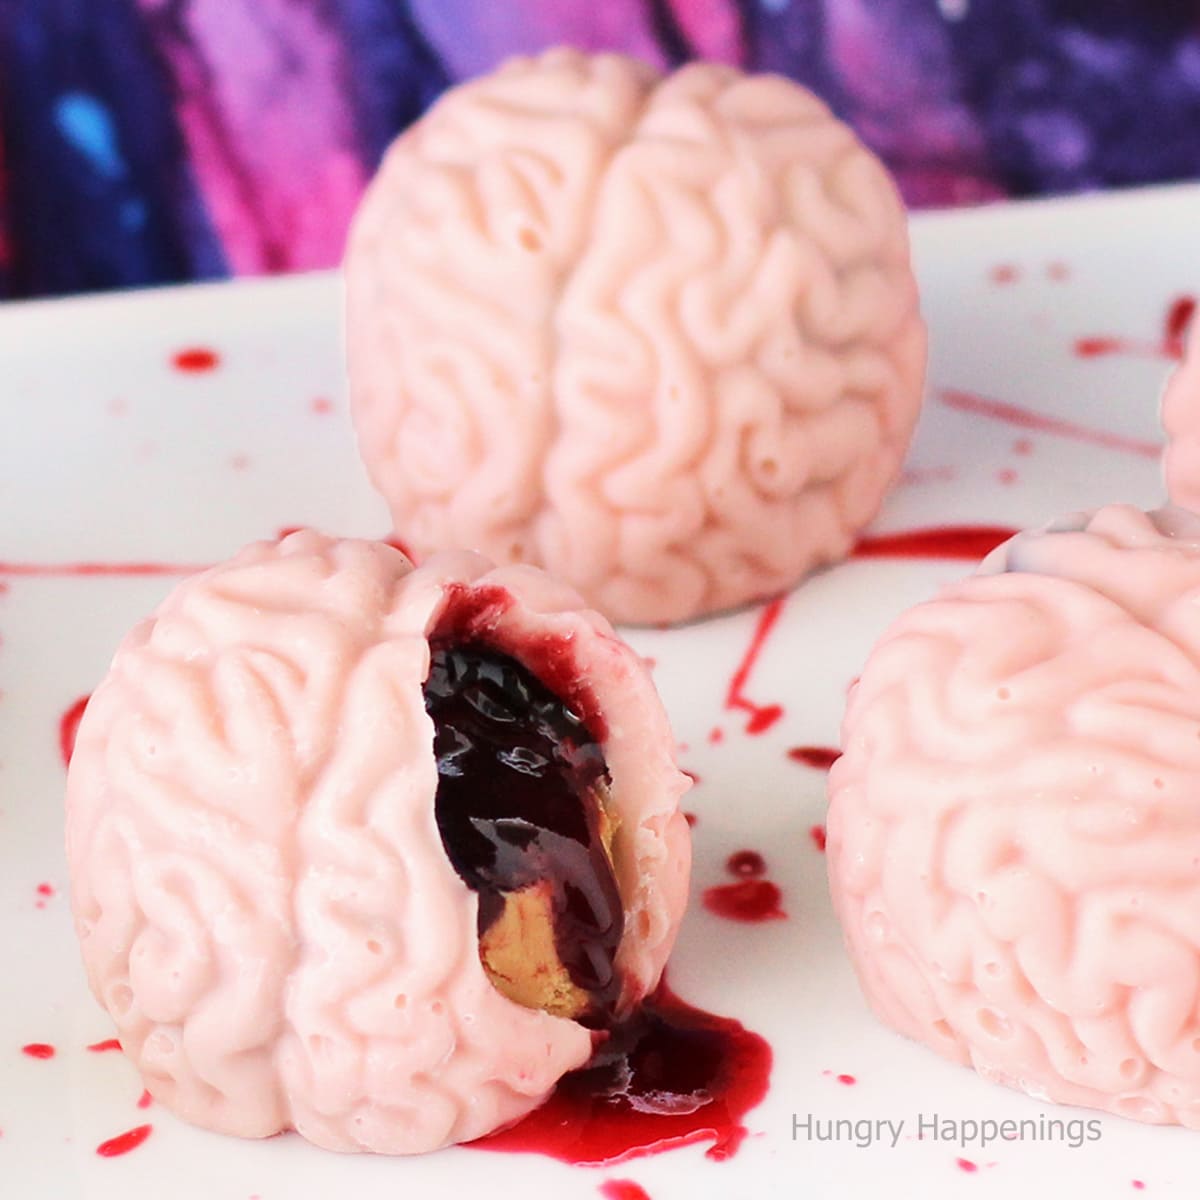
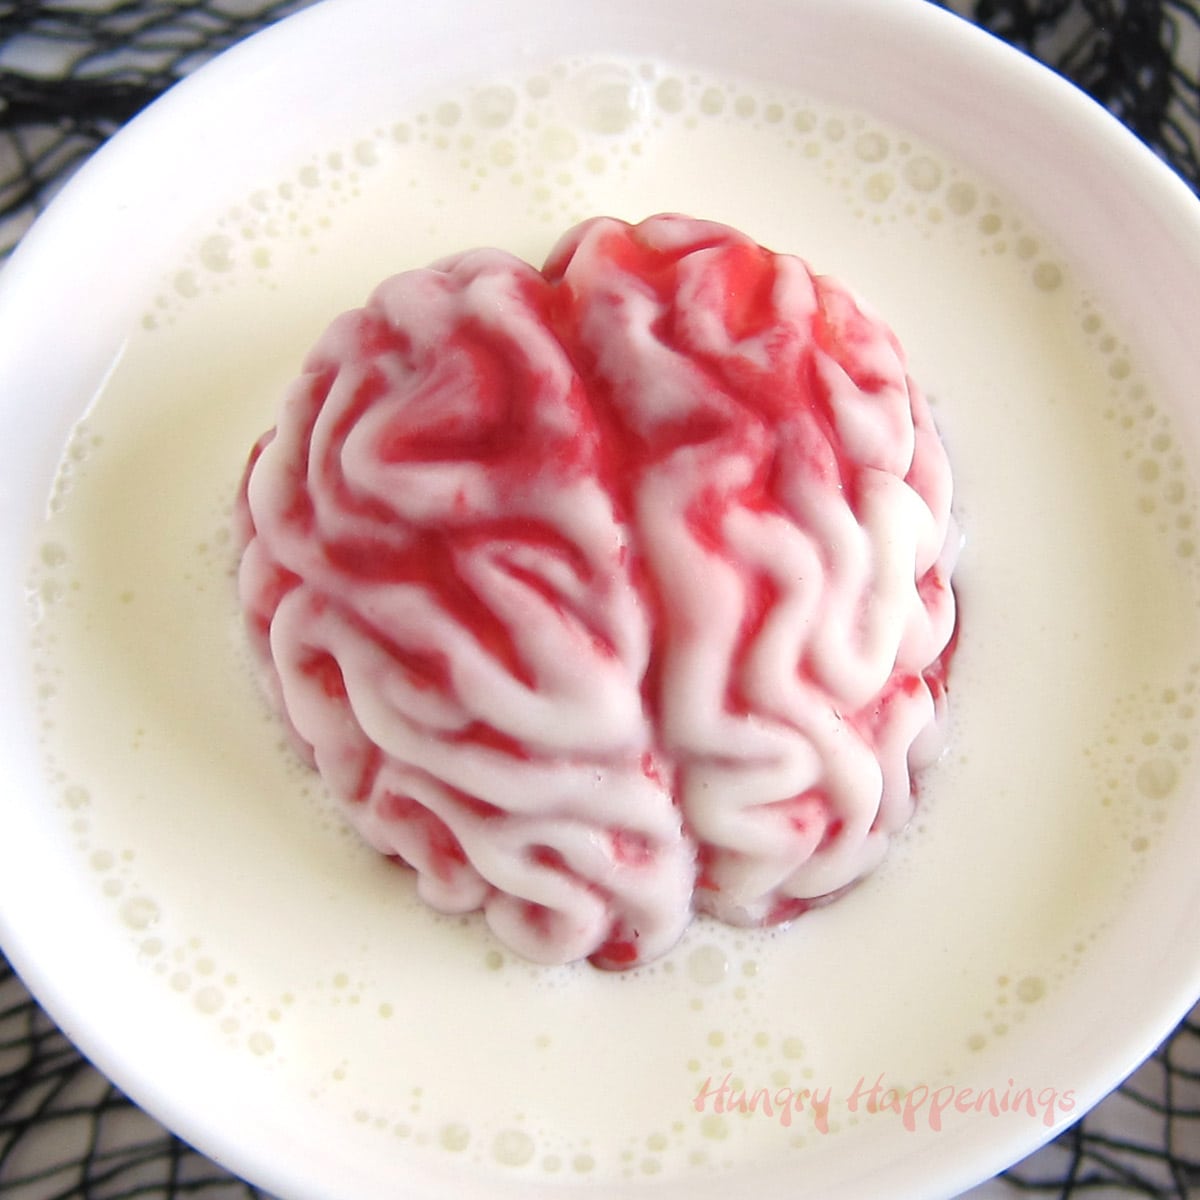
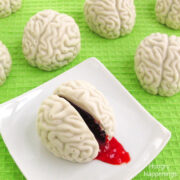
These Cake Ball Brains oozing cherry blood are to die for. The white chocolate-covered chocolate cake balls filled with cherry sauce will be a huge hit at your Halloween party or zombie-themed event.

Transform an ordinary cake ball into something a bit gruesome for Halloween this year. These cake ball brains are filled with a blend of chocolate cake and vanilla frosting with some bloody-looking cherry sauce.
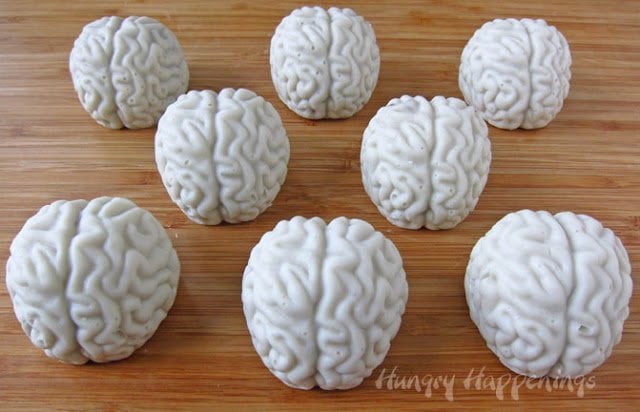
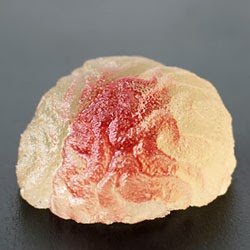
The white chocolate brains look so real and taste so good!
They would make a great dessert for a zombie-themed Halloween party.
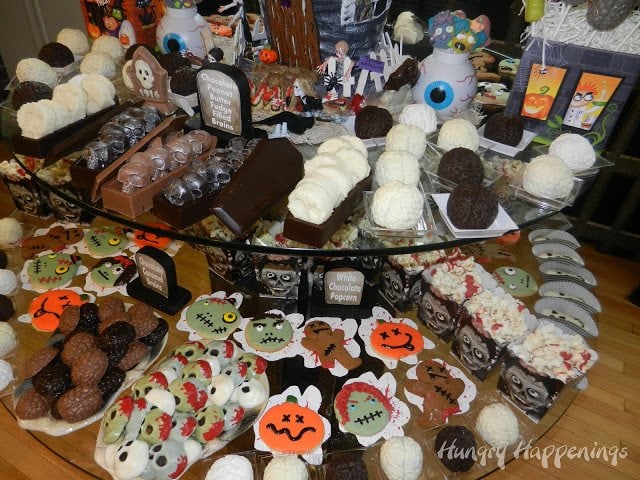
I served them at our party alongside other zombie-themed desserts and chocolates.
Actually, these creepy Halloween desserts have been so popular with my party guests over the years that I've served them at several of our Halloween parties.
More recently, I filled my white chocolate brains with peanut butter fudge and jelly. You can see the recipe and video tutorial to make PB&J Candy Brains here.
My guests always comment on how real the brains look. To get the realistic brain shape, you'll need to use some silicone brain molds.
Cake Ball Brains
(makes 28-36)
Ingredients
- 1 baked chocolate cake
- ¼ - ½ cup vanilla frosting
- 30-38 ounces melted white candy melts or melted and tempered pure white chocolate*
- black candy coloring (if you want your brains to be grey)
- cherry, raspberry, or strawberry preserves, dessert sauce, or ice cream topping (¾ teaspoon per brain)
- red food coloring (if you want to intensify the color or the fruit spread to make it look more like blood)
Update
- I made these and used about one ounce of candy melts per brain and about 2 tablespoons of the cake ball mixture, but I just had some friends over helping me get brains done for our party, and after making 20 brains, had used all the white candy melts but had cake leftover.
- Their candy coating was thicker than what I made. So by the end, they made 36 brains and used much more of the white candy melts.
- So, your quantities will depend a lot on your skill level using candy coating. I added more candy melts to the quantities just to be sure you have enough to make all your brains.
*If you don't have experience working with or melting candy melts, or you would like to use melted and tempered pure white chocolate, read my detailed Chocolate Making Tips page for instructions.
Supplies
- silicone brain molds
You can find silicone brain molds and some of the ingredients needed to make these cake ball brains on Amazon. I earn a small commission when you make a purchase using the affiliate links at no extra cost to you.
 Household Cold Whiskey Kitc...Shop on Amazon
  3Pcs 4 Holes Brain Ice,Ice ...Shop on Amazon
  Wilton Melting Chocolate Br...Shop on Amazon
 ") LaetaFood Wafers Super Whit...Shop on Amazon
LaetaFood Wafers Super Whit...Shop on Amazon Instructions
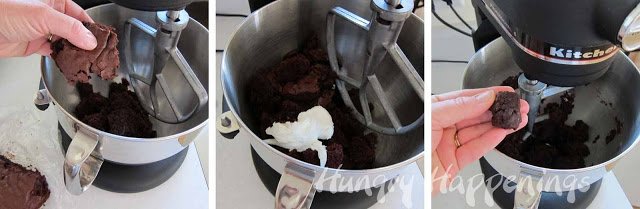
Make the cake ball filling.
- Remove any hard edges from the cake. This will give you a softer cake ball filling.
- Break up the center of the cake into a mixing bowl or the bowl of a stand mixer (my preferred method**) or a food processor.
- Add ¼ cup white frosting.
- Mix to combine.
- If the mixture holds together well and you can easily form balls, then stop; if it crumbles, add up to another ¼ cup of frosting.
- Set aside.
**By using a stand mixer, your cake balls will have a smooth truffle-like consistency. If you do this by hand, you will probably want to mix it with your actual hands to get it smooth.
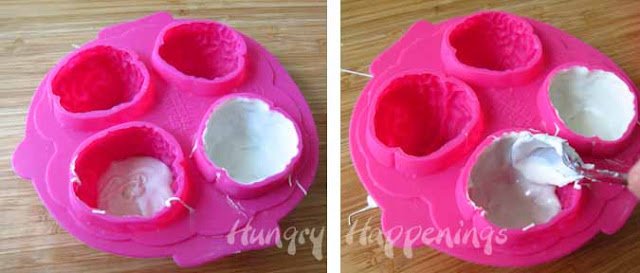
Create white chocolate shells in the brain molds.
- If you'd like your brains to be gray, stir drops of black candy coloring into your melted white confectionery coating until you get the desired shade.
- I made mine a pale gray, but you could go much darker if you prefer.
- You can also make your candy brains pink or green. Just be sure to use oil-based candy colors to color your candy melts or white chocolate.
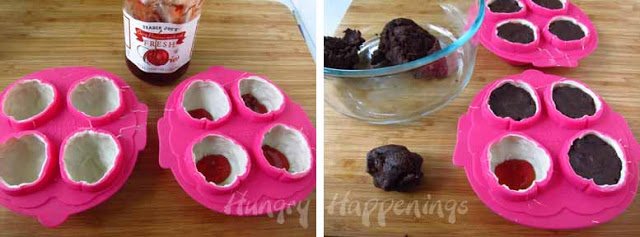
- Spoon some melted white candy coating into one of the brain mold cavities. Use a spoon or a pastry brush to paint the coating in a thin layer all around the inside of the mold. Be sure you can't see any pink (the color of the mold) through the white. Paint all four brain cavities in your mold.
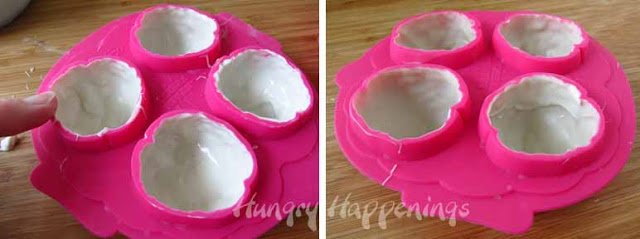
- Wipe off any candy coating around the edges of the mold.
- Freeze for 5 minutes if you are using candy melts or refrigerate for 15 minutes if using pure white chocolate.
- Don't leave them in any longer, or you may get cracks and condensation on your brains, and you wouldn't want that now, would you?
Fill candy brains with cake ball filling and "blood."
- Remove the molds from the freezer.
- If you want your cherry filling to be brighter red, add a few drops of red food coloring.
- Spoon ¾ teaspoon of the cherry filling into each brain cavity.
- Scoop out about 2 tablespoons of the cake ball mixture and press it into a brain cavity, leaving enough room to add a layer of candy coating on top.
How to make the fruity "blood"?
- You can use cherry, raspberry, or strawberry preserves or dessert sauce (ice cream topping) to make your fruit-flavored blood.
- You'll want it to be thin enough to ooze but thick enough that it won't get absorbed into the cake ball filling.
- When I made these back in 2012, I used Trader Joe's Cherry Preserves. I added red food coloring to make them really vibrantly red. By adding the liquid food coloring and stirring the preserves, it became thin enough that it oozed nicely when the cake ball brains were cracked open.
- Raspberry sauce would work beautifully here, too. Just be sure to use seedless sauce or strain out the seeds.
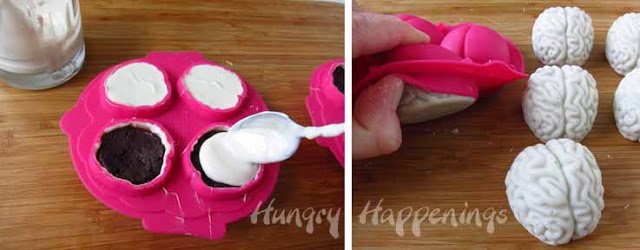
Add more white chocolate.
- Spoon some more white candy coating on top of each cake ball and smooth it out.
- Be sure to wipe off any excess coating around the edge of the mold.
- Freeze for 5 minutes if you used candy melts or refrigerate for about 10 minutes if you used pure white chocolate.
- Remove the cake ball brains from the fridge, turn the mold upside down, then press and pull on the mold until your brains pop out.
- These molds curve inward toward the opening so the candy brains will not just fall out. You need to pull on the molds around the edges to get them out.
Storage
- Store the candy-coated brains in an airtight container for up to a week.
- Just know that the longer they sit, the more likely it is that the cherry jam or sauce will soak into the cake.
- Thin sauces will soak in faster.
- If that happens, just serve them with a bit of extra sauce.
Can I freeze the chocolate brains?
- I don't recommend freezing or storing these in the refrigerator, as the moisture in the fridge will cause beads of condensation on your cake ball brains.
- But if you absolutely do need to make them ahead, wrap each brain in plastic wrap, then place them in a large zip-top bag or airtight container.
- Freeze for up to 3 months.
- To thaw, remove the bag and set it on the counter overnight.
- Then in the morning, you can open the bag and unwrap the brains.
- This should help to eliminate some of the moisture on the outside of the chocolate.
- Just know that the chilled brains might crack if frozen.
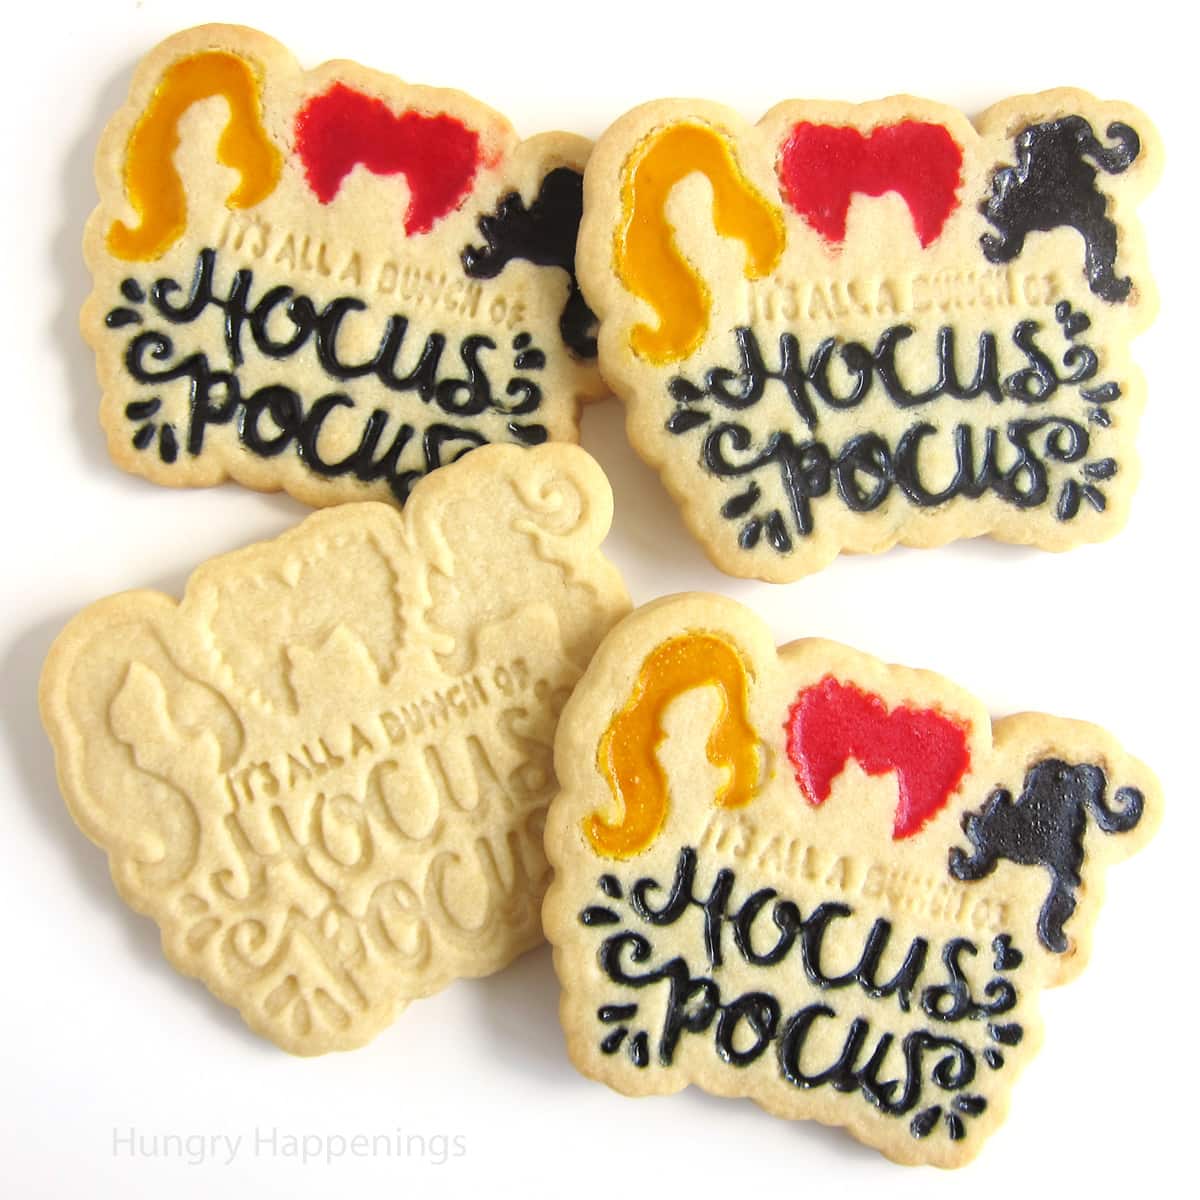
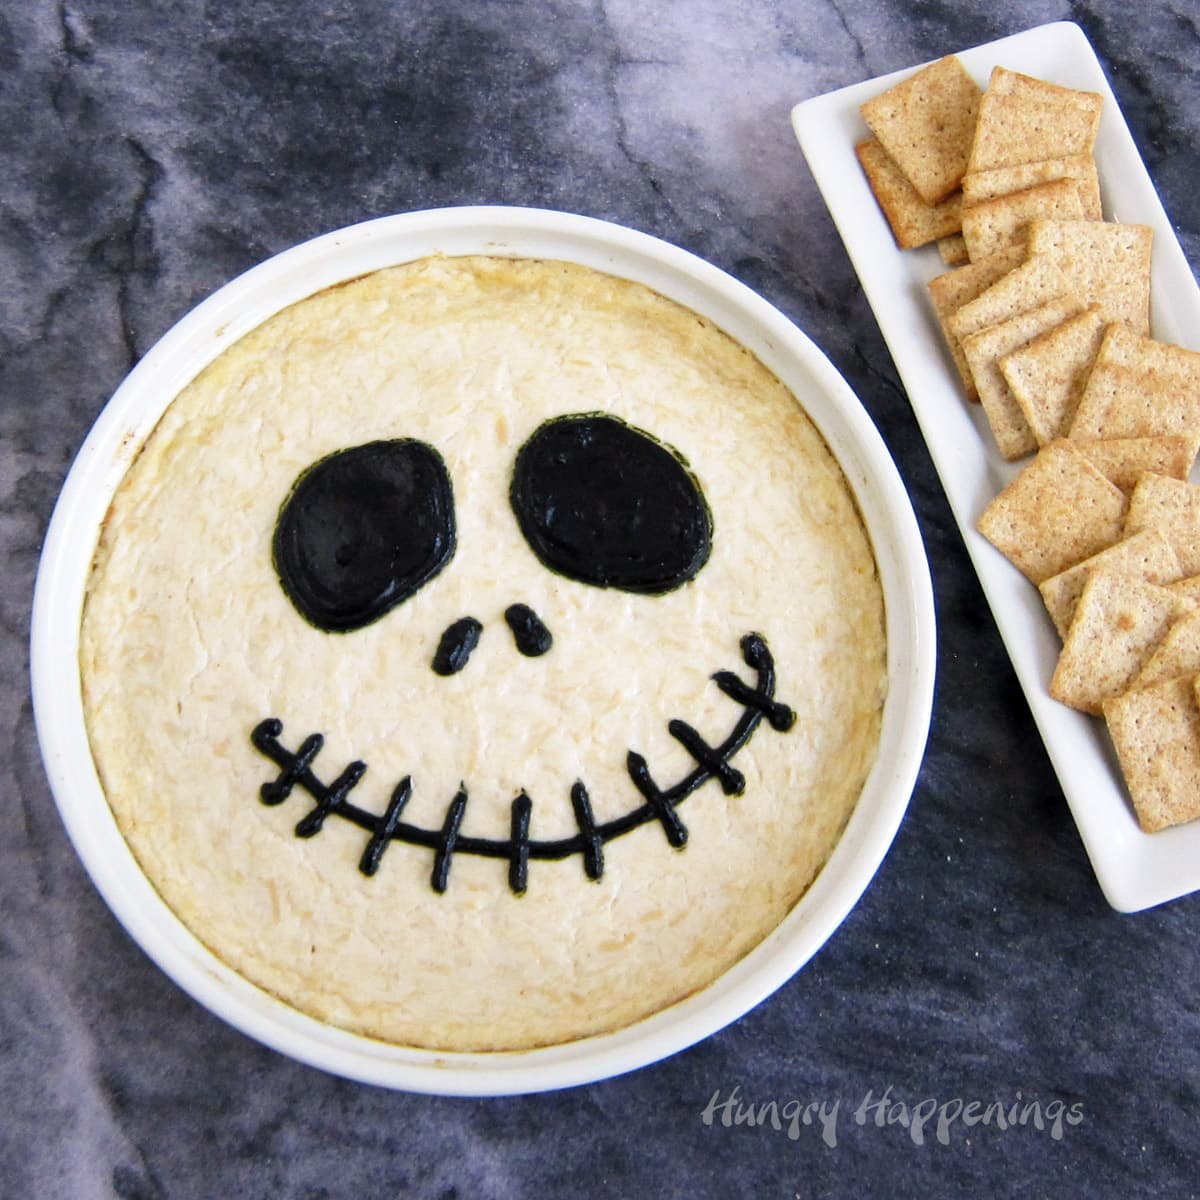
Related Recipes
If you plan to host a zombie-themed party or movie night, you might also like to make these other brain-shaped snacks.
Be sure to check out all the Halloween recipes here on Hungry Happenings.
Recipe
This recipe was originally published on October 11, 2012.
White chocolate brains filled with a blend of chocolate cake, vanilla frosting, and oozing fruit-flavored blood (cherry or raspberry preserves or dessert sauce.)
- 1 baked chocolate cake (use either a 9 x 13-inch sheet cake or 2 8-inch round cakes)
- ¼ - ½ cup vanilla frosting
- 30-38 ounces melted white candy melts or melted and tempered pure white chocolate
- optional: black pink, or green oil-based candy coloring
- ⅔ cup cherry, raspberry, or strawberry preserves or dessert sauce (about ¾ teaspoon per brain)
- red liquid food coloring
-
Cut the edges off the chocolate cake and discard.
-
Break up the center of the cake into a mixing bowl or the bowl of a stand mixer.
-
Add ¼ cup white frosting.
-
Mix until it holds together in a soft ball.
-
Add more frosting if needed.
-
Set aside.
-
If desired, stir in drops of oil-based candy coloring to add color to your white chocolate brains.
-
Spoon some melted white chocolate into one of the brain mold cavities.
-
Spread the chocolate around to create a nice, evenly coated, thin shell.
-
Repeat.
-
Wipe off any candy coating around the edges of the mold.
-
Freeze for 5 minutes, if you are using candy melts, or refrigerate for 15 minutes, if using pure white chocolate.
-
Remove the molds from the freezer.
-
Stir a few drops of liquid food coloring into the fruit preserves.
-
Strain out any pieces of fruit or seeds.
-
Spoon ¾ teaspoons of the fruit filling into each brain cavity.
-
Scoop out about 2 tablespoons of the cake ball mixture and press it into a brain cavity leaving enough room to add a layer of candy coating on top.
-
Spoon some more white candy coating on top of each cake ball and smooth it out.
-
Be sure to wipe off any excess coating around the edge of the mold.
-
Freeze for 5 minutes if you used candy melts or refrigerate for about 10 minutes, if you used pure white chocolate.
-
Unmold the candies.
Store the candy-coated brains in an airtight container for up to a week.

- Banana Split Bars – A Fun and Easy Summer Dessert - March 4, 2026
- Pineapple Fudge (No Candy Thermometer Needed!) - March 4, 2026
- No-Bake Peanut Butter Pie Recipe - March 3, 2026


Sam Pilling says
Fantastic. I have cake pop mix and a brain mould. Kept wondering if I could combine the two and make this. Well done, you have saved me at keast 20 minutes scratching my head in thought :o)
Armande Perlen says
Ooooh those are amazing! Have never seen anything like it!:D
carla says
my candy coating (food lion brand candiquik) shatters into a jillion fragments when i pop the brains out of the mold. maybe a thicker shell of coating is needed? any advice? these are so incredibly awesome - i had such high hopes! thanks for the awesome idea.
Beth Jackson Klosterboer says
Hi Carla,
I've not ever used candiquik, but would assume if your candy is shattering that you need a thicker shell. If candiquik is really thin when melted, you may need to create two layers in your brain molds. Paint the mold once, harden it in the freezer for 5-8 minutes, then remove from the freezer and let sit for at least 5 minutes, then paint on another layer and freeze again.
Elizabeth says
This info is a big help. Wish I'd read it last night when I was crying over my shattered brains I'd hoped to take to work. Was ready to give up but will try again. Mine was likely too thin as well - it was a struggle to keep the candy on the sides of the mold and not all pooled at the base. Is there an easy way to thicken this to make it easier?
Beth Jackson Klosterboer says
Hi Elizabeth, the best way to have a thicker coating is to simply let it cool down until it is thicker but still workable. I used Wilton Candy Melts which are pretty thick when melted and had no trouble at all getting a nice shell. But I know I've used other products over the years and some are thinner than others. Thin is great for some projects, but for this you need to have thicker coating. I'll have to buy some Candiquik and see what it is like. I've not ever seen it before, but will try to find it in my area. Then I'll know to give instructions to those of you using it for projects. I hope you had some success with this new technique.
Anonymous says
I literally just made these one minute ago. Very easy. A little difficulty getting the brains out of the mold, but not too much. I used Wiltons Colorburst pastels candy melts. It gave a nice blue vein look to the brains.
P. Calef
Beth Jackson Klosterboer says
So happy to hear you had a pretty easy time making these. You are right about getting them out of the mold. It does take a bit of effort, but they eventually pop out and look great. I almost cut off the top part of the mold to make it easier, but found that if I just pulled the edge away from the candy, I was able to turn the mold upside and and press the brain out. Once I got the hang of it, I like that nice rounded shape of the brain. I like the idea of using the Colorburst pastels. I'd love to see a picture of your brains if you took any.
Chris says
From my brain to your table. These are awesome!
Anonymous says
One of my sons had brain surgery almost 3 years ago. I'd love to make these and send them to his surgeon, but I won't have time this year. Maybe I'll get the molds and have them for next year, but then it doesn't just have to be for Halloween.
Anonymous says
I made these and they are darling...but they are too sweet 🙁 Is there a way to get a less sweet candy coating?
Beth Jackson Klosterboer says
There are several different brands of white candy coating and they have varying levels of sweetness. Of the brands I have tried, Wilton and Guittard are very sweet, Merkens and Peter's are a bit less sweet. Peter's is my favorite, and can be purchased from cake/candy supply stores. If you can temper pure white chocolate, then you could use that instead of the candy coating and you would end up with a nice rich and creamy coating which is still sweet, but the least sweet of all of your options.
Kimberly @ A Night Owl says
Thank you for linking up at create & inspire last week! Tonight we will be featuring YOU! Hope to see you there!xo,Kimberly
Jan Schattling says
That is awesome.
I will make them for the boardgame night at our store.
The people will freak out.
As I live in germany it was kind a problem getting the frosting and the candy melts.
Is there a way to make frosting yourself?
Or is it even needed?
When I normally press together chocolate cake it instantly stays in ball form, but probably my cake has more moisture in it.
I also got no black candy coloring, so I got some black candy melts and hope it will work if I mix some of them in.
Only one more week, I am so exited to make them. ^^
Beth Jackson Klosterboer says
You can use Nutella or any kind of frosting to hold the cake together for a normal cake ball. To be honest being you are pushing the cake into a mold, you probably will be alright just smashing the cake up especially if it's a really moist cake. I actually did use white candy melts with a bit of black candy melts mixed in to make the gray coloring. It works well, but I didn't think most people would want to buy the black candy melts just to use a few to make these, that's why I suggested using the coloring. Either way will work perfectly. Have fun making them and at your boardgame night. Oh, I love playing boardgames and actually have lots of them on tables at my party. There are some really fun Halloween themed games out right now.
Jan Schattling says
Thanks.
One more question because I am not sure about the "put them in the freezer" thing, probably because most of my english speaking friends don't care about correct grammar. ^^
By "freezer" do you mean the actual freezer where you store your ice and frozen stuff, oder do you mean the refrigerator for storing milk and vegetables?
I just ask because I don't want the get the temperatures or timing wrong.
Sorry. It's not that easy when you get your english from british and american sources and everyone uses their own terms. 🙂
Beth Jackson Klosterboer says
Hi Jan, Yes, I do mean the freezer where you keep your ice. I love that I have readers from around the world, but it is a challenge to use terms that everyone will understand. I know our measurements are so different too and that is a challenge.
Beth (www.livinglifeintentionally.blogspot.com) says
O WOW! That looks AMAZING!! You are so super duper clever!! I shared it with my Facebook reader here: https://www.facebook.com/LivingLifeIntentionally
Thanks for linking up to TGIF! I so look forward to seeing everyone's creativity. I hope you link up again tomorrow =-)
Beth
Beth Jackson Klosterboer says
Thanks for sharing the Cake Ball Brains with your readers!
Amanda says
As a neuroscience PhD student, I would pretty much pay you to make these for the day I finally defend my dissertation! So awesome!!!
Beth Jackson Klosterboer says
Wow, what an accomplishment that will be! If you live in Ohio, I could make these for you:)
Anonymous says
hi, I m trying to make these for my friends birthday in a few days. Any chance you could post a link to the chocolate cake recipe? thank you very much!
Beth Jackson Klosterboer says
I actually just used a Duncan Hines cake mix.
Jennifer @ Delicieux says
These are fantastic, a little bit creepy and a little bit gross, but in a good way. 🙂 I've never seen brain molds before.
Evelyn says
Just bought the brain molds from Amazon...Did you put two layers of the candy coating or just one?
TheMoonAndMe says
Very cool. A little icky...but cool nonetheless!
🙂
Kelly
Spacemonkeyluvn says
Love it! Delicious and creepy. Just the way I like it. I'll be making these for my coworkers on Halloween 🙂
Angelina Ballerina says
My husband works at a Halloween store for the season... I've volunteered to make something for his staff and THIS is absolutely perfect. You are my hero! Good luck with your party - I can't wait to see what your other goodies are!
Beth Jackson Klosterboer says
I hope they all love the brains! Have fun making them and eating them too.
Christina Leigh says
Oh this is so cool! Im thinking about making some treats for everyone in my dr's office for Halloween (I see a neurologist for migraines), they are all so awesome there, and this would be PERFECT! I can't think of a better idea! Everybody needs some extra brain power occasionally lol! Thanks for sharing! 🙂
Beth Jackson Klosterboer says
Sorry about your migrains, I had one migraines that lasted for 2 1/2 years, yes, I said one single headache. So, I can totally sympathize with your pain. These would be a perfect and funny thing to bring to your doctor. I love that idea!
Ashley says
wow!! nice job! These look amazing. I am going to attempt them - hope they turn out like yours
Carrie Penny says
I just bought the molds so I can make these for our football Halloween party! I am so excited! Every year I spend about a week looking at what to make and this is one of my favorite recipie ideas of all times!
Beth Jackson Klosterboer says
Thanks Carrie. Have fun making your cake ball brains and I hope all of your party guests love them too!