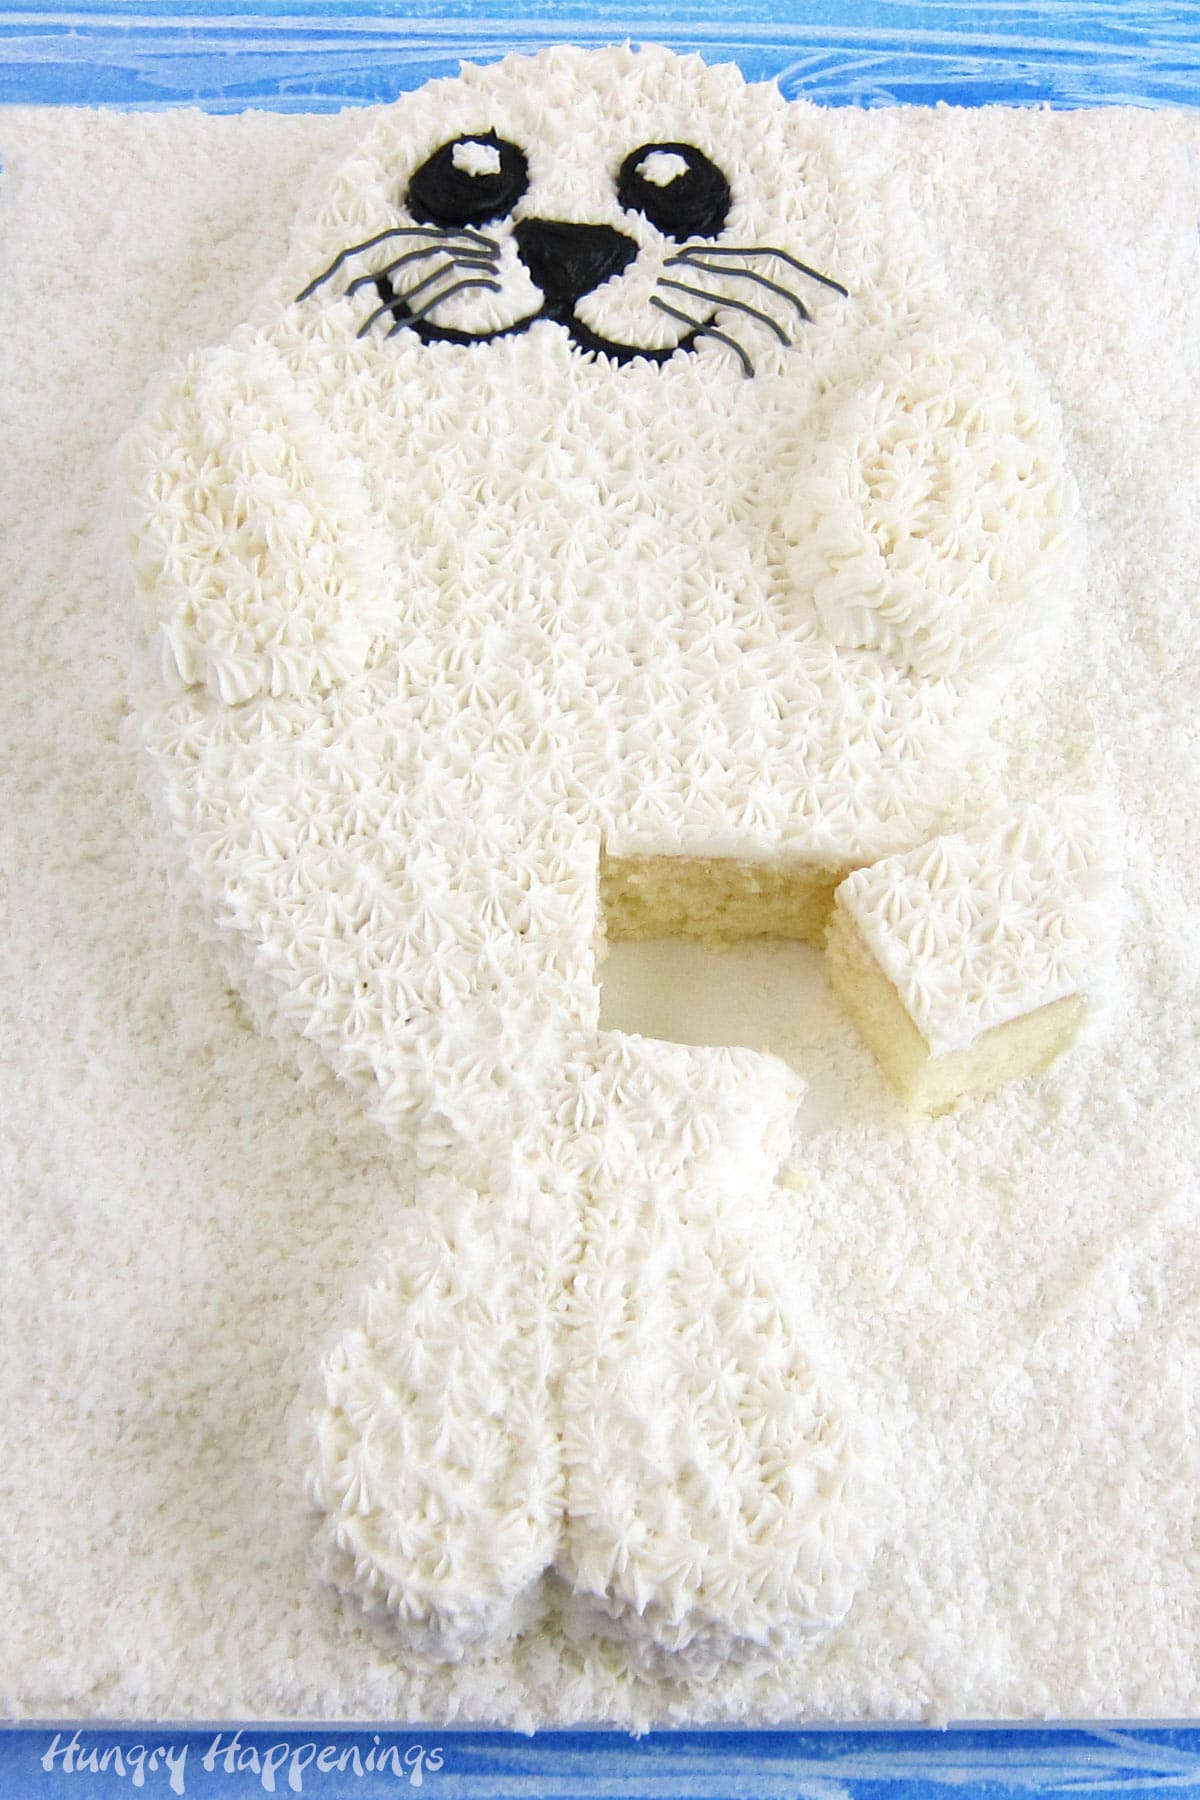
This Seal Cake couldn't be cuter! This adorable cut-apart cake looks like a white harp seal pup lying in the snow. It's easy to make too, using a template as a guide.
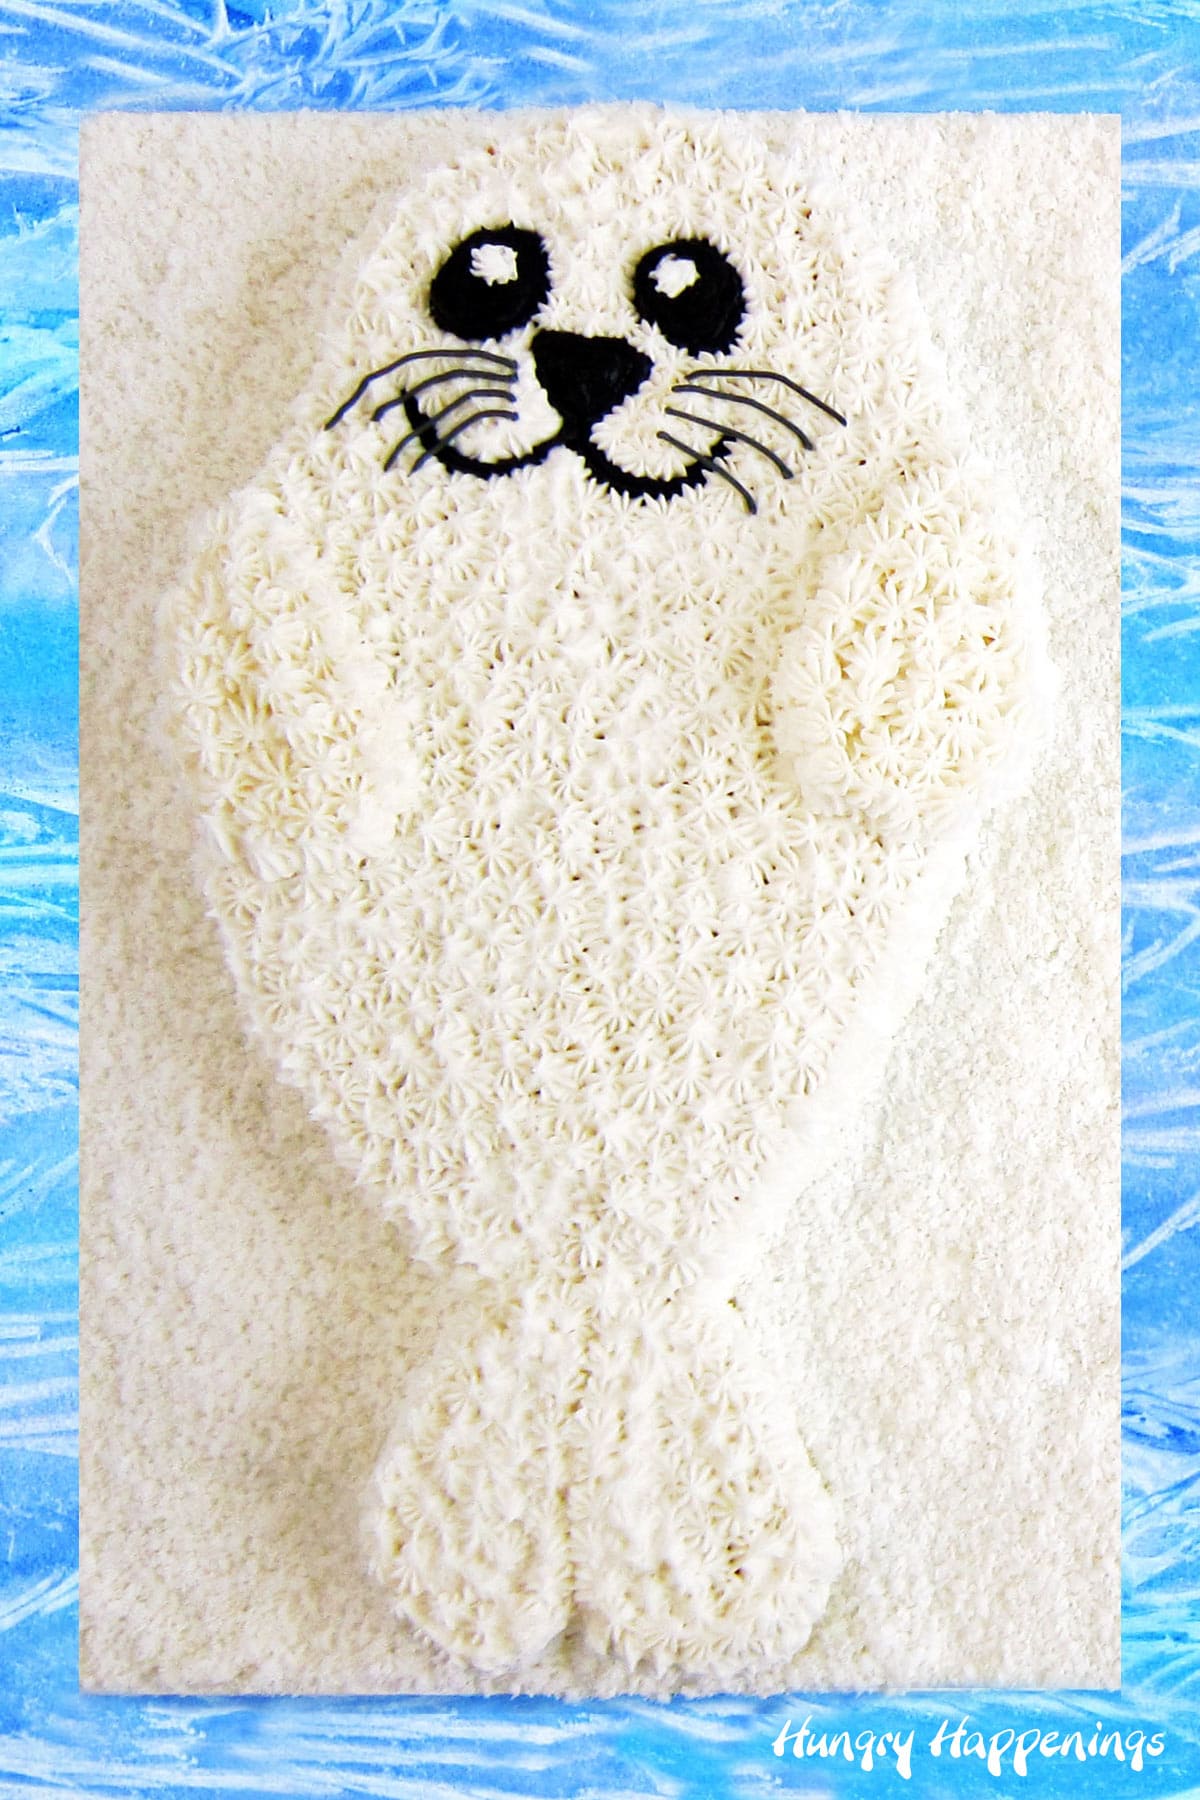
I know, a white-on-white cake is difficult to see in pictures, but believe me, this cake was even cuter in person than it appears in this photograph. I hope you enjoy making it for an ocean or animal-themed party.
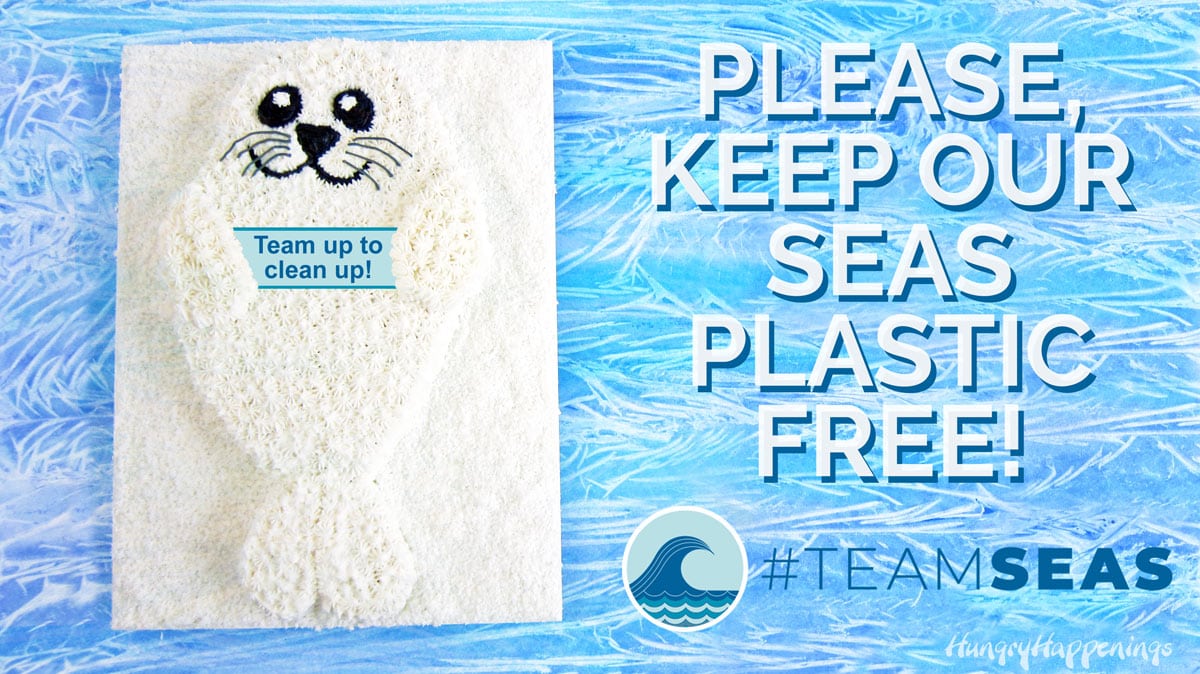
It may seem like an odd time of year for me to be sharing a Seal Cake tutorial with you, as Halloween is just a few days away, but I'm a part of #TEAMSEAS, a group of YouTubers who are working together to raise $30M to clean up our oceans and rivers.
Did you know there are 200 million tons of plastic already circulating in our marine environments and that an estimated 11 million more tons will enter our waterways this year? So many animals are impacted by our trash, and that breaks my heart!
Marine animals cannot only be entrapped by plastics, but they can also swallow them and die or suffer several health issues.
Seals are one of the animals that are most affected by plastic pollution, and #TEAMSEAS plans to remove the equivalent of 85 football fields covered a foot deep in the trash with your help. If you'd like to join me in donating to this amazing cause, go to teamseas.org.
So, let's make a seal cake.
Ingredients
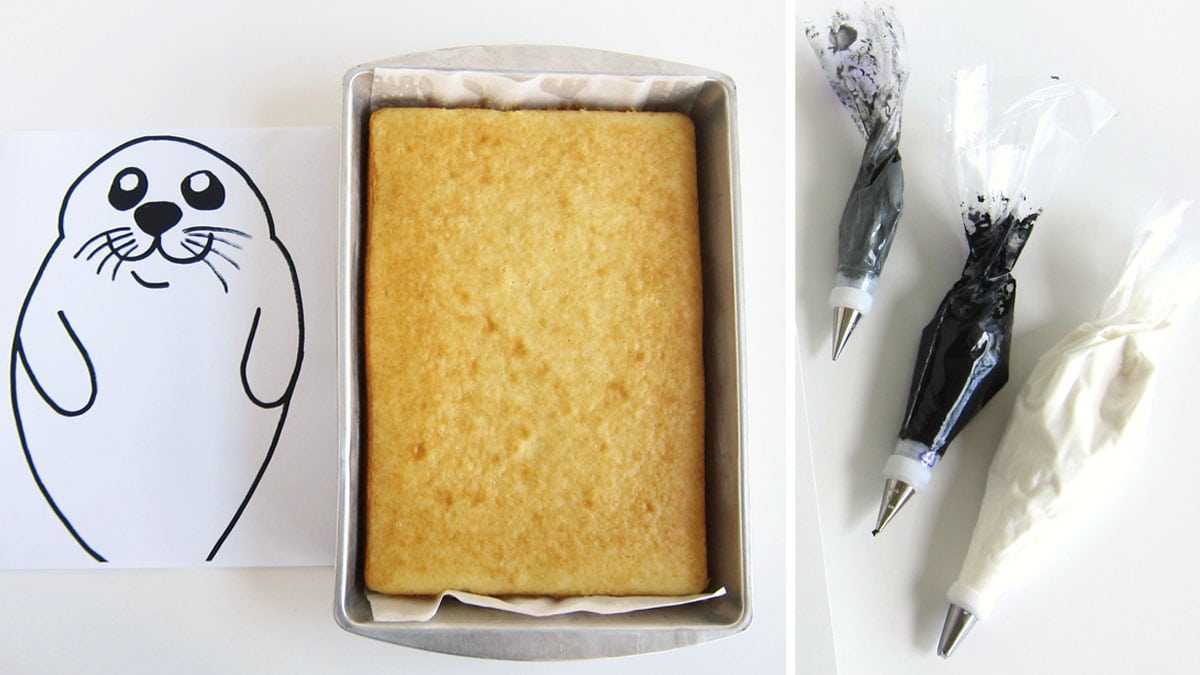
- 1 (9x13-inch) sheet cake
- I doctored a Duncan Hines white cake mix using milk instead of water and by adding 3 tablespoons of a pudding mix (the powder, not the prepared pudding) and 3 tablespoons of sour cream. You can simply use the cake mix ingredients, but I highly recommend adding the pudding mix and sour cream, as it really adds amazing moisture and flavor to the cake.
- You can also bake a white cake from scratch using my favorite white cake recipe.
- white, black, and grey frosting
- I used Wilton Creamy White Decorator Icing, which is bright white. If you make homemade buttercream frosting using butter, you may want to add some white food coloring to brighten up the color of your off-white frosting.
- To make the black frosting, start by adding some cocoa powder to the white frosting before adding the black food coloring. You will use less food coloring and get a deeper black color.
- Make the black frosting a day in advance, and the color will deepen.
Supplies
- 12x16-inch cake board (or larger)
- optional - coconut, finely chopped in a food processor (to create snow)
- seal cake template - Download this printable Seal Cake template.
Instructions
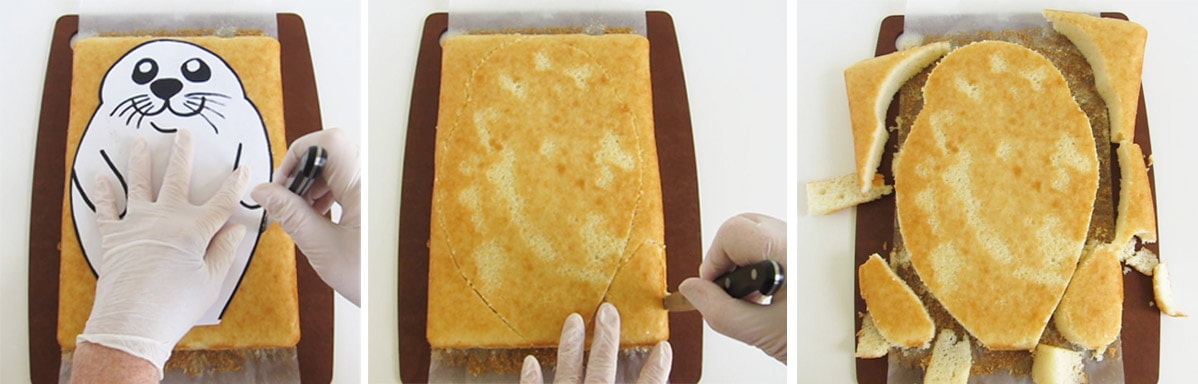
Step 1 - Cut out the seal cake.
- Print out the seal template, then cut it out using scissors or a craft knife.
- Lay the template on top of your cake.
- Use a sharp knife to cut the cake around the template.
- If desired, you can poke the template using the tip of the knife to mark where the eyes and nose will go.
- Then, cut two flippers from the bottom corners of the cake.
If you prefer, you can use a clear piping gel transfer instead, as I did for my Olaf Mickey Mouse Cake. You set a piece of acetate or wax paper over the design, pipe on clear piping gel over the lines, then carefully flip the design upside down onto the cake. Gently press over the lines just to make sure the piping gel sticks to the cake, then lift off the template.
You can then pipe over the top of the piping gel lines.
Or if you are really artistically inclined, you can simply use the design as a guide when decorating your cake.
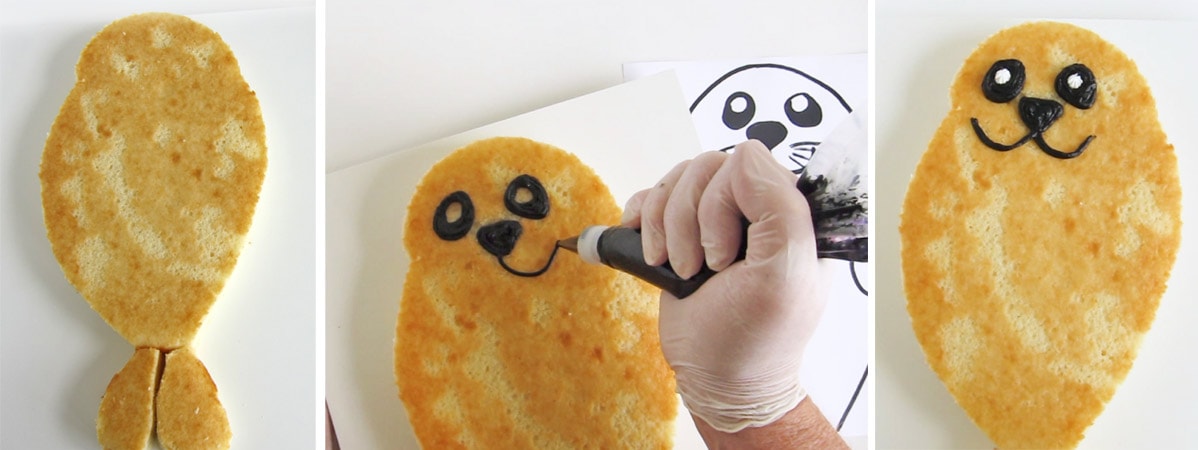
Step 2 - Pipe on the face.
- Fill pastry bags with black, white, and dark grey frosting.
- Fit the black frosting bag with a #5 round tip.
- Pipe on the eyes, nose, and mouth using black frosting.
- Then, add a white frosting star to each eye. If needed, pipe more black frosting around it to fix its shape.
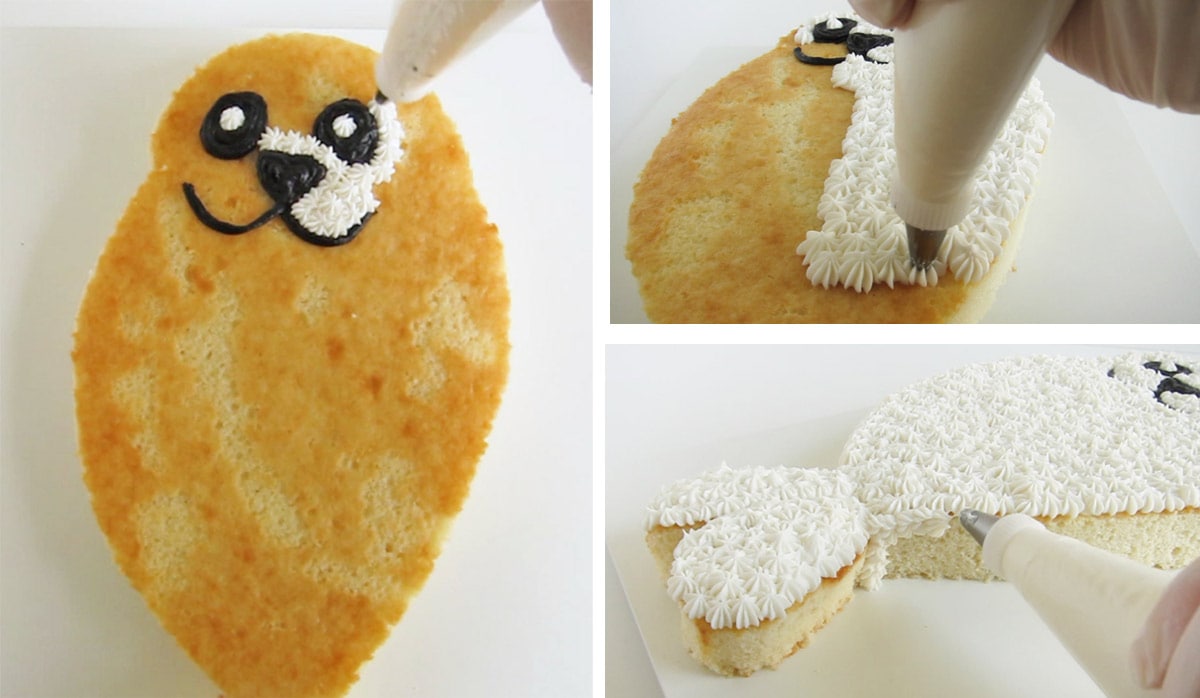
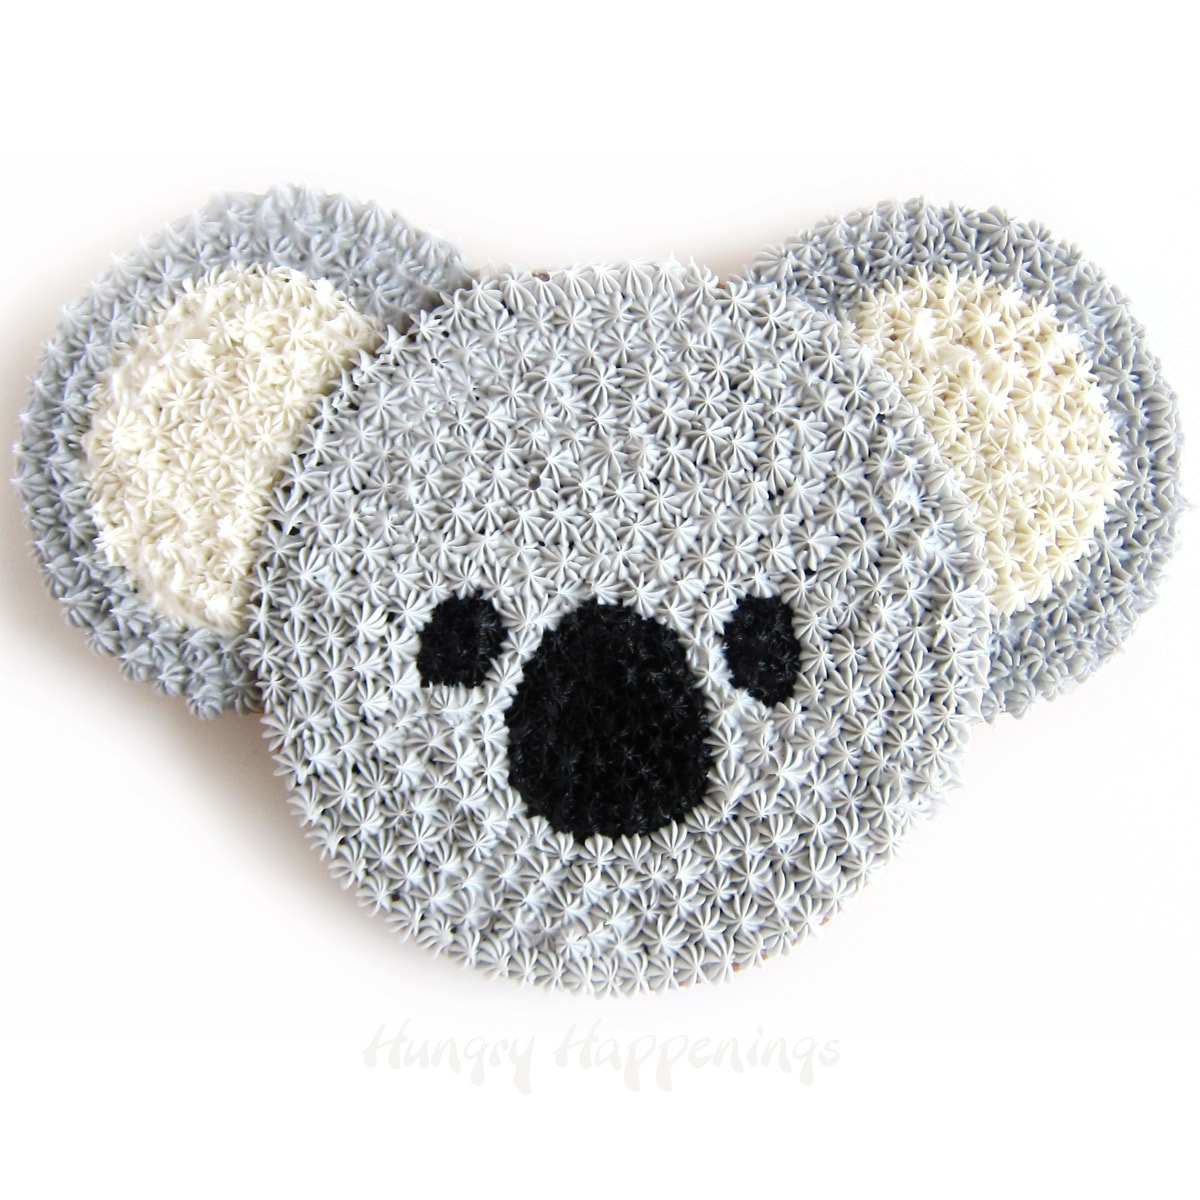
Step 3 - Pipe white stars all over the cake.
- Fill a pastry bag fitted with a #21 open star tip with white frosting.
- Pipe white frosting stars all over the cake, leaving the eyes, nose, and mouth uncovered.
- To pipe stars:
- Set the pastry bag with the tip just above the surface of the cake.
- Squeeze the bag and allow a small amount of frosting to come out onto the cake.
- Stop squeezing as you quickly lift the bag away from the cake.
- This will create one star.
- Set the tip next to the first star and repeat.
- Repeat, making sure each star touches the one next to it.
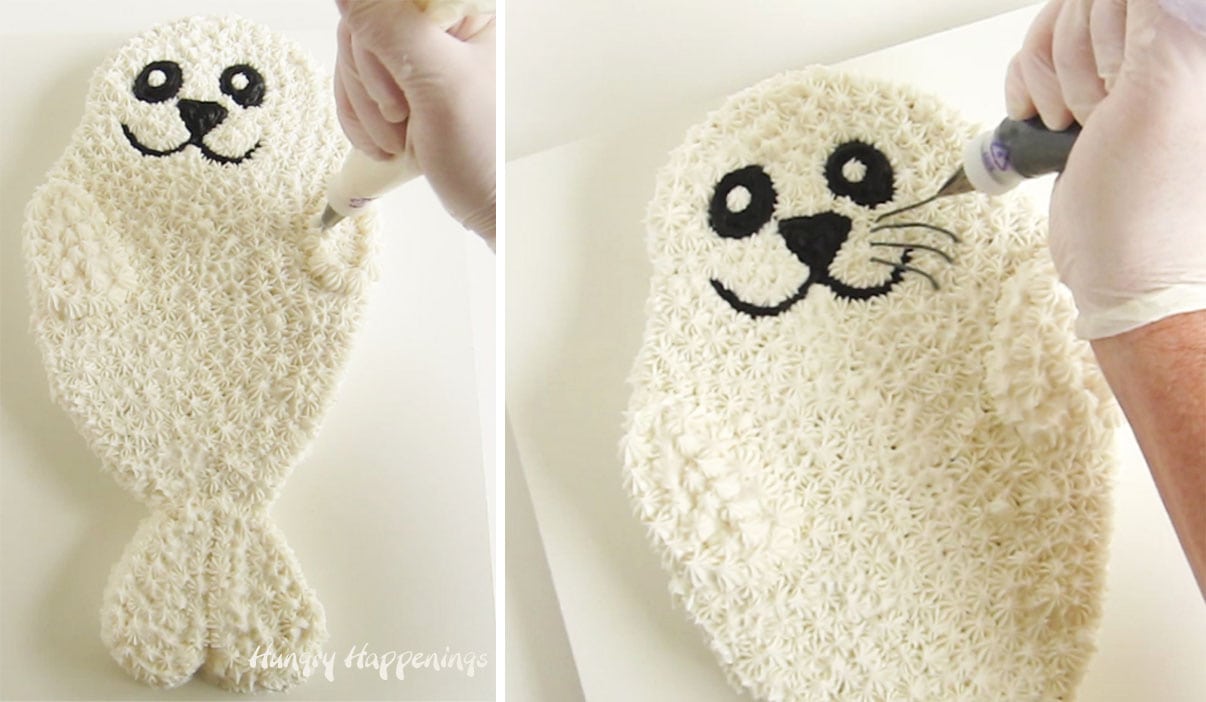
Step 4 - Pipe on pectoral flippers and whiskers.
- To pipe on the pectoral flippers, pipe on a few layers of white stars on either side of the seal until you get two nicely shaped flippers.
- Pipe four thin grey whiskers onto either side of the nose.
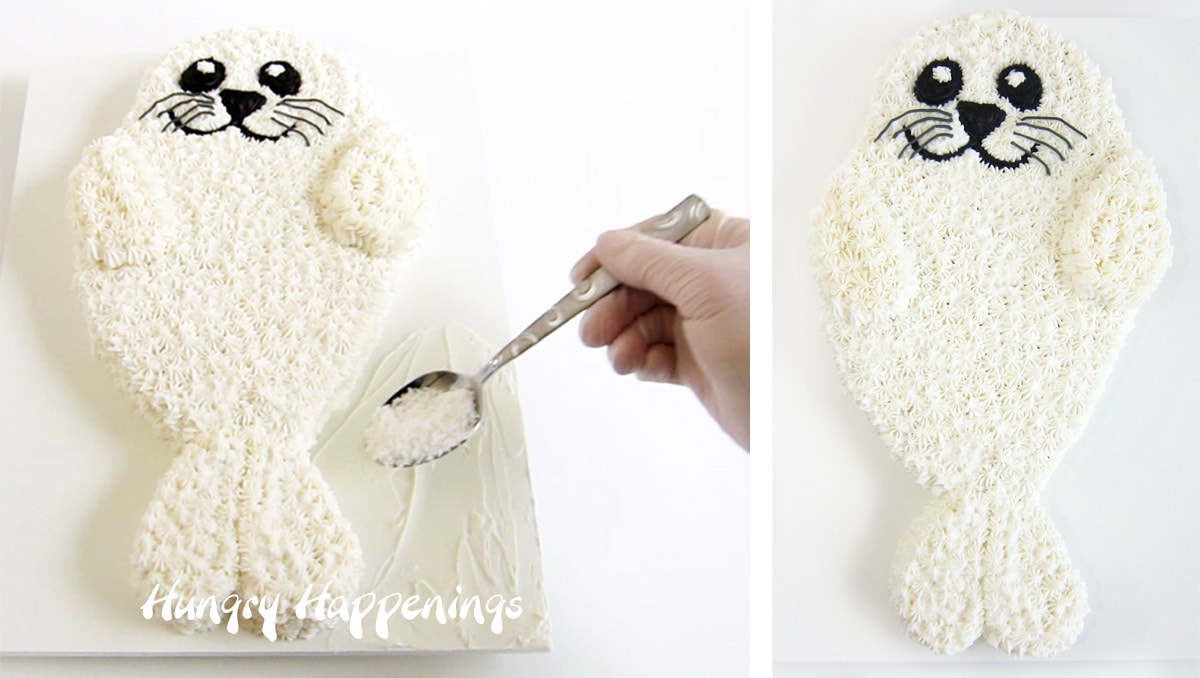
Step 5 - Optional, cover the cake board with edible coconut snow.
- If desired, spread a thin layer of frosting over the cake board.
- Sprinkle finely chopped coconut over the cake board.
- Use a food processor to finely chop the coconut quickly.
Note:
- You can spread the frosting to about ½ inch from the edge of the cake. There's no need to frost it right up next to the cake. The coconut snow will stay in place.
Serve and enjoy!
This cake is soft and moist and will stay fresh at room temperature for up to 3 days.
Related Recipes

Printable Recipe

This cut-apart seal cake is easy to make using a 9 by 13-inch sheet cake decorated with white, black, and grey frosting.
- 1 box white cake mix
- 3 tablespoons instant white chocolate or vanilla pudding mix
- 3 tablespoons sour cream or Greek yogurt
- 1 cup water or milk
- ⅓ cup vegetable oil
- 3 egg whites
- 3 cups white frosting
- ⅓ cup black frosting
- 2 tablespoons grey frosting
- optional, ½ cup finely chopped coconut
-
Preheat your oven to 350 degrees Fahrenheit.
-
Grease and flour a 9x13-inch baking pan then line the bottom with parchment paper for ease of removal.
-
Combine all the cake ingredients in a mixing bowl and beat, using an electric mixer, on low speed for 30 seconds.
-
Increase the speed to medium and beat for 2 minutes.
-
Pour batter into the prepared pan.
-
Bake for 26-34 minutes until a toothpick inserted in the center of the cake comes out clean.
-
Allow the cake to cool completely then remove it from the pan.
-
Print and cut out the printable Seal template.
-
Place it on top of the cake and use a sharp knife to gently cut around the template.
-
Cut two teardrop-shaped flippers from the corner pieces of the cake.
-
Discard the cake scrapes (or enjoy a snack).
-
Arrange the cake on a cake board with the flippers at the bottom of the cake.
-
Fill a pastry bag fitted with a #5 round tip with black frosting.
-
Pipe on the seal's eyes, nose, and mouth.
-
Fill a pastry bag fitted with a #21 open star tip with white frosting and pipe a single white star in the eye to create a highlight.
-
Then, pipe white stars all over the seal cake, leaving the eyes, nose, and mouth exposed.
-
Pipe on two pectoral flippers using more white frosting.
-
Then, fill a pastry bag fitted with a #2 round tip with grey frosting and pipe four whiskers on either side of the seal's nose.
-
Optionally, spread a thin layer of frosting over the cake board and sprinkle finely chopped coconut (snow) over top.
Recipe Video
Store at room temperature for up to 3 days.
The calories are approximate. Calories will depend on the type of frosting used.

- Banana Split Bars – A Fun and Easy Summer Dessert - March 4, 2026
- Pineapple Fudge (No Candy Thermometer Needed!) - March 4, 2026
- No-Bake Peanut Butter Pie Recipe - March 3, 2026
Please leave a comment.