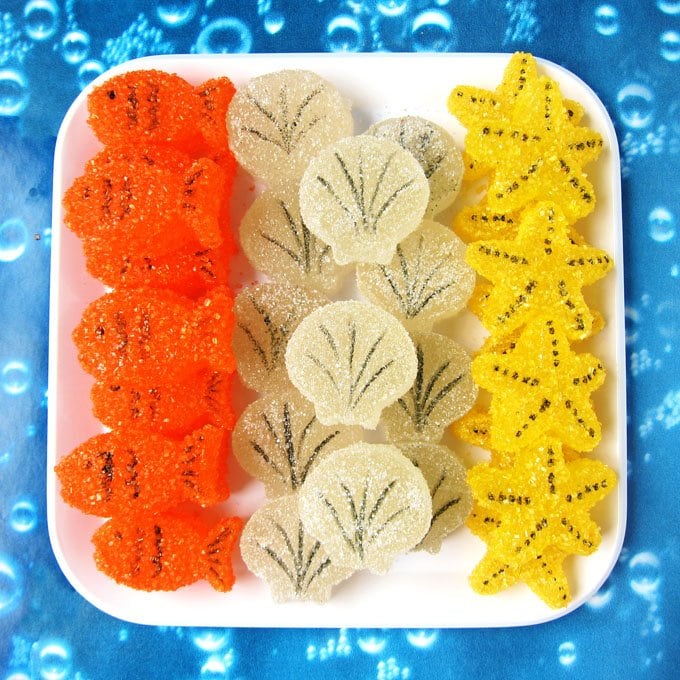
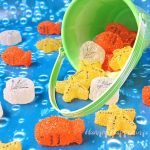
Make gumdrops using a sea life silicone mold. These Homemade Under the Sea Gumdrops are shaped like Goldfish, Starfish, and Sea Shells and are fun treats for your beach-themed party.

If you have not made homemade gumdrops, now is the time to do it! These homemade candies are made using fruit pectin, not gelatin which makes the best gumdrops you'll ever taste.
They are soft and chewy instead of sticky. Plus, you can flavor them how you like using candy oil.
They are so much better than any gumdrops you can buy in the store. Oh, and they are cuter too!
Let's make these cute and tasty fish, starfish, and seashell gumdrops.
Ingredients
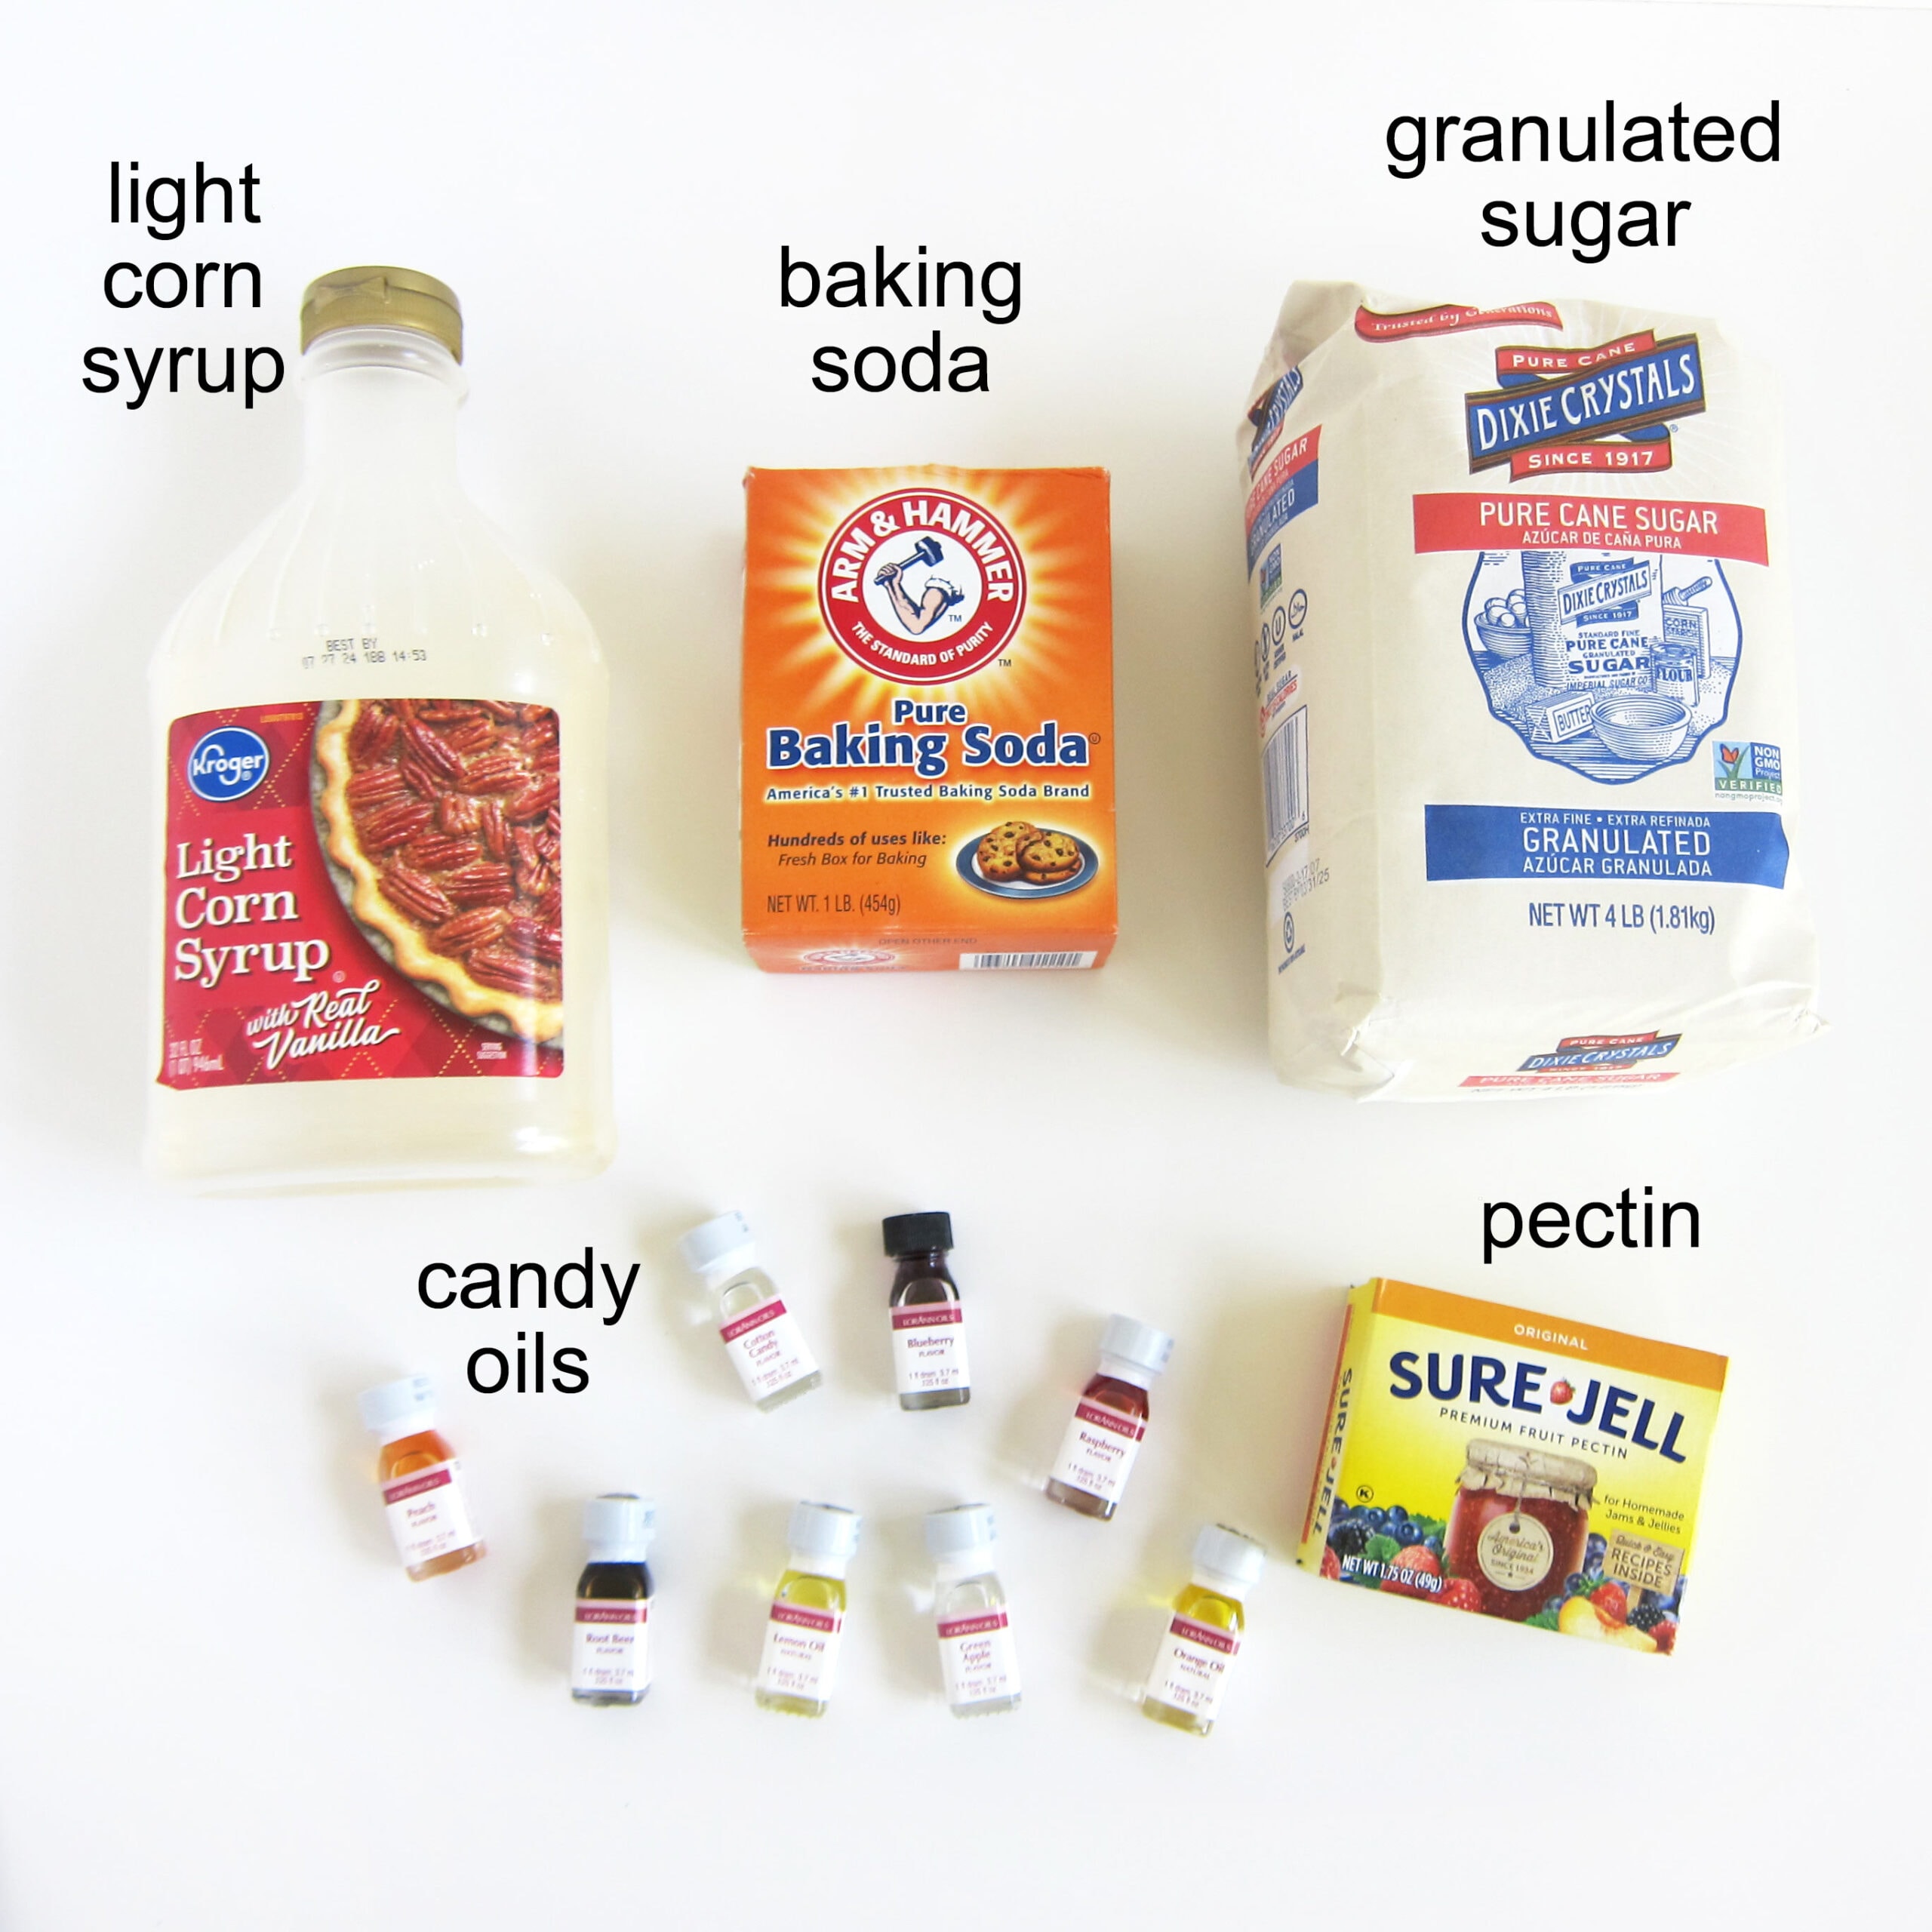
powdered fruit pectin (not low or no sugar pectin) - I used Sure-Gel pectin because it is clear. Some pectins, like Ball Pectin, have a brownish tint.
baking soda - Baking soda will provide lift to the candies so they are airy and light instead of firm and sticky.
sugar - Use granulated sugar to make your candy sweet.
light corn syrup - Not only does corn syrup add sweetness, but it also prevents your gumdrops from crystallizing and adds the perfect chew to the candies.
flavored candy oil - Use your favorite candy oils to flavor these homemade gumdrops.
colored sugar - You can use any color. I made orange fish (goldfish) and yellow starfish.
Supplies
silicone Under the Sea Mold with starfish, fish, and shells
1 ½ or 2-quart saucepan, preferably a good quality stainless steel pan
2 or 3-quart saucepan
candy thermometer
glass bowl with a spout or a glass mixing bowl
skewer or toothpick
") Sure-Jell Original Premium ...Shop on Amazon
Sure-Jell Original Premium ...Shop on Amazon  All-Clad D3® Stainless Ste...Shop on Amazon
  All-Clad D3 Stainless Steel...Shop on Amazon
  Wilton Sparkling Sugar Deco...Shop on Amazon
  Wilton Sparkling Sugar Deco...Shop on Amazon
  CK Products No.1 Sanding Su...Shop on Amazon
  Americolor Black Food Write...Shop on Amazon
Use this technique to make your homemade gumdrops.
Butter the sides of a heavy 1-½ or 2-quart saucepan. Set aside.
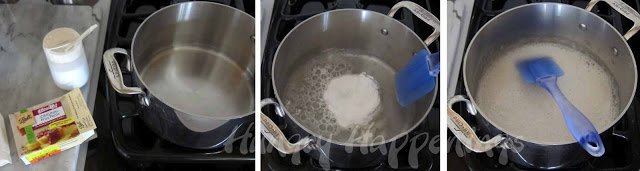
In another 2 or 3-quart saucepan combine water, pectin, and baking soda. The mixture will be foamy. Bring to a boil over high heat, stirring constantly. Remove from heat and set aside.
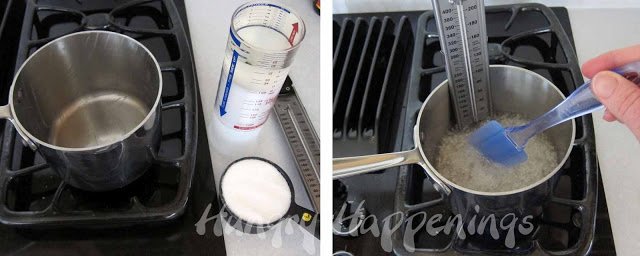
In the buttered saucepan pour the corn syrup into the bottom. Sprinkle sugar in the center of the pan. Turn the heat on medium-high and allow it to cook for one minute. Then stir gently to dissolve sugar. Be careful not to splash the sugar crystals onto the side of your saucepan. Bring to a boil, stirring constantly.
This took me just a few minutes, but the recipe says it can take up to 10 minutes.
Clip your candy thermometer onto the side of your pot. Cook until the thermometer registers 260 degrees Fahrenheit. You will continue to cook your sugar (ultimately you'll want it to reach 280 degrees which is the soft crack stage,) but at this point, you need to set your pan of pectin mixture back on the stove and heat it over high heat until it comes to a boil.
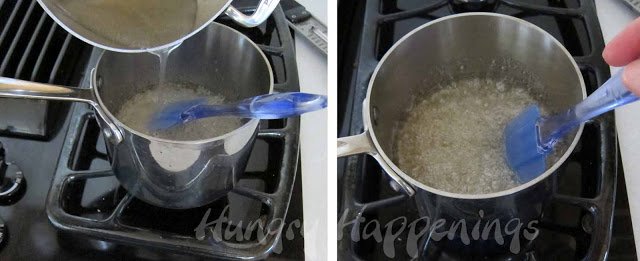
Once your pot of boiling corn syrup/sugar reaches 280 degrees remove it from the heat or turn off your gas. Slowly and VERY CAREFULLY drizzle in the hot pectin, stirring slowly yet constantly. You DO NOT want to splash any of this hot boiling sugar on your hands. Once all the pectin has been poured into the saucepan, return it to medium-high heat and cook it for one more minute, then remove from heat and pour into a glass bowl, with a spout, preferably. This stops it from continuing to cook.
To flavor your gumdrops, add ¼-1/2 teaspoon of flavored oil if flavoring the whole batch.
To check if you like the flavor, fill a glass with ice water, take a small spoonful of your hot gumdrop mixture, and set the spoon in the ice water. Let it set for at least 30 seconds. Remove it and touch it to make sure it is cool. The inside will be hotter than the outside, so if it feels warm at all, return it to the ice water for another 30 seconds. Then taste it. Adjust your flavoring accordingly.
Optional: You can divide your batch and use various flavorings if you prefer. You can also add coloring now if you'd like. Grocery store variety food coloring will work fine.
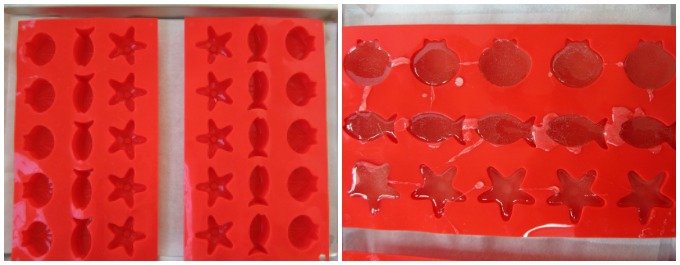
Carefully pour into the silicone mold, filling each cavity to the top. If you make a bit of a mess like I did, you can use a metal spatula to scrape off the excess candy into your pan, just be sure you DO NOT touch the hot candy.
Let the candy sit at room temperature for about 6 hours to firm up.
To remove your gumdrops from the silicone molds, turn the mold upside down and press on the back side of the mold. The candy will pop right out.
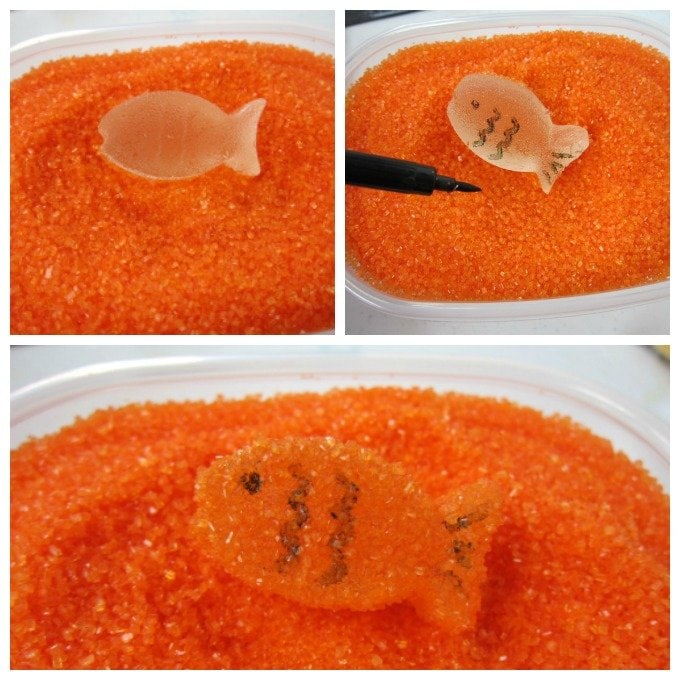
To add some detail to your goldfish gumdrops, use a black food coloring marker to draw on scales and an eye. Then roll the candy in orange decorating sugar. You can add details to the starfish and sea shells too. Then roll the shells in white, opalescent, or silver decorating sugar, and the starfish in yellow or brown decorating sugar.
Let the gumdrops sit at room temperature for about an hour if you plan to package them or stack them on top of each other in a beach pail or on a plate.
Related Recipes
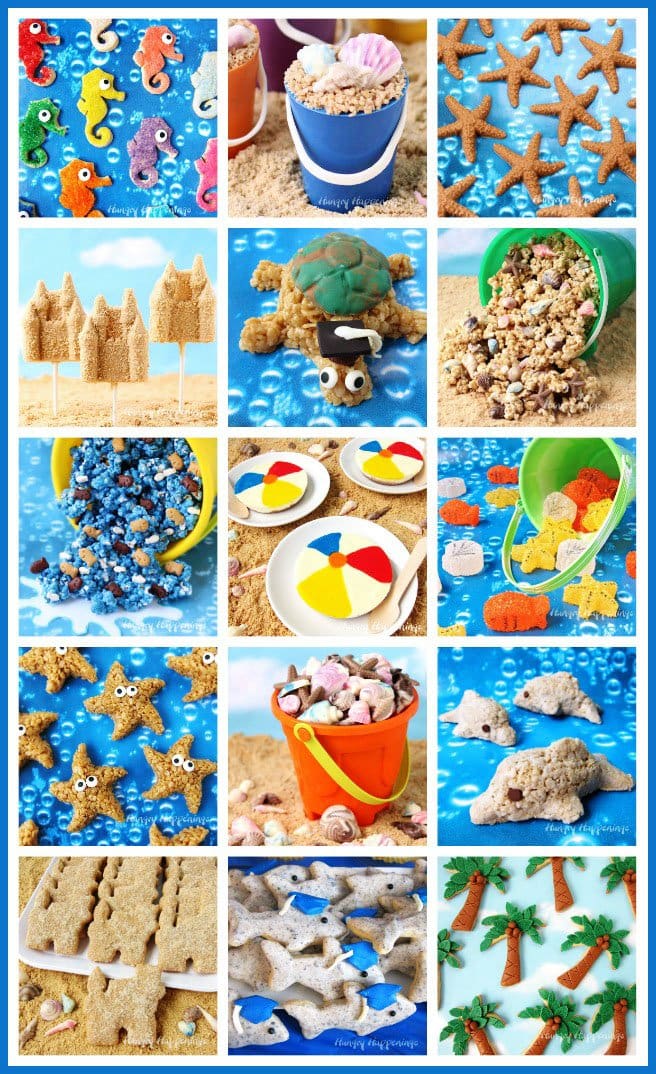
Embrace the beautiful weather that we are having and make some of these gorgeous and scrumptious Summer Fun Recipes.
You can find the tutorials for the projects by clicking on the links below.
Sugar Coated Sea Horse Cookies • Chocolate Beach Pails • Butterscotch Crunch Starfish
Sandcastle Lollipops • Caramel Rice Krispie Turtles • Beach Party Popcorn
Under the Sea Popcorn • Beach Ball Cheesecakes • Under the Sea Gumdrops
Caramel Rice Krispie Treat Starfish • Chocolate Sea Shells • Rice Kripie Treat Dolphins
Sugar Coated Sea Horse Cookies • Sugar Coated Sea Horse Cookies • Palm Tree Cookies
Recipe
These orange, yellow, and white gumdrops shaped like goldfish, starfish, and sea shells are the perfect summer treat! They are adorable and yummy, and they are homemade so you don't have all the preservatives of store bought ones!
- ¾ cup water
- 1 1.75 ounce package powdered fruit pectin (original not low or no sugar pectin)*
- ½ teaspoon baking soda
- 1 cup sugar
- 1 cup light corn syrup
- flavored oil or extract
- optional food coloring
- colored decorating sugar orange, yellow, white
-
Butter the sides of a heavy 1-½ or 2 quart saucepan and set aside.
-
In another 2 or 3 quart saucepan combine the water, pectin, and baking soda.
-
Bring to a boil over high heat, stirring constantly.
-
Remove from heat, cover, and set aside.
-
In the buttered saucepan add corn syrup and water.
-
Set over medium-high heat stirring until sugar disolves.
-
Bring to a boil.
-
When candy reaches 260 degrees Fahrenheit, remove the lid and place the pot of pectin back on high heat and bring to a boil.
-
When candy reaches 280 degrees F, remove from heat and slowly pour in the hot pectin mixture.
-
Return to medium-high heat and stir for one minute.
-
Remove from heat and stir in ¼ - ½ teaspoon flavored oil.
-
Add coloring, if desired.
-
Carefully pour into silicone candy mold.
-
Set molds aside for 6 hours.
-
Turn molds upside down and press on the back side of the mold to remove the candies.
-
Add details using a black food coloring marker.
-
Roll in colored decorating sugar.
-
Set aside for 1 hour before packaging.

- Banana Split Bars – A Fun and Easy Summer Dessert - March 4, 2026
- Pineapple Fudge (No Candy Thermometer Needed!) - March 4, 2026
- No-Bake Peanut Butter Pie Recipe - March 3, 2026
Karen @ Sugartown Sweets says
Glub, glub, glub!! I love these. You make them sound so yummy, I need to give them a try. And of course they are adorable..I love all your beach themed treats. :o)
Beth says
LOL! I have always loved gumdrops. but these homemade ones are so much better than any I've ever tasted. I'd definitely give them a try!
THe Partiologist says
I am in love with your under the sea gumdrops. I've never made homemade gumdrops, but have so many molds that would work, I promise to give it a try!
Beth says
As much as you enjoy making homemade treats you definitely would love these homemade gumdrops. It's so fun to make them using silicone molds in lots of cool shapes.