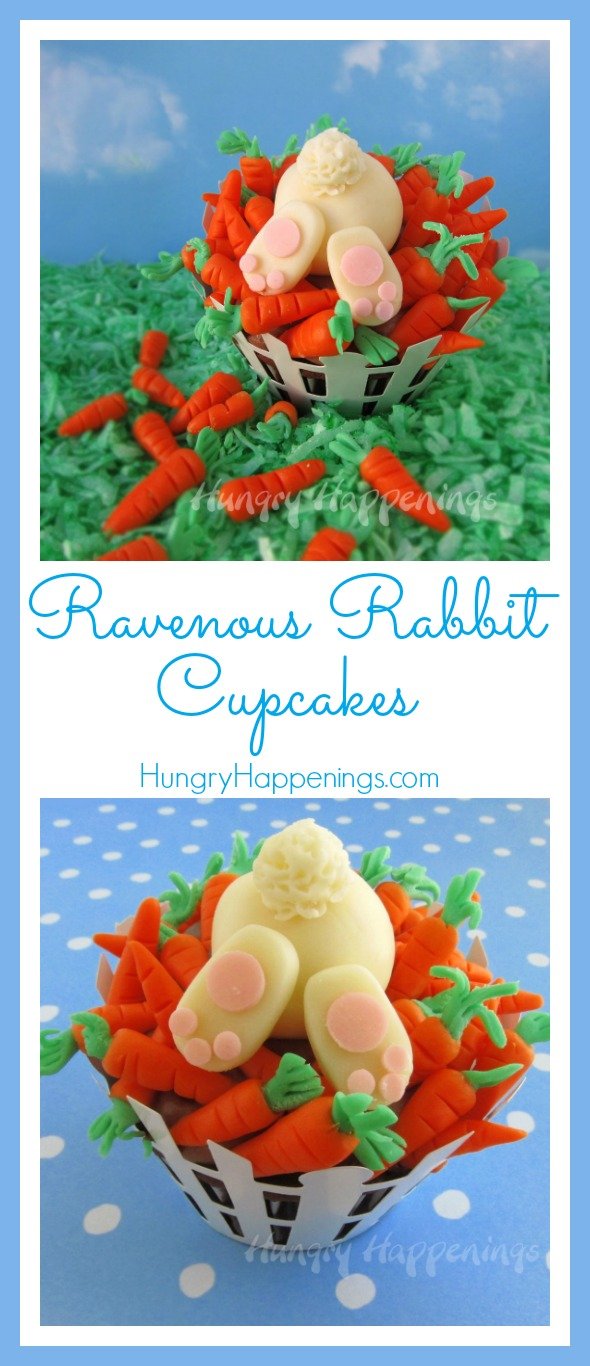
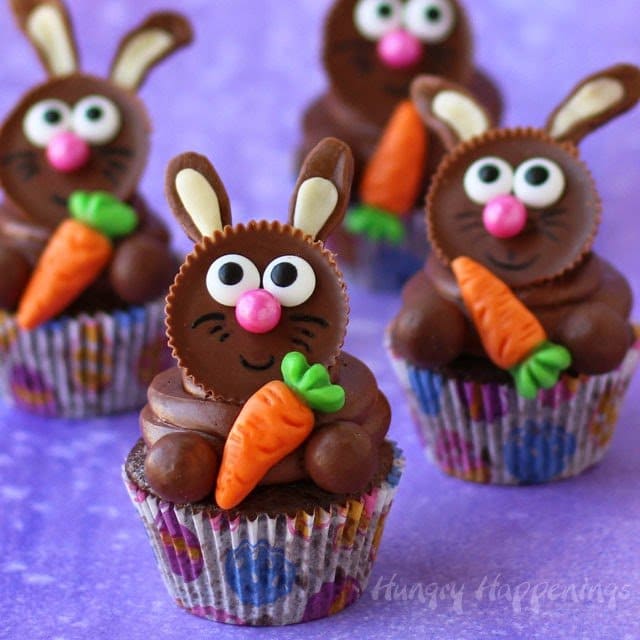
Show off your baking skills and impress your family and friends with these adorable Ravenous Rabbit Cupcakes! They are a delicious treat and everyone will be diving for these cupcakes like a rabbit diving for carrots!
I couldn't wait to share these cute Easter cupcakes with you.
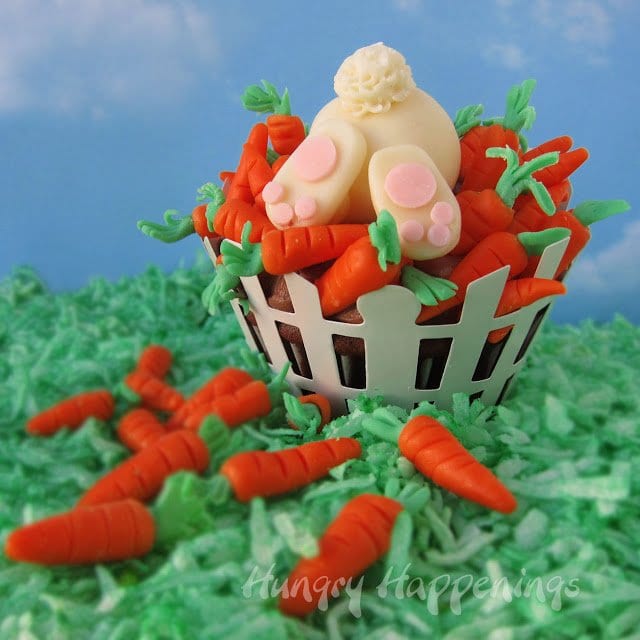
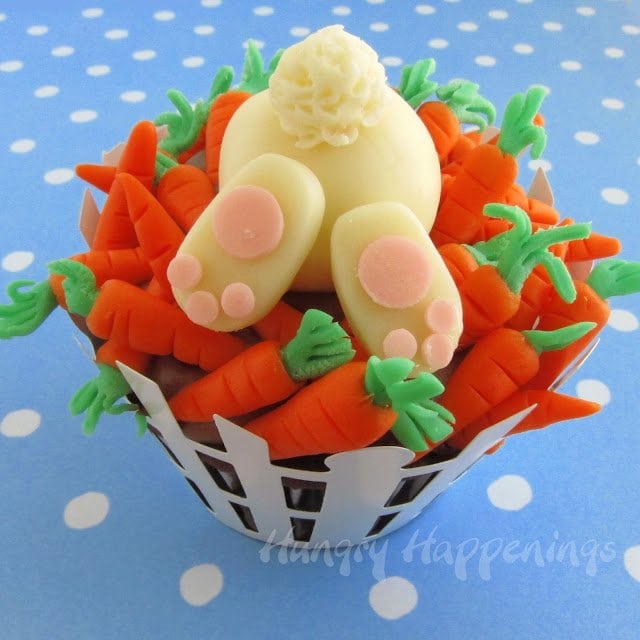
You will notice a theme this Easter. I've gotten a bit obsessed with bunny butts. Isn't the one on the cupcake just adorable?
I just love how the little ravenous rabbit is digging into the carrot patch. His cute little fuzzy tail and big floppy feat are sticking out of a pile of carrots.
These cupcakes will each require quite a bit of time to hand-sculpt the bunny and all those carrots. I'm not saying you should run screaming from this project, I just want you to be aware of the work involved before you decide to make these the night before you need them.
Unless you, yourself are the Energizer bunny, you'll want to give yourself plenty of time to make all the modeling chocolate pieces, but the end result it so worth the effort.
Ravenous Rabbit Cupcakes (makes 12)
Ingredients
12 baked cupcakes
1 ½ - 2 cups frosting
1 recipe white modeling chocolate (or use about 20 ounces white fondant)
orange, green, pink candy coloring
Wilton White Picket Fence Cupcake Wrappers
powdered sugar to dust work surface
corn syrup to glue the modeling chocolate pieces together (or use water)
Supplies needed:
#12 round pastry tip and # 6 round pastry tips, optional
rolling pin, optional
fine tip paint brush (food only)
toothpick
knife
pastry bag and large round decorating tip, optional
Instructions:
Optional: Pinch off about two tablespoons of white modeling chocolate and color it light pink. Note: The pink candy coloring is vibrant, so use just a tiny amount of it to make your pink.
Lightly dust the work surface with powdered sugar. Roll out the pink modeling chocolate as thin as possible. Press the small end of the #6 round pastry tip into the clay, twist, and then pull up. Continue doing this until you fill the pastry tip with small rounds of pink modeling chocolate. Turn it upside down and allow rounds to fall out. You'll need 72 tiny rounds. Do the same making 24 larger rounds using the #12 tip.
Alternately: you could just pinch off very small amounts of the pink modeling chocolate and roll them into balls then flatten them to make your circles. This will take more time, though.
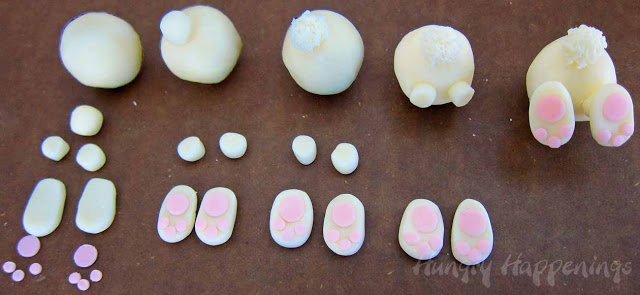
Pinch off teaspoon-sized pieces of white modeling chocolate. Roll into balls, then flatten into an oblong shape creating 24 bunny feet.
Dip a fine-tip paintbrush or toothpick into corn syrup. Brush onto the center of each foot. Press one pink round onto each foot. Brush three small dots of corn syrup around the edge of each foot and press on three tiny pink rounds. You can use water instead for this step. I think the corn syrup will hold the larger pieces in the next step a bit better than the water, though.
Pinch off 12 pieces of white modeling chocolate (a little less than a tablespoon) and roll them into balls for the bunny bodies. Pinch off 12 pea-size pieces of white and roll them into balls for the tails.
Pinch off 24 slightly smaller pieces and roll into balls, then flatten on either side to make little legs. Brush the top of each large ball with a dab of corn syrup.
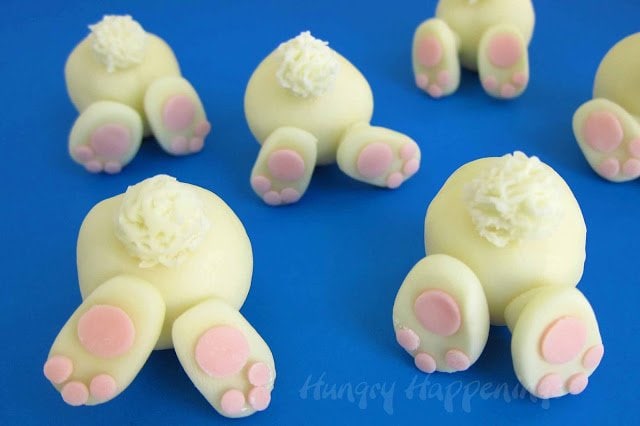
Attach a tail. To make your tails look fuzzy, use a knife to jab at the ball pulling out little tufts of modeling chocolate all around it.
Attach two legs with corn syrup then attach a foot on each leg.
Allow your bunnies to dry for a while before handling them.
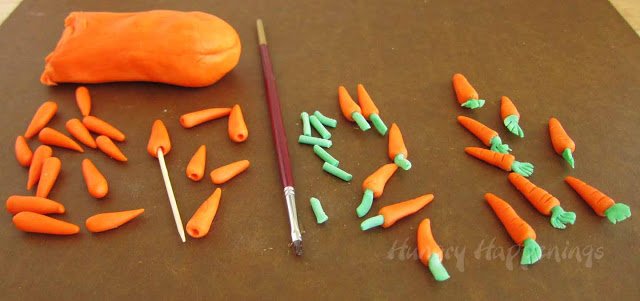
Pinch off and color some modeling chocolate green. Color a large amount orange. Pinch off pea-sized pieces of orange and roll into balls. Then roll into carrot shapes. Pinch of tiny pieces of green and roll into very thin logs. Cut into ¼" or so pieces. Use a toothpick to create a hole in each carrot.
Dab a bit of corn syrup into each hole. Insert a green log into each carrot.
Flatten and cut the green to look like leaves. Use a knife to make indentations across each carrot. You will need a lot of carrots to cover your 12 cupcakes.
All of the carrots pictured above went onto one cupcake. You don't need green on each and every carrot, as you'll want to put some on your cupcake, upside down.
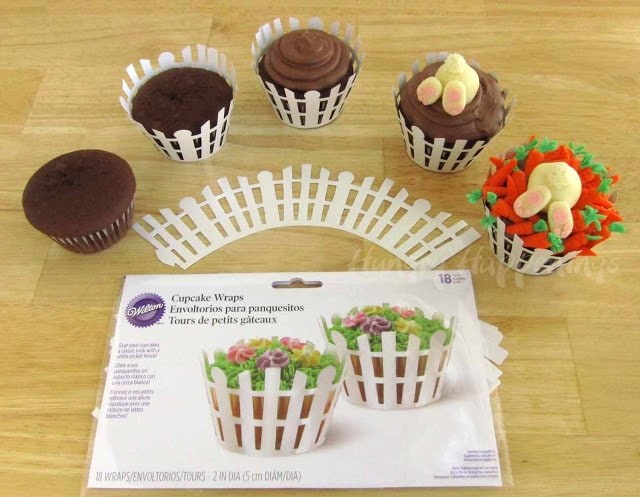
Wrap cupcakes with picket fence cupcake wrappers. Frost cupcakes using a pastry bag and pastry tip or with a spoon.
Set one rabbit in the center of the frosting.
Surround the rabbit with lots of carrots.
Your cupcakes are ready to serve. Store in an airtight container for up to a few days.
Items used to create this project found on Amazon.com Wilton Picket Fence-Cupcake...Shop on Amazon
 Chefmaster Orange Candy Col...Shop on Amazon
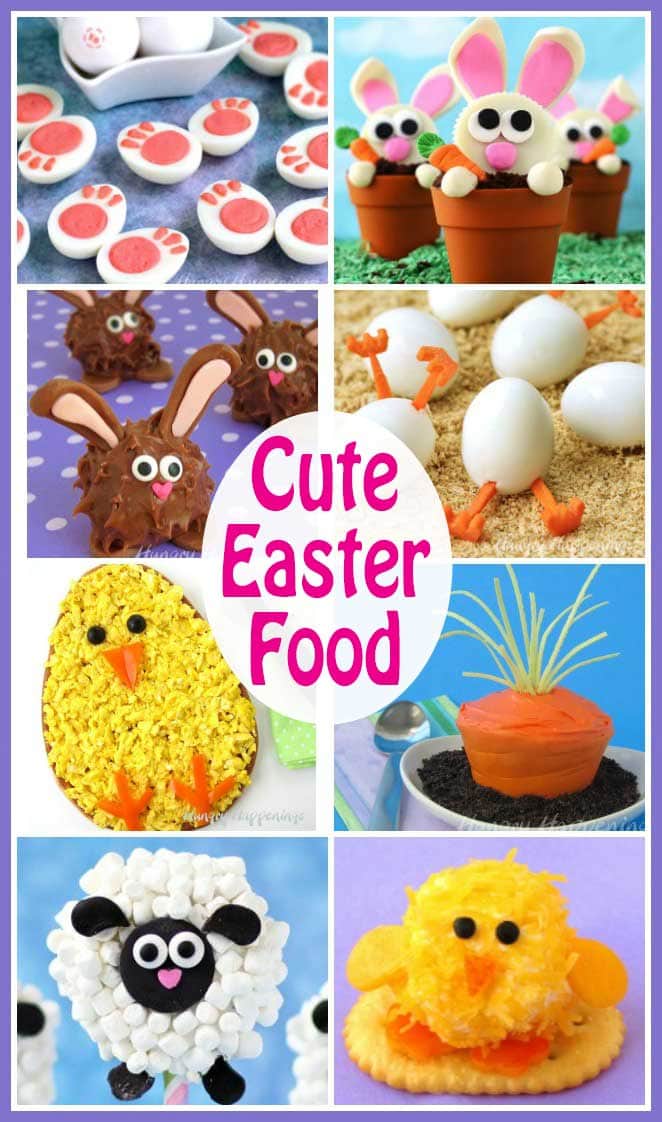
If this Easter Recipe interests you, then you should go and check out all these other delicious ideas.

- Banana Split Bars – A Fun and Easy Summer Dessert - March 4, 2026
- Pineapple Fudge (No Candy Thermometer Needed!) - March 4, 2026
- No-Bake Peanut Butter Pie Recipe - March 3, 2026
JeanWeber says
I love the way you do it. Will surely try it this Easter. Thanks!Rabbit Breeds
lizy b says
These are absolutely my most favorite Easter treat ever!!! EVER!!!!!! So stinkin' fabulous!
Jill @ KitchenFunWithMy3Sons.com says
Had to feature this today...so cute! http://kitchenfunwithmy3sons.blogspot.com/2012/03/kitchen-fun-and-crafty-friday-link_22.html
Our Delightful Home says
These are too cute. I would love for you to link up to my Linky Party via: http://ourdelightfulhome.blogspot.com/2012/03/show-me-what-you-got-linky-party-6.html
Mrs. Delightful
www.ourdelightfulhome.blogspot.com
Jerri Rivers says
Your cupcakes are so cute! I found you on pinterest and I'm featuring you as my Pinterest pick at my Friday Favorites party this week. Come by and check it out!
Anonymous says
Oh wow, these are SO incredible! Thanks for sharing!
Jacki
Trish - Mom On Timeout says
You're being featured tonight - thanks so much for sharing!
Beth Jackson Klosterboer says
Thanks Trish!
Mindie Hilton says
How could I not feature these on Thursday at Bacon Time, so incredibly cute!
Beth (www.livinglifeintentionally.blogspot.com) says
These are crazy CUTE!! WOW!! Thanks for linking up to TGIF! Have a great week & I'll see you Friday =-)
Beth
MrsFoxsSweets says
These look amazing! So creative!
Jamie says
Oh my word! Those are so cute and creative!
Selena (Fruit Carving Studio) says
That is absolutely amazing!!
Shannon, Food Channel Editor, Momtrends.com says
These are so flipping adorable! (I pinned them too on my own account, hopefully I will get brave enough to attempt them)!
Thanks for linking up to Friday Food at Momtrends.com!
eowyn3772 says
This is amaizing. You realy got the talent. Not only for baking but for decorating and the photos are great. Beautifull post.
Trish - Mom On Timeout says
Are you kidding me with this??? So freaking adorable! Just pinned this one! LOVE! Thanks for sharing on Mom On Timeout!
Sue says
These are just WAY TOO CUTE, Beth! You've done it again! 🙂
Jenny Melrose says
These are so stinkin' cute! I love the butts, but also the little carrots. The detail in these is amazing! I'm following.
Lisa @ Flour Me With Love says
Oh my goodness are these cute! Thanks so much for sharing at Mix it up Monday! I hope you'll stop back soon 🙂
A To Zebra Celebrations says
wow! wow! these are incredible! I invite you to my linky party on Tuesdays and it's still open if you'd like to link. I am visiting for the 1st time on your blog..love it! ~nancy~
Goings on at the Glenn's says
these are awesome and your tutorial is fantastic! Love love love. I pinned it