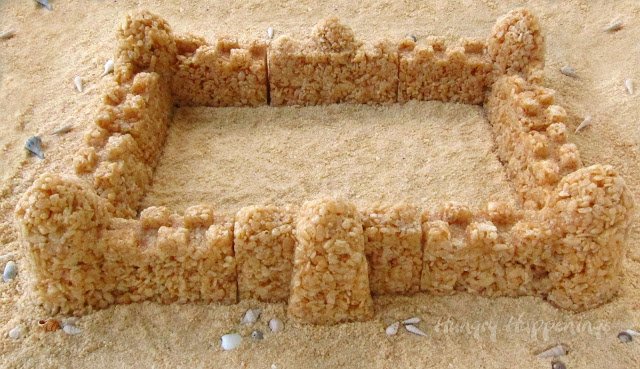
Build an edible castle to be the centerpiece at your beach-themed party.
This Caramel Rice Krispies Treat Sandcastle is sure to impress your party guests and it's fun to make using a beach toy as a mold.

A vacation at the beach wouldn't be complete, at least for kids, without building a sandcastle.
I can remember spending the afternoon sitting in the warm sand listening to the ocean waves crash against the shore while shoveling sand into buckets and sand molds and painstakingly constructing my own castle, trying to hurry before the tide moved in and took my creation back out into the deep blue sea.
It's been a long (oh, so very long) time since I played in the sand like that, but just recently I had the amazing opportunity to visit and sleep in a castle.

Well, actually the building we stayed in is a 19th-century castellated house, but it was an exciting experience just the same. It looks like a castle, right?
Castell Deudraeth was our home for two spectacular nights while we visited the village of Portmeirion in Wales. The village is on a cliff overlooking an estuary that leads to the Irish Sea.
If we hadn't been so busy, hiking and dining during our stay, (the food was fabulous,) we could have gone down to the beach and spent a lazy afternoon building a sandcastle. Instead, I decided to wait until I got home and make one in my kitchen.
I found my culinary inspiration in sand molds, once again. There are just so many clever culinary uses for those simple plastic beach toys. So far, I've used them to create Marshmallow Sea Creatures and Peanut Butter Fudge Starfish; today I'll show you how to make a caramelized cereal treat using a sand castle mold.

This crispy treat recipe, from Mouldings, Inc., has been in my recipe box since the early '90s. The company used to make plastic molds for the purpose of creating crispy treats, microwave cakes, jello, and more. Sadly, I haven't seen these molds in stores in many years.
I have many of these molds, and love using them, but discovered the sand molds work just as well for crispy treats.
You could use any shape of sand mold to make your caramel rice cereal treats. I chose to make a castle that can be used for quite a variety of occasions:
- beach or pool party (use sand and seashells)
- Father's Day (add some flags that say, "Dad, you are the king of our castle)
- princess party (eliminate the sand and add some colorful flags or banners)
- Renaissance festival event (eliminate the sand and add a moat)
- Halloween party (use Cocoa Krispies to make a dark and sinister-looking castle)
As a matter of fact, my friend is hosting a Renaissance party this weekend so I gave her the castle to display along with her other desserts. I can't wait to hear what her guests think about it.
UPDATE:
I recently had a conversation with a reader who was concerned that these molds are not labeled as food safe; she suggested lining them with plastic wrap. I thought that was a really great suggestion. I also had a reader ask if the traditional Rice Krispies treat recipe would work for this project.
So ...
I tested both, the plastic wrap and the traditional recipe, and happily, both worked perfectly. Just know that it will take 3 full recipes of the marshmallow cereal treats to create this castle.
The pictures below were made using the caramel rice cereal treats in this recipe but were molded without the use of the plastic wrap.
Cereal Treat Sand Castle (serves 18-24)
Ingredients:
19 cups (18-ounce box) crisp rice cereal (Rice Krispies Cereal)
2 sticks butter (8 ounces)
2 cups light brown sugar
1 ¾ cups light corn syrup
1 can sweetened condensed milk
optional, sandy crumbs from cereal or cookies
Supplies Needed:
medium saucepan with lid
heatproof spatula or wooden spoon (it is best to butter it)
sandcastle molds, washed and dried*
optional, seashells
*I have found these plastic beach toys in discount stores, dollar stores, department stores, and even drug stores. They are easy to find all summer long. The actual molds I used were purchased for $1.59 at the Christmas Tree Shop last summer.
Instructions:
- Pour crisp rice cereal into a very large heatproof bowl.
- Cut butter into small pieces.
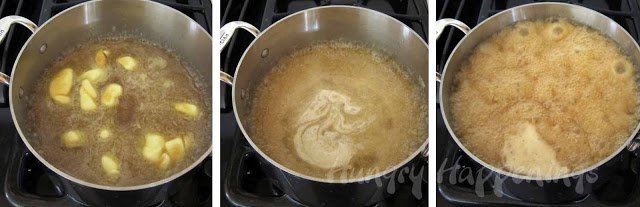
- Place butter, brown sugar, and corn syrup in a medium saucepan.
- Heat on medium, stirring as needed, until the butter melts and the mixture begins to bubble around the edges.
- Place the lid on the pan for one minute.
- Remove lid and allow to boil for 2 more minutes, without stirring.
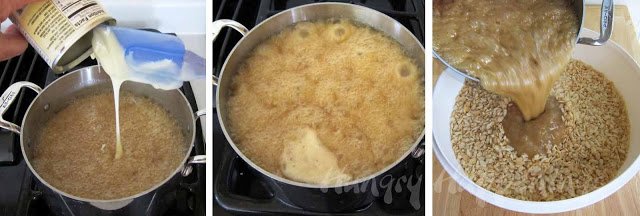
- Remove from heat and add sweetened condensed milk, stir to combine.
- Return to medium heat and allow to boil for three minutes.
- Remove and immediately pour over crisp rice cereal.
- Don't scrape the bottom of the pan.
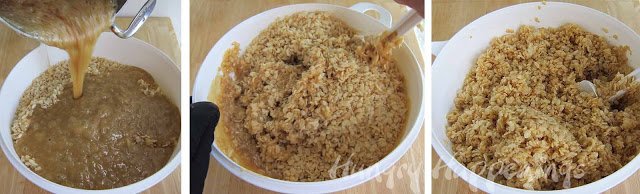
- Use a heatproof spatula or wooden spoon to stir the cereal until it is well coated with the caramel.
- This mixture will be extremely hot, so be careful not to touch it.
- Allow mixture to cool, stirring it frequently until you can easily touch it. Just don't let it cool too much or it will get too hard and won't be easy to press into the molds.
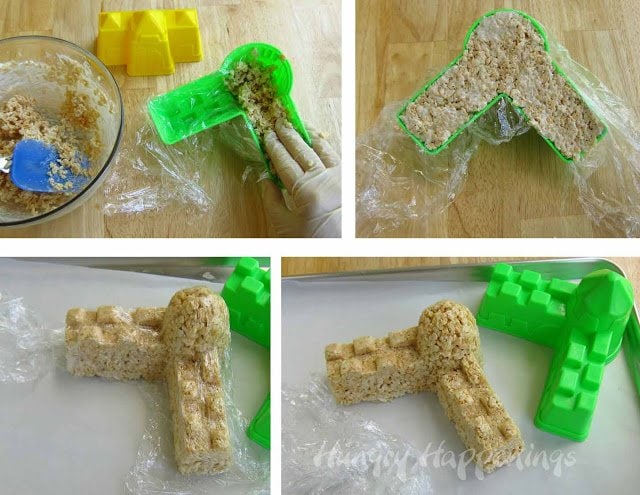
- If you want, you can line your sand molds with plastic wrap or you can spray the inside of the mold with baking spray, but I found that neither is really necessary as the caramel cereal treat mixture is fairly slippery and will fall out of the mold easily.
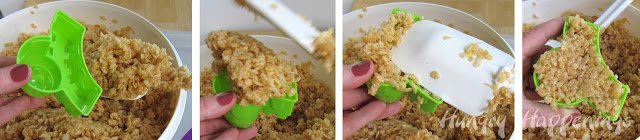
- Then spoon some of the cereal treat mixture into your plastic mold.
- Press down firmly making sure the caramelized cereal fills all the crevices.
- Fill each mold to the top and press down using your spatula or spoon to really compress the cereal in the mold.
Note:
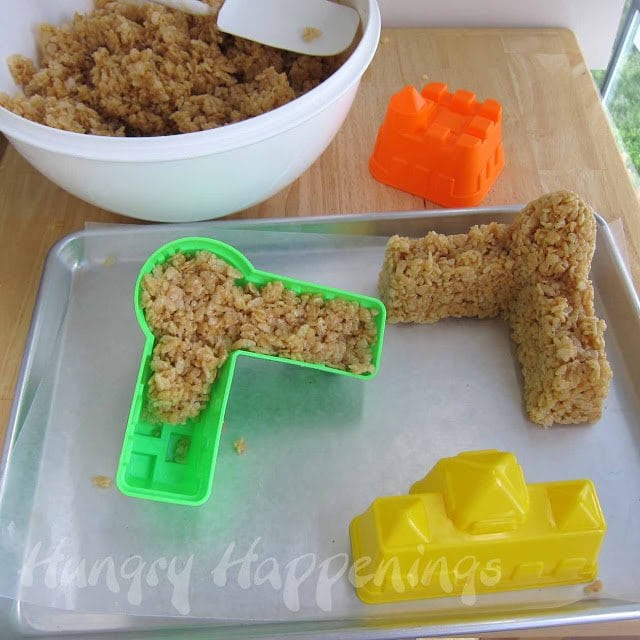
I started by using a sandcastle mold that was about 4" long but found the features of the castle wall were just too small to really show up well, so I decided to use a larger set of molds.
I made the first piece, pictured in the upper right-hand corner, and didn't make sure to really press the cereal mixture into all the crevices in the mold. As you'll see with the pictures below, I did a much better job filling the molds so all the details really showed up.
I was even able to fix the first one.
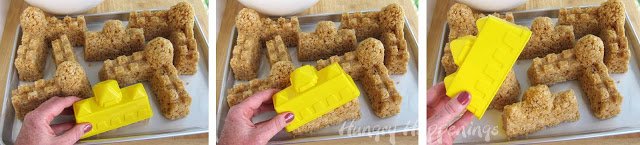
To un-mold the cereal treats, just turn the mold upside down and shake.
The molded piece should fall right out. If it doesn't, pull the sides of the plastic mold away from the cereal treat and shake gently and it should fall out.
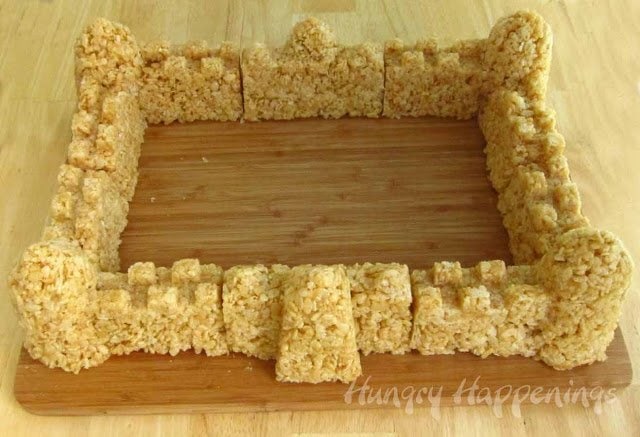
- Assemble your castle however you'd like.
- My sand mold set really didn't have much to work with; I couldn't figure out how to add any of the square pieces (see the orange sand mold in one of the pictures above,) so my castle is just a large rectangle with a lovely large courtyard.
- Each set of sandcastle molds will be different, so you can get as creative as you'd like with your castle.
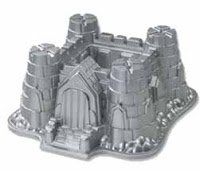
If you have one of these Nordic Ware Castle Bundt pans, you could use the cereal treat recipe in it as well. It will make a really great-looking castle.
Of course, buying this pan may cost more than sand molds, but the shape is really nice. I've included some links for castle sand molds below, but I couldn't find the exact molds that I used.
You can display your cereal treat sandcastle on a large cutting board, on a cardboard cake board, or just on a table covered with edible sand (I used crushed Rice Krispies.)
Keep your crispy castle stored in an airtight container for a week or more. I used to make bunny-shaped caramel crispy treats using this recipe every year at Easter and packaged them in cellophane bags and they would keep for several weeks.
Recipe

Build a sandcastle using caramel Rice Krispie treats instead of sand. It's a fun dessert for a beach-themed or princess party.
- 19 cups (18-ounce box) Rice Krispies Cereal
- 2 sticks butter 8 ounces
- 2 cups light brown sugar
- 1 ¾ cups light corn syrup
- 1 can (14 ounces) sweetened condensed milk
- optional, sandy crumbs from cereal or cookies
-
Pour 19 cups of Rice Krispies Cereal into a very large heatproof bowl.
-
Cut 2 sticks of butter into small pieces.
-
Place the butter, along with 2 cups of brown sugar, and 1 ¾ cups light corn syrup in a medium saucepan.
-
Heat on medium heat, stirring as needed, until the butter melts and the mixture begins to bubble around the edges.
-
Place the lid on the pan for one minute. Condensation will build up and will wash the sugar crystals down the side of the pan.
-
Remove the lid and allow the caramel to boil for 2 more minutes, without stirring.
-
Remove from the heat and stir in 1 can of sweetened condensed milk.
-
Return to medium heat and bring it back to a boil.
-
Allow it to boil for three minutes without stirring.
-
Remove and immediately pour over the cereal.
-
Use a heatproof spatula or wooden spoon to stir the cereal until it is well coated with the caramel.
-
Allow the caramel cereal treat mixture to cool for 5-10 minutes, stirring it frequently, until it's cool enough to touch.
-
Spoon some of the cereal treat mixture into your plastic mold.
-
Press down firmly making sure the caramelized cereal fills all the crevices.
-
Fill each mold to the top and press down using your spatula or spoon to really compress the cereal in the mold.
-
Set aside to allow the treat mixture to cool for about 10 minutes.
-
Turn the mold upside down and shake the mold until the cereal treat sandcastle pieces fall out onto your work surface.
-
Arrange your sandcastle on a cutting board, serving platter, or cake board.
This is best eaten the day it is made but it will keep for up to 10 days.
More beach-themed recipe ideas...
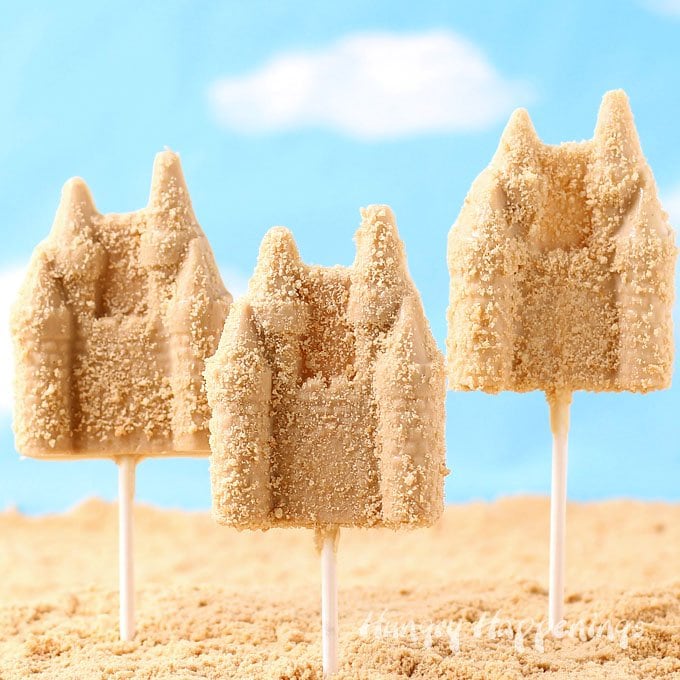
Peanut Butter Sandcastle Lollipops
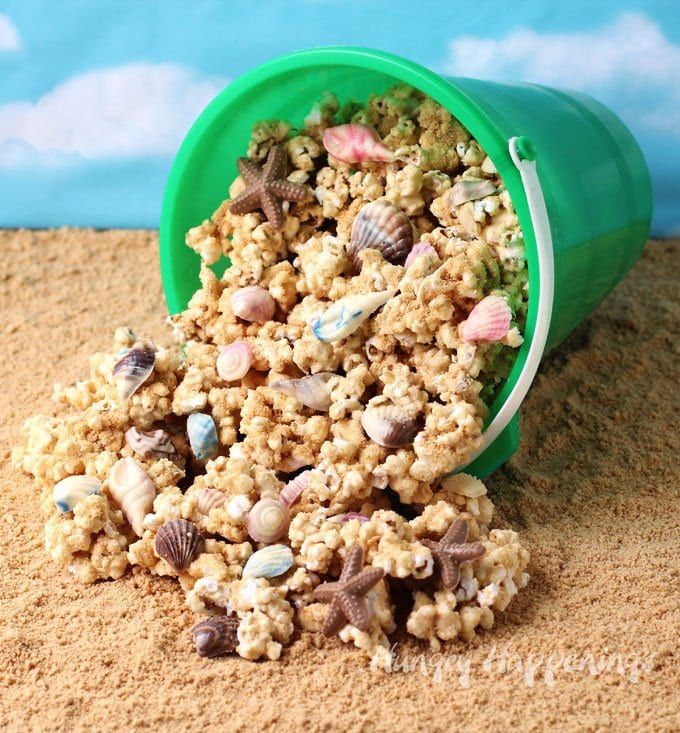
Beach Pail Popcorn filled with Chocolate Seashells

Caramel Rice Krispie Treat Starfish
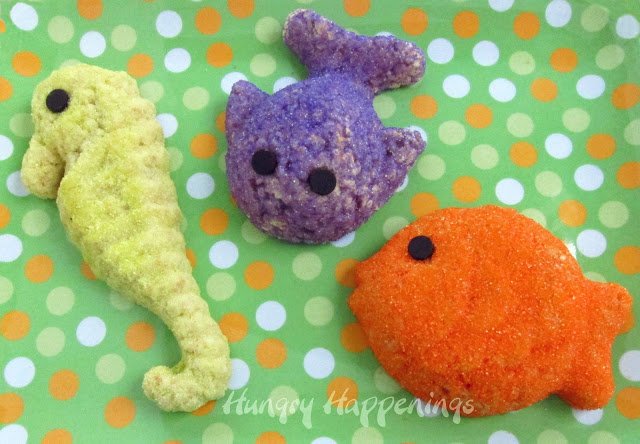
Rice Krispie Treat Sea Animals - Seahorse, fish, and whale.
Embrace the beautiful weather that we are having and make some of these gorgeous and scrumptious Summer Fun Recipes.

- Banana Split Bars – A Fun and Easy Summer Dessert - March 4, 2026
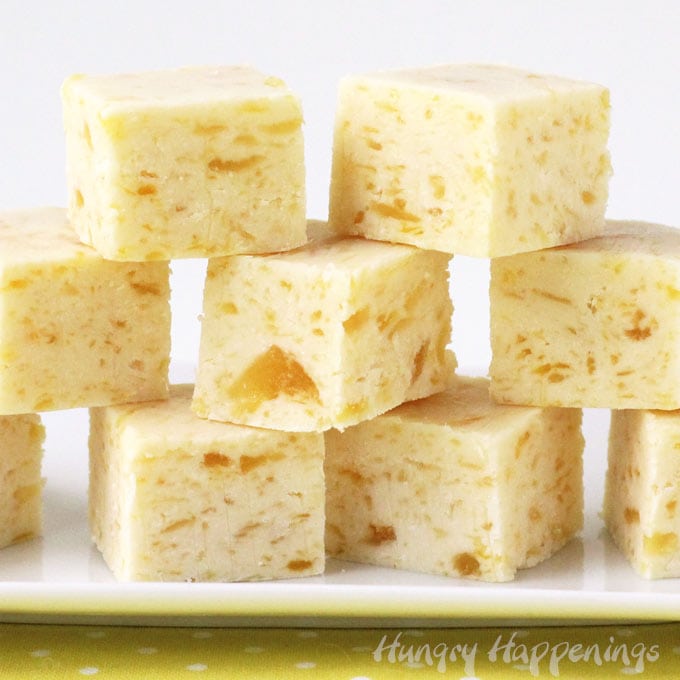
- Pineapple Fudge (No Candy Thermometer Needed!) - March 4, 2026
- No-Bake Peanut Butter Pie Recipe - March 3, 2026


Mama Jodi says
This is such a fun idea. I can totally see doing this for a beach party. Thanks for the clever idea. Jodi @ www.meaningfulmama.com
Winnie says
Absolutely gorgeous
Unique idea and super creative
Mackenzie says
I LOVE this! I can't wait to try this later in the Summer! 🙂 I'd love to invite you to join us on Saturday Show & Tell at Cheerios and Lattes! I know my readers would love this idea too!
Have a great weekend!
Mackenzie 🙂
http://www.cheeriosandlattes.com/saturday-show-tell-15/
Mackenzie says
Ok, so my mom turns 60 this year and we will be celebrating at the beach. I'm really thinking about making this, what do you think? Easy and quick? Thanks for sharing this great post on Saturday Show & Tell @ Cheerios and Lattes last week! 🙂 Hope to see you again this weekend! 🙂
Mackenzie
Mackenzie says
Congratulations! You're a featured favorite on this week's Saturday Show & Tell @ Cheerios and Lattes! 🙂
Dorothy @ Crazy for Crust says
How great is that??? This is adorable!
Not Your Ordinary Agent says
You did it again! Smart cookie, you! Please link up to Foodie Friday
Michelle says
This is a GREAT idea! So creative! 🙂
Ladies Holiday says
This is some amazing creativity! I would love to try this with my kiddos- stopping by from Mom on a time out hop!
Dip It In Chocolate says
This is such a clever idea!! I found you through Dorothy's link party. You have a great site.
Oltreverso says
Grazie! Bellissima idea!
Paola
Anonymous says
Could there be any issue with using the sand molds for food? I'm assuming they are not tested for being food safe, so that makes me worry a little bit. Maybe lining them with saran wrap before using them would be a little bit safer?
Beth Jackson Klosterboer says
You bring up a very good point. There are strict regulations regarding plastics in kid's toys as many small children put toys in their mouths, but these molds are not labeled food safe. I am going to go back and change my tutorials to include the use of plastic wrap. As soon as I can, I'll re-work my pictures too. The plastic wrap might just make it easier to un-mold as well. Thank you so much for asking this question and making this suggestion.
Beth Jackson Klosterboer says
So, I just tested this out, took pictures, and added the changes to the tutorial. Thanks again, for bringing this topic up! The plastic wrap does actually make it easier to un-mold, so it is the perfect solution.
Maranda says
This is awesome!
thingsforboys says
What a great idea! I have 2 nordicware tins and hardly ever use them. This is a great way to give them another job. Now I need to buy some sand moulds too 🙂
Laura loves cakes says
This looks so good...I love the moulds! They always seem to use rice krispies to model parts of complicated cakes on Ace of Cakes...but I've never tried it! 🙂
darce says
Wondering if the classic Rice Crispy treat recipe made with marshmallows would work. Does your recipe make a similar treat? Thanks for another creative and fun idea!
Beth Jackson Klosterboer says
Hi Darce,
I have yet to try the regular marshmallow cereal treats in the castle mold, but would assume it would work. It will just be more sticky, so I'd recommend putting on food handling gloves, buttering your gloved hands well, and really pressing the mixture into the molds. I'm just working on another sand mold cereal treat recipe that adds white chocolate to the usual marshmallows and butter so that they are easy to mold. I'll be sharing it as a guest post on Sunday over at Kitchen Fun with My 3 Sons.
CharityB says
Saw the pic on Pinterest and came over to see the cuteness. 🙂 WE have been using white chocolate in our rice crispy treats for several years. It's pretty much amazing. Good luck with your next project!
Beth Jackson Klosterboer says
Hi Charity, well, I decided to test out the traditional cereal treat recipe and it worked perfectly. It is a bit stickier, so I just buttered my gloves really well and had no trouble pressing it into the molds.
I like the addition of white chocolate; it really tastes great and was easier to mold. Jill may post that tutorial sooner than Sunday. I'll let everyone know when it goes up.
Mal says
I adore this idea! So fun for the summerMal @ The Chic Geek
MJB♥ says
Found your blog on Pinterest, I'm also from the Buckeye State! Great ideas you have! =)
Beth Jackson Klosterboer says
Thanks and welcome, fellow buckeye!
Karyn - Pint Sized Baker says
This is great!! Love it!
Karyn - Pint Sized Baker says
Love this idea!! So fun!
Angell @ Passionate and Creative Homemaking says
How cool! I would of never thought to do that!
Love your blog!
-A fellow email subscriber 🙂
Our Pinteresting Family says
This is a great idea !I love how you used the plastic molds...what a money saver. Megan