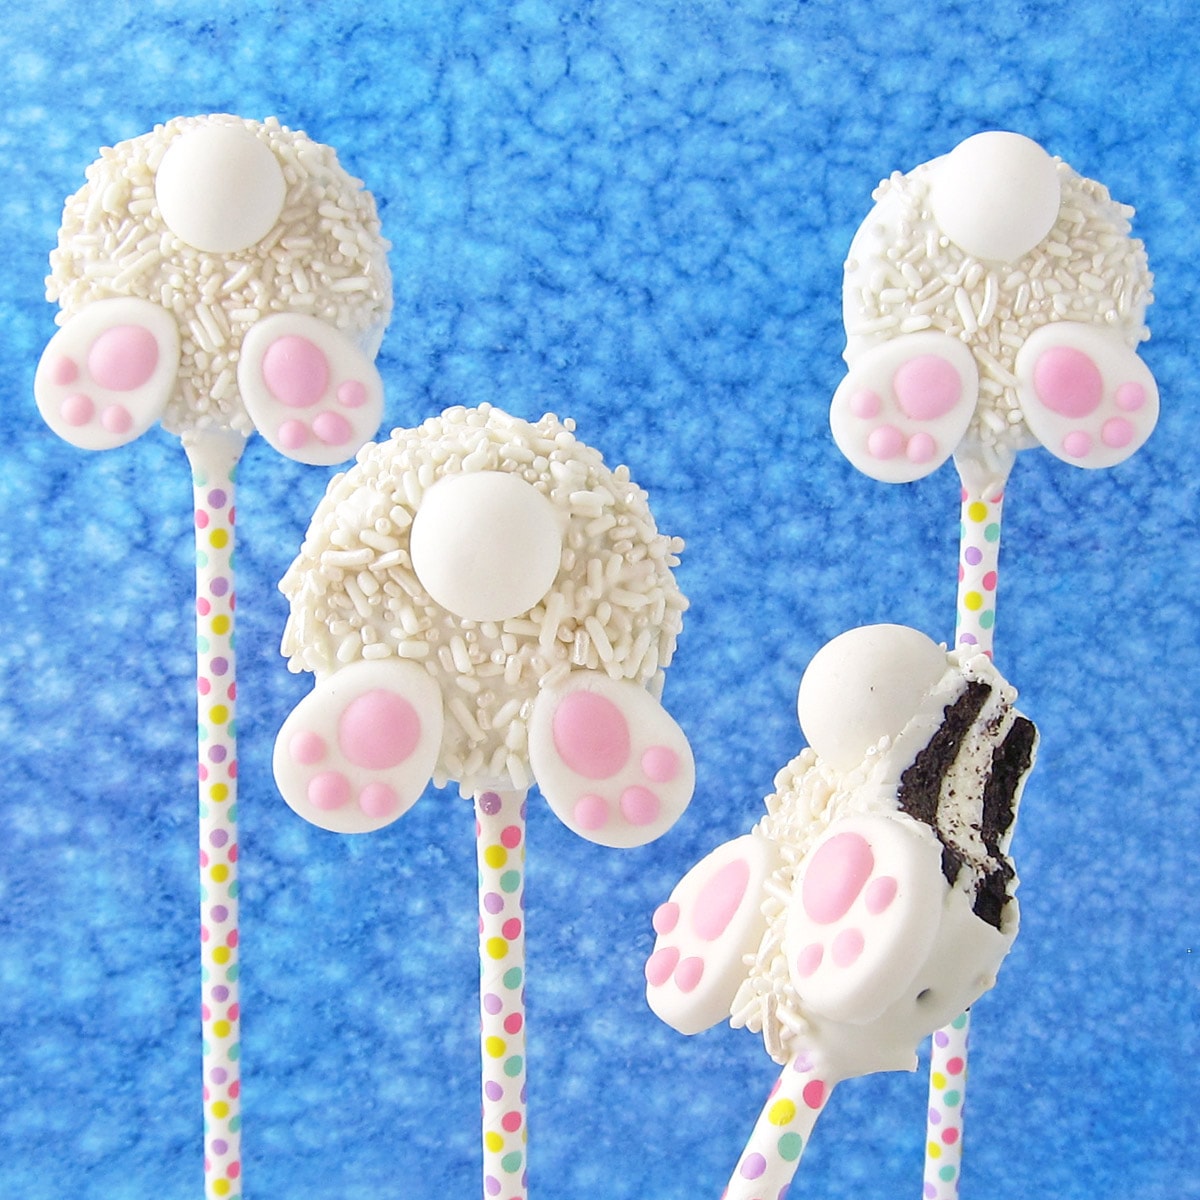
These adorably cute Easter Brownie Bunny Butts are quick and easy to make using a boxed brownie mix, mini Reese's Cup Eggs, and frosting. They are perfect for Easter dessert or to sell at an Easter craft show or bake sale.

So now that you know how to make Reese's Peanut Butter Bunny Feet, we are going to shrink them down and use the small bite-size Reese's Peanut Butter Eggs to make feet for these adorable Brownie Bunny Butts.
I love making bunny butts. There's just something so endearing about seeing a fuzzy little tail and big floppy feet on a rabbit's backside.
This Easter edible craft is a perfect project to do with kids. I could see baking the brownies, bringing them to a Sunday school class or a Girl or Boy Scout meeting, and having the kids do the decorating.

Once again I used modeling chocolate to decorate my Reese's Bunny Feet, but if you are doing this project with a group of kids and you don't want to make modeling chocolate, you could use store-bought fondant, strawberry Tootsie Rolls or any kind of pink taffy.
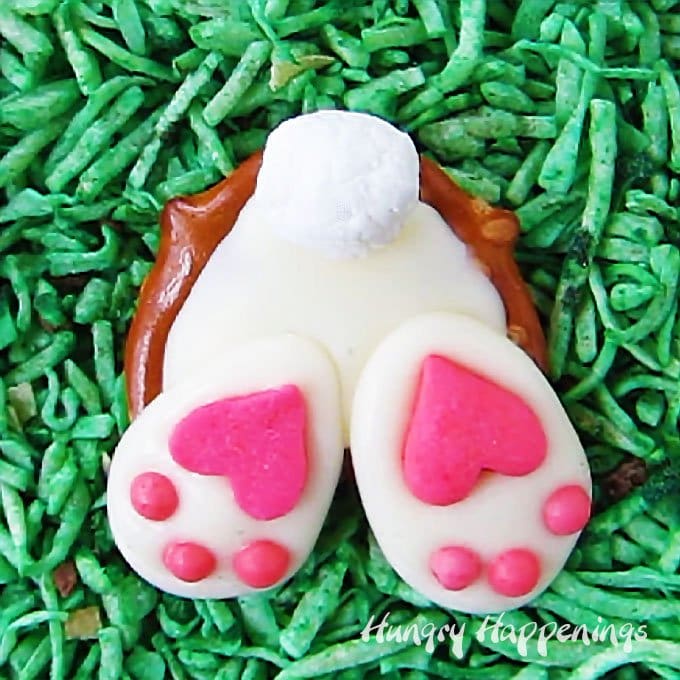
To make my bunnies look like they are burrowing down into a rabbit hole, I set them on some green coconut grass. The grass is really just for decoration so you could use plastic Easter grass if you prefer. If you want to make the grass more part of the dessert, then use green frosting.
If any of the kids have peanut allergies, you can use brown modeling chocolate to make the feet instead of the peanut butter fudge eggs.
Ingredients
- brownie mix
- egg oil, water (according to package instructions)
- bright pink modeling chocolate candy clay (click the link to get the 2-ingredient recipe)
- Reese's Eggs
- whipped white frosting
- shredded coconut colored with green food coloring - To make green coconut, pour flaked or shredded sweetened coconut into a zip-top bag and squirt in liquid green food coloring. Shake to coat the coconut.
Supplies
whoopie pie pan
fondant roller
silicone mat
small round plunger cutters or metal cutters - If you don't have the ½ inch and ¼ inch plunger cutters, you can pinch off pieces of the candy clay, roll them into balls, then flatten them to create the pad and toes on the Reese's Egg Bunny Feet.
Items used to create this project that are available on Amazon.com (commission earned for affiliate sales).
 PME Plunger Cutters, Miniat...Shop on Amazon
 Wilton Fondant 9 Inch Rolli...Shop on Amazon
") Wilton 12-Cavity Whoopie Pi...Shop on Amazon
Wilton 12-Cavity Whoopie Pi...Shop on Amazon Betty Crocker Ultimate Fudg...Shop on Amazon
 Wilton Water BrushShop on Amazon
 Wilton Easy Flex Silicone 1...Shop on Amazon
Instructions

Fill the whoopie pie pan with brownie batter.
Pre-heat oven to 325 degrees (for non-stick pans.) Spray the whoopie pie pan with non-stick spray. I squirted some just in the middle of each cavity then used my fingers to spread it evenly around the bottom and up the sides of each cavity.
Make your brownie batter and evenly divide it among the 12 whoopie pie cavities in your pan. Use a spoon to spread the batter into one thin layer.

Bake and cool.
Bake your brownies for 22-28 minutes until the edges look firm and the center no longer looks wet. You'll want these baked through so that they aren't so soft that they won't hold their round shape.
Cool completely before popping them out of the pan. I used a flat plastic spatula to help remove the brownies from the pan. This kitchen tool is super thin and was easy to fit in between the brownie and the pan. The brownies popped right out once I was able to loosen them from the pan.

Make the Reese's Cup bunny feet.
While your brownies are baking and cooling, you can get your bunny feet made. Unwrap the Reese's Peanut Butter Eggs.
Roll out some pink modeling chocolate on a non-stick silicone mat using a fondant roller. Use the large round plunger cutter to cut 24 dots and the small round plunger cutter to cut 72 dots.
Brush a light amount of water on the backside of a large pink dot and set it in the middle of an egg. Gently press down around the edges to make it stick. Do the same with three of the small dots, creating a paw pattern. Repeat.

Decorating your bunny butt brownies.
Spoon some white frosting into a sandwich-size zip-top bag, and cut off the tip. Use a small dab of frosting to attach your bunny feet along one edge of the brownies. Pipe on a tail.

Serving the bunny brownies on edible coconut grass.
If you want, sprinkle some green coconut on or pipe some green frosting in a small round plate or bowl and snuggle a bunny in the middle.

Packaging
I packaged up most of my Brownie Bunny Butts and donated them to my nephew's baseball team for their bake sale. They were all sold in a flash. Putting them in a plastic-wrapped bowl worked perfectly. I then snuggled the bowls down into some large shirt boxes to transport them.
This would be a great way to package them up if you are having kids decorate them to bring home.
Storage
Store your Brownie Bunny Butts in an airtight container for up to 3 days.
Related Recipes
I have created a lot of bunny butt treats and Easter Recipes.
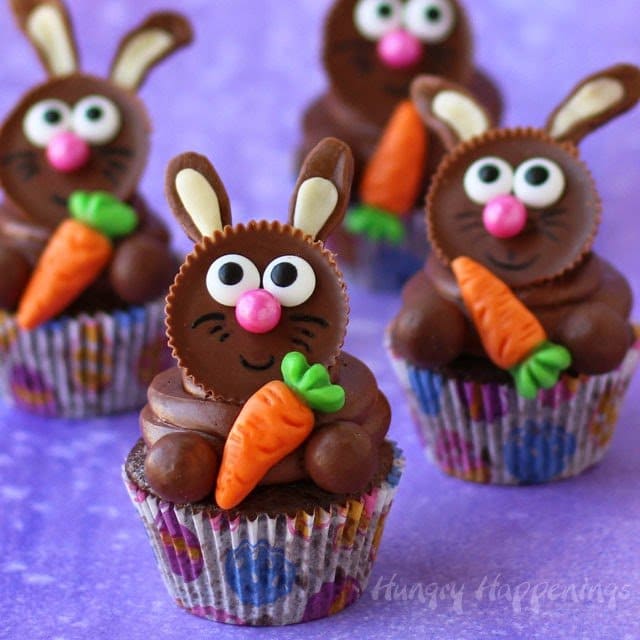
Bunny Butt Push Pops • Bunny Butt Cupcakes • Bunny Paw Deviled Eggs • Bunny Butt Ice Cream Cones
Video
Be sure to watch this quick video to see how easy these cute Easter brownies are to make.
Recipe

- 1 box brownie mix, plus the egg and oil according to the package instructions
- 1 ounce bright pink modeling chocolate, or pink taffy
- 24 Mini Reese's Eggs
- ½ cup whipped white frosting
- optional, 3 cups shredded coconut colored with green food coloring
-
Preheat oven to 325 degrees F.
-
Spray a non-stick whoopie pie pan with 12 round cavities with baking spray.
-
Mix brownie mix, egg, oil, and water (and a fudge packet if included) according to package instructions.
-
Equally divide batter among the 12 round whoopie pie cavities.
-
Bake for 22-28 minutes until the edges look set and the center is not longer wet.
-
Remove and allow to cool completely before removing from pan.
-
Roll out bright pink modeling chocolate to about 1/16th of an inch thickness.
-
Cut 24 circles using a ½ inch round plunger or metal cutter.
-
Cut 72 circles using a ¼ inch round plunger cutter or straw.
-
Brush water on one side of a ½ pink circle then press the wet side on top in the center of a Reese's Egg.
-
Brush water on three of the smaller pink circles and press the wet sides onto the egg to create three bunny toes.
-
Repeat, creating all 24 bunny feet.
-
To assemble the Brownie Bunny Butts:
-
Sprinkle some green coconut around the edge of the plate if using.
-
Set the brownie in the middle of the plate.
-
Spoon the frosting into a small zip top or pastry bag.
-
Pipe a frosting tail near one edge of the brownie.
-
Use frosting to attach two feet opposite the tail.
Store your Easter bunny butt brownies in an airtight container at room temperature for up to 3 days.
Calories are approximate due to variances in brownie mixes and frosting.

- Banana Split Bars – A Fun and Easy Summer Dessert - March 4, 2026
- Pineapple Fudge (No Candy Thermometer Needed!) - March 4, 2026
- No-Bake Peanut Butter Pie Recipe - March 3, 2026

Elizabeth says
where do I get the pink modeling chocolate??
Beth says
You can make pink modeling chocolate by either making white modeling chocolate and coloring it pink or by using pink candy melts to make some. You can find the simple two ingredient recipe here - https://hungryhappenings.com/chocolate-making-tips/.
If you don't want to make it, you can use fondant or even pink taffy. Have fun.
gemma says
this is great and quite simple, love it
Nicole (Bellenza Party Suite) says
Haha this so cute!
The Partiologist says
Who knew a bunny's butt could be so cute! 🙂
Sara says
Beth, these are adorable!
Erin says
So adorable! You do such amazing work!!!
Brenda @ SweetSimpleStuff says
Yeah for bunny butts ... can never get enough of them! Pinned 🙂
Patti Tucker says
Pinned!
Danielle Stickel says
SO CUTE - nothing cuter than a bunny butt! I will so have to make these!!
Amber Harrop says
So Cute 🙂 Thanks for sharing
Trish - Sweetology101 says
LOVE these...simple, cute and YUM my 3 favorite ingredients. Take care.