These Cookie Googly Eyes actually wiggle just like the plastic craft store googly eyes, but are so much more fun, because you can eat them.
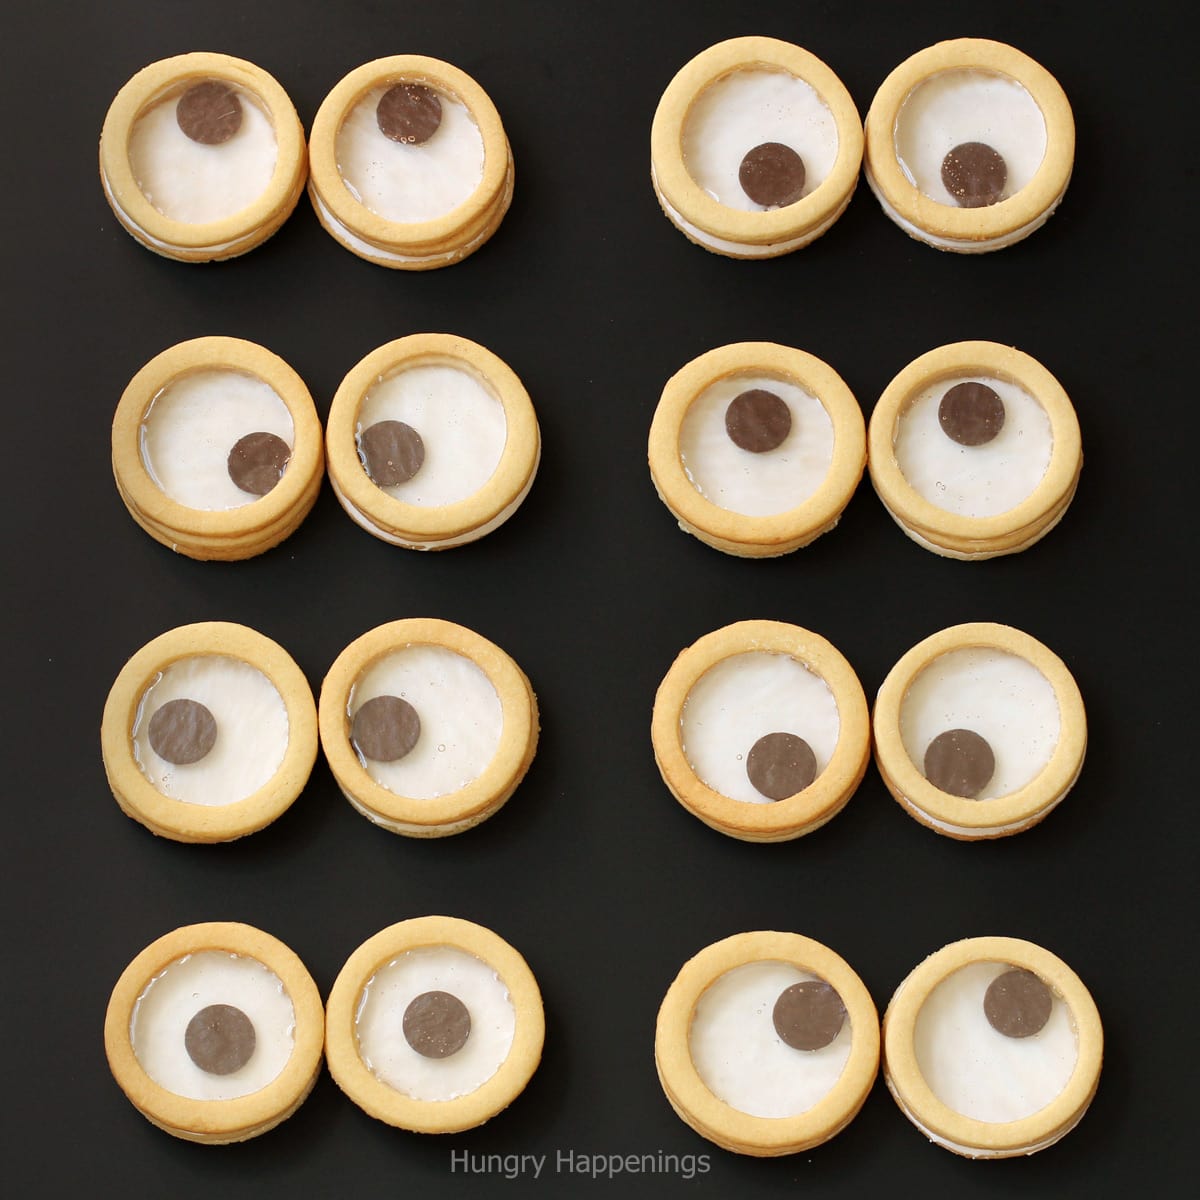
I can't quit playing with these edible googly eyes. They wiggle just like the plastic craft store googly eyes but are so much more fun because you can eat them when you are done shaking them around.
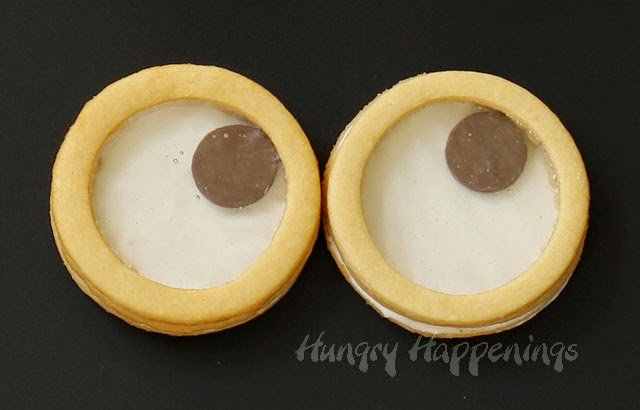
Each eyeball cookie is made with one round cookie that's iced with white royal icing, two cookie rings, candy glass, and a chocolate pupil. They are stacked together to form a googly eye.
I've used clear mint candies to make clear windows for my Mason Jar Cookies, Snowflake-Filled Snowman Cookies, Pot of Gold Cookies, and Magnifying Glass Cookies but for these eyeball cookies, I chose to use Isomalt.
Isomalt is a sugar substitute used by candy sculptors. It is super easy to melt and work with, is structurally strong enough for elaborate sugar sculptures, and hardens crystal clear.
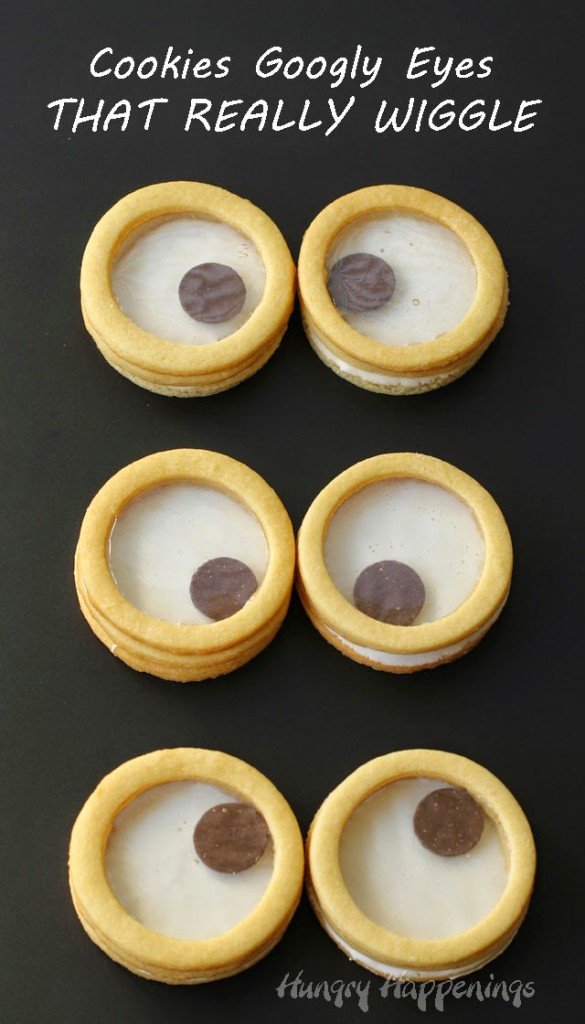
I found a few tricks for making these round isomalt discs for my cookies, which I'll share with you in the tutorial, but all in all, these were pretty simple cookies to make and decorate. They just take time.
You need to be patient and let the royal icing harden overnight then you need to allow the isomalt time to set up as well. I tried to rush a few, and the googly eyes didn't google, instead, they sunk into the icing and stuck there. So, don't be in a hurry.
Ingredients
Cookie Dough:
- all purpose flour I start with 4 cups, then add more if needed
- salt
- baking powder
- butter softened slightly
- granulated sugar
- eggs
- pure vanilla extract
- almond extract
Icing:
- Betty Crocker Cookie Icing or homemade royal icing - To make this project go a little quicker you can use store-bought, Betty Crocker Cookie Icing like I did. It's just one less thing to make and fewer dishes to clean, and honestly, I think it tastes pretty darn good too.
Clear Part of the Googly Eye:
- Isomalt nibs or sticks broken into 1-inch pieces
Pupil:
- Dark Melting Candy Wafers Ghirardelli, Candy Melts, or Merkens
Supplies
3-inch round cookie cutter
2 ¼ inch round cookie cutter
parchment paper
3 sturdy aluminum or metal baking sheets (you don't want to use the kind that warp when hot)
You can find supplies needed to create this recipe on Amazon. I earn a small commission when you use the sales links in this post to make a purchase at no extra cost to you.
 CakePlay Isomalt Nibs - Cle...Shop on Amazon
 Betty Crocker Cookie Icing,...Shop on Amazon
 Ghirardelli Candy Making an...Shop on Amazon
  Wilton Black Candy Melts® ...Shop on Amazon
  SweetGourmet Candy Junior W...Shop on Amazon
Instructions
Make the sugar cookie dough.
- Mix the flour, salt, and baking powder together in a bowl. Set aside.
- Cream butter and sugar until light and fluffy.
- Stir in eggs, vanilla, and almond extract.
- Add dry ingredients and stir just until it's mixed in.
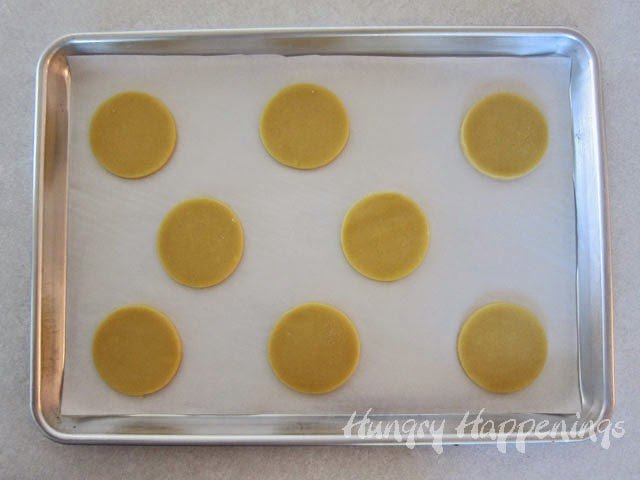
Cut out circle cookies.
- Roll cookie dough out to ¼ inch thickness.
- Cut out 24 circles using a 3-inch cookie cutter.
- Set on a parchment paper lined baking sheet and refrigerate for 30 minutes.
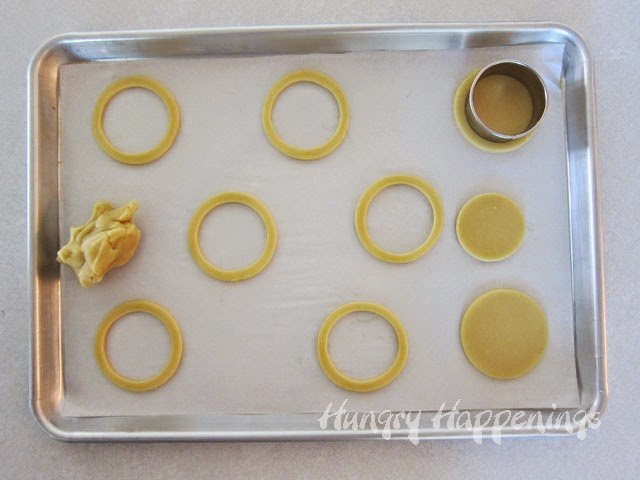
Cut out cookie rings.
- Cut out 24 more round cookies, then using a 2 ¼ inch cutter cut a circle from the center of each of those cookies.
- Re-rolling dough as needed, do this again creating 24 more cookies with holes in them, making a total of 48 holey cookies.
- Refrigerate for 30 minutes.
- Bake cookies in a 375-degree oven for 7-11 minutes until set. You don't want the cookies to get too brown, so keep an eye on them at the 7-minute mark.
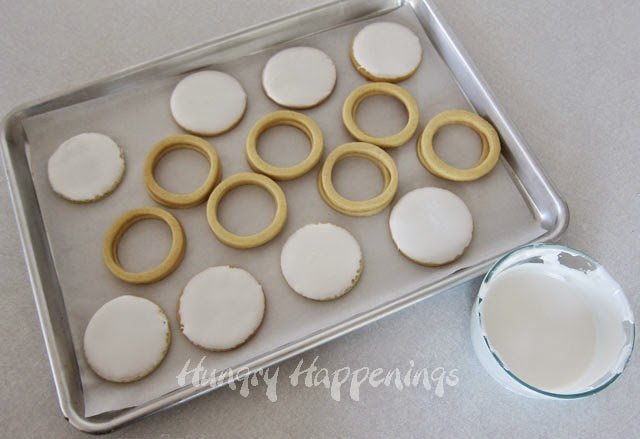
Ice the round cookies.
- Cut open one tube of the Betty Crocker Cookie Icing and pour it into a microwave-safe bowl. Heat it for about 20 seconds until it is thin and pourable.
- Dip the tops of the whole round cookies in the icing so you get a nice smooth surface. If you want, you can pipe it on instead. I just found it easier to dip. R
- Reheat the icing as needed.
- If you need more icing, squeeze some out of your second tube into the bowl. You'll need this tube intact for the next step.
- Allow the cookies to dry for an hour.

- Attach one holey cookie on top of each of the frosted cookies using a thin band of white icing.
- Allow these cookies to dry overnight! Don't rush this. The icing needs to be very hard so the googly eyes can slide around on top.
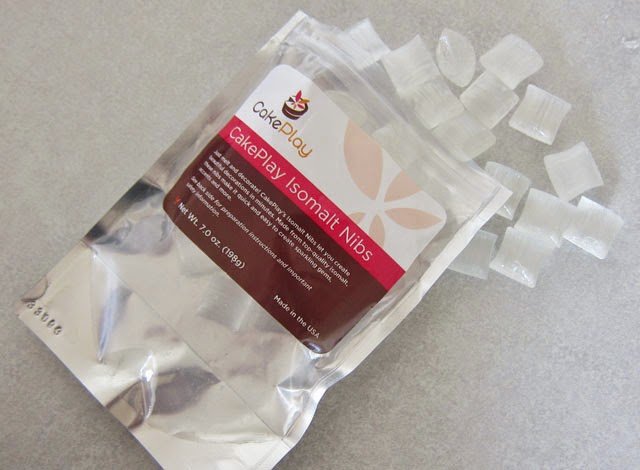
Isomalt
Place three baking pans in a 350 degree oven and allow them to get good and hot.
Meanwhile, make the clear tops of the googly eyes. Start by placing the Isomalt nibs or broken sticks into a glass microwave-safe bowl with a pour spout.
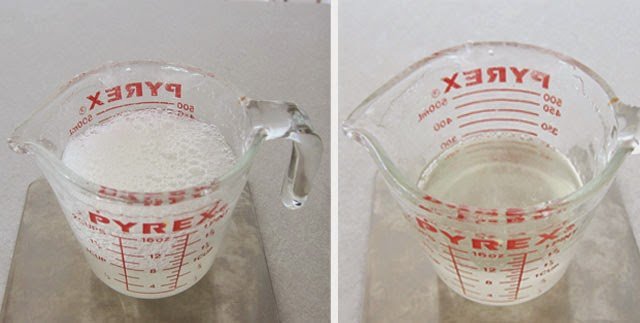
Melt the isomalt.
- Heat in the microwave until melted and thin.
- I heated mine for 1 minute, then stirred it to incorporate the melted isomalt with any lumps that remained, and then I heated it again for about 20 seconds.
- I let it sit in the microwave until the bubbles disappeared, then I heated it again for 15 seconds, allowed the bubbles to disappear, and was ready to pour.
- It's important that most of the air bubbles are gone, otherwise, you'll end up with lots of bubbles in your candy eyes.
DO NOT TOUCH THIS HOT SUGAR, IT WILL BURN, BADLY. I wear protective gloves, just to be sure it doesn't touch my skin. It will take layers of skin off, and it is incredibly painful.
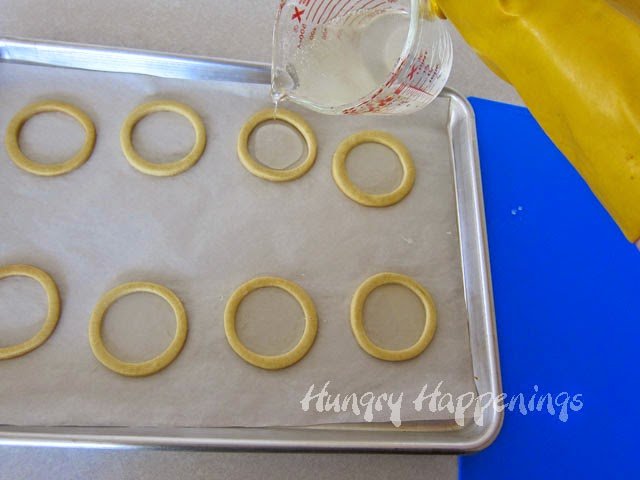
Pour the isomalt into the cookie rings.
- Remove one hot pan from the oven. Set it on a towel or trivets. Place a piece of parchment paper in the pan. Set 8 cookies on the paper.
- Pour some isomalt in the center of each cookie, allowing it to completely cover the center.
- If needed, you can use a toothpick to move some of the sugar out to the edges.
- Allow the isomalt to harden overnight.
Tips
The heat of the pan will help the isomalt spread and get rid of the air bubbles that will form as you pour them. You can use a creme brulee torch to help remove air bubbles, by heating the isomalt once it's poured, I found this hot pan method easier and quicker. A few bubbles are fine, but the first few I poured on a cold pan had a cloudy appearance.
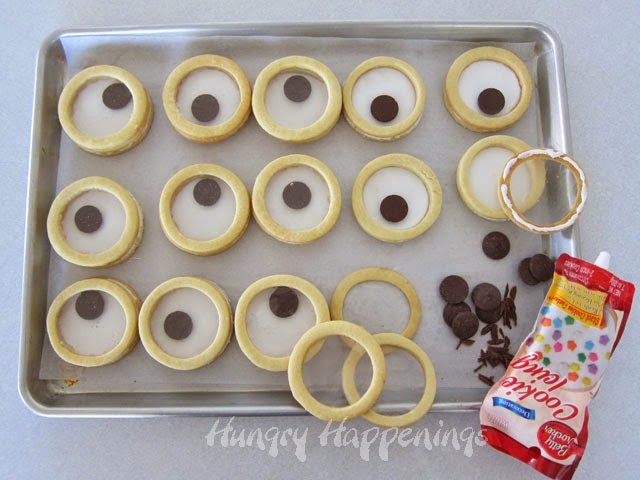
Add the chocolate pupils.
After the icing has dried overnight, you can assemble your Cookie Googly Eyes.
My Ghirardelli Candy Making Wafers and most Candy Melt type wafers have a tip on one side. I used a sharp knife to cut my wafers into thin flat wafers, cutting off the tip.
Set one candy wafer inside the stacked cookies. Pipe some icing on the back side of the candy-filled cookies and set one on each cookie stack.
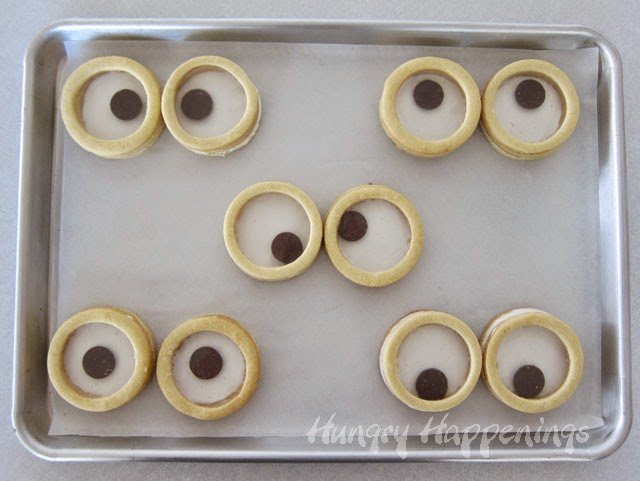
Now go have fun wiggling your cookies.
Storage
Store your cookies in an airtight container (preferably a metal cookie tin) for up to a week.
Related Recipes
Be sure to check out all of my fun Halloween food ideas.
Recipe
These cookie googly eyes really wiggle. Each layered cookie has a clear candy glass window that allows you to see the chocolate pupil wiggling around a white iced cookie eye.
- 4 - 4 ¼ cups all-purpose flour (start with 4 cups, then add more if needed)
- ¾ teaspoon salt
- ¾ teaspoon baking powder
- 1 cup butter, softened slightly
- 1 ½ cups sugar
- 2 large eggs
- 1 ½ teaspoons pure vanilla extract
- ¾ teaspoon almond extract
- 2 tubes Betty Crocker Cookie Icing (or homemade royal icing)
- 10 ounces Isomalt nibs (or sticks broken into 1-inch pieces)
- 24 Dark Melting Candy Wafers (Ghirardelli, Candy Melts, or Merkens)
-
Mix the flour, salt, and baking powder together in a bowl. Set aside.
-
Cream butter and sugar until light and fluffy.
-
Stir in eggs, vanilla, and almond extract.
-
Add dry ingredients and stir just until it's mixed in.
-
Roll cookie dough out to ¼ inch thickness.
-
Cut out 24 circles using a 3 inch cookie cutter.
-
Set on a parchment paper lined baking sheet and refrigerate for 30 minutes.
-
Cut out 24 more round cookies, then using a 2 ¼ inch cutter, cut a circle from the center of each of those cookies.
-
Re-rolling dough as needed, do this again creating 24 more cookies with holes in them, making a total of 48 holey cookies.
-
Refrigerate for 30 minutes.
-
Bake cookies in a 375 degree oven for 7-11 minutes until set.
-
Cut open one tube of the Betty Crocker Cookie Icing and pour it into a microwave safe bowl.
-
Heat it for about 20 seconds until it is thin and pourable.
-
Dip the tops of the whole round cookies in the icing so you get a nice smooth surface.
-
Allow the cookies to dry for an hour.
-
Attach one holey cookie on top of each of the frosted cookies using a thin band of white icing.
-
Allow these cookies to dry overnight! The icing needs to be very hard so the googly eyes can slide around on top.
-
Place three baking pans in a 350 degree oven and allow them to get good and hot.
-
Meanwhile, make the clear tops of the googly eyes.
-
Start by placing the Isomalt nibs or broken sticks into a glass microwave safe bowl with a pour spout.
-
Heat in the microwave until melted and thin.
-
Remove one hot pan from the oven. Set it on a towel or trivets.
-
Place a piece of parchment paper in the pan. Set 8 cookies on the paper.
-
Pour some isomalt in the center of each cookie, allowing it to completely cover the center.
-
Allow the isomalt to harden overnight.
-
Good morning. Now you are ready to assemble your Cookie Googly Eyes.
-
The Ghirardelli Candy Making Wafers and most Candy Melt type wafers have a tip on one side.
-
Use a sharp knife to cut wafers into thin flat wafers, cutting off the tip.
-
Set one candy wafer inside the stacked cookies.
-
Pipe some icing on the back side of the candy filled cookies and set one on each cookie stack.
-
Now go have fun wiggling your cookies.
Recipe Video
Store your cookies in an airtight container, preferably a cookie tin, at room temperature for up to a week.
- How to make peanut butter? - February 15, 2024
- OREO Penguins - December 20, 2023
- OREO Snowmen - December 20, 2023



Rebecca
Thanks for responding, Beth.
Although super cute, its way too complicated for my skill level (lack of).
Rebecca Goldfarb
Awesome cookies. I have some dumb questions.
Why are there double the amount of holey cookies?
How are the "eyes" not falling out of the cookie if you turn it upside down?
Where exactly is this clear sugar being poured into?
In the end, why are you piping some icing on the back side of the candy filled cookies?
Sorry for the abundance of questions which the explanations are probably very clear and I'm just not understanding.
Thank you!
Beth
Hi Rebecca,
Each googly eye cookie is made up of 3 cookies. The bottom cookie is whole and it is covered in white icing (which not only adds the white color to the eyes, but gives your dark candy melt wafer a smooth surface on which to wiggle around on). The second cookie has a hole in it which gives your room for the dark candy melt wafer room to move. The top cookie also has a hole in it and it is filled with the clear candy. So you bake 1 solid round cookie, 1 cookie with a hole in it, and one cookie with a hole in it that is filled with candy for each Googly Eye. The cookies are all held together using icing. It's best to allow the icing on the bottom cookie to dry completely so it's really smooth. Then pipe icing on the back of the middle cookie and attach it to the bottom cookie. Set the dark candy melt (pupil) inside the hole. Then pipe icing on the back of the candy filled cookie and attach it to the middle cookie.
I hope this helps!