If you really want to WOW someone special this Valentine's Day, and you have time to spend making something really spectacular, make this Raspberry Lemon "I ❤ You" Valentine's Day Reveal Cake.
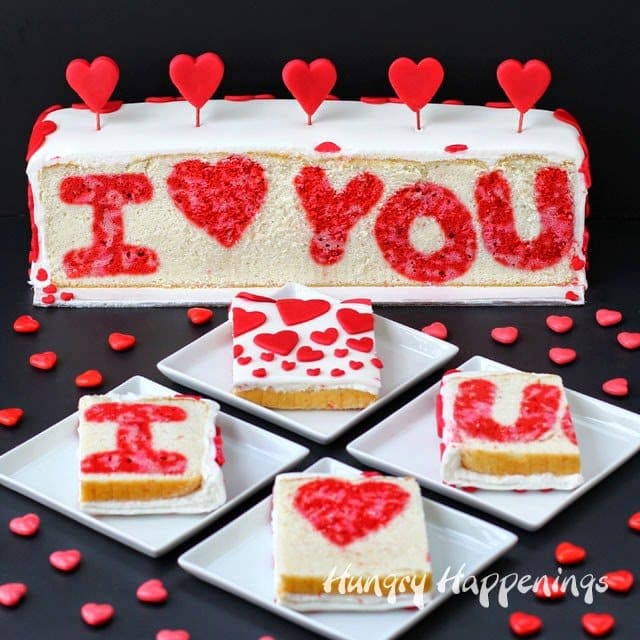
This cake has been a total labor of love. It's been two days in the making yet worth every minute because the reaction I got when I cut into the cake was priceless.
My friends came over for dessert last night and they were happy to see the red fondant heart covered cake on the table, but assumed it was just a normal cake inside.
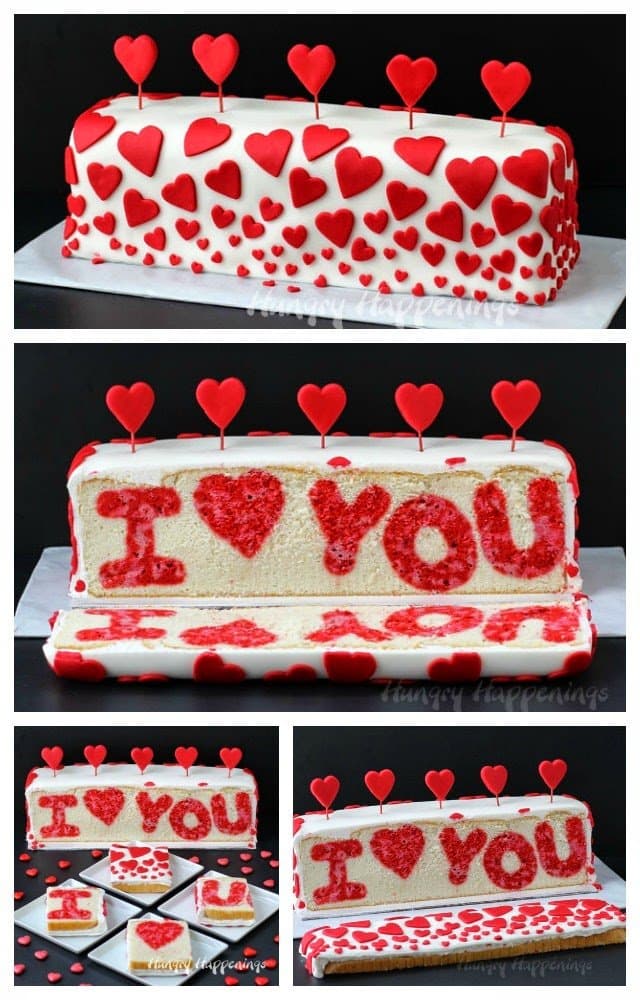
I hated to cut into the cake. It was really the prettiest cake I've ever made, but I was so excited to show off the inside, that I just had to make the cut.
As the knife sliced through the fondant, my heart was racing, the room fell silent, and I said a little prayer. I was really hoping all my hard work paid off.
As the outer slice of cake fell forward to reveal "I ❤ You" it was as if the first fireworks had lit up the sky on the 4th of July.
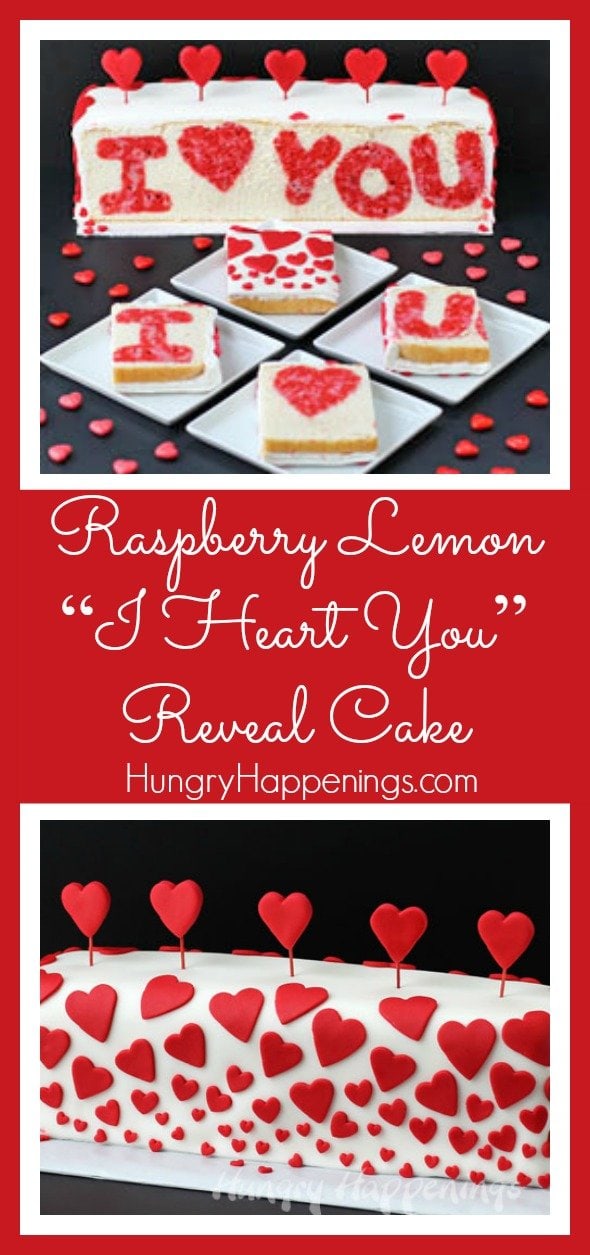
I was so relieved to see it turned out exactly as I hoped. The letters looked great. I love how whimsical the bright red and pink swirled cutouts looked against the background of a bright white cake.
I was even more elated that the flavor combination of lemon and raspberry made this cake "over the top incredible." according to my friend.
I'm not going to say this is an easy project, but seriously hearing all the amazing comments from my friends was so worth the effort and I know you'd get the same reaction from your loved ones too. If you plan to make this cake, give yourself an entire day to complete it. You won't be working that whole time, but the cakes take a long time to bake and cool. You can break up the work over two days, to make it easier on you, like I did.
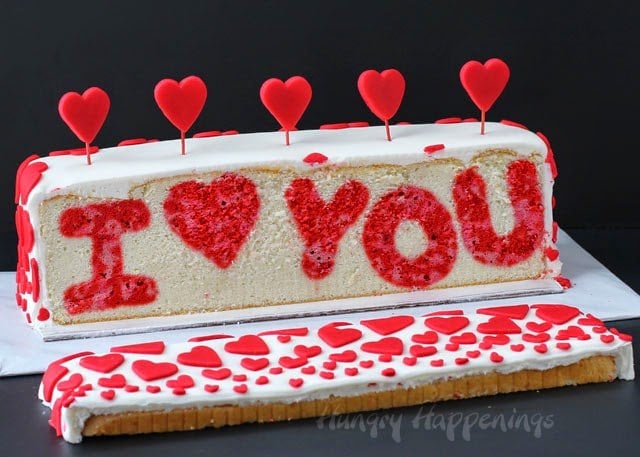
Raspberry Lemon "I ❤ You" Valentine's Day Reveal Cake
Ingredients:
Raspberry Pound Cake Letters -
24 ounces frozen raspberries (to make 1 ⅓ cups puree)
2 (16 ounces) boxes pound cake mix
2 packets powdered whipped topping*
½ cup (1 stick) butter, softened and cut into small pieces
2 whole eggs
2 egg whites
optional: ¼ teaspoon raspberry flavored candy oil
Lemon Pound Cake-
2 (16.25 ounce) boxes white cake mix
2 packets powdered whipped topping mix*
6 ounces cream cheese, softened
1 ¾ cup water
¼ cup freshly squeezed lemon juice
2 tablespoons lemon zest
7 egg whites
*Powdered whipped topping mix can be found in the baking section of your grocery store usually with the powdered pudding and mousse mixes. It will help give your cakes more volume.
Frosting & Decorations-
3 ½ pounds Wilton Creamy White Decorator Icing
40 ounces Wilton Decorator Preferred White Fondant
12 ounces Wilton Decorator Preferred Red Fondant
Instructions:
Preheat your oven to 325 degrees Fahrenheit.

How to make raspberry pureé.
- Heat the frozen raspberries in a saucepan set over medium heat.
- As the raspberries get hot, begin smashing them.
- Once they are broken down, remove them from the heat and pour into a fine-mesh sieve set over a glass measuring cup. Press the raspberries to extract the juice.
- Discard the pulp and seeds.
I actually put my puree through the sieve a second time to make sure all the seeds were removed.
You need 1 ⅓ cup of the raspberry puree for the pound cake recipe. If you don't have enough, add some water. If you have too much, remove some.
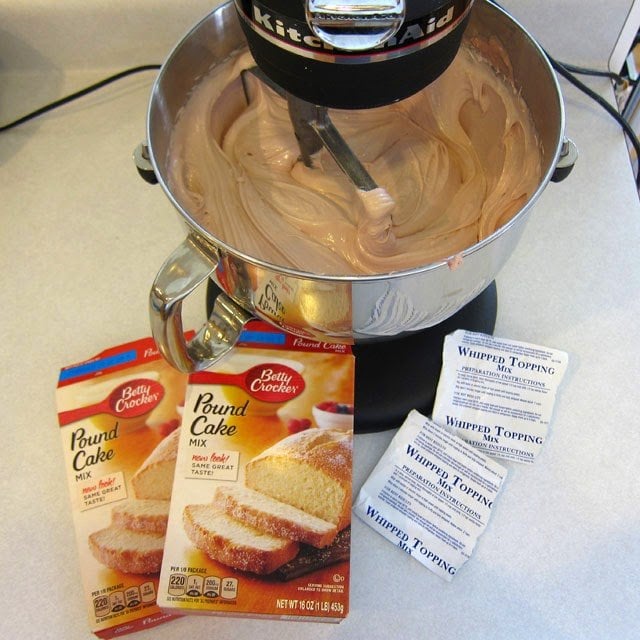
Raspberry Pound Cake Recipe
I suggest making your pound cakes using a stand mixer as the batter is thick and there is a lot of it. If you don't have a stand mixer, then cut the recipe in half and make two separate cake batters.
- Combine 2-pound cake mixes with whipped topping mix and butter.
- Mix on low speed in a stand mixer until the butter is broken up into pea-size pieces.
- Add the raspberry puree, eggs, egg whites, and raspberry flavored candy oil, if using.
- Mix on low speed for 1 minute, then increase speed to medium and beat for 2 minutes.
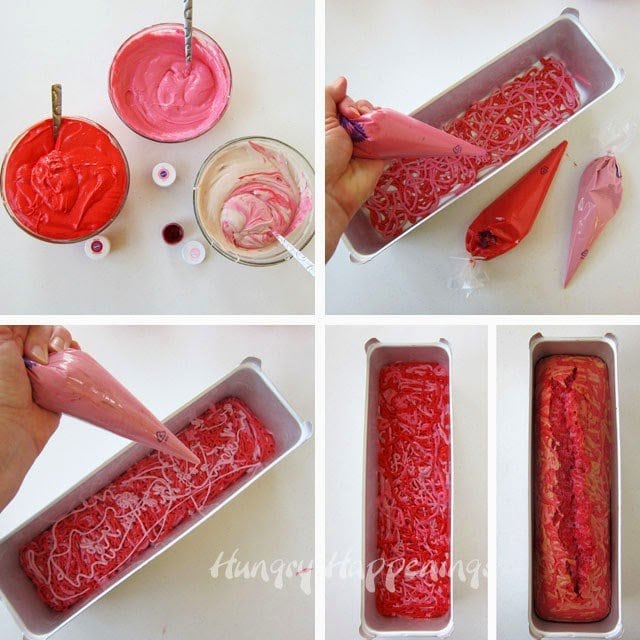
Pipe colored cake batter into the pan.
- Divide the raspberry pound cake batter into 3 bowls and color one red, one bright pink, and one light pink.
- I colored about ½ of the batter red and divided the other half into two bowls to create the two shades of pink. My cakes turned out quite red with flecks of pink. If you want more pink, equally divide the batter.
- Spray a Wilton Long Loaf pan with Wilton Bake Easy Spray.
- Pour each color batter into a Wilton Disposable Pastry Bag.
- Pipe squiggles of batter over the bottom of the pan. Start with red, then light pink, then red, then bright pink. Repeat until you fill the entire pan.
- Tap the pan a few times on the counter to remove any big air bubbles.
- Bake for 70-80 minutes, until a toothpick inserted in the center of the cake, comes out clean.
- Allow the cake to cool for 10 minutes, then remove it from the pan and allow it to cool for 1 hour.
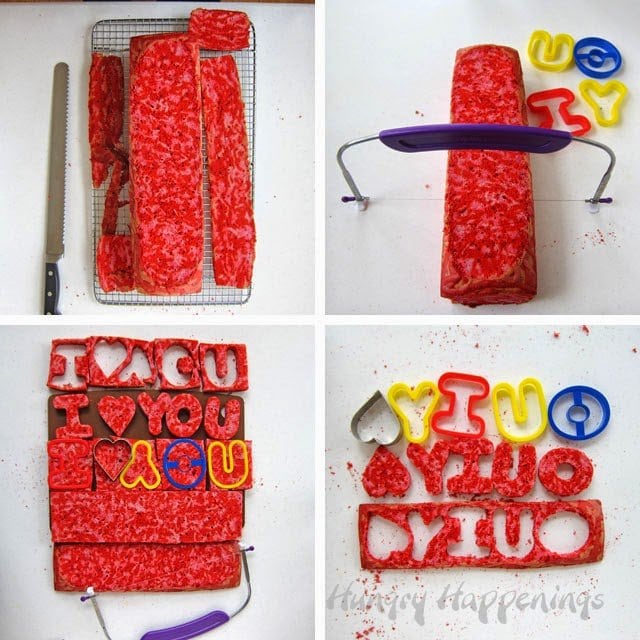
- Trim the cracked top and sides off the cake.
- Use a Wilton Cake Level set at the lowest setting to cut 4 even slices out of the length of the cake. The slices need to be no thicker than the cookie-cutter you will use.
- Cut "I" "Y" "O" "U" and a heart out of each slice.
- My top slice wasn't completely flat at the ends, so I had to rearrange my cutter to get nice even pieces.
- Lay the cake cutouts in a single layer on a cutting board or baking sheet. Freeze for at least 1 hour.
- Once the cut-outs are frozen, you can make the lemon pound cake batter.
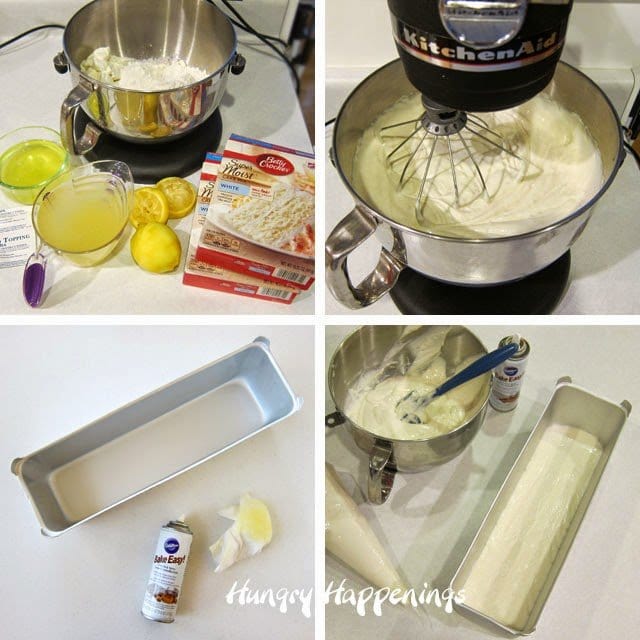
Lemon Pound Cake Recipe
- Combine all the lemon pound cake ingredients in the bowl of a stand mixer.
- Beat on low speed for one minute, then on medium speed for 2 ½ minutes.
- Spray a Wilton Long Loaf pan with Bake Easy Spray. I'd also suggest sprinkling flour in the pan if you are going to use Bake Even Strips around your pan.
- Pour a small amount of cake batter into the pan, filling it about an inch deep.
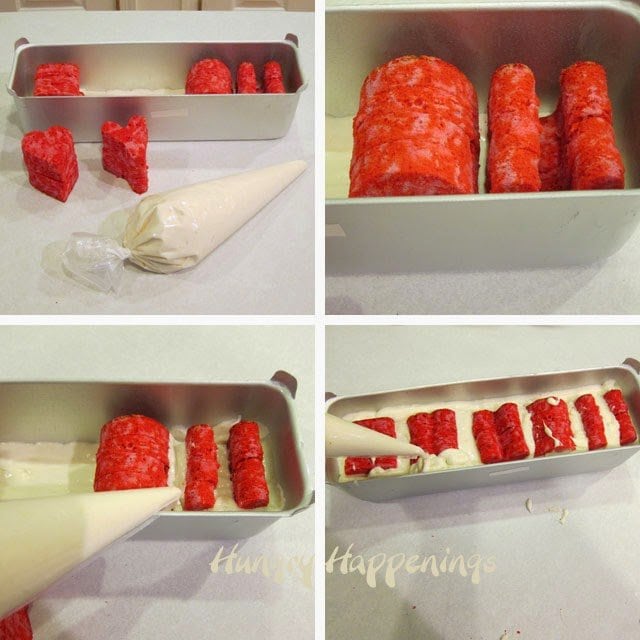
Line up cake letters in the pan.
- Stack the "I" cakes together and set them near one end of the pan, pressing them down into the cake batter.
- Stack the "U" cakes together and set at the opposite end of the pan, pressing them down into the cake batter.
- Stack the "O" cakes together and set next to the "U" cakes, pressing them down into the cake batter.
- Pour some of the cake batter into a 16-inch disposable pastry bag. Pipe some batter around the "U" cakes and in the middle of the "U" cakes and in the middle of the "O" cakes.
- Pipe some batter in between the "I" cakes and the "O" cakes. You want enough to hold the hearts and the "Y" cakes in place.
- Stack the heart cakes together and press into the batter next to the "I" cakes. Do the same for the "Y" cakes. I didn't press mine down quite far enough, so the heart and the "Y" stuck up a bit higher than the other letters, but I kind of liked how it looked.
- Make sure to space the cakes so that there is a little extra space between the "I" and the heart, as well as, the heart and the "Y."

- Cover the letters with the remaining cake batter. Spread it out in an even layer.
VERY IMPORTANT - Mark your cake so you know which is the front (where the letters are facing so they read "I (heart) You." I put a few little heart sprinkles on the cake to mark it.
- Bake the cake at 325 degrees Fahrenheit for 75-85 minutes until a cake tester (or skewer) inserted into the center of the cake comes out clean. When you poke into the cake, you may hit one of the letters. So be sure to check a few spots.
- Allow to cool in the pan for 10 minutes, then turn it out onto a cooling rack to cool completely.
NOTE: I wrapped my pan in Wilton Bake Even strips, which definitely helped my cake bake up nice and level, which is what I wanted for this cake. The only issue with using the Bake Even strips was that the edges of the cake were so moist, that the cake stuck a bit to the pan. If you use them, be sure to spray your pan well and dust it with some flour. That should help.
I also put a tin foil band around the pan because I wasn't sure how high the cake would rise. I didn't need the tin foil, so don't bother.
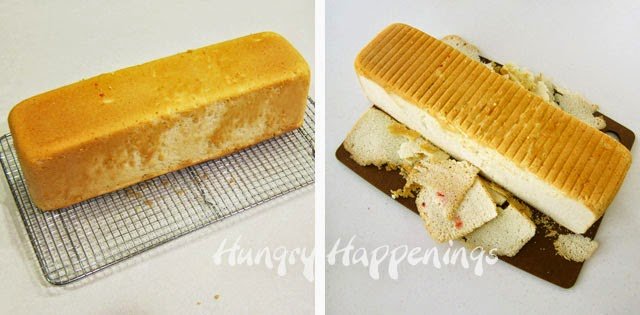
You can see that the sides of my cake (in the picture on the left) are a bit messy because it stuck to the pan a bit. This was not that big of a deal because I had to trim the cake anyway. The pan is slightly angled so trim all four sides of the cake so it has nice straight sides.
I turned the cake upside down to carve it, that's why you see lines on the cake. It's from the cooling rack.
Be sure you keep track of which side is the front of the cake!
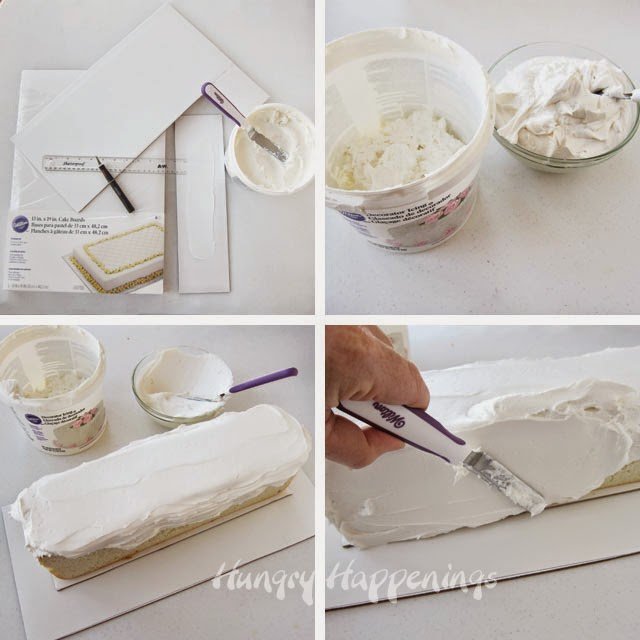
Frost your cake.
- Measure your cake and cut a cake board so that it is ¼ inch larger all around (mine was 15 ¼ inches by 4 ¼ inches.) Put an arrow on the bottom of the board to mark the front of the cake.
- Spread a little frosting on the board, and set the cake on top, with the front-facing in the direction of the arrow.
- You will lose track of the front of the cake as you frost it, so the arrow is helpful.
- Just be careful when you lift it up to look to see which way the arrow is facing.
- Cut a larger board to use as the serving platter, leaving 3 or 4 inches around the cake. This board will also help you turn the cake as you decorate it.
- The Wilton Creamy Decorator Icing in the 4.5-pound tub is medium thickness and you want thin to ice your cake, so thin it out with some water. Add a tablespoon of water at a time until you get a nice spreadable icing. I added about 3 tablespoons to about 3 ½ pounds of icing.
- Use an offset spatula to frost the cake so that you have a very thick layer of frosting all over the cake.

- Use a Wilton Icing Smoother to smooth the sides and top of the cake.
- Hold the smoother upright, and run it along the bottom of the cake board to get straight sides.
- Go around the cake a few times, removing excess frosting as you go.
- Clean the frosting off the smoother as you work.
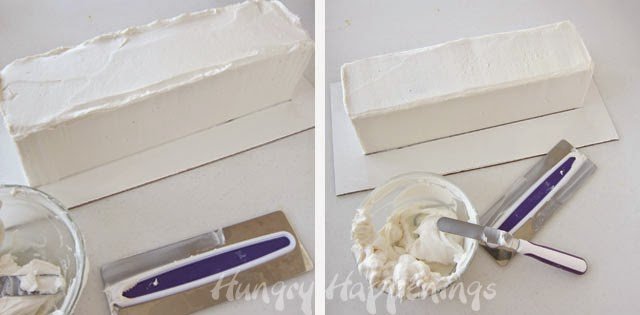
See how much frosting is scraped off the cake?
It's always best to add a lot of frosting then take it off as you smooth it out.
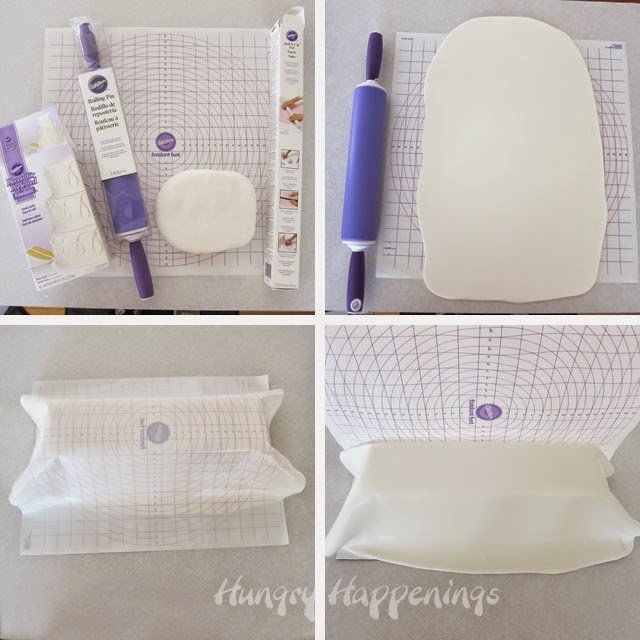
- Roll the white fondant out on a Fondant Mat. You'll need the fondant to be 23 inches long by 15 inches wide. The mat isn't quite long enough, so just roll the fondant out past the edges.
- Pick up the entire mat, set it over the cake so the fondant side is facing down.
- Peel the mat off and the fondant will drape over the cake.
I have to stop here for a brief moment to tell you that I LOVE this mat. Using it made placing the fondant on the cake so easy!!! I have always struggled to lift big pieces of fondant and have ruined cakes in the process of covering them. I will never do it any other way again.
I also love this rolling pin. It has the perfect nonstick surface, is heavy-duty, rolled my fondant perfectly, and comes apart for cleaning.
O.K. back to the cake ...
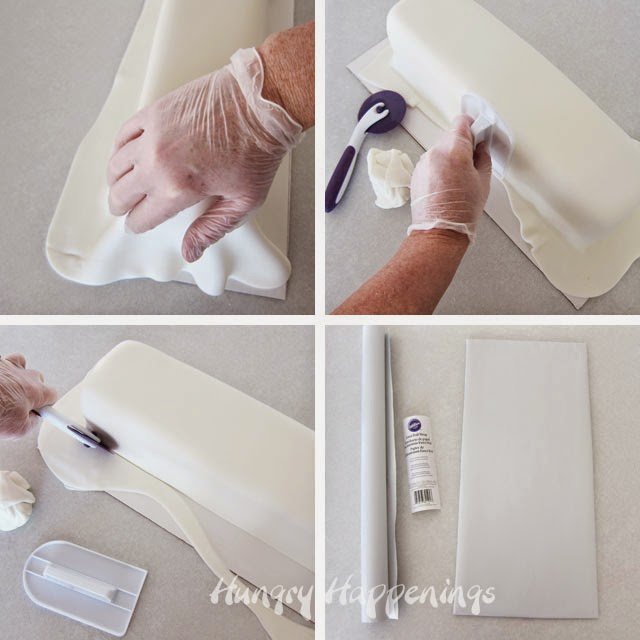
- Use your hands and a fondant smoother to smooth the fondant out over the cake.
Optional: Carefully lift your cake up off the larger cake board. I set mine up on two coffee mugs so it would be easier to pick up the second time. Wipe the large cake board clean, then cover it in Wilton White Decorator Foil. This will give your board a really nice clean look. It covers the edges of the cardboard and looks great.
When you set the cake back down, be sure to look for your arrow, so you know which is the front of the cake.
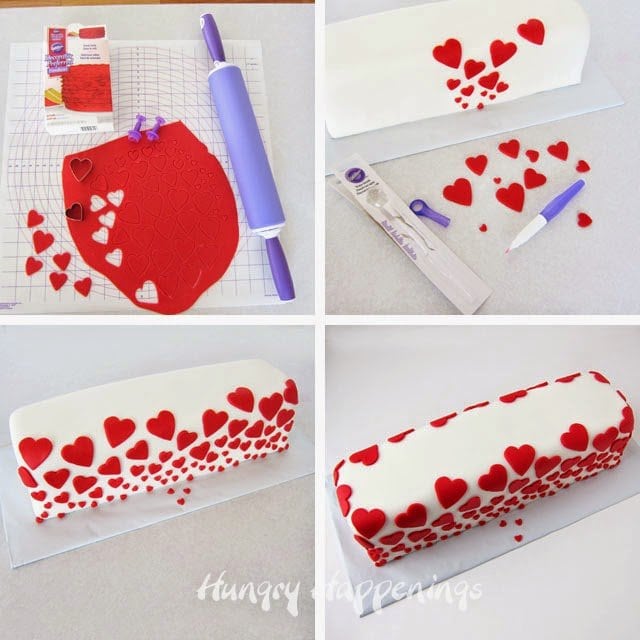
- Roll out the red fondant.
- Cut four different size hearts using cookie cutters and fondant plunger cutters.
- Brush the back sides of the fondant hearts with water using Wilton's Water Brush (which is another amazing tool,) and press them onto the fondant covered cake.
- Place a few tiny hearts on the cake board, to mark the front of the cake.
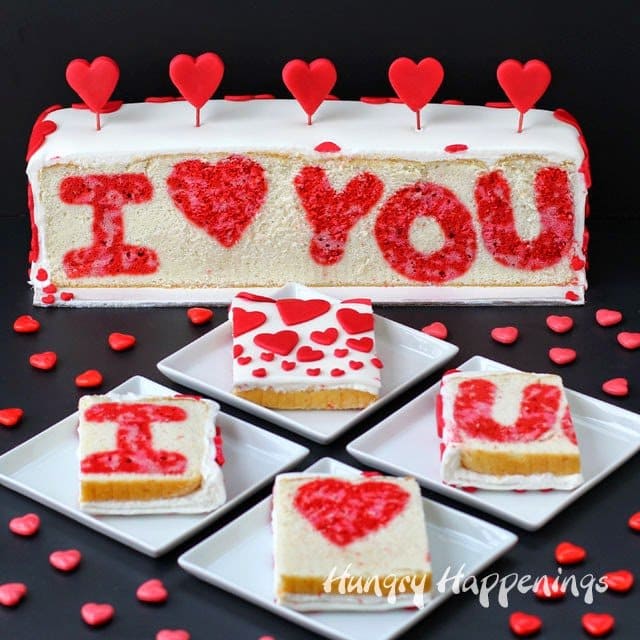
When you serve the cake, you'll need a long serrated knife to cut long slices from the front of the cake to reveal the special message hiding inside. C
ut those long slices into smaller pieces and serve.
You can purchase these items from Amazon.com (commission earned for sales)
 Wilton Performance Long Loa...Shop on Amazon
 Wilton Roll And Cut MatShop on Amazon
 Wilton Fondant Mini Cutouts...Shop on Amazon
 Wilton Cake Icing SmootherShop on Amazon
  Wilton Disposable 16-Inch D...Shop on Amazon
  Wilton 12-Inch Disposable D...Shop on Amazon
 Wilton Adjustable Cake Leve...Shop on Amazon
 Wilton Decorator Preferred ...Shop on Amazon
 Wilton Bake Easy Non-Stick ...Shop on Amazon
 Wilton Water BrushShop on Amazon
 Wilton Angled Spatula, 9-In...Shop on Amazon
 Wilton Creamy White Decorat...Shop on Amazon
 Wilton Alphabet and Number ...Shop on Amazon
 Wilton W7102-04 Decorator P...Shop on Amazon
 Wilton 7-Piece Valentine's ...Shop on Amazon
 Wilton Easy Glide Fondant S...Shop on Amazon
 Wilton Decorate Smart Fonda...Shop on Amazon
  Icing Colors 1 Ounce-Red (n...Shop on Amazon
 Wilton 610-256 Icing Gel, 1...Shop on Amazon
  Wilton 13 x 19 Inch Cake Bo...Shop on Amazon
 Wilton Rolling Pin 12 Inche...Shop on Amazon

Cut into this lemon pound cake to reveal a special message, “I ❤ You”, created by raspberry pound cake letters.
- 24 ounces frozen raspberries to make 1 ⅓ cups puree
- 2 16 ounces boxes pound cake mix
- 2 packets powdered whipped topping*
- ½ cup 1 stick butter, softened and cut into small pieces
- 2 whole eggs
- 2 egg whites
- optional: ¼ teaspoon raspberry flavored candy oil
- 2 16.25 ounce boxes white cake mix
- 2 packets powdered whipped topping mix*
- 6 ounces cream cheese softened
- 1 ¾ cup water
- ¼ cup freshly squeezed lemon juice
- 2 tablespoons lemon zest
- 7 egg whites
- 3 ½ pounds Wilton Creamy White Decorator Icing
- 40 ounces Wilton Decorator Preferred White Fondant
- 12 ounces Wilton Decorator Preferred Red Fondant
-
Preheat your oven to 325 degrees Fahrenheit.
-
Heat the frozen raspberries in a saucepan set over medium heat. As the raspberries get hot, begin smashing them. Once they are broken down, remove them from the heat and pour into a fine mesh sieve set over a glass measuring cup.
-
Press the raspberries to extract the juice. Discard the pulp and seeds.
-
You need 1 ⅓ cup of the raspberry puree for the pound cake recipe. If you don’t have enough, add some water. If you have too much, remove some.
-
Combine 2 pound cake mixes with whipped topping mix and butter.
-
Mix on low speed in a stand mixer until the butter is broken up into pea size pieces.
-
Add the raspberry puree, eggs, egg whites, and raspberry flavored candy oil, if using.
-
Mix on low speed for 1 minute, then increase speed to medium and beat for 2 minutes.
-
Divide the raspberry pound cake batter into 3 bowls and color one red, one bright pink, and one light pink.
-
Spray a Wilton Long Loaf pan with Wilton Bake Easy Spray.
-
Pour each color batter into a Wilton Disposable Pastry Bag.
-
Pipe squiggles of batter over the bottom of the pan. Start with red, then light pink, then red, then bright pink. Repeat until you fill the entire pan.
-
Tap the pan a few times on the counter to remove any big air bubbles.
-
Bake for 70-80 minutes, until a toothpick inserted in the center of the cake comes out clean.
-
Allow the cake to cool for 10 minutes, then remove it from the pan and allow it to cool for 1 hour.
-
Trim the cracked top and sides off the cake.
-
Use a Wilton Cake Level set at the lowest setting to cut 4 even slices out of the length of cake.
-
The slices need to be no thicker than the cookie cutter you will use.
-
Cut “I” “Y” “O” “U” and a heart out of each slice.
-
Lay the cake cutouts in a single layer on a cutting board or baking sheet.
-
Freeze for at least 1 hour.
-
Once the cut-outs are frozen, you can make the lemon pound cake batter.
-
Combine all the lemon pound cake ingredients in the bowl of a stand mixer.
-
Beat on low speed for one minute, then on medium speed for 2 ½ minutes.
-
Spray a Wilton Long Loaf pan with Bake Easy Spray.
-
Pour a small amount of cake batter into the pan, filling it about an inch deep.
-
Stack the “I” cakes together and set them near one end of the pan, pressing them down into the cake batter.
-
Stack the “U” cakes together and set at the opposite end of the pan, pressing them down into the cake batter.
-
Stack the “O” cakes together and set next to the “U” cakes, pressing them down into the cake batter.
-
Pour some of the cake batter into a 16 inch disposable pastry bag.
-
Pipe some batter around the “U” cakes and in the middle of the “U” cakes and in the middle of the “O” cakes.
-
Pipe some batter in between the “I” cakes and the “O” cakes. You want enough to hold the hearts and the “Y” cakes in place.
-
Stack the heart cakes together and press into the batter next to the “I” cakes. Do the same for the “Y” cakes.
-
Cover the letters with the remaining cake batter. Spread it out in an even layer.
-
Mark the pan so you know which way the letters are facing.
-
Bake the cake at 325 degrees Fahrenheit for 75-85 minutes until a cake tester (or skewer) inserted into the center of the cake comes out clean.
-
Allow to cool in the pan for 10 minutes, then turn it out onto a cooling rack to cool completely.
-
Use an offset spatula to frost the cake so that you have a very thick layer of frosting all over the cake.
-
Cover the cake in fondant.
-
Roll out the red fondant.
-
Cut four different size hearts using cookie cutters and fondant plunger cutters.
-
Brush the back sides of the fondant hearts with water using Wilton’s Water Brush (which is another amazing tool,) and press them onto the fondant covered cake.
-
Place a few tiny hearts on the cake board, to mark the front of the cake.
More Cakes
from Hungry Happenings
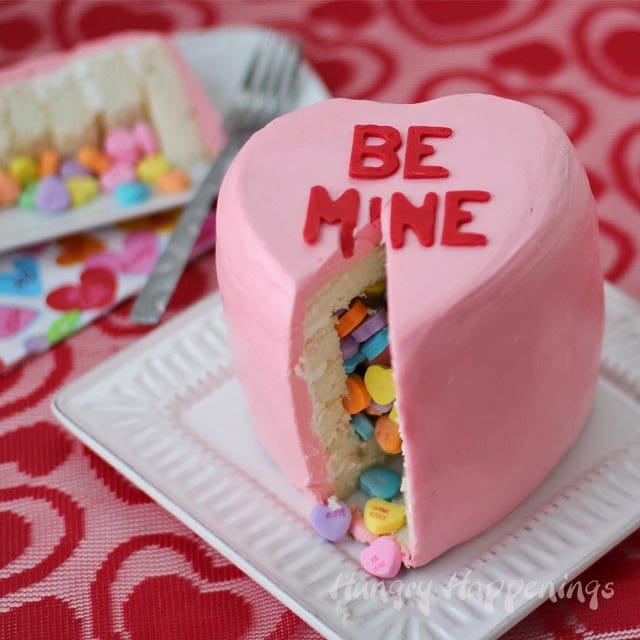
Conversation Heart Pinata Cake
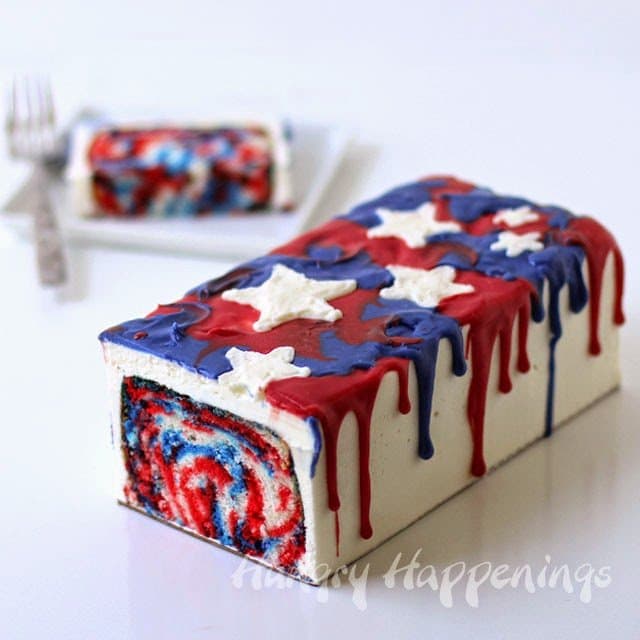
4th of July - Red, White and Blue Tie-Dye Cake
Coconut Cake with Coconut Buttercream and Red and Blue Ganache
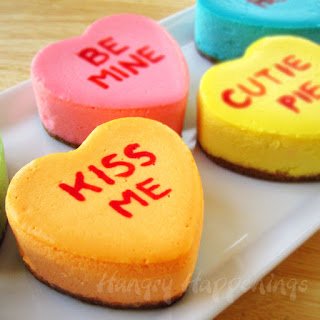
Conversation Heart Cheesecakes
If you are looking for other treats or gifts to make for Valentine's Day,
you might like these other recipes too.

- How to make peanut butter? - February 15, 2024
- OREO Penguins - December 20, 2023
- OREO Snowmen - December 20, 2023

Anonymous
I have always enjoyed making cakes but can't afford all the cool stuff to make them even more awesome. This cake looks great.
Anonymous
Baked most of my life. Took Wilton classes in 2013 and now it's all I want to do. In 2014 I took the new Wilton classes. I trying to get a home cottage bakery up and running. <3 Happy little cake girl.
karen
I'm an advanced beginner? I took one class a LONG time ago, and I make several cakes a year, but nothing too ambitious
Maylin Rodriguez
I'm really new at this but I have fun and I try really hard. I have my fails but I learn from then. 🙂
Anonymous
beth - did you put the letters in at different heights - or did they float up during baking??
LOVE that effect! :0) jodi
beth
I put more batter under the heart and the "Y" and didn't press them down into the batter enough, that is why they are higher than the other letters. Like you, in the end, I loved it. I liked that it was more whimsical looking with the crooked letters.
Anonymous
My cake decorating experience is very basic but I really want to go to the next level and would love to win this one.
heather hgtempaddy@hotmail.com
Angela
Ive made several for family and sold a few to others...i love being creative!
Sugartown Sweets
This cake on it's own is simply gorgeous. I can only imagine how nervous you were cutting into it, especially with others looking on at the same time. But as we all can see, it turned out awesome! I love the "I <3 YOU"!!
It does look a bit labor intensive..but the ones we love are so worth it! Happy Valentine's Day. Can't wait to hear about the WDW trip. 🙂
beth
Thanks:) I was a total wreck cutting into the cake, but that would have happened even without an audience. After spending two days making a cake, the thought of it not turning out as hoped was stressful. I was so relieved to see it was practically perfect.
Happy Valentine's Day to you too:)
Heather Dexheimer SF
Love the great ideas
Marsha A
I absolutely love your blog, recipes and photos. I look at them with awe because they are so amazing and beautiful. So much God-given talent! If I win this, I will "attempt" to make this cake, but I am sure it will turn out looking like a 3 yr old made it. LOLOL. Thanks so much for an awesome giveaway!!
beth
That is so nice to hear. I do feel very blessed to have a creative talent and believe we all have it within us to be creative. I was fortunate to have an artist for a mother who encouraged my creative spirit. I hope I help to encourage yours!
Carlee Scharnhorst
I just recently got into decorating cookies and cakes. I am much more of a cook than a baker or artist... but I have fun trying!
darce
Gorgeous
beth
Thanks, Darce:)
Amy
I love to decorate but I do basic stuff and I have never used fondant!
Anonymous
I took a cake decorating class for 8 weeks at the local community college, had fun but that was many years ago and I am far from being a great cake decorator!!!
Sandy H
Love your cake. I haven't tried the cut out method and would start with maybe just hearts inside.
beth
Thanks, Sandy. I think starting with simple hearts is a great plan. It's a good way to try out the technique.
Kristen
I have made a few cakes for my kids' birthdays. I have not used real fondant, only homemade marshmallow fondant. My goals for the cakes I have are much higher than my actual ability, but they usually came out ok (though I usual run out of time and don't get to finish decorating it). I would love to have the actual tools for making/decorating the cakes; it would make it so much easier (especially the fondant mat! I have the hardest time moving large pieces). Thanks for the giveaway!
Anonymous
love to decorate! new. self taught. always eager to learn!
endwillnev
I have only decorated basic cakes with basic frosting, but I would like to try fancy piping at some point...!
Rachel Clayson
I am not new to cake decorating but I am no means an expert! My fondant work is much better than icing decorations. I love this cake idea!
beth
Thanks, Rachel. I made a handful of cakes back in the 80's before fondant came on the scene. Working with icing can be very challenging, that is for sure. Fondant is a nice tool to use to decorate a cake.
Sue
I am definitely a novice cake decorator, but I have fun! Your cake is AMAZING and perfect!
beth
Thanks, Sue. I've really only been decorating cakes seriously for a little over a year and have learned so much.