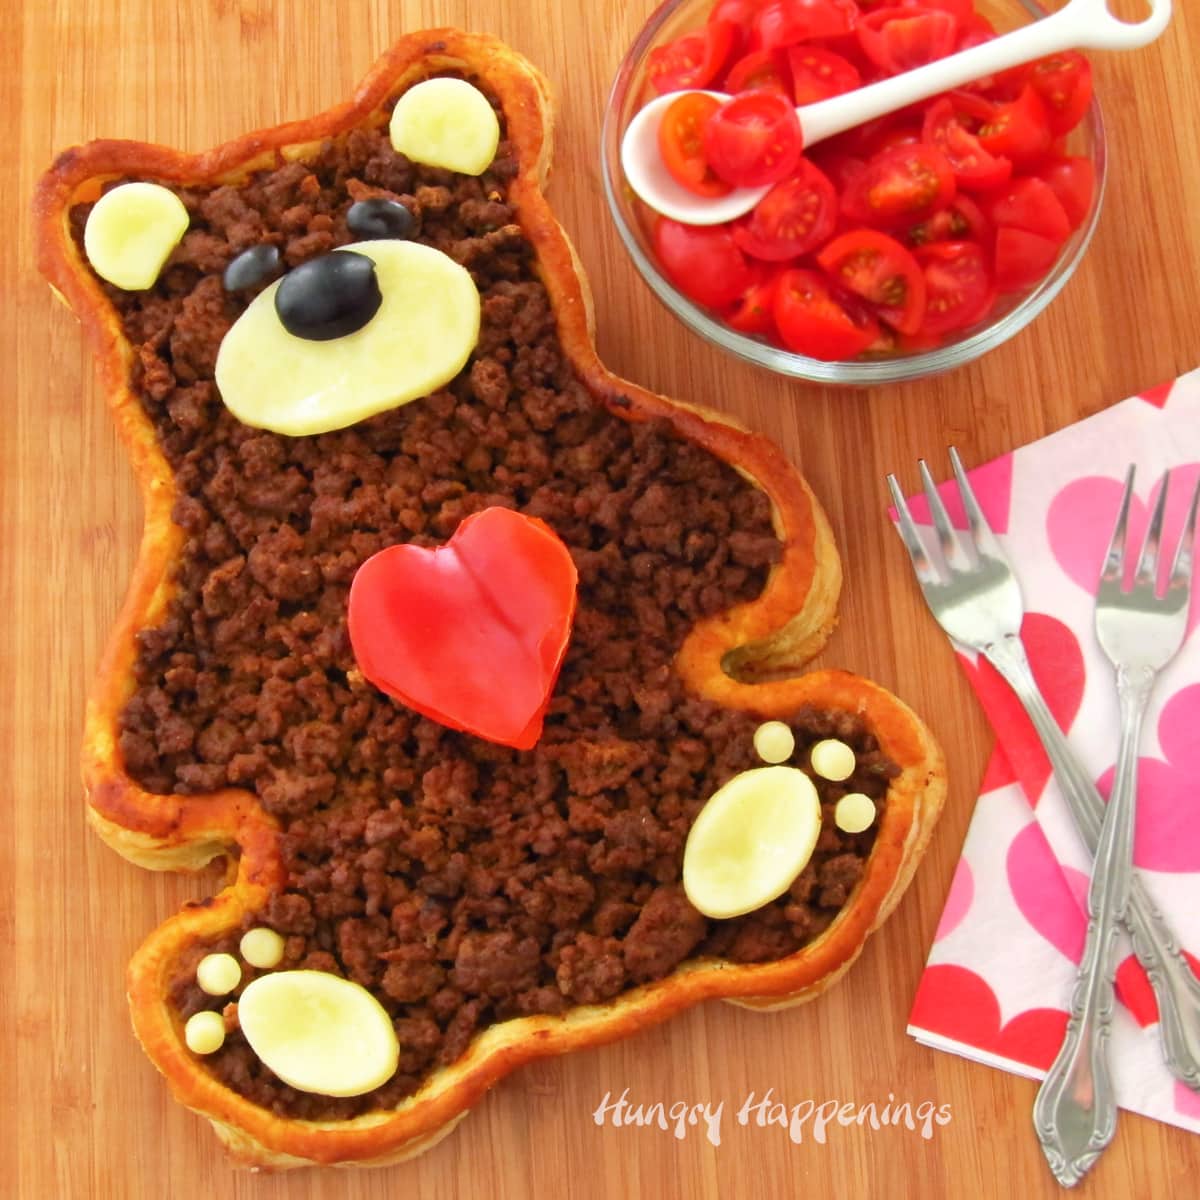
This adorably cute Teddy Bear Taco Tart is fun to serve on Valentine's Day, at a birthday party, or even for a baby shower. The bear-shaped puff pastry crust is filled with taco meat, cheese, olives, and tomatoes.
If you are looking for a family-friendly Valentine's Day dinner or a fun birthday party meal, or a baby shower appetizer, make this delicious taco tart.
Kids of all ages will love this festive-looking meal. It's easy to make using a sheet of frozen puff pastry and your favorite taco fillings.
You simply cut out the puff pastry sheet into a teddy bear shape, top, and bake.
Ingredients
1 sheet puff pastry, thawed according to the instructions on the box
egg wash (mix 1 egg with 1 teaspoon water) or use milk or cream
¾ cup blended shredded Mexican cheese
2 cups cooked taco meat
Decorations:
2-3 slices of white cheese
2 black olives
1 slice of red pepper or tomato
Supplies
teddy bear template
rolling pin
knife and/or a pastry wheel
parchment paper
baking sheet
pastry brush
fork
optional, small oval cutter and a #12 round pastry tip to cut decorations
You can find some of these supplies on Amazon. I earn a small commission for any sales at NO extra cost to you.
 Wilton Better Baking Pastry...Shop on Amazon
 Wilton Fondant Roller, 20-I...Shop on Amazon
") ChefLand Parchment Paper Pa...Shop on Amazon
ChefLand Parchment Paper Pa...Shop on Amazon Makin's Clay Cutters 22/Pkg...Shop on Amazon
Instructions
Cut out a teddy bear.
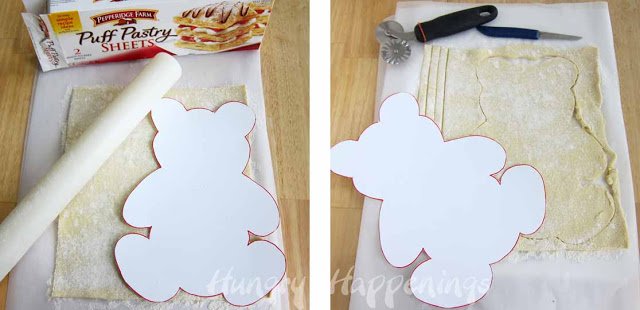
- Print and cut out the teddy bear template.
- Lightly dust a piece of parchment paper with flour.
- Unfold the thawed sheet of puff pastry and set it on the parchment paper. Pinch together the seams, if necessary.
- Lightly dust the top of the puff pastry with flour.
- Use the rolling pin to roll the dough out so that it is 11" long.
- Set the teddy bear template over one side of the pastry.
- Use a knife to cut out the teddy bear shape.
- Cut four ¼" wide strips from the remaining dough.
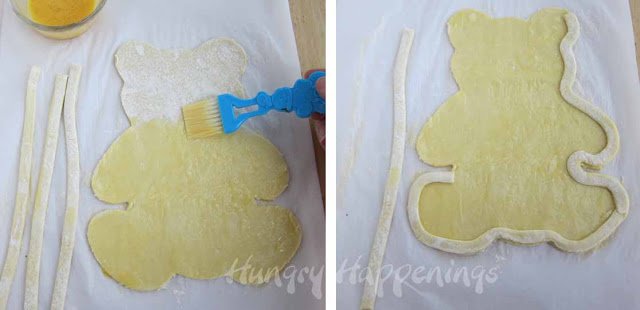
Brush with egg wash and make a border.
- Brush egg wash, milk, or cream all over the teddy bear.
- Lay the strips along the edge of the teddy bear pinching the seams together where necessary.
- Cut off any excess dough.
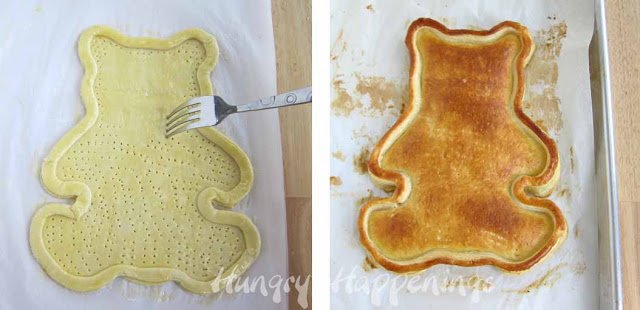
Bake.
- Lift up the sheet of parchment paper and set the teddy bear on the baking sheet.
- Use a fork to prick holes all over the dough not including the border.
- Refrigerate for 30 minutes.
- Preheat oven to 400 degrees while the is chilling.
- Bake dough for 15-18 minutes until deep golden brown.
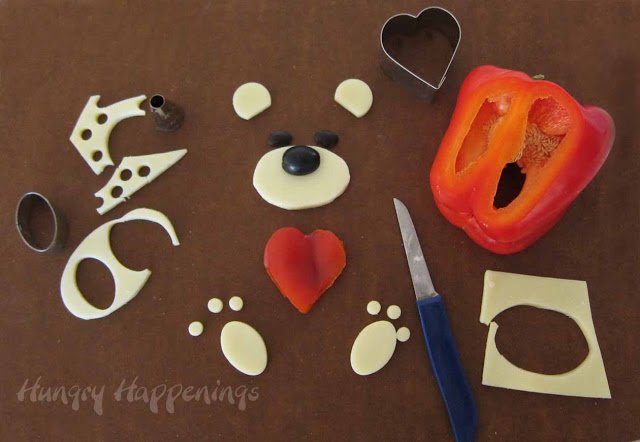
Cut out the teddy bear decorations.
- While the teddy bear tart crust is baking, create the decorations.
- Cut one large oval from a slice of cheese to be the bear's snout two small ovals for the paws and six tiny circles for the toes. I used a knife, a small oval cookie cutter, and a #12 round pastry tip.
- Cut two circles then cut a third off of each for the ears.
- Cut the black olives in half lengthwise and set one, flat side down, on the large cheese oval to make a nose.
- Cut two small ovals out of the other olives to make eyes.
- Cut one slice of red pepper or tomato into a heart shape using a cookie cutter or knife.
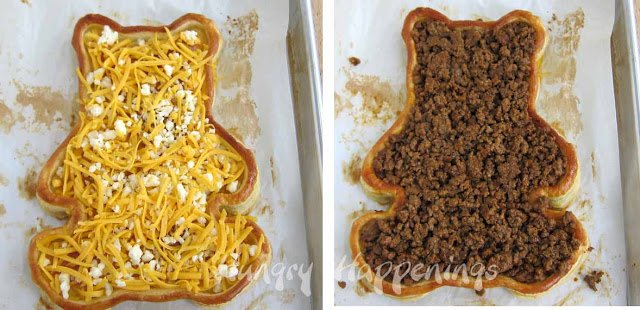
Fill the tart crust with taco fillings.
- Remove baked pastry crust from oven and carefully top with cheese then taco meat.
- Bake for an additional 8-10 minutes until heated through.
- Note: I know it looks like I added feta cheese, but that is actually Monterey Jack cheese. I just crumbled up the scraps after making my decorations (pictured above) then added some cheddar to go along with it.
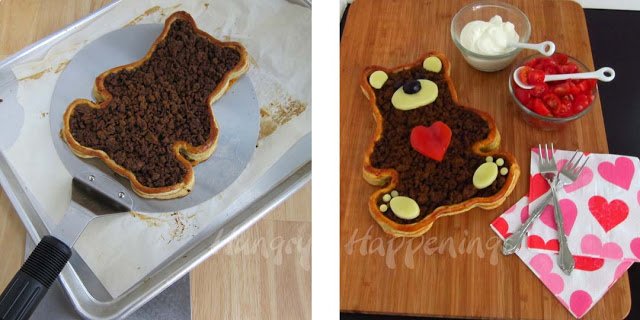
Bake and decorate.
- Immediately remove from oven and move onto a serving platter or cutting board using a large spatula, an oven spatula, or pizza peel.
- Add the eyes, ears, paws, and snout.
- Serve hot along with sour cream, tomatoes, and if you like, jalapenos and guacamole.
Variations
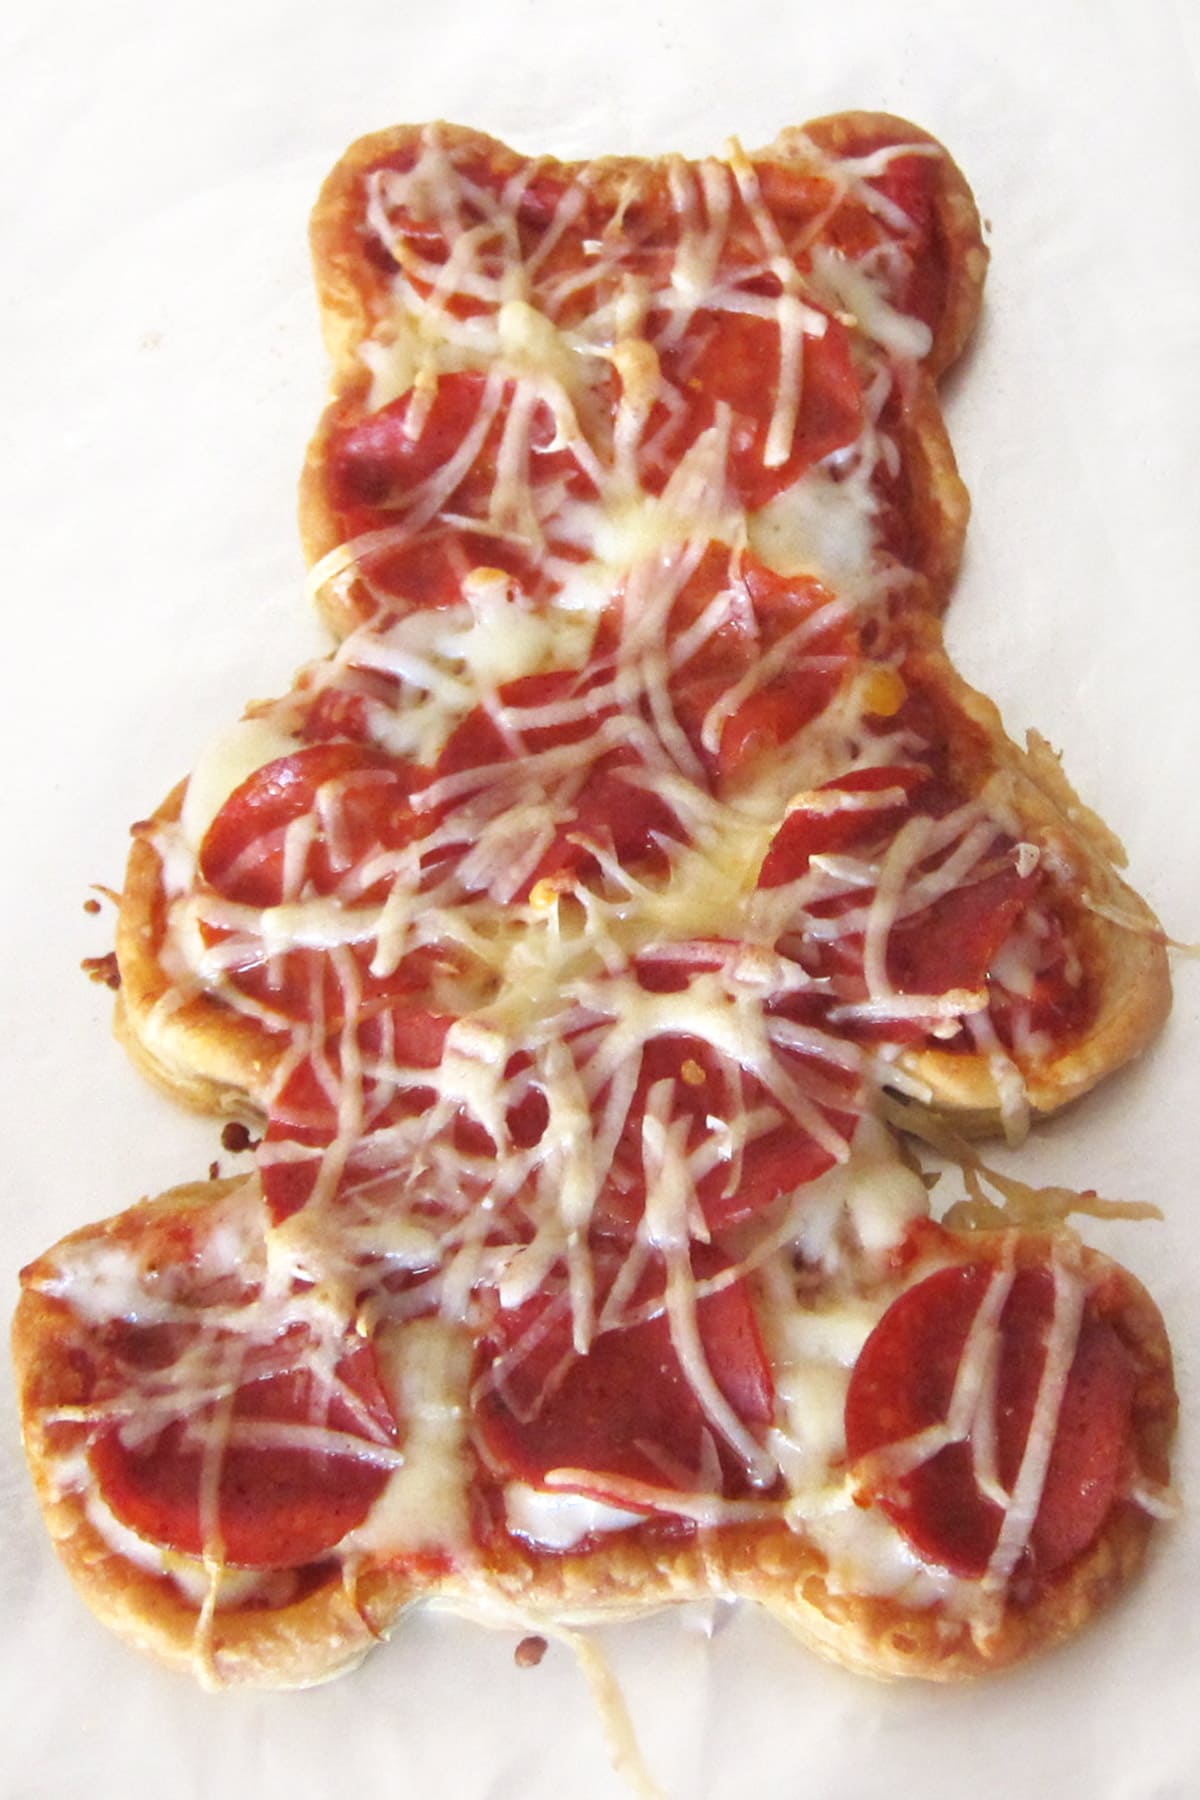
You can top your teddy bear pastry crust with pizza toppings if you prefer. I made this Teddy Bear Pizza using pizza sauce, pepperoni, and mozzarella cheese.
You could serve both the taco tart and pizza at the same Valentine's Day or birthday party. They'd go great together.
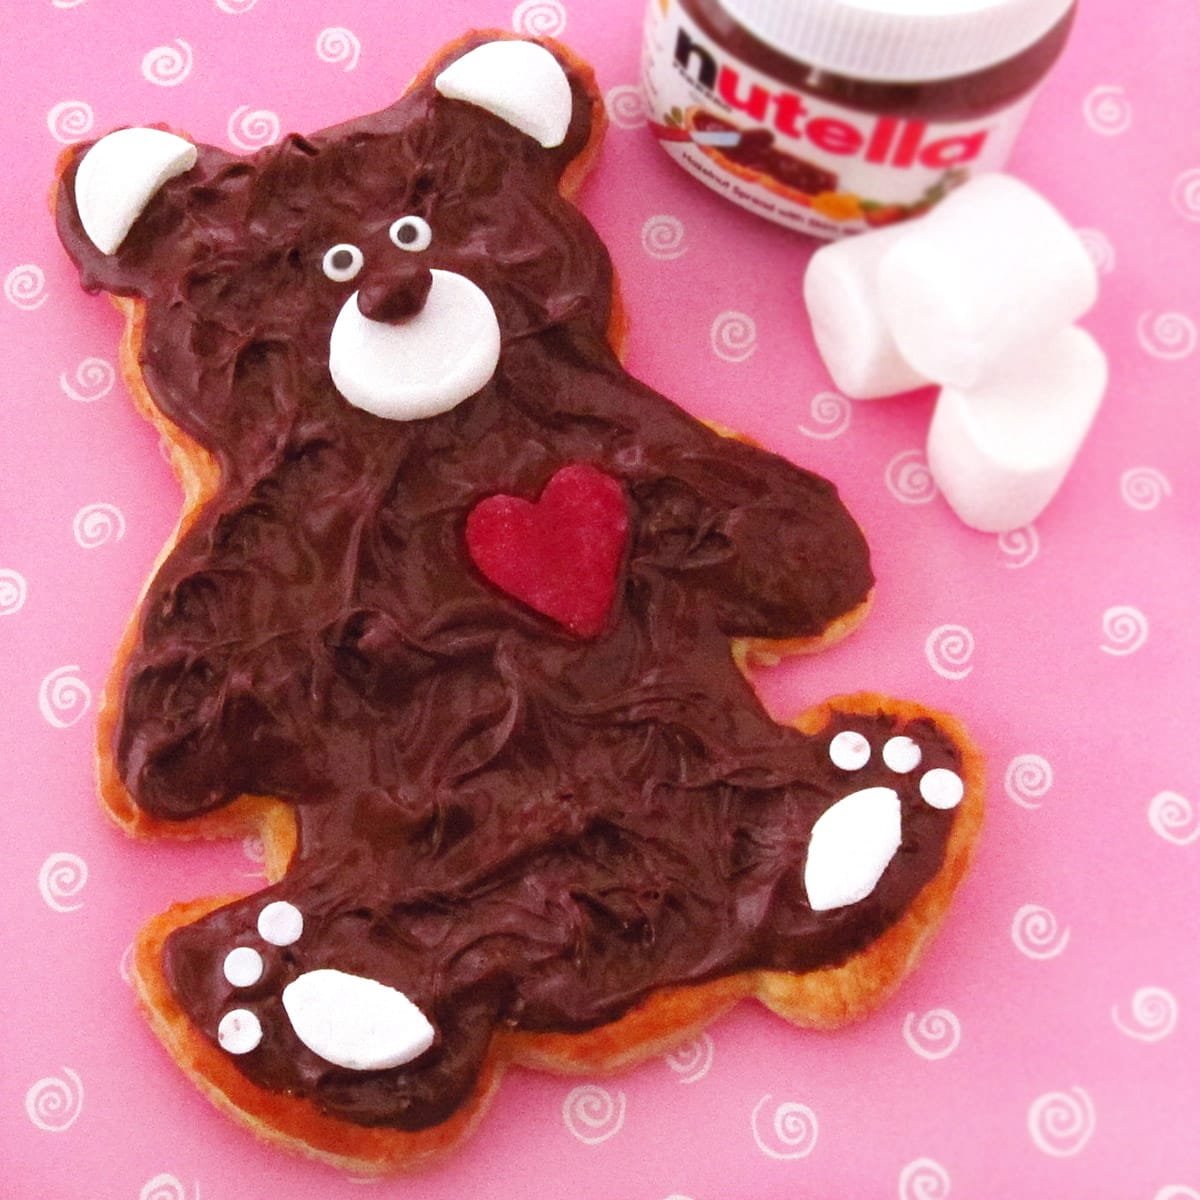
You can fill the baked puff pastry with Nutella instead. To decorate it, cut out marshmallow ears, snout, and paws. Attach a brown M&M nose to the marshmallow snout. Add two candy eyes and one candy heart.
This sweet version of this teddy bear tart will be a perfect accompaniment to either a taco bear or a pizza bear.
Related Recipes
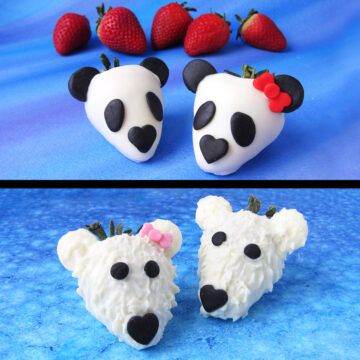
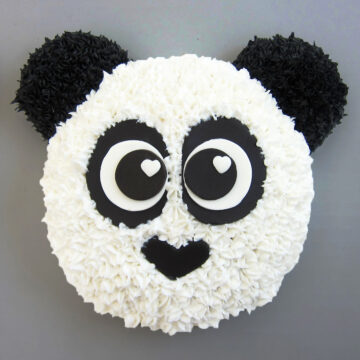
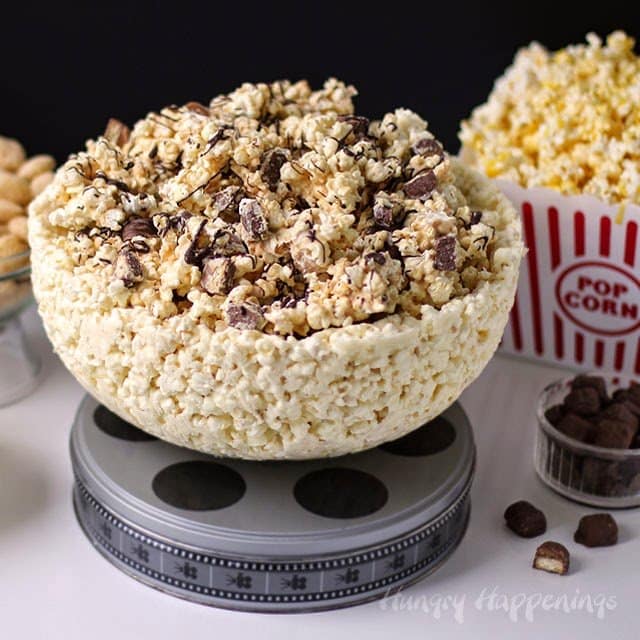
You might also like to make these other bear-themed recipes for your party.


Recipe

This cute teddy bear-shaped taco tart has a puff pastry crust filled with taco meat, cheese, olives, and tomatoes. It's a fun kid-friendly Valentine's Day dinner, birthday party meal, or baby shower appetizer.
- 1 sheet puff pastry, thawed according to the instructions on the box
- egg wash, mix 1 egg with 1 teaspoon water or use milk or cream
- ¾ cup blended shredded Mexican cheese
- 2 cups cooked taco meat
- 2-3 slices of white cheese
- 2 black olives
- 1 slice of red pepper or tomato
-
Print and cut out the teddy bear template.
-
Lightly dust a piece of parchment paper with flour.
-
Unfold the thawed sheet of puff pastry and set it on the parchment paper. Pinch together the seams, if necessary.
-
Lightly dust the top of the puff pastry with flour.
-
Use the rolling pin to roll the dough out so that it is 11" long.
-
Set the teddy bear template over one side of the pastry.
-
Use a knife to cut out the teddy bear shape.
-
Cut four ¼" wide strips from the remaining dough.
-
Brush egg wash, milk, or cream all over the teddy bear.
-
Lay the strips along the edge of the teddy bear pinching the seams together where necessary.
-
Cut off any excess dough.
-
Lift up the sheet of parchment paper and set the teddy bear on the baking sheet.
-
Use a fork to prick holes all over the dough not including the border.
-
Refrigerate for 30 minutes.
-
Preheat oven to 400 degrees while the is chilling.
-
Bake dough for 15-18 minutes until deep golden brown.
-
While the teddy bear tart crust is baking, create the decorations.
-
Cut one large oval from a slice of cheese to be the bear's snout and two small ovals for the paws and six tiny circles for the toes. I used a knife, a small oval cookie cutter, and a #12 round pastry tip.
-
Cut two circles then cut a third off of each for the ears.
-
Cut the black olives in half lengthwise and set one, flat side down, on the large cheese oval to make a nose.
-
Cut two small ovals out of the other olives to make eyes.
-
Cut one slice of red pepper or tomato into a heart shape using a cookie cutter or knife.
-
Remove baked pastry crust from oven and carefully top with cheese then taco meat.
-
Bake for an additional 8-10 minutes until heated through.
-
Immediately remove from oven and move onto a serving platter or cutting board using a large spatula, an oven spatula, or pizza peel.
-
Add the eyes, ears, paws, and snout.
-
Serve hot along with sour cream, tomatoes, and if you like, jalapenos and guacamole.
Serving and Storage
This taco tart is best served immediately after it is made. You can store leftovers in the refrigerator for up to 2 days. Reheat in the oven at 300 degrees for 8-10 minutes until the meat is warmed through.
Template
Get the teddy bear template here - https://files.hungryhalloween.com/teddy%20bear%20template.pdf

- Banana Split Bars – A Fun and Easy Summer Dessert - March 4, 2026
- Pineapple Fudge (No Candy Thermometer Needed!) - March 4, 2026
- No-Bake Peanut Butter Pie Recipe - March 3, 2026

Cheese and Pickles says
This is one way to make a personalised teddy bear ! I never thought of doing anything like this for my children, thank you for idea.
Nana says
Finally I found a great recipe for my silicone teddy bear mould, rather than cake & jelly ^.^
CREATIVE BETH <3
personalised teddy bear says
Really great idea, Thank you for sharing.
Beth (www.livinglifeintentionally.blogspot.com) says
GORGEOUS!! You are seriously amazing!!! Is every dinner at your house this amazing?!? WOW! Thanks for linking up to TGIF =-)
Beth
Beth Jackson Klosterboer says
Thanks Beth. Oh, I wish every meal I prepared were this fun, but I spend so much time working on recipes for my blog, many of which are sweets, that by the time I need to make dinner, I'm tired and I just chop up veggies for a salad.Fortunately my husband doesn't mind, especially if he gets to indulge in cheesecakes and peanut butter fudge for dessert. Tonight for Valentine's Day, I am actually making homemade meatballs and sauce. The sauce is simmering on the stove now. I'm trying a new recipe, so I hope it's good.
Jo and Sue says
Thought I'd let you know Sue and I gave this a go. It worked wonderfully!!! We made a boy and girl bear. I put a sneak peak up if you want to have a look. http://joandsue.blogspot.com/2012/02/valentines-food-ideas.html We also tried your Conversation Heart Cheesecakes. Your ideas are making Sue and I look like geniuses - keep up the good work 🙂 lol
Beth Jackson Klosterboer says
I am so in love with your pair of teddy bear taco tarts that I not only added your picture in my reader's gallery, but I also added it to my post so that everyone looking at the recipe would see what a wonderful idea you had. You ladies are geniuses!!!!
Jo and Sue says
Thank you for adding our pic 🙂 We have a few more up now!! http://joandsue.blogspot.com/2012/02/beary-cute-taco-tarts.html
Beth Jackson Klosterboer says
Hi Jill, I hope your first linky party is going well. I linked up this and a few others. Happy Valentine's Day.
Trish - Sweetology101 says
just so much fun!!!
Wendy Mac says
Wow!! That is amazing, you are so creative!!
Wendy
Wendymacdesigns.com
Beth Jackson Klosterboer says
Thanks Wendy, I'm glad you like them.
Tiffany Yang says
I love that Nutella bear. He is so cute!
Beth Jackson Klosterboer says
Thanks Tiffany, it was really tasty too. My husband ate most of it, but I was able to sneak a few bites.
Tiffany Yang says
My husband doesn't like cute food. Sigh.....
Beth Jackson Klosterboer says
Oh, my! I guess you make all of your amazingly adorable food for you and your son. I'll have to admit that my husband also thinks food should look like, well, what food is meant to look like, but he does sometimes get a kick out of my creations. He especially likes what I make for our Halloween parties and has accepted the fact that he'll dine on themed cuisine at least twice a week.
Rina says
Super adorable, my son will love this! Thanks for the step-by-step tutorial. Loving your blog:)
Beth Jackson Klosterboer says
Thanks Rina. Have fun making them for your son!
Diana - FreeStyleMama says
That is so adorable and it's actually something I think I could make. Oh the possibilities of shapes! Thanks for linking up at Thematic Thursday.
Beth Jackson Klosterboer says
I know, I think there are endless possibilities with this idea and I'm sure I'll make some more of them in the future.
Dorothy @ Crazy for Crust says
Wow, that's so great. I love all the variations you made with your "failures" (which looked pretty good to me!), especially the Nutella one, yum. I could eat this whole Taco Teddy myself!
Beth Jackson Klosterboer says
Thanks Dorothy, We did indeed enjoy eating all of the goofs, especially the Nutella one. My husband and I shared the taco tart, but he said he could have eaten the whole thing too!
Liz @ A Nut in a Nutshell says
This is just so incredibly cute! I am loving your blog!
Beth Jackson Klosterboer says
Thanks Liz, I'm happy to hear it.
CuteEverything.com says
Sorry you were sick! This looks adorable and I love the nutella one, too!
Beth Jackson Klosterboer says
Thanks Michelle, I'm feeling 100% better now.
marissa says
you are one creative gal that would be so fun to serve and eat! I would love you to add this and any other posts you want to show off to my What We Wore and Made party over at http://raegunwear.blogspot.com/search/label/WWWMW
Beth Jackson Klosterboer says
Thanks for the invite. I linked up this recipe.
Heather McMullin says
Come share this fabulous recipe at my Famous Linkz Party!!
-Heather
@ www.made-famous-by.com
Beth Jackson Klosterboer says
Thanks for the invite Heather. I linked up this recipe. It would be really amazing to hear people say "this recipe was made famous by..." and hear my name attached. I love the concept of your blog.
shopannies says
love it too cute and tasty come see what I shared at http://shopannies.blogspot.com
Beth Jackson Klosterboer says
Thanks!
Jo and Sue says
Oh my gosh...that is so amazing. Once again you have blown us away with your creativity. So cute. Thank you for the inspiration - I really want to give this a try now 🙂
Beth Jackson Klosterboer says
Thanks:) The best thing about this idea is that you can cut this pastry into any shape your heart desires. I look forward to seeing how this idea inspired you two. I just love what you have done with my recipes so far. You inspire me too!
Jan says
I love how honest you are about making your wonderfull foods, and having problems on your own.
That way I could imagine to try It myself, even if it won't come out perfect the first time.
Keep on going. I love your blog because it gives me so much inspiration.
Beth Jackson Klosterboer says
Thanks you Jan. I don't want people to feel intimidated by my recipes and feel it is important for you to know that there are times when it takes me a few tries to get a recipe just right. I hope that all my work makes it easier for my readers to make it right the first time without a great deal of effort so you can have fun in the kitchen.