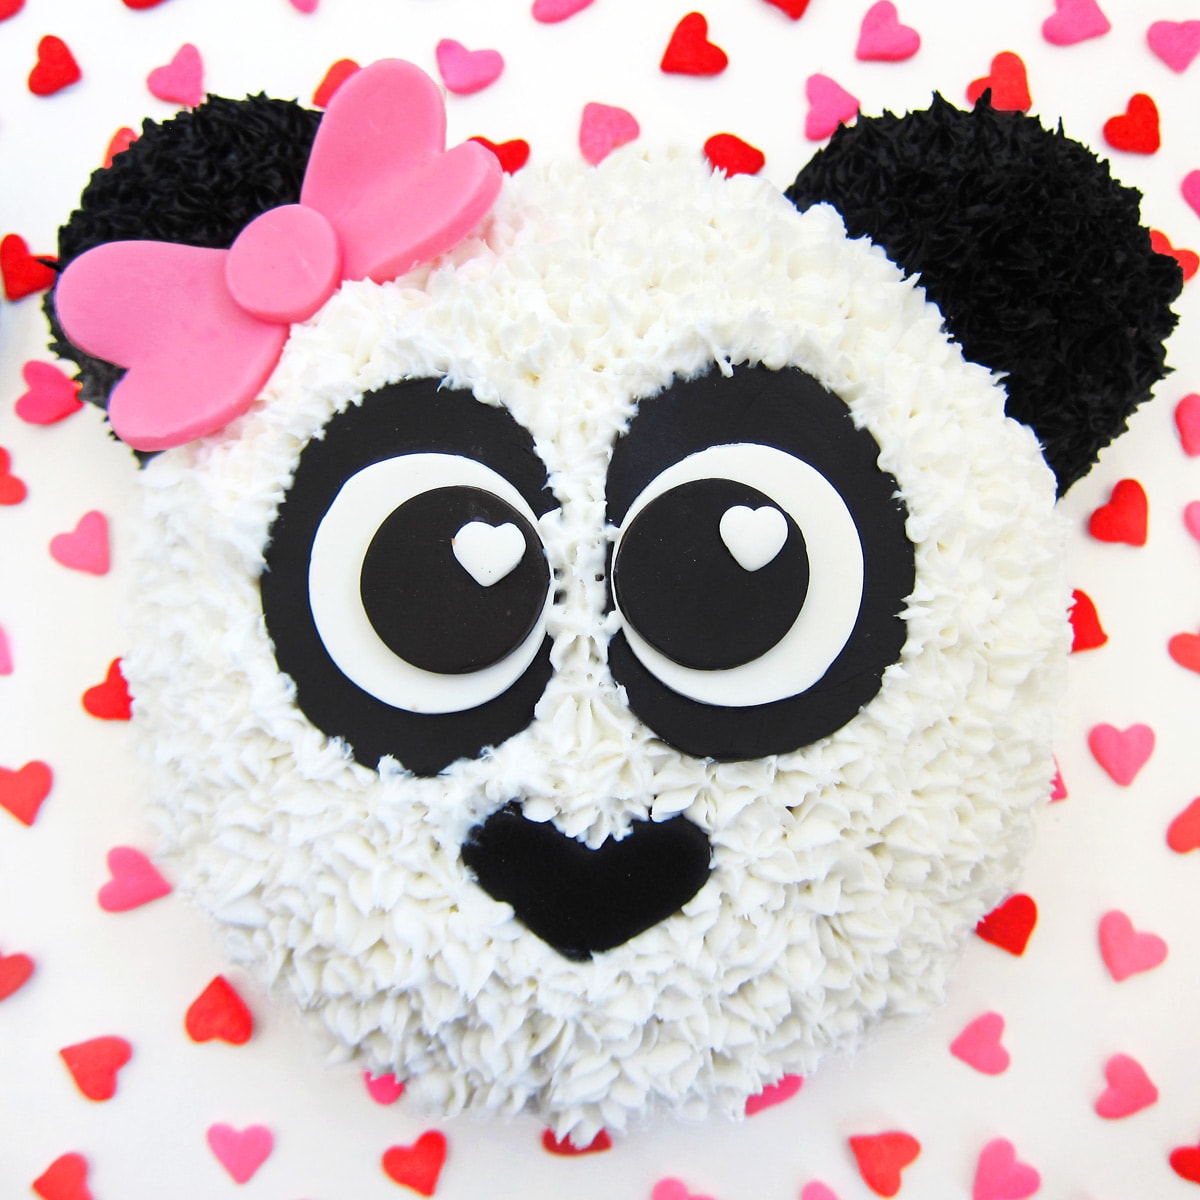
Learn how to make the cutest Panda Cake using round cakes and cupcakes decorated with white and black frosting and modeling chocolate or fondant toppers. These easy panda cakes will be fun to serve for Valentine's Day, a baby shower, a birthday party, or Sweetest Day.
I've been wanting to make a cute panda cake ever since I saw the most adorable Valentine's Day box designed by Snowy Bliss.
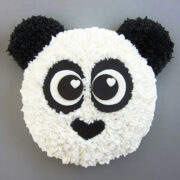
I took inspiration from her craft and gave my pandas heart-shaped noses and heart-shaped highlights in their eyes.
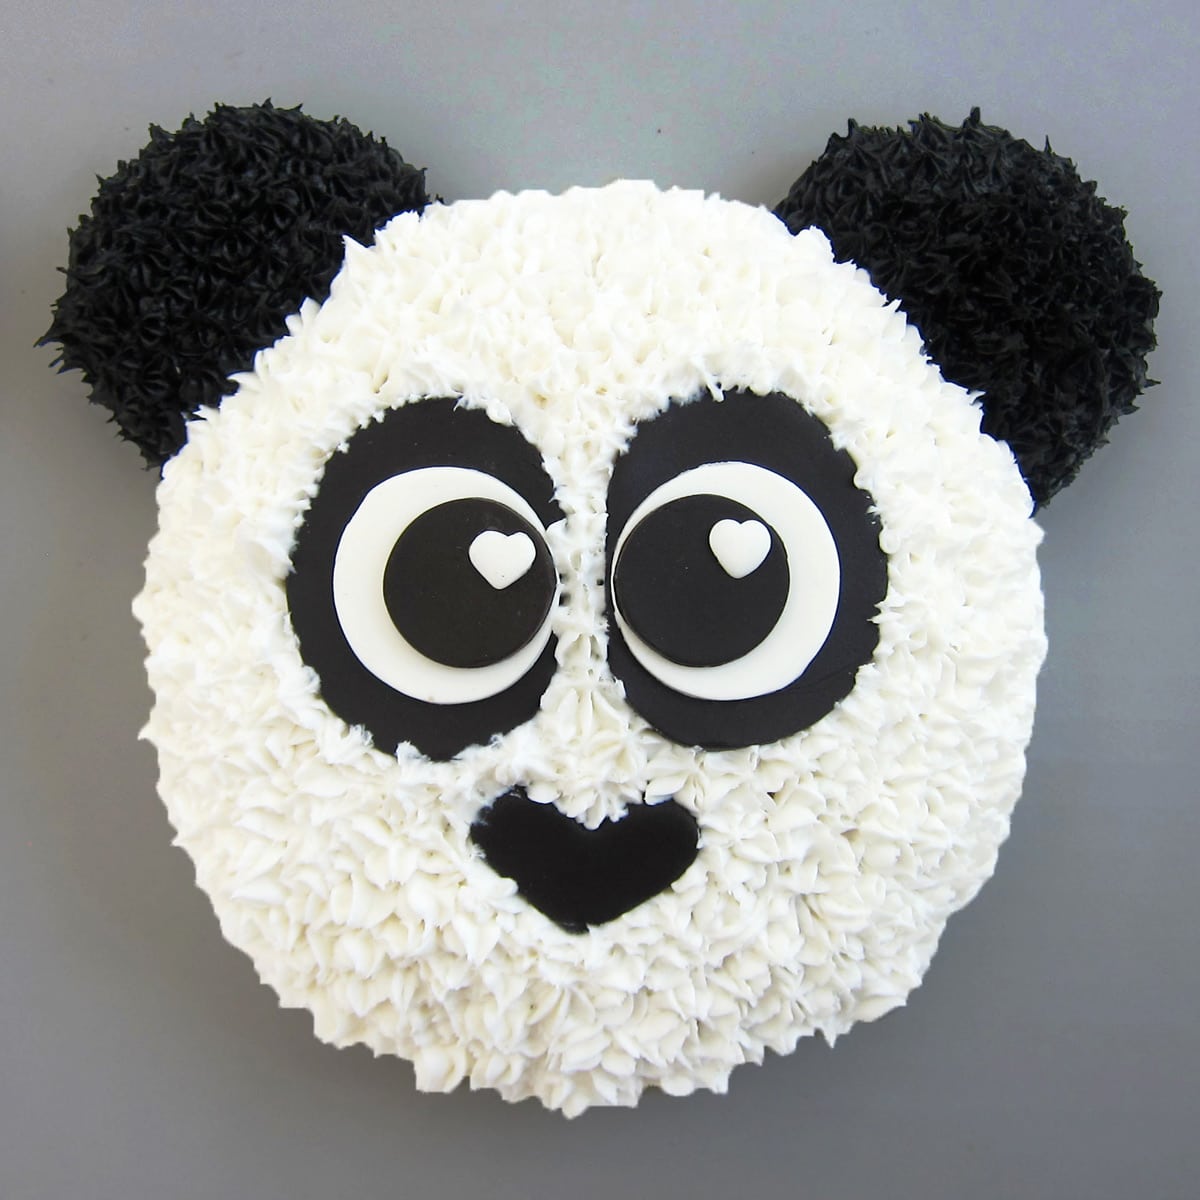
Each cake was so easy to decorate using black and white frosting. I piped frosting stars over the surface of the cake, then added modeling chocolate features.

To keep it simple, I doctored a white cake mix and baked two six-inch round cakes and some cupcakes. Since I had enough batter for two cakes, I made one a boy panda and one a girl panda.
They are seriously so darn cute! They were a perfect dessert for Valentine's Day. They'd also be fun to serve at a baby shower or birthday party.
So, let's make some panda cakes!
Step-By-Step Tutorial
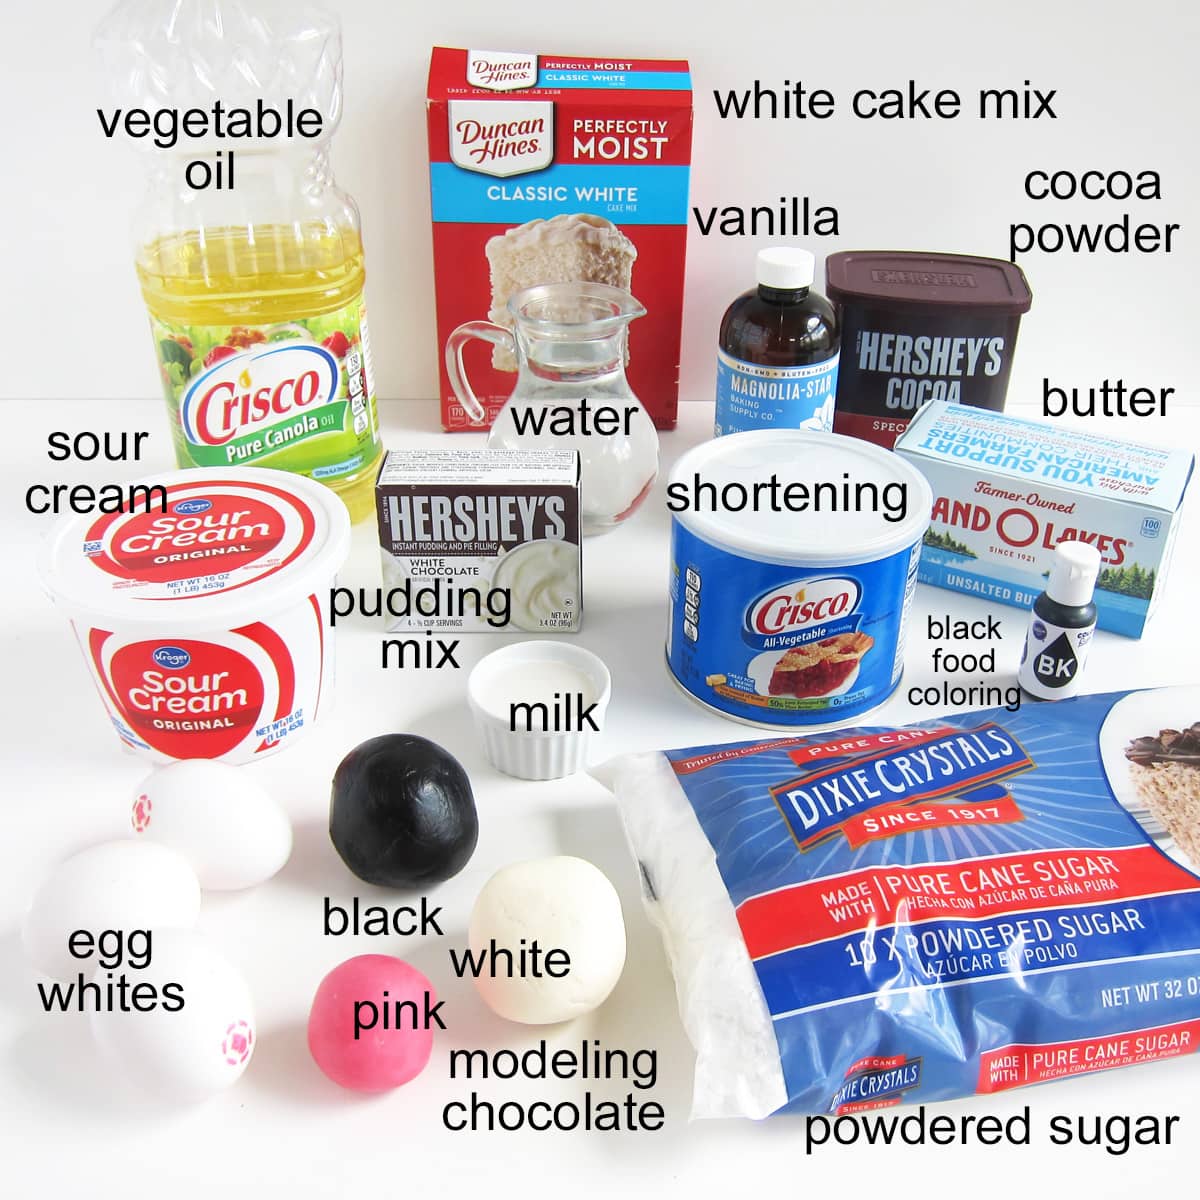
Ingredients
White Cakes - white cake mix, vegetable oil, egg whites, sour cream, and instant white chocolate or vanilla pudding mix
White and Black Frosting - You can use homemade frosting (see the recipe in the recipe card) or store-bought frosting.
Modeling Chocolate or Fondant (black, white, and pink)
To make black frosting, add black food coloring to chocolate frosting instead of white frosting. You'll need far less coloring that way.
If you add enough black coloring to white frosting to get it really black, it will probably taste quite bitter, so I always recommend starting with chocolate frosting.
If you only have white frosting, then add some cocoa powder (preferably Dutch Cocoa powder, which is darker than natural cocoa powder) to the frosting before adding the black coloring. If the frosting gets too thick, add a few drops or more of water or milk to thin it out.
Stir together 12 ounces of melted and cooled (to about 91 degrees F) chocolate or candy melts with ¼ - ⅓ cup of corn syrup until thickened. Knead until smooth. Cover in a zip-top bag and allow to cool for at least 30 minutes.
Be sure to check out my step-by-step tutorial for making homemade modeling chocolate and my troubleshooting tips page so that you can easily make perfect modeling chocolate (that isn't greasy or hard) every time.
Make your modeling chocolate using Bright White Candy Melts.
If you use pure white chocolate, which has an off-white tint to it, you'll need to knead in some bright white food coloring to make it pure white.
Either add black food coloring to modeling chocolate that has been made using semi-sweet chocolate or black candy melts.
Learn more about how to color modeling chocolate, here.

Supplies
You can find most of these supplies on Amazon (I earn a commission for sales using affiliate links at no additional cost to you).
- muffin tin with 6 or 12 cupcake cavities
- 2 6-inch round cake pans
- 2 6-inch round parchment papers to fit in the bottom of the cake pans
- butter and flour to coat the inside of the pans
- 1 large 13-inch by 19-inch cake board
- or 1 large rectangular red cake board
- ½-inch, 1-inch and 1 ½- inch round cookie cutters
- optional 2 ¼ inch oval cookie cutter (or cut with a knife)
- pizza cutter or knife
- optional, silicone mat (if you don't have one, then dust your work surface with cornstarch)
- silicone rolling pin
- mini heart plunger cutter or cookie cutter
- 1-inch heart cookie cutter
- 2 - 2 ½ cups white frosting (see recipe below)
- ½ - ⅔ cup black frosting (color chocolate frosting using black food coloring)
- #21 open star pastry tip
- pastry bags
Instructions

Step 1: Bake the cakes and cupcakes.
- Bake two 6-inch round cakes and 4 cupcakes.
I used a doctored white cake mix. I added some sour cream and instant white chocolate pudding mix to make the cake really moist and flavorful. You can simply use a white cake mix, as is, or make a white cake from scratch.
Step 2: Make the ears.
- Cut off a small curve from each cupcake and attach them to the round cakes using frosting.
- The cupcakes will become the ears of the panda.
- The cupcake ears need to fit up against the round cake, so you want to cut off enough of each cupcake so that they fit around the curve of the larger cake.
- Use some frosting to attach the cupcake ears to the round cakes.
One doctored cake mix made the perfect amount of batter to fill two 6-inch round pans and 4 cupcakes. Also, if you want to use cupcakes for the ears, they fit best on a 6-inch cake.
If you want to make larger 8-inch panda bear cakes, then you'll need to make more than one cake mix, and you'll need to bake the ears in jumbo cupcake pans, ramekins, or small bowls.
Butter (or grease with shortening) the bottoms and sides of the cake pans and 4 cupcake cavities. Dust them with flour, then turn the pan upside down to allow the excess flour to fall out.
Line the round cake pans with a round piece of parchment paper to guarantee the cake won't stick to the pan.
I don't recommend lining the cupcake pans with liners, as you want the cupcake to bake directly in the muffin tin so that you get a nicely shaped cupcake that is the right size. A liner will create a smaller cupcake with ridges.

Step 3: Make modeling chocolate decorations.
- Roll out black and white modeling chocolate or fondant and cut out the pieces for the eyes and black fur patches around the eyes on each panda cake.
- Cut four ovals (2 for each bear) that are about 2 ¼ inches long and about 1 ¾ inches wide.
- You'll notice in the video that I used an oval cookie cutter, then cut it and reshaped it a bit. You can easily cut this by hand.
- Cut four 1 ½-inch circles from the white and four 1-inch circles from the black.
- Cut four small ¼ inch hearts from the white using a plunger cutter or tiny heart cutter.
 panda bear cake toppers. Instructions at HungryHappenings.com. #fondant #modelingchocolate #pandacake #panda #caketoppers")
- Attach the modeling chocolate pieces together to create the panda's eyes.
- Brush a very thin layer of water on the back of one of the white circles and attach it to the black oval.
- Attach one black circle onto the white circle to create the panda bear's pupils.
- Then attach a small white heart in one corner of that pupil to be the highlight or fleck of light.
- Repeat, creating a second eye with the heart placed so that the highlight is coming from the same direction as the first eye (so have them on the right on both pupils or on the left)
- Repeat, creating another set of eyes.
- Cut two 1 ½-inch long hearts from the black modeling chocolate for the noses.
- I squished a 1-inch heart cookie cutter to be 1 ½ inches long. It was then wider than it was tall.
- You can cut this by hand if you don't want to use a cutter.
OPTIONAL DECORATING IDEA:
If you prefer, you can pipe the eyes and nose using frosting directly onto the panda bear cake.

Step 4: Decorate the cakes.
- Attach the modeling chocolate eyes and nose to the round cakes using frosting.
- Spoon white frosting into a pastry bag fitted with a #21 open star pastry tip, and some black frosting into another pastry bag also fitted with a star tip.
- Pipe white stars all over the round cakes, going around the modeling chocolate eyes and nose.
- Pipe black stars over the cupcake ears.

Make a pink candy clay bow to attach to one of the panda bear cakes.
- Roll out pink candy clay and cut out one ½-inch circle and two 1-inch hearts.
- Attach them together using water to create a bow.
- Press the pink bow onto the frosting just below the ear on one of your panda cakes.
Tips:
- These panda cakes are easy to decorate by piping stars all over the surface of your cake.
- Fill a pastry bag that is fitted with a star tip with frosting.
- Set the start tip just above your cake.
- Squeeze just until a small star-shaped bit of frosting comes out of the bag, making sure the frosting is attached to the cake surface.
- Then quit squeezing and pull up quickly, creating a peak.
- If you prefer, you can just spread frosting over the cakes.
Storage
- These panda cakes can be stored at room temperature for 2-3 days.
- Allow the frosting to crust over before covering the bear cakes with plastic wrap.
- I then like to cover my cakes with a large plastic container or box.
- I don't recommend storing these cakes in the refrigerator as they will dry out, but you can place leftover slices in an airtight container and store them in the fridge if needed.
- Any modeling chocolate that gets refrigerated will develop condensation on its surface, which will make the decorations sticky.
Can I freeze these panda cakes?
- You can freeze the cakes themselves, but I would wait to decorate them until the day or so before you want to serve them.
- Modeling chocolate should not be frozen or refrigerated (see comment above).
Variations
- You can use the same decorating technique to make panda cupcakes. You'll just need to cut everything smaller.
Related Recipes


Recipe
Decorate round cakes with white and black icing and modeling chocolate or candy clay or fondant to look like the cutest panda bears for Valentine's Day, a baby shower, or a birthday.
- 1 box (15.25 ounce) white cake mix
- 1 cup water
- ⅓ cup vegetable oil
- 4 egg whites (or 3 whole eggs)
- ¼ cup sour cream
- ¼ cup instant white chocolate pudding mix (or vanilla pudding mix)
- 1 cup vegetable shortening (preferably hi-ratio shortening)
- ½ cup butter, softened
- 6 cups powdered sugar
- 3 tablespoons milk, plus up to 3 tablespoons more, if needed
- 1 ½ teaspoons vanilla extract
- 3 tablespoons cocoa powder
- black food coloring
- 2 ounces black modeling chocolate, candy clay, or fondant
- 1 ounce white modeling chocolate, candy clay, or fondant
- 1 ounce pink modeling chocolate, candy clay, or fondant
-
Allow the cake ingredients to sit at room temperature for about an hour.
-
Preheat oven to 350 degrees Fahrenheit.
-
Brush two 6-inch cake pans with butter then dust with flour and line with a round of parchment paper.
-
Brush 4 cupcake cavities in a muffin tin with butter then dust with flour.
-
Combine the cake mix, water, oil, egg whites, sour cream, and pudding mix together in a large mixing bowl.
-
Use an electric mixer to beat on low for 30 seconds then increase speed to medium and beat for 1 ½ minutes.
-
Fill 4 cupcake cavities about ⅔'s full with batter.
-
Divide the remaining batter among the two 6-inch cake pans.
-
Bake the cupcakes and cakes for 18-26 minutes removing the cupcakes as soon as they are done at around 18-20 minutes. Check the cakes at around the 22 minute mark.
-
A toothpick inserted into the cakes should come out with just a few moist crumbs. Or the cakes should spring back when you press a finger on top.
-
Allow the cakes and cupcakes to cool for 10 minutes in their pans then remove them and set them on a cooling rack. Peel off the parchment paper once the cakes are cooled completely.
-
Place cakes forming two bears on a large cake board and cut each cupcake at a curve so that they fit up against the cake to form the panda bear's ears.
-
Beat the shortening and butter together until well combined using an electric mixer.
-
Add the powdered sugar and beat until light and fluffy.
-
Add the vanilla and 3 tablespoons of the milk and beat until fully incorporated and the frosting is smooth.
-
Add more milk as needed to make the frosting soft enough to pipe through a star tip yet hold it's shape.
-
Spoon ⅔ cup of the frosting into another bowl.
-
Stir the cocoa powder into that small bowl of frosting then color using black food coloring and add more milk, if needed.
-
Roll out the black, white, and pink modeling chocolate to about ⅛th inch thickness on a silicone mat using a silicone rolling pin.
-
Cut four 2 ¼ inch by 1 ¾ inch ovals from the black modeling chocolate.
-
Cut four 1 ½ inch circles from the white, four small ¼ inch hearts from the white and four 1 inch circles from the black.
-
Attach one white circle to one black oval using a thin layer of water or clear piping gel.
-
Attach one black circle on top of the white circle then attach one small white heart along one edge of the black circle.
-
Repeat creating 4 eyes with all the hearts pointing up or down in one direction.
-
Cut out two 1 ½ inch long heart shaped noses from the black modeling chocolate.
-
Cut two 1 inch hearts and one ½ inch circle from the pink modeling chocolate.
-
Place the two points of the heart together then attach the circle over the top of the tips using water or piping gel to form a cute bow.
-
Attach two eyes and a nose using frosting to each round cake.
-
Pipe white frosting using a star tip over the entire surface of the round cakes around the eyes and nose.
-
Pipe black frosting stars over the cupcake ears.
-
Press the pink modeling chocolate bow just below one ear of one of the panda cakes.
-
Serve and enjoy!
Recipe Video
Allow the frosting to crust over then cover the panda bear cakes with a large box or plastic wrap and store at room temperature for up to 2 days.

- Banana Split Bars – A Fun and Easy Summer Dessert - March 4, 2026
- Pineapple Fudge (No Candy Thermometer Needed!) - March 4, 2026
- No-Bake Peanut Butter Pie Recipe - March 3, 2026


Tianna says
Hey I want to make this cake, but can I use red velvet cake mix. If I did would I still use pudding, sour cream, ect?
Beth Klosterboer says
Hi Tianna,
I prefer to add the pudding and sour cream to my cake mixes but you don't have to. It does make the cake more moist and a bit more dense which makes it easier to decorate. If you are using red velvet cake, you could use chocolate pudding if you want to ramp up the chocolate flavor. It may darken the color of the cake a bit but it will taste great. Vanilla pudding would work fine too. If you can find the red velvet pudding, that will work the best but any of them will work well.
Jennifer says
Made this for my daughter and it turned out perfect! Thank you!
Beth says
I am so happy to hear that!
Fiamma Toscano says
Thanks for the panda bear cake recipes. I have made this cake to surprise my brother on his birthday.
Beth says
You are welcome! I'm so happy to hear that you have made this cute panda cake. 🙂
Betsy Wilson says
These are seriously the cutest panda cakes ever! I am going to make them for a baby shower and the inside of the cake is going to reveal whether it is a boy or a girl. I'm so excited. Thanks for the great design.
Beth says
That is such a fun idea! I hope you enjoy making and serving your cute little panda cakes.
Meredith says
Hi Beth - Attempting to make this cake for my daughter’s birthday but I can only find sugar free white chocolate pudding mix. Should I use that or use vanilla instead? Thank you!!
Beth says
Hi Meredith,
Go ahead and use vanilla instead. It will work just fine!
Have fun. I hope your daughter loves her birthday cake.
Rose says
These cakes are super cute Beth!!
Beth says
Thanks, Rose!
JoAnn says
That is a cool mixer, where can I find one and what are they called
Beth says
It is a Nutrimill Artiste. This was the first time I used it and it mixed the batter really well. I love that I can easily add ingredients and that the beaters really got into the corner of the bowl. It comes with a lid that you can slide open which is really great too. You can find them on amazon here - https://amzn.to/2RLW0a5. They are primarily white but you have the option of having a red, black, or grey stripe.
That is an affiliate link. I earn a small commission at no extra cost to you.