If your drawing skills are limited, but you want to draw a detailed image on the top of a cheesecake, you can use a piping gel transfer. I could never have created this Eagle Scout Cheesecake without this useful cake decorating trick.
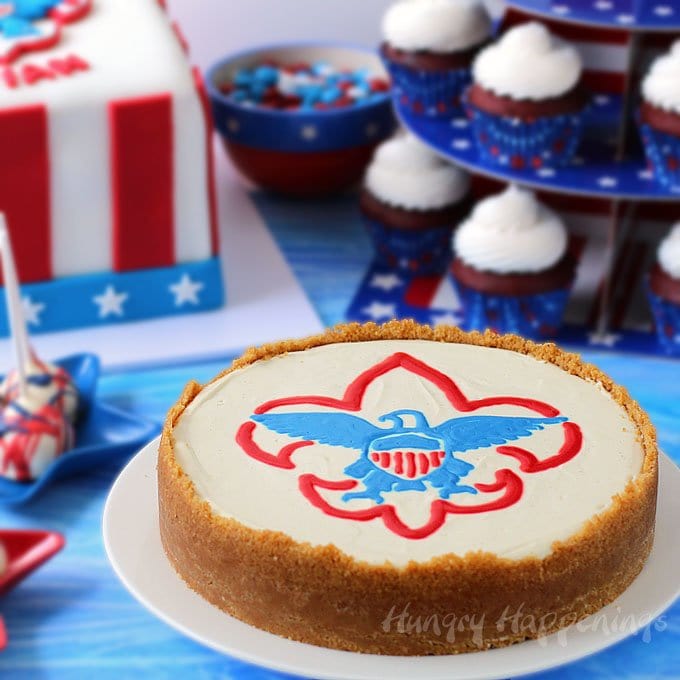
Many of you have asked for an easier way to add an image to the top of a cheesecake because like me your drawing skills are limited. When I set out to create this cheesecake for my nephew's Eagle Scout ceremony, I knew I'd be hard-pressed to get the emblem to look right.
If you are fortunate enough to have a KopyKake projector, adding just about any image to the top of a cheesecake will be easy for you. You can simply project the image you want down onto the top of the cheesecake and use it as a guide. I have not yet invested the money to get a cake projector so I had to find another way to transfer the image onto the top of my cheesecake.
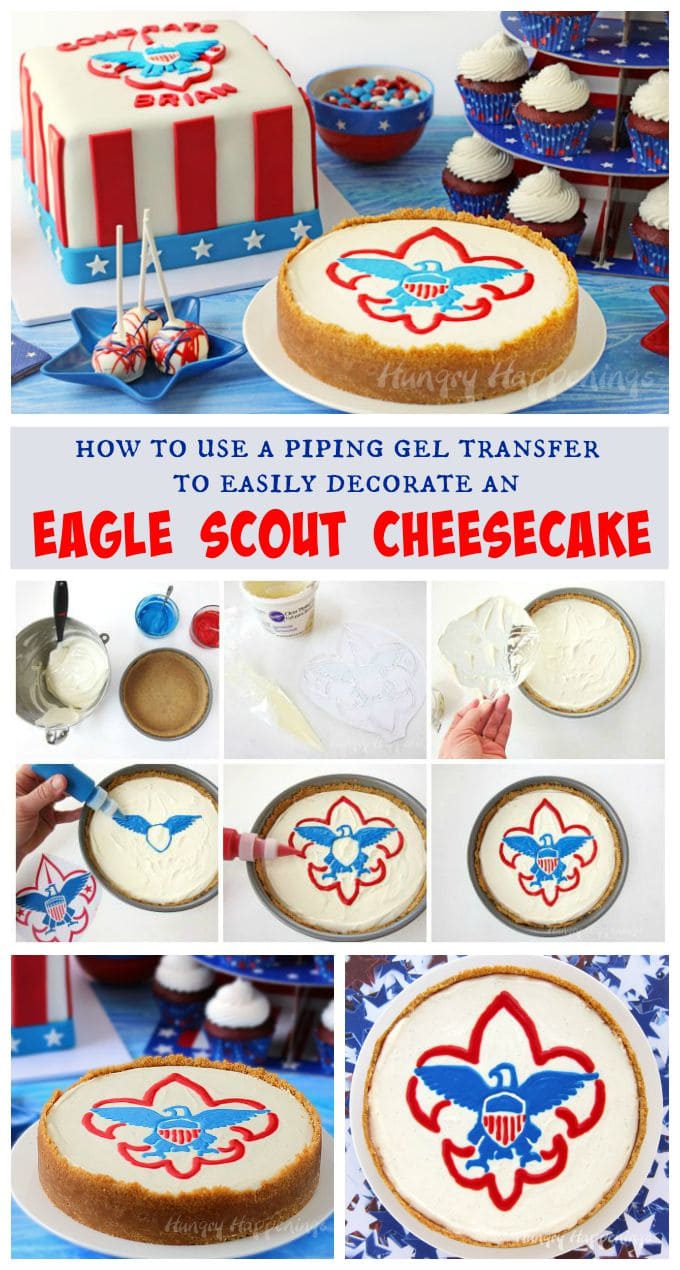
I used a piping gel transfer, a simple cake decorating technique that I learned at a Wilton Method Cake Decorating Class last year, and it worked out perfectly.
Had I done this by hand, I'm pretty sure my eagle would have looked more like a turkey and that's not the regal bird I wanted on top of this dessert to be served at a dignified Eagle Scout ceremony.
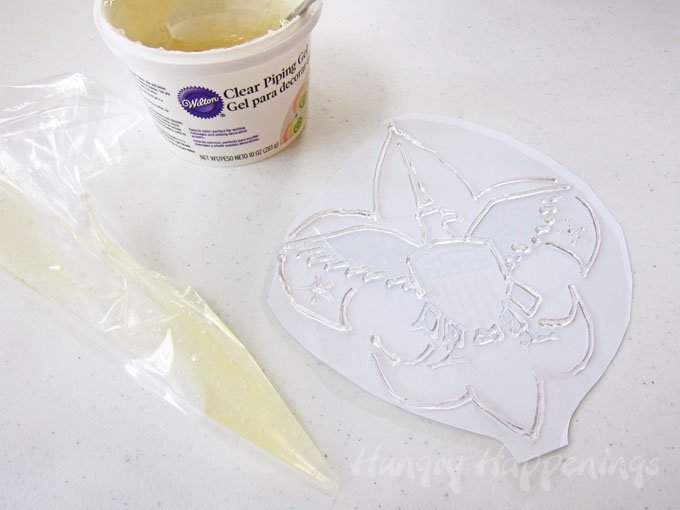
To make the piping gel transfer, you first need to print out the image you want to add to your cake.
It's best to print out the image in reverse, so it's easy to see under a piece of wax paper. I forgot to do that, so I just flipped my image upside down and used a piece of clear acetate instead. I think using acetate is a much better idea when using this technique on a cheesecake because it's a bit easier to lift off the cheesecake filling. You can find clear acetate sheets at art supply stores or online.
To make the transfer, set the image under your piece of acetate. Spoon Clear Piping Gel into a disposable pastry bag. Pipe the gel over the outline of your artwork.

You then set the piping gel transfer on top of the cheesecake filling, gel side down, rub gently around the piped drawing, and then lift it off. It will pull up some cheesecake, but that is fine. As it bakes the cheesecake will smooth out.
It leaves just enough of the design on the cheesecake that you can use it as a guide and pipe the colored cheesecake filling over top.
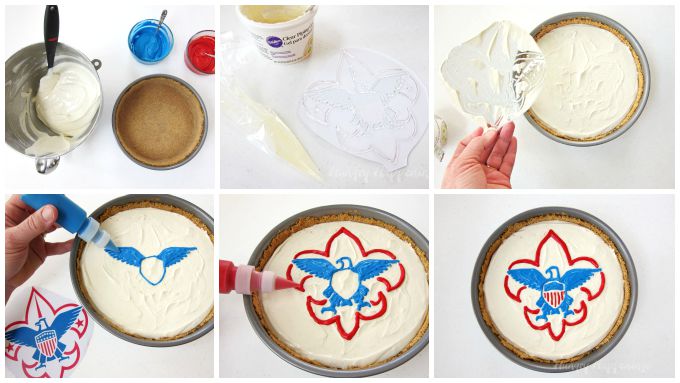
To make the Eagle Scout Cheesecake, you'll need to make your cheesecake crust and filling using the recipe below. Remove about 3 tablespoons of the filling and color it blue.
Then remove about 2 tablespoons of the filling and color it red. Pour the remaining cheesecake filling over the baked crust, create the piping gel transfer, set it gel side down on the cheesecake filling, and remove it to reveal the outline of the Eagle Scout emblem.
Pour the colored cheesecake filling into squeeze bottles or pastry bags. Pipe on the blue and red cheesecake filling, creating the Eagle Scout emblem.

Bake the cheesecake in a water bath for 45-50 minutes. The top should look set but the center will still giggle. Open the oven door a crack, turn off the heat, and allow the cake to rest for 15 minutes. Then remove from the water bath, and allow to cool at room temperature for 1 hour. Refrigerate for at least 6 hours before serving.
I like to keep my cheesecake in the springform pan, drape a piece of paper towel over the top of the pan, cover it in tin foil, and place it in the refrigerator. This keeps condensation from forming on the cheesecake. You can refrigerate the cheesecake for up to 3 days or freeze the cheesecake for up to a month if you need to make it in advance.

I did make my cheesecake in advance because I had so many other desserts to make for the Eagle Scout ceremony. My sister helped me make Red, White, and Blue Whoopie Pie Stars, cake pops, white chocolate popcorn, red velvet cupcakes, a cake, and mousse cups, in addition to the cheesecake.
I can't wait to share more about this wonderful celebration with you, especially what's inside that cake. Can you guess what it might be?
Stop back later this week to see my nephew Brian, cut into the cake to reveal the surprise.
Items used to create this project can be found at Amazon.com (commission earned for sales)
 Wilton Clear Piping Gel, 10...Shop on Amazon
  Grafix Acetate Pad, 9 x 12 ...Shop on Amazon
  Calphalon Simply Calphalon ...Shop on Amazon
 Wilton Color Right Performa...Shop on Amazon
Recipe

- CRUST:
- 1 ½ cups graham cracker crumbs
- 1 ½ tablespoons sugar
- 4 ½ tablespoons melted butter
- .
- CHEESECAKE FILLING:
- 3 8 ounce packages of cream cheese, softened
- 1 cup sugar
- 3 large eggs
- 1 cup sour cream
- 1 teaspoon pure vanilla extract
- blue and red food coloring
-
CRUST:
-
Preheat oven to 325 degrees Fahrenheit.
-
Spray a 9 inch springform pan with cooking spray.
-
Combine graham cracker crumbs, 1 ½ tablespoons sugar, and melted butter.
-
Press it in the bottom and up the sides of the springform pan.
-
Bake for 10-12 minutes until fragrant and the edges begin to brown.
-
Remove from oven and press into an even layer using a flat bottomed glass.
-
Allow the crust to cool.
-
Set a large roasting pan in the oven and pour in 1 ½ inches of hot water.
-
If using a traditional clamp style sprinform pan, wrap the bottom of the pan in two layers of tin foil.
-
CHEESECAKE FILLING:
-
Combine cream cheese and sugar and beat until light and fluffy.
-
Add eggs and beat to combine.
-
Add sour cream and vanilla and beat to combine.
-
Scoop out 3 tablespoons of filing and place in a small bowl.
-
Color using several drops of blue food coloring.
-
Spoon into a squeeze bottle or pastry bag.
-
Scoop out 2 tablespoons of filling and place in a small bowl.
-
Color using red food coloring.
-
Spoon into a squeeze bottle or pastry bag.
-
Pour the remaining cheesecake filing over crust.
-
Use a piping gel transfer to add the Eagle Scout Emblem to the top of the cheesecake.
-
Pipe the red and blue cheesecake filling to create the Eagle Scout Emblem.
-
Set cheesecake in roasting pan filled with water and bake for 45-50 minutes.
-
The top of the cheesecake should look set but still wiggle.
-
Turn off oven, crack open door, and let cheesecake sit for 15 minutes.
-
Remove cheesecake from water bath and allow to cool for 1 hour at room temperature.
-
Refrigerate for at least 6 hours.
You can use this technique to create any of these festive cheesecakes.
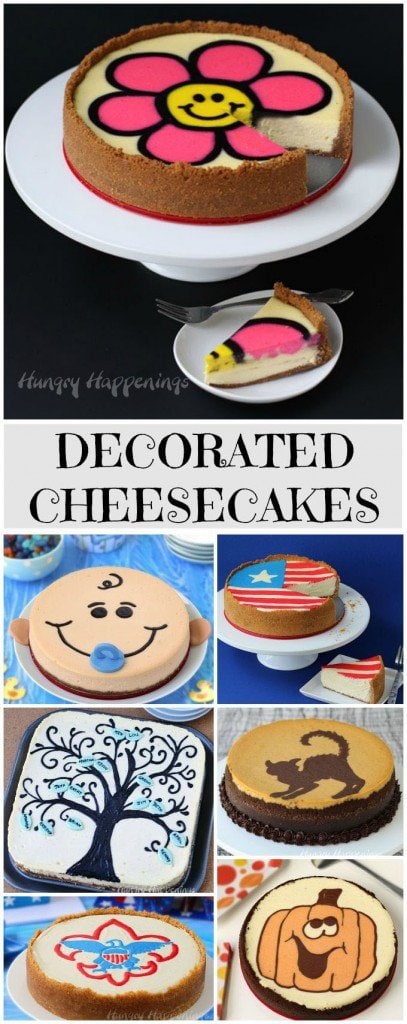
Decorated Daisy Cheesecake
Peach Cobbler Flavored Cheesecake Baby • Flag Cheesecake
Family Tree Cheesecake • Black Cat Pumpkin Cheesecake
Eagle Scout Cheesecake • Jack-o-Lantern Cheesecake

- Banana Split Bars – A Fun and Easy Summer Dessert - March 4, 2026
- Pineapple Fudge (No Candy Thermometer Needed!) - March 4, 2026
- No-Bake Peanut Butter Pie Recipe - March 3, 2026
karenb says
Beth, Thanks for this GREAT tip!!! Does this piping gel transfer only work on cheesecake? Will it work on unbaked cake or cookies?
Beth says
Thanks, Karen. So far, I've only tried it on a frosted cake and the cheesecake, but I assume if you are using a thick cake batter it would work great there too! For cookies, I'm guessing you'd have to thin out some of the cookie dough to pipe over the piping gel transfer. That could be very interesting. I'm going to have to try both ideas:)
The Partiologist says
I'm afraid my eagle would have looked something other than an eagle without this method! Your cheesecake turned out REGAL!
Beth says
Mine definitely would have been a mess without this method. I am so happy it worked. I'll be using it from now on.
Aida@TheCraftingFoodie says
Beth, what an awesome trick! As a cookie decorator who does not have a KopyKake, I'm always looking for ways to transfer images. I use royal icing transfers all the time. Maye I can figure out a way to get use this method for cookie decorating!
Beth says
I have not tried it on cookie yet, but because the piping gel is clear it is easy to cover with frosting or cheesecake filling. I'm sure it would work on buttercream cookies but don't know about royal icing. If you try it, I'd love to hear the results.
lisa@hooplapalooza says
hey what an awesome trick Beth! let me guess what's inside that cake...a Boy Scout? lol seriously though i think it could be an eagle?! 😉
Beth says
Good guesses! The reveal will happen in a few days. I'm excited to share it with you as soon as I get the post written.
Tavette says
Thanks for sharing what you learned about making designs on top of a cheesecake. Sounds absolutely "do-able". With this method you don't really need a projector. Remember those old overhead projectors all teachers had way back when? There was an acetate sheet involved then too.
Can't wait to hear how you did the stars on top of the cupcakes and to see what you "reveal" inside the cake. My guess - an Eagle?
Your many contributions to the celebration are going to be the talk of the day. Brian will be the proudest Eagle Scout there.
Beth says
I wish I had one of those old school projectors. That would work perfectly. I'd love to own a KopyKake! Maybe someday, I'll splurge and buy one.
Brian was pretty happy with all the desserts and was definitely the envy of all the other boy scouts at the celebration. Several asked me to do desserts for their events. LOL! I only did this for my special nephew and was happy he liked his treats.
You'll have to wait a few more days to find out if your guess about the inside of the cake is correct.
Amber Harding says
Cool stuff!
Beth says
Thanks, Amber.