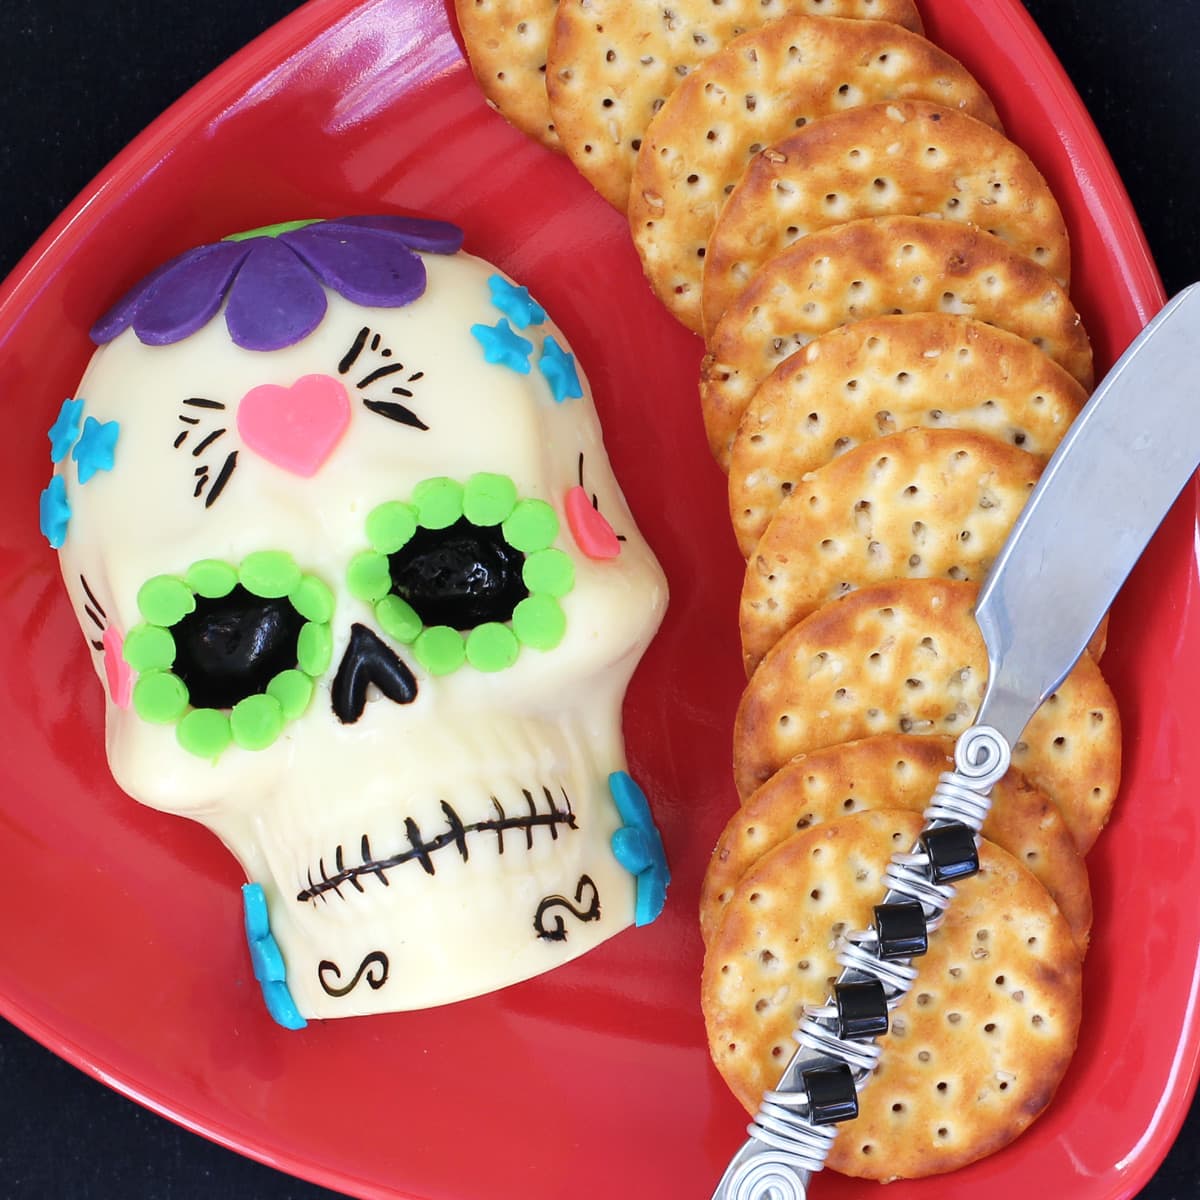
Create a festive appetizer for your Dia de los Muertos celebrations. This colorful Day of the Dead appetizer looks like a sugar skull but tastes like cheese!
I can't wait to serve this festive appetizer for Dia de Los Muertos. We are hosting a Day of the Dead party this year and our party guests will be decorating their own sugar skulls and eating lots of festive food including cheesecake mousse skulls, pizza skulls, and more.
The idea to make this sugar skull made out of cheese came to me while I was making all the sugar skulls that my party guests will be decorating.
Sugar Skulls are so fun to make and this cheese skull is equally fun to create. It does take some time but it will look so cool on any Day of the Dead food table. Just like traditional sugar skulls, you can add your own unique twist by decorating it like you want.
Have fun!
Ingredients
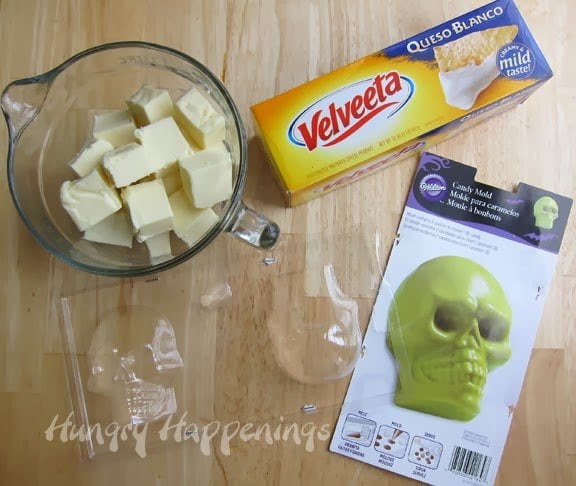
Velveeta Queso Blanco Cheese
food coloring
Supplies
large plastic sugar skull mold
food handling gloves
silicone mat
small plunger cutters or metal cutters
food coloring markers or paintbrushes
Items used to create this project that are available on Amazon.com (commission earned for sales)
 Large 3-d Skull Front 1 LB ...Shop on Amazon
  Make Your Own Sugar Skull- ...Shop on Amazon
  PME Plunger Cutters, Miniat...Shop on Amazon
 Ateco Plain Tear Drop Cutte...Shop on Amazon
Instructions
Cut Velveeta Con Queso into small chunks. Melt in the microwave, stirring often. You want the cheese completely melted and smooth.
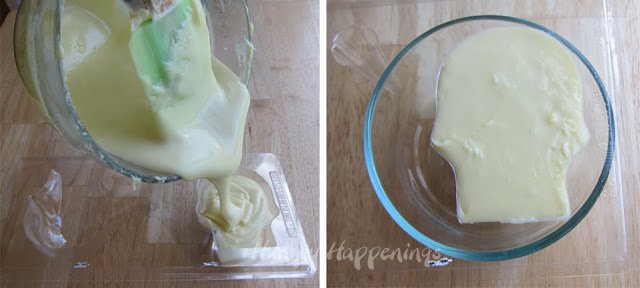
Pour melted cheese into sugar skull mold. If you want a full skull, fill both the front and back cavity. Tap the mold down several times to remove air bubbles. Being I only filled the front of my mold, it wouldn't sit level, so I placed a bowl under the skull to hold it flat.
Carefully lift the filled skull mold up over your head, keeping it perfectly level, to see if there are any big air bubbles. If there are, poke the back end of a skewer or knife into the mold and pop the air bubbles. You can't fix these once the cheese sets.
Place mold in the freezer for about 30 minutes.

Meanwhile, use your leftover melted cheese or melt more to make the colorful decorations. I melted way more cheese than I needed for one skull. You'll probably only need about a tablespoon of cheese per color, depending on how many colors you want to use. I ended up with pink, blue, green, and purple.
Divide the cheese into small bowls. Color with various food colorings. If your cheese is liquid enough, spread it on a non-stick baking mat. If not, just roll it into a ball and flatten it out.
I set the cheese in between two non-stick mats and rolled it out using a rolling pin. You can also just fold the mat over the cheese and roll it out. A zip-top bag would work in place of the non-stick mat.
Freeze your colored cheese for about 10 minutes until it's still flexible but not sticky. If it gets too hard, just let it sit at room temperature for a minute or two and it will soften up.
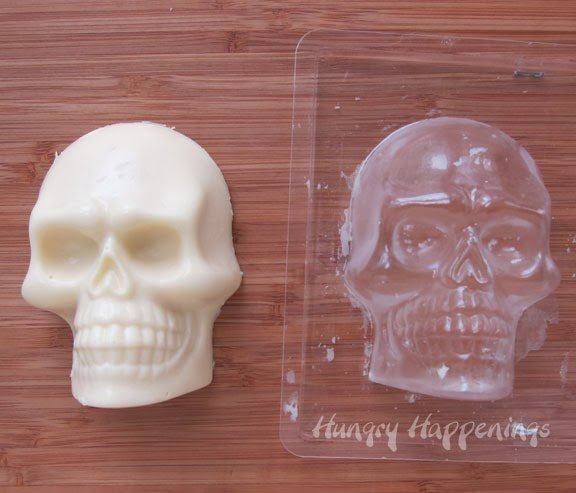
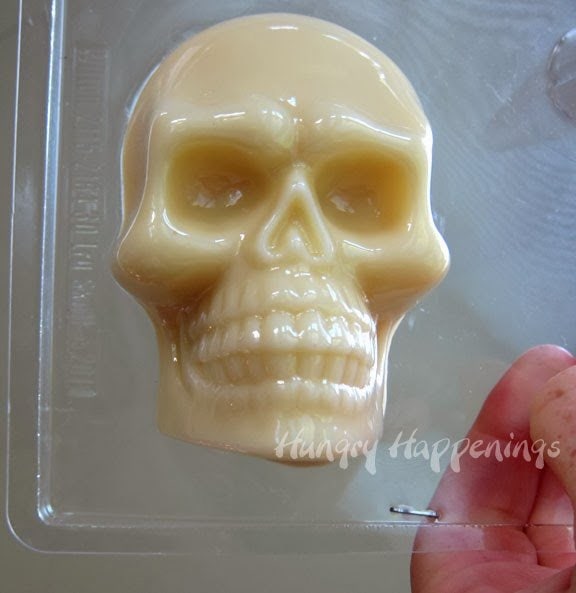
Remove your sugar skull mold from the freezer, turn it upside down over your work surface, and press down on the plastic mold, releasing the cheese and allowing it to gently fall onto the counter.
If it won't come out, you can pull away around the edges of the mold to see if that helps. If not, freeze for another 10 minutes and try again.
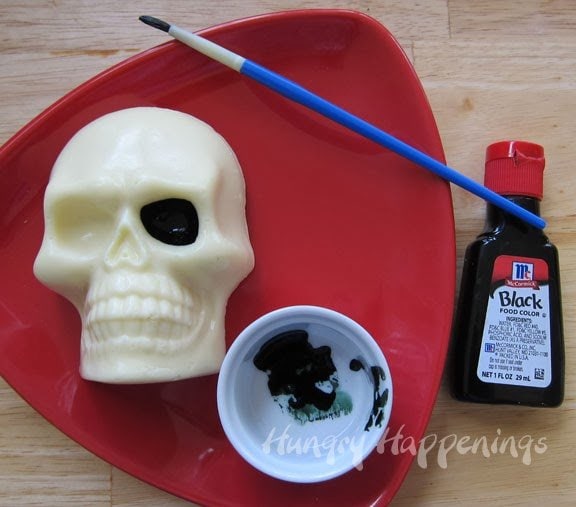
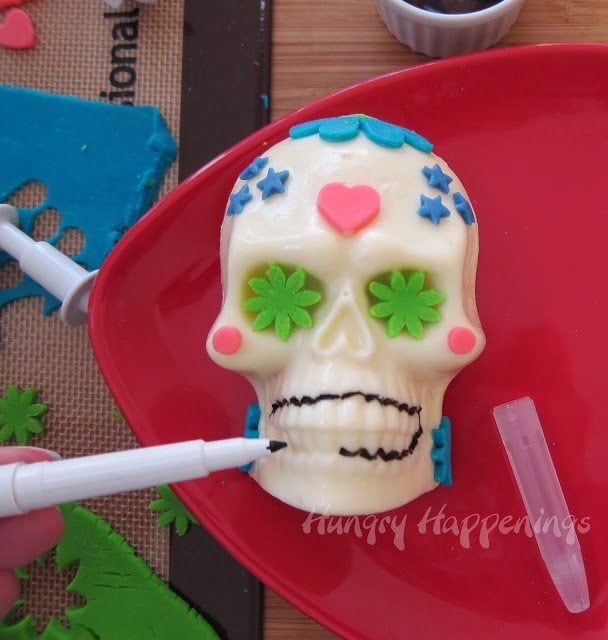
Paint black food coloring into the eye and nose sockets.
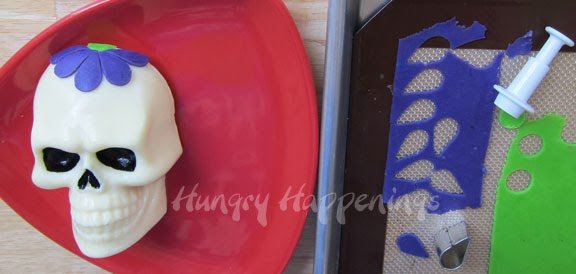
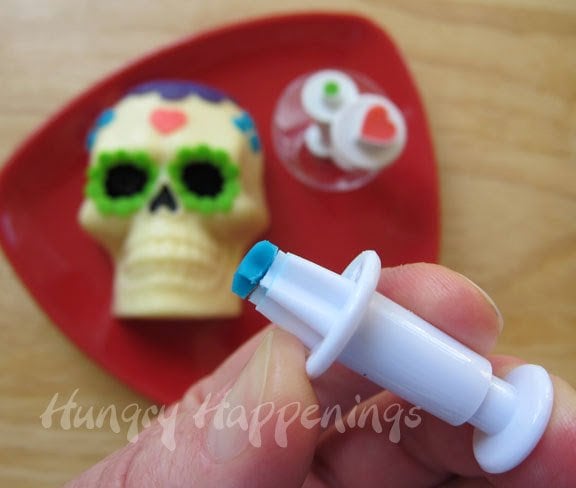
Use small metal cutters and plunger cutters to cut decorations out of the colored cheese. Press the decorations onto the cheese skull. They will stay in place without any "glue."
If you've not ever used a plunger cutter, go out and get some, now! They are the best tool for making small decorations out of fondant, modeling chocolate, or cheese.
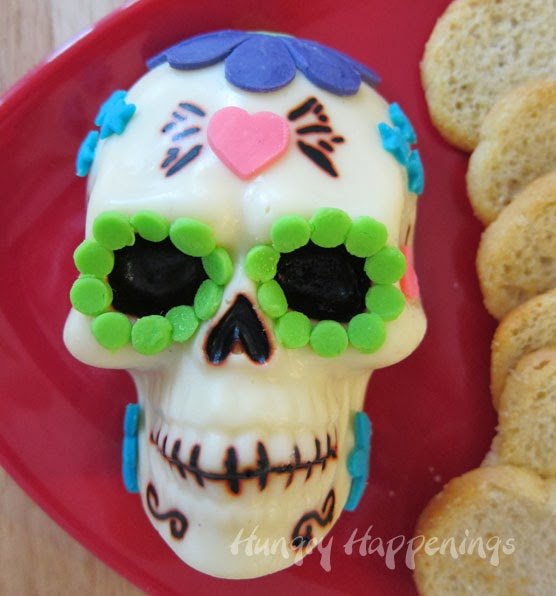
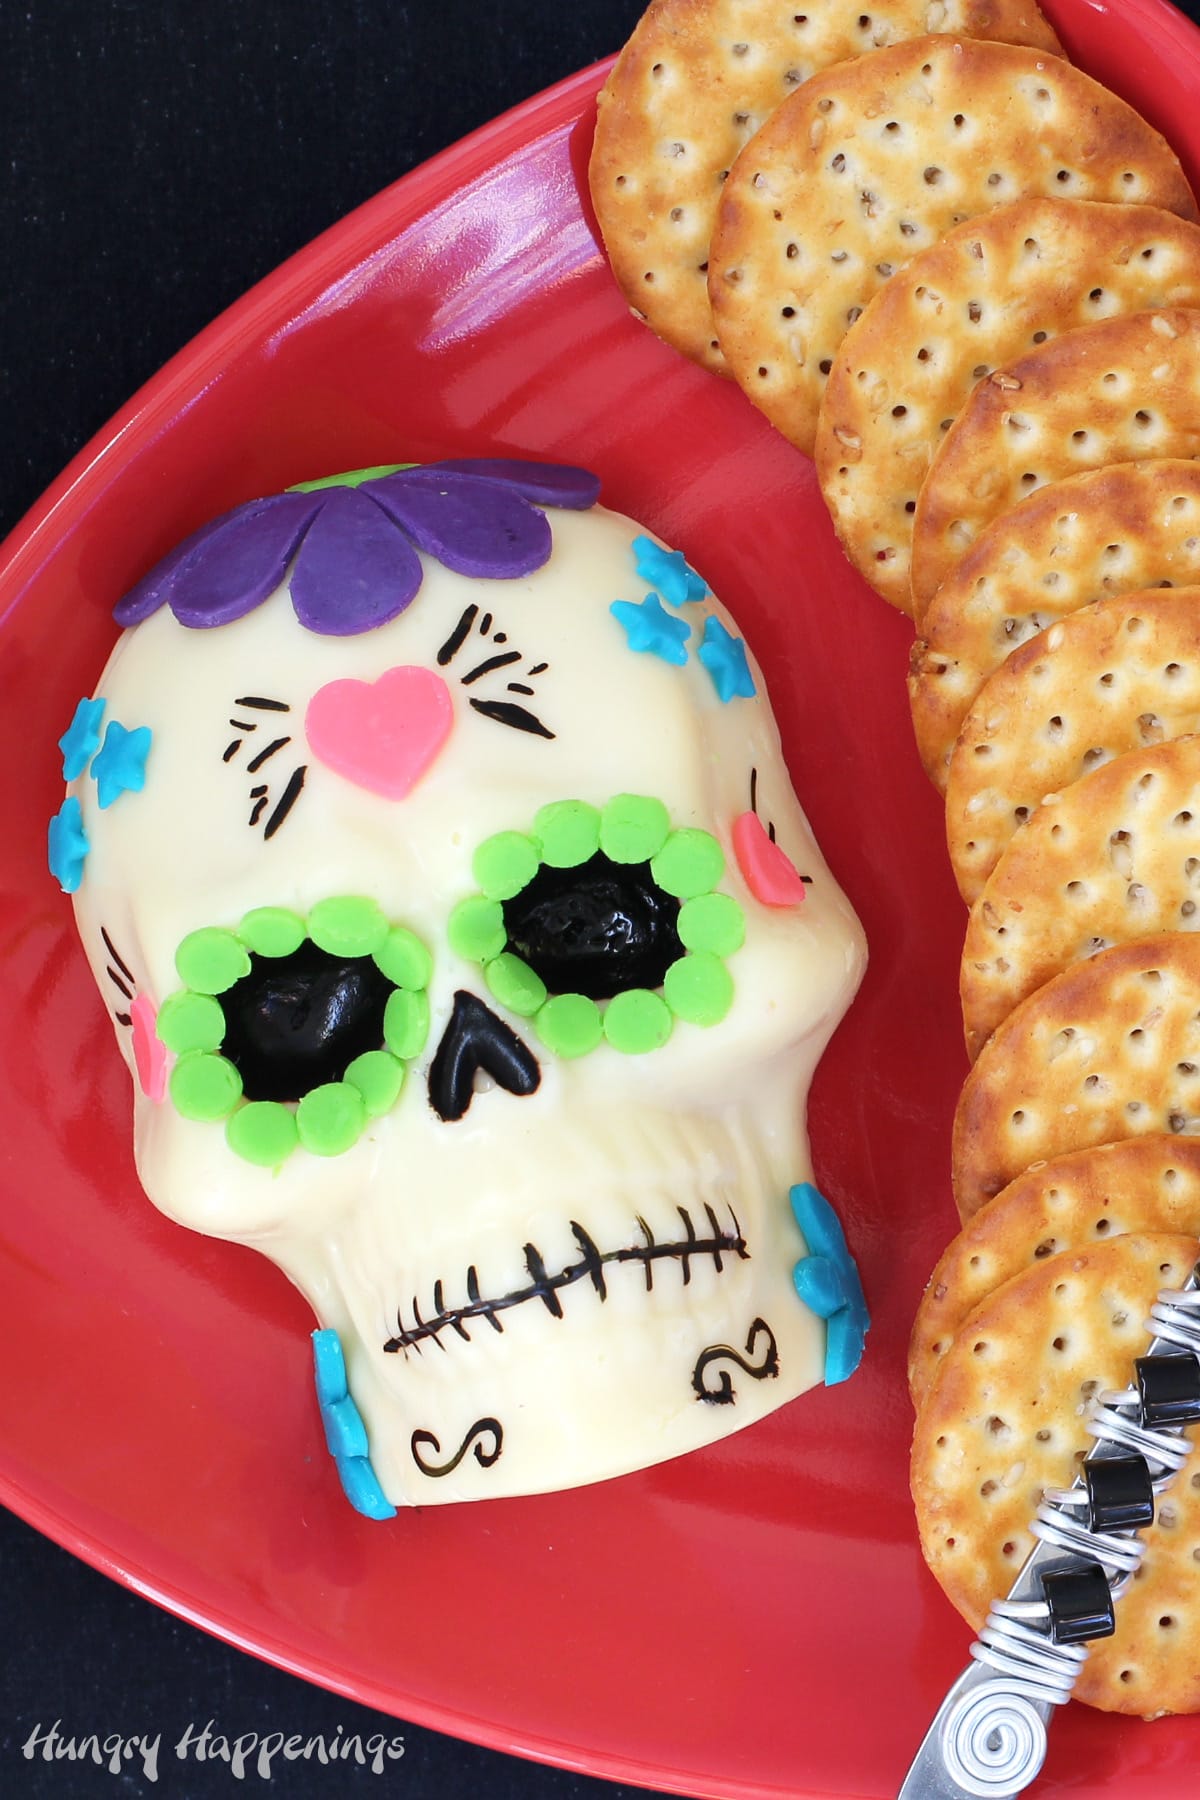
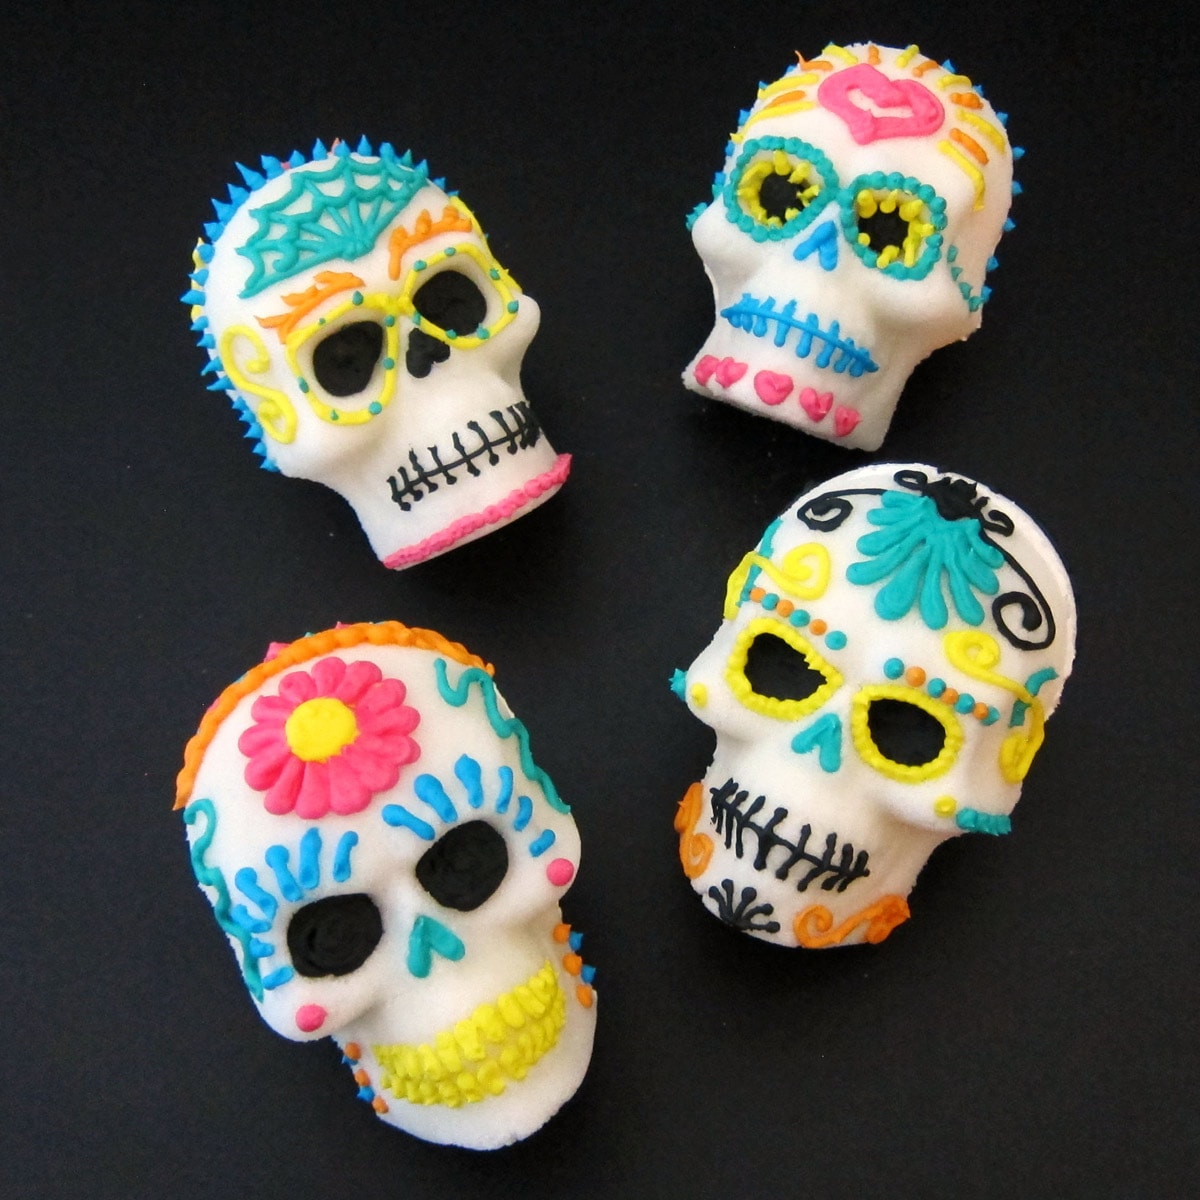
I cut blue stars, pink hearts, green dots, and blue and purple petals out of cheese to decorate my cheese skull.
I decorated another cheese skull using green petals over the eyes and similar decorations. I ended up ruining it, by adding black around the mouth. Just as I was taking this picture I pressed the marker up against the cheese and it bled. I tried to cover it up and made an even bigger mess.
In the end, I like the new design better, but you can see there are unlimited options for decorating these skulls.
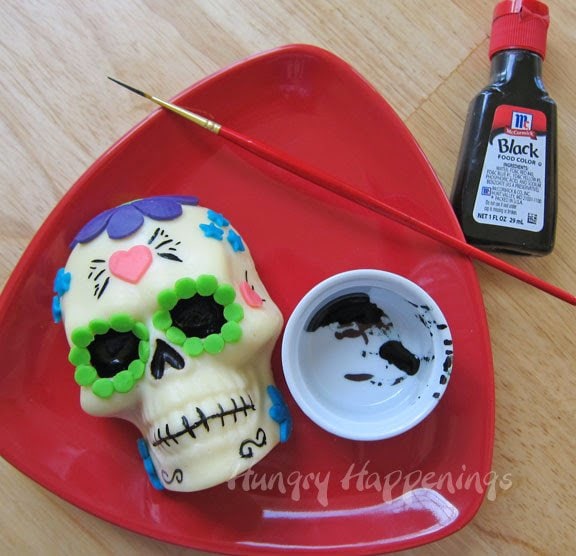
Use black food coloring to put some finishing touches on your cheese sugar skull.
Something really cool will happen as the black food coloring seeps into the cheese. The edges will begin to turn pink.
I had wrapped up my skull and stored it in the refrigerator overnight. When I pulled it out to show my friend, I noticed the pink glow around the black. I love it.
Storage
I wrapped the skull in plastic wrap and stored it in the freezer for our party. I'll thaw it in the refrigerator a day before our event. If you don't need to freeze it, just store it in an airtight container in the refrigerator for about a week. Serve with crackers.
Related Recipes
If you are looking for more festive Halloween food ideas, be sure to check out my Halloween category page. You'll find over 100 fun and festive recipes for the holiday.
Recipe

- Velveeta Queso Blanco
- Large sugar skull mold or chocolate mold
- neon food coloring
- non-stick baking mat like a Silpat or some large zip top bags
- optional: rolling pin
- black food coloring
- food use only paint brushes 1 fine tip, 1 medium tip
- small metal fondant cutters and/or plunger cutters
-
Cut Velveeta Con Queso into small chunks.
-
Melt in the microwave, stirring often.
-
Pour melted cheese into sugar skull mold.
-
Tap the mold down several times to remove air bubbles.
-
Place mold in freezer for about 30 minutes.
-
Use your left over melted cheese or melt more to make the colorful decorations.
-
Divide the cheese into small bowls.
-
Color with various food colorings.
-
Set the cheese in between two non-stick mats and rolled it out using a rolling pin.
-
Freeze your colored cheese for about 10 minutes until it's still flexible but not sticky.
-
Remove your sugar skull mold from freezer, turn it upside down over your work surface, press down on the plastic mold, releasing the cheese and allowing it to gently fall onto the counter.
-
Paint black food coloring into the eye and nose sockets.
-
Use small metal cutters and plunger cutters to cut decorations out of the colored cheese.
-
Press the decorations onto the cheese skull.
-
Cut blue stars, pink hearts, green dots, and blue and purple petals out of cheese to decorate your cheese skull.
-
Use black food coloring to put some finishing touches on your cheese sugar skull.
-
Serve with crackers.

- Banana Split Bars – A Fun and Easy Summer Dessert - March 4, 2026
- Pineapple Fudge (No Candy Thermometer Needed!) - March 4, 2026
- No-Bake Peanut Butter Pie Recipe - March 3, 2026


Karen says
This is a great idea! Thanks so much for posting this!
thedunhamz says
Did you freeze this already decorated? How long can it be frozen?
beth says
I did actually freeze this after I had decorated it. I defrosted it in the refrigerator the day before our party and then served it. It was in the freezer for 2 weeks, but I think you could freeze it up to a month.
Michelle | Creative Food says
This really is brilliant. The skull looks amazing!
The Partiologist says
Wow, Beth - I really love how this turned out. Now I Want to have a PARTY featuring this SKULL!
Heather - Chickabug says
I'd agree that it is beautiful - but a little spooky too. Either way, I really love it! : )
Sarah says
This is SO great! How creative, too. And you can't go wrong with crockpots full of delicious food. I need to find some occasion to give this cool cheese mold a try!
Lynn@Happier Than a Pig in Mud says
Is it ok to say this is beautiful??? You know, in a spooky way:@) Have fun at the party!
beth says
I think it's quite beautiful too! Thanks, I'm hoping our party is a lot of fun this year.
Anonymous says
Wow, that is so great! I wish we had that kind of cheese where I'm from