Learn how to make Sugar Skulls (Calavera) for the Day of the Dead (Dia de los Muertos) using a plastic skull mold, then see how to decorate the skulls using colorful royal icing. Watch my Sugar Skull Video Tutorial.
 celebrations. See the recipe and video tutorial at HungryHappenings.com. #dayofthedead #sugarskulls #skulls #royalicing #diadelosmuertos")
Have you seen elaborately decorated Sugar Skulls and wanted to make one? I have put together a video tutorial to show you how to make sugar skulls for the Day of the Dead, but before we get to that, let me tell you a little bit about the tradition of making sugar skulls.
What is the Day of the Dead?
- The Day of the Dead (Día de los Muertos) is a celebration of life, not death.
- It is believed that the gates of heaven open at midnight on October 31st, and the spirits of the dead can be reunited with their families. The deceased children come on November 1st and the adults on November 2nd.
- This holiday is celebrated in Mexico and parts of South America, but has also become increasingly popular among Latino communities in the United States. We even hosted a Day of the Dead-themed party back in 2013.
- Sugar skulls are a traditional craft that are made to be placed on beautifully decorated altars (ofrendas) by the family of a deceased relative during the Day of the Dead celebration.
What is placed on the altar for Dia de los Muertos?
- Every altar (ofrenda) should include the four elements:
- Water - is often placed in pitchers on the altar so the spirits can quench their thirst.
- Wind - is represented by traditional paper banners, known as Papel picados, that blow in the wind.
- Earth - is represented by food and flowers because the cycle of death and life is often associated with new crops growing up in fields where crops died the season before.
- Fire - Candles help the spirits find their way.
Ideas for food to be placed on your Ofrenda:
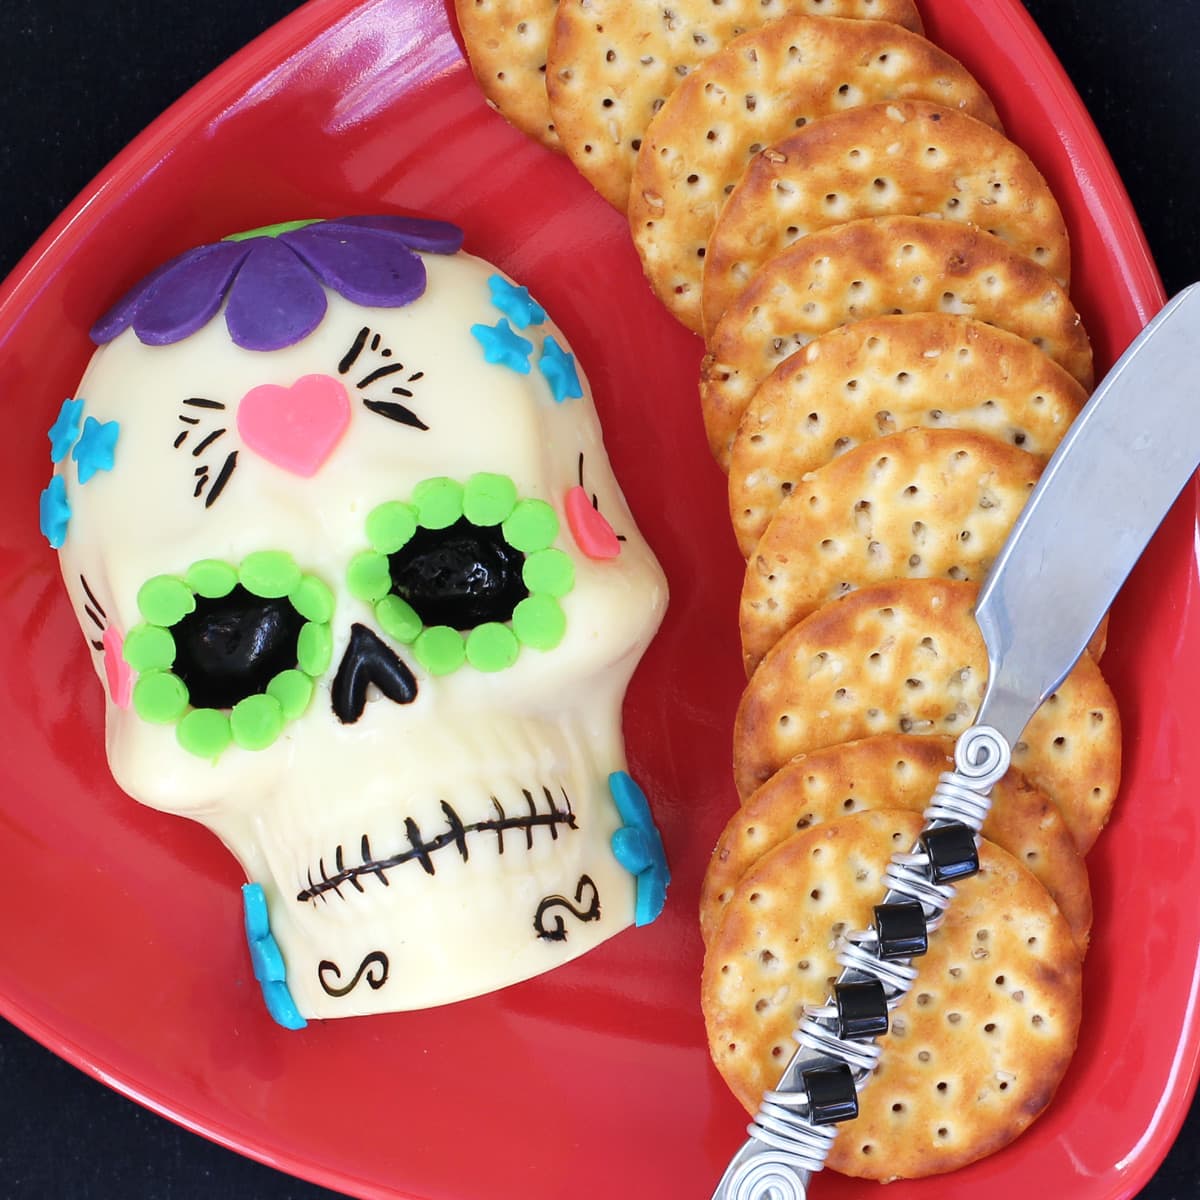
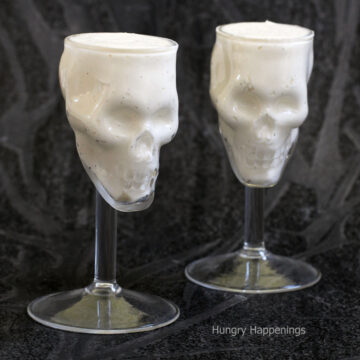
- Cheesecake Mousse Skulls
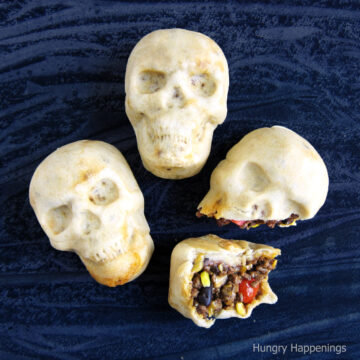
- Burrito Skulls or Enchilada Skulls
- Pan de Muerto
- Champurrado
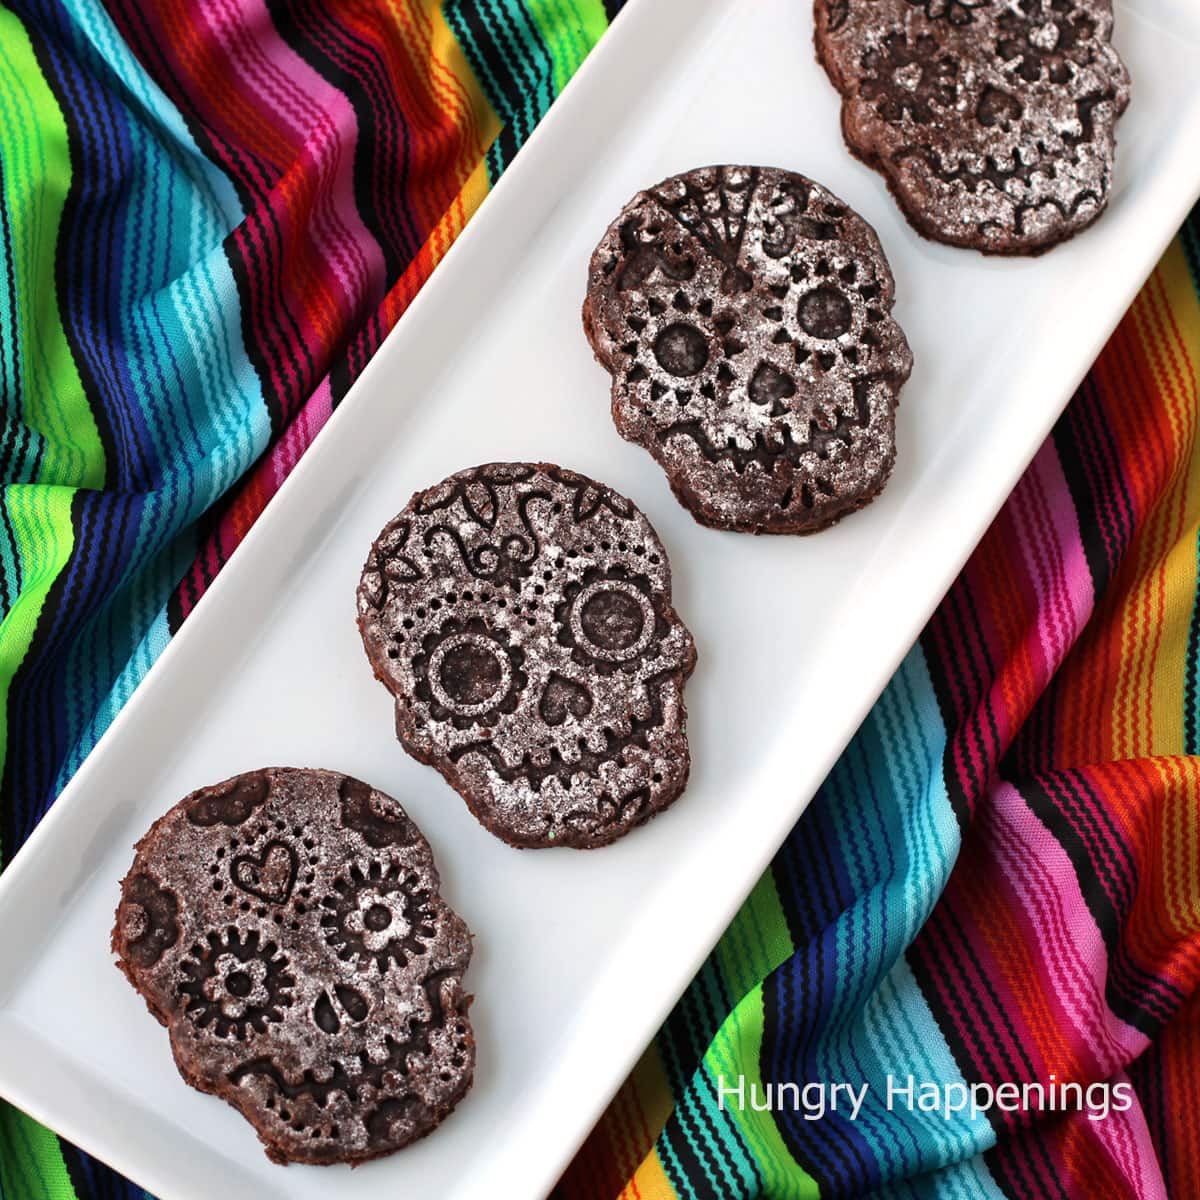
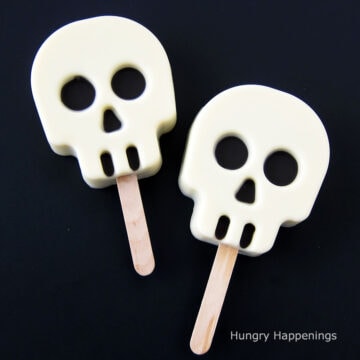
- Calavera Cookies
 using a plastic skull mold then see how to decorate the skulls using colorful royal icing. See the recipe at video tutorial at HungryHappenings.com. #sugarskulls #howtomakesugarskulls #dayofthedead #diadelosmuertos #halloween")
Sugar Skull Supplies
- meringue powder
- Meringue powder is composed of cornstarch, dried egg whites, sugar, citric acid, and some stabilizers.
- Some sugar skull recipes call for raw egg whites, which are fine to use, since sugar skulls are meant to be decorations and are not usually eaten.
- granulated sugar
- water
- plastic skull mold
- The recipe below will make 4 sugar skulls that are approximately 4 inches long and 3 ½ inches deep
- I used a mold that I've had on hand for many years. I'll link below to some skull molds that are available on Amazon.
- royal icing and food coloring
You can find supplies needed to make these homemade sugar skulls from Amazon (commission earned for sales).
 Large 3-d Skull Front 1 LB ...Shop on Amazon
 Front Skull (1) Back Skull") Cakegirls Large Skull Choco...Shop on Amazon
Cakegirls Large Skull Choco...Shop on Amazon Make Your Own Sugar Skull- ...Shop on Amazon
 Wilton Meringue Powder Egg ...Shop on Amazon
 Wilton Color Right Performa...Shop on Amazon
 DIXIE CRYSTALS SUGAR GRANUL...Shop on Amazon
  Wilton 4-Piece Set, 0.8 x 2...Shop on Amazon
  Ateco 810 - 10 Piece Plain ...Shop on Amazon
Sugar Skull Recipe
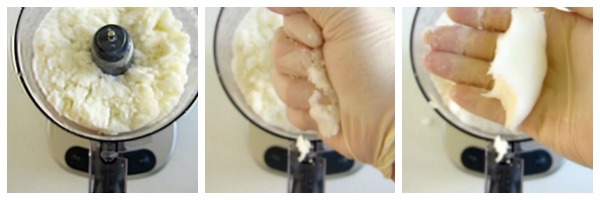
- Stir together the sugar and meringue powder, then add the water and stir until all the sugar is wet.
- I used a food processor to make sure the sugar gets evenly mixed with the water.
- Squeeze together some of the sugar, and if it holds together, it's ready.
- If it's too dry, add some more water, a teaspoon at a time, until you get the right consistency.

How to create sugar skulls using a plastic skull mold:
- Spoon some of the wet sugar into a 3-D skull mold.
- Press the sugar into the mold, compacting it tightly.
- Continue to fill the mold, then scrape off any excess sugar so that you have a flat surface on top.
- Fill both the front half and back half of the mold.
- Place a piece of parchment paper and cardboard over the top of the mold.
- Carefully flip the mold and board upside down.
- Set the cardboard on the counter.
- Lift the mold of the sugar skull.
- If the sugar skull sticks, it is too wet. You will need to pour the sugar back into the bowl and add a bit more dry sugar to the mixture.
- If the skull breaks apart, it's too dry. Pour the sugar mixture back into the bowl and add a bit more water.
- Allow the skull to dry for at least 6 hours. Then turn it over and allow the other side to dry for at least 6 hours.
- Spread a thin layer of royal icing between the two halves of the skull.
- Press them together, remove any icing that has oozed out from in between the two pieces, then let them dry for at least an hour before decorating.
NOTE: Sugar skulls need to dry hard, so it is best not to make them on humid days when there is too much moisture in the air.

Other Decorating Ideas
You can decorate your sugar skulls using paint, foils, colored glue, glitter, or royal icing.
There is no limit to the designs you can make. Be creative and have fun adding your decorations. I used brightly colored royal icing to decorate mine.
Related Recipes
Sugar Skull (Calvera) Recipe

Sugar skulls made using granulated sugar, meringue powder, and water are hardened then decorated with colorful royal icing to be placed on an altar for the Day of the Dead.
- ¼ cup meringue powder
- 6 cups granulated sugar
- ⅓ cup water
- 7 ½ teaspoon meringue powder
- 6 teaspoons water
- 1 pound powdered sugar
- 1 teaspoon almond extract (optional)
- food coloring
-
Mix the sugar, meringue powder, and water together until the sugar holds together when squeezed. If the sugar is too loose add a bit more water.
-
Fill both the front and back of the skull mold with the wet sugar compacting it tightly so that there are no air holes. Scrape off the excess so that the tops are flat.
-
Cut some parchment paper and cardboard so that they are a bit bigger than the skull mold. Set the parchment paper over the top of the mold then set the cardboard on top of the parchment paper. Grab onto the mold and cardboard, and carefully flip them upside down and set on the counter. Carefully lift the mold up off the sugar skulls. The mold should come right off. If the sugar sticks, it's too wet. Scrape it out of the mold, clean the mold, and add some more dry sugar to the mixture and try molding it again. If your sugar skulls do not hold together you will need to add a bit more water.
-
Allow your sugar skulls to dry for at least 6 hours before flipping them over so that the other side can dry as well. Let them dry a minimum of 12 hours.
-
Make royal icing by whisking the water and meringue powder then adding the powdered sugar and almond extract and beating until it begins to lose its shine.
-
Spread a thin layer of royal icing on the flat part of the backside of each skull. Press the front and back sides together. Use your finger to wipe off the icing that oozes out from between the two pieces. Allow the icing to dry for at least an hour before decorating your skulls.
-
Color the royal icing using food coloring then spoon into pastry bags fitted with small round tips.
-
Pipe royal icing onto the skulls creating any designs you like.
-
Allow the icing to dry for several hours before using them to decorate your Day of the Dead altar.
Recipe Video
- The entire process from start to finish will take approximately 24 hours due to all the drying time.
- These skulls can be eaten but they are really supposed to be used as decoration, not as a dessert.
This tutorial was originally posted on October 29, 2018.

See more Day of the Dead recipes, here.

- Banana Split Bars – A Fun and Easy Summer Dessert - March 4, 2026
- Pineapple Fudge (No Candy Thermometer Needed!) - March 4, 2026
- No-Bake Peanut Butter Pie Recipe - March 3, 2026

Jocelyn Weart says
Hi! Do you have a recommendation for the colored glue or paint for these skulls? Our 2nd-grade teacher wants to do these for her 24 students. I am trying to gauge how long this will take and what would be best for them to use on the skulls. Icing will be tough. Thank you for any advice you can share!
Beth Klosterboer says
Hi Jocelyn,
There are many options the kids could use to decorate their skulls. Colored glitter glue would look really fun! You can find tubes and bottles of different shapes and sizes here - (ad) https://amzn.to/42RjRHP
I personally like the tubes, because they are easy to hold and feel like writing with a marker. Little fingers will find them easy to use. Kids work more quickly than adults do, as they aren't as precise. I'd guess it might take 15-25 minutes for the kids to decorate their skulls.
I hope they enjoy making their skulls!
Jill says
My mold is cast iron. Do you think this will still work?
Beth Klosterboer says
I've not used a cast iron mold before, but I think it should work fine. The sugar skulls pop right out of the plastic mold, so I think they would do the same in a cast iron mold. I'd love to hear how it turns out. Enjoy making and decorating your skulls.
Melissa Miller says
Thanks for the detailed instructions. They were so easy to follow. I love your sugar skull designs. They are colorful and fun!
Beth says
Thank you! I am happy you found the step-by-step instructions helpful.
Connor says
This is a great recipe but would I be able to do it without meringue powder or with flour instead
Beth says
Thanks! You can make them using egg whites instead of meringue powder. I have not done that but you can find recipes online using egg whites. I have not seen any recipes using flour.
Elia Najera says
I do not see links for the skull molds. I am really looking forward to make these!
Beth says
Hi Elia,
The actual mold that I used is no longer available but you can find other similar skull molds on Amazon. Here's one that I think would work well - https://amzn.to/3nJWiLd
Here's another - https://amzn.to/2SKSTgC
And another - https://amzn.to/36TaUBU
Have fun making and decorating your sugar skulls!
Vicki says
What do your sugar skulls taste like? Will kids like them?
Beth says
Hi Vicki,
Sugar Skulls are really meant to be decorations as they are made using just sugar and water. You can certainly eat them, but it will taste like eating a big sugar cube with some royal icing on top.
The Partiologist says
You've done a great job with the sugar skulls, love all those bright colors!
Beth says
Thank you. They are so fun to decorate. I'm sure you'd do a great job.