Make an elegant and delicious appetizer for a wedding or bridal shower. Cheese Ball Wedding Cakes are easy to make and can be decorated with cream cheese, cheese flowers, herbs, or real flowers.
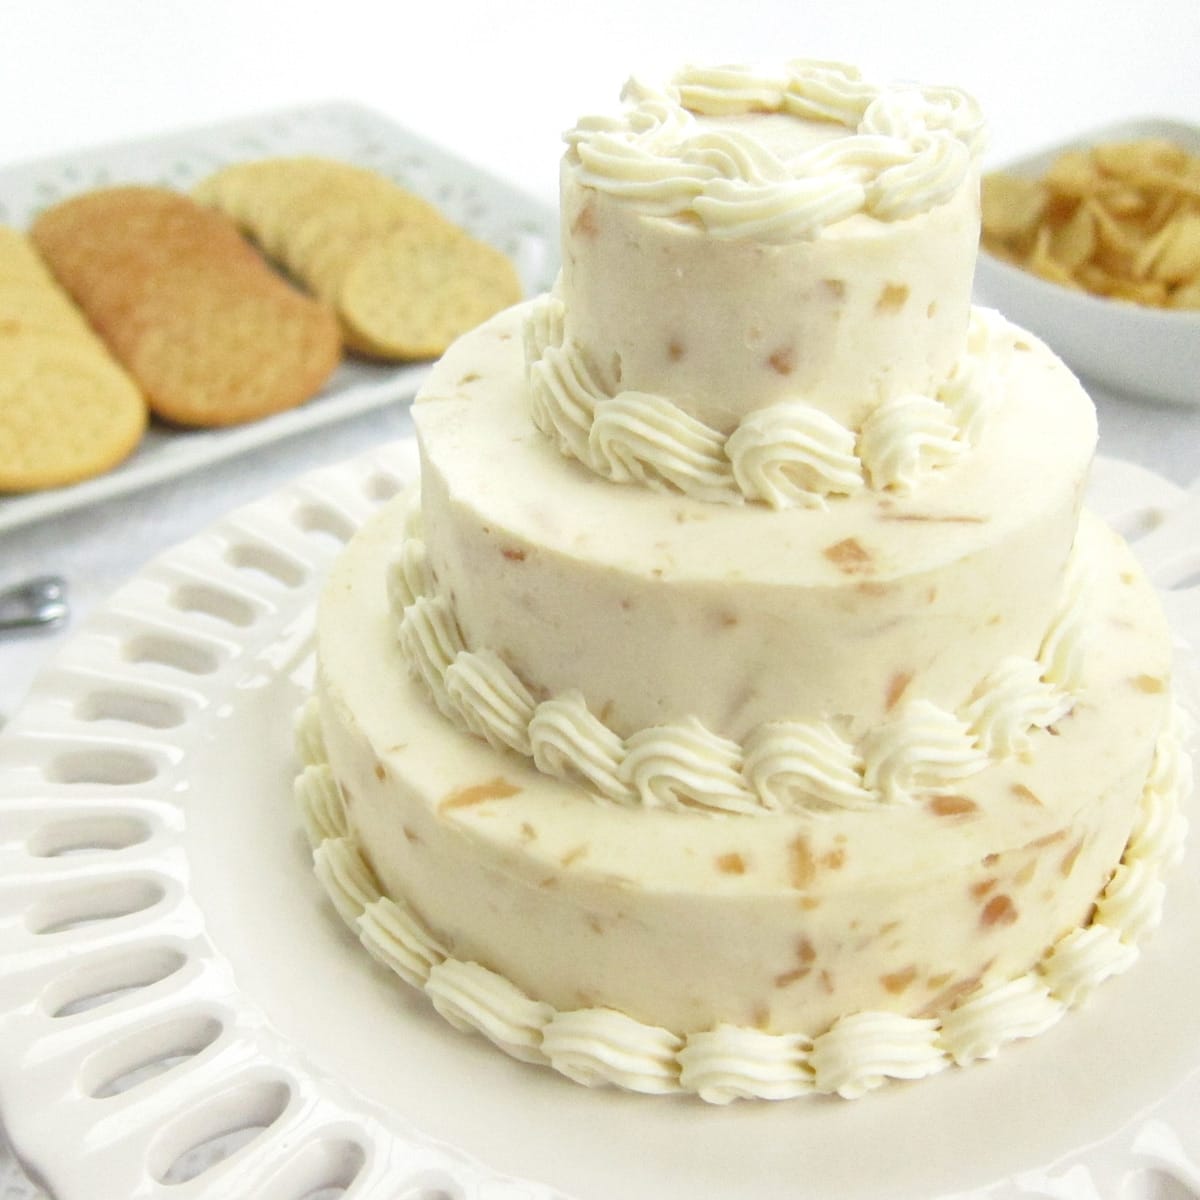
If you are looking for a beautiful and elegant appetizer to make for an upcoming wedding or bridal shower, these delicious wedding cake cheese balls are sure to impress your party guests.
No matter what type of bridal shower you host, you will want to have wonderful food, and I think this cheese spread molded into a wedding cake would make a fantastic addition to your menu.
Even if you don't have any cake-decorating experience, you can make one of these pretty cheese balls. I'll show you how to create a variety of wedding cake designs.
You'll start by making an easy cheese ball recipe and then shape it into the round tiers of a wedding cake. I found it easiest to use round cookie cutters and will show you that method below but you can do it by hand.
Then, you'll add your decorations. You can pipe cream cheese around the border of your cheese ball cake, or add herbs, or flowers. You can even make flowers out of cheese.
There are so many options and they all look beautiful.
I used a delicious Roasted Garlic Parmesan Cheese Ball recipe to make my cheese ball wedding cake. You can use any cheese ball recipe you like just be sure it doesn't have a lot of color to it if you want a pretty white wedding cake.
Roasted Garlic Parmesan Cheese Ball Wedding Cake
Ingredients
whole head (bulb) of garlic - You'll roast this in the oven until the garlic is soft in texture and mild in flavor.
olive oil - Pour this over the garlic before roasting.
blanched and slivered almonds - These will add a wonderful nutty flavor to the cheese ball.
cream cheese - Use full-fat cream cheese for the best flavor. Be sure to set the blocks out at room temperature for at least one hour and up to 3 hours before mixing the cheese ball.
Parmigiano-Reggiano Cheese - Use good quality cheese for the best flavor.
pinch of salt
Optional seasoning - pinch of white pepper - Don't use black pepper or your cheese ball will have black spots.
Optional decorations - a tub of cream cheese, edible flowers, or white cheese slices and yellow food coloring (to make cheese daisies)
Supplies
4 ½", 3 ¼", and 2" round cookie cutters
food processor or an electric hand mixer
offset (angled) metal spatula
tin foil and plastic wrap
optional: piping bag fitted with a coupler and a #21 star tip
Instructions

Roast Garlic
Preheat oven to 400 degrees (I use my toaster oven for small jobs like this.) Cut the head of garlic in half and set it on a piece of tin foil. Drizzle olive oil over garlic. Fold the foil and pinch the edges closed.
Roast in the oven for 35-45 minutes until garlic is golden brown. Allow to cool to room temperature. Squeeze the two halves of the garlic to expel the soft roasted garlic.
Note: I put my garlic through a garlic press, just to remove the darker outer skin of the garlic cloves so that my cheese spread didn't get too brown. It isn't necessary, but I think the cakes look better cream-colored than tan.
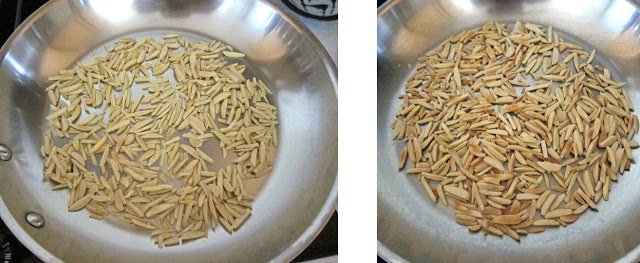
Roast slivered almonds.
Roast the slivered almonds. Pour the almonds into a skillet set over medium or medium-low heat.
Stir often as they roast until they turn golden brown. I usually heat the nuts until they just begin to brown, then I turn off the heat and allow the nuts to roast in the residual heat of the skillet. I don't worry about burning the nuts that way. Allow the nuts to cool to room temperature.
Combine the cream cheese, grated Parmesan cheese, roasted garlic, salt, and white pepper, if using, in the bowl of a food processor. Pulse until creamy and smooth.
Add nuts and pulse 10 times just to incorporate the nuts. If using an electric mixer, combine all the ingredients in a mixing bowl, and blend until smooth and creamy. Roughly chop the nuts and combine.
Create the cheese ball wedding cake layers
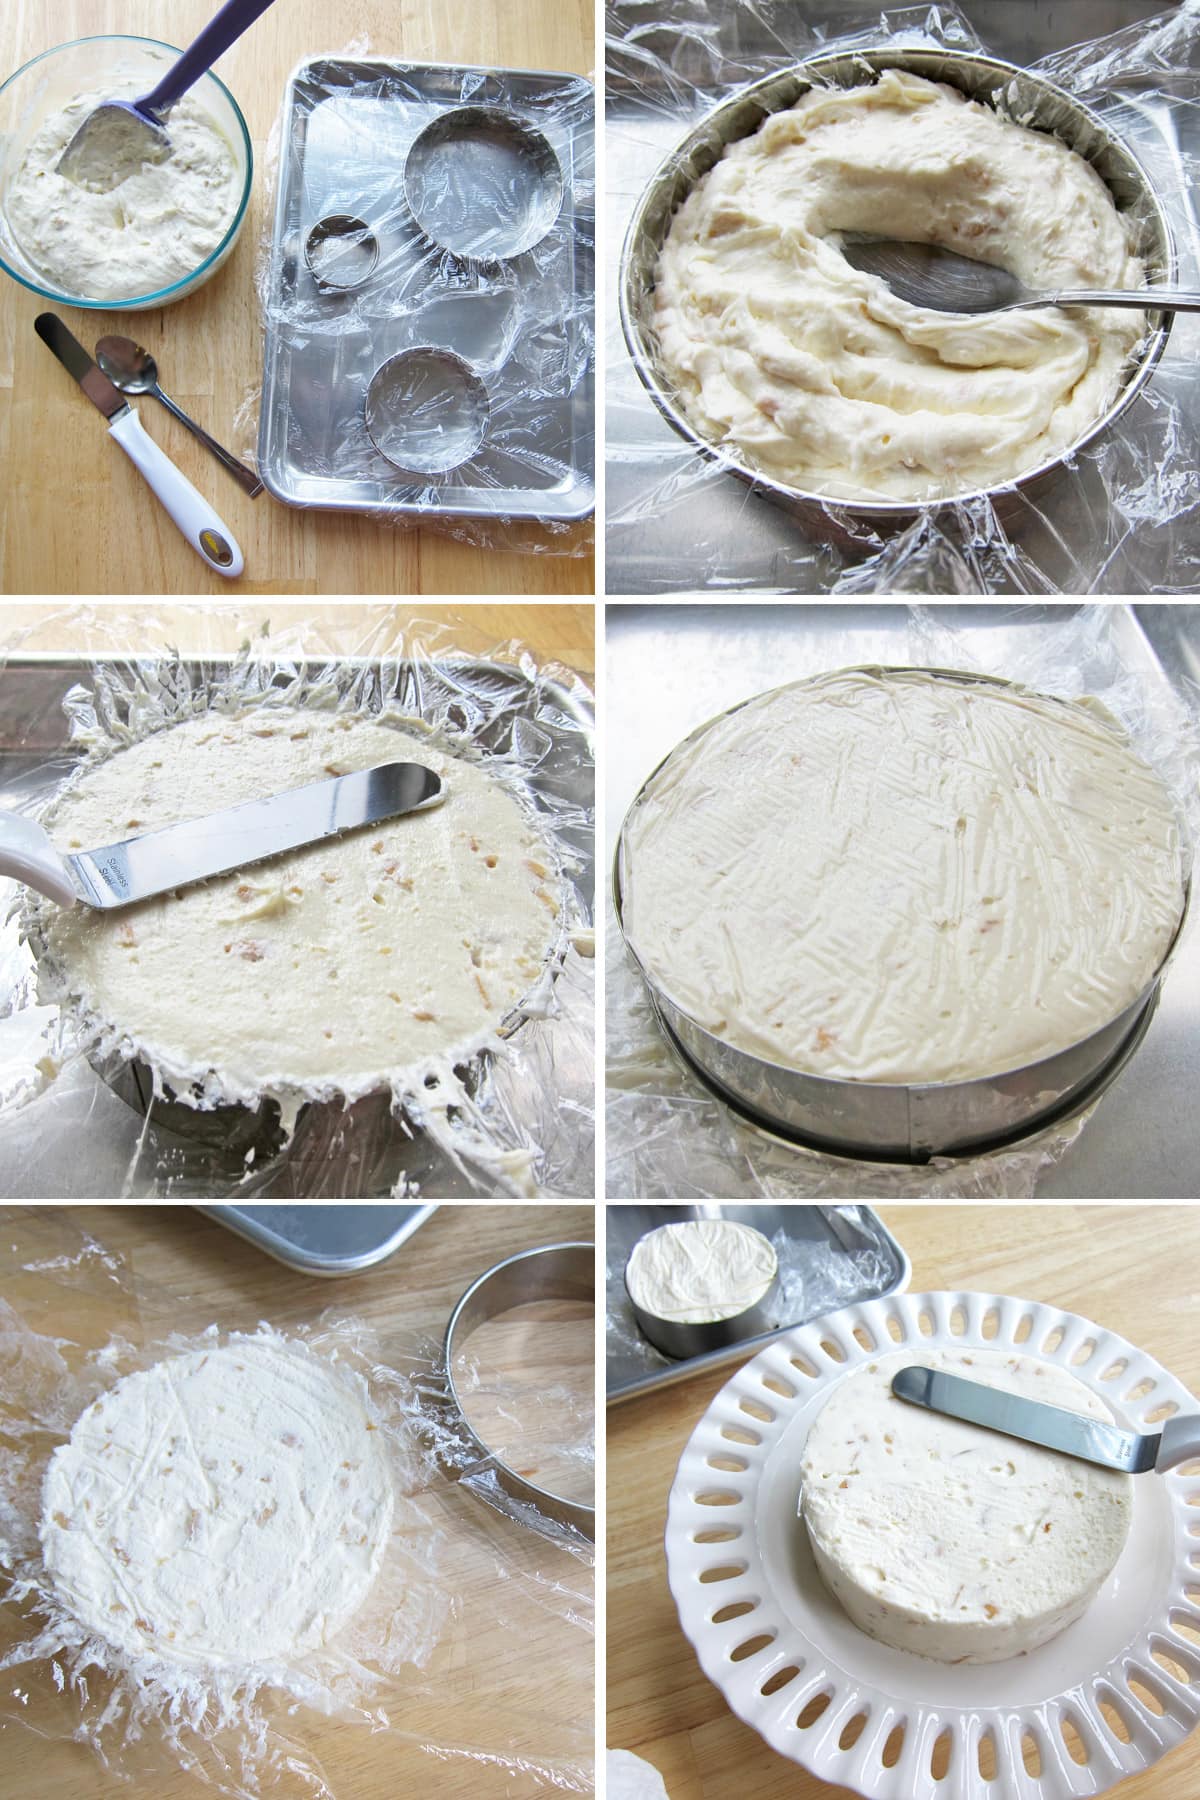
Line each of the round cookie cutters with plastic wrap. Spoon the cheese spread into each of the cutters, making sure to completely fill the cutter. Level off the cheese spread using an offset spatula.
Fold plastic wrap over the top of the cheese spread. Flip the filled cookie cutter upside down. You need to make sure the cheese completely fills the cutter.
As you can see, in the middle picture, the cheese doesn't completely fill the cutter on the left.
Use your fingers to press the cheese to flatten it out so that it fills the cutter around the edges. If you skip this step, your layered cakes will have gaps where the cakes touch.
Chill for at least 2 hours, and up to several days.
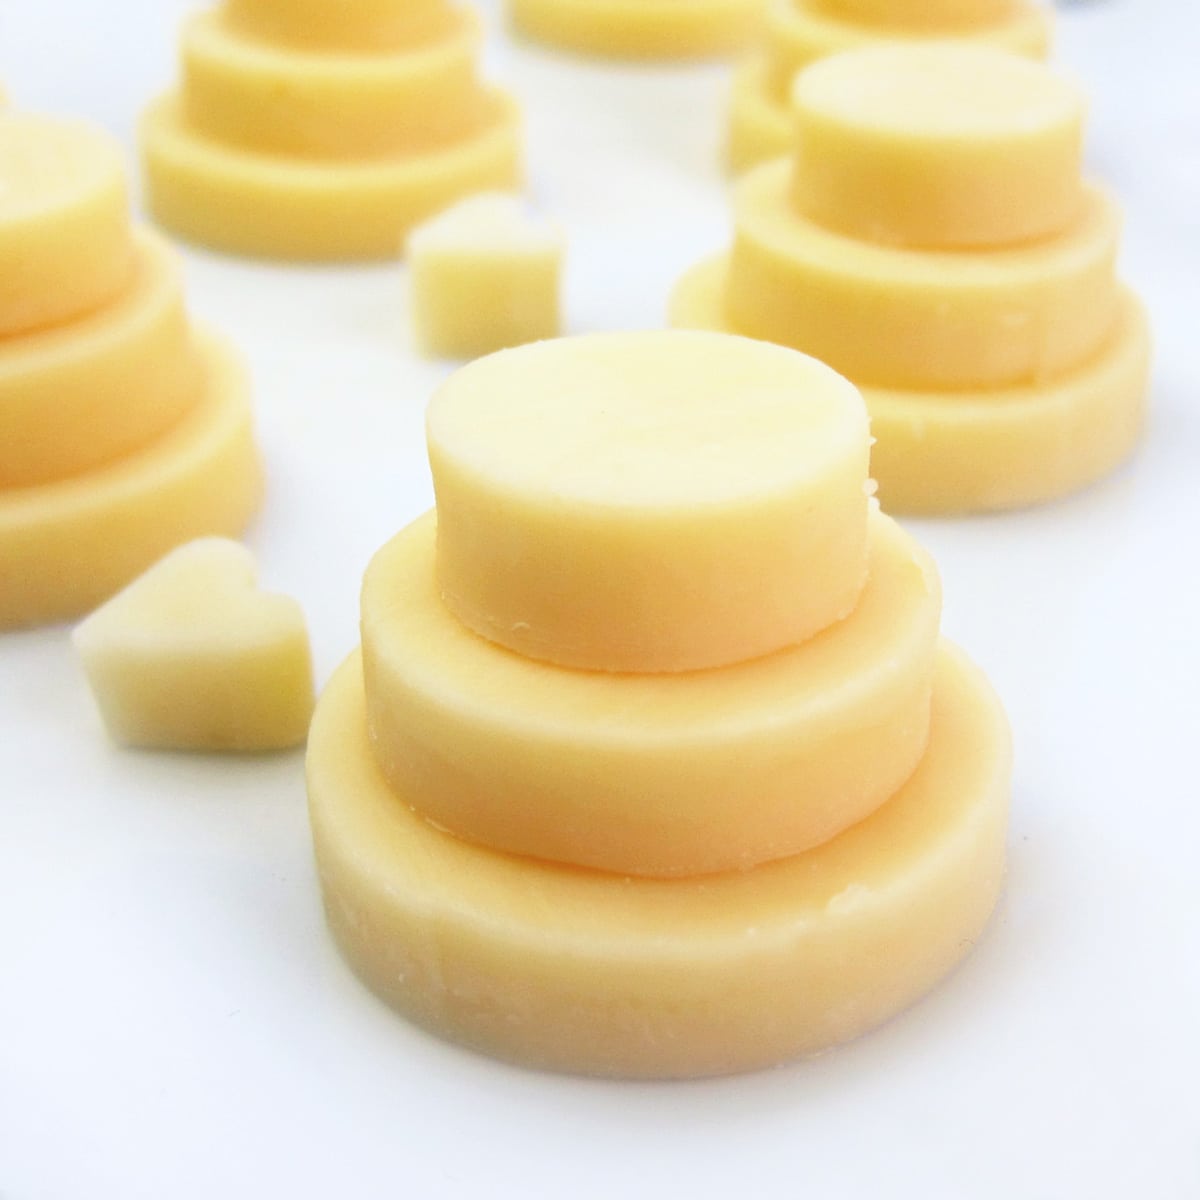
Stack the wedding cake layers.
Unmold and unwrap the chilled cheese rounds. Set the 4 ½" cheese round on a serving platter or small cake stand.
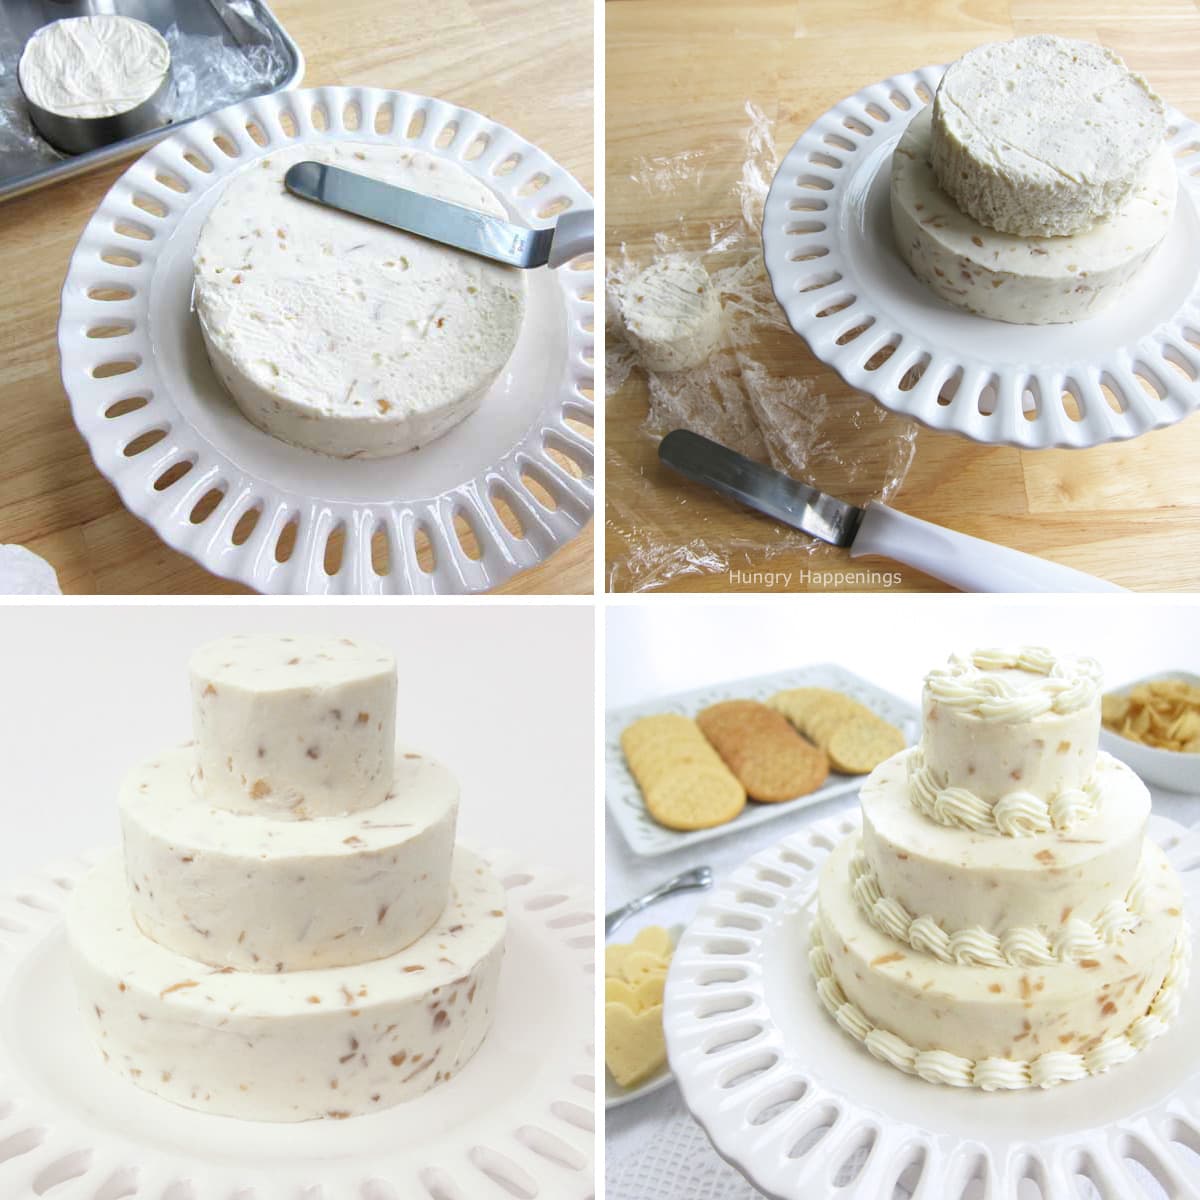
Each of the cheese rounds (a.k.a. cake layers) will have a wrinkled-looking exterior caused by the folds in the plastic wrap. This is unavoidable. To smooth out the top and sides of your cake layers, run an offset spatula under hot water, dry, and then use it to smooth the top and sides of the cheese round. I actually filled a glass with hot water and just dipped the spatula into the water, then wiped it dry with paper towels, and used it to smooth out the wrinkles.
Once you've smoothed out the bottom cake layer, stack the 3 ¼" cake layer in the center on top of the first layer. Smooth it out then add the third and smallest cake layer and smooth it out.
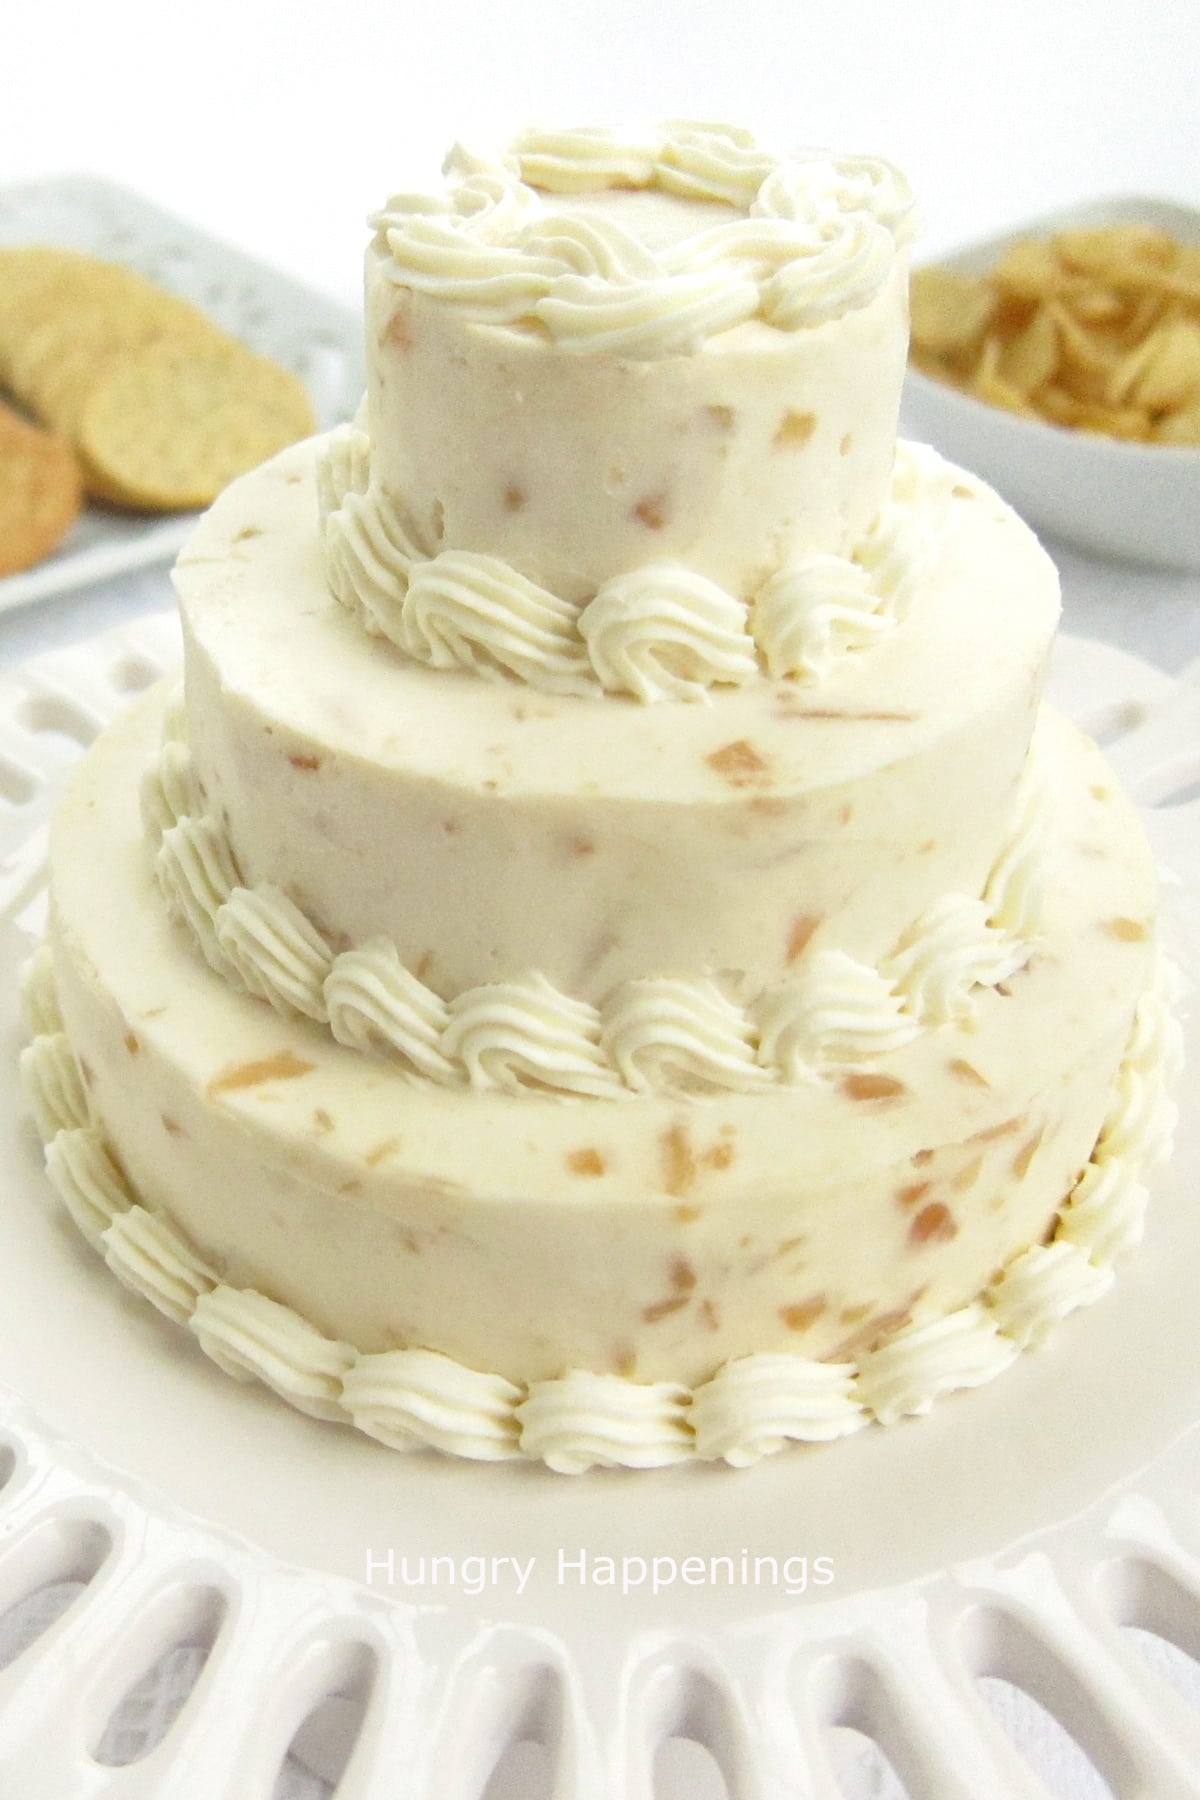
You can now decorate your cake any way you'd like.
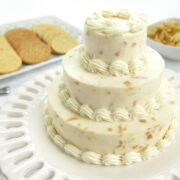
I decorated this cake by spooning whipped cream cheese into a pastry bag fitted with a #21 open star tip. I piped a simple border around each cake layer.
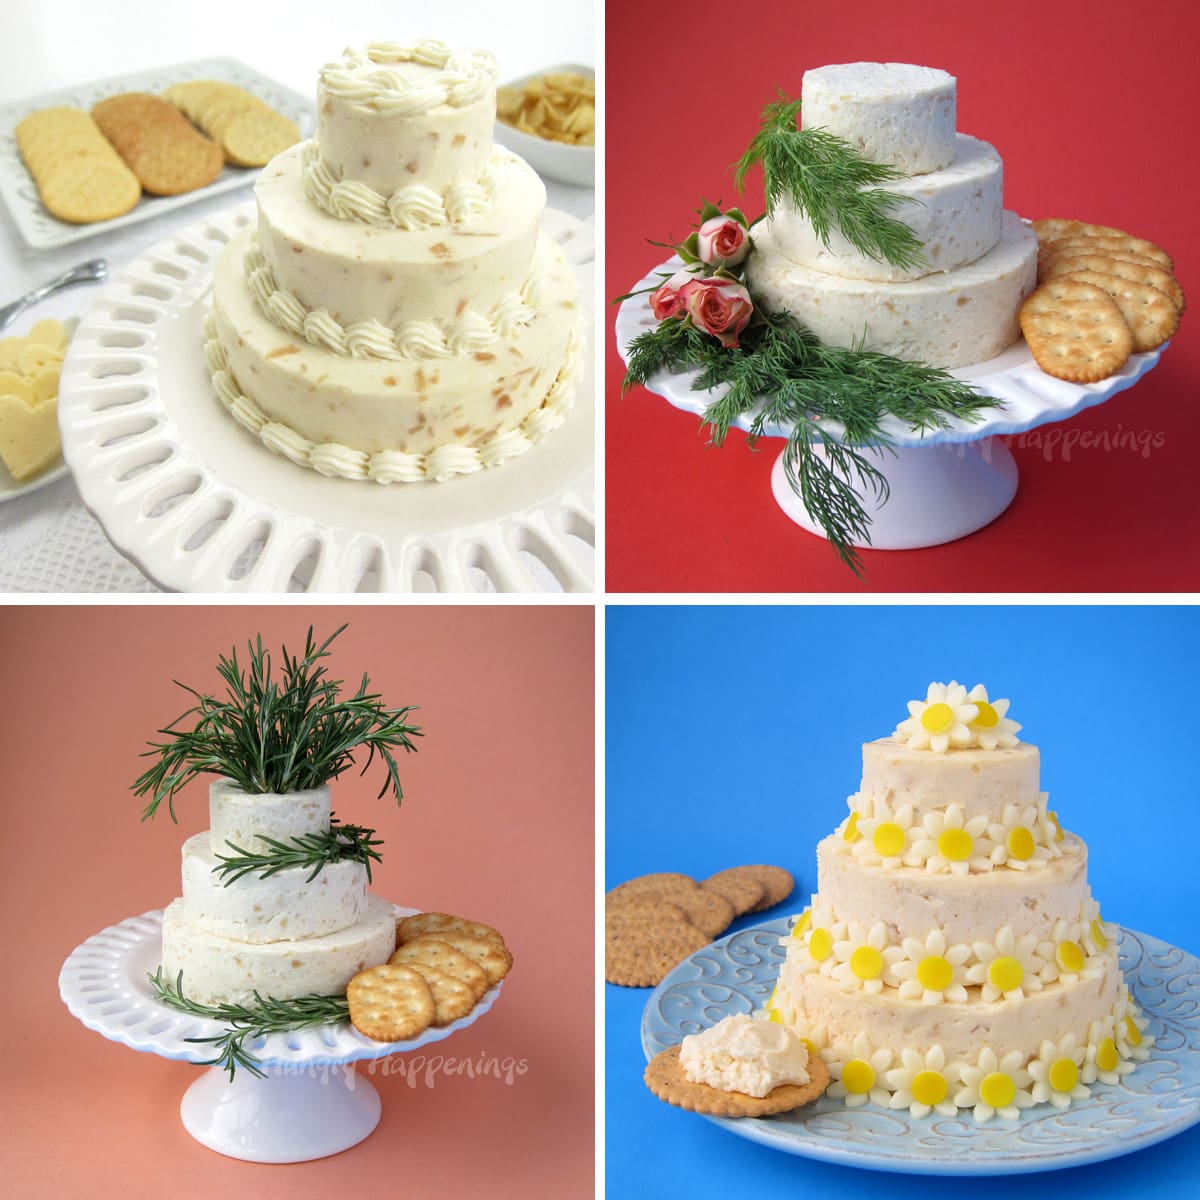
Variations
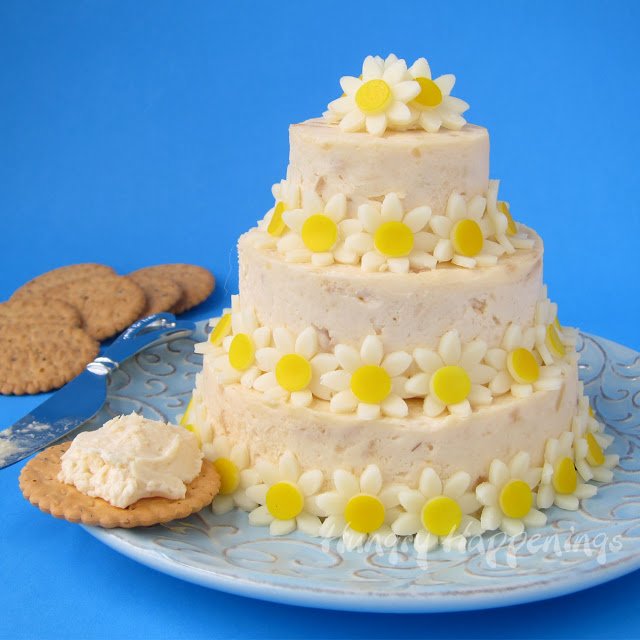
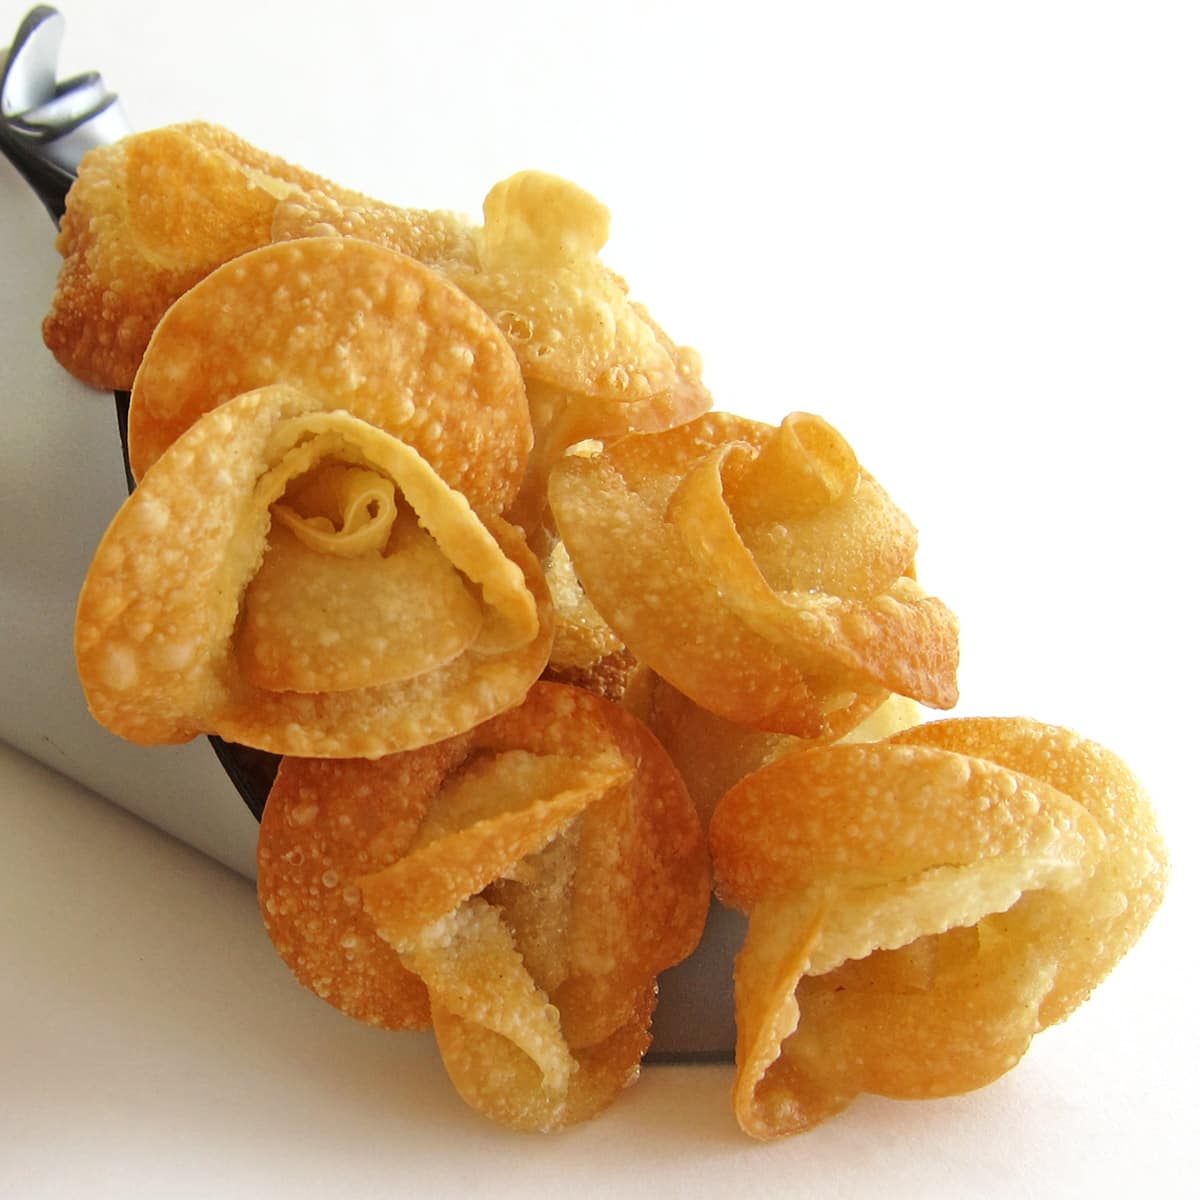
I created this daisy wedding cake cheese ball and shared a step-by-step tutorial in another post. I absolutely loved the design.
The flowers are easy to make using cheese slices.
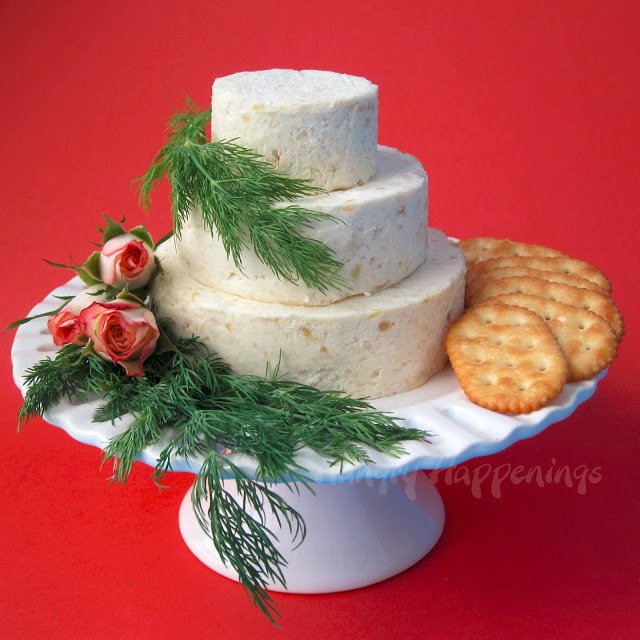
This cake is decorated with fresh dill and a few roses. If you add real flowers to your cheese ball, be sure they are pesticide-free.
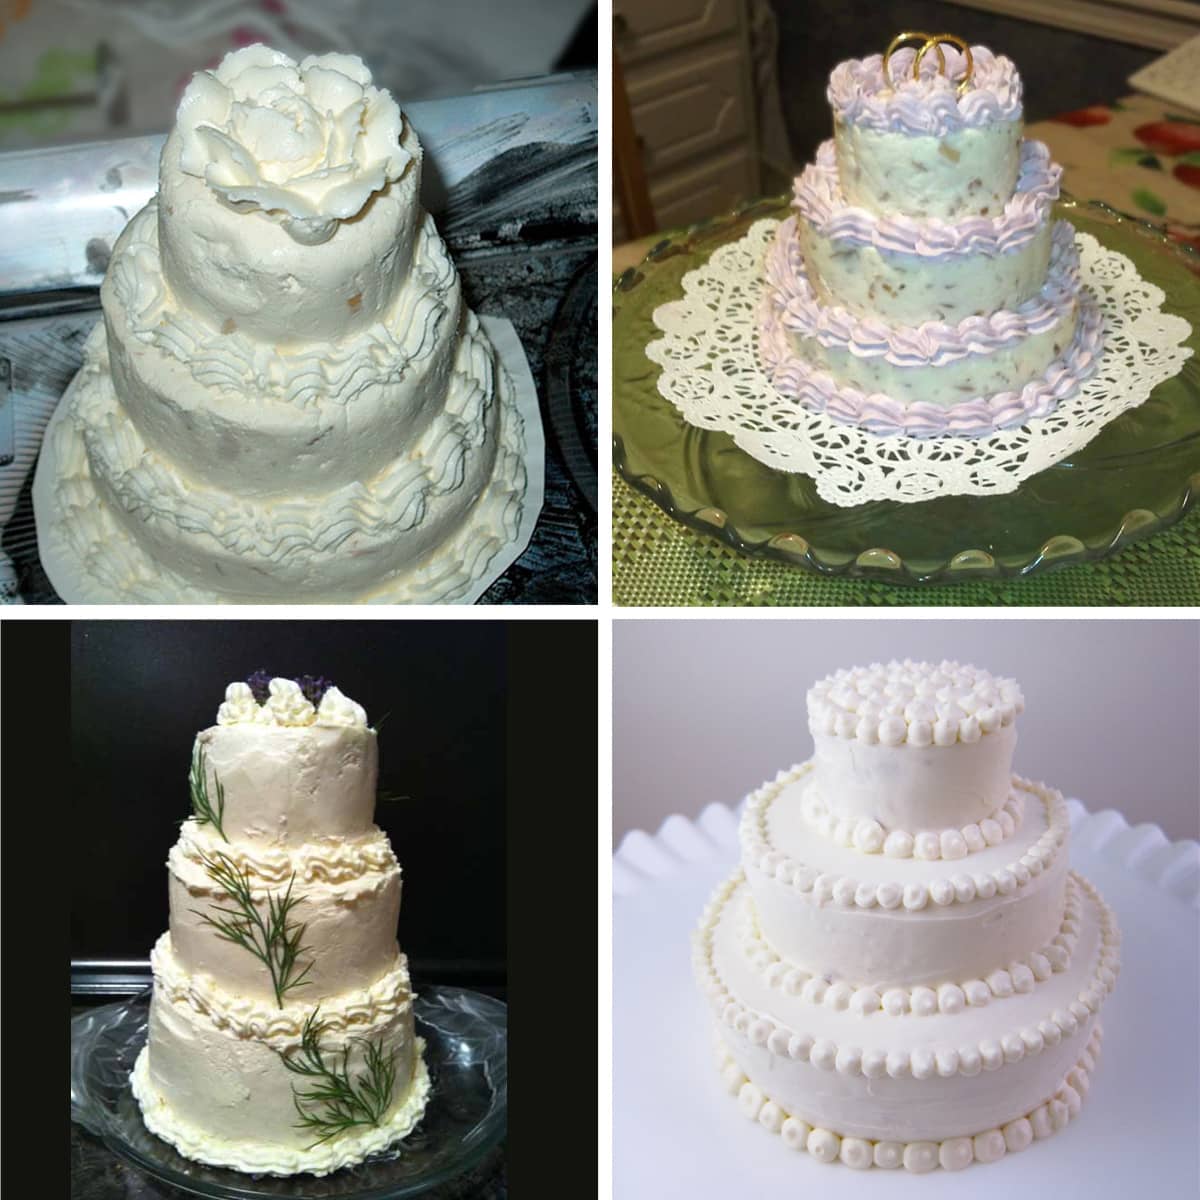
Reader's Wedding Cake Cheese Balls
These wedding cake cheese balls were all created by my readers. Some of these were served at weddings and others were served at bridal showers.
Everyone said they were a huge hit with their party guests.
Related Recipes
Be sure to check out all of my Wedding and Bridal Shower Recipes.
Recipe
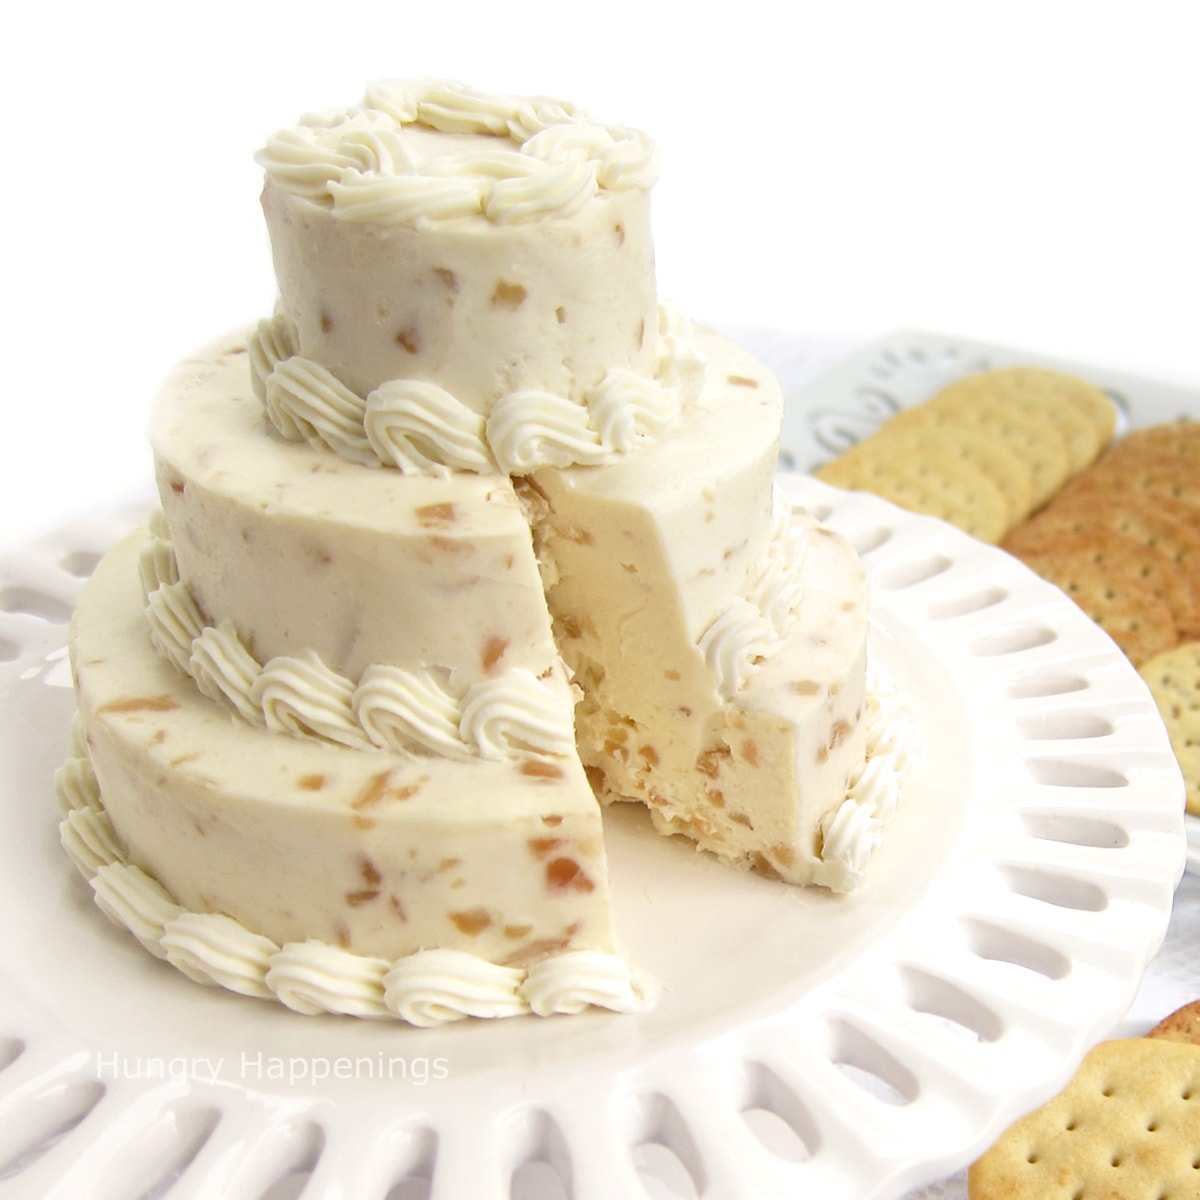
Create a beautiful appetizer for a bridal shower or wedding. This three-tier cheese ball wedding cake is made using a roasted garlic and parmesan cheese ball recipe.
- 1 whole head of garlic
- 1 teaspoon olive oil
- ⅔ cup blanched and slivered almonds
- 16 ounces (2 blocks) of cream cheese, softened
- ¾ cup freshly grated Parmigiano-Reggiano Cheese or freshly grated Parmesan
- pinch of salt
- optional: pinch of white pepper (don't use black pepper.)
- optional decorations: a tub of cream cheese or edible flowers, or white cheese slices
-
Preheat oven to 400 degrees.
-
Cut the head of garlic in half and set it on a piece of tin foil. Drizzle olive oil over garlic. Fold the foil and pinch the edges closed.
-
Roast in the oven for about 45 minutes until the garlic is golden brown. Allow the roasted garlic to cool to room temperature.
-
Squeeze the two halves of the garlic to expel the soft roasted garlic and press it through a garlic press to remove the dark outer skin.
-
Roast the slivered almonds in skillet set over medium-low heat until golden brown.
-
Allow the nuts to cool to room temperature.
-
Combine the cream cheese, grated Parmesan cheese, roasted garlic, salt, and white pepper, if using, in the bowl of a food processor.
-
Pulse until creamy and smooth.
-
Add the roasted almonds and pulse 10 times just to incorporate the nuts.
-
If using an electric mixer, combine all the ingredients in a mixing bowl, and blend until smooth and creamy. Roughly chop the nuts and combine.
-
Line 4 ½", 3 ¼", and 2" round cookie cutters with plastic wrap and set on a baking sheet.
-
Spoon the cheese spread into each of the round cookie cutters, making sure to completely fill the cutter.
-
Level off the cheese spread using an offset spatula.
-
Fold the plastic wrap over the top of the cheese and smooth out the wrinkles using your fingers.
-
Chill the cheese balls for at least 2 hours, and up to several days.
-
Remove the cheese balls from the cookie cutter and peel off the plastic wrap.
-
Set the 4 ½" cheese round on a serving platter or small cake stand.
-
Run a metal spatula under hot water then dry it off. Run it around the edge and top of the cheese ball layer to smooth it out.
-
Stack the reamaining two layers onto the first and smooth them out.
-
Decorate by piping cream cheese around the border or adding herbs, edible flowers (or flowers that are free of pesticides), or cheese flowers.
-
Chill until ready to serve.
Store your cheese ball wedding cake in the refrigerator until you are ready to serve it. It's best to set the cheese ball out at least 30 minutes before serving so the cheese softens enough to scoop it out. It can sit on your appetizer table for a few hours.

- Banana Split Bars – A Fun and Easy Summer Dessert - March 4, 2026
- Pineapple Fudge (No Candy Thermometer Needed!) - March 4, 2026
- No-Bake Peanut Butter Pie Recipe - March 3, 2026
Lisa says
I have wanted to make this for such a long time and finally did. It came out amazing and really looked like a mini wedding cake. Everyone loved it . Can I post a picture somehow ? Thanks so much for the great idea.
Beth says
Hi Lisa,
I am so happy to hear your cheese ball wedding cake turned out so well!!! I'd love to share a picture of it with my audience. You can send your picture to beth@hungryhappenings.com.