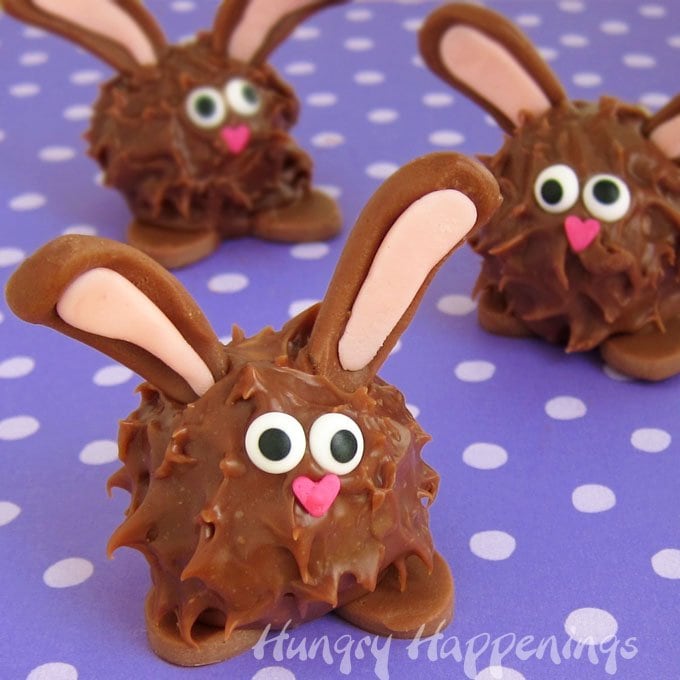
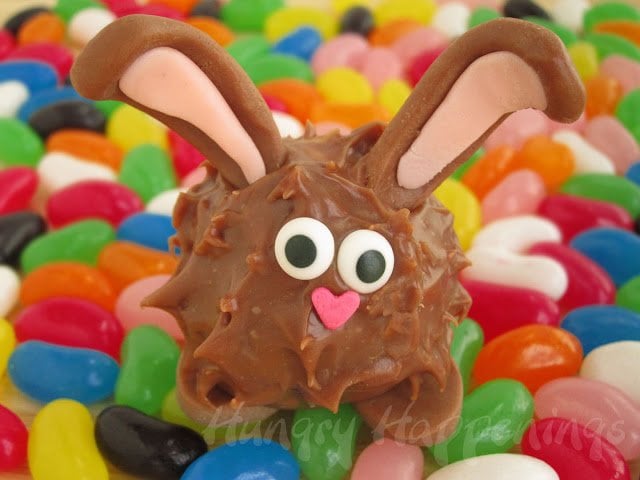
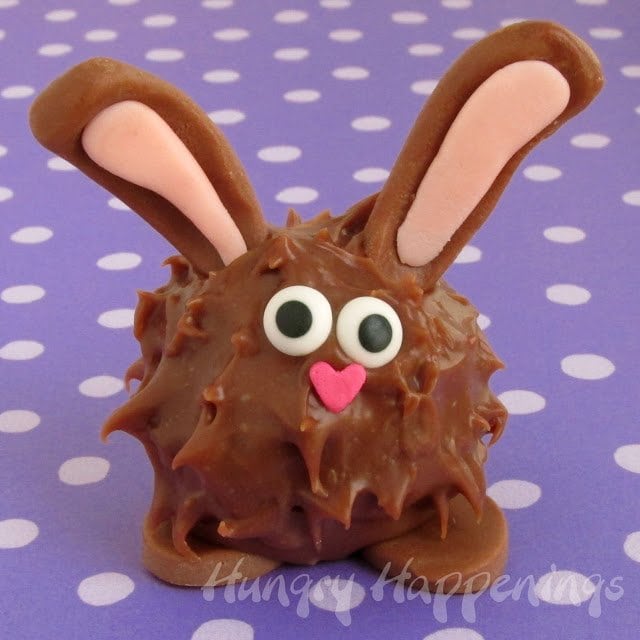
Fill your baskets with these adorably cute Peanut Butter Fudge Filled Chocolate Easter Bunnies. Each one is made with a peanut butter fudge ball coated in milk chocolate ganache and is decorated with chocolate ears and feet.
Waking up on Easter morning to find a basket filled with sweet treats was one of the highlights of my year when I was young. Oh, who am I kidding, I still love it.
Of course, the chocolate bunnies that used to satisfy me at age 7, don't hold a candle to the ones found in my basket now.
Each year my husband goes out and buys some Peeps, jelly bunnies, and jelly beans to put in my basket, but for the most part he just raids my chocolate kitchen and is always sure to grab a solid chocolate bunny and some peanut butter fudge filled chocolate eggs.
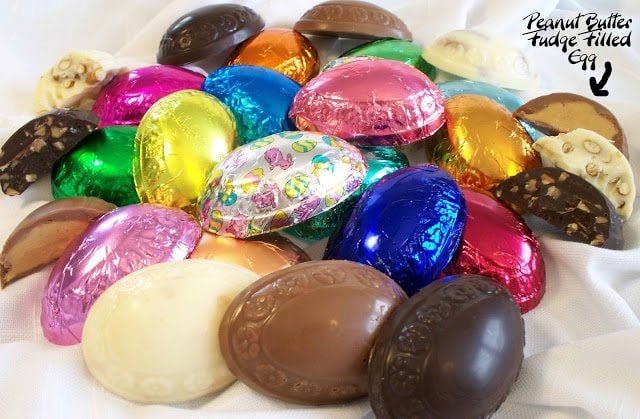
I love, love, love peanut butter and chocolate and so do my customers. Each year I make more peanut butter fudge filled eggs than any of the other 18 flavors in my selection. So when it came time to put together Easter recipes, I knew I needed to do something with peanut butter fudge.
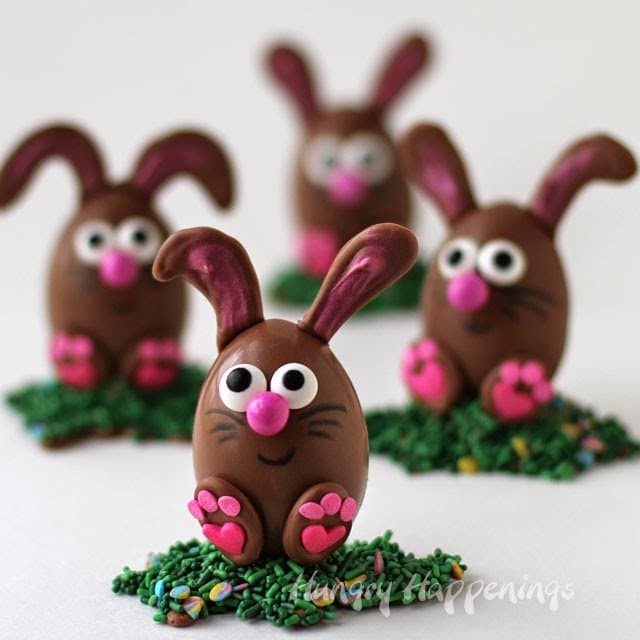
My peanut butter fudge recipe which uses melted white candy coating and peanut butter chips mixed with creamy peanut butter and a pinch of salt is very versatile. It can be poured into molds, hardened, and served as is, like my Peanut Butter Fudge Hearts or Peanut Butter Fudge Starfish. Or it can be poured into a chocolate shell to create the eggs pictured above or my Chocolate Easter Egg Bunnies.
It can also be scooped and rolled into balls like I did to make these Peanut Butter Fudge filled Chocolate Easter Bunnies.
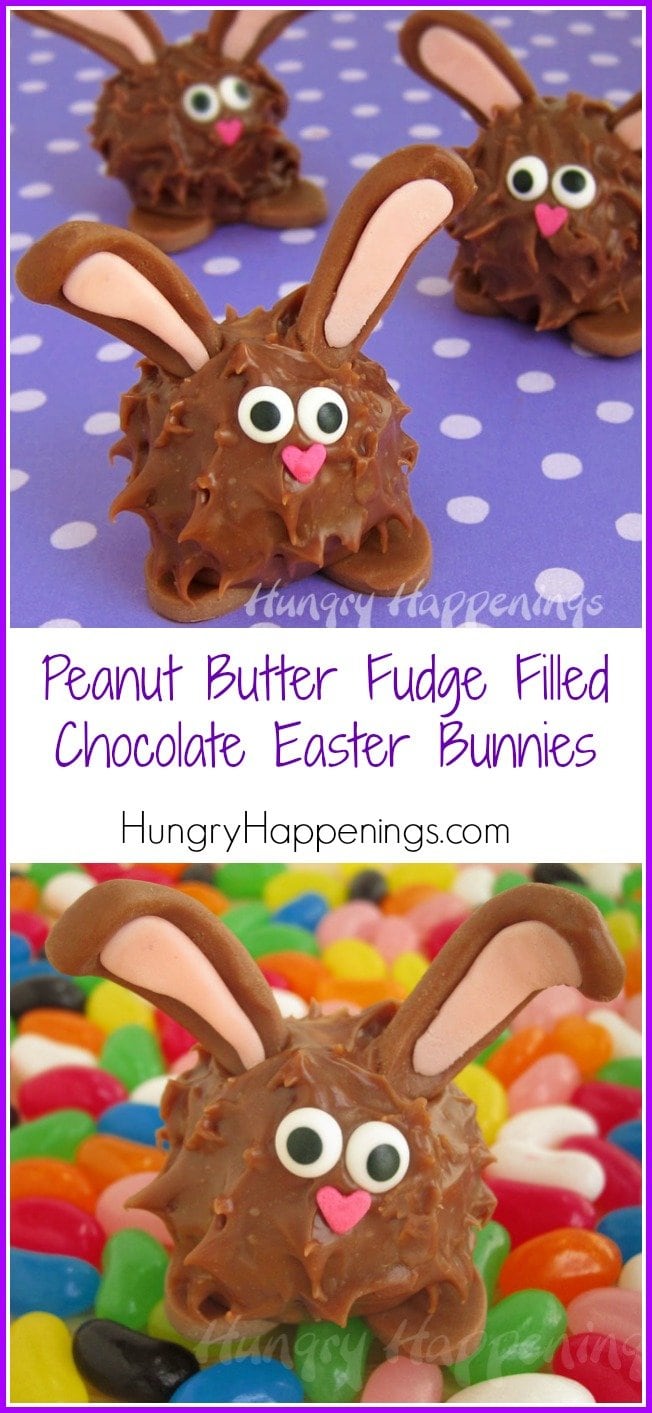
To make these bunnies, you'll make the creamy peanut butter fudge, allow it to cool and firm up so you can scoop it into balls which will be dipped into milk chocolate ganache and decorated with modeling chocolate ears and feet and candy eyes, and a cute heart-shaped nose.
This recipe will make the most decadently creamy chocolate bunny you've ever tasted.
I actually made these sweet little Easter bunnies back in 2012. That was during my second year of blogging when I didn't have a very large number of followers. They are still one of my favorite Easter treats, so I thought I'd share them with you again with enhanced images and a printable recipe.
Here are a few notes about this recipe...
I absolutely love the creamy peanut butter fudge made using peanut butter chips and white chips, but realize some of you will not have the time to wait several hours or overnight for it to set up. If you are in a hurry, you can use the peanut butter fudge recipe I used to make my Pink Fuzzy Slipper Cookies, It uses peanut butter, powdered sugar, butter, and whipping cream and is quick and easy to make.
If you aren't a fan of peanut butter but still want to make these adorably cute chocolate Easter bunnies, simply use the techniques I'm going to show you, but use cake balls, chocolate truffles, doughnut holes, or Oreo truffles instead.
I used modeling chocolate to create the ears and feet, but you could pipe them out of chocolate or use Tootsie Rolls and pink taffy or store bought fondant. There are so many possibilities.
Before you begin If you don't have much experience working with chocolate and confectionery coatings, you might want to read my Chocolate Making Tips. You'll also find the recipe and tutorial for making homemade modeling chocolate there too along with troubleshooting information.
Ingredients:
Peanut Butter Fudge -
8 ounces white confectionery coating*
4 ounces Reese's Peanut Butter Chips
1 cup creamy peanut butter (I suggest Jif Peanut Butter)
a pinch of salt
Milk Chocolate Ganache -
16 ounces good quality milk chocolate, finely chopped or chips
½ cup heavy whipping cream
1 tablespoon light corn syrup
Decorations -
milk modeling chocolate (¼ of the recipe will be enough for this project)
white modeling chocolate (¼ of the recipe will be more than enough for this project)
pink candy coloring
powdered sugar to dust work surface, optional
water
36-40 candy eyes
18-20 pink heart sprinkles
*I personally use Peter's White Caps which you can usually find at cake/candy decorating stores, but Merken's white coating also has a good flavor for this recipe. A grocery store option is to use Nestle Premier White Morsels (white chips) which when melted may need a teaspoon of vegetable oil stirred in, if too thick, they have the right flavor.
Supplies needed:
Microwave-safe mixing bowl
rolling pin
small oval metal cutter
parchment paper or Silpat
baking sheet
double boiler (or use a pan with a bowl set on top)
drinking glass
chocolate dipping fork or a plain fork
spatula or knife
optional, tweezers (food only)
Items used to make this recipe available on Amazon.com (affiliate links)
 Reese's Peanut Butter Bakin...Shop on Amazon
  Pink Heart Sprinkles 2.6 Ou...Shop on Amazon
 Wilton Wilton Oval Fondant ...Shop on Amazon
  White And Black ½-Inch Ca...Shop on Amazon
Instructions:
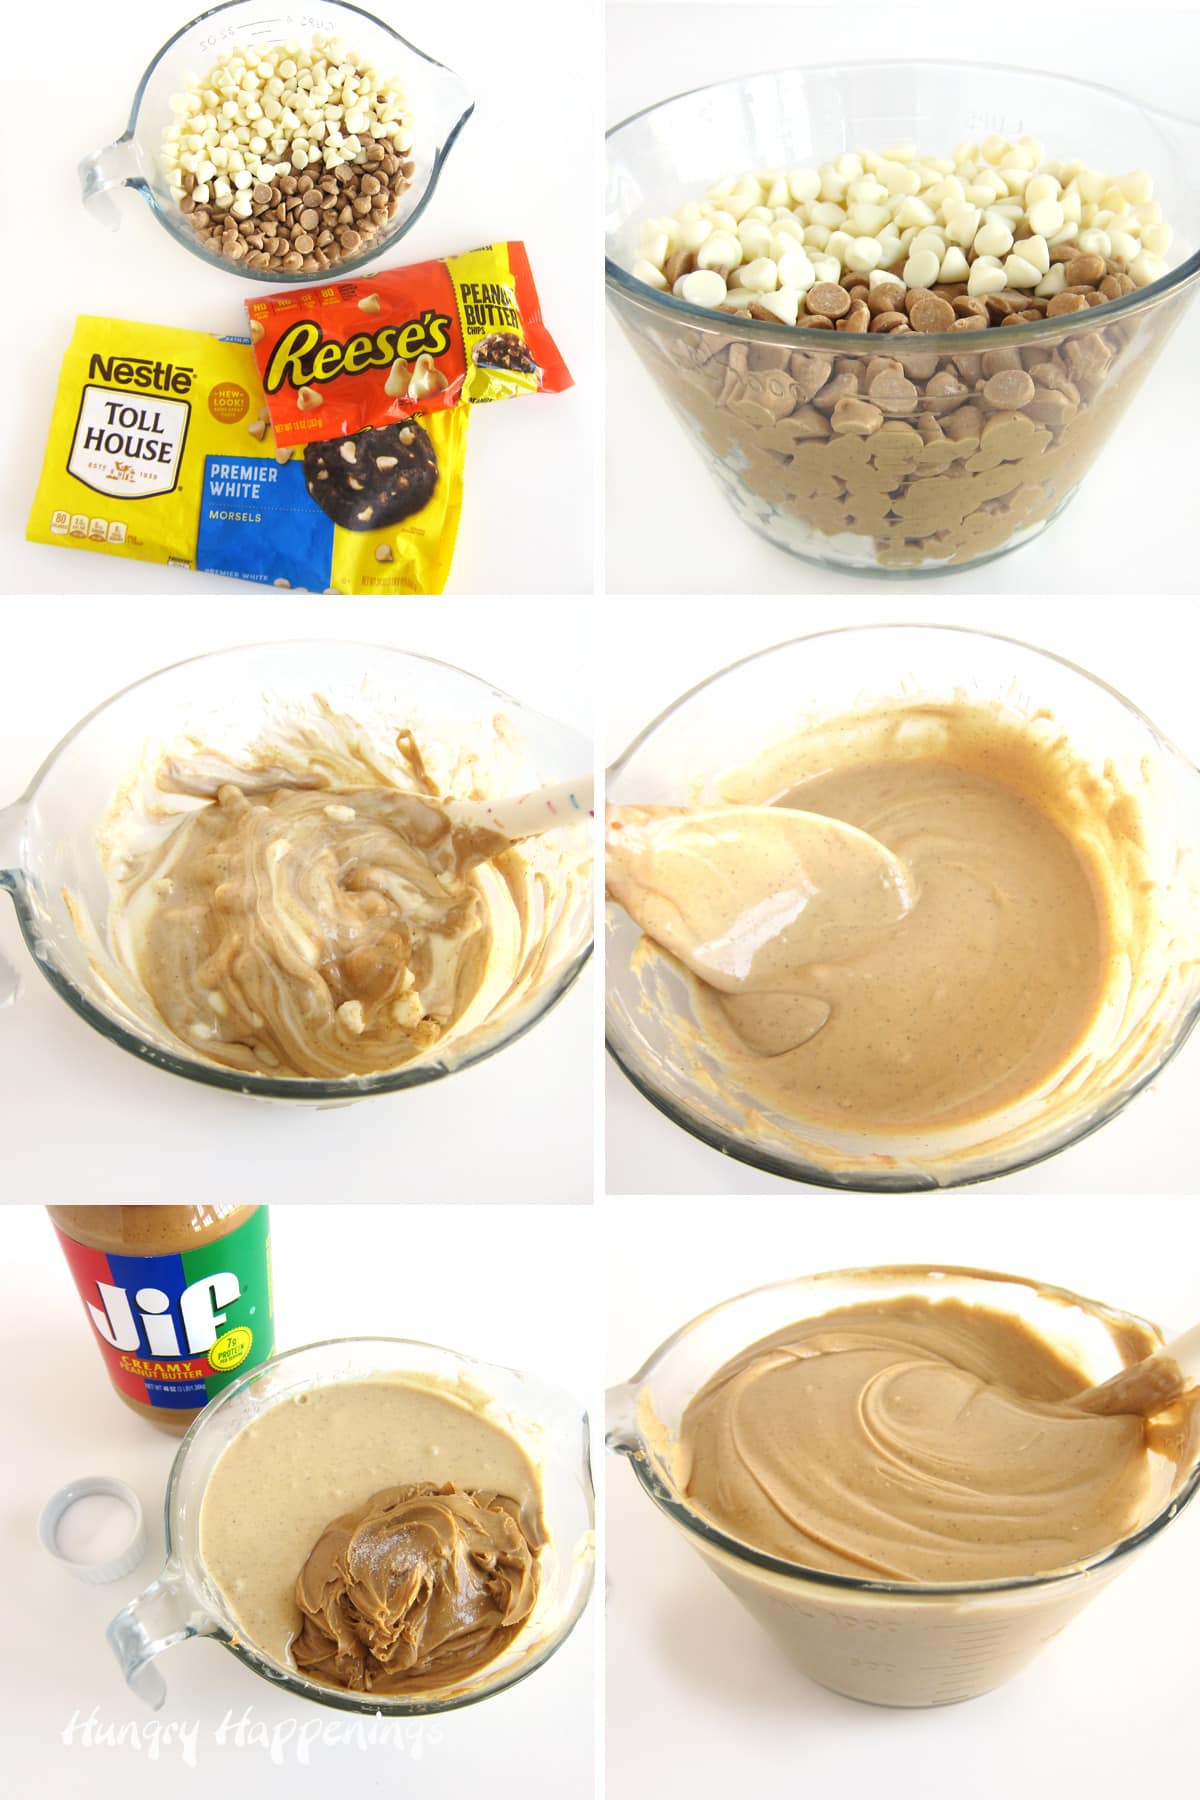
Place white confectionery coating wafers and peanut butter chips in a microwave-safe mixing bowl. Heat on high power for 30 seconds. Remove and stir the chips around or they will burn. Heat for 25 more seconds, then stir. Heat for 20 seconds, then let it sit in the microwave for 2-3 minutes, then stir vigorously.
If all of the chips are not melted, heat at ten-second intervals, stirring in between each, until completely melted. If you don't have a microwave, you can melt this in a double boiler. Once melted, stir in peanut butter and salt.
Make sure to mix really well, scraping the bottom of the bowl. If you don't stir the peanut butter into the candy, you'll end up with clumps of hardened candy coating your peanut butter fudge.
Don't you just want to put your mouth under the flowing fudge? I can't resist sampling it in its liquid state. Quality control is so important, don't you agree?
At this point, you need the peanut butter fudge filling to go from a melted state to a solid state. I like to just cover my bowl and let it sit overnight. If you don't have that kind of time, pour it into a shallow bowl, like a pie dish, and let sit for several hours until set.
While your peanut butter fudge is setting you can get busy making your bunny ears and feet. Use the instructions here to color your white modeling chocolate pink. Just be aware that the pink coloring can be very vibrant and bright, so use a very small amount.
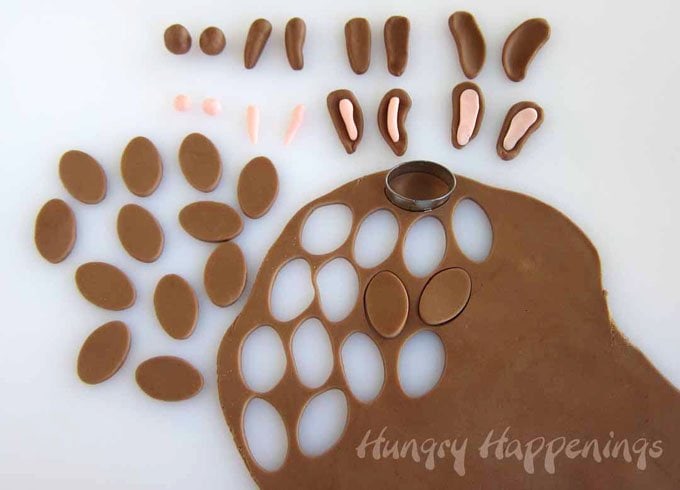
Make bunny ears.
To make the bunny ears, pinch off 40 small pieces of your milk-flavored modeling chocolate. Roll into balls then into a teardrop shape then flatten and curve up the edges and bend 20 to the right and 20 to the left.
Pinch off smaller pieces of pink modeling chocolate and do the same making the pink fur for inside the ears. Brush the back of the pink piece lightly with water and press it onto the brown ears.
Lightly dust your work surface with powdered sugar. Roll the milk-flavored modeling chocolate to about ⅛" thickness. Use a small oval metal cutter to cut out 40 feet. If you don't have a small oval cutter, you can just pinch off balls of milk modeling chocolate and flatten them into ovals.
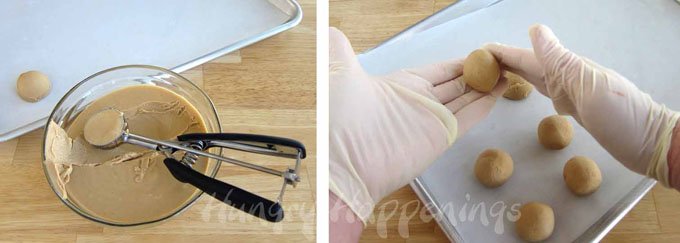
Make peanut butter fudge balls.
Once your peanut butter fudge has been set up, scoop out 18-20 heaping tablespoonfuls and roll into balls.
If your hands are warm, the balls will melt a bit as you roll them. Either wash your hands as needed or wear food-handling gloves, as I did. If the balls are a bit bumpy, it won't matter.
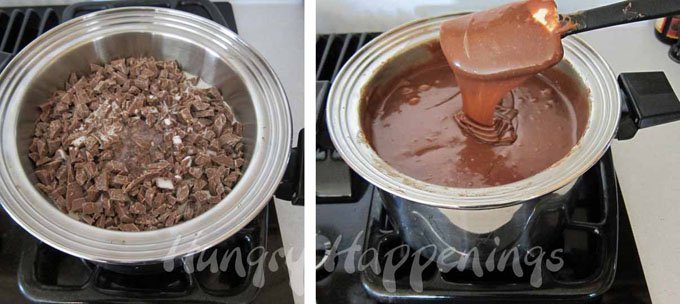
Make chocolate ganache.
Use a double boiler or a pan with a bowl that fits on top of the pan to make your milk chocolate ganache. Fill the bottom pan with 1 inch of water. Set it over low heat. Fill the top bowl with your chopped milk chocolate, heavy whipping cream, and corn syrup. Set the bowl on top of the pan of water making sure the water doesn't touch the bowl.
Allow the chocolate to melt, stirring often. Do NOT increase the heat or you might burn the chocolate. Allow it to melt slowly.
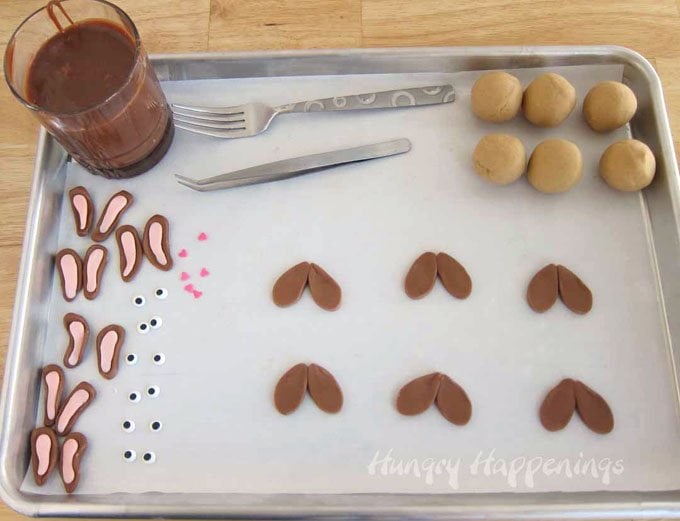
Pour some of your milk chocolate ganache into a drinking glass for ease of dipping. Place two bunny feet next to each other on a parchment paper or Silpat lined baking sheet.
Have your chocolate ears, candy eyes, and heart sprinkles ready. I find it easiest to add small decorations if I use tweezers so have those ready too.

Dip peanut butter balls.
Set one peanut butter ball in your chocolate ganache. Use a fork to press the ball down into the ganache, covering it completely. Put the fork under the ball and pull it out of the ganache. Tap the fork on the side of the glass a few times to remove the excess ganache.

Make the chocolate look furry.
Set the peanut butter fudge ball on top of two of the modeling chocolate bunny feet. Use a spatula or knife to create the furry look of your chubby bunnies. Press the spatula onto the chocolate ganache, and pull up and away creating spikes. Do this all around the peanut butter fudge ball.
If you have any spots where the peanut butter fudge is showing, fill in with some ganache. Immediately decorate your bunny.
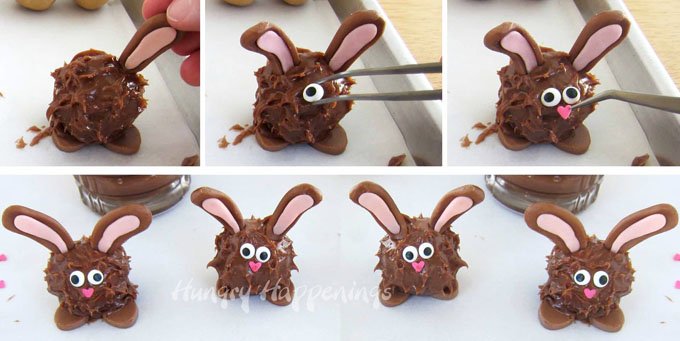
Decorate your bunnies.
Press the ears onto the top of the ball.
Press on two eyes and a heart-shaped nose.
Repeat creating more bunnies. Allow your chocolate bunnies to sit at room temperature to dry.
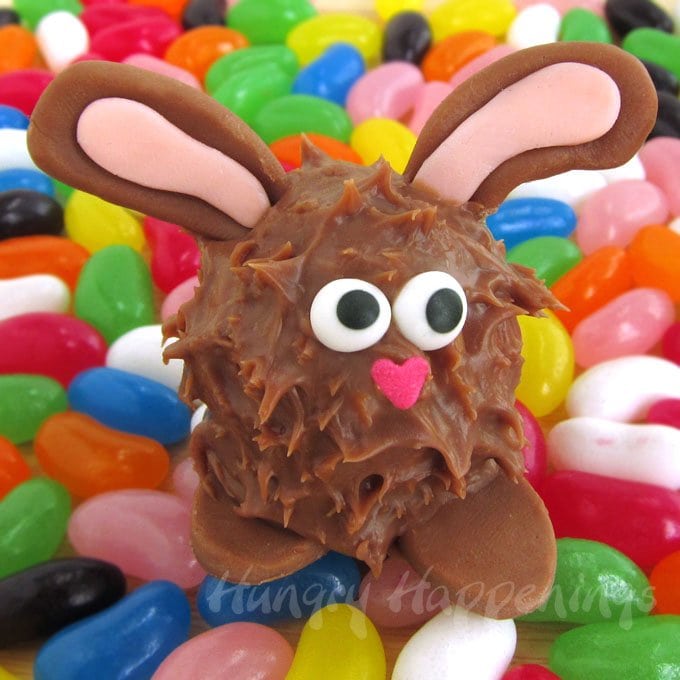
Storage
Store in an airtight container for up to 10 days. If you keep them refrigerated, just be aware that the modeling chocolate pieces will get condensation on them and will appear sticky, so I recommend just keeping them at room temperature.
If you’d like to have the ultimate guide to working with Candy Clay (modeling chocolate) be sure to get your printed or e-book copy of Candy Clay Creations. This 102 page book is filled with tips and tricks for making and working with candy clay along with 17 step-by-step tutorials for decorating cupcakes, cookies, and more using candy clay. It’s a fantastic resource for anyone who wants to make festively decorated treats.
RELATED: Find dozens of easy fudge recipes at HowToMakeEasyFudge.com.
Related Recipes
Be sure to check out all of my Easter Recipes.
Recipe

Fill your Easter Baskets with Peanut Butter Fudge Filled Chubby Bunnies! They're so delicious and are the perfect Easter candy.
- 8 ounces white confectionery coating candy coating
- 4 ounces Reese's Peanut Butter Chips
- 1 cup Jif creamy peanut butter
- a pinch of salt
- 6 ounces milk modeling chocolate
- 2 ounces white modeling chocolate
- pink candy coloring
- powdered sugar to dust work surface optional
- water
- 36-40 candy eyes
- 18-20 pink heart sprinkles
- 16 ounces good quality milk chocolate finely chopped or chips
- ½ cup heavy whipping cream
- 1 tablespoon light corn syrup
-
Combine white confectionery coating and peanut butter chips in a microwave safe mixing bowl.
-
Heat for 15-30 second increments, stirring after each, until melted.
-
Stir in the peanut butter and salt.
-
Pour it into a shallow bowl and let sit for several hours until firm.
-
Scoop out 18-20 heaping tablespoonfuls and roll into balls.
-
To make the bunny ears, pinch off 40 small pieces of your milk modeling chocolate.
-
Roll into balls then into a teardrop shape then flatten and curve up the edges and bend 20 to the right and 20 to the left.
-
Pinch off smaller pieces of pink modeling chocolate and do the same making the pink fur for inside the ears.
-
Brush the back of the pink piece lightly with water and press it onto the brown ears.
-
Lightly dust your work surface with powdered sugar.
-
Roll the milk modeling chocolate to about ⅛" thickness.
-
Use a small oval metal cutter to cut out 40 feet.
-
Set a double boiler filled with 1 inch of water over low heat.
-
Fill the top bowl with your chopped milk chocolate, heavy whipping cream and corn syrup.
-
Allow the chocolate to melt, stirring often.
-
Pour some of your milk chocolate ganache into a drinking glass for ease of dipping.
-
Place two bunny feet next to each other on a parchment paper or Silpat lined baking sheet.
-
Dip one peanut butter ball into chocolate ganache.
-
Remove and allow excess ganache to drip off.
-
Set the peanut butter fudge ball on top of two of the modeling chocolate bunny feet.
-
Create spikes all over the ganache (see tutorial for instructions.)
-
Press the ears onto the top of the ball.
-
Press on two eyes and a heart shaped nose.
-
Repeat creating more bunnies.
-
Allow your chocolate bunnies to sit at room temperature to dry.
- Irresistible Sweets with Dixie Crystals® - July 13, 2024
- How to make peanut butter? - February 15, 2024
- OREO Penguins - December 20, 2023


Allison says
I am making these bunnies for a pot luck. I am rolling the fudge and they are melting slightly. The fudge set overnight. Do you refrigerate the peanut butter fudge once you roll them into balls before you dip them in the ganache? Also, do you let the ganache cool slightly before dipping the fudge balls in it?
Beth says
I'm so happy to hear you are making these treats. The fudge will be a bit soft when rolled because of the warmth of your hands. Let the balls sit at room temperature (or chill in the fridge) for a little while after rolling and they should firm up. Let the ganache cool until it's thickened slightly. You want the ganache to be thick enough that you can spike it to make it look like fur. I know you will love how these treats taste! Enjoy.
Karen @ Sugartown Sweets says
My first thought was yum yum yum! My second thought was, I'm so glad you posted these cute little bunnies again..and your awesome peanut butter fudge recipe!
My husband has always filled my stocking at Christmas, but the Easter baskets have always just been for the kids and now grandkids. So just now while reading your post I looked over at my hubby and said, "I want you to fix me an Easter basket this year". He said, "ok". I can't wait to see what he puts in it! Thanks Beth! 🙂
Beth says
Oh, I'm so happy I inspired your husband to create an Easter basket for you. I love that my husband makes one for me every year. It makes me feel like a kid again.
The Partioligist says
I'd like to hop on over and raid your chocolate kitchen! I'll just hope you have some of those peanut butter bunnies left!!
Beth says
You are always welcome to raid my candy kitchen. I love sharing.
Catherine Holt says
What adorable Easter bunnies and they look incredibly tasty too. What more could you want 🙂
Mama Stacey says
My partner wants one made out of modeling clay so he can just put it on a shelf because it's "so damn cute". 🙂
beth says
These bunnies would look quite adorable as decorations on a shelf!
Beth Jackson Klosterboer says
Thanks! I use Chrome and can see all the photos. Do you use a different web browser? I wonder why they aren't showing up!
This Busy Life says
These are so cute. Some of the photos are missing from your tutorial on this page.
mommyrina says
i would LOVE to try to make these for my 7 yr old daughters classroom Easter party. But i am not very good at this kind of stuff. and i have none of the materials. Do you think it would be possible still to do? or should i not waste my money cause i will end up with a disaster? HELP please!!!!?!??????
Beth Jackson Klosterboer says
Hi Mommyrina, I love these little guys and had so much fun creating them. As you can see from the instructions, they have quite a lot of steps involved and will take some time to create. They also use a lot of different ingredients and supplies. You can swap out supplies and just cut out your pieces with a knife, you can use other candies you might have on hand for the eyes and nose, and even use Tootsie Rolls instead of the modeling chocolate. So you could cut your list of things to buy if you have other items on hand.
I hope you give them a go and that you have success. Have fun!
Janine Eshelbrenner says
These are crazy adorable, Beth! I can't wait to include these cuties in my Easter sweets roundup next week!
Beth Jackson Klosterboer says
Thanks for including them in your roundup:)
Tiffany Bonvie says
I was wondering if you make your own modeling chocolate? If so what is the recipe? If not what brand do you recommend?
Beth Jackson Klosterboer says
HI Tiffany, yes, I do make my own modeling chocolate. I have a great tutorial all about making modeling chocolate and fixing it if it's dry, crumbly, greasy, or sticky. Go here to see the recipe and tutorial --->https://hungryhappenings.com/chocolate-making-tips/
Anonymous says
my daughter has peanut allergies, and I have substituted Soy butter and Sunflower seed butter in many recipes, and found them to work perfectly! (even the peanut-butter addicts didn't know the switch)
Beth Jackson Klosterboer says
That is a great option for peanut allergies. I've not tried either, but will have to do that. Thanks for the information:)
Beate says
adorable bunnies - very cute and thanks for showing us how to make them
Beth Jackson Klosterboer says
Have fun making your little chocolate bunnies and if you'd like, I'd love to see pictures of your creations. You can send them to beth@hungryhappenings.com and I'll share them in my Reader's Gallery.