Learn How to Paint With Wilton Candy Melts. See how to make colorful lollipops, pretzel pops, and more using colored Candy Melts.

As a young teen, I attended my first candy-making class and learned the art of painting lollipops using confectionery coatings.
My candy-making skills have come a long way since that first lesson, but no matter how much I learn, and how many creative things I can make, I still want to paint lollipops for holidays and special occasions.
When I first started this blog, I wrote a tutorial featuring hand-painted Easter lollipops and shared tips on painting with confectionery coatings.
You may not have been reading Hungry Happenings back then, so I thought I'd revisit this topic.
This is a long-winded post, with tons of tips. I'm sharing over 30 years of lollipop-making experience. I hope you find all the information helpful
How to Paint Using Wilton Candy Melts and Supplies
Ingredients
Wilton Candy Melts in a variety of colors
Supplies
electric skillet (this will make this process so easy)
glass jars, coffee mugs, or glasses
food-use-only paint brushes
candy molds
lollipop sticks
clear bags
ribbon
Instructions
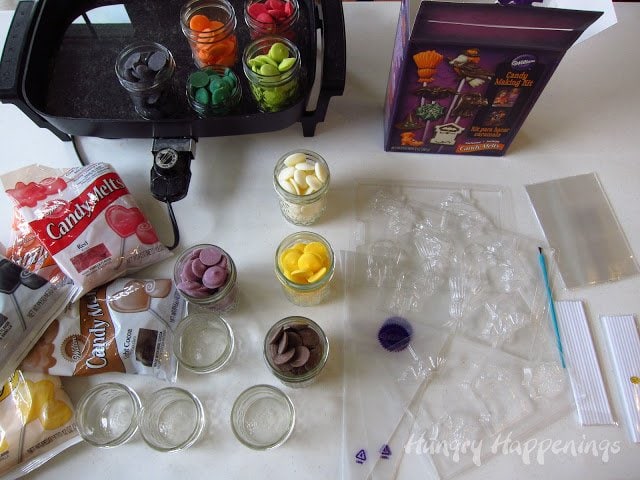
Before you begin, you'll need to gather your supplies and clean out your freezer, so you have some space to place the molds.
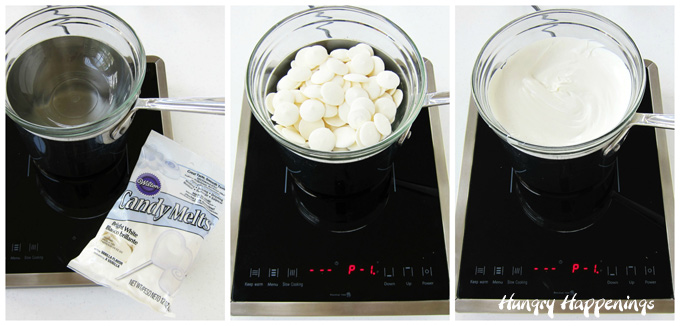
There are several different methods you can use to melt your Candy Melts: in the microwave, in a double boiler, or in a water bath in an electric skillet.
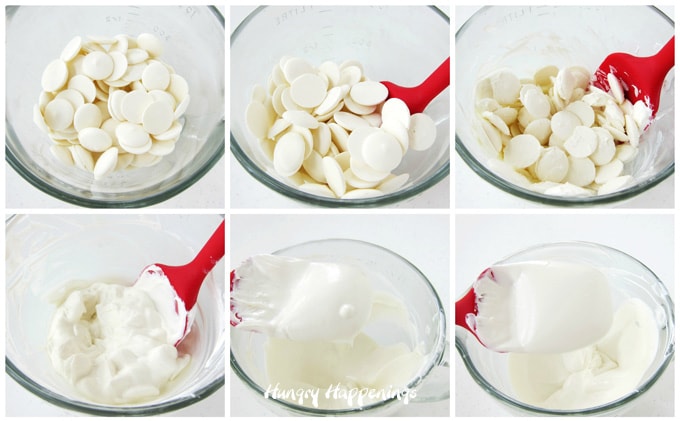
Melt Candy Melts in the microwave.
Every microwave is different so this is just a guideline, but it is safest to go slow and stir often. I always use high power for short bursts of time.
- Pour one bag of Candy Melts into a microwave-safe bowl. Heat on high power for 30 seconds, remove from microwave and stir. Your wafers won't look melted much at all at this point.
- Heat for another 30 seconds then remove and stir. The wafers will start to look melted.
- Then, heat for another 30 seconds. Let the bowl sit in the microwave for a few minutes then remove and stir.
- If all of the wafers are not melted, heat for 15 seconds, rest, then stir.
Candy coatings burn easily. If you do burn the coating, you'll have to throw it away and start over in a clean bowl. You can't just scoop out the burnt coating as the whole batch will smell and taste burnt.
Melting Candy Melts in a double boiler.
- Fill a 2 or 3-quart pan with one inch of water. Set the pan over low heat.
- Pour candy melts into a bowl and set it over the pan of water, making sure the bottom of the bowl does not touch the water.
- Heat, stirring often, until melted.
This method is slow and you run the risk of getting steam or water in your candy coating, so be very careful to dry the bottom of the pan when you remove it.
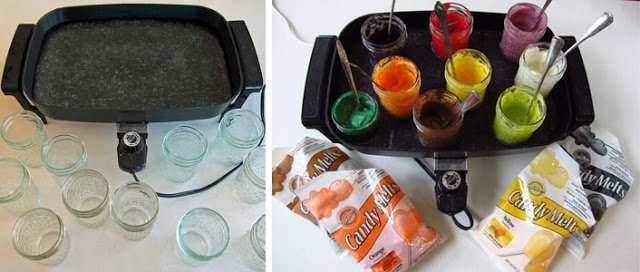
Melting Candy Melts in an electric skillet.
- Fill an electric skillet with some hot tap water and set the temperature to "WARM" or the lowest setting.
- Fill glass jars, coffee mugs, or ramekins with the Candy Melt wafers.
- Place the jars in the water-filled skillet. Make sure the water comes up about halfway on your shortest jar.
- Allow the candy coating time to melt, stirring it as needed.
This can also be slow if you have large amounts of any color. If I have a lot of one or more colors, then I first melt them in the microwave and then keep them melted in the skillet.
Tips
You can keep your candy coating melted in the jars in the skillet all day using this method, just stir the candy throughout the day if it starts to harden around the edges or on the top. You can add candy melts throughout the day to your jars too. Also, be sure to replenish the hot water as it evaporates.
Most importantly, be careful that you don't spill water in the candy coating, or it will seize up and become too thick to use. If you pick up a jar to move it closer to you, put a towel under the jar as you move it, so drops of water don't end up in other jars of coating.
Temperature
Do not allow your candy melts to get over 115 degrees Fahrenheit. If the chocolate gets too hot it can burn or become too thick.
How to thin candy melts?
Candy melts can become too thick if overheated, if exposed to large shifts in temperatures (on a hot truck then into a cold building), as they age, or if exposed to liquid or steam.
Use Paramount Crystals or Wilton EZ Thin to thin out thick candy melts. These products are flakes of the same fat (palm kernel oil) that is used to make Candy Melts. You add a pinch to the thick chocolate and stir until melted. Keep adding the crystals until the candy melts are the desired consistency. The flakes of fat will help to thin out the candy melts without altering the flavor or texture. The candy melts will harden properly
You can use coconut oil or vegetable oil to thin out candy melts, but the chocolate may not harden completely and may look greasy depending on how much you need to add.
Once your candy coating is melted, you can begin painting:
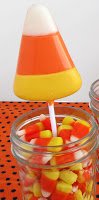
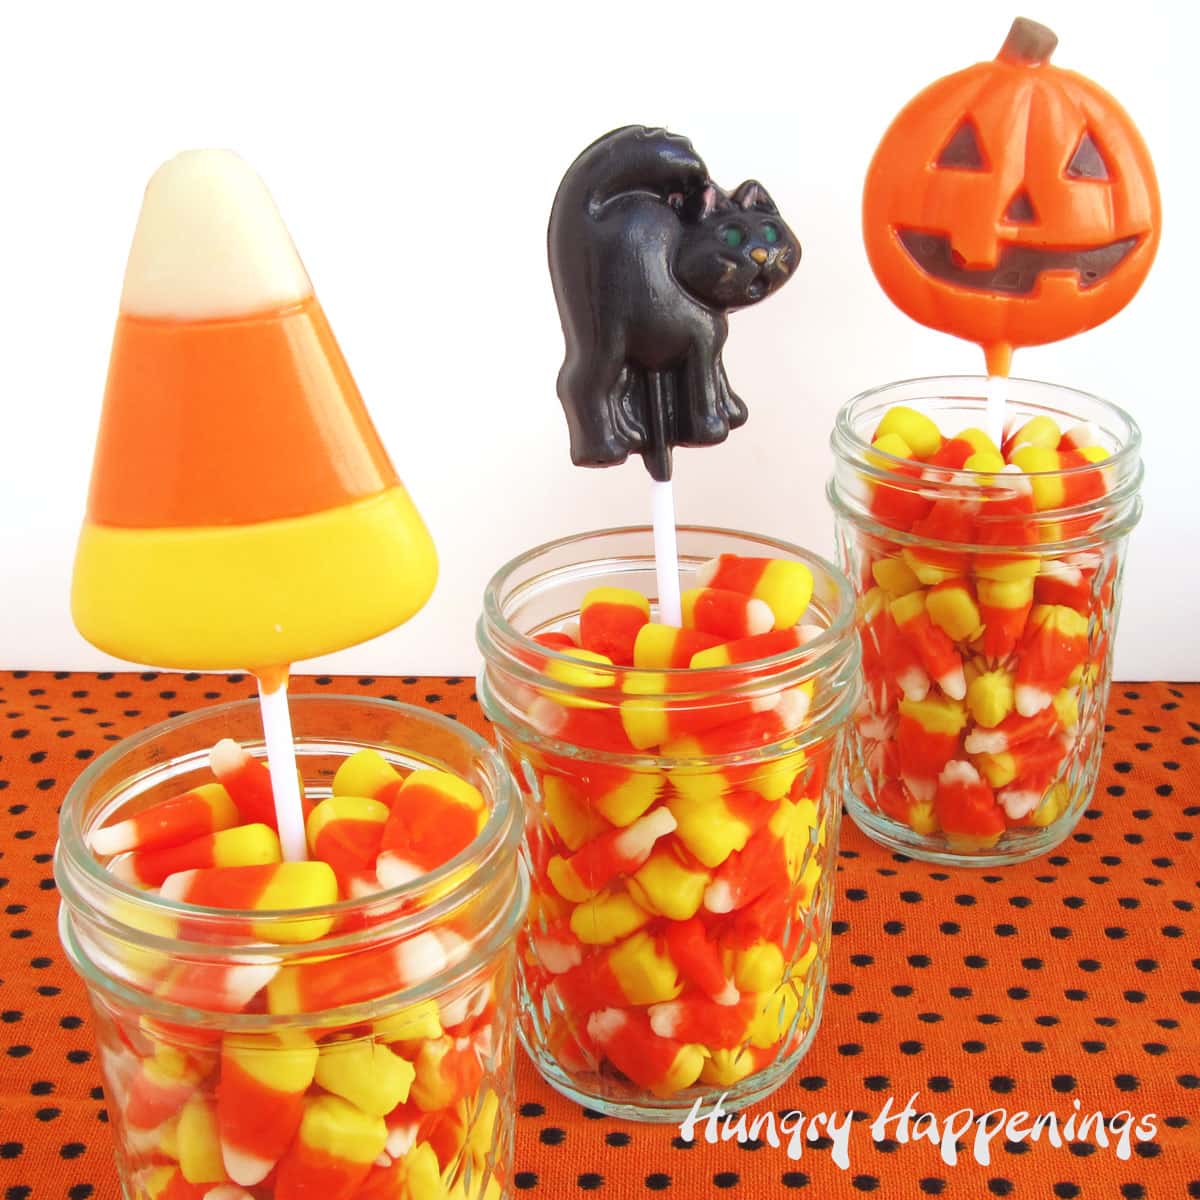
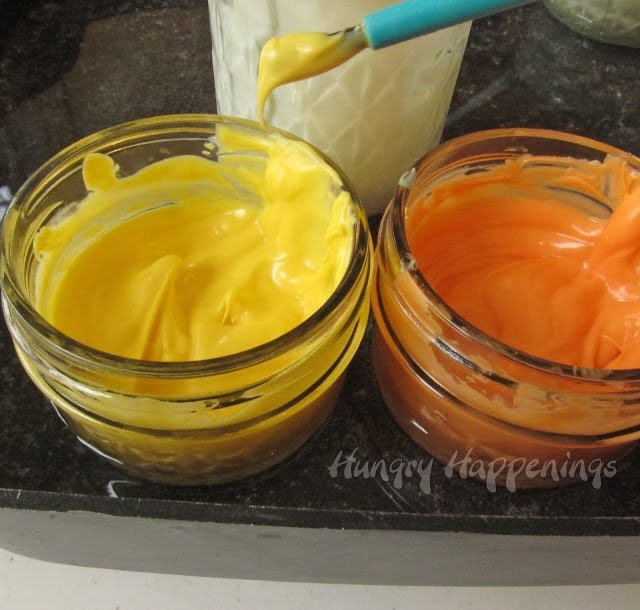
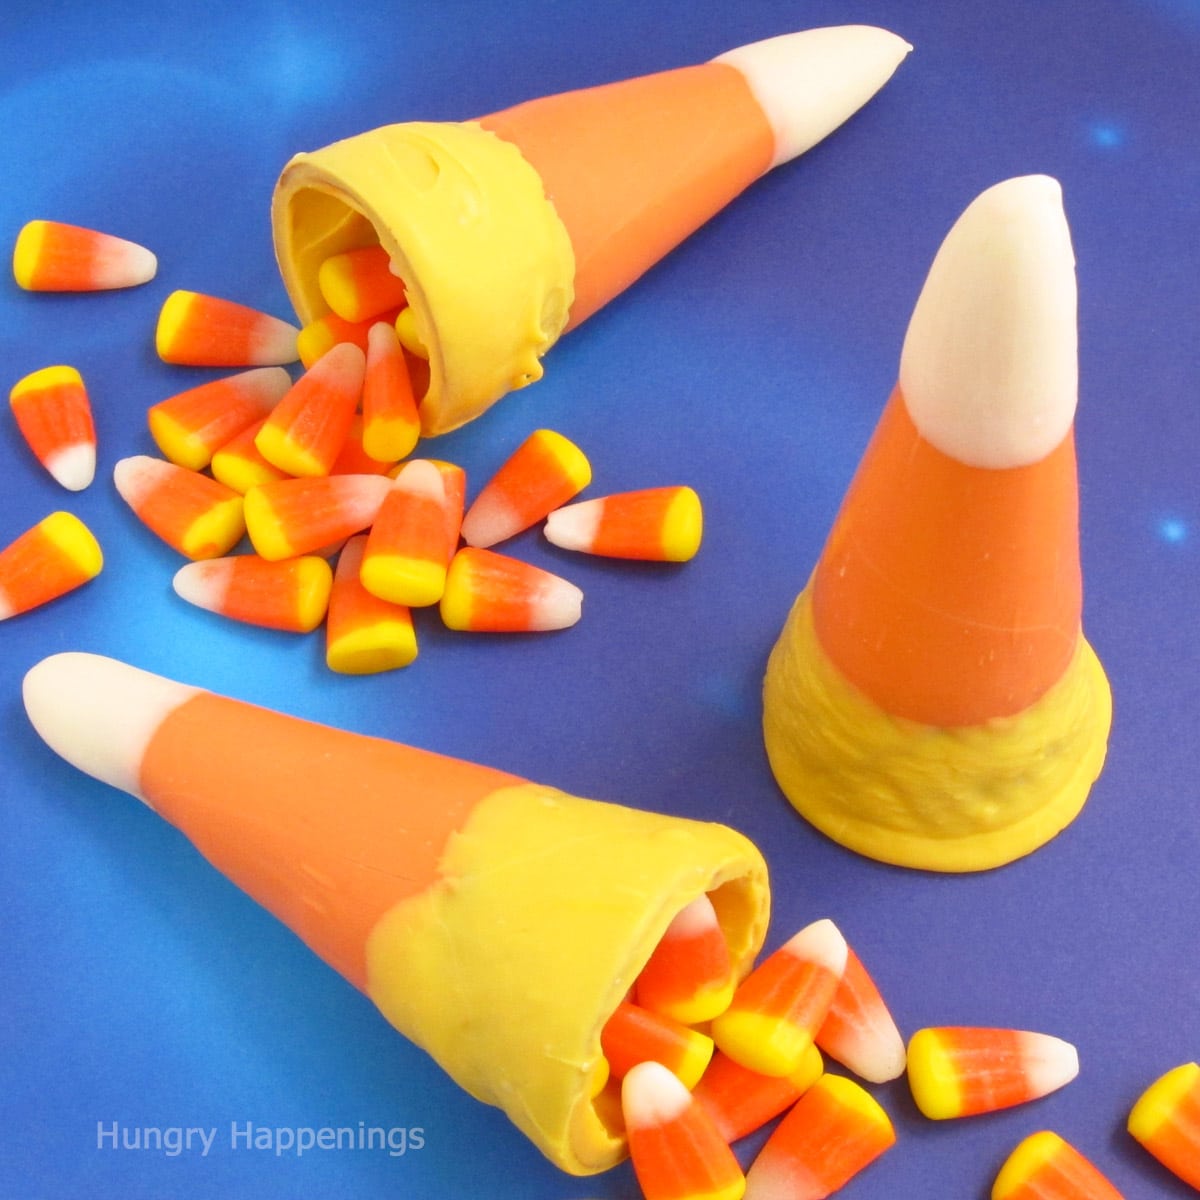
Before you begin painting your first lollipop you need to decide which colors you want to use. For this candy corn pop, I chose yellow, orange, and white.
When you paint your candies, you don't have to paint using all three colors. You can choose which color will be your background or fill color. I chose the orange, but the yellow or white would work too. The background color is the color of candy melt you will pour into the mold rather than paint into the mold. Choose the color that fills the largest surface.
Some lollipops will have more obvious background colors. For instance, if you were painting a smiley face and the mold had eyes and a mouth, you'd paint those and then fill in with yellow.
How to paint with chocolate?
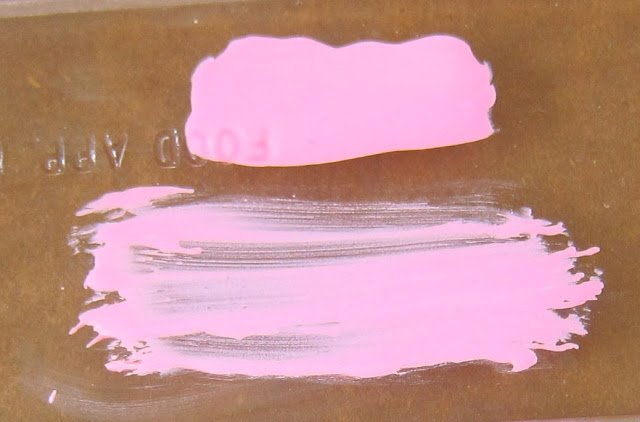
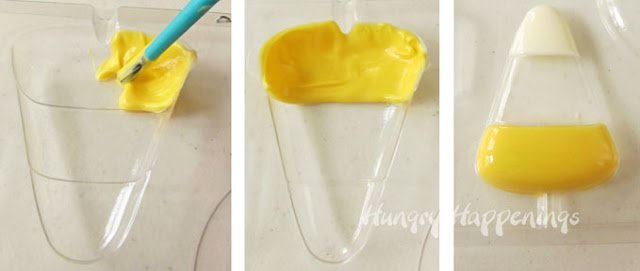
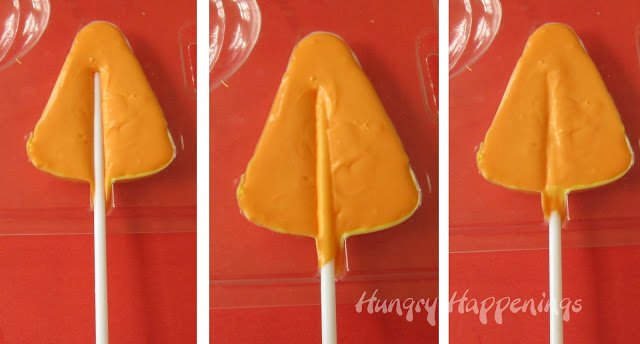
Painting chocolate lollipops is different than painting on a canvas or paper. When you paint on paper, you brush the paint across the paper. If you do that on a candy mold, the color will look streaky.
You need to dab thicker amounts of candy melts into the mold in order to get a nice opaque-looking color.
If you look at the picture above you can see the difference between candy melts that have been dabbed onto the mold (top) and those that have been brushed across the mold (bottom).
Picking up candy paint on your brush.
Use a different paintbrush for each color of candy melts you have in your skillet.
To begin painting, dip your paintbrush into the center of a jar of candy coating, not along the sides of the jar, to pick up nicely melted chocolate.
TIP: As you work, your brushes will end up with hardened candy on them. To continue using the brush effectively, dip it in the jar of melted candy and swirl it around allowing the hardened candy to melt.
Dab the colored candy melts into the candy mold.
Dab your paintbrush into the cavities in your candy molds allowing the candy coating to fill in the indented area in the mold. Get more colored candy on your brush as needed and keep dabbing until the area is completely covered.
TIP: Be careful when painting sucker molds to keep the area where the stick will go, free of candy coating or it will be hard to attach the stick.
TIP: If you work quickly, you can paint the second color into your molds. If not, then freeze your candy for 1-2 minutes at this point, otherwise if left out at room temperature too long, the first color you painted will begin to harden and it can end up getting white streaks or spots on it.
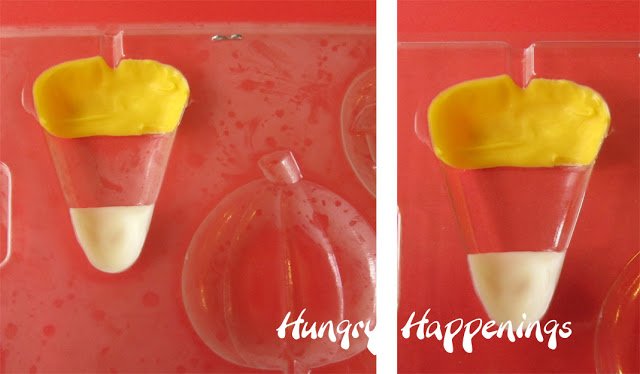
Let the mold warm up.
Remove the mold from the freezer. It will be chilled and have a frosty appearance (picture on left.) Allow it to come to room temperature before continuing.
TIP: If you start to either paint or fill while the mold is too cold, your candy will instantly harden when it comes in contact with the mold. If you are painting, the candy can stick to parts of the mold you don't want it to, and if you are trying to fill it, you can end up with holes in your candies.
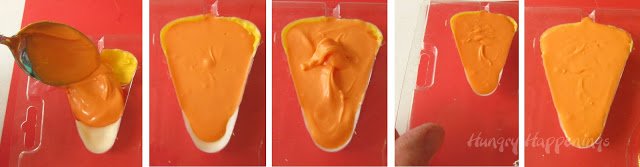
Fill your candy molds with candy melts.
Spoon some of your chosen background color (orange) into the mold.
Tap the mold gently allowing the candy to spread in the mold. Add more candy melts and tap again.
Repeat until the cavity is full right to the top. Just be careful not to overfill.
Tap to remove air bubbles.
TIP: I will usually put the mold over my head, being absolutely sure to keep it horizontal, so I don't spill candy coating out of the mold, then check to see if there are air bubbles. If there are, I stick a paintbrush into the candy, pressing out the air bubbles.
Add a lollipop stick.
Candy molds have several different types of stick holes. Wilton molds usually have holes that allow you to add a stick that will stick out from the sides of the mold.
Be sure you have enough room in your freezer to have sticks coming out from both sides of the mold before you add them. Side-by-side freezers, may not allow for this. Other molds will have stick holes within the confines of the mold.
To attach a stick, set it in about ¾ of the way up on your filled cavity (don't go all the way, or once hardened your candy can crack easily.) Press it down then twist the stick to cover it with candy. Tap the mold to get a really good covering.
Freeze your lollipops for about 10 minutes until they are set. You can tell if they are set by lifting the mold up over your head, once again keeping it level and looking at the candy. If you have areas in the center of the mold that look darker than the rest of the mold, it is still wet. Put it back and check again in a few minutes. You can also gently tug on the stick and the candy should pop out if ready, if not, freeze it longer.
TIP: DO NOT forget about your candies and leave them in the freezer for more than 15 minutes. They will get sticky with condensation, and that will never, ever, and I mean ever, go away! It will dry eventually if left out at room temperature, but you will not have a nice shiny finish anymore. Your pops will have a texture to them. They will be hard to package as they can stick to the plastic and have a wet appearance.

Unmold the lollipop.
Once the candy coating is set, remove your candy mold from the freezer and lower it over your table.
Set your hand or a cutting board on top of the mold. Turn it over and allow the candy to fall out.
Some molds will require you to push on the back side in order to pop the candy out. Allow your candy suckers to come to room temperature before proceeding.
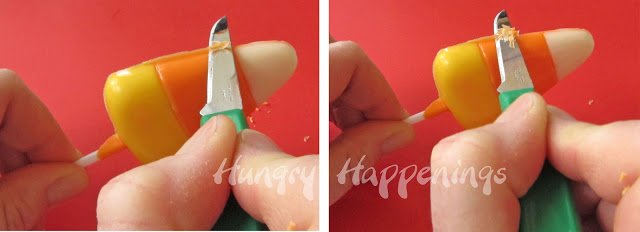
Remove excess chocolate from the lollipop.
If you have any excess candy around the edges or your candies, you can trim it with a sharp knife. Be careful to just slide the knife along the edge of the candy or you can end up taking chunks out of your lollipops.
TIP: Don't do this while your candy is cold or the static electricity will cause the shavings to stick to the lollipops. If this happens set the lollipop aside for a while. Then gently brush off the candy shavings.
To paint a more detailed design using layers of colored Candy Melts:

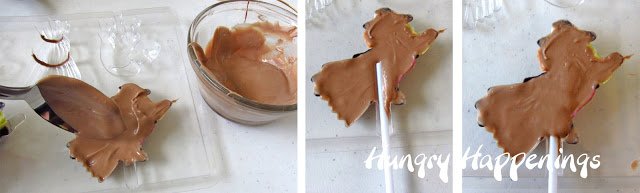
If you are painting a mold that requires lots of colors and layers, start by painting one color. In the witch mold, paint the tip and brim of the hat, the eye, the dress, and the shoe with black candy melts.
Then place the mold in the freezer for 2 minutes just until hardened.
Adding layers.
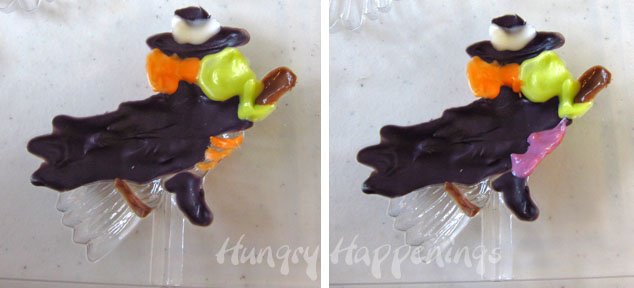
Then, paint the green face directly over the black eye, then paint the green hand and the white strip on the hat. Freeze for 2 minutes.
Then paint the orange stripes on the socks, the orange hair, the brown broom handle, and the brown band on the broom. Freeze for two minutes.
Then paint on the purple over the orange stripes on the socks. Freeze for 2 minutes.
Make sure you allow your mold to come to room temperature before you begin painting each time.
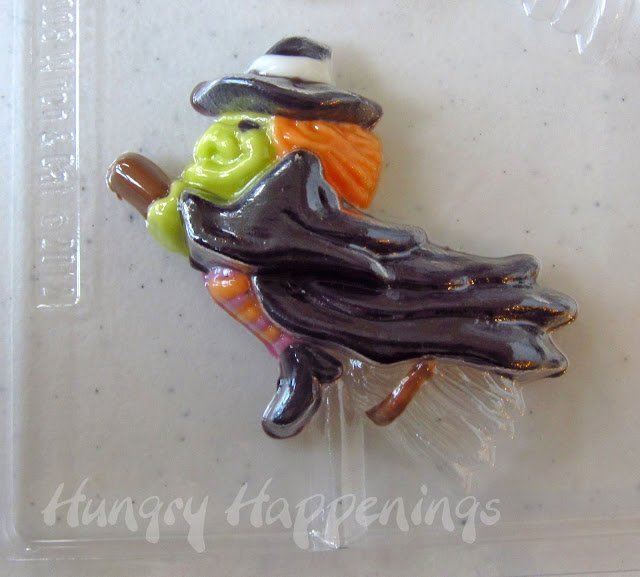
You can see looking at the picture above that I have just the broom bristles yet to color. I don't need to paint this though.
I will just fill the entire cavity in the mold with the color of the broom bristles.
I could have chosen to do this with black, but while I began painting the black eye, I just continued to paint all the black areas.
Filling the candy mold.
I wanted a nice light brown color for the bristles, so I mixed some white candy melts with some lite cocoa candy melts to get the desired color. Fill the entire cavity with the light brown. Put a lollipop stick into the candy coating and twist it so that it's covered in the candy. Freeze for about 10 minutes until set, then remove from the mold.
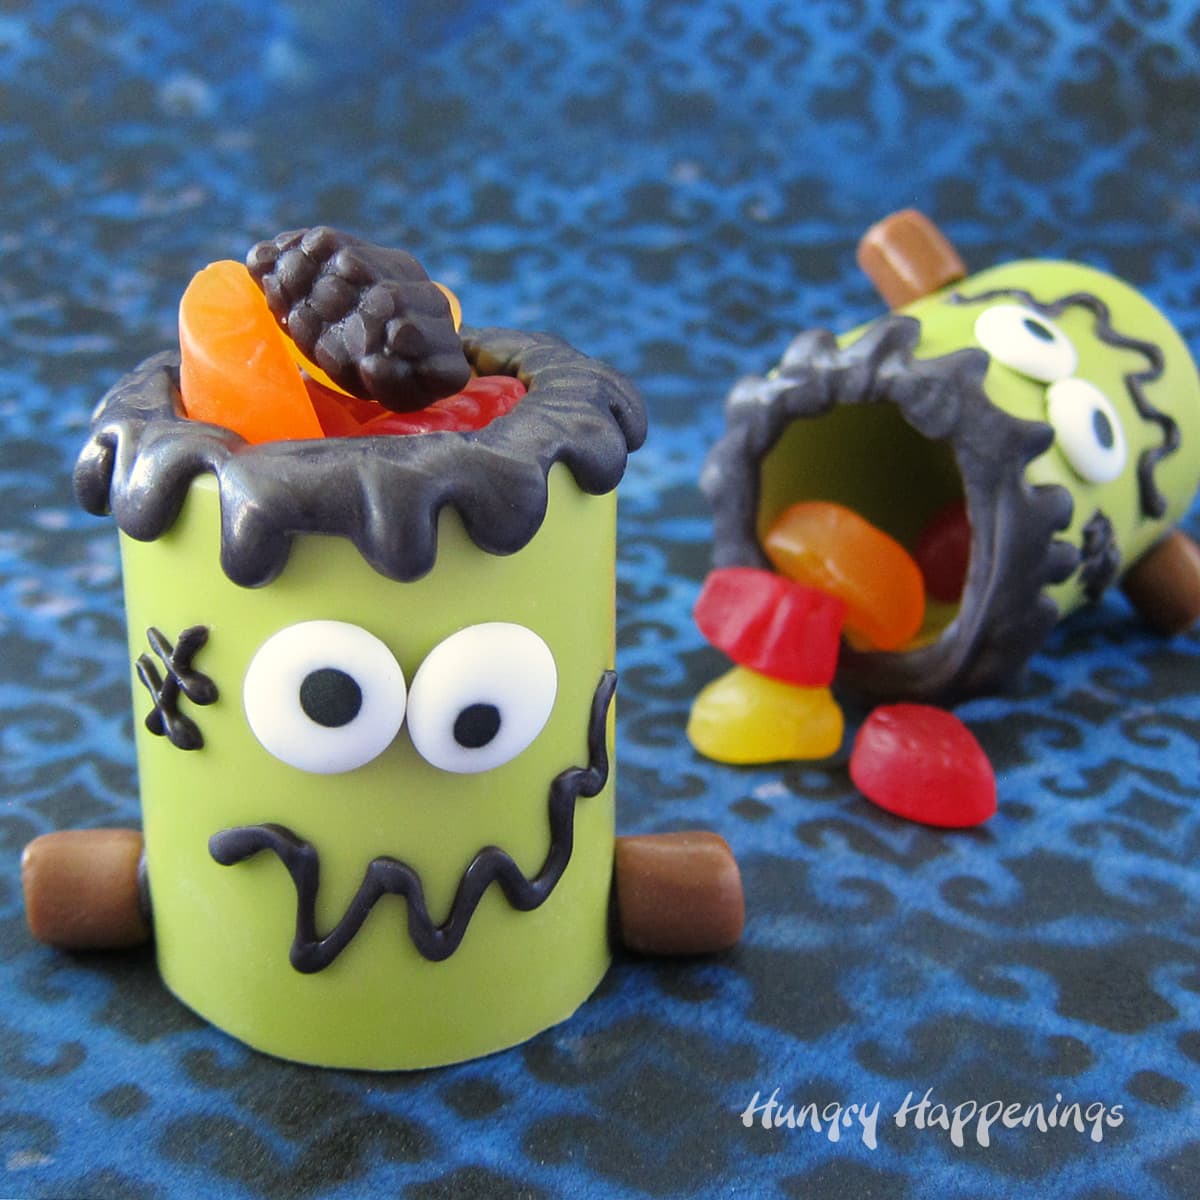
You can paint any candy mold using these techniques like these tombstones.
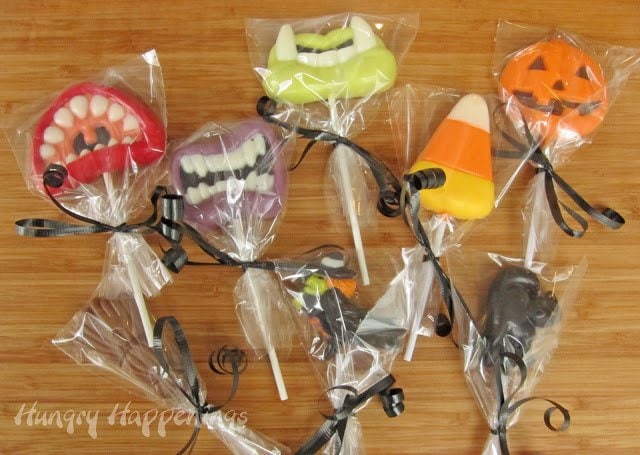
Package the lollipops.
Package your lollipops or candies in Wilton's clear bags and tie them with ribbon. Store your lollipops in a cool place preferably in an airtight container.
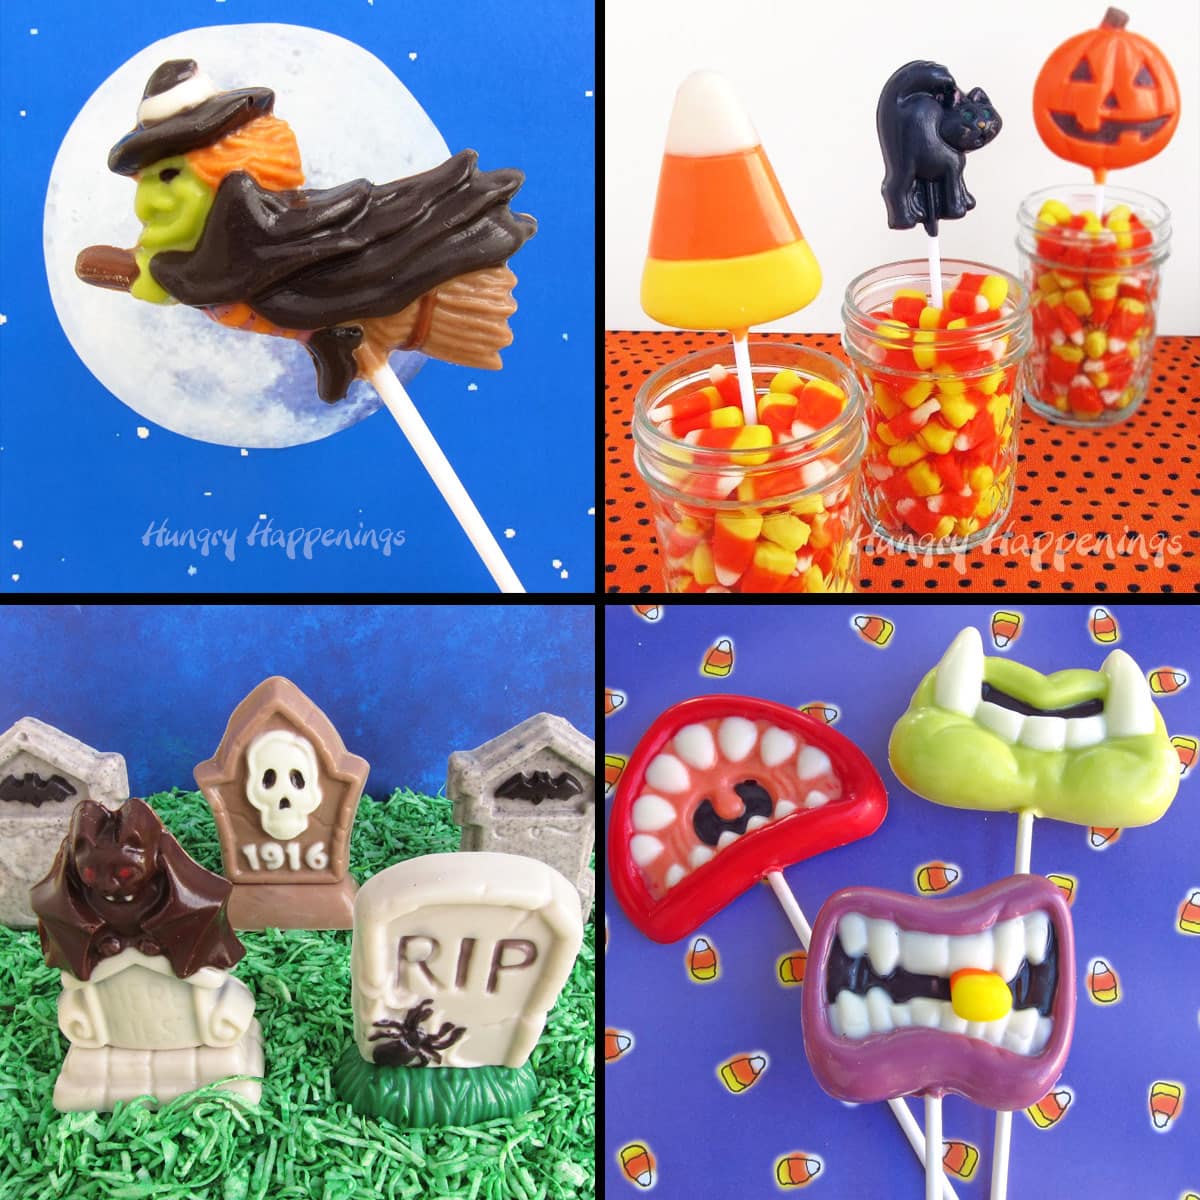
Related Recipes
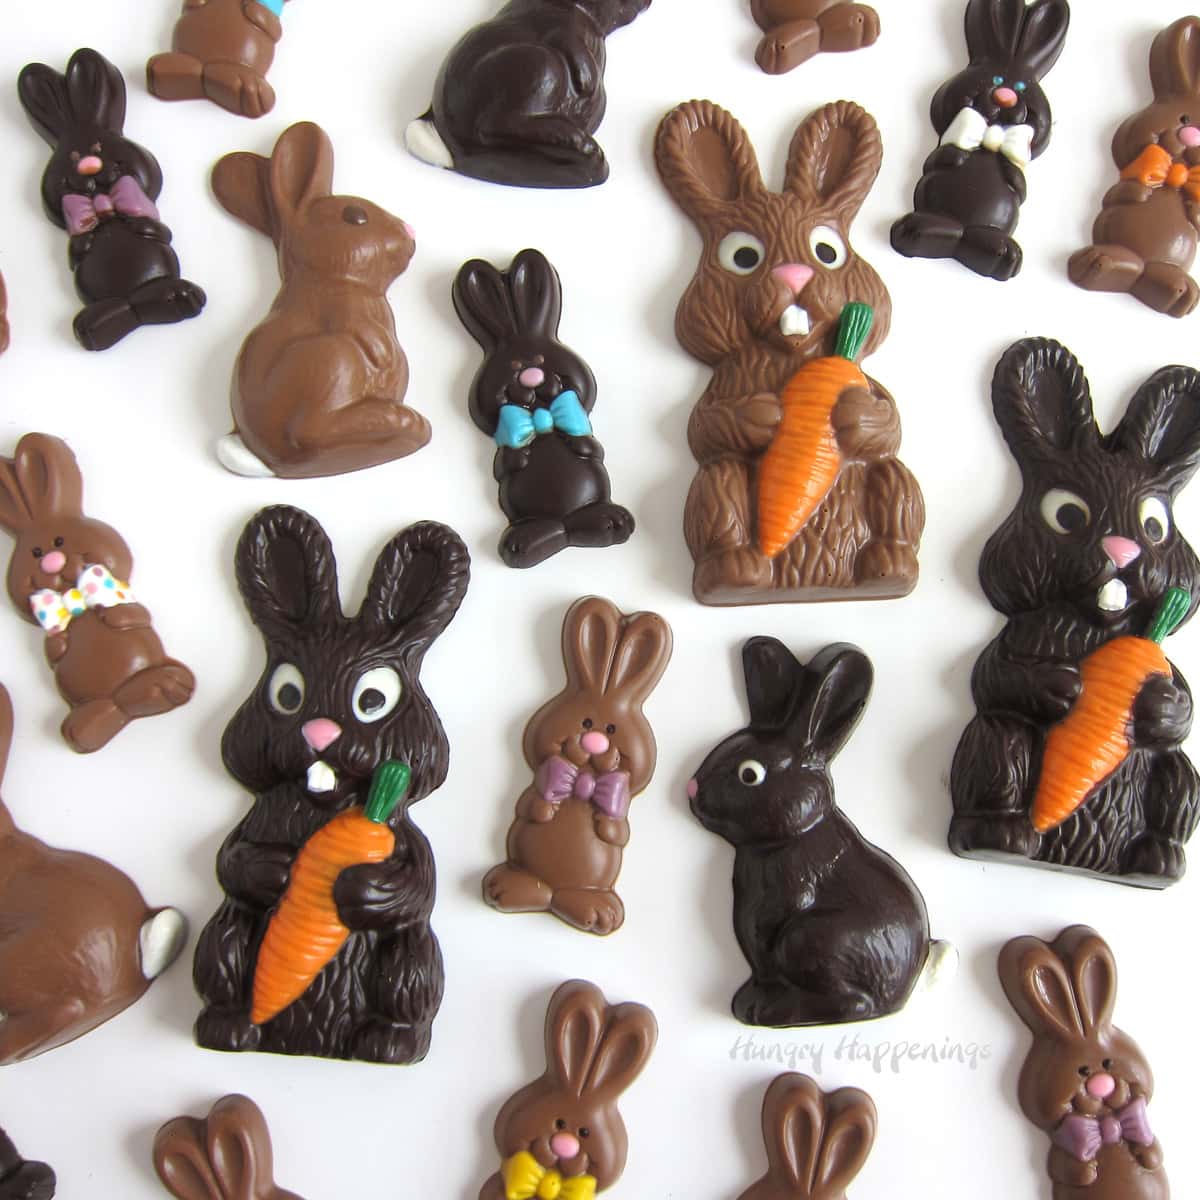
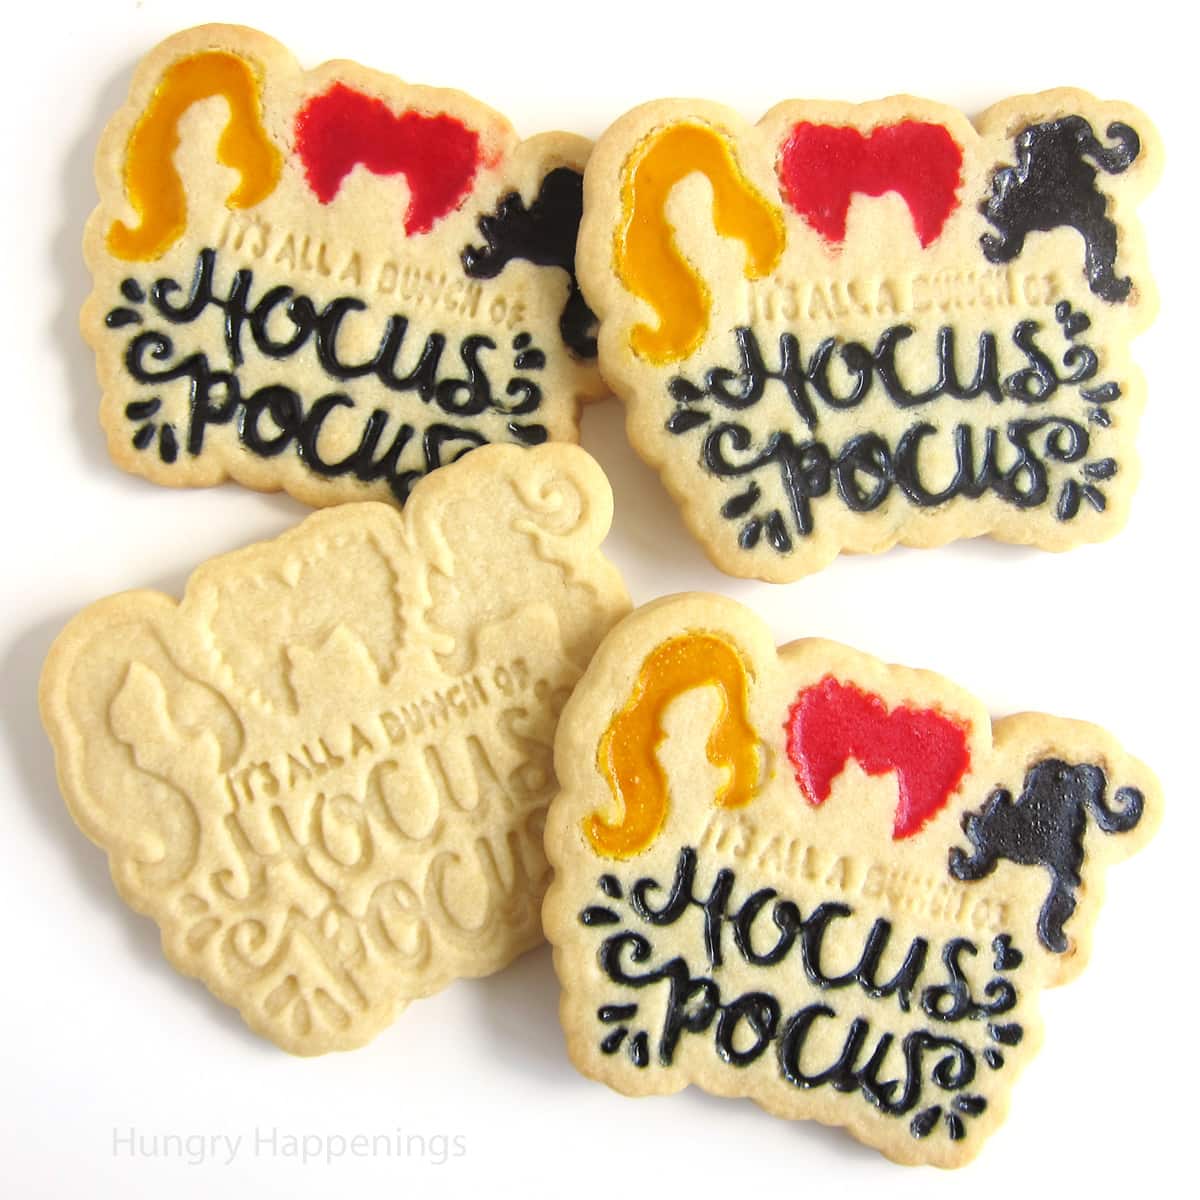
If you enjoy making these hand-painted lollipops, you might also like making these other homemade chocolates.
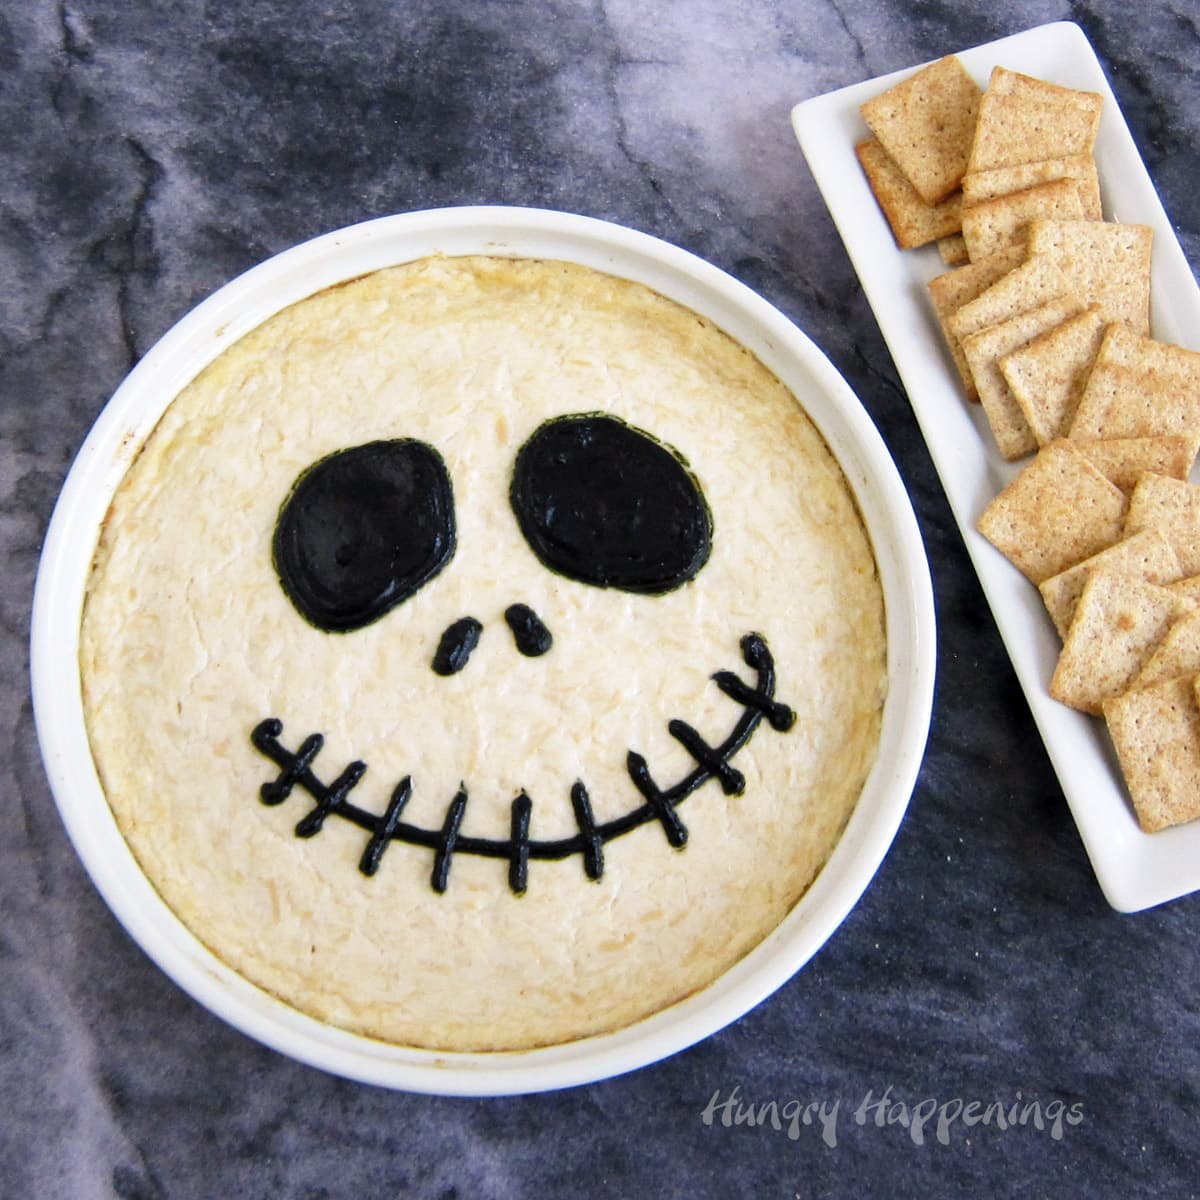
Be sure to check out all the Halloween recipes here on Hungry Happenings.

- Banana Split Bars – A Fun and Easy Summer Dessert - March 4, 2026
- Pineapple Fudge (No Candy Thermometer Needed!) - March 4, 2026
- No-Bake Peanut Butter Pie Recipe - March 3, 2026


debbieluttrell says
I subscribed to you, via email!!!
Trish - Mom On Timeout says
I also follow on Pinterest. Have an awesome day Beth!
debbieluttrell says
I liked Wilton on Facebook!
Trish - Mom On Timeout says
I am following you on Twitter now!
debbieluttrell says
I liked you on Facebook!
debbieluttrell says
I followed you on Pinterest
Khandra Henderson says
I follow hungry happenings on pinterest
(pinterest.com/khandra)
khandra.henderson@gmail.com
debbieluttrell says
I have made lollipops with Wilton candy melts several times, but I learned some great tips from this article, such as using the electric skillet. Genius!
Anonymous says
I follow on Facebook! Jillrusinko@yahoo.com
Anonymous says
I follow on Pinterest! Jillrusinko@yahoo.com
Trish - Mom On Timeout says
I like Wilton on Facebook.
Anonymous says
I follow on Twitter! Jillrusinko@yahoo.com
Trish - Mom On Timeout says
I like Hungry Happenings on Facebook.
Anonymous says
I follow Wilton! Jillrusinko@yahoo.com
Trish - Mom On Timeout says
Hi Beth! You make it look so easy 🙂 I have never painted lollipops OR candy before but it sure looks fun!
Khandra Henderson says
I follow hungry happenings on twitter
(@khandra_essence)
khandra.henderson@gmail.com
Khandra Henderson says
I am subscribed to your email
khandra.henderson@gmail.com
Khandra Henderson says
I like Wilton on Facebook
(khandra Henderson)
khandra.henderson@gmail.com
Khandra Henderson says
I like hungry happenings on Facebook
(khandra henderson )
khandra.henderson@gmail.com
Khandra Henderson says
I hope I win I have never tried cant making and it would be fun
khandra.henderson@gmail.com