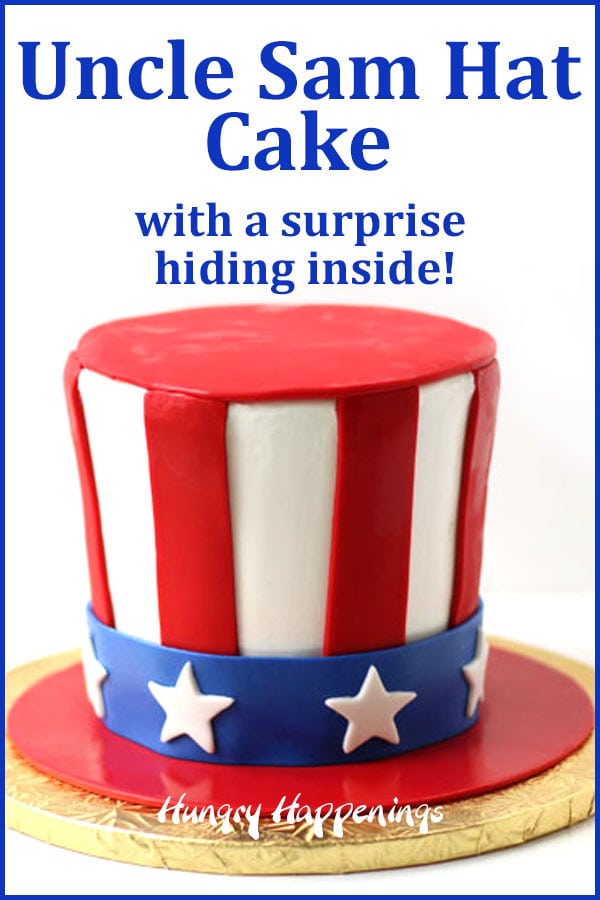
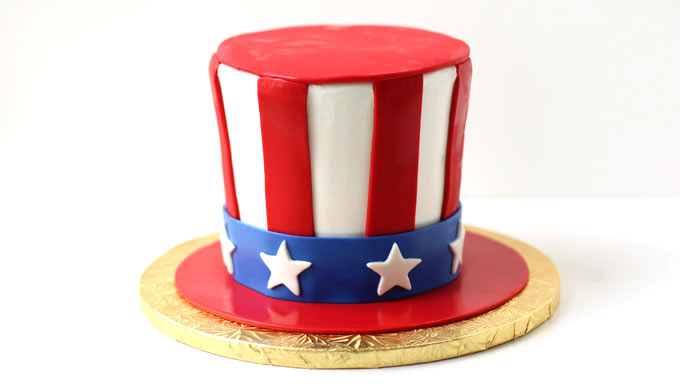
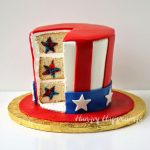
Cut into this Uncle Sam Hat Surprise Cake to reveal red and blue tie-dye stars hiding inside. This cake is sure to impress your 4th of July party guests.

The Fourth of July is a great holiday to create a spectacular dessert and this Uncle Sam Hat Cake will really wow everyone at your party or picnic.
The exterior of the cake is pretty impressive looking, but I'm guessing before the first fireworks light up the sky, you'll hear lots of oohs and ahhs as soon as you serve your first slice.
With each cut of this very tall cake, you will reveal red and blue tie-dye stars hiding inside.

The cake is quite large and will feed a crowd, which is great for me, as we often attend picnics with lots of friends and family.
We all gather together to celebrate this summer holiday, grill out, play games, and eat a lot of food, before all settling down on our blankets to watch the vibrant colors fill the sky.
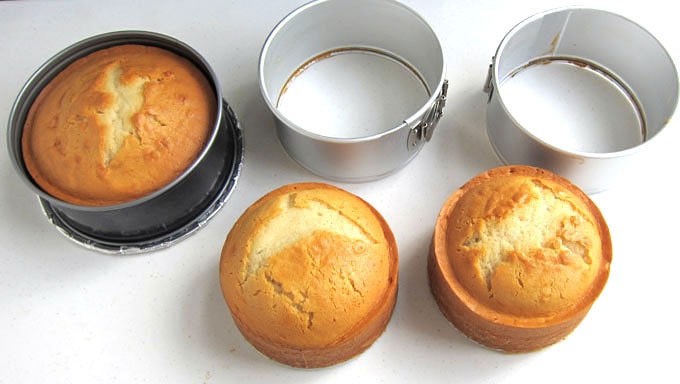
If you want to make this cake for your celebration, be sure to plan ahead, as you need some special pans. In order for the stars to really show up inside your cakes, you need to bake the batter in tall pans.
I used two 6-inch round spring-form pans and one 8 inch round springform pan all of which were 3 inches tall.
Sadly, two-inch tall pans will not work. Believe me, I tried. I actually made a total of 12 cakes while developing this recipe and found that 3-inch tall pans are a must!
Making an Uncle Sam Hat Cake
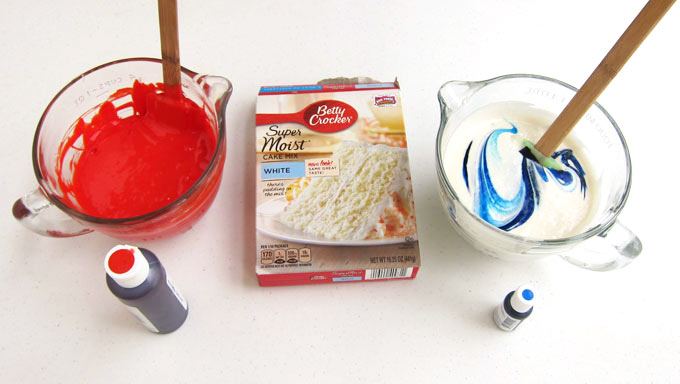
- The first step in making this cake is to create the red and blue cake that will be cut into stars, so whip up one cake mix and divide the batter in half, then color one-half red, the other blue.
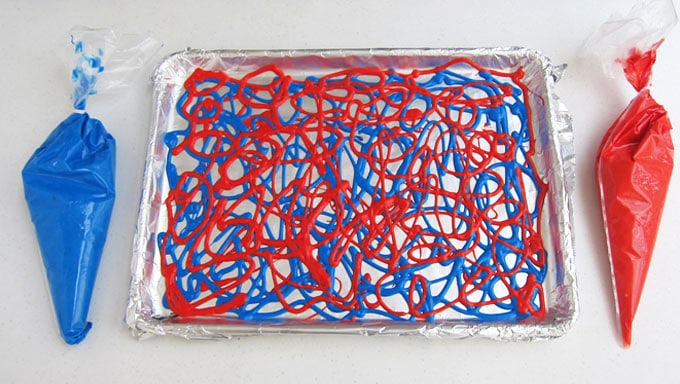
- Then go a little wild drizzling the red and blue cake batter into a baking sheet.
- I used a large 18 x 13-inch pan, but two 9x13 inch pans will work well too, just drizzle half of the batter into each of the two pans.
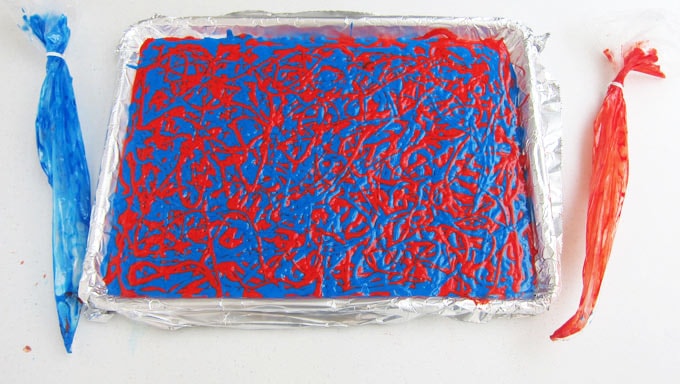
- Once you finish using all the blue and red cake batter, pop the pan/s into the oven and bake the cake/s. Let them cool for 20 minutes, then freeze for at least an hour.
- You want the cake nice and firm so it's easy to cut.
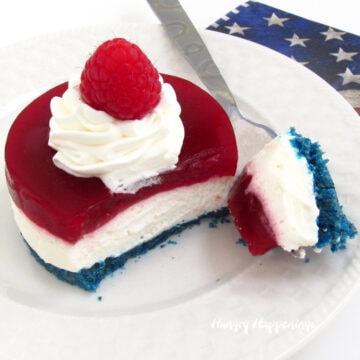
NOTE: If you'd like to see a video where I create a tie-dye cake, check out my Red, White, and Blue Tie-Dye Cake recipe post and video.
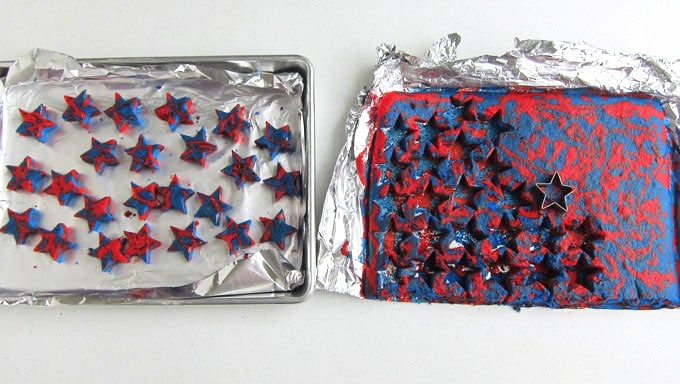
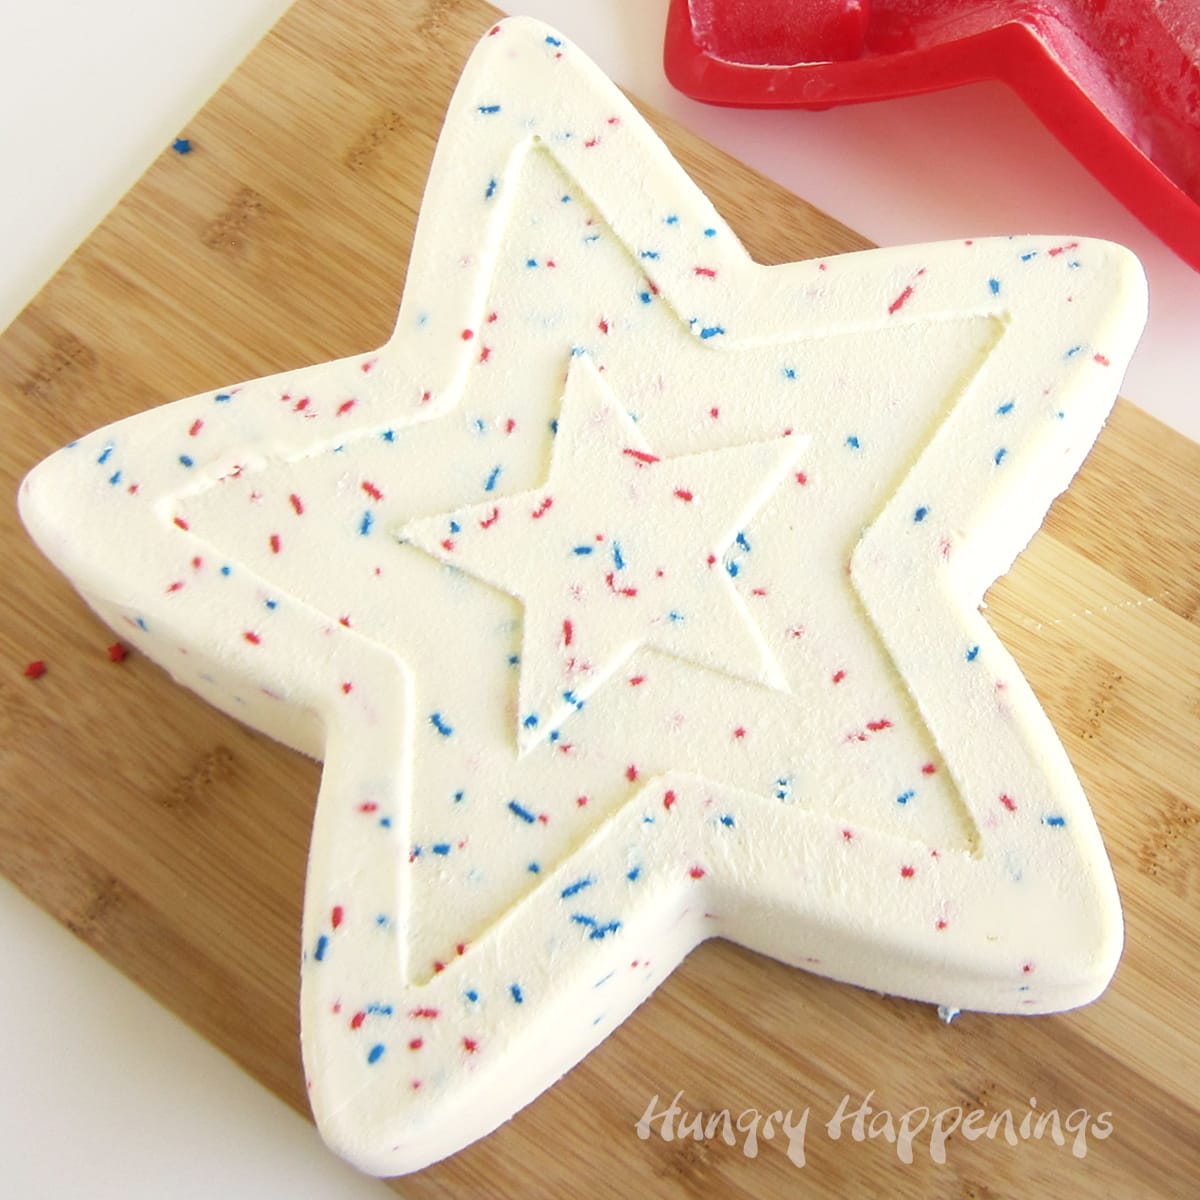
- Use a 1-inch star cookie cutter to make about 45 red and blue swirled stars.
- Once they are all cut, pop them back in the freeze for at least 15 minutes.
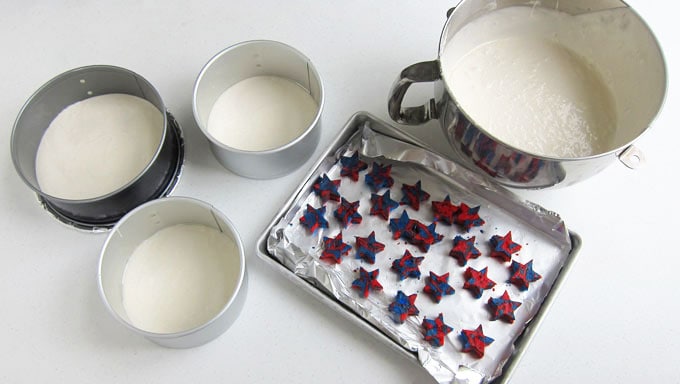
- Get your pans ready for the cake batter by greasing them with shortening and dusting with flour or spraying them with non-stick spray with flour in it. To make it easier to remove the baked cakes, line the bottoms of the pans with parchment paper rounds or some non-stick tin foil. I tried out both and they each worked well.
- Make more cake batter using two cake mixes.
- Fill each round pan with 1 cup or so of batter, enough to cover the entire bottom of the pan.
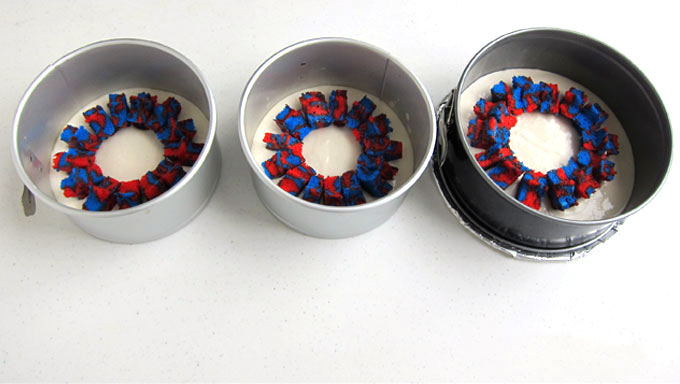
- Grab the stars out of the freezer and arrange them in a circle in the center of each pan. I used 41 stars to create my circles.
- Make the circles the same size in each pan. You'll be carving off part of the larger cake and you don't want to cut away part of your stars, so keeping the circle of stars the same as in the smaller pans works great.
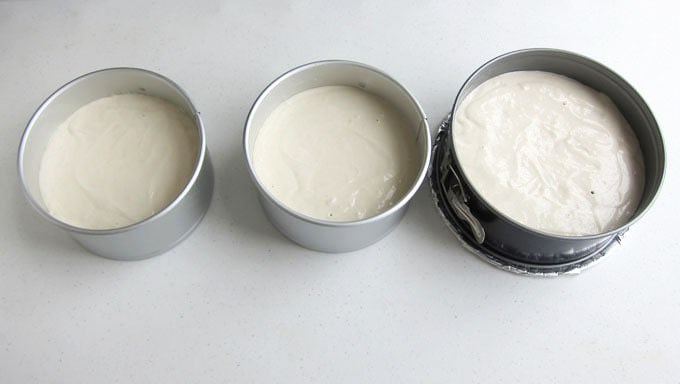
- Pour the remaining batter into the pans completely covering the stars.
- Be careful as you pour so the stars don't fall over or break.
- I started by pouring about a cup of batter into the center of the pan, then drizzled batter around the edge of the pan, then over the top of the stars.
- Bake the cakes in the middle rack of your oven.
- The cakes will most likely crack on the top as they bake. That's because the pans are really full of batter. It's alright, as you'll be cutting off the domed tops anyway.
- Be patient for a few hours and let the cakes cool.
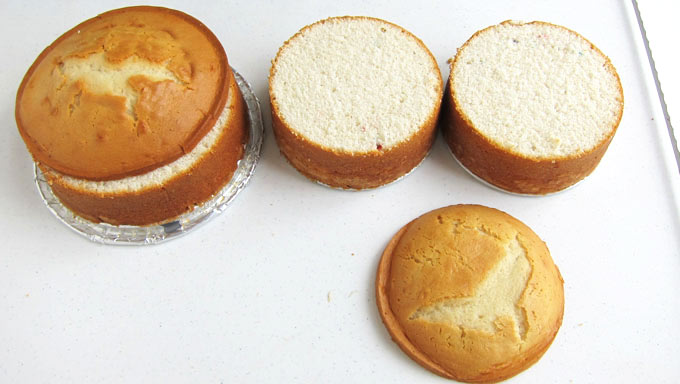
- Once they are ready, cut off the domed tops.
- I cut a slit into each of my cakes, peeked inside, just to be sure I wasn't cutting off the tops of the red and blue stars.
- Then I finished cutting and removed the tops.
- If you do see the stars, begin a new cut and remove less of the dome.

- Set one of the 6-inch round cakes on a cake board.
- Add lots of fluffy Betty Crocker Whipped White Frosting on top and stack on the other 6-inch cake and frost the top of that too.
- Carve the 8-inch cake to make the top of the Uncle Sam Hat.
- His hat kind of flairs out at the top. To carve the cake, I found it easiest to put the bottom circle from the 6-inch spring-form pan on top of my 8-inch cake. I used a long knife to cut at an angle from the edge of the 6-inch round down to the edge of the cake. It was a great start.
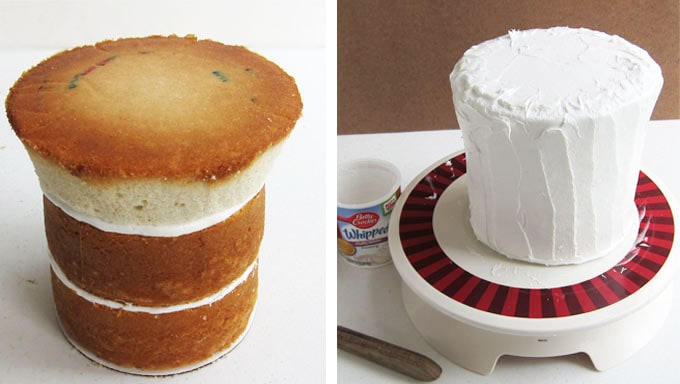
- Once I placed the carved cake on top of the other cakes, I carved it a bit more just to get the right shape, then I frosted the entire thing.
- I could have covered the cake in fondant but wanted to keep this a bit easier to decorate, so I just smoothed out the white frosting and added fondant decorations to it.
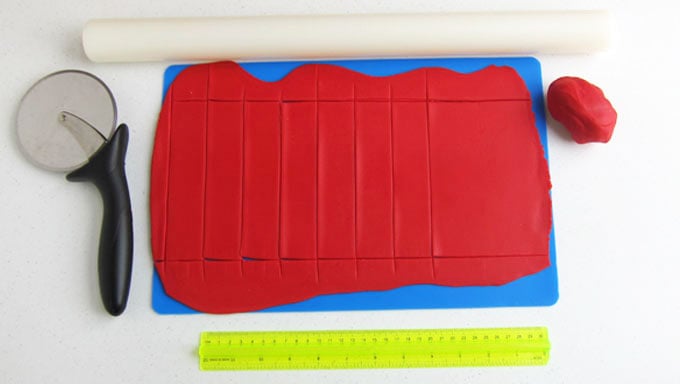
- To determine how to cut the stripes for the hat, I measured the stacked cake from top to bottom, rolled out some red fondant, and cut seven strips that were the height of the cake and about 1 ⅜ inches wide.
- Then I let the strips dry for a while so they would be easier to handle.
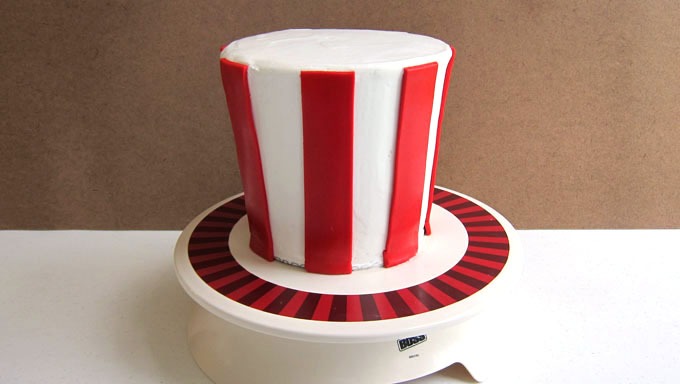
- Being the cake was frosted, attaching the stripes to the cake was easy. I just pressed them onto the cake, going around the cake, spacing them about 1 ⅜ inches apart.
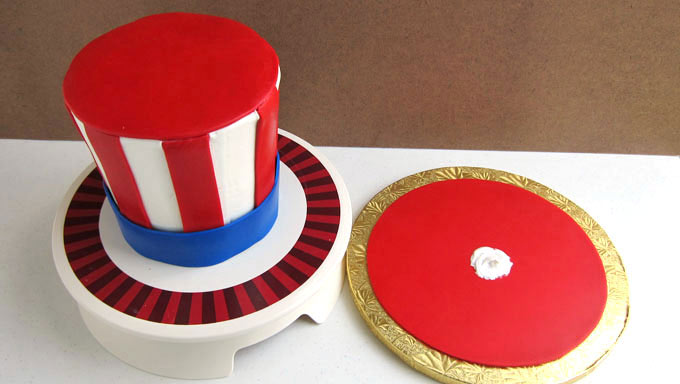
- Then I measured the top of the cake and made a big red circle of fondant to put on top.
- I cut another larger red circle of fondant out, placed it on an even larger cake board, and put a dab of frosting in the center.
- I very carefully lifted the cake and set it in the center of the red fondant circle.
- I took one more measurement around the base of the cake, cut a blue strip of fondant and wrapped it around the base of the cake.
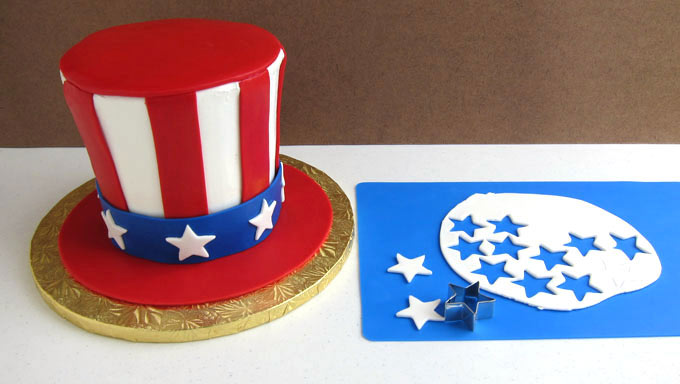
The final touch was making white fondant stars which I added to the blue hatband.
I suggest you bring the cake to your 4th of July party and gather your friends and family around just before you cut it to reveal the hidden stars.
This recipe was originally developed for Tablespoon.com in June of 2014 (but they removed the recipe in 2020) so I used Betty Crocker cake mixes and frosting. You can make this cake using any cake mix and any frosting.
- 3 Betty Crocker Super Moist White Cake Mixes
- eggs, oil, and water (called for on cake mix package)
- red and blue gel food coloring
- 4 tubs Betty Crocker Whipped White Frosting
- 24 ounces red fondant
- 4 ounces royal blue fondant
- 2 ounces white fondant
-
Preheat oven to 350 degrees Fahrenheit.
-
Make one cake mix according to package instructions.
-
Divide batter in half. Color one-half red, the other blue.
-
Line an 18x13 inch baking pan or two 9x13 inch baking pans with non-stick foil or parchment paper.
-
Pour batter into disposable pastry bags or zip-top bags. Snip off the tip of the bag. Pipe squiggles of blue batter into the bottom of the pan. Pipe on some squiggles of red batter, then repeat, layering the two colors until you use up all the batter.
-
Bake cake/s for 20 minutes.
-
Allow cake/s to cool for 20 minutes, then freeze for at least one hour until firm to the touch.
-
Cut out about 45 red and blue swirled stars, using a 1-inch star-shaped cookie cutter. Place cut-outs on a lined baking
-
sheet and put back in the freezer for at least 15 minutes.
-
Preheat oven to 325 degrees Fahrenheit.
-
Make two more cake mixes, according to package instructions.
-
Prep two 6-inch round by 3-inch tall pans and one 8-inch round by 3-inch tall pans by greasing them with shortening and
-
dusting with flour or by spraying with flour non-stick baking spray. Line the bottom of the pans with a round of parchment or non-stick foil.
-
Pour one cup batter into the bottom of each pan.
-
Arrange 10-15 stars in a circle around the center of each pan.
-
Carefully pour some batter in the center of each pan, around the edge of the pans, and over the tops of the stars.
-
Set the 8-inch pan to the back of your oven on the middle rack then set the two smaller pans on either side in the front of the oven. Bake cakes for 58-64 minutes until a toothpick poked in the center of each cake comes out clean.
-
Allow cakes to cool completely, about two hours. Remove from pans and peel off parchment rounds.
-
Trim off domed tops on each cake.
-
Set one 6 inch round cake on a cake board, top with frosting, add another 6-inch round, and more frosting.
-
Carve the 8 inch round cake around the circumference at an angle from about 6 inches in the center of the cake to the outer 8-inch edge.
-
Set on top of stacked cakes and carve to shape into Uncle Sam's hat.
-
Frost entire cake, smoothing the frosting well.
-
Measure the height of the cake. Roll out red fondant. Cut 7 strips of fondant that are the height of the cake by 1 ⅜ inch wide.
-
Allow them to dry until they are easy to handle.
-
Attach red fondant stripes to frosted cake, placing them vertically on the cake. You want to space them so they are about
-
1 ⅜ inches apart.
-
Roll out more red fondant, cut out an 8 inch round, set on top of the cake.
-
Roll more red fondant out and cut a 10 inch round. Set it on a cake board or serving platter. Add a dab of frosting to the center of the red fondant circle. Pick up cake and place it on the fondant circle.
-
Roll out the blue fondant into a long strip. Cut a 2-inch wide strip that is long enough to circle the base of the cake. Wrap it around the cake.
-
Roll out the white fondant, cut 7 stars using the 1-inch star cookie cutter. Attach the white stars to the blue hatband, spacing them so the stars line up with the red stripes.
-
Store cake at room temperature for up to 3 days. Cut to reveal the red and blue swirled stars inside.
If you're looking for other 4th of July Recipes, click the link and explore all my other Independence Day inspired food.


- Banana Split Bars – A Fun and Easy Summer Dessert - March 4, 2026
- Pineapple Fudge (No Candy Thermometer Needed!) - March 4, 2026
- No-Bake Peanut Butter Pie Recipe - March 3, 2026

Joan says
You’re amazing. I love red white and blue cakes but not matter what I do I can not get a good red. Any tips?
Beth says
Hi Joan,
Thanks! I used Americolor Super Red coloring and it worked great. It is the best red coloring that I have found. Other red food colorings aren't concentrated enough and you have to add too much coloring to achieve an acceptable red color and that much color can affect the flavor of your cake. I'd highly recommend you invest in a bottle of the Americolor Super Red. I know you'll love it.
Tracy Jacobs says
I click on the link and looked and searched but can’t seem to find this at Tablespoon, can u please direct me or send me a link to it! Ty and btw! This cake is just stunning!!!
Beth says
Sorry about that, Tracy. I didn't realize they had taken the recipe down. I went ahead and added the full recipe and tutorial to this post so you can see it here now. Enjoy!
Holly says
Hi Beth - You totally outdid yourself this time! Hugs, Holly
Karen @ Sugartown Sweets says
This cake is amazing! The slice is so awesomely tall..very impressive cake!
Crochet Hooks says
so fun! I love this cake, you did an awesome job on this one!
beth says
Thanks so much!
Sue says
You're too much, Beth, and I love it!
beth says
Thanks, Sue.
The Partiologist says
I can only imagine the work it took to create this amazing cake! I love how it turned out and I wish I were your neighbor... 🙂
beth says
I wish you were my neighbor too, although I fear we'd get into a lot of trouble together:)
Lisa@hooplapalooza says
OH MY! this cake is AWESOME Beth! hats off to you! :>D
beth says
LOL! Thanks, Lisa.
Lynna says
OH my, this is a beautiful cake!!1
anne says
This is absolutely adorable! I can only imagine the amount of time it took to get that accomplished!
beth says
Thanks, Anne. Yes, this project was a challenge:)
June Baby says
That looks amazing! Great Fourth of July idea! 🙂
beth says
Thanks, June Baby:)