Decorate sugar cookies with a modeling chocolate mouse. These cute Christmas Mouse Cookies are easy to make and they are so darling that kids of all ages will love them.

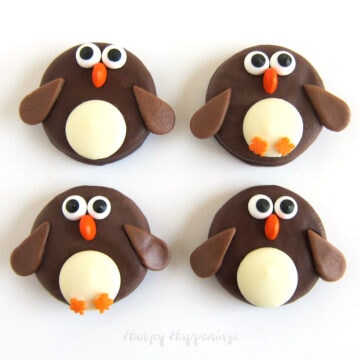
Making the Chocolate Penguin Rice Krispies Pops earlier this week inspired me to create an entire series of holiday sweets featuring modeling chocolate decorations, starting with these Christmas Mouse Cookies.
In each post, for the next two weeks, I'll share a new holiday design that can be used to top cookies, brownies, rice krispies treats, cakes, cupcakes, and chocolate-dipped goodies.

When I created the penguin pops, I started by cutting a rice Krispie treat into an egg shape because an egg is an easy shape to cut and it's also a very easy shape to dip in chocolate.
To keep things simple, I decided to start each and every one of my designs by cutting a 2" wide by 2 ½" tall egg shape out of whatever baked good or chocolate treat I plan to top.
It was a challenge, but I found a way to turn eggs into mice, polar bears, Santa, elves, kids, reindeer, angels, and more. I can't wait to share all of them with you, as well as, ideas for a variety of sweets that these festive decorations can adorn.

For day one, although I'm dying to share some of the more complicated designs because they are so cute, I thought it best to start with the most basic design - the Christmas mouse.
Before you begin, are you familiar with modeling chocolate (chocolate clay)? If you are a follower here, I'm sure you are, as it is my favorite medium to use when decorating sweets.
If not, you can find my modeling chocolate recipe, here.
For all of these designs, you can use fondant if you prefer, but I personally favor the flavor of the modeling chocolate whether it is made from milk, white, or dark chocolate. It is easy to roll out and cut into shapes and attaches to itself using water.
You can find my sugar cookie recipe, here.
For all of my designs, I use mini metal cutters, round pastry tips, and a knife to cut my shapes.
You can find most of these shaped cutters in the craft store either in the cake decorating aisle or the clay aisle. My favorite cutter sets include an assortment of small shapes by Makin's, and assorted shaped fondant cutters by Wilton.
For the mouse, I used a 1" round cookie cutter, a small round fondant cutter from Wilton, and a #12 round pastry tip.
Christmas Mouse Cookies
You'll need:
egg-shaped sugar cookies baked and cooled
frosting, any flavor
black food coloring
pink food coloring
food handling gloves (highly recommended to use when adding color)
powdered sugar, to dust work surface
cutting board
rolling pin
egg cookie cutter - 2" wide by 2 ½" tall
1" round cookie cutter
⅝" round cutter
#12 round pastry tip
food only paintbrush
knife or pointed fondant tool
* I used dark modeling chocolate to create the eyes, but you can simply color some white modeling chocolate with black food coloring instead.
Instructions:
- Pinch off some white modeling chocolate and color it pink for the ears and nose.
- For detailed coloring instructions, go here.
- This is where I wear those food-handling gloves, otherwise, my hands turn a rainbow of colors.
- To the remainder of the modeling chocolate, add some black coloring, one drop at a time, and knead after each addition until you get a nice feather gray color.
- Dust a cutting board lightly with powdered sugar.
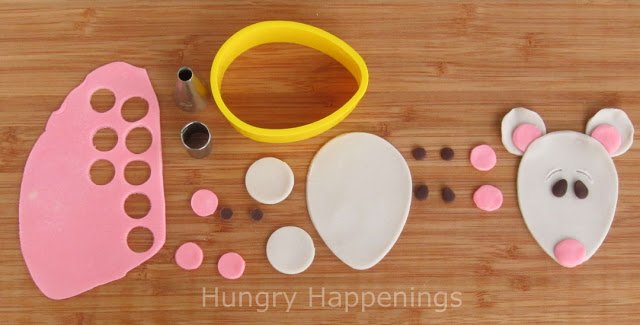
- Roll out the gray, pink, and black (or dark) modeling chocolate to 1/16" of an inch.
- Use the egg cookie cutter to cut out the mouse heads, and a 1" round cutter (sorry, not pictured above) to cut two ears for each mouse.
- Then cut three ⅝" round circles from the pink for each mouse.
- Use the small end of the #12 round pastry tip to cut two small circles for each mouse (cut, then turn it upside down and tap on the counter and the circles will drop out the larger end of the tip.)
- Pinch the dark circles in between your finger and thumb to shape them into a teardrop for the eyes.
- To get the pieces of modeling chocolate out of other small cutter, use something with a rounded edge, to gently push the pieces out.
- Attach the shapes together using water to create each mouse.
- Ex: brush the underside (the side with the powdered sugar on it) of one of the pink circles very lightly with water using a paintbrush.
- Press the pink circle onto the pointed tip of the gray egg to form the nose.
- To make the eyebrows, use a knife or a pointed fondant tool to lightly carve curves above the eyes.
For more detailed instructions on cutting shapes, see the post featuring my modeling chocolate penguins.
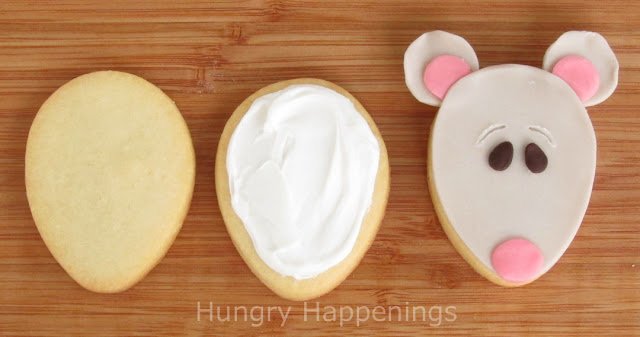
- Frost your egg-shaped cookies and top with a modeling chocolate mouse.
- Your adorable cookies are ready to serve or package for gifts.
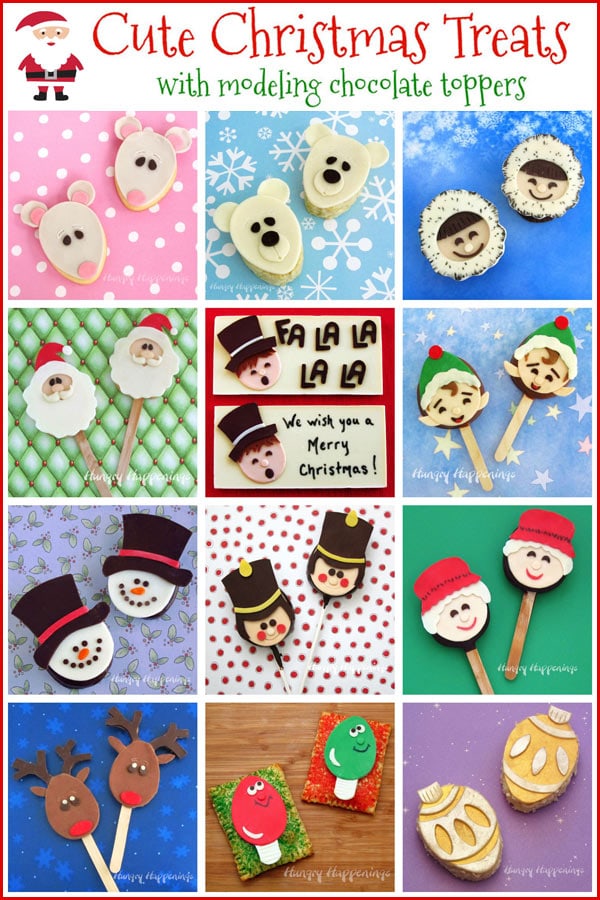
See all of my 12 Sweet Designs of Christmas

- Banana Split Bars – A Fun and Easy Summer Dessert - March 4, 2026
- Pineapple Fudge (No Candy Thermometer Needed!) - March 4, 2026
- No-Bake Peanut Butter Pie Recipe - March 3, 2026

Beth Jackson Klosterboer says
Thanks Sue and Sue:)
Sue says
The mouse cookies are darling! I love their ears:)
Sue @ Cakeballs, cookies and more says
Super cute, I think I will try out the chcolate soon.