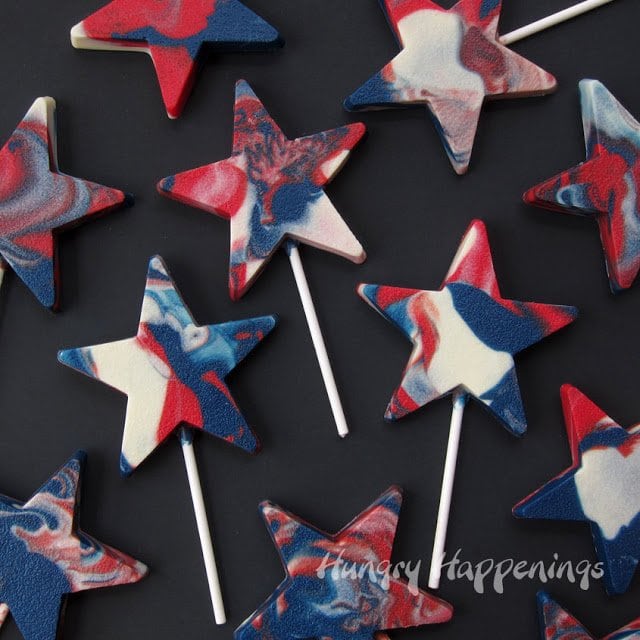
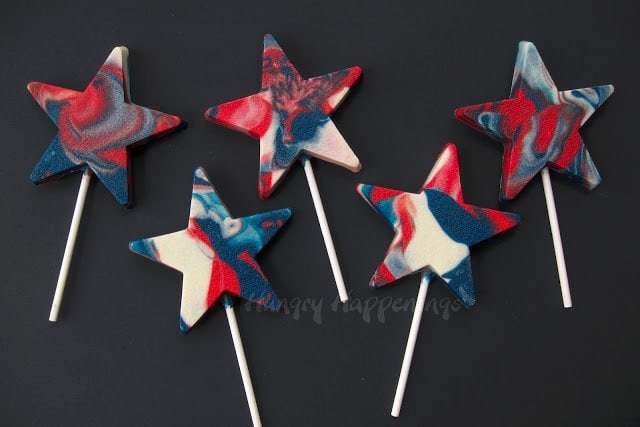
Use your left-over chocolate to make these elegant Red, White, and Blue Swirled Star Pops! These tasty treats are perfect for 4th of July, Memorial Day, Labor Day, and any other patriotic event!
What can you do with left over melted candy coating?
Swirl them together to create really cool looking treats.
I recently made a batch of Rice Krispie Treat Star Lollipops for our 4th of July dessert table and had more red, white and blue candy coating than I needed for the project. I could have just poured the coating out onto a pan, frozen it for a few minutes, broken it up into small pieces and stored it for a later use, but instead, I swirled it together to create these patriotic star lollipops.
In the past I've swirled colored confectionery coating to make Easter eggs and fall leaves, but had never combined patriotic colors to create anything for July 4th. I don't know why I never thought to do it before. I've actually always been a fan of the red, white and blue color combination and think the colors swirled together in these lollipops look great.
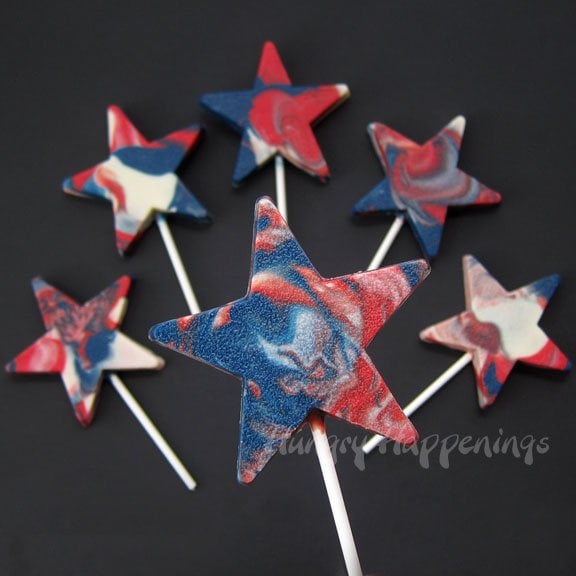
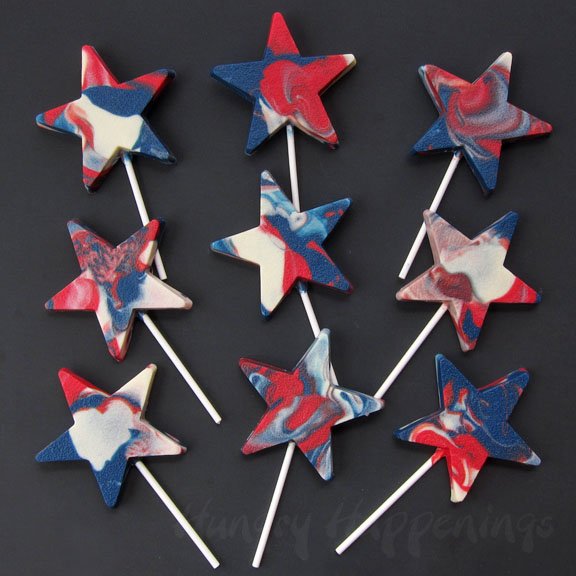
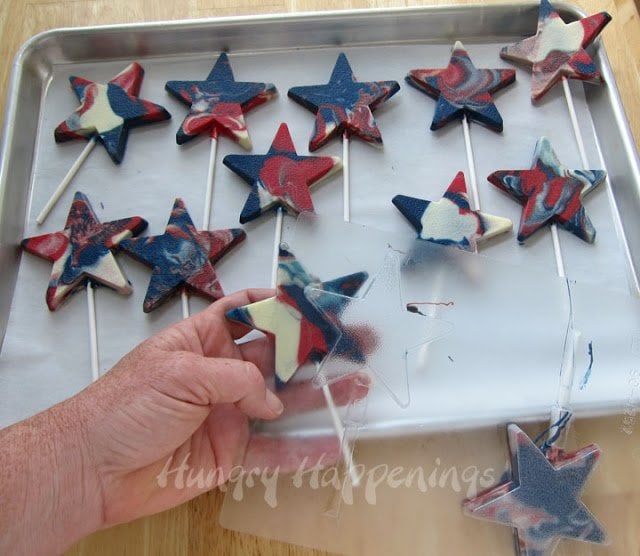
Each star pop is unique. I love that. You just have to work in small batches so that the colors don't all blend together. You don't want purple pops. But even if you are swirling enough candy coating to make two pops at a time, these 4th of July treats wont take long to make.
Red, White and Blue Swirled Star Pops
You'll Need:
equal amounts of red, white and blue colored confectionery coating/candy melts*
a small bowl or ramekin
star lollipop molds
lollipop sticks
*Make 'N Mold and Classen both make dark blue confectionery coating wafers. If you use Wilton Blue Candy Melts or Merkens blue confectionery coating, the blue isn't very dark, so you'll need to add some blue candy coloring to it in order to get a nice deep blue. You can also just use white candy melts and color it with red and blue coloring, if you prefer.
Instructions:
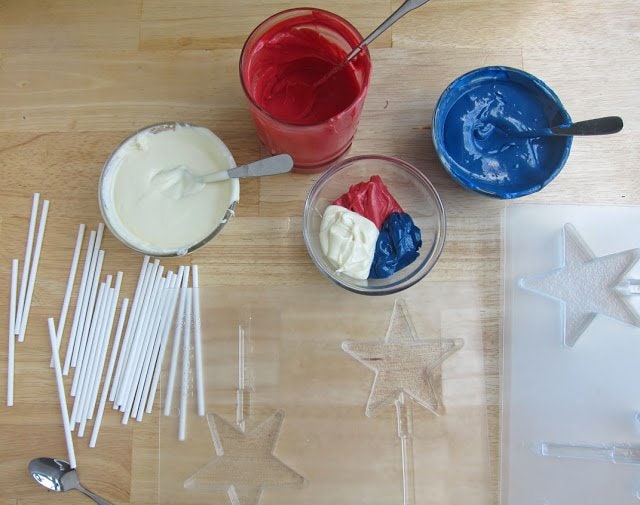
Melt the red, white and blue confectionery coating. See detailed instructions on my Chocolate Making Tips page, here. Keeping the three colors separate, spoon about ¼ cup of red, white and blue candy coating into a small bowl or ramekin (see picture above.)
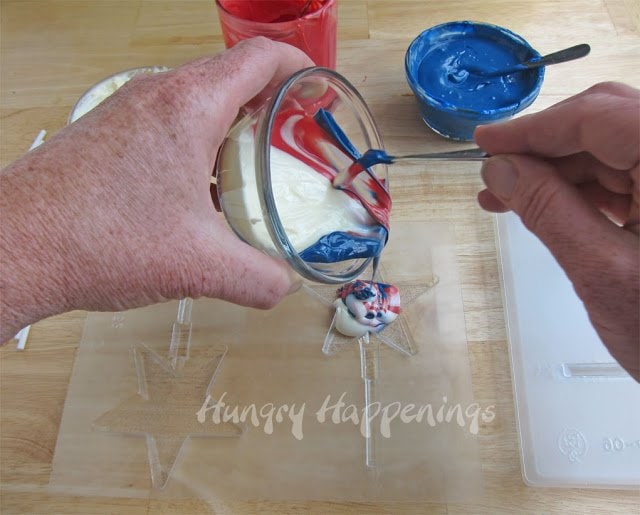
Lift the small bowl and allow the colored candy coating to flow out into the star shaped lollipop molds. You can use a spoon to aid in this process, just don't use the spoon to actually swirl the candy. Just allow it to pour into the mold, swirling as it goes.
You only want to put enough candy coating into the small bowl in order to make about two lollipops. That way, when you go to make more, you continue to add clean colors to the bowl. The more you pour out of the bowl the more the colors will blend together. So, if you add a lot of candy coating all at once, you'll run the risk of turning the candy coating purple.
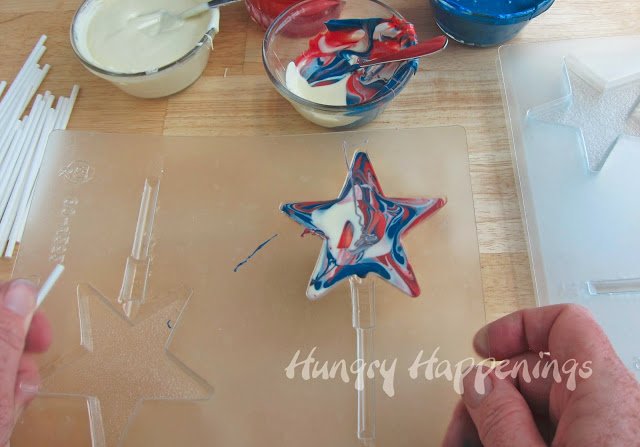
Once you fill one star cavity, tap the mold on the table a few times to allow any air bubble to come to the surface and pop. This will also help swirl the colors together.
To show you how the colors swirl, I lifted the lollipop mold up over my head and snapped a photo. Be careful if you try to do this, you need to keep the mold completely flat. If you tilt it at all, the candy coating will run out of the star cavity.
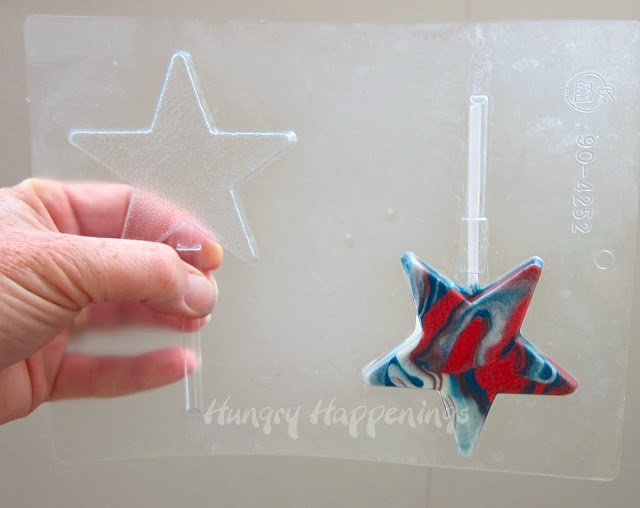
Once you fill all the star cavities in your mold, put the mold in the freezer for about 10 minutes to harden the candy coating.
Remove from freezer, turn mold over, and check to make sure there are no wet spots on your star. If the center looks darker than the outer edges it is probably still wet. With some molds the center will always look a bit darker. So, once you turn the mold over, see if the stars just fall out of the mold. If they don't, then gently press on the back side of the mold to push them out. If they stick or resist, put the mold back in the freezer for another two minutes, then try again. Don't leave them in the freezer for longer than a total of 15 minutes, or the lollipops will develop condensation which will make them sticky and wet.Allow the lollipops to sit at room temperature for about 20 minutes before packaging or storing them.
Store in an airtight container for up to a month. You can wrap your Red, White and Blue Swirled Star Pops in clear cellophane bags to give as party favors at your Fourth of July event, or fill a vase, bowl or jar with candy and arrange the lollipops to create a centerpiece for your dessert table.
Items used to create this project that are available on Amazon.com (commission earned for sales)
 Wilton Red Candy Melts Cand...Shop on Amazon
 Wilton White Candy Melts, 1...Shop on Amazon
 Wilton Blue Candy Melts® C...Shop on Amazon
 Merckens Coatings, RedShop on Amazon
 Merckens Super Coatings, Wh...Shop on Amazon
 Make 'N Mold Red Vanilla Fl...Shop on Amazon
 Make 'N Mold Candy Wafers -...Shop on Amazon
 Dress My Cupcake Chocolate ...Shop on Amazon
 CK Products Sucker Lollipop...Shop on Amazon
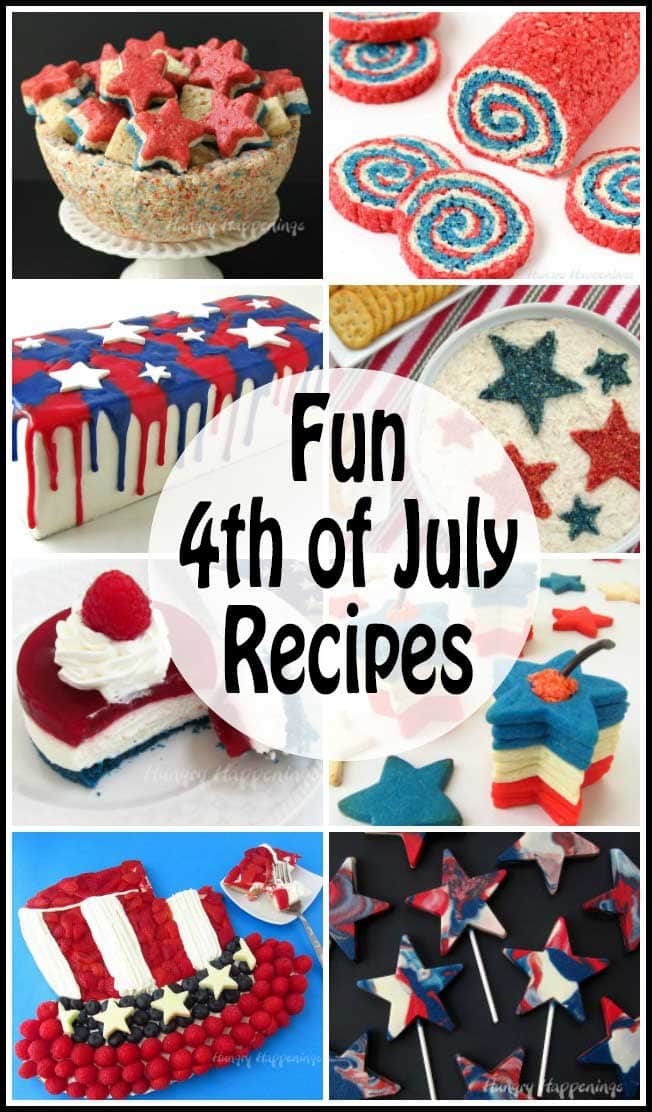
If you're looking for other 4th of July Recipes, click the link and explore all my other Independence Day inspired food.

- Banana Split Bars – A Fun and Easy Summer Dessert - March 4, 2026
- Pineapple Fudge (No Candy Thermometer Needed!) - March 4, 2026
- No-Bake Peanut Butter Pie Recipe - March 3, 2026

Sue says
Talk about making good use of leftover candy melts!?! These are so fun and pretty...certainly worth making with candy melts not leftover:)
Tara from The Magnolia Barn says
These are so cute!
Diana - FreeStyleMama says
I love your creations!
Michelle | Creative Food says
These are gorgeous!!
Madelein - Mother of six says
Oh, they look really nice 🙂
Brenda @ SweetSimpleStuff says
I love marbling ... looks great and is so easy to do!
The Partiologist says
These are so simple but so pretty - and I love chocolate! 🙂