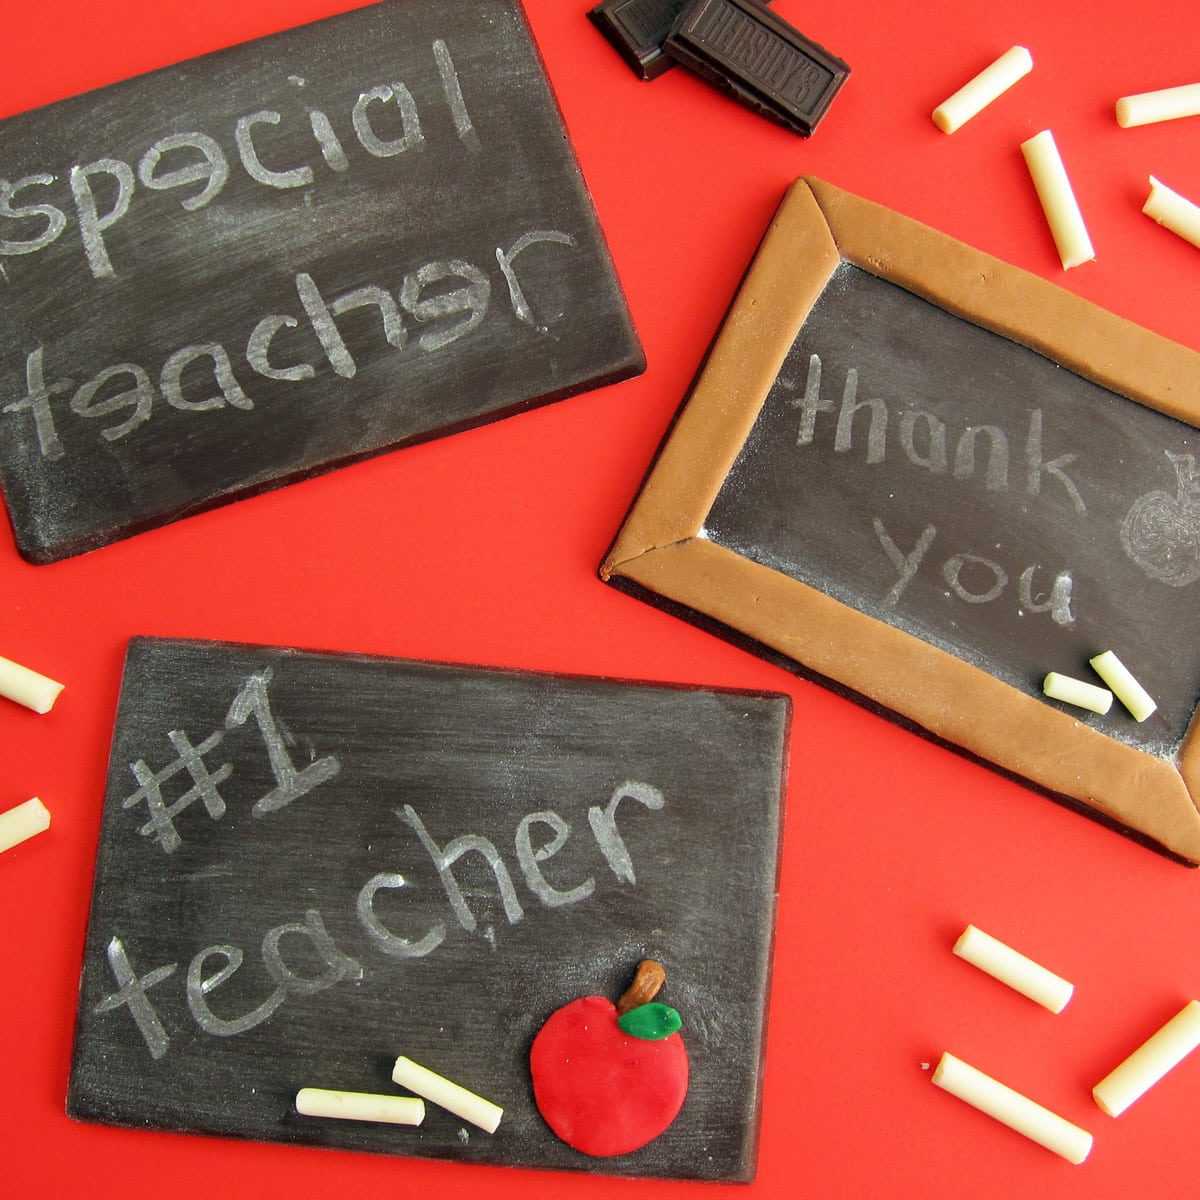
Surprise your child's teachers or your students with personalized Chocolate Chalkboards. These school-themed treats are fun to make for back-to-school parties, teacher's appreciation gifts, and graduation.
We always made homemade gifts for our teachers at Christmas and Teacher Appreciation Week. My teachers would have loved receiving one of these edible chalkboards.
I'm excited to share this school-themed food craft project with you. The chalkboards can be made using handmade or store-bought chocolate bars. You will need to make some homemade white chocolate chalk to go with the chalkboards.
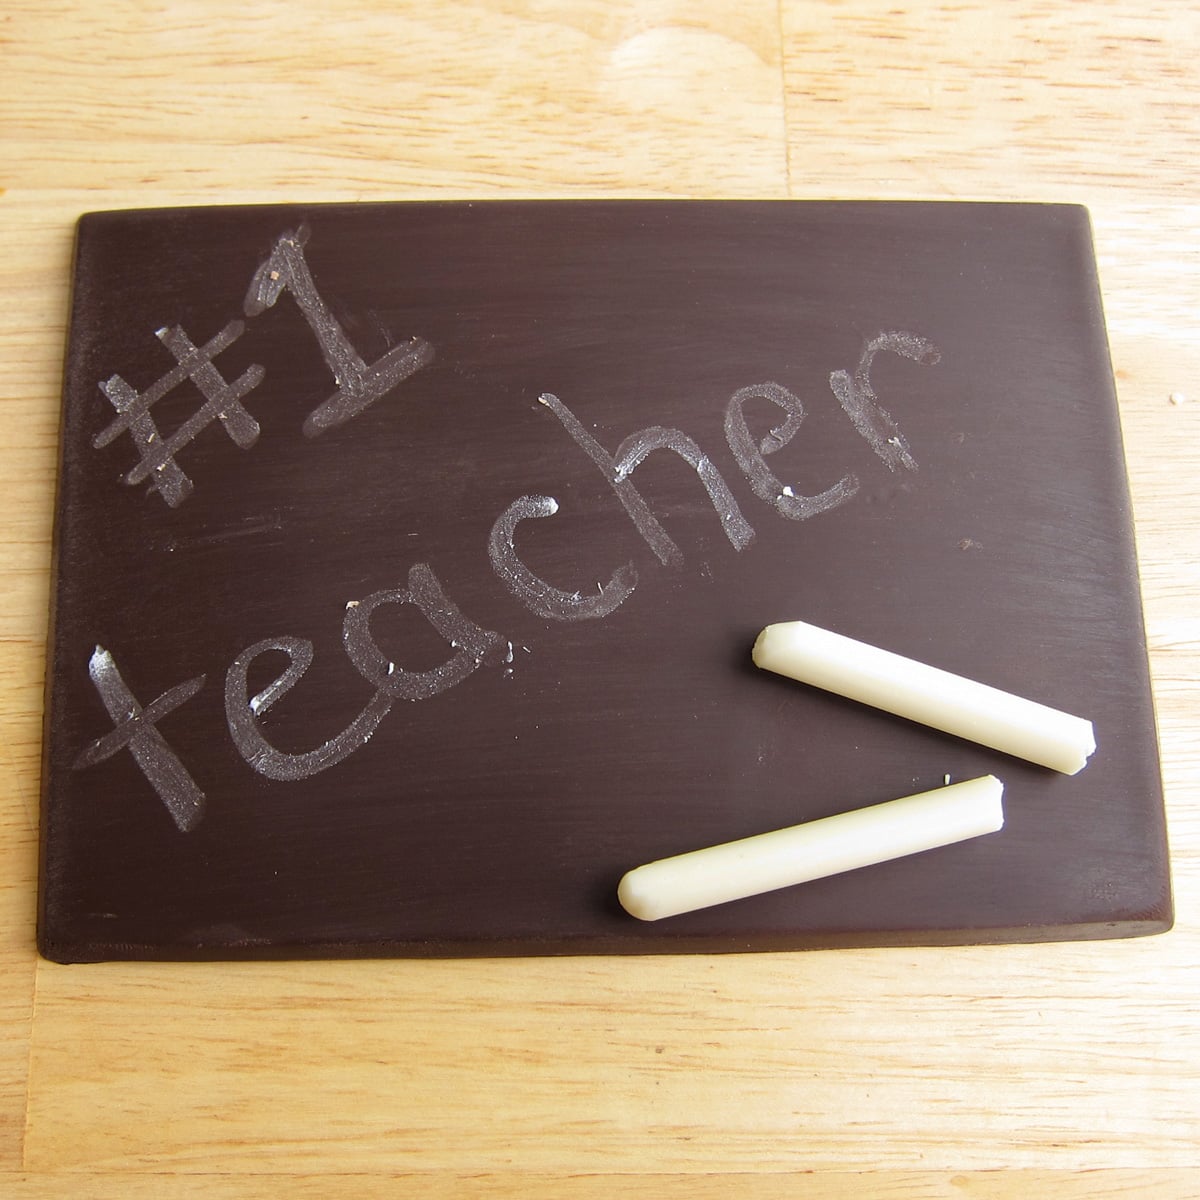
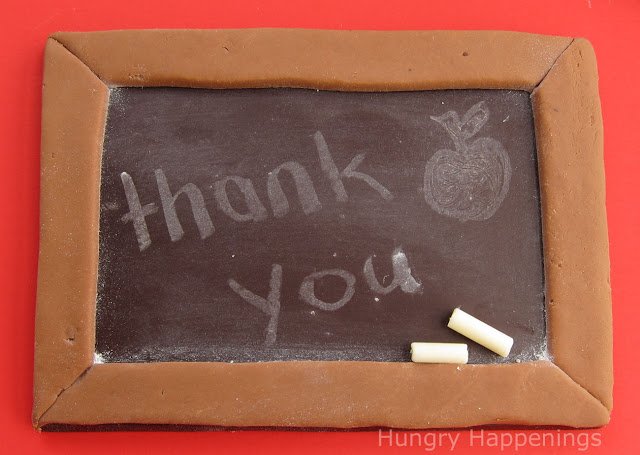
The edible chalk can be used to write special messages on your boards like, "#1 Teacher," "Thank You," or "Special Teacher."
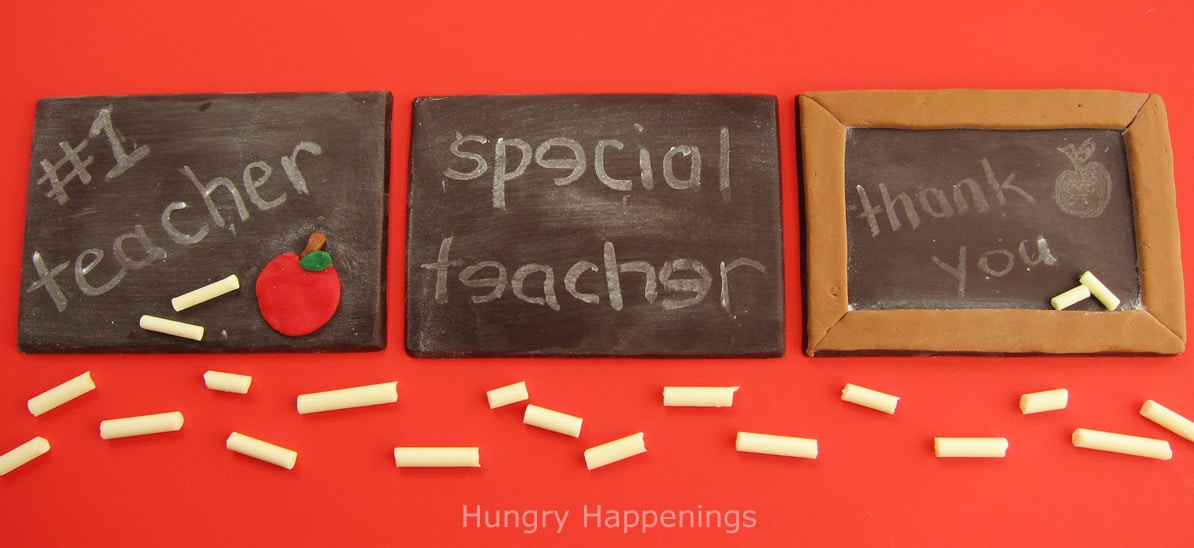
The boards look great plain but can be decorated with a border or embellishments like a candy apple.
Ingredients
dark chocolate candy bars - You can make homemade chocolate bars or use large thick store-bought chocolate bars. The bars should be at least 5 inches long. If you use break-apart bars, be sure they are thick enough to withstand a little pressure when you write on them using the white chocolate chalk.
white compound chocolate (also known as candy melts, melting wafers, almond bark, or confectionery coating) - You will use this to make the white chocolate chalk that can be used to write on your chocolate chalkboards.
powdered sugar - If you brush powdered sugar over the chocolate bars, they will look like chalkboards that have been erased.
optional decorations - You can make borders or decorations like apples using homemade 2-ingredient modeling chocolate, taffy, or fondant.
Before you begin, read my Chocolate Making Tips for instructions on melting compound chocolate (candy melts, almond bark, melting wafers) or melting and tempering pure dark chocolate (heating and cooling to exact temperatures).
Supplies
disposable pastry bag or a zip top bag
drinking straws (don't use bendable straws with ridges, you need a smooth surface)
glass filled with a few inches of sugar
wooden skewer or long toothpick
optional: candy bar candy molds (I used a 6-½" by 4-½" rectangle mold)
If you can't find a candy bar, you can pour chocolate into a rectangle plastic container to create candy bars with a smooth surface on the top. Just make sure the container is smooth inside.
Instructions
Make homemade chocolate bars.
Melt dark confectionery coating/candy melts (or temper pure dark chocolate) and pour it into candy bar molds or a rectangular plastic container.
Freeze the chocolate for 10-20 minutes until set (refrigerate if using pure chocolate). Then un-mold the bars and let them come up to room temperature before proceeding.
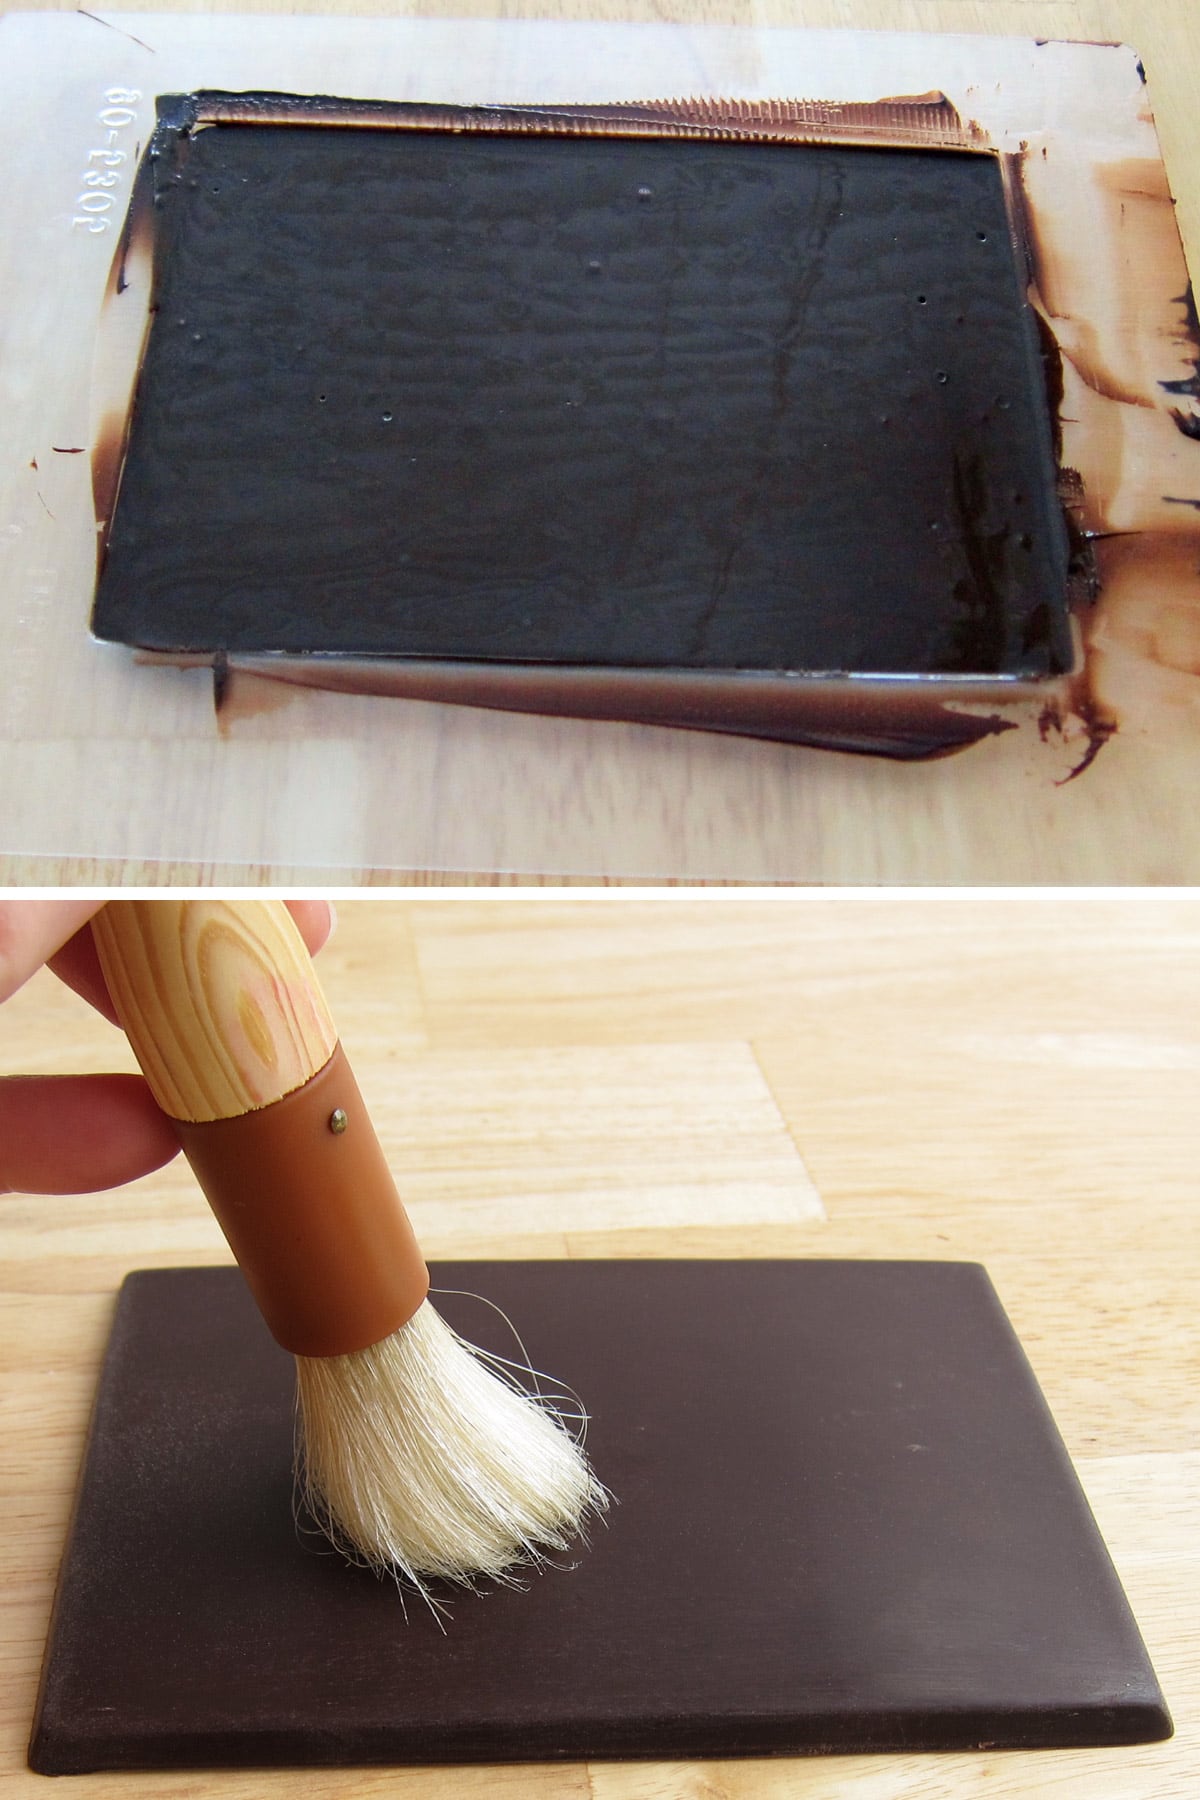
Now to transform your candy bar into a chalkboard, you need to rough up the surface of the candy bar. Take a pastry brush or a paper towel and rub the bar to take away the shine of the bar. You don't want to rub so hard that you end up with indentations, just enough to dull the surface.
Make white chocolate chalk.
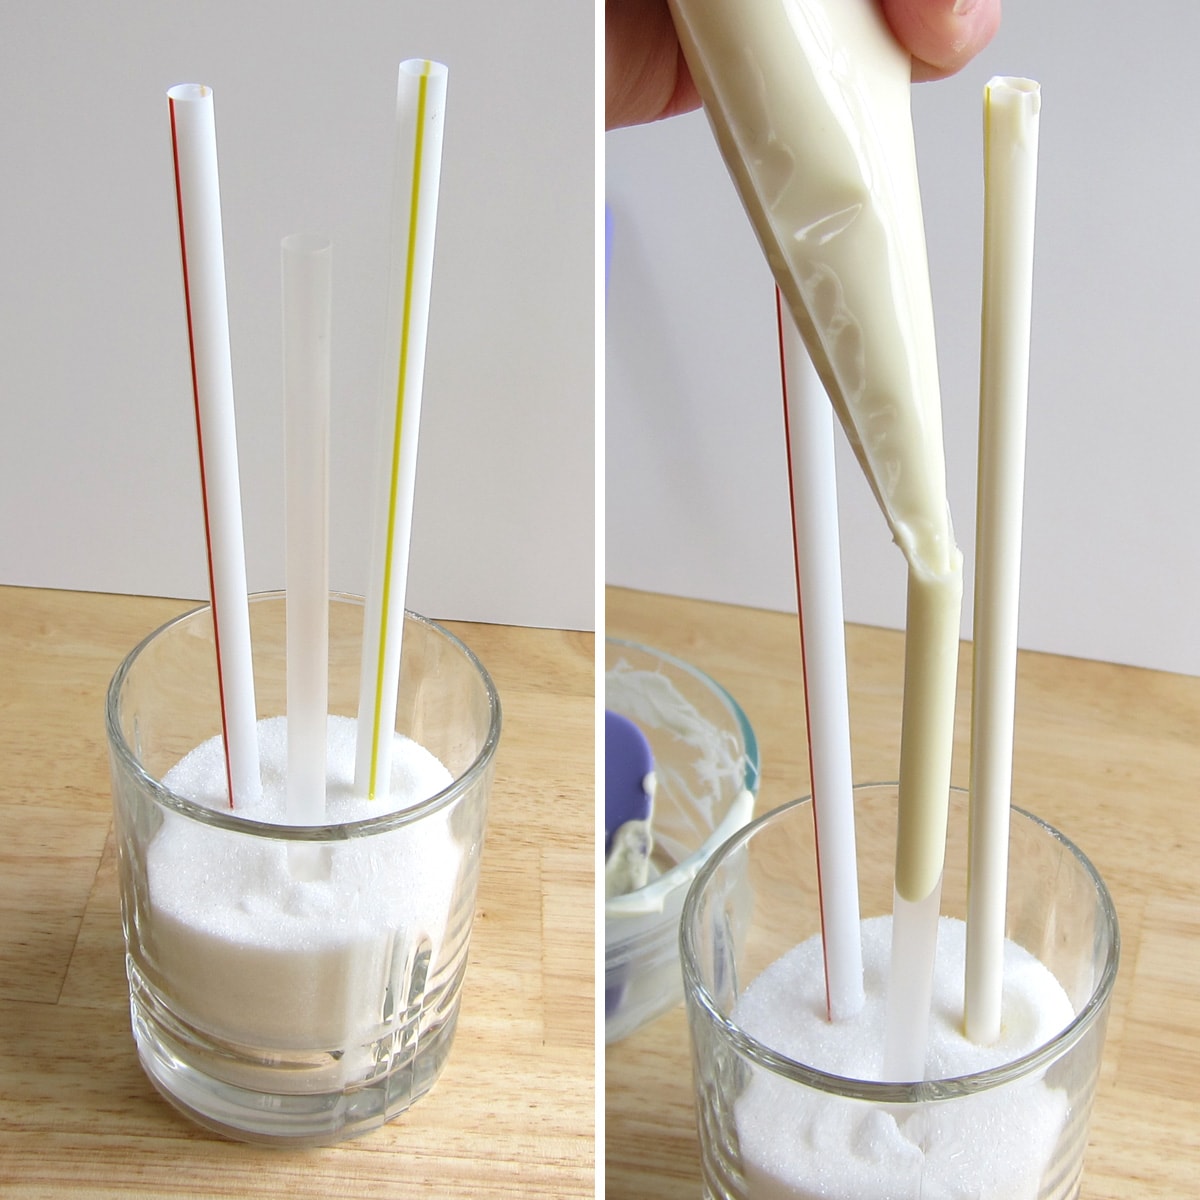
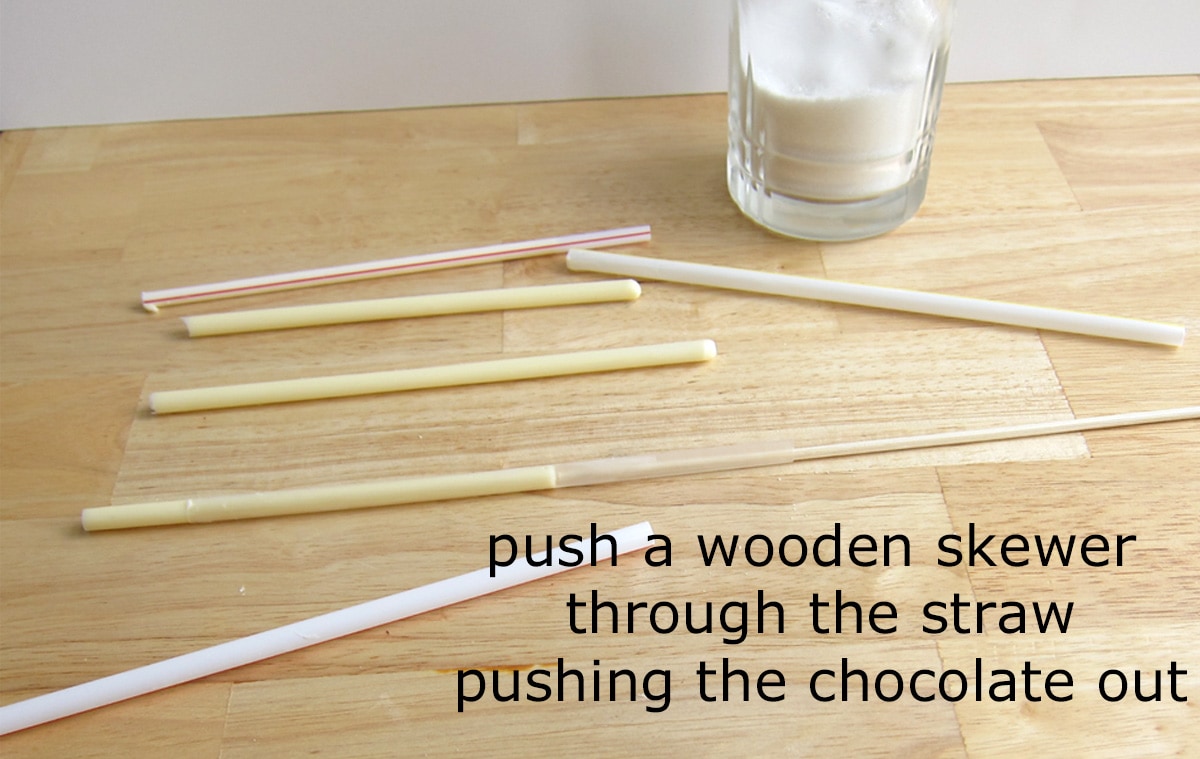
Pour a few inches of sugar into a glass and insert drinking straws into the sugar. Fill one straw for each chalkboard you plan to make. You'll have more than enough chalk.
Pour the white candy melts (confectionery coating) into a small microwave-safe bowl. Heat on high for 15-second bursts, stirring after each until melted.
Once melted, pour the white chocolate into a disposable pastry bag or a zip-top bag. Cut the tip off the bag.
Squeeze the white chocolate into a straw filling it completely. Repeat.
Freeze your candy-filled straws for 5-10 minutes. Set your timer. You don't want to forget them in the freezer as the candy will become sticky if left in the freezer for too long and won't come out of the straw.
Remove the white chocolate chalk from the straws.
To remove the candy from the straw, push a wooden skewer or toothpick into the straw and push the candy up and out of the straw.
If the candy won't come out, you may need to freeze it for a minute or two longer. Just don't leave it in the freezer for too long or it will stick permanently.
Break the candy chalk into pieces.
Allow the white chocolate chalk to come to room temperature before using it to write on the chalkboards.
Use the candy chalk to write a special message on your candy bars. You will break several pieces of candy chalk while writing each message. Well, I did, anyway. I found smaller pieces worked best to write on the boards but it's nice to have some longer pieces to add to the gift when packaged.
Dust with powdered sugar.
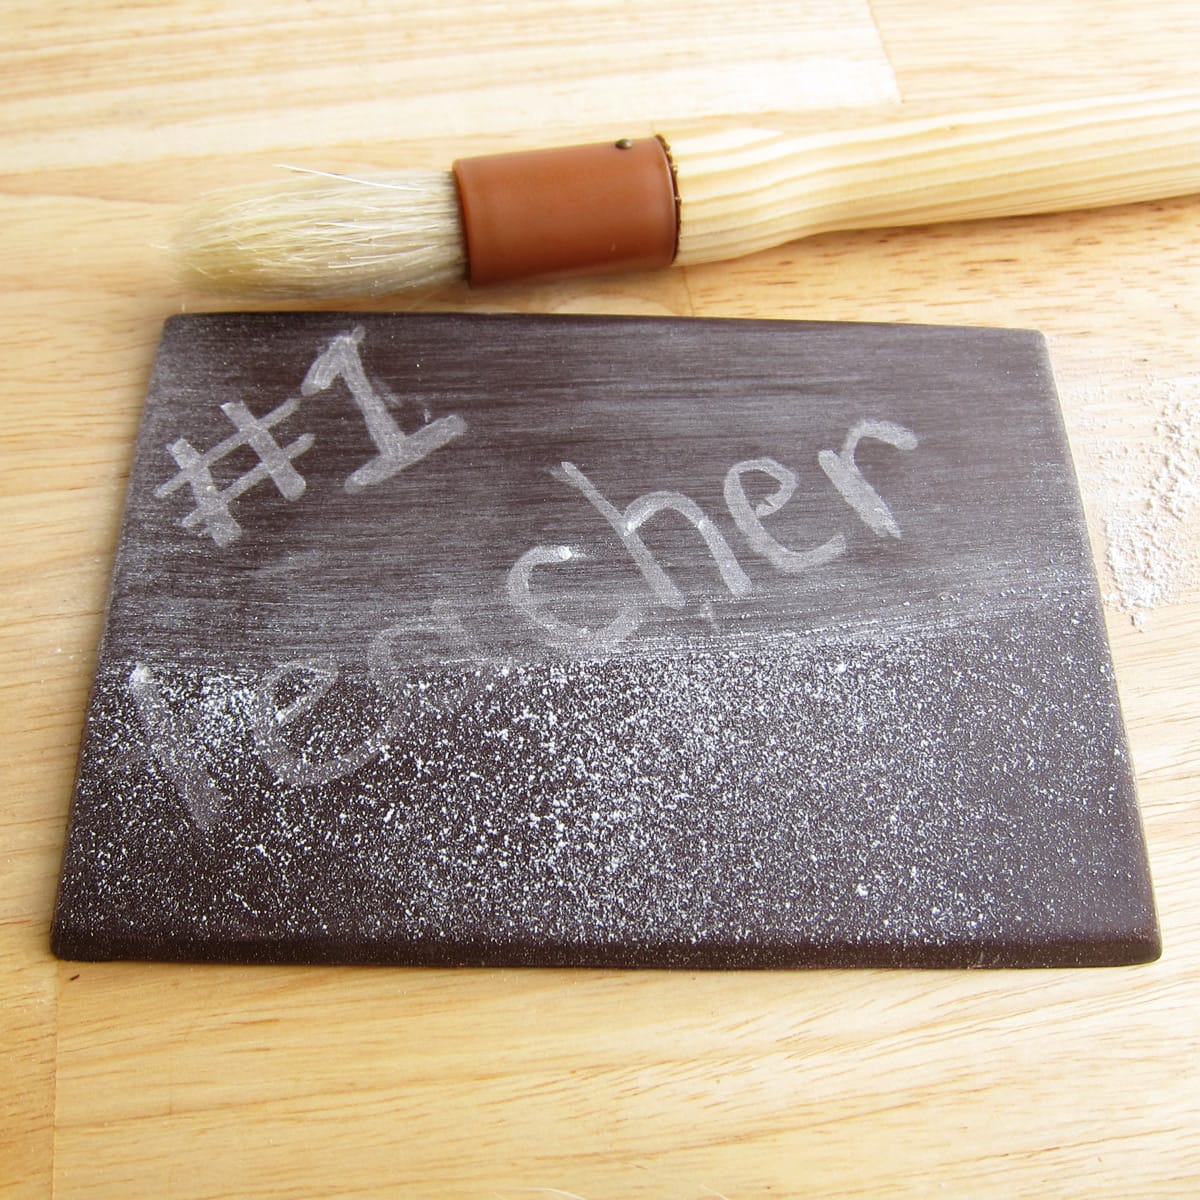
Once you've completed your writing, sprinkle some powdered sugar over the candy bar.
Use the pastry brush to brush the powdered sugar across the candy bar.
Your chalkboard now looks like it has had a lot of school lessons written and wiped away over the years.
To add a frame around your chalkboard:
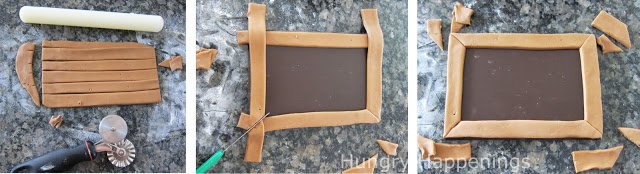
Dust your work surface with some powdered sugar. Roll some brown modeling chocolate (either make modeling chocolate using milk chocolate or tint white modeling chocolate with brown candy coloring) out to ⅛" thickness. Cut into ½"-1" thick strips.
Place one strip on each of the four sides of your chalkboard, overlapping the strips at the corners. You need to cut the strips at the corners so that they match up nicely.
The easiest way to do this is to cut down through the overlapping strips at a 45-degree angle. Remove the excess modeling chocolate then gently press the two angled strips together. Repeat with all the corners.
Attach the frame to the chalkboard.
Reheat the white candy melts in the microwave on defrost for 10-second intervals, stirring after each, until melted.
Use a bit of melted candy to attach the frame pieces and a few pieces of candy chalk to the chalkboard.

Add decorations.
To make an apple, color some white modeling chocolate with red candy coloring. Pinch off about a teaspoonful and roll into a ball. Flatten and shape it into an apple shape.
Color some modeling chocolate brown to create the apple stems and some green for the leaves.
Attach decorations with melted confectionery coating/candy melts.
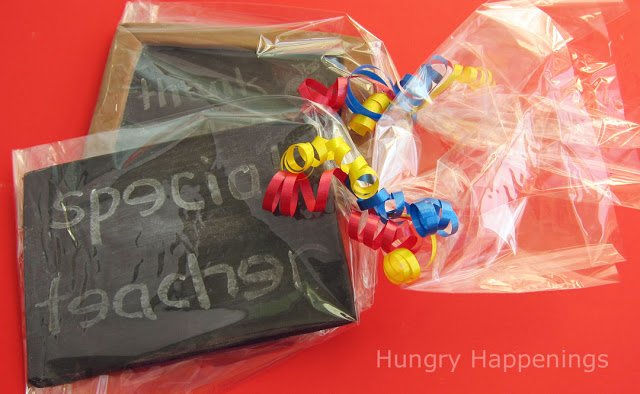
Package the chalkboards.
These chocolate chalkboards can be personalized for any occasion and will make great gifts for teachers, students, and faculty members.
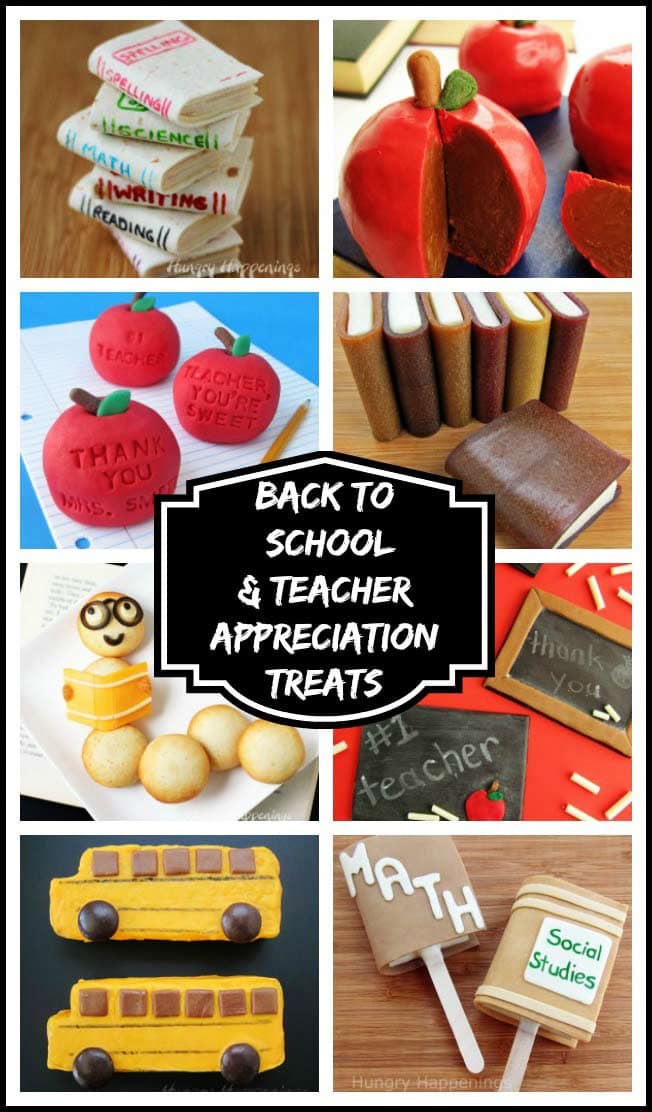
If you are looking for more fun Back to School or Teacher Appreciation Gift ideas be sure to check out all these other amazing food craft and recipe ideas on my School & Teacher Treats Page.

- Banana Split Bars – A Fun and Easy Summer Dessert - March 4, 2026
- Pineapple Fudge (No Candy Thermometer Needed!) - March 4, 2026
- No-Bake Peanut Butter Pie Recipe - March 3, 2026
Adriana Soto says
Estoy enamorada de ésta página. Soy una ama de casa en Costa Rica y esto me ha servido de inspiración para hacer mis proyectos y salir economicamente adelante. Gracias por compartir sus hermosas ideas.
Dios la bendiga
Adriana
beth says
I'm in love with this page. I am a housewife in Costa Rica and this has inspired me to make my project and go forward economically. Thanks for sharing your beautiful ideas.
God bless
Adriana
Hi Adriana,
I'm so happy you stopped by and am pleased you like my projects. I hope you enjoy making some of my recipes.
Have a sweet day,
Beth
Mackenzie says
Beth, Thanks for the inspiration! I am sharing your great idea today with my readers and linked back to your original! You are so creative! 🙂 The only thing I did differently was I actually stuck the straw in the white chocolate and sucked it up the straw! haha! It was SO much easier than squeezing it into the straw... I wasn't patient enough for that! 🙂
I think you're great! Thanks again!
Mackenzie 🙂
cheerios and lattes.com
Beth Jackson Klosterboer says
Hi Mackenzie, clever idea to make the white chocolate chalk. I just went to your website, and your chocolate chalkboards turned out great. I'm happy to see that using a Hershey's Bar worked so well for you. That makes the project quite a bit easier to complete. Hope the teachers love them!
Sowmya Karthy says
Love the idea of using the powdered sugar to get the used board effect - it looks soooooooooooooo real!!!!!!!!!!!!!!! Amazing..
Sowmya
http://nivedhanams.blogspot.in/
Helen Slater says
This is a fantastic idea, but it unfortunately didn't work out for me this time (purely my own fault ;)) But I still linked to you in my post if you would like to see
http://www.byhelen.co.uk/scraps/2012/07/10/teacher-gifts-hybrid/
Helen x
Beth Jackson Klosterboer says
Sorry to hear it didn't work for you. The only thing I can think of is if the chocolate bar and the white chocolate chalk weren't hard enough you wouldn't be able to scratch the word onto the chocolate with the chalk. Another option is to actually scratch words into the chocolate bar with a toothpick then dust powdered sugar over it. It wont look as good as the actual candy chalk marks, but it will still give the effect of a chalkboard. Hope the teachers enjoyed the candy bars anyway. I'm sure they did!
MissCandiquik says
I don't even know what to say - you are beyond creative. Love your ideas - I will have to make this someday 😉 Thanks for sharing.
Alexis @ we like to learn as we go says
Thanks again for linking up to my link party! I'm featuring you tomorrow on my blog!
Beth Jackson Klosterboer says
Thanks for featuring my choc-boards, Alexis!
Alexis @ we like to learn as we go says
This is one of the most creative teacher's gifts I've ever seen! I know teacher's would love this! I would love for you to link it up to my link party. I know my readers would love it too!
http://weliketolearnaswego.blogspot.com/2012/05/what-i-learned-wednesday-9.html
Heather Kinnaird says
what a seriously creative gift~ love it
Katie @ Quality Cheap Home says
What a great idea! So personal and most teachers won't pass up chocolate. I'd love for you to link up at my party and show them off as well!
http://qualitycheaphome.blogspot.com/search/label/POC%20Linky%20Party