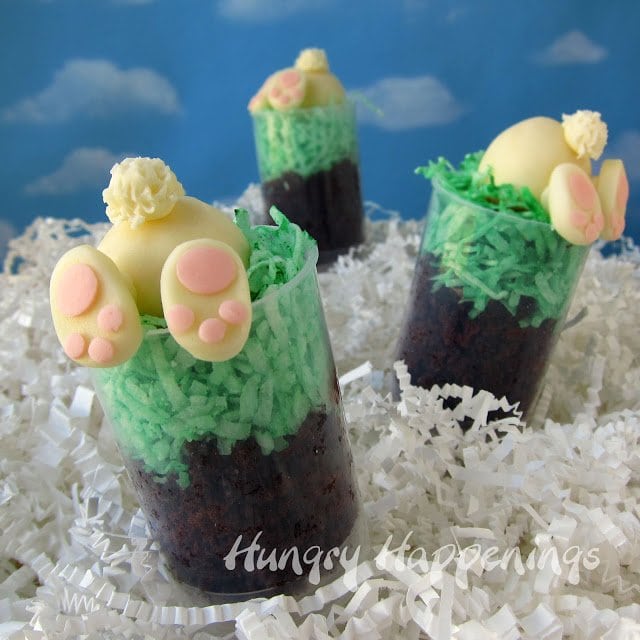
These adorably cute Bunny Butt Push-Up Pops are as fun to make as they are to eat. Serve them for Easter dessert. The whole family will love them.
I LOVE this Easter push pop treat and am so excited to share it with you. Push-up pops are all the rage right now and they are the perfect container to use for this fun dessert.
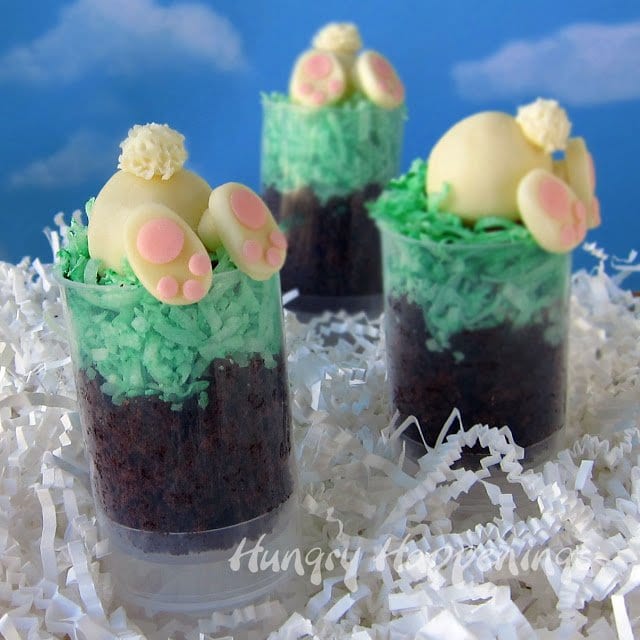
Each push-pop tube is filled with chocolate cake dirt and green coconut grass topped with a yummy white chocolate bunny.
I hope you have fun making this Easter Recipe. I know your party guests will enjoy eating these cute treats.
Down the Bunny Hole Push-Up Pop Treats (makes 12)
Ingredients
1 recipe white modeling chocolate
pink candy coloring
powdered sugar to dust work surface
corn syrup to "glue" the modeling chocolate pieces together
12 chocolate cupcakes (or 1 - 8" cake)
1 cup chocolate frosting
1 cup sweetened coconut and green food coloring - If you or your kids don't like coconut, you can use edible Easter grass. It comes in long strands which could easily be cut into smaller pieces. You might need two packages.
Supplies
#12 round pastry tip and # 6 round pastry tips, optional
rolling pin, optional
12 push-up pop containers
pastry bag or zip-top bag
quart size zip top bag
Instructions
Optional: Pinch off about two tablespoons of white modeling chocolate and color it light pink. Note: The pink candy coloring is vibrant, so use just a tiny amount of it to make your pink.
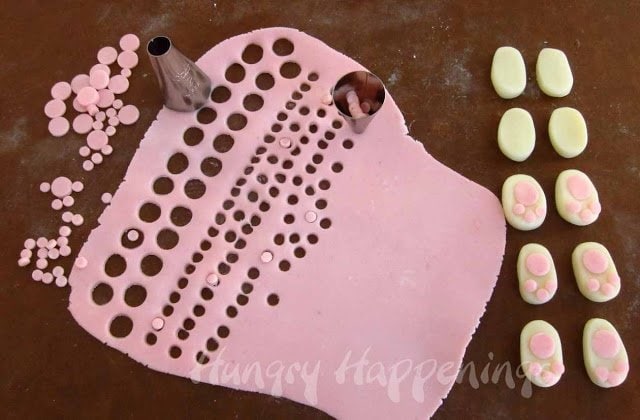
Lightly dust the work surface with powdered sugar. Roll out the pink modeling chocolate as thin as possible. Press the small end of the #6 round pastry tip into the clay, twist, and then pull up.
Continue doing this until you fill the pastry tip with small rounds of pink modeling chocolate. Turn it upside down and allow rounds to fall out. You'll need 72 tiny rounds. Do the same making 24 larger rounds using the #12 tip.
Alternately: you could just pinch off very small amounts of the pink modeling chocolate and roll them into balls then flatten them to make your circles. This will take more time, though.
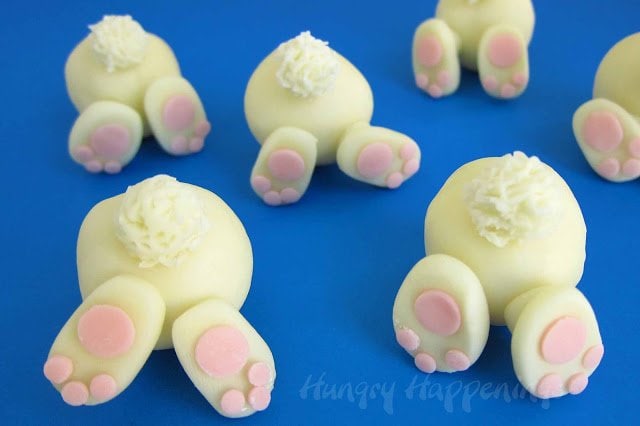
Pinch off teaspoon-sized pieces of white modeling chocolate. Roll into balls, then flatten into an oblong shape creating 24 bunny feet.
Dip a fine-tip paintbrush or toothpick into corn syrup. Brush onto the center of each foot. Press one pink round onto each foot. Brush three small dots of corn syrup around the edge of each foot and press on three tiny pink rounds. You can use water instead for this step. I think the corn syrup will hold the larger pieces in the next step a bit better than the water, though.
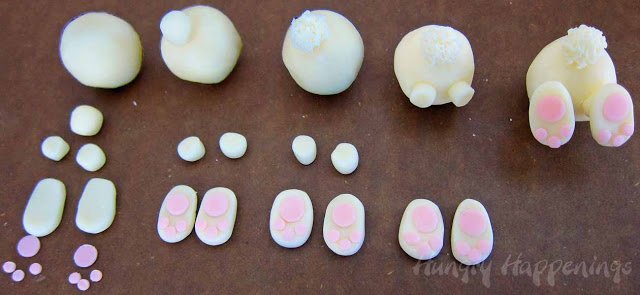
Pinch off 12 pieces of white modeling chocolate (a little less than a tablespoon) and roll them into balls for the bunny bodies. Pinch off 12 pea-size pieces of white and roll them into balls for the tails.
Pinch off 24 slightly smaller pieces and roll into balls, then flatten on either side to make little legs. Brush the top of each large ball with a dab of corn syrup. Attach a tail.
To make your tails look fuzzy, use a knife to jab at the ball pulling out little tufts of modeling chocolate all around it. Attach two legs with corn syrup then attach a foot on each leg.
Allow your modeling chocolate bunny butts to dry for at least an hour so they are easier to handle.
If you don't have a stand for your push-up pops, you'll want to secure them somehow before filling them with the cake. I filled a large basket with shredded paper and it worked great, but I'm thinking about buying a stand for future use.
I'm sure it is much easier if you have one to keep the push pops from toppling over while you fill them. Plus it offers a wonderful way to display your push pop treats.
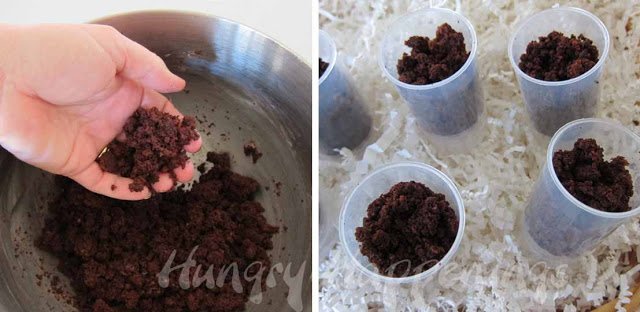
Crumble up the cupcakes and stir in 2 tablespoons of chocolate frosting. You want the mixture to be loose and crumbly so it looks like dirt. I mixed my cake and frosting in my Kitchen-Aid Mixer, which worked great.
Assemble the push-up pop containers then fill them about ¾ full with the crumbled cake.
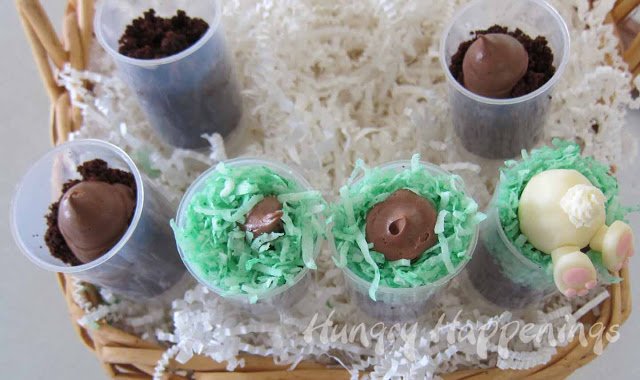
Put the remaining frosting in a pastry bag or zip-top bag snip off the tip and pipe some frosting into the center of each push-up pop (don't fill to the edge, you want the coconut to show around the edge, not the frosting.)
Put coconut in a zip-top bag. Add a few drops of green food coloring, close the bag, and shake. Add more coloring if needed, and shake again, being sure all the coconut is colored green.
Sprinkle the green coconut around the frosting, filling each container to the top. Pipe on a bit more frosting in the center of the coconut. Press one bunny butt onto the frosting.
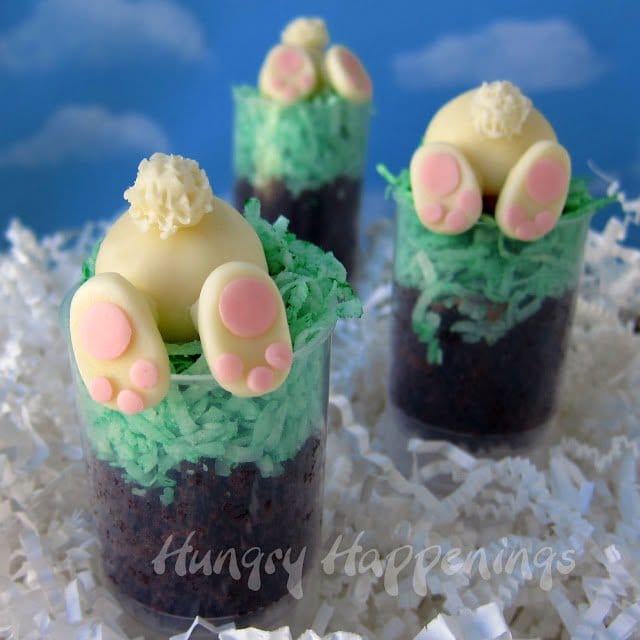
Your Down the Bunny Hole Push-Up Pop Treats are ready to serve. You can cover them with plastic wrap and keep them at room temperature for a day, maybe two.
You can find supplies needed to create this recipe on Amazon. I earn a small commission when you use the sales links in this post to make a purchase at no extra cost to you.
 Giarraffa Co. Push Pop Cont...Shop on Amazon
 Americolor Soft Gel Paste F...Shop on Amazon
 Round Decorating Piping Tip...Shop on Amazon
 Ateco Pastry Bag, Disp. 12"...Shop on Amazon

- Banana Split Bars – A Fun and Easy Summer Dessert - March 4, 2026
- Pineapple Fudge (No Candy Thermometer Needed!) - March 4, 2026
- No-Bake Peanut Butter Pie Recipe - March 3, 2026
Legendary Letters says
I absolutely love these! They are adorable! I want to serve them after Easter dinner. I bet my family would totally get a kick out of them. 🙂
ihlamurcum says
so cute,I liked.
amy beth marantino says
i want to try the Orange Flavor Bakery Emulsion Natural Flavoring
amy beth marantino says
these treats are adorable. very well done.
Anonymous says
I love these. I made the chocolate bunny butt cake by Betty Crocker for one of this Easters desserts. I got lots of laughs and yums too! Wish I had seen these little guys. If I was lucky enough to win the prize I would choose the zoo cupcake liners..those are fantastic!Tough choice as there are many,many interesting things on their site.
Nikki1118 says
Great cute idea! I made them for Easter and took them to my boyfriends parents house; they were a hit; thank you! Since I am quite the procrastinator I waited too long to get the push pops I used small Dixie cups instead which worked out great too! Thanks for the idea! Keep posting!
Beth Jackson Klosterboer says
Thanks Nikki. I'm so glad they were a hit! I think using Dixie cups is a great idea and it's much more budget friendly. Hope you had a great Easter.
Nikki1118 says
I made these for Easter and took them to my boyfriends parents, they were a hit! Thanks for the great idea! Another suggestion for the cups, because I couldn't find the push pops is small Dixie cups.
Beth (www.livinglifeintentionally.blogspot.com) says
Cute, Cute, Cute!!! Happy Easter Beth =-)
I shared it with my readers here: https://www.facebook.com/LivingLifeIntentionally - Thanks for linking up to TGIF! See you tomorrow =-)
Beth
Beth Jackson Klosterboer says
Thanks for sharing Beth!