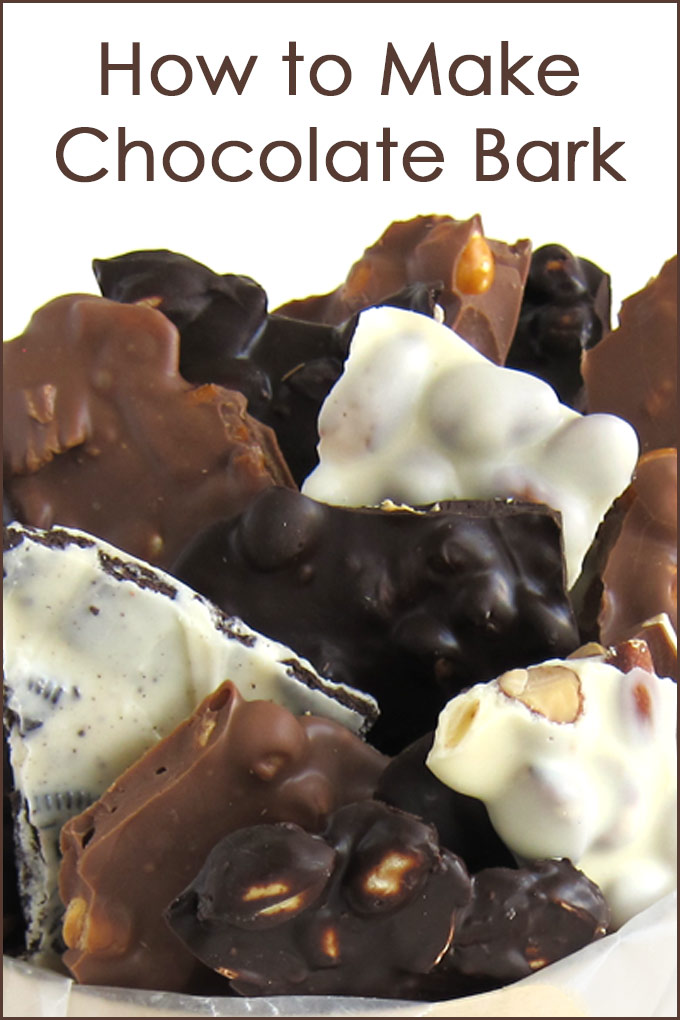
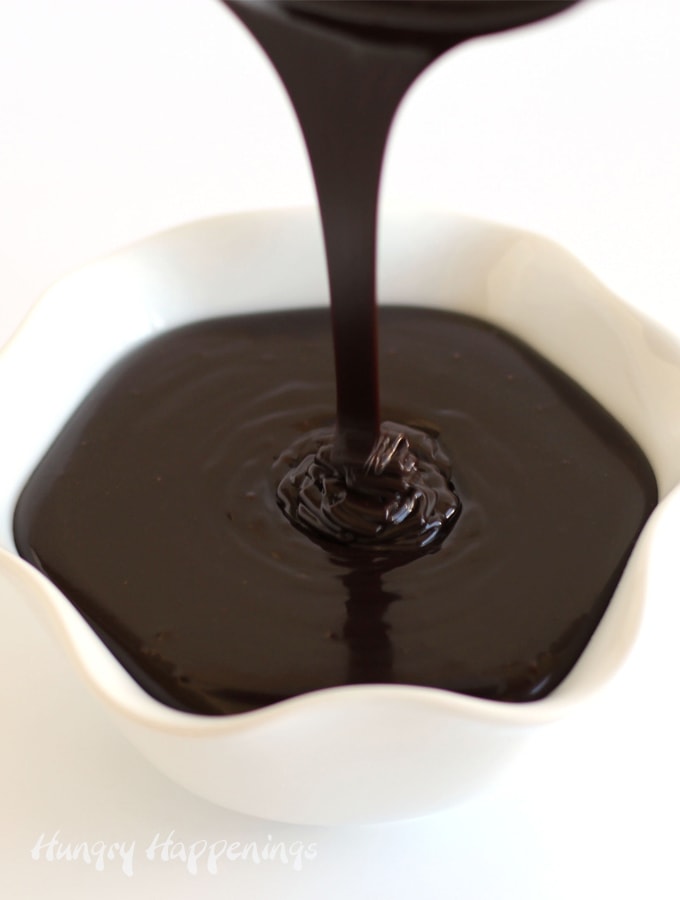
Chocolate bark is one of the easiest candies to make using as few as two ingredients.
You can simply break it into pieces and place it in your candy dish or you can package chocolate bark in tins and gift bags to give as Christmas gifts, birthday presents, or thank you gifts.
Whether you are making homemade chocolate for the first time or are an experienced candy-maker, this chocolate bark recipe will be perfect for you.
What is chocolate bark?
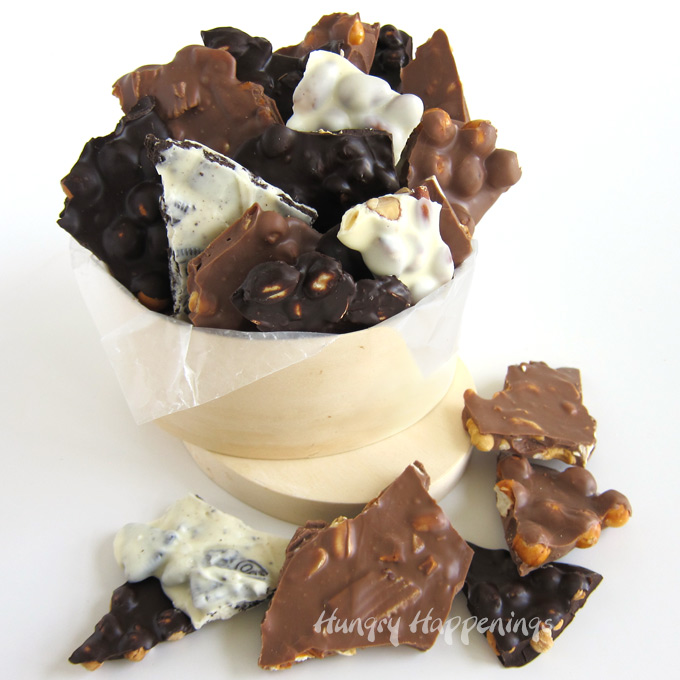
- Chocolate bark is a thin layer of chocolate filled with mix-ins like nuts, cookies, candies, pretzels, dried fruit, or toffee bits that is broken into pieces that resemble tree bark with scraggly edges and random shapes.
- This chocolate bark is not to be confused with blocks of confectionery coating (compound chocolate made using vegetable oils instead of cocoa butter) that is sold as Almond Bark, Candi Quik, or Candy Coating which many people call chocolate bark.
Chocolate bark is super easy to make using as few as two ingredients.
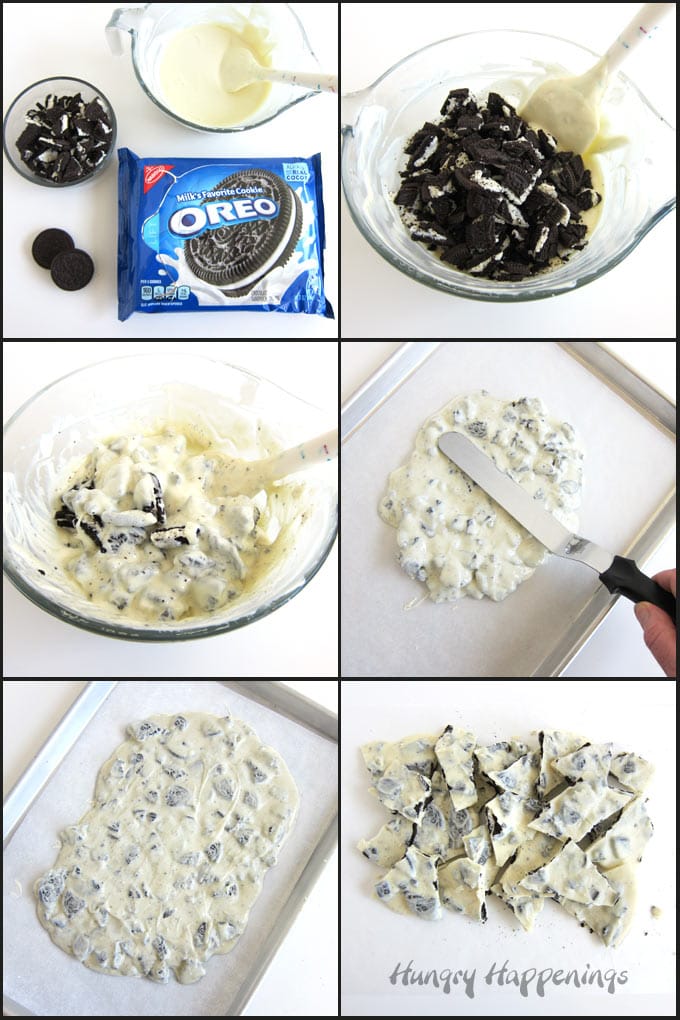
To make chocolate bark, you properly melt your chocolate, then stir in mix-ins, spread it on a pan, let it chill to harden, then break it into pieces. Easy peasy!
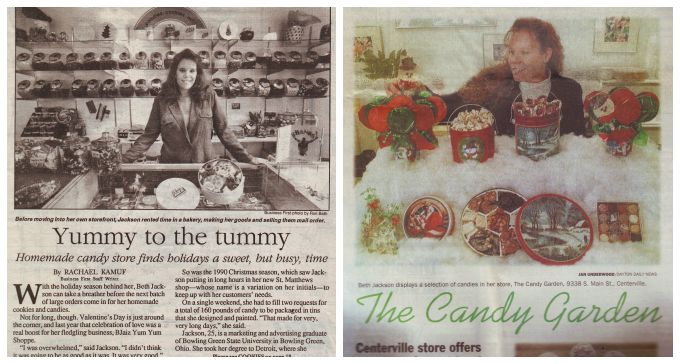
When I opened my first candy/cookie store back in 1989, I began selling chocolate bark because it was easy enough for any of my employees to make, could be flavored using dozens of different ingredients, and could be packaged to make nice gifts.
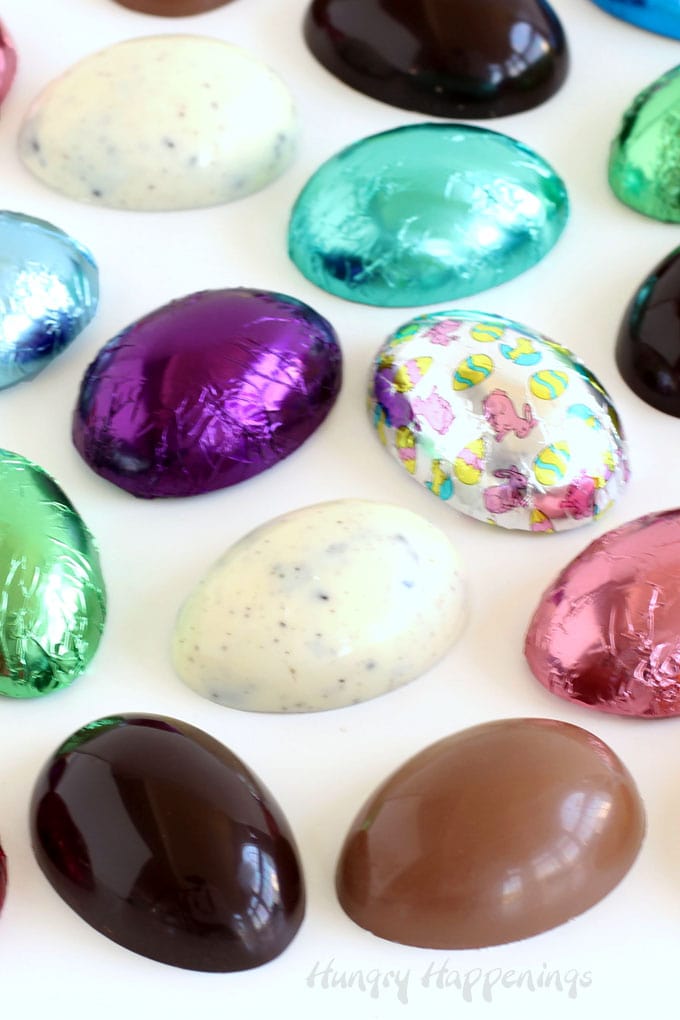
I got creative and made chocolate bark hearts, chocolate bark Christmas trees, and chocolate bark Easter eggs for the holidays.
I even crafted round chocolate bark lollipops then arranged them into bouquets. They were quite popular at a time when cookie bouquets, which we also made, were all the rage.
If you'd like to learn more about chocolate making, be sure to check out my chocolate-making classes at The Sugar Academy.
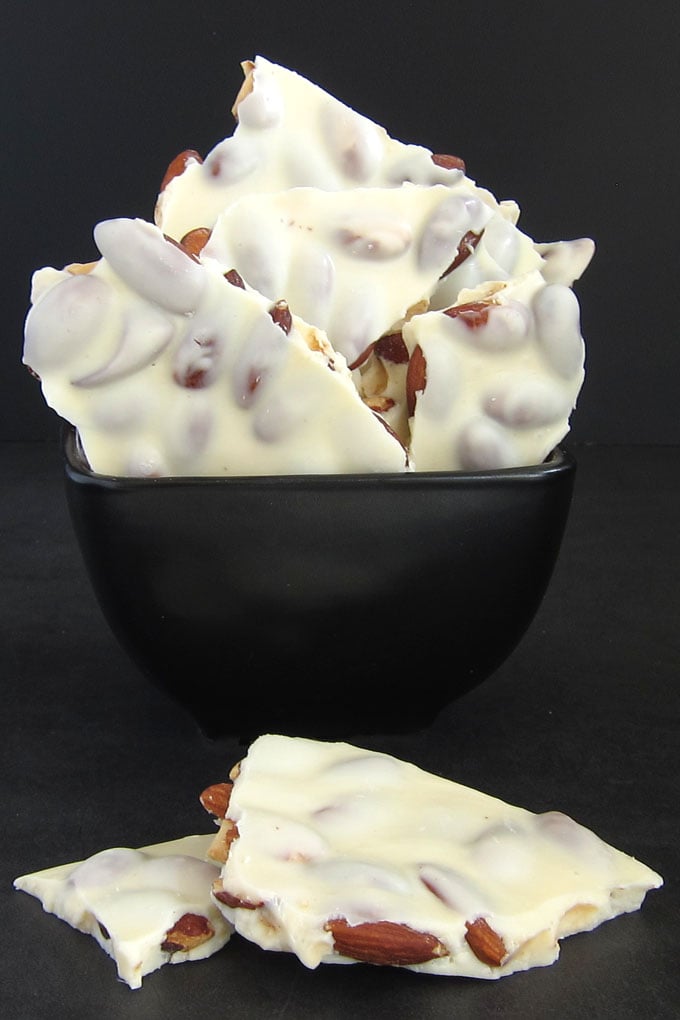
Back in the 80s, the only chocolate bark you typically found in a candy shop was filled with almonds and it was usually made with white chocolate.
Almond bark was very popular back then and still is, but there are so many ingredients you can mix into white, dark, or milk chocolate to make bark.
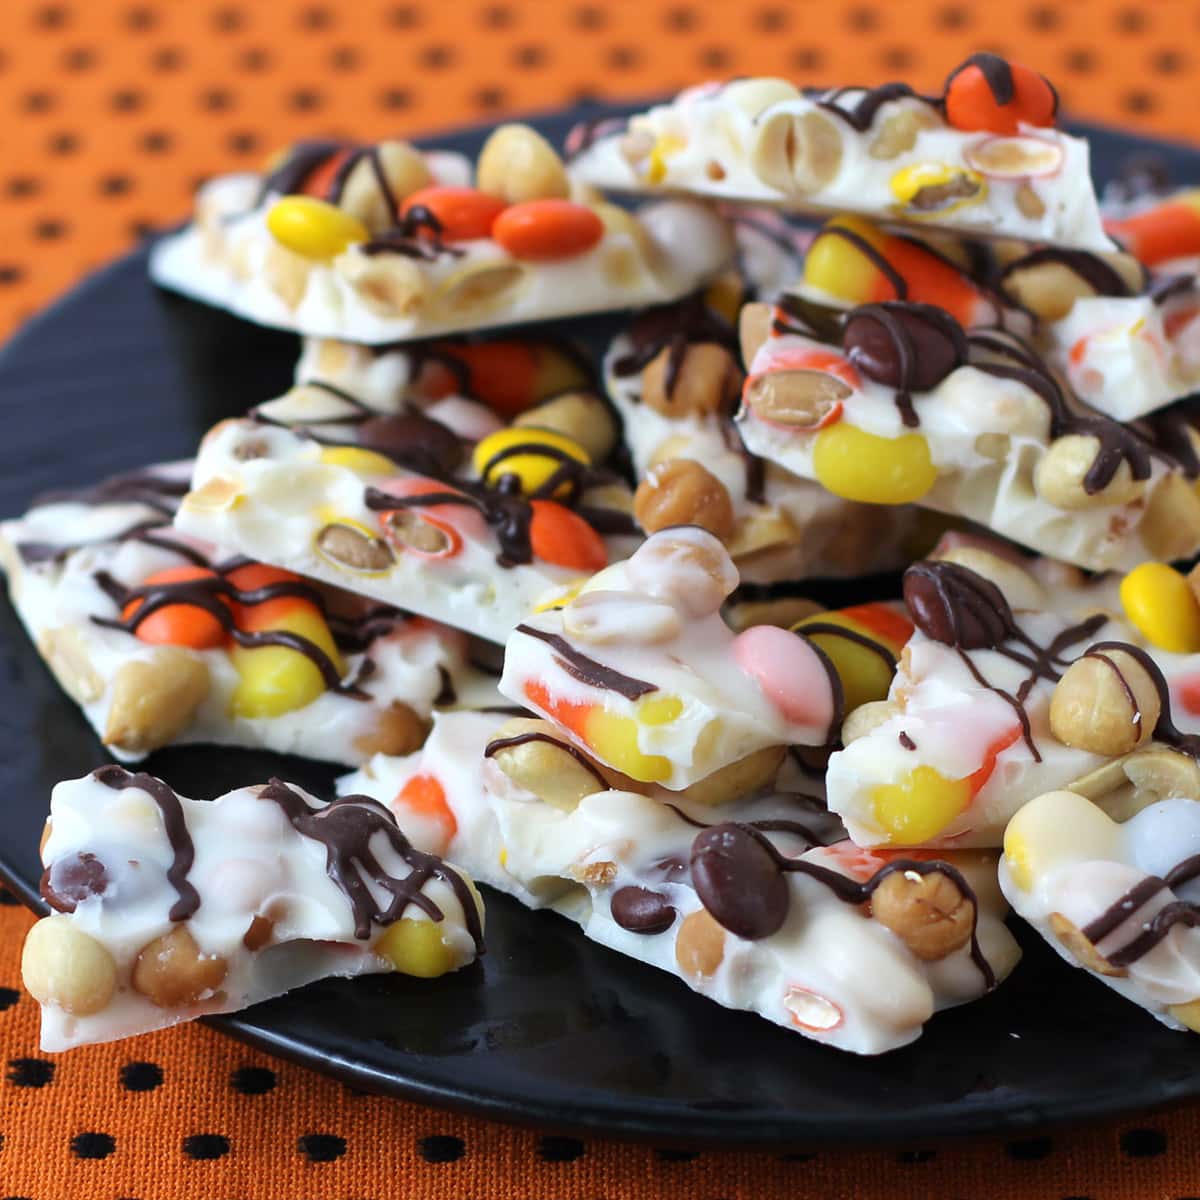
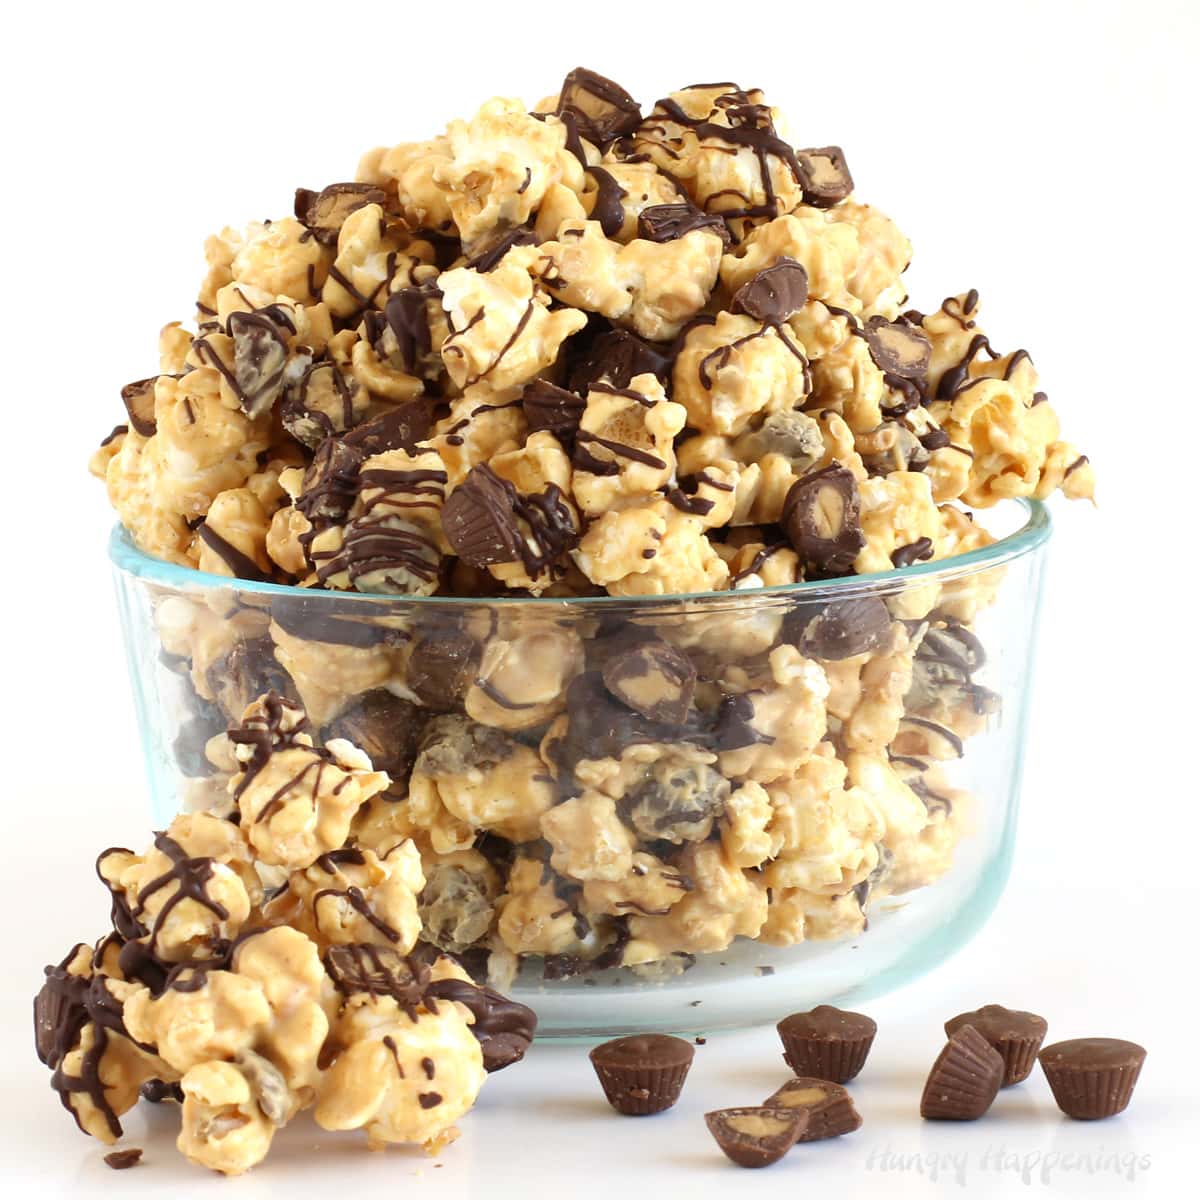
I love making bark using an unusual combination of potato chips, pretzels, and peanuts (I call it Couch Potato Bark), but my favorite bark is loaded with peanuts, pretzels, OREO Cookie pieces, toffee bits, Reese's Pieces, caramel, and is topped with tiny pieces of peanut butter fudge topping. It's affectionately known as Yum Yum named after my first store.

Before you can learn how to make chocolate bark, you need to know a little bit about chocolate.
What chocolate to use for chocolate bark?
You can use pure chocolate or compound chocolate (known as confectionery coating, candy melts, melting wafers, or almond bark) to make chocolate bark.
Pure Chocolate
- Pure chocolate contains cocoa butter which melts at body temperature so it gives the chocolate a luxuriously smooth texture when it melts on your tongue.
- The flavor is decadently rich and delicious.
- When pure chocolate is in temper it has a wonderful snap and shine.
I highly recommend using pure chocolate to make your chocolate bark however pure chocolate must be tempered. You cannot simply melt it and hope for the best. That will not work.
Why do you need to temper pure chocolate?
- Cocoa butter contains crystals that are stabilized at certain temperatures. When you temper the chocolate you need to either heat the chocolate slowly so that it never goes out of temper, or you need to heat it to a temperature where all the crystals break apart, then cool to get the crystals to form the proper type of crystal structure.
- Chocolate bars, callets, or chips, that you purchase from the store are already in temper but once you melt them they need to be tempered again.
- If you do not properly temper your chocolate, it will NOT harden properly. When you break chocolate, it should snap. Chocolate that is not tempered properly will be soft.
- Also, untempered chocolate will develop bloom which means it will become streaky or spotty.
Tempering chocolate doesn't have to be hard but it can take a bit of practice. I'm going to share the two easiest methods for tempering chocolate below.
How to temper chocolate the easy way in the microwave.
- Finely chop or grate 16 ounces of chocolate and place in a microwave-safe bowl. You want tiny uniform pieces of chocolate for this tempering method.
- Heat on high at 10-15 second increments, stirring after each, until melted. As you get close to melting, cut the heat to 50% power.
- You need the chocolate to melt and stay within the tempering range of:
- 88-91 degrees Fahrenheit for dark chocolate
- 86-88 degrees Fahrenheit for milk chocolate
- 82-84 degrees Fahrenheit for white chocolate
- If the temperature of your chocolate goes above these numbers, you will have to heat it up to 110-120 degrees and use the seeding method below.
I prefer using the seeding method (see below), but this method can be quick and easy.
You can use this method with any chocolate bar that you purchase from the grocery store, but I recommend using either Callebaut semi-sweet chocolate bars or Peter's Burgundy Chocolate Bars if you want to use chocolate bars. Both come in large 10 or 11-pound blocks.
Can you make chocolate bark using chocolate chips?
- Yes, but be sure to check the ingredients label. If they contain cocoa butter, chocolate chips must be tempered so that your chocolate bark hardens properly. If the ingredients list palm kernel oil or other vegetable oil, they won't need to be tempered.
- Be aware that chocolate chips are made with emulsifiers to keep them from melting in cookies. They do not melt as quickly or as easily as other chocolates.
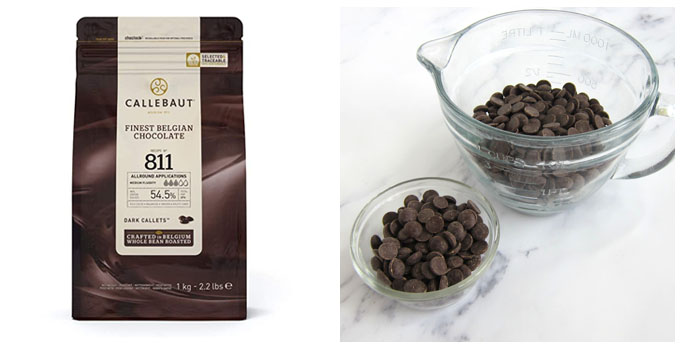
Couverture Chocolate Callets
These callets may look like chocolate chips but they are not. These little chocolate wafers are meant to melt easily unlike chocolate chips which contain stabilizers.
I use Callebaut Couverture Chocolate Callets to make my chocolate bark and I temper the callets using the seeding method (see details below).
If you have never tempered chocolate, I highly recommend purchasing these chocolate callets. I have taught dozens of students how to temper chocolate using Callebaut callets and every single student has had success tempering their chocolate the very first time.
Plus, they are made with the most delicious Belgium chocolate.
Seeding Method of Tempering Chocolate
- Separate 16 ounces of chocolate placing 12 ounces in a microwave-safe mixing bowl and setting the other 4 ounces aside for later use.
- Melt 12 ounces of dark chocolate to 115°-120° Fahrenheit, milk chocolate to 110°-115° F, or white chocolate to 105-110° F.
- Begin to cool the chocolate by stirring in about 2 ounces of chocolate. Continue to stir, scraping down the sides of the bowl until all of those chocolate pieces have melted.
- Check the temperature of the chocolate.
- Continue to sprinkle in small amounts of the chocolate callets and stir to cool the bowl of chocolate.
- Be sure to always scrape the sides of the bowl. You do not want the chocolate to harden around the edge of the bowl.
- Your goal is to get the chocolate to 88-91 °F for dark chocolate; 86-88°F for milk and 82-84°F for white.
- Once the chocolate reaches that temperate, remove any unmelted chocolate pieces. If there aren't many pieces you can also just dissolve them using an immersion blender. If there are too many, however, you don't want to do that as you will run the risk of cooling the chocolate too much.
Can you melt chocolate without a microwave?
- Yes.
- Alternatively, you can melt your chocolate in a double boiler set over low heat.
- Fill a pot with 1-inch of water and set a tight-fitting bowl over the opening of the pan.
- Fill the bowl with chocolate and heat on low stirring often until melted.
- Continue to heat until the chocolate reaches the appropriate temperature.
- Then remove from the heat and follow the instructions above.
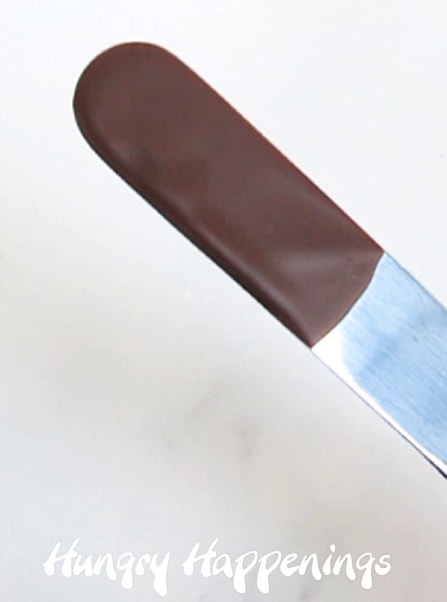
How to know if chocolate is in temper?
- Test the temper of the chocolate by dipping a metal spatula, spoon, or knife into the chocolate.
- Shake it, to remove the excess chocolate then set it aside at room temperature.
- In 3-5 minutes, the chocolate should harden and look shiny.
- Alternatively, you can spread a small amount of chocolate on a piece of parchment paper and allow it to air dry for 3-5 minutes. It should peel off the paper and snap when broken.
- While you are waiting, be sure to stir your bowl of chocolate, to make sure it doesn't cool too much around the edge.
- If your test chocolate has hardened and looks shiny be sure to check the temperature of your bowl of chocolate before proceeding to make your chocolate bark.
- The chocolate will have cooled slightly and will need to be warmed slightly!
- Heat it in the microwave for about 5 seconds then remove and stir and check the temperature. Do not let it go above temper temperature (91° dark, 88° milk, or 84° white). If it does, you have to start this whole process over again.
- You are now ready to mix in your chocolate bark ingredients.
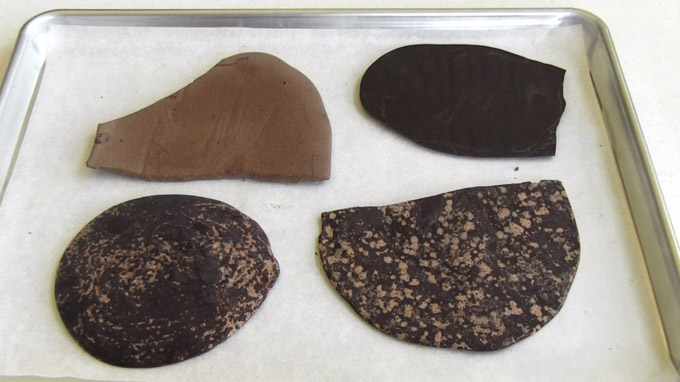
Can I skip tempering pure chocolate?
- NO!
- If you do not temper your pure chocolate the chocolate will be soft, streaky, spotty, or even chalky.
- The chocolate that is pictured above is all out of temper. The bloom (white spots and streaks) did not develop right away, however. The chocolate looked fine the first day but bloomed later the next day.
- Also, as I mentioned above, chocolate that is not in temper will not harden properly. It will be soft and won't break nicely. It will actually bend not snap apart.
Can I use compound chocolate (candy melts) to make chocolate bark?
- Yes, compound chocolate, also known as, confectionery coating, candy melts, melting wafers, or almond bark can be used to make chocolate bark.
- Compound chocolate contains vegetable oil typically palm kernel oil instead of cocoa butter so it does not need to be tempered.
- This type of chocolate is easy to melt and it hardens beautifully without any fuss.
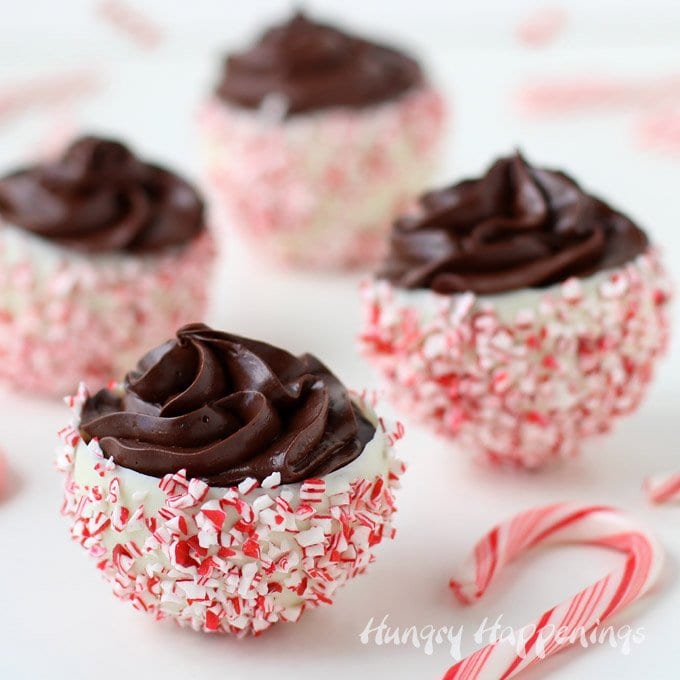
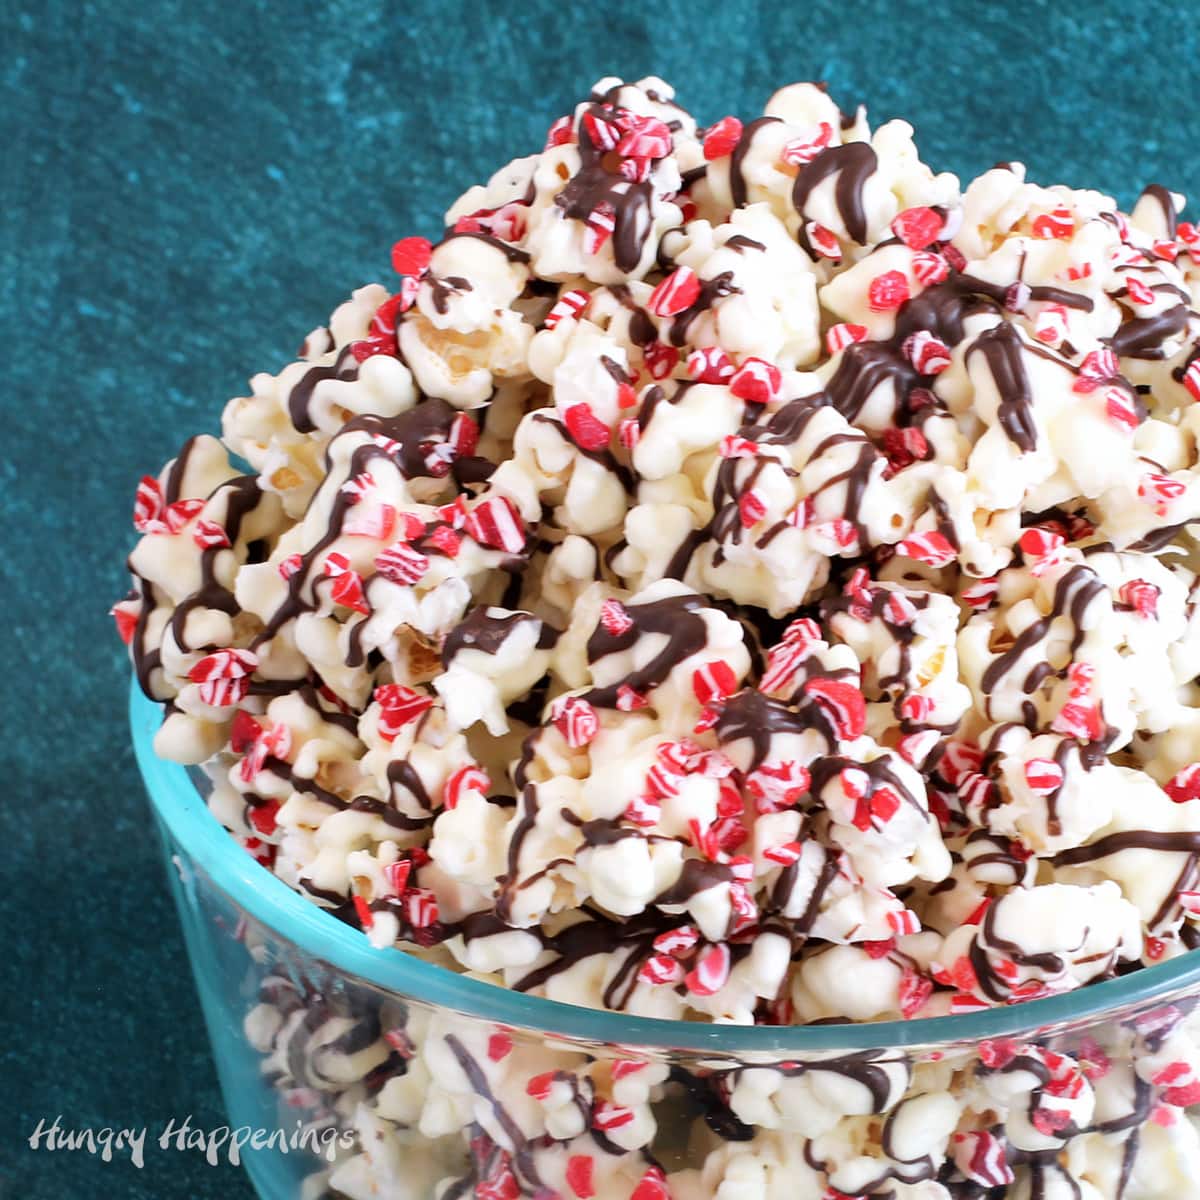
- The flavor and texture are not as luxurious as pure dark or milk chocolate made with cocoa butter but compound chocolate does have a nice chocolate flavor. I particularly like using white compound chocolate to make many of my treats including my Candy Cane Chocolate Cups.
- Some popular brands of compound chocolate are Wilton Candy Melts, Ghirardelli Melting Wafers, Merckens Confectionery Coating, and Great Value Almond Bark.
- I particularly enjoy the flavor of Peter's White Caps and use it to make all of my white chocolate barks but they are more difficult to find unless you are able to purchase them at a cake/candy decorating store or are willing to purchase a 25-pound case (which is what I do).

How to melt candy melts.
- Pour your candy melts into a microwave-safe bowl and heat on high power for 30 seconds then remove and stir.
- Repeat this process until most of the chocolate is melted.
- Then heat at high power for 15-second increments, stirring after each, until completely melted.
- Alternatively, you can melt your chocolate in a double boiler set over low heat.
- Fill a pot with 1-inch of water and set a tight-fitting bowl over the opening of the pan.
- Fill the bowl with chocolate and heat on low stirring often until melted.
Check out my chocolate-making tips page for a more detailed tutorial discussing the differences between the types of chocolates and their melting methods.
Can I use colored candy melts?
- Absolutely! You can use any colored Candy Melts wafers if you want to add some color to your chocolate bark.
- If you want to color white candy melts be sure to use oil-based candy color, not water-based icing coloring.
Now the easy part!
How to make chocolate bark?
The easy recipe is below, but be sure to scroll past the recipe to read tips and tricks for making your homemade bark.

Pieces of chocolate filled with mix-ins like peanuts, cashews, almonds, pretzels, cookies, toffee, and more are broken into various shapes that are reminiscent of tree bark.
- 16 ounces melted and tempered pure chocolate or melted compound chocolate (candy melts, almond bark, melting wafers)
- ½ - 1 cup mix-ins like nuts, cookie pieces, pretzel pieces, toffee bits, caramel bits, dried fruit
-
Line a baking sheet with parchment paper or a silicone baking mat.
-
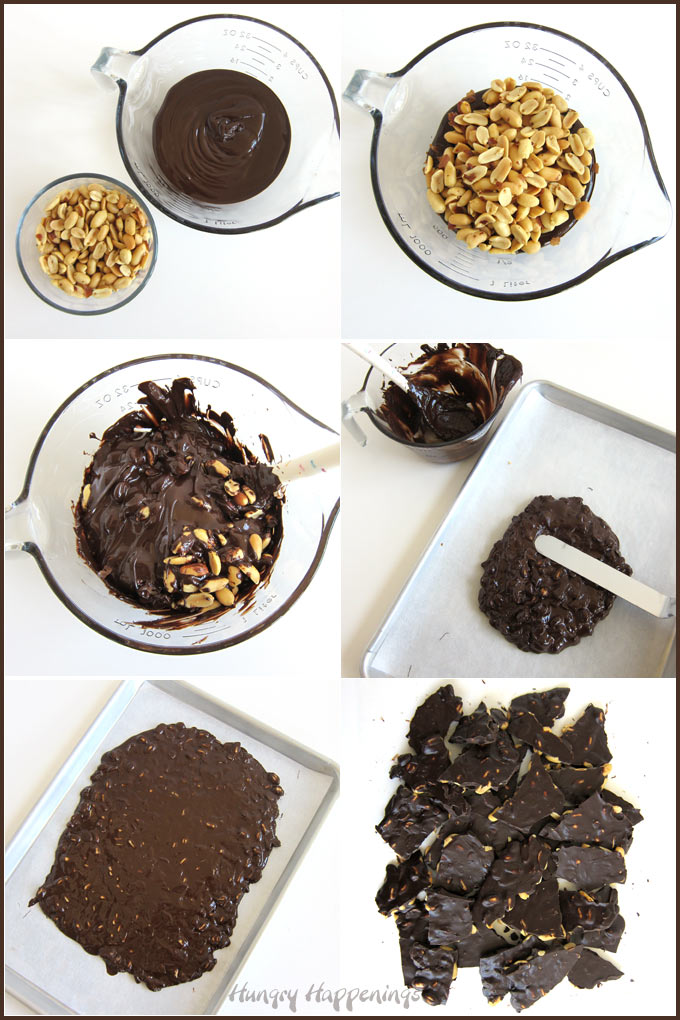
Combine the melted/tempered chocolate with your mix-ins, and stir for a few seconds just until the ingredients are coated in chocolate.
-
Pour the chocolate onto the parchment paper-lined pan, and spread it into a ¼-inch to a ½-inch thick layer.
-
Alternatively, you can spread the chocolate on your baking sheet, then sprinkle the nuts, cookie pieces, dried fruit, etc. over the top.
-
Refrigerate your chocolate bark for about 15 minutes until the chocolate hardens.
-
Then, remove and set aside for at least 30 minutes before breaking into pieces.
- You can add in as little as ½ cup of ingredients and as much as 1 cup. The amount you will use will depend on the size of the ingredient. Example: use fewer toffee bits and more OREO Cookie pieces.
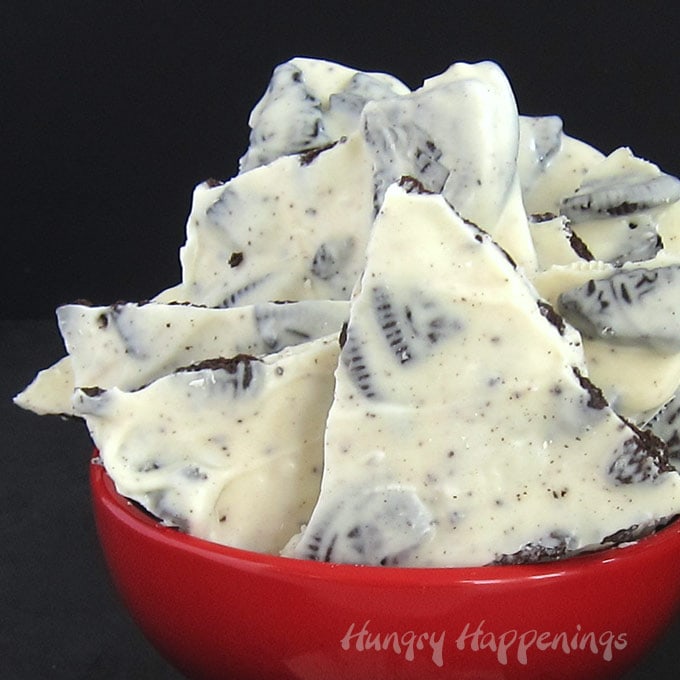
- The thickness will really depend on the mix-ins you use. For example, toffee bark may be closer to ¼-inch thick while Cookies and Cream Bark made using OREO Cookie pieces will be thicker.
- Store chocolate bark at room temperature for up to a few months.
- The shelf life will depend on the expiration date of your mix-ins.
- For example, bark made with marshmallows will only have a shelf life of about a month as marshmallows tend to dry out over time, but bark made with toffee or caramel bits may keep for up to 4 months.
- e careful to use fresh nuts as they go rancid over time and will ruin your chocolate bark if they go bad.
- To freeze, wrap the chocolate bark well in parchment paper or wax paper then overwrap in tin foil. Place in a zip-top bag and freeze for up to 3 months. Thaw on the counter overnight before opening the chocolate.
That's it! Making chocolate bark is that easy.

Tips for making chocolate bark.
Do not overmix the chocolate and toppings!
- If for instance, you are making milk chocolate cashew bark, and you pour the cashews into the chocolate and mix for more than a few seconds, the chocolate will begin to thicken and possibly even harden making it very difficult to spread the chocolate onto your pan.
- Just mix the ingredients into the chocolate for a few seconds. That's all it takes. As you pour the chocolate out onto the baking sheet and spread it into an even layer, the ingredients will get blended even more.
Use an offset spatula to spread your chocolate onto the pan.
- An offset spatula is flat and large and can easily and quickly push the chocolate across the pan, so you will get a nice even layer of chocolate.
- If you don't have an offset spatula, use a silicone spatula or large spoon to spread your chocolate. Just move quickly, as the chocolate will thicken as it cools.
Spread the chocolate evenly onto the pan.
- You want your chocolate bark to have an even thickness throughout and you want ingredients evenly distributed.
- As I mentioned, you want your bark to be between ¼-inch and ½-inch thick.
- Too thin and the bark will break too easily when packaged. Too thick and the bark is too difficult to bite into.
Fill in any large gaps.
- Once you spread the chocolate onto the pan, fill in any large gaps with more mix-ins.
- When I'm using large ingredients, like pieces of OREO Cookies, I find big gaps where there's only white chocolate. I like to fill in those gaps. To fill in the gaps, I press a piece of cookie down into the wet chocolate, then spread a thin layer of chocolate over the top.
- You will also notice that the edges of your chocolate bark may be devoid of ingredients, so add more around the edges.
- You can have space in between your ingredients, just be sure there are no big cavernous spaces where the chocolate sinks in between the mix-ins. It's best to have your bark as one even layer.
Hold the parchment down using tape.
- If you put some tape in the corners of your pan, this will keep your parchment paper from sliding around the pan while you are trying to spread the chocolate bark into an even layer.
- Just roll up some masking tape (or better yet, use painter's tape) and place it in the four corners of the pan.
- If you use double-stick tape, be sure to roll both edges so you can easily remove it from the pan later.
- If you don't use tape, use one hand to hold the parchment paper in place while you are spreading the chocolate into an even layer.
Can I sprinkle toppings over the chocolate instead of mixing them in?
- I tend to stir the ingredients into the chocolate because they stay fresher if enrobed in the chocolate. Plus, the bark is easier to break when the ingredients are all inside the chocolate.
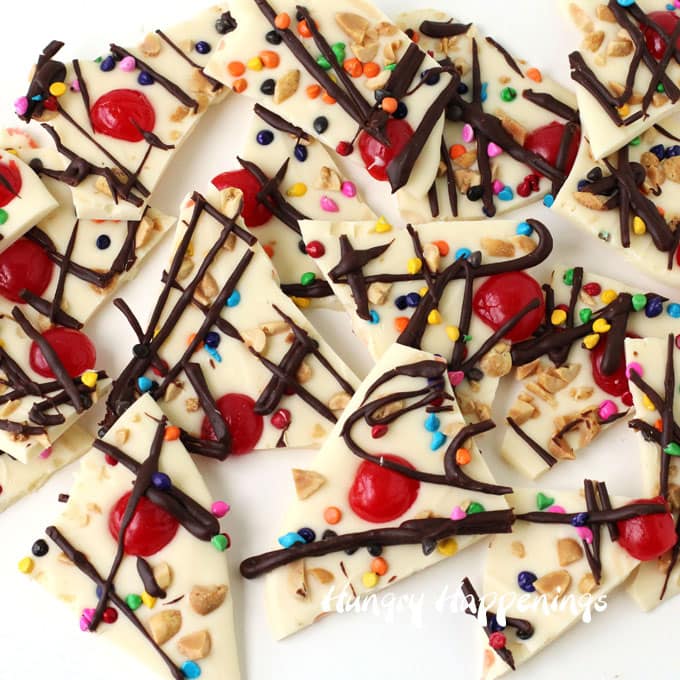
- But, chocolate bark, like this Ice Cream Sundae Bark, looks really pretty with toppings sprinkled over the chocolate.
- If you prefer, you can spread the chocolate onto the baking pan and sprinkle your chocolate bark ingredients over the top.
DO NOT put toffee bits or marshmallows on the top of your chocolate!
- Toffee bits will become soft and sticky if they are exposed to air for too long so be sure to mix them into the chocolate.
- Marshmallows become dry and hard once exposed to air so it's best to mix them into the chocolate as well.
Break chocolate bark into pieces after the hardened chocolate warms to room temperature.
- When the chocolate bark comes out of the refrigerator it will be very hard.
- It will be easier to break your chocolate bark into pieces once the chocolate has warmed to room temperature.
How long does chocolate bark take to set?
- It will take about 15 minutes for chocolate bark to harden in the refrigerator.
- The more you are in and out of your refrigerator, the lower the temperature will go and the longer it will take for your chocolate to harden.
- If the bark looks wet, keep it in the refrigerator longer.
- You can allow pure chocolate to harden at room temperature. A tray of chocolate bark should harden completely within about an hour.
- If you are using pure chocolate and your bark hasn't hardened in the fridge after about 30 minutes or on the counter after an hour, your chocolate was out of temper and will not ever harden completely. It will still taste fine though.
Cut chocolate bark while it's still soft.
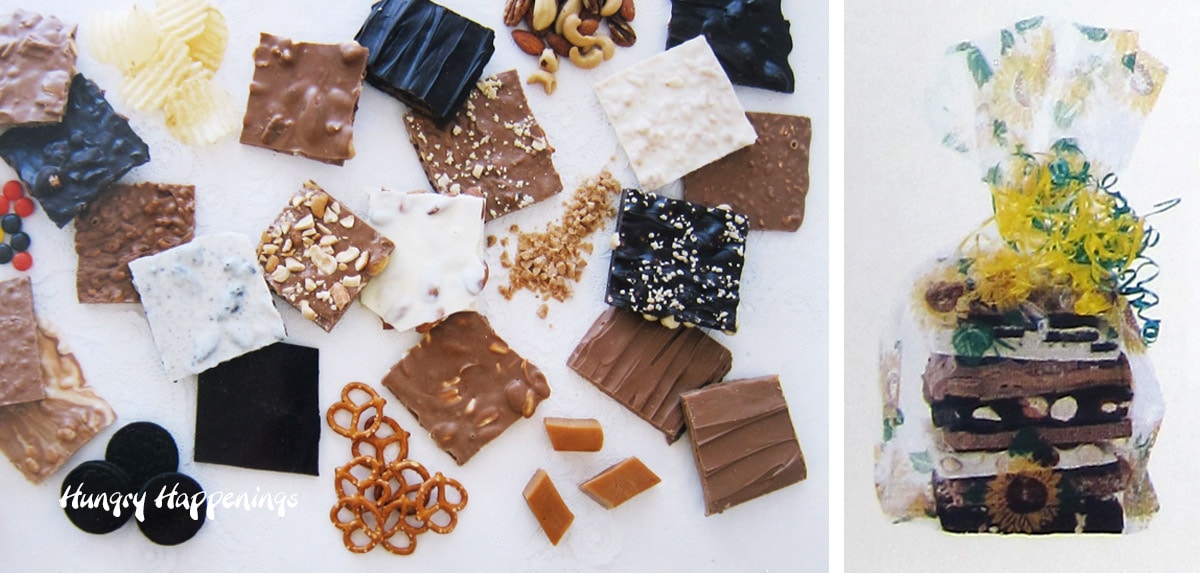
You can cut chocolate bark into squares and rectangles then stack them up and package them in clear cellophane bags. These pictures were scanned from an old catalog from my candy store. The quality of the scan isn't great, but you can see the concept.
- If you want to cut your chocolate bark into squares or rectangles, it's best to do that while the chocolate is still soft, but is not wet.
- If you are using pure chocolate, you can simply allow the chocolate to begin hardening at room temperature. Or you can place it in the refrigerator for a few minutes, then remove it and cut it. The amount of time will depend on the type of chocolate you are using. Dark chocolate hardens more quickly than milk or white chocolate.
- If you are using compound chocolate (candy melts, almond bark, etc.) do not let it begin to dry at room temperature. It will get streaky or spotty if it air dries. It will harden more quickly than pure chocolate, so check it after a minute or two.
- As soon as the chocolate no longer looks wet, but has not hardened completely, make your cuts using a pizza cutter or knife.
- Set a timer if you have to. Once the chocolate hardens completely, the chocolate will break if you try to cut it. It's best just to break it up at that point.
I had a 3-inch wide by 8-inch long template cut out of acrylic (lucite) at Lowes (in the glass cutting aisle). I set the template over the soft chocolate and run a pizza cutter along the edge. Then I move it and make another cut.
Once I've cut across the tray, I make perpendicular cuts so I end up with perfect 3-inch squares. I use the small jagged edge pieces to fill tins or to put on trays.
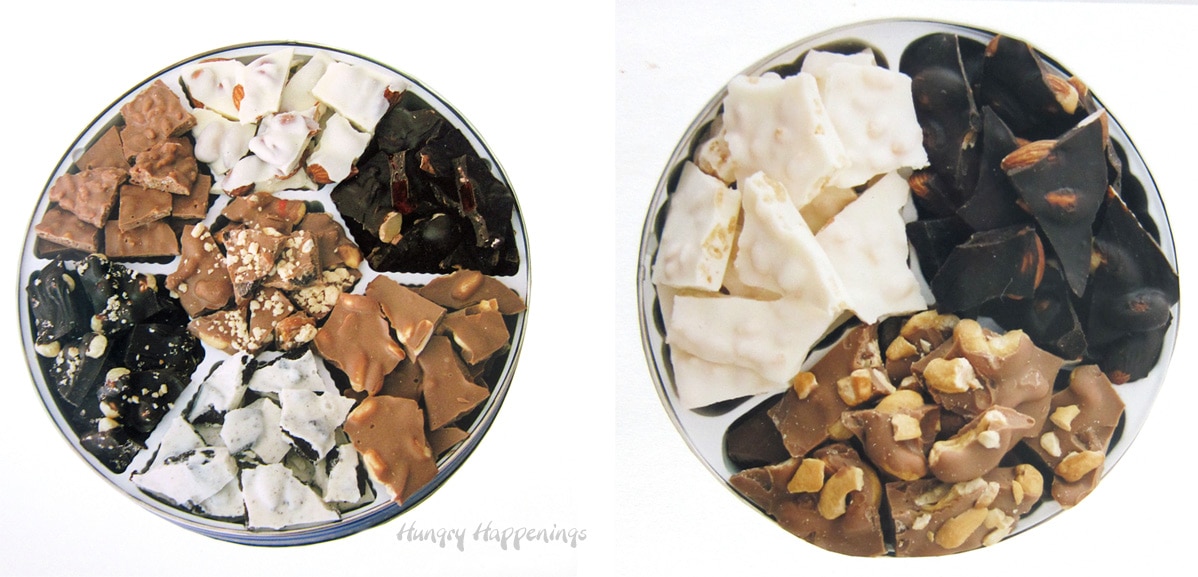
Package chocolate bark in tins.
- Break your homemade chocolate bark into bite-size pieces and layer it in metal cookie tins.
- In my stores, I lined my tins with plastic dividers so I could keep the various chocolate bark flavors in their own section.
- Packaging these tins is like putting a jig saw puzzle together but they look really amazing once filled.
- I love using metal tins. They seal well and will keep chocolate bark fresh for months.
Store your chocolate bark in an airtight container.
- Store chocolate bark at room temperature in an airtight container. Be sure the container is clean and free of any odor.
- Chocolate will pick up odors from the air or from the container.
- Also, be sure you do not package any bark that has a strong odor like peppermint with any other chocolate bark unless you want all the bark to taste like peppermint! Been there, done that!
Can chocolate bark be frozen?
- Sure, but I'm not a fan of freezing chocolate because it picks up odors from the refrigerator, can develop condensation and become sticky, and can bloom (become streaky or spotty).
- If you decide to freeze the chocolate, wrap it well in parchment paper or wax paper, then overwrap it in tin foil and place it in a zip-top bag or airtight container. I would also recommend adding a paper towel inside the bag or container to wick up moisture and ice crystals.
- To thaw, remove it from the freezer and let it sit unopened at room temperature overnight. Then open it and enjoy!
Have you made chocolate bark? What did you put in it? Tell me in the comments section below! If you like this post, be sure to leave a star rating along with your comment. Below are some other fun chocolate bark ideas.
More Chocolate Bark Recipe Ideas
Click the image or the title to go to the recipe page.
White Chocolate Candy Corn Bark
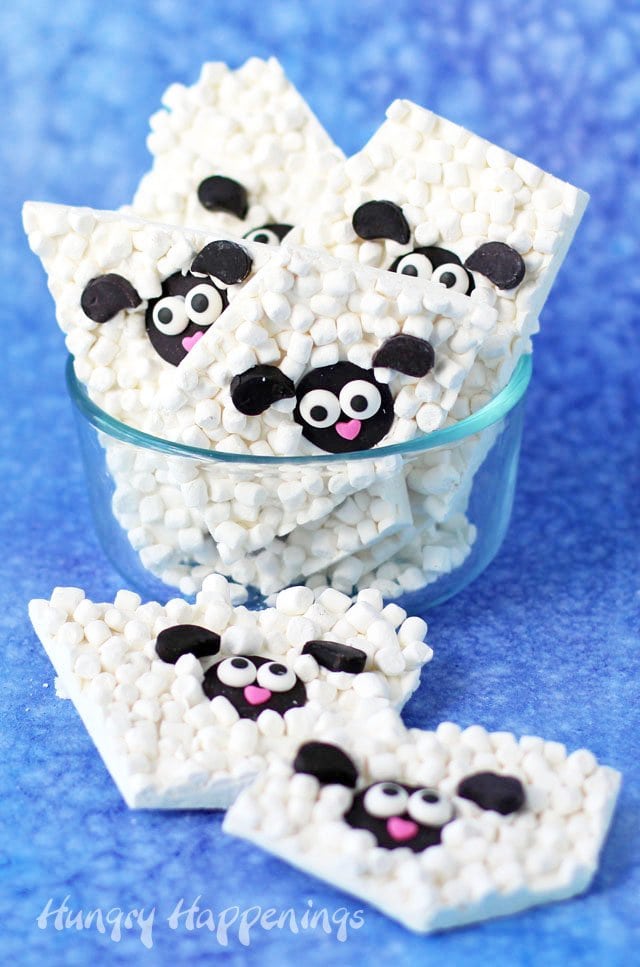
White Chocolate Whooly Lamb Bark

- Banana Split Bars – A Fun and Easy Summer Dessert - March 4, 2026
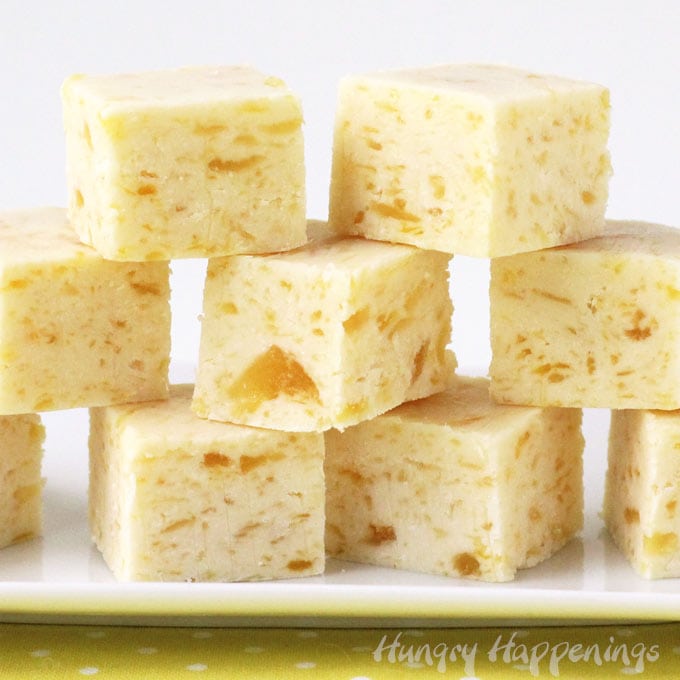
- Pineapple Fudge (No Candy Thermometer Needed!) - March 4, 2026
- No-Bake Peanut Butter Pie Recipe - March 3, 2026
Please leave a comment.