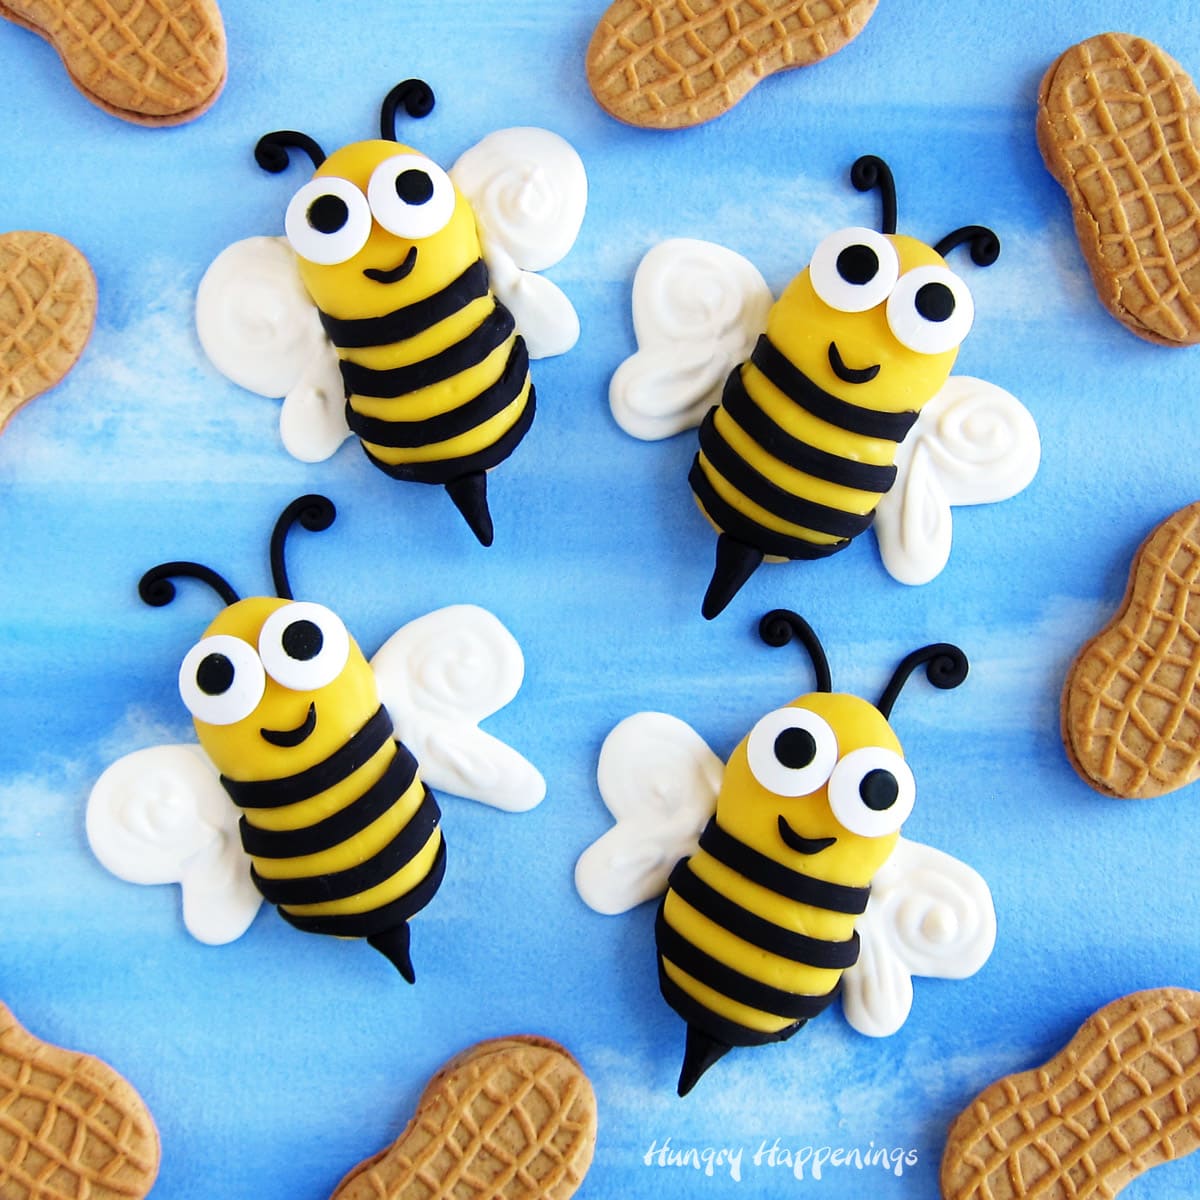
Have fun making these sweet Bumble Bee Cookies using candy melts and modeling chocolate (candy clay). These Decorated Nutter Butter Cookies could not be any cuter with their bright yellow and black striped bodies, sweet expressive candy eyes, and angelic white wings.
I'm always so excited to hear that you have been inspired by one of my food crafts and that you have recreated one of my treats to share with family and friends.
When I create something like these adorably cute Nutter Butter Bumble Bee Cookies I become giddy at the thought of sharing them with you. I imagine them making you smile and that makes me smile too.
I wish you could all live in my neighborhood so I could share my sweet treats with you, but blogging about them is the next best thing. I can imagine you making these little Bumble Bee Cookies for an Earth Day celebration, a birthday party, or even for a spelling bee.
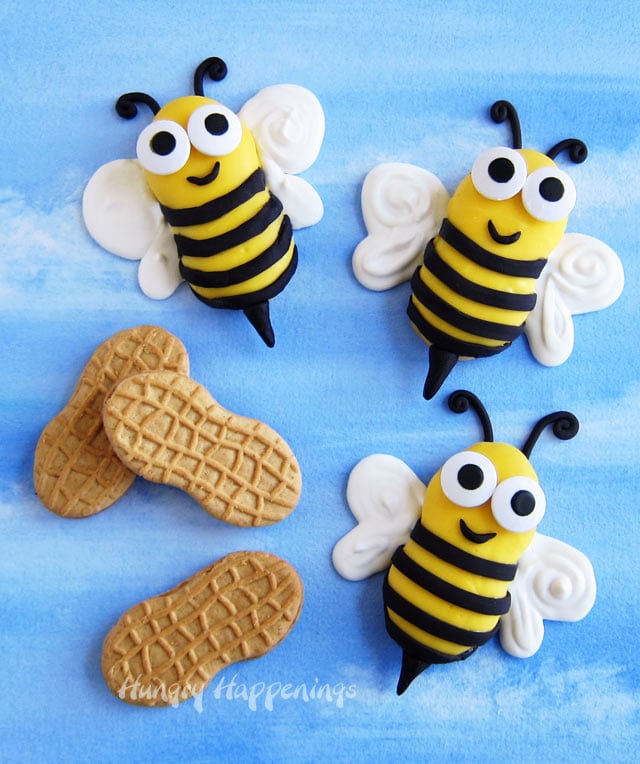
If you did live next door or down the street, I would happily share these bee cookies with you.
They were so fun to make using Nutter Butter Cookies dipped in yellow Candy Melts and decorated with modeling chocolate, candy eyes, and white candy melt wings.
Ingredients
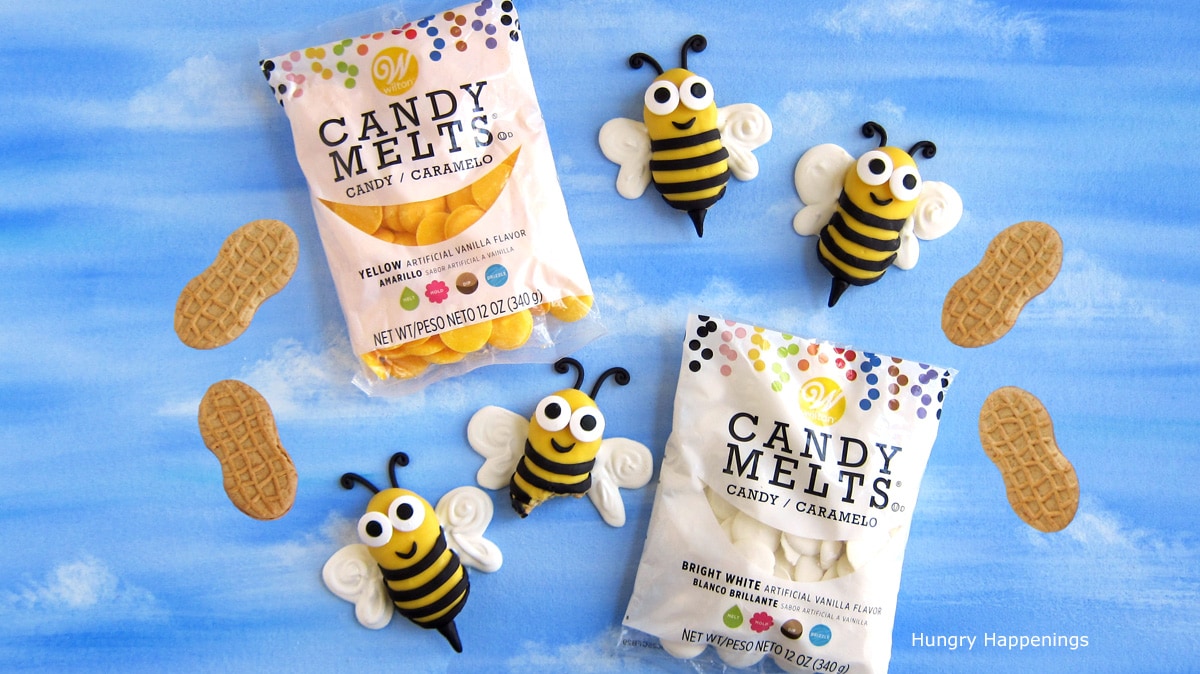
Nutter Butter Cookies
Yellow Candy Melts
black modeling chocolate - Make modeling chocolate using dark chocolate and then knead in some black food coloring.
jumbo candy eyes- I used Jumbo Eyes because I thought they looked so cute, but you can use any size of candy eyes.
white candy melts
Supplies
parchment paper-lined baking sheets
chocolate dipping fork or kitchen fork
clay extruder or knife
pastry bag or squeeze bottle
Instructions
If you've never worked with Candy Melts before, be sure to check out my Chocolate Making Tips page for melting instructions.
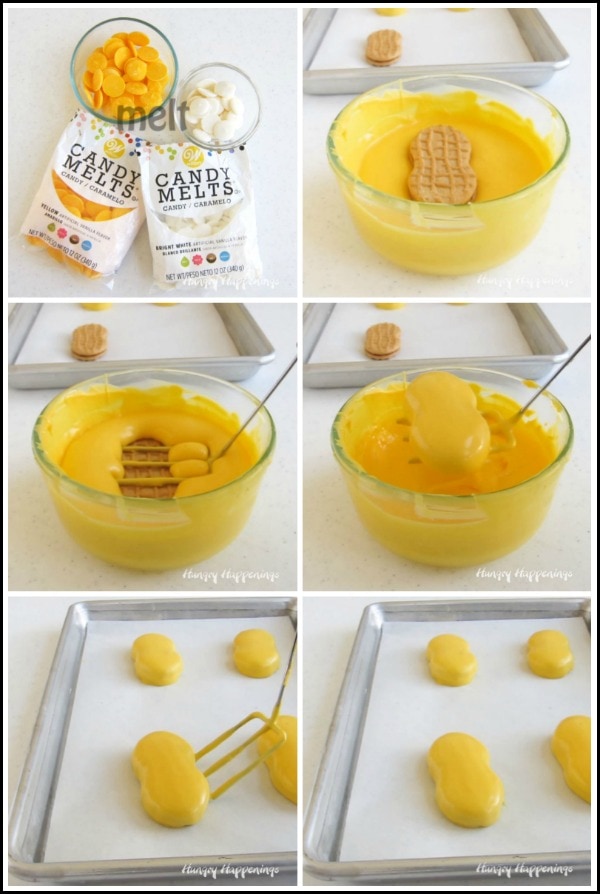
Dip the Nutter Butter Cookie in yellow candy melts.
- Set the cookie in a bowl of melted yellow candy melts.
- Submerge it in the candy melts.
- Use a dipping fork or a kitchen fork to lift the cookie out of the candy melts.
- Tap the handle of the fork on the side of the bowl a few times and allow the excess candy to drip off the cookie.
- If needed, scrape any big drips of candy melts off by running the cookie along the edge of the bowl.
- Set the dipped cookie on a parchment paper-lined baking sheet,
- Freeze the dipped cookie for 3-4 minutes until hardened (any longer and the candy might crack).
NOTE - Dip a few cookies then get them in the freezer. If you allow the candy coating to harden at room temperature your candy may develop white spots or streaks. The quicker the candy hardens the better, so freezing works best.
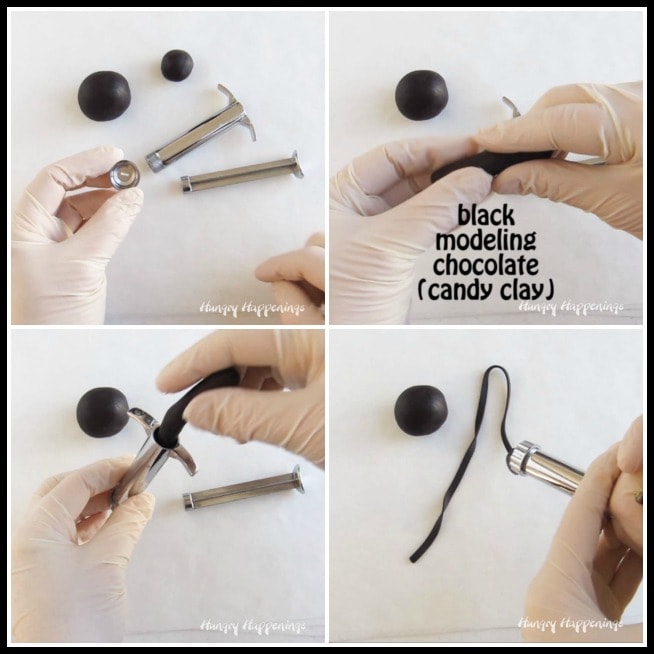
Make the bumble bee's stripes.
After you dip your Nutter Butter Cookies you'll want to add the black stripes, antennae, smiles, eyes, and wings.
When I was designing these Bumble Bee Cookies I wanted the bee's black stripes to be uniform so I used a clay extruder to create thin ribbons of the modeling chocolate. I also used it to make thin ropes for the antennae and mouths. You can find clay extruders at craft stores in the clay aisle. I have four of them and use them with modeling chocolate all the time to easily make ribbons, hair, and ropes.
To make black modeling chocolate you can start with modeling chocolate made with dark chocolate or with candy clay made using Black Candy Melts. Both will need to be colored with some black food coloring to get a nice vibrant black. See tips for coloring modeling chocolate on my Chocolate Making Tips Page/Modeling Chocolate Recipe.
How to use a clay extruder with modeling chocolate?
- Choose the disc you want to use and insert it into the screw cap on the clay extruder (for the stripes choose a rectangle opening for the antennae and mouth use a small hole).
- Roll the modeling chocolate into a long tube.
- Insert it into the clay extruder.
- Insert the plunger.
- Press the plunger and extrude the modeling chocolate.
- Cut off strips and lay across the cookie to create the stripes.
- Attach the stripes using clear piping gel (you can use yellow candy melts, but the piping gel is a bit neater).
- Create a small smile and two antennae for each bee.
- Attach the smile using clear piping gel and the antenna using yellow candy melts.
You'll also need to shape a small stinger for each bee using the modeling chocolate.
If you have not ever used or made modeling chocolate, also known as candy clay or chocolate clay, you can find the recipe on my Chocolate Making Tips Page/Modeling Chocolate Recipe. It's a simple 2-ingredient recipe that makes a clay that is similar to fondant but it tastes like chocolate.
I love working with it so much that I wrote a book called, Candy Clay Creations, that's available on Amazon.
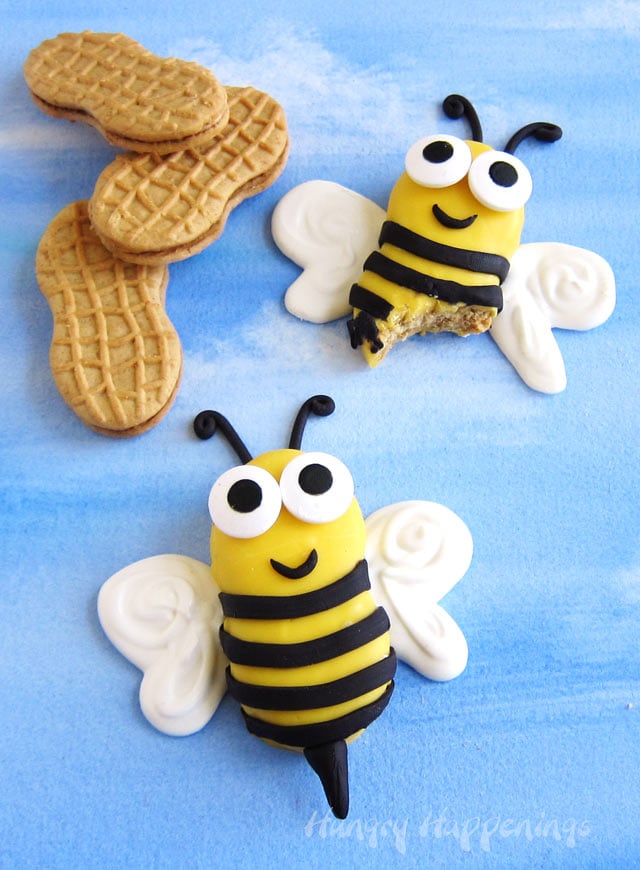
Decorating the bumble bees.
Brush clear piping gel on one side of a black stripe and lay it across the yellow Nutter Butter cookie. Cut off the excess modeling chocolate along the sides of the cookie.
Continue to add more stripes.
Next, attach two candy eyes using yellow candy melts.
The last step will be to pipe some wings using white candy melts onto a parchment paper-lined baking sheet. Set the bumble bee cookie over the wings and then pop the cookie in the freezer until the white chocolate hardens.
Video step-by-step tutorial.
Watch the video below to see how to make and decorate these Bumble Bee Cookies.
Supplies
You can find the supplies needed to make these Bumble Bee Nutter Butter Cookies on Amazon. I earn a small commission when you use the Amazon links to make a purchase at no extra cost to you.
 Nutter Butter Peanut Butter...Shop on Amazon
 Wilton Yellow Candy Melts, ...Shop on Amazon
 Wilton Candy Melts, Bright ...Shop on Amazon
 Decorating Candy 1oz-Large ...Shop on Amazon
 Wilton Black Vanilla Candy ...Shop on Amazon
 McCormick Black Food Color,...Shop on Amazon
Recipe
- 12 ounces Yellow Candy Melts melted
- 8 Nutter Butter Cookies
- 4 ounces black modeling chocolate candy clay
- clear piping gel
- 16 jumbo candy eyes
- 6 ounces Bright White Candy Melts
-
Dip Nutter Butter Cookies in Yellow Candy Melts and set them on a parchment paper-lined baking sheet.
-
Freeze for 3-4 minutes until hardened.
-
Fit a clay extruder with a ribbon disc (small rectangle whole).
-
Insert black modeling chocolate in the clay extruder and press out ribbons of the candy clay.
-
Brush clear piping gel in a thin line over the upper middle part of the cookie and lay a strip of black modeling chocolate over top.
-
Cut off the excess modeling chocolate.
-
Repeat creating four black, curved stripes across each cookie.
-
Pinch off small pieces of black modeling chocolate and roll them into cones.
-
Attach along the bottom edge of the cookie to create the bee's stinger.
-
Press more black modeling chocolate through the clay extruder fitted with a round hole disc.
-
Cut tiny pieces of the modeling chocolate to create a smile then create two antennae.
-
Attach the smile using clear piping gel.
-
Attach the antennae using yellow candy melts.
-
Attach two candy eyes using yellow candy melts.
-
Pipe two wings and set a cookie on top.
-
Allow the wings and antennae to harden before moving the cookies.
Recipe Video
Store your bumble bee cookies in an airtight container at room temperature for up to a month.
- How to make peanut butter? - February 15, 2024
- OREO Penguins - December 20, 2023
- OREO Snowmen - December 20, 2023


Barbara S Bunch
Awesome love it, great ideas
Beth
Thanks Barbara! I'm glad you like them. 🙂
Nini
Can I make the black stripes, etc without the tool?
Beth
Yes, you can roll out the candy clay using a rolling pin and cut the strips. Or you can pipe on black candy melts. Either will work fine! Have fun.
lisa @hooplapalooza
ok if i were under a tree and got stung by a bunch of these please let me bee. LOL
Beth
LOL!
The Partiologist
Oh my goodness, these cookies are unBEEleivable cute, I love them!
Beth
You are so sweet!
Karen @ Sugartown Sweets
I would never have guessed that you used Nutter Butter cookies! But I will be your new neighbor to try one of your adorable Bee Cookies AND all your other yummy treats!
Beth
I sure wish you did live close. We'd have so much fun creating treats together!