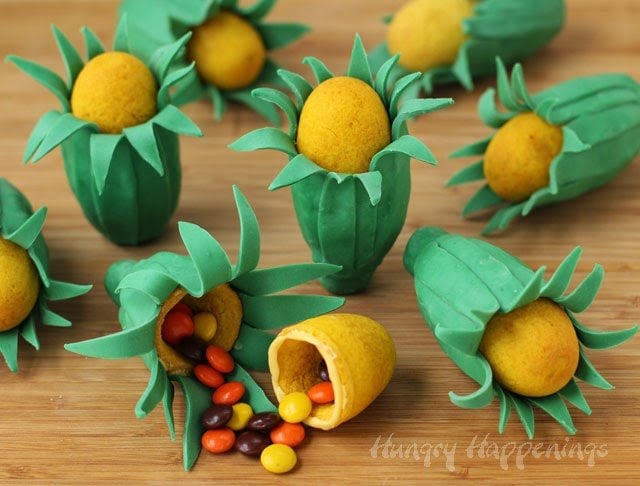
Learn how to make Ear of Corn Piñata Cookies for this Cinco de Mayo. Stuff your favorite candies into the hollow centers and watch them burst like piñatas.

I was really excited when I came up with the concept to make 3-D corn on the cob cookies filled with candy I worked for two days to get them right, made three batches of cookies, and finally felt I had something that resembled corn.
That was until my husband came into the kitchen and said they looked like eggs wrapped in leaves or odd-looking sunflowers. UHG!
I thought they were still pretty cool so I decided to share them with you. What do you think?

The candy-filled cookies are still fun, even if they don't exactly resemble ears of corn and I'm happy to have something to share with you today.
They'd be fun to bake for Thanksgiving, Cinco de Mayo, a summertime party or a backyard barbecue. So, let's get baking.
Ingredients
Sugar Cookie Dough (see recipe below)
yellow food coloring
Reese's Pieces or other small candies (about a cup)
yellow Candy Melts
green-colored modeling chocolate - Click the link to see the recipe to make modeling chocolate.
Supplies
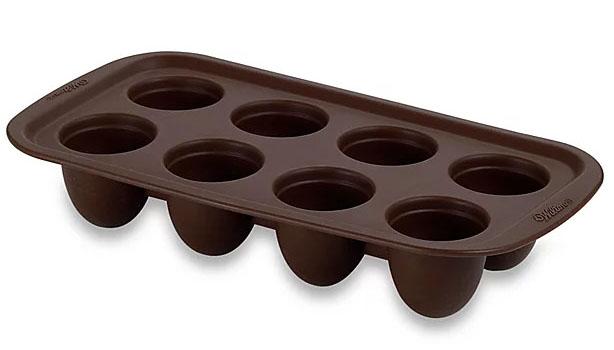
brownie pops molds - These molds can be found at craft stores, discount stores, and online.
Instructions
Make the cookie dough according to the recipe below and add yellow food coloring to make it the color of corn.
Create the corn on the cob-shaped cookies.
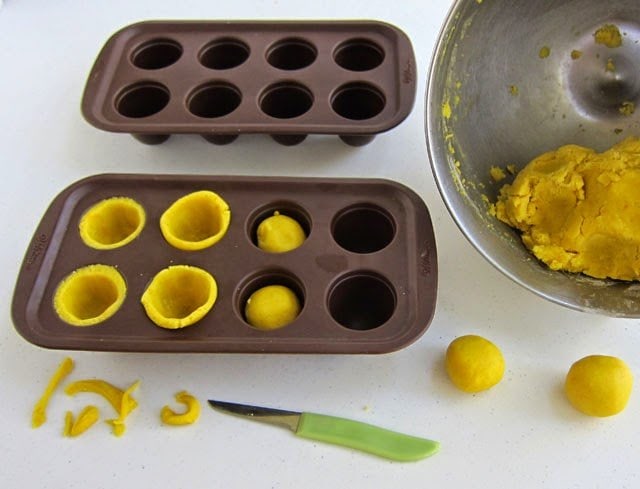
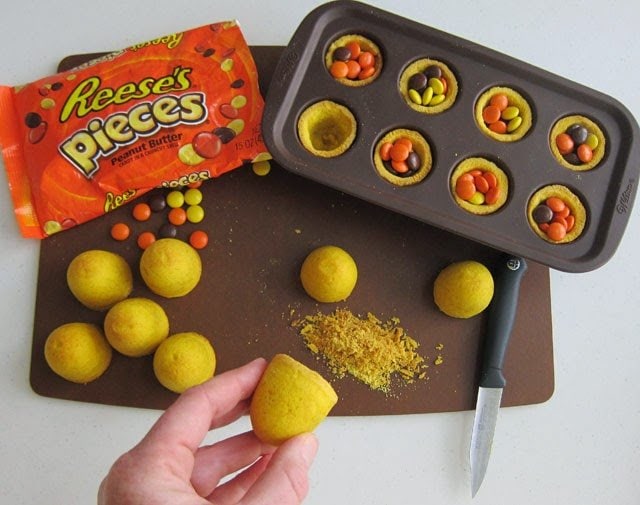
Pinch off heaping tablespoon-sized pieces of the yellow dough, roll them into balls, and then press them into the cavities of a Wilton Brownie Pop Mold.
Use your finger or the tip of a wooden spoon to create a well in each dough ball. Press the dough into a ¼-inch thick shell inside each mold.
Cut off any dough that comes out over the top of the molds.
Refrigerate for at least one hour. You want the cookie dough to be really cold before you bake it.
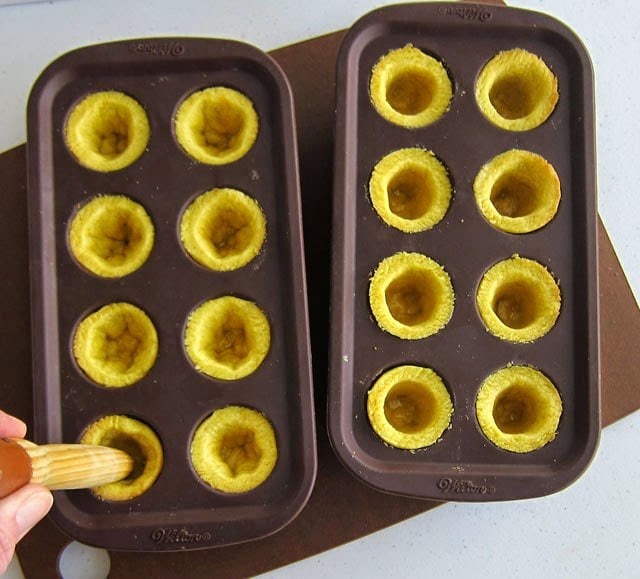
Making the wells in the baked cookies smooth.
Preheat your oven to 350 degrees Fahrenheit.
Bake cookies for 14 minutes. Remove and use the end of a wooden spoon to reform the shells, pressing the dough that has puffed back into a thin layer.
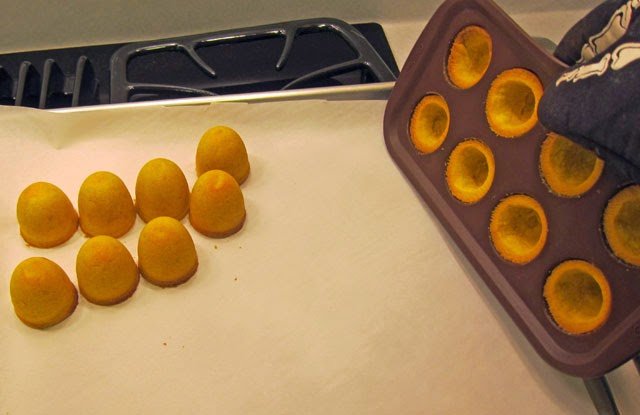
Unmold the cookies.
Put the cookies back in the oven for 6 minutes then remove them and carefully turn them over allowing the cookies to come out on a baking sheet.

Bake longer.
Set the cookies all with the rounded tips up then put them back in the oven for 4-8 minutes, until the tops start to turn golden brown.
You just want to make sure the cookies are baked through.
Allow the cookies to cool completely.
Trim and fill the cookies.
Use a sharp knife to smooth out the top edge of each cookie. You want each egg-shaped cookie to be smooth.
Set 8 cookies in the silicone mold. Fill those cookies with candies. The mold will hold the cookies in place. You could also use an egg carton.
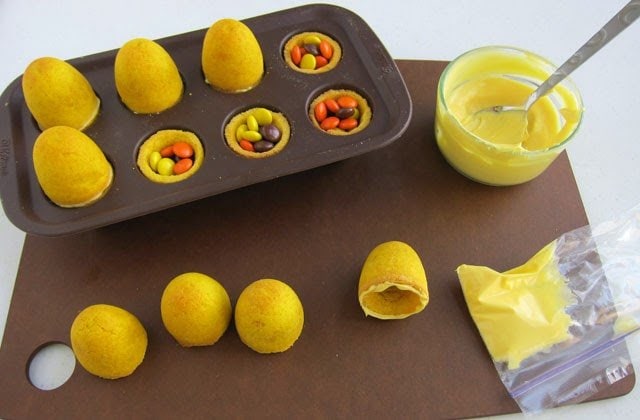
Attach two cookie halves together.
Melt the yellow Candy Melts, by heating them for 20-second intervals on high power in the microwave, stirring after each, until melted.
Pour the candy coating into a pastry bag, zip-top bag, or squeeze bottle.
Pipe some candy coating around the top edge of a cookie and set it on top of a candy-filled cookie, forming the ear of corn. Repeat.
Allow the candy coating to dry for 10 minutes before you remove the cookies from the mold.
Cutting out and adding the green husks.
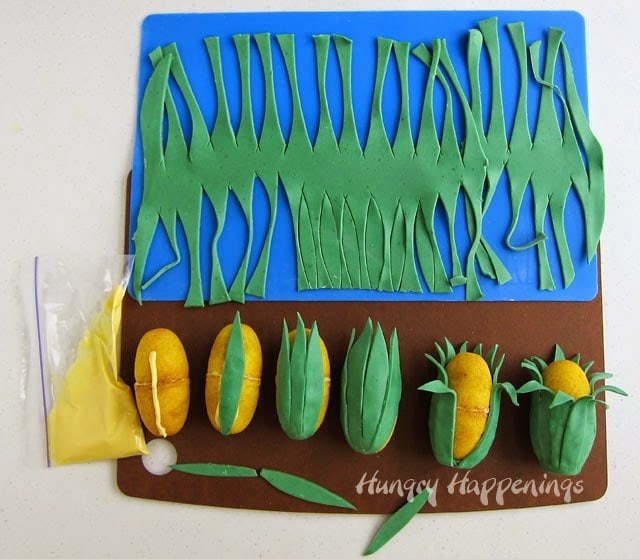
Roll out the green modeling chocolate to about 1/16th of an inch, preferably on a non-stick silicone mat, or on a corn starch-dusted cutting board.
Cut out long leaf shapes. They need to be long enough to cover the ears of corn, plus hang over a bit.
Pipe a line of yellow candy coating onto a cookie, and press one green husk on top. Continue to pipe on the yellow candy coating, attaching the green corn husks as you move your way around the corn cookie. In the back. allow the husks to stick all the way up to the top of the cookie.
In the front, they should just come up over the seam in the cookie. Bend the husks to look like they are being peeled from the ear of corn.
You can add a stem if you'd like. I think they look more realistic with stems.
Related Recipes
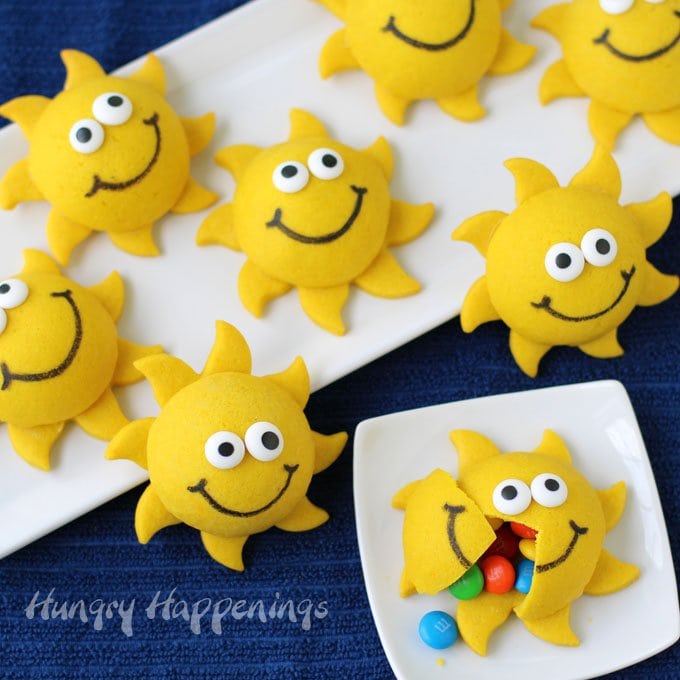
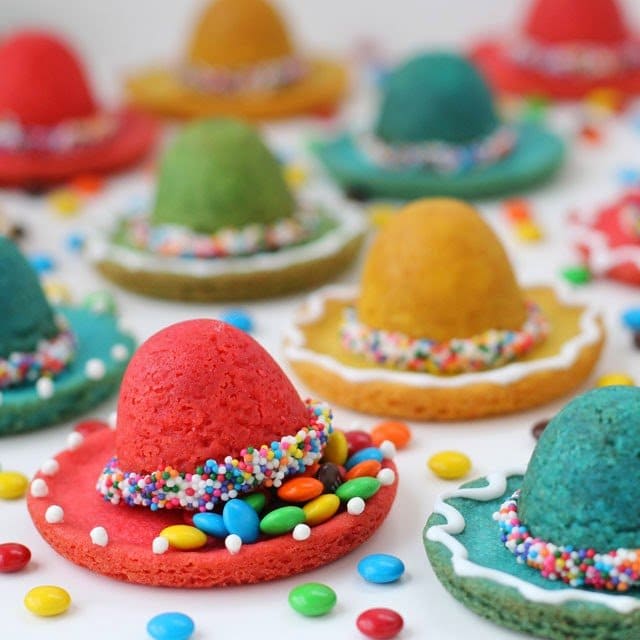
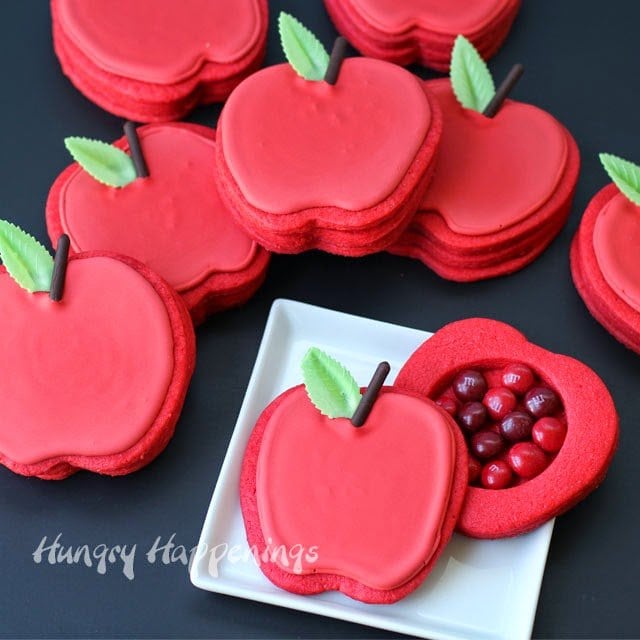
You might also like these other candy-filled Pinata cookies.
Be sure to also check out all of my amazing Thanksgiving Recipes.
Recipe
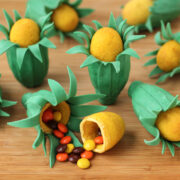
3-D corn on the cob cookies are filled with candy and are decorated with modeling chocolate leaves. Break them open to reveal the surprise hiding inside.
- 2 cups all purpose flour
- ¼ teaspoon salt
- ¼ teaspoon baking powder
- ½ cup unsalted butter, softened slightly
- ¾ cups sugar
- 1 large egg
- ¾ teaspoons pure vanilla extract
- ½ teaspoon almond extract
- yellow gel or paste food coloring
- 1 cup Reese's Pieces or other small candies
- 4 ounces yellow Candy Melts, melted
- 12 ounces green modeling chocolate
-
Mix the flour, salt, and baking powder together in a bowl. Set aside.
Cream the butter and sugar until light and fluffy.
Stir in egg, vanilla, almond extract, and some drops of yellow food coloring. Add more coloring until you get a really bright shade of yellow and mix until well combined. The color will get lighter when you add the dry ingredients.
Add dry ingredients and stir just until it's mixed in.
-
Pinch off heaping tablespoon-sized pieces of dough and press into the cavities of a Wilton Brownie Pop Mold.
Use your finger or the tip of a wooden spoon to create a well in each dough ball. Press the dough into a ¼-inch thick shell inside each mold.
Cut off any dough that comes out over the top of the molds.
Pop the molds in the refrigerator for at least 1 hour.
-
Preheat your oven to 350 degrees Fahrenheit.
-
Bake the cookies for 14 minutes.
Remove and use the end of a wooden spoon to reform the shells, pressing the dough that has puffed back into a thin layer.
-
Put the cookies back in the oven for 6 minutes then remove them and carefully turn them over allowing the cookies to come out on a baking sheet. Set them all with the rounded tips up then put them back in the oven for 4-8 minutes, until the tops start to turn golden brown.
-
You just want to make sure the cookies are baked through.
-
Allow the cookies to cool completely.
-
Use a sharp knife to smooth out the top edge of each cookie. You want each egg shaped cookie to be smooth.Set 8 cookies in the silicone mold. Fill those cookies with candies.
-
Melt the yellow confectionery coating, by heating it at 20-second intervals on high power in the microwave, stirring after each, until melted. Pour the candy coating into a pastry bag, zip-top bag, or squeeze bottle.
Pipe some candy coating around the top edge of a cookie and set it on top of a candy-filled cookie, forming the ear of corn.
Repeat. Allow the candy coating to dry for 10 minutes.
-
Roll out the green modeling chocolate to about 1/16th of an inch, preferably on a non-stick silicone mat, or on a corn starch-dusted cutting board.
Cut into long leaf shapes. They need to be long enough to cover the ears of corn, plus hang over a bit.
-
Pipe a line of yellow candy coating onto a cookie, and press one green husk on top. Continue to pipe on yellow candy coating, attaching leaves as you move your way around the corn cookie. In the back. allow the leaves to stick all the way up to the top of the cookie. In the front, they should just come up over the seam in the cookie.
Bend the husks to look like they are being peeled from the ear of corn.
-
You can add a stem if you'd like. I think they look more realistic with stems
Store the cookies at room temperature for up to 5 days.

- Banana Split Bars – A Fun and Easy Summer Dessert - March 4, 2026
- Pineapple Fudge (No Candy Thermometer Needed!) - March 4, 2026
- No-Bake Peanut Butter Pie Recipe - March 3, 2026

MrsB says
These look great! I love all the different ways you're finding to fill cookies and cakes with surprises!
If I could be so bold as to make a suggestion for these cookies.....
Try turning your pan over and baking the dough on the outside of the shapes. You would then be able to mark the dough with the back of a knife before baking so that it looks like corn kernels. Also, the inside of the cookie is a lot more spacious for all those little treats!
I've tried this upside-down baking before and it works great.
It wouldn't matter if not every one was perfect, because you cold used the less pretty ones inside the 'leaves'.
Beth says
Wilton just came out with a metal pan just like this silicone mold which would work great using your suggestion. When I make my candy filled cookies using my metal cake ball pan, I do put the dough on the outside and it works great. Adding the "corn" is a fun idea! I'll have to give that a try.
Christie Campbell says
These looks fabulous!! Honestly, I am so envious because they look amazing! I know I don't have patience to make anything like this. Perfect for the holidays! Thank you for linking up with #FoodieFridays.
Michelle Nahom says
Personally I think you did a fabulous job with these! And that is great you finally got through and got the tickets!! 🙂
beth says
That's so sweet, Michelle. Thanks.
Jill @ KitchenFunWithMy3Sons.com says
These are amazing Beth!
beth says
Thanks, Jill.
Michelle @ Giraffes Can Bake says
These are so cute, I love them! I don't think it matters that they don't like exactly like ears of corn, they're cookies afterall! Besides, what do mean know anyway? 😉 Pinning and sharing these for sure, they're awesome!
beth says
It's so nice to hear so many people do think they look like ears of corn. I shared all your comments with my husband and he just shrugged. What does he know?
dina says
what a cute idea!
beth says
Thank you, Dina:)
AmieJo says
These are adorable. What a great idea! pinned and shared
beth says
Thank so much, Amie Jo, especially for pinning:)
Anonymous says
Beth these are so cute. Great for Thanksgiving. Thanks. Trish P.S. The brains were a big hit at my daughters work. Thanks again.
beth says
Thanks Trish. I'm so glad the Cake Ball Brains were a bit hit again for you. That's always nice to hear.
Michelle says
They look great! I showed my son a picture without the title and he said right away they looked like corn.
beth says
Yay! I'm so happy to hear that. I thought they did too. I think my husband just looks at things very literally. I need to remember that next time and be confident in my design.
Sugartown Sweets says
This post requires a long comment!
First, the corn pinata cookies are way cute! And what a sweet Mom to come and help you clean the kitchen. :o) I can sorta relate to how you must have felt while making that cake..it used to take me two and three days to decorate one as I wanted it to be absolutely perfect. Haha, the stress got to me and now I no longer make cakes. I can't wait to see yours, they're ALWAYS perfect.
How beyond exciting to be asked by the Rachael Ray show to film a video! Even if you have to wait till next year for it to air! The fact that they've seen your edible crafts pretty much guarantees this will not be only time they'll ask you!
As for the Food Blogger Forum..hip, hip hooray! When I saw your FB post, I googled it. I'm waitlisted for this year, but I hope to see you and lots of others next year.
I can not wait to see your photos and hear all about it. It's bound to be amazing! Good things are happening @ Hungry Happenings and with all your hard work, you deserve it. :o)
beth says
Hi Karen,
Oh, the cake was such a mess, but after three attempts, I finally got something that looked nice. I really don't enjoy making cakes because I don't feel like I know what I'm doing half the time. I usually spend two days working on them too. It's so much work and so much time. I have a lot of respect for cake decorators.
I just heard from the Rachel Ray show this afternoon and they are going to try to squeeze it in around Christmas. I would love for that to happen, even though it's a Thanksgiving recipe.
I still have to pinch myself when I think about getting a coveted spot at the Food Blog Forum. I'm beyond excited and I'll be sure to take lots of pictures to share here.
I do hope we get to meet someday. I'm thinking about hosting a retreat for fun food bloggers. I need to start working on plans, but I'm just too busy. Maybe some day!
Brenda @ SweetSimpleStuff says
Cute corn cookies! I beg to differ with you ... corny in a good way 🙂 Congrats on scoring the tickets ... persistence pays off! This is a learning experience too ... sometimes we shouldn't listen to opinions from hubbies (believe me, I know) ... I bet your mom would give a better opinion 😉
beth says
Yeah, my husband looks at everything in such a literal way. It's hard for him to remember, it's just a cookie!
I am so excited to have gotten tickets to the conference and am so glad I didn't give up.
Lisa@hooplapalooza says
oh and HAPPY HAPPY 50th!!! 🙂
beth says
O.K. not yet. Not yet. I still have a few more months. I can't even believe I'm going to turn 50 soon.
Lisa@hooplapalooza says
oh Beth! they shoulda just given you a ticket as you are the epitome of food bloggers for crying' out loud!!! sure am SOOO happy you got one though! and these "eggs wrapped in leaves" are freaking awesome. i bet you can draw the kernels on them with food marker so that would be easy i think?! too bad i didn't know about the conference as i only live 3 hrs away form orlando and go to disney a lot-that would've been something else to meet you and Jill! (sad face) but i can't wait to hear all about it! all that agonizing pain you went thru will be worth it 🙂 and here's to messy kitchens! rather messy from creativity than sparkling clean from boring...lol 😉
beth says
LOL! You always make me laugh, Lisa. You should drive over and meet us at Disney anyway. It would be so fun to meet you.
Here's to messy kitchens everywhere!!! I think I'm going to write your message and hang it on my wall;)
Hani Bacova says
Ooh my Beth, I want to hug you now, now that is one hell of a week.
I'm sorry abour RR, I hope they air it next year.
I'm glad you got the tickets and now you'll be able to have some fun, outside of the kitchen. These are so darling, doesn't matter what you see in them they are awesome and I love anything with surprise. Thank you for all your hard work Beth and Beth's mom for helping out with the clean up. What a sweet mom.
beth says
Thanks for the hug, Hani:) It's amazing how such a bad week can turn out so amazing. It just goes to show that life can change in the blink of an eye. I am so looking forward to my trip. I am truly blessed to have such a wonderfully helpful mom. She could hear the stress in my voice and offered to come help clean. Aside from getting the tickets, it was the best part of my week. Have a great weekend.
The Partiologist says
I'm sure you're disappointed, but better late than never with the Rachel Ray video, right? And just a bit of advice, husbands are not usually the best to ask about creative projects, I love your ear of corn piñata cookies and knew exactly what they were at a glance! Plus, now that you've scored your Disney ticket, you're bound to have Magical days ahead!! 🙂
beth says
It's not definite that the video will air next year, but I guess it was a good experience as I really need to learn to make videos of my food projects. I'm glad you knew my cookies weren't eggs;)
I am over the moon happy about going to the conference at Disney and feel really blessed to have snagged a ticket, I just wish you were joining Jill and I for our magical trip.