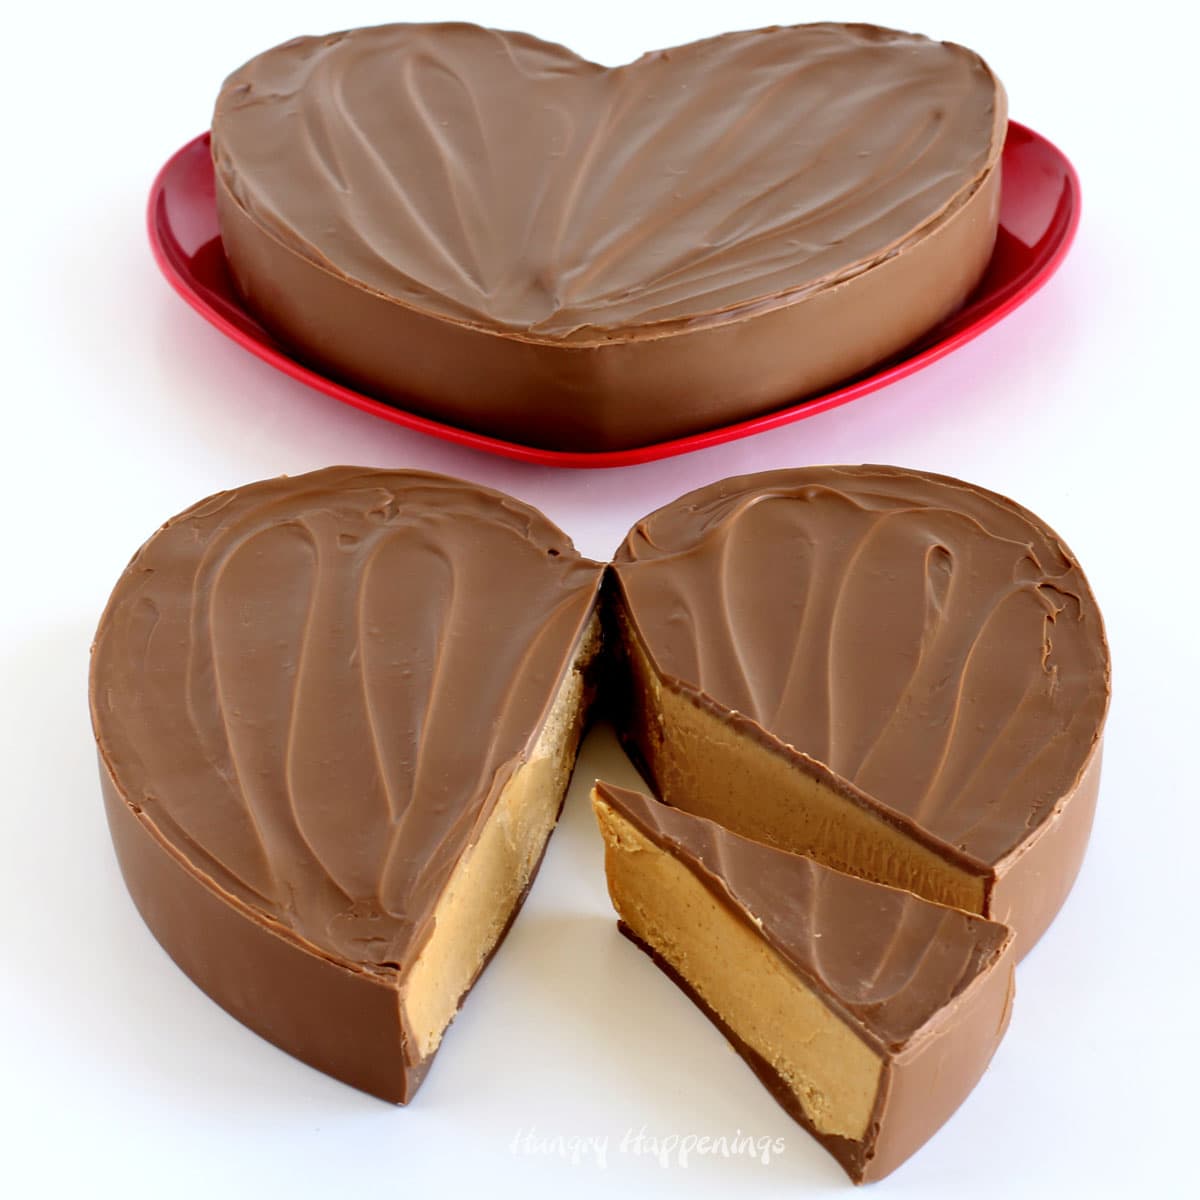
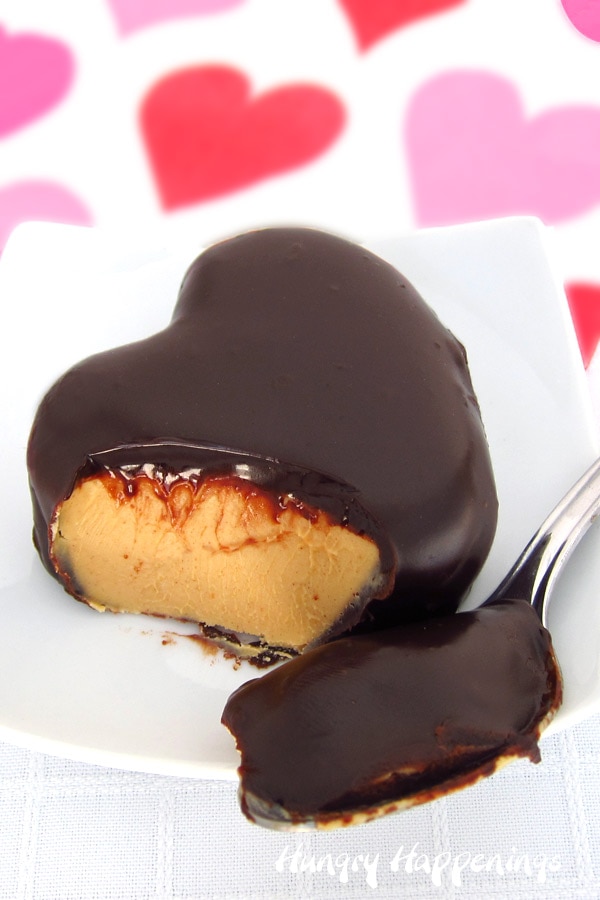
Valentine's Day is the perfect time to make a giant milk chocolate peanut butter cup heart to give to someone you love. This 2.75-pound chocolate heart is made using a silicone cake pan and is filled with deliciously creamy peanut butter fudge.
Does your sweetheart love Reese's Cups?
Yes!
Then, you have to surprise him or her with one of these 8-inch chocolate peanut butter cup hearts for Valentine's Day.
This giant candy heart will surely make the holiday extra sweet.
A few months ago, I made a copycat Reese's Cup Thanksgiving Pie which was essentially a giant peanut butter cup and it was a huge hit with the friends that I gifted them to and with my readers.
So many of you wrote to tell me that you made one or more of the oversized peanut butter cups to give as gifts for Christmas and that they were so well received.
I thought it would be fun to revisit this recipe for Valentine's Day.
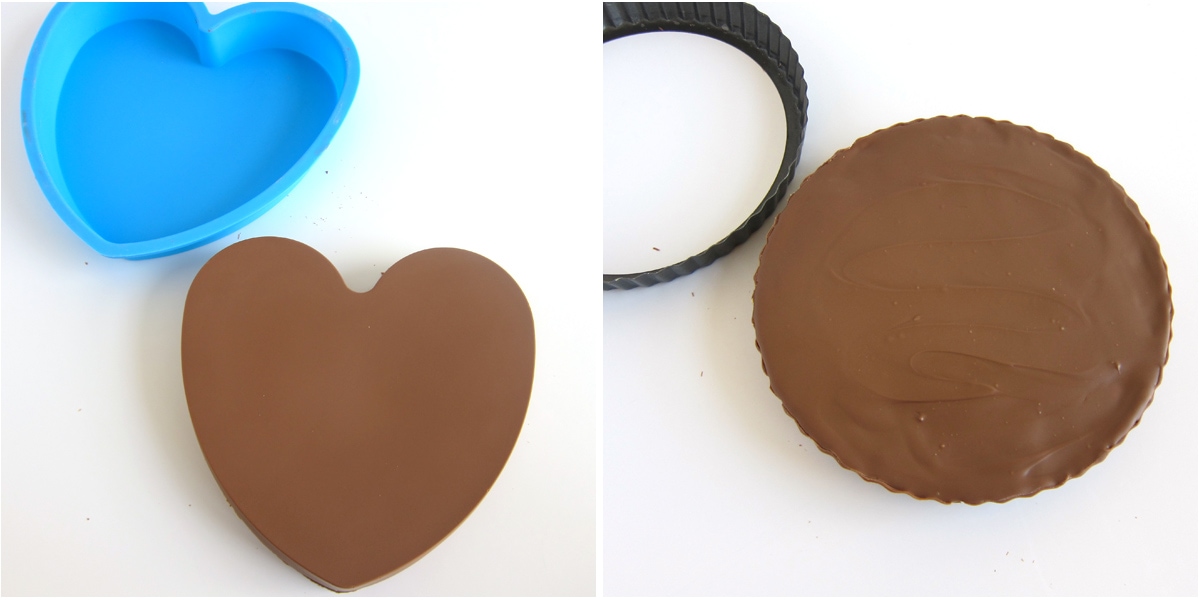
I used a round tart pan with a removable bottom to make the original giant Reese's Cup. The challenge with using a tart pan is that you have to hold the removable bottom plate in place so that chocolate does not get underneath it.
The good thing about using a tart pan is that it creates a peanut butter cup that is about an inch thick.
You can buy heart-shaped tart pans, but they are typically only 4-inches in diameter. I wanted my heart-shaped peanut butter cup to be really large, so I opted to use an 8-inch silicone heart cake pan which was super easy to use. It does make a peanut butter cup that is a bit thicker, about 1 ½ inches.
When I made the original giant Reese's Cup, I filled it with Chocolate Buckeye Filling made using peanut butter, butter, and powdered sugar. It tastes just like the filling in a Reese's Cup, but it needs to be refrigerated if you plan to keep it for more than a few days.
If you want to make one of these peanut butter fudge hearts in advance to give as a gift or you want to sell them, it's best to use peanut butter fudge that does not need refrigeration.
If you use my Easy Microwave Peanut Butter Fudge to fill the chocolate hearts they'll stay fresh at room temperature for up to 2 months. The filling is super easy to make using just four ingredients and is liquid when first made so it can easily be poured into the chocolate shell.
Let's make a peanut butter fudge-filled chocolate heart!
If you do not have experience working with chocolate, be sure to read my Chocolate Making Tips page for detailed information about the difference between pure chocolate and compound chocolate (candy melts, melting wafers, confectionery coating, almond bark, etc.) and how to melt them.
If you use pure chocolate with cocoa butter listed in the ingredients it must be tempered (heated and cooled to exact temperatures). If you simply melt it, the chocolate will not harden properly and your chocolate heart will not have a good snap or shine.
If you don't want to temper your chocolate, then use compound chocolate (candy melts, almond bark, Girardelli melting wafers, etc.)
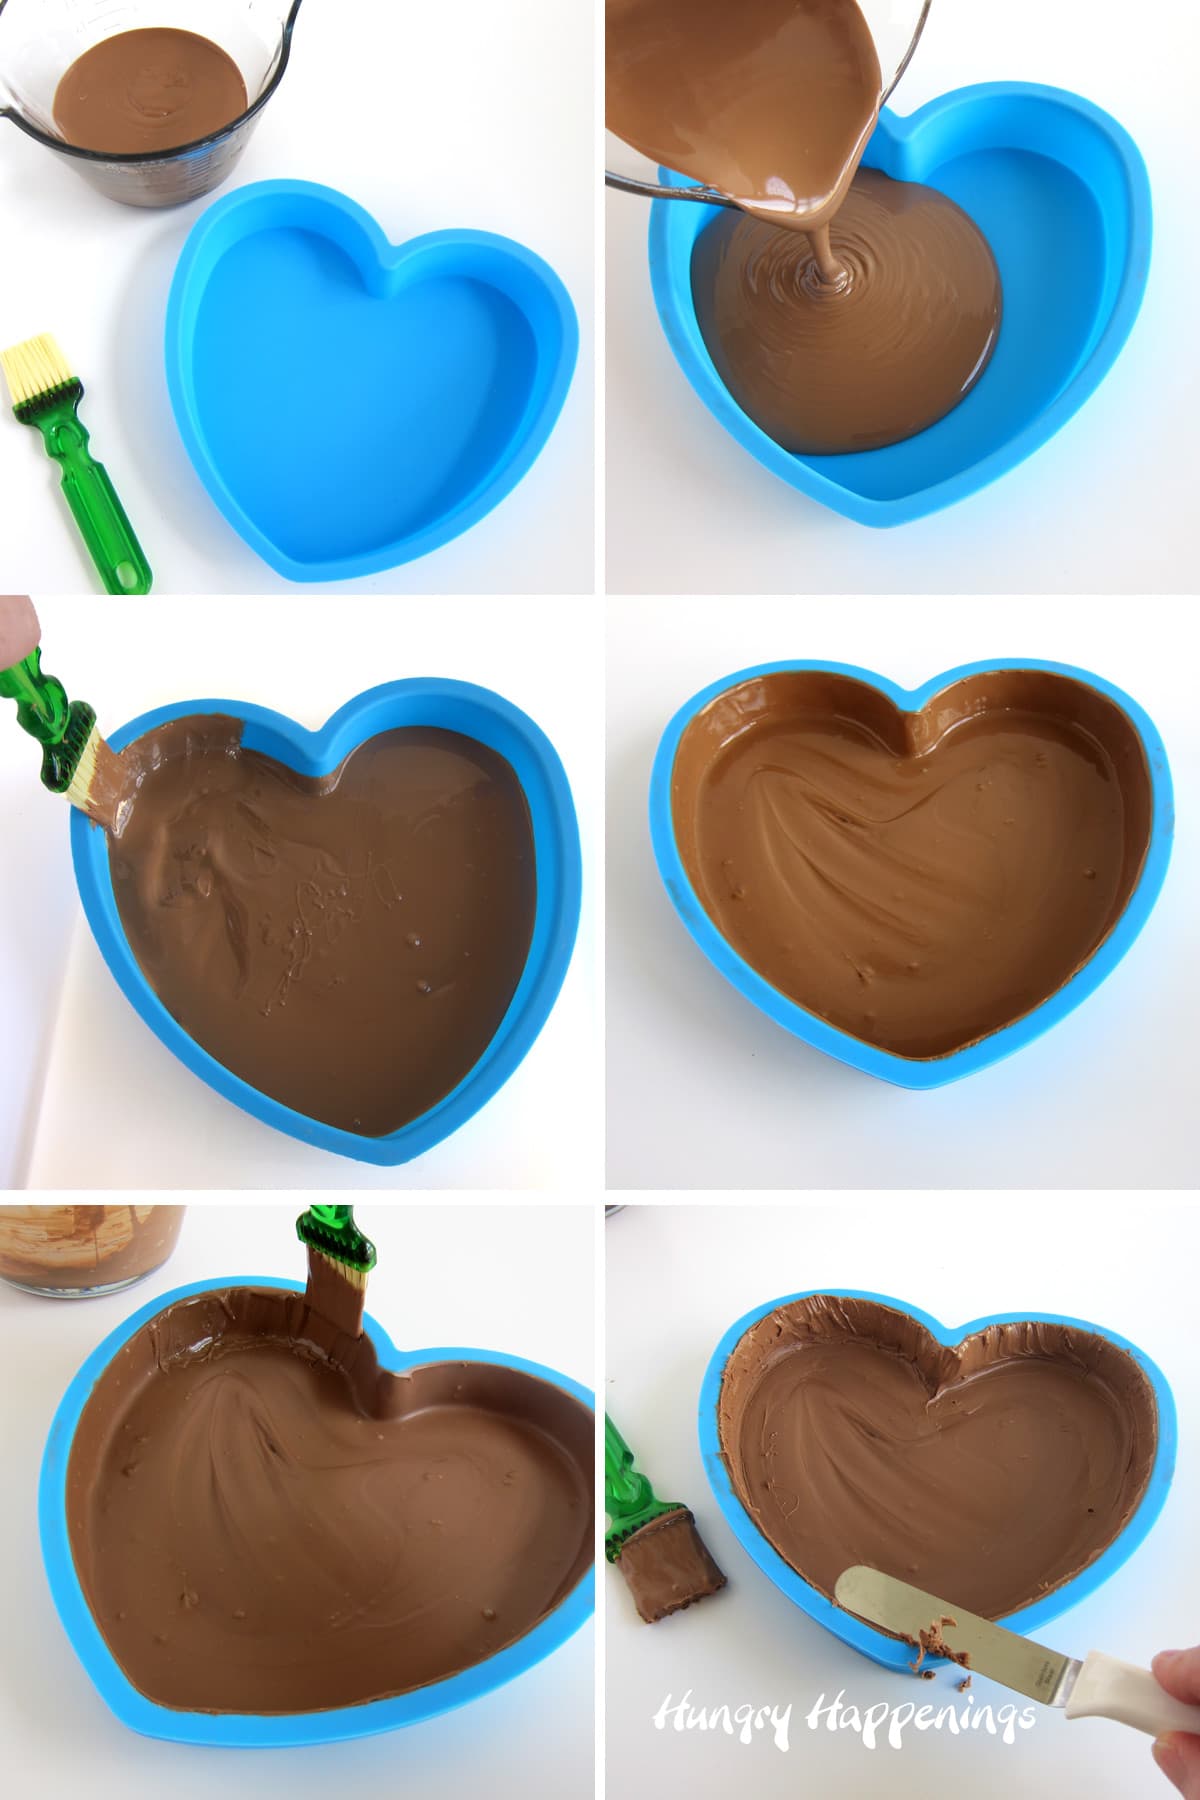
step one - make the heart-shaped chocolate shell
- Pour 10 ounces of melted and tempered pure milk chocolate or 10 ounces of melted compound chocolate into the silicone heart mold.
- Use a pastry brush to brush the chocolate up the sides of the mold.
- Wipe any excess chocolate off around the top edge of the mold.
- Chill the chocolate heart in the refrigerator if you used pure chocolate and in the freezer if you used compound chocolate (candy melts) for about 10 minutes.
- Remove the heart from the refrigerator or freezer and brush about 1 more ounce of chocolate around the sides of the mold.
- Scrape off any excess chocolate around the top edge using a metal spatula or knife.
- Chill for another minute or two until that chocolate hardens.
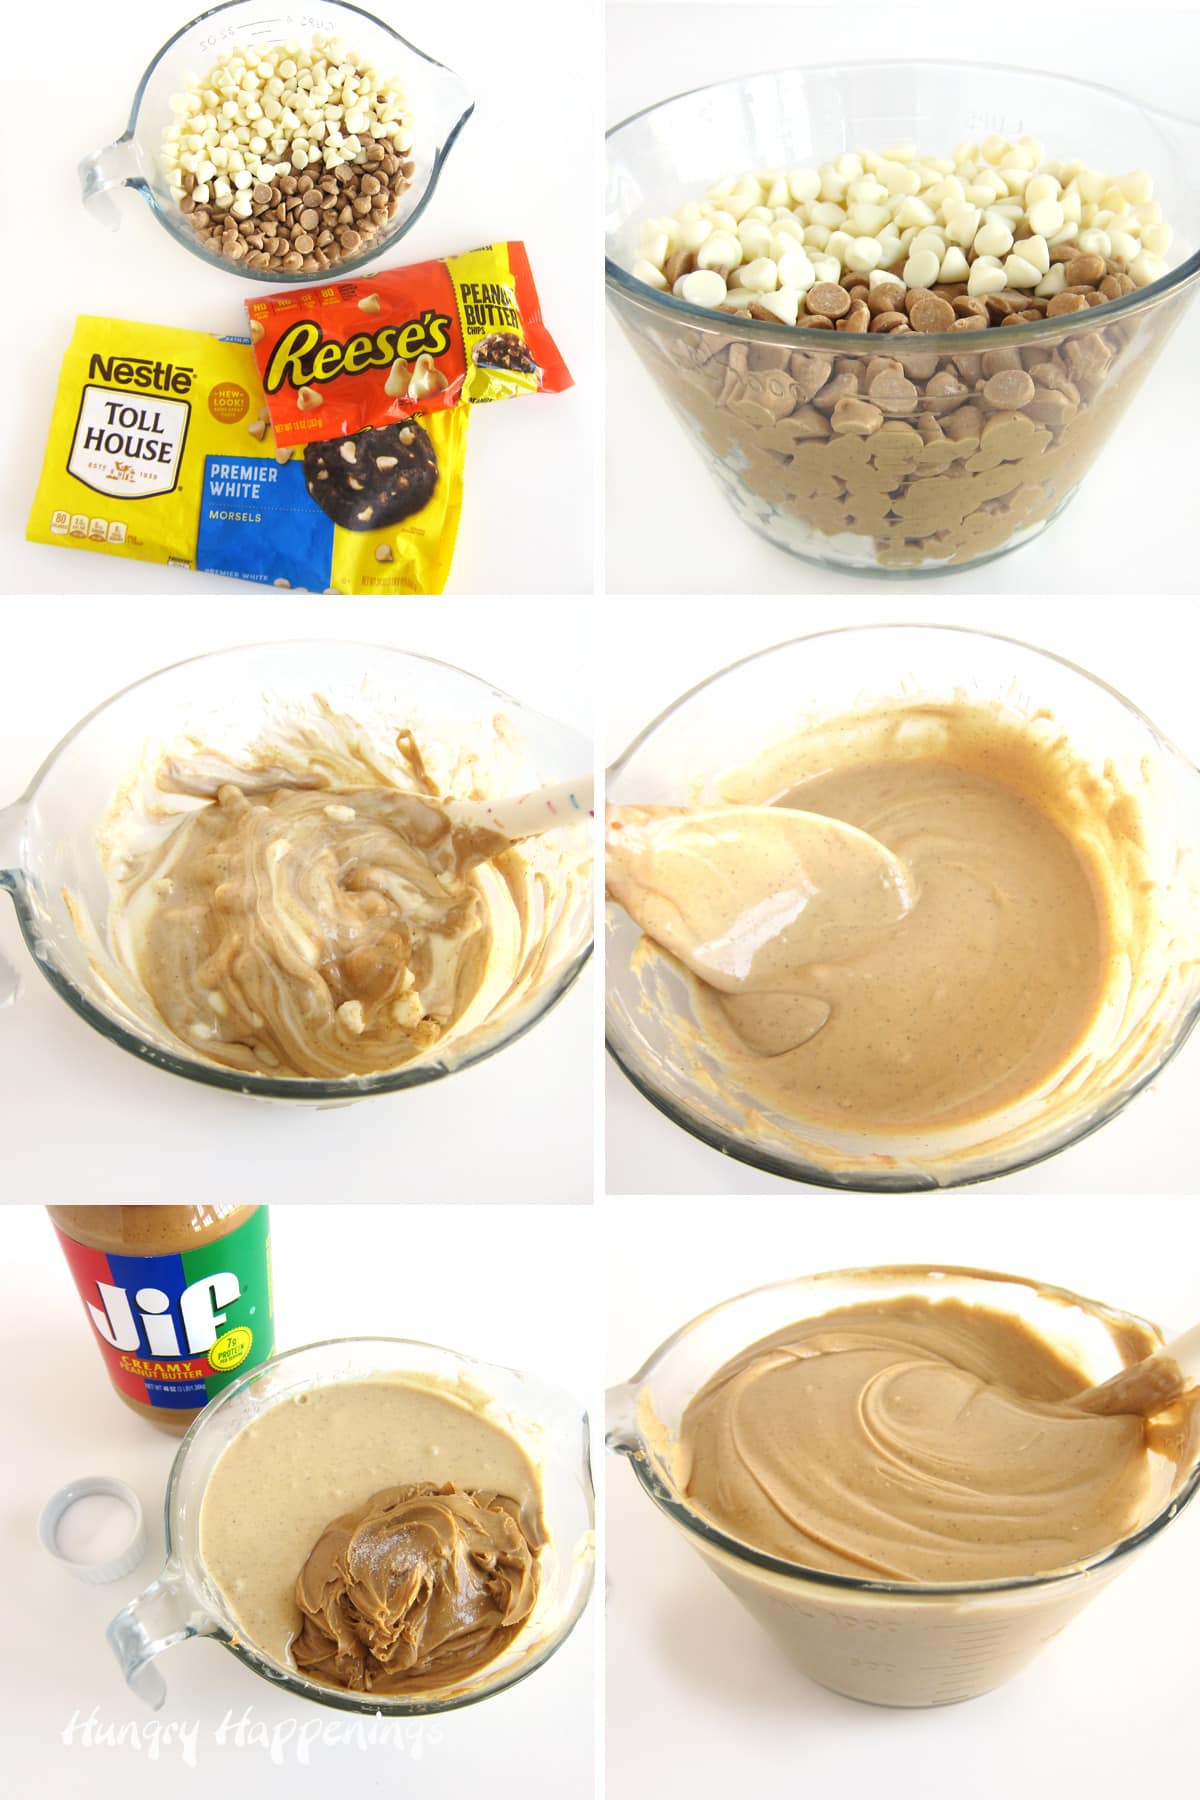
step 2 - make the creamy peanut butter fudge
- Combine 16 ounces of Nestle Premier White Morsels (white chips or white candy melts) with 8 ounces of Reese's Peanut Butter Baking Chips in a microwave-safe mixing bowl.
- Heat on high power for 30-second increments, stirring after each until melted.
- Stir in a pinch of salt and 16 ounces of creamy peanut butter. I used Jif, but Reese's Creamy Peanut Butter would taste great too.
- Let the peanut butter fudge filling cool just until it barely feels warm. This should take 5-15 minutes depending on how hot you got the white and peanut butter chips.
- This peanut butter fudge is liquid when it is warm, but it will thicken quickly as it cools so don't let it cool down too much. If it does firm up too much, you can just reheat it in the microwave.
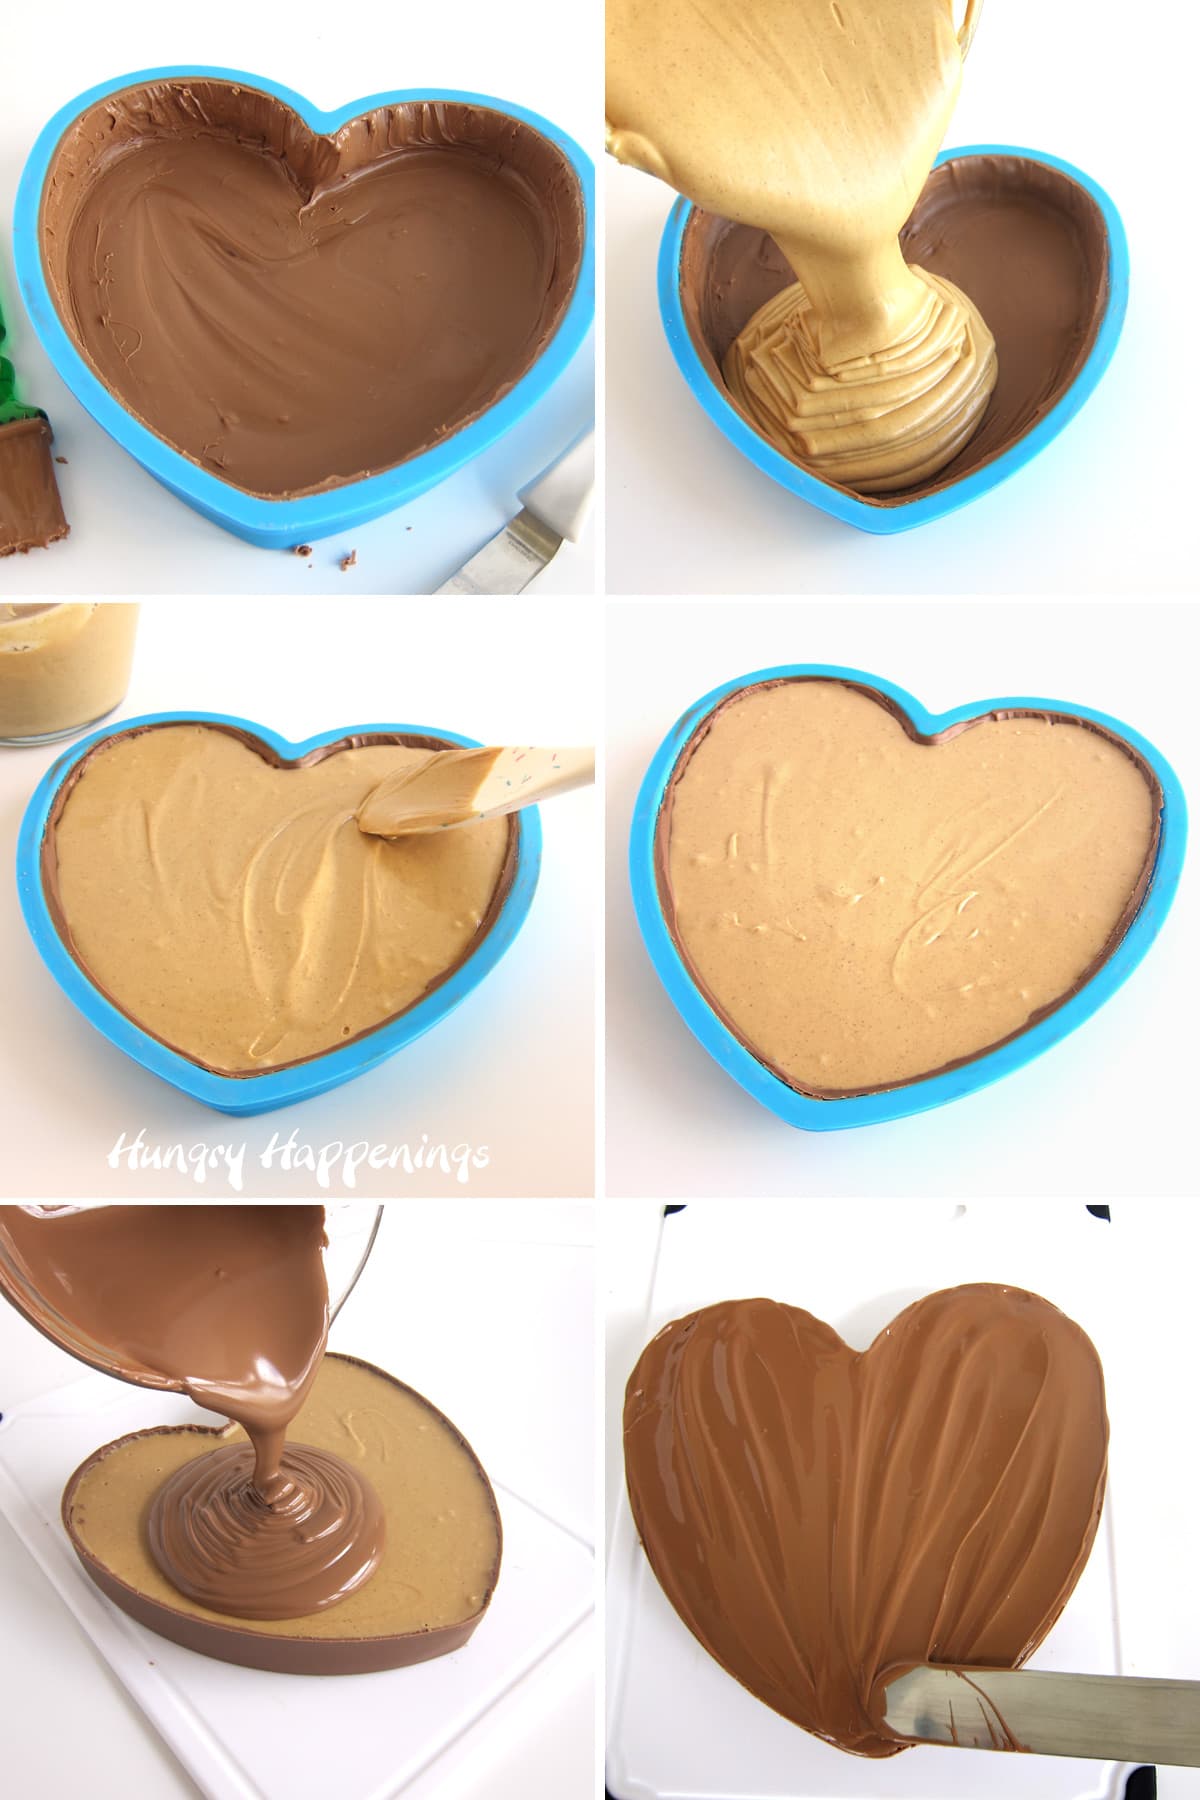
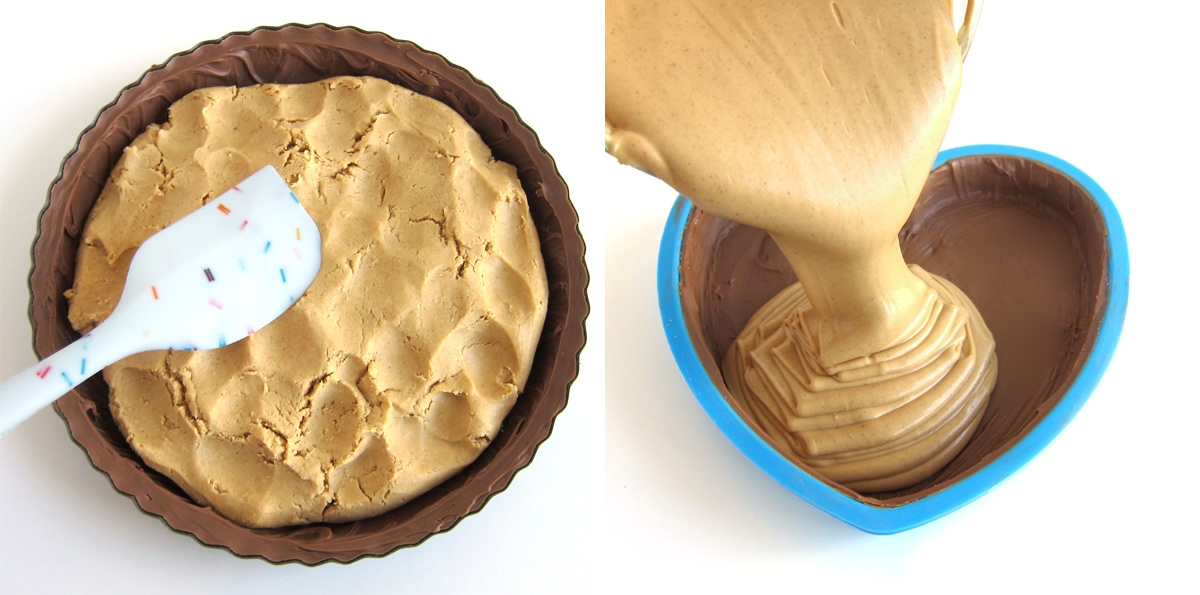
step 3 - fill the chocolate heart with peanut butter fudge
- Pour the cooled peanut butter fudge into the chocolate shell and spread it into an even layer leaving about ⅛-inch around the top edge.
- You will have more peanut butter fudge than you need.
- You may have as much as 1 cup of fudge left depending on the thickness of your milk chocolate shell. You can see some fun ideas for using the leftover peanut butter fudge below the recipe card.
- Refrigerate the peanut butter fudge-filled chocolate heart for 30 minutes until the fudge firms up.
- Remove the chocolate heart from the silicone mold. Peel the mold away from the chocolate and pull it off.
- Spread 4 ounces of milk chocolate over the fudge-filling.
- I found it much easier to spread the chocolate around the edge of the heart when it was removed from the silicone mold.
- Chill for about 10 minutes until the chocolate hardens.

How to store the hearts?
Store the chocolate peanut butter heart at room temperature for up to 2 months. NO refrigeration is needed.
You can wrap the hearts in clear cellophane or a gift basket bag and tie it with a ribbon to give as a gift. Or you can package them in a cake or pizza box.
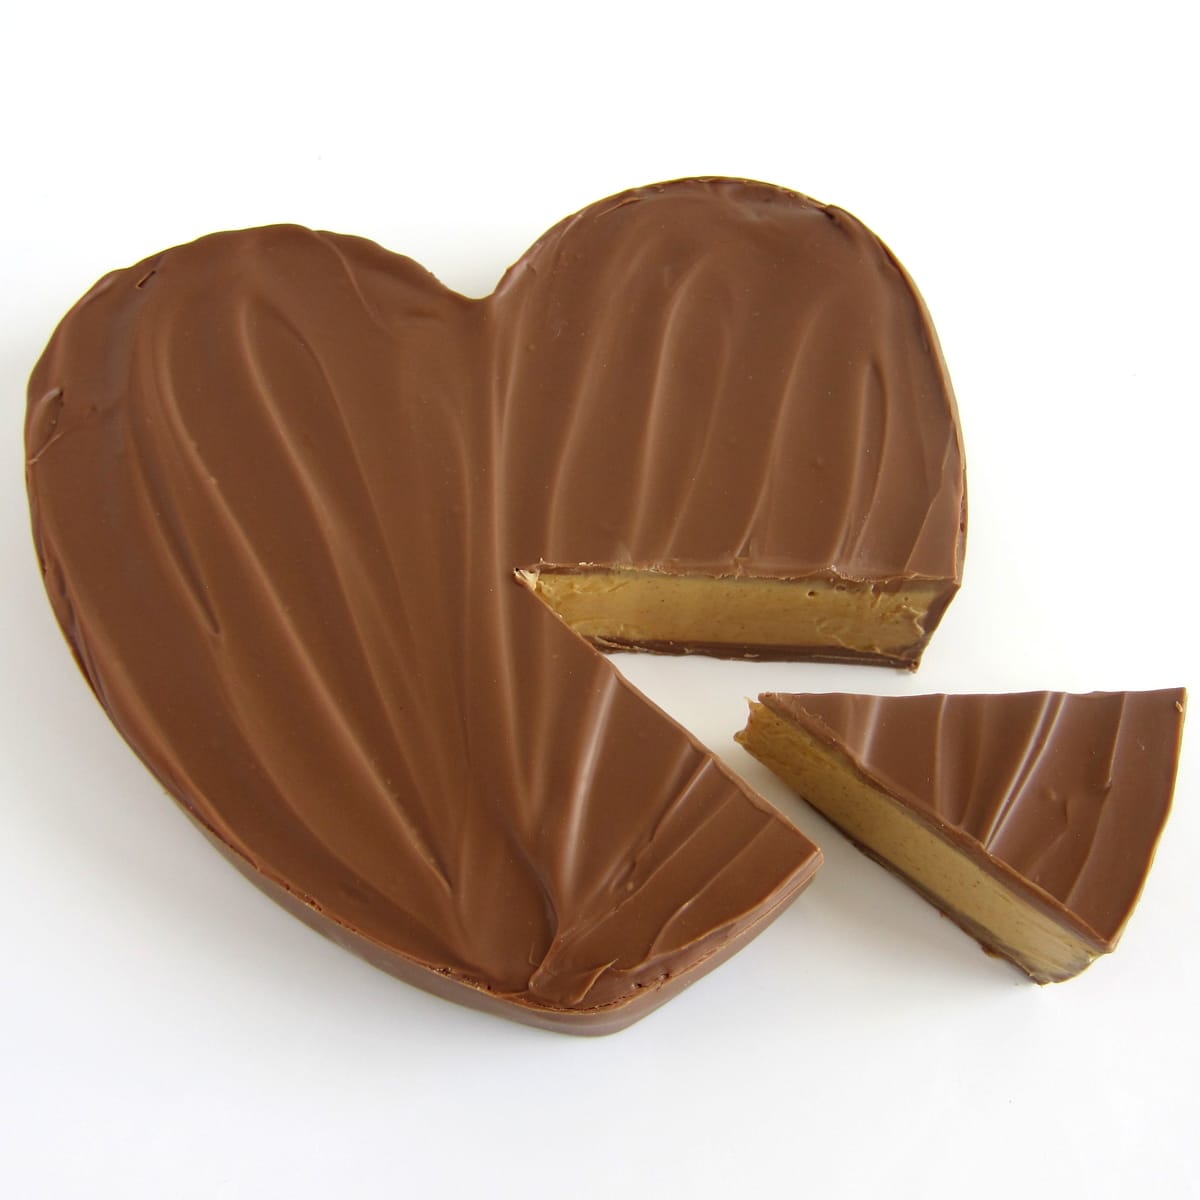
How to cut the peanut butter cup heart?
Heat a knife over a flame (a gas stove or a candle) for a few seconds. Then, use the hot knife to slowly cut through the chocolate. It will melt the chocolate just enough to make a nice cut.
Wipe the knife clean, then heat it over the flame again before making each cut.
Where can I get the silicone heart mold?
You can find the heart mold and ingredients needed to make these peanut butter cup hearts on Amazon. I earn a small commission when you use the product links in this post at NO extra cost to you.
 Gexo Heart Silicone Molds 2...Shop on Amazon
  COOKNBAKE Valentine's Day S...Shop on Amazon
  X-Haibei 8-inch Heart Shape...Shop on Amazon
  Nestle Toll House Premier W...Shop on Amazon
 ") Jif Creamy Peanut Butter, 1...Shop on Amazon
Jif Creamy Peanut Butter, 1...Shop on Amazon ") Reese's Creamy Peanut Butte...Shop on Amazon
Reese's Creamy Peanut Butte...Shop on Amazon
This copycat Reese's Cup Heart makes a perfect gift for Valentine's Day but would also be fun to serve as a bridal shower dessert or to give as a birthday gift.
- 16 ounces pure milk chocolate, melted and tempered (see notes)
- OR light cocoa candy melts, melted
- 16 ounces (2 ⅔ cups) Nestle Premier White Morsels (white chips or white candy melts)
- 8 ounces (1 ⅓ cups) Reese's Peanut Butter Chips
- 16 ounces creamy peanut butter
- 1 pinch table salt
-
Pour 10 ounces of melted and tempered pure milk chocolate or melted candy melts into the bottom of the 8-inch heart-shaped silicone mold.
-
Spread the chocolate into an even layer and up the sides of the mold using a pastry brush.
-
Go around the mold twice pushing the chocolate up the sides.
-
Wipe off any excess chocolate around the top edge of the mold.
-
Then chill the chocolate in the refrigerator if using pure milk chocolate and in the freezer, if using candy melts for about 10 minutes until the chocolate hardens.
-
Then, paint on a second layer just around the sides of the chocolate heart and scrape off any excess chocolate around the top edge.
-
If needed, chill for a minute or two until that chocolate hardens, then set aside while making the fudge filling.
-
Combine the white chips and peanut butter chips in a microwave-safe bowl.
-
Heat on high power for 30-second bursts, stirring after each, until melted.
-
Stir in the peanut butter and a pinch of salt.
-
Let the fudge cool until it no longer feels too warm. This will take 5-15 minutes depending on how hot you got the white and peanut butter chips.
-
Pour the fudge into the chocolate heart shell, spreading it into an even layer, just until it comes to ⅛-inch from the top.
-
Reserve the remaining fudge for another use.
-
Chill for about 30 minutes until the fudge firms up.
-
Then, spread the remaining chocolate over the fudge, sealing the edges.
-
Chill for about 10 minutes until the chocolate hardens.
- If using pure milk chocolate that contains cocoa butter you melt 12 ounces of the chocolate to 115 degrees F, then seed it with the remaining 4 ounces of chocolate, and cool it to 88 degrees F. See my Chocolate Making Tips page for detailed instructions.
- If using light cocoa candy melts, you can simply melt them in the microwave on high power for 30-second bursts of power, stirring after each, until melted.
- If you do not have a microwave, you can melt the chocolate (and the white and peanut butter chips) using a double boiler set over low heat on the stove.
- Store your peanut butter cup hearts at room temperature for up to 2 months.
- See below the recipe card for fun ways to use the remaining cup of peanut butter fudge.
How to use the leftover peanut butter fudge?
You can allow the fudge to firm up and roll it into balls and make chocolate-dipped peanut butter fudge balls or you can make these other fun treats.
Pour it into small heart-shaped molds to make these delicious Chocolate Peanut Butter Fudge Hearts. They are covered in creamy chocolate ganache and will make great little desserts for Valentine's Day.
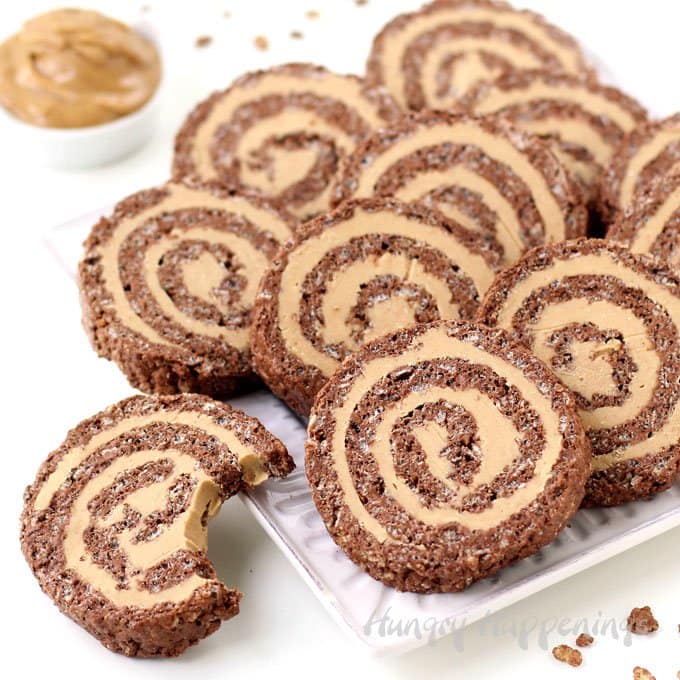
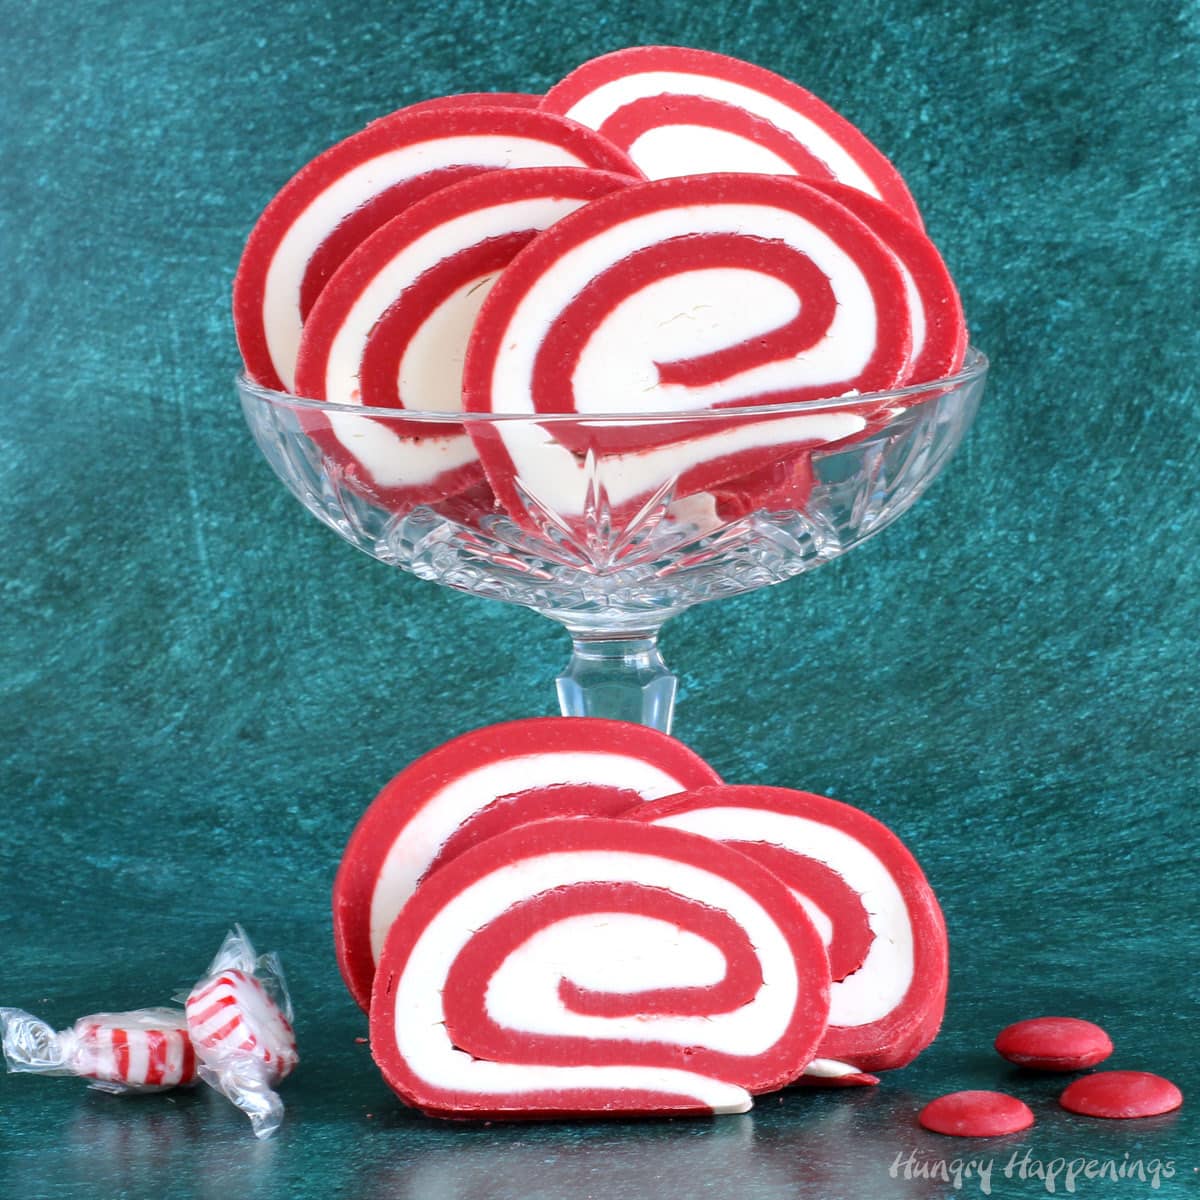
Or pour it over a thin layer of Cocoa Krispie treats, then roll it up and cut it into slices to create these amazing Cocoa Krispie Treat Pinwheels. This dessert looks as great as it tastes.
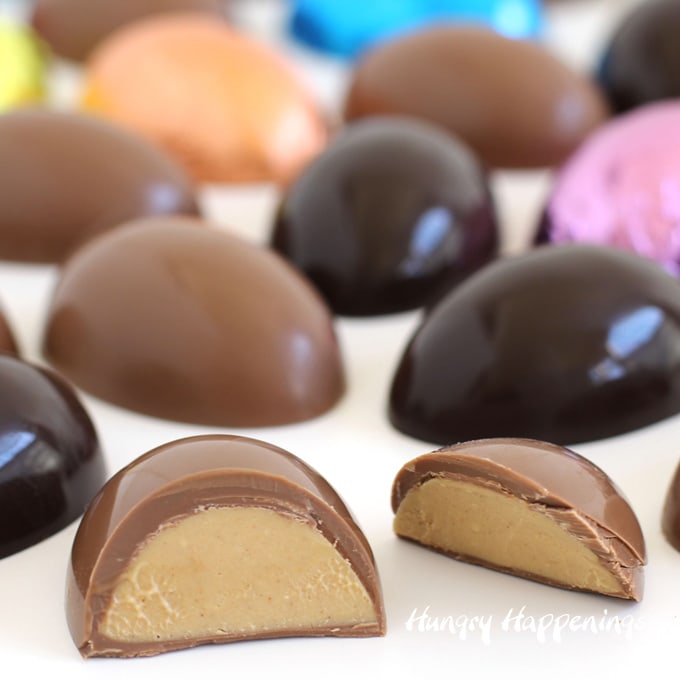
I know it may be a bit early, but you can always pour it into egg-shaped chocolate shells to make Peanut Butter Fudge Easter Eggs. You can use the same candy-making techniques using any shaped candy mold.

For Easter, you can also make these adorable Chocolate Peanut Butter Fudge Bunnies. How cute are they?
Enjoy!

- Banana Split Bars – A Fun and Easy Summer Dessert - March 4, 2026
- Pineapple Fudge (No Candy Thermometer Needed!) - March 4, 2026
- No-Bake Peanut Butter Pie Recipe - March 3, 2026


Please leave a comment.