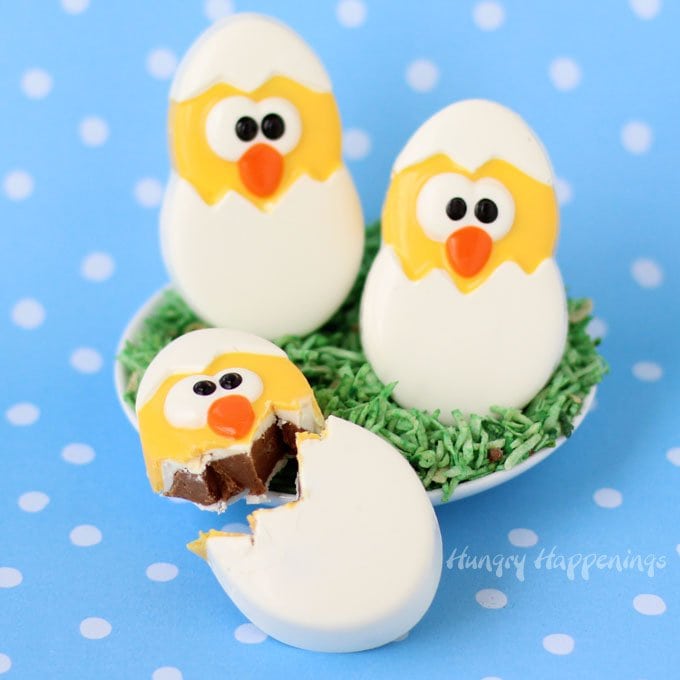
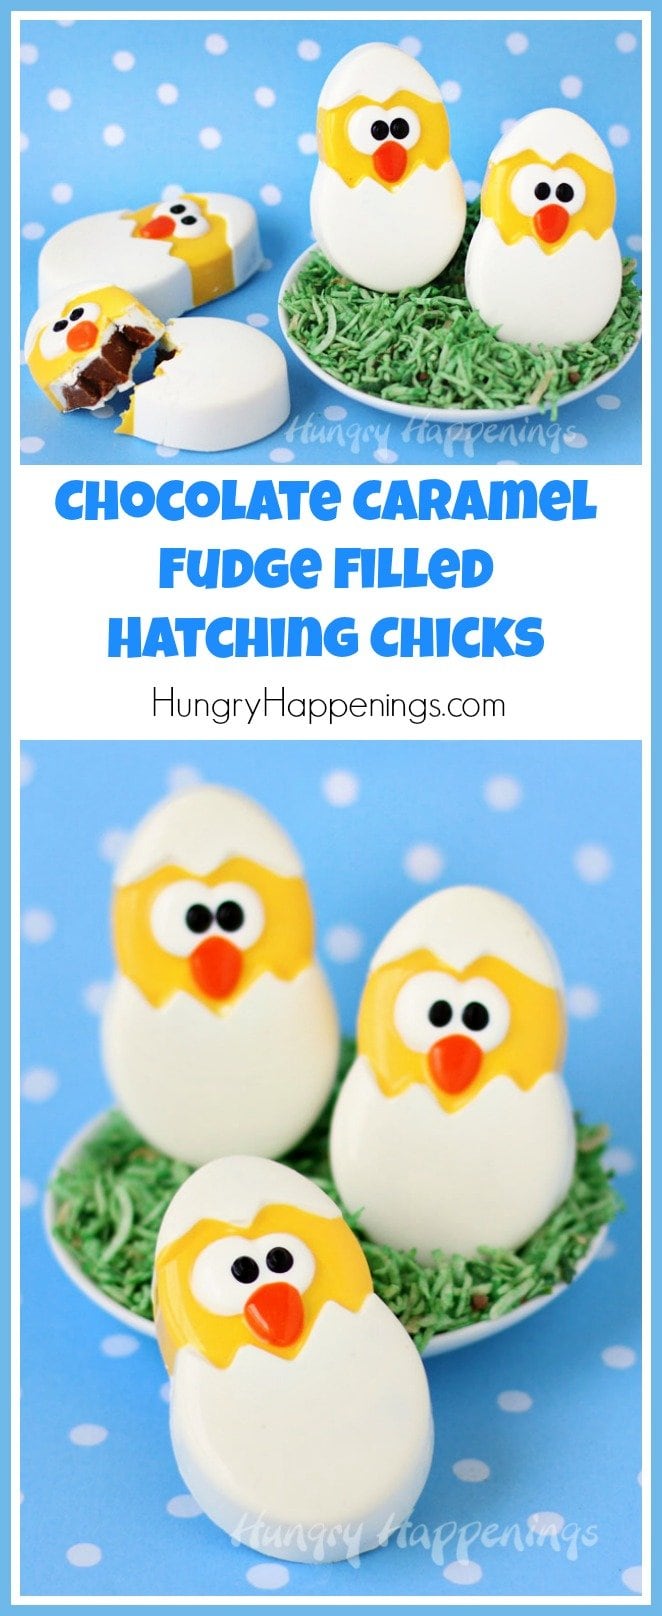
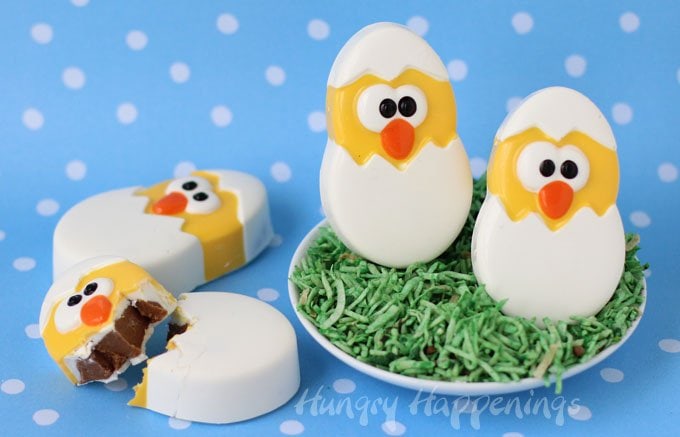
Add some super cute Chocolate Caramel Fudge filled Hatching Chicks to your Easter baskets this year. Your kids will love these homemade white chocolate Easter chicks, each filled with creamy caramel flavored milk chocolate fudge.
Some of the most popular chocolates I make each year for Easter are hatching chick lollipops. My customers order more of them than any other individual piece of candy. They love them as much as I do. The mold I have been using to make these Easter treats is the same one I've used for over 30 years. It's cute, really cute, but it doesn't even hold a candle to the chocolate chicks I made this week using a new Easter Chick Cookie Mold.
I recently discovered SpinningLeaf, a candy mold manufacturer that makes what they call cookie molds. The molds are specifically created to make chocolate covered cookies. They have molds for all of the major holidays along with sports balls, animals, flowers, and more.
I ordered a bunch of the molds to try them out. I have to say that the molds are extremely sturdy, which I love. The designs are fantastic, as well. My only issue with these candy molds is that the depth is such that the chocolate coating around the cookie is too thick, making it hard to eat.
 Chocolate Caramel Fudge filled Hatching Chicks
 Chocolate Caramel Fudge filled Hatching Chicks
So, I plan to use my new candy molds in other ways.
My favorite of the new molds is definitely the one I used to make these cute Easter chicks. I hand painted colored white chocolate candy melts into the mold, created a white chocolate shell, then filled it with a 2 ingredient chocolate caramel fudge.
I know my customers are going to flip when they see these. They will be the perfect treat to add to their Easter baskets. They are cute enough for kids but decadent enough for adults too. I'm thinking they will be my new best seller.
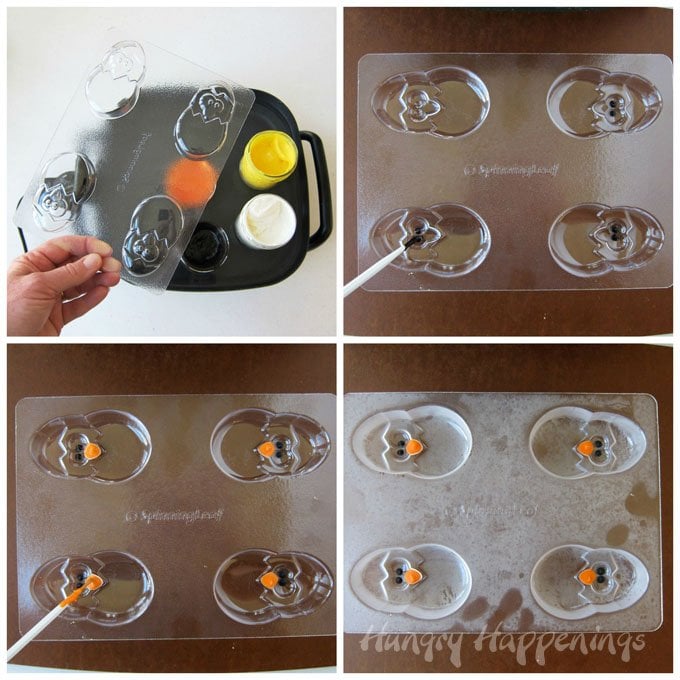
If you want to make some of these for your own Easter baskets, start by melting white, orange, yellow and black candy melts.
To keep your candy coating melted as you paint your candy molds, you can set your bowls or jars into a water bath in an electric skillet. You can keep your candy warm all day long using this method. See more details about this, along with detailed melting instructions and detailed instructions on how to paint into candy molds, on my Chocolate Making Tips page.
You'll need a few food use only paint brushes in order to paint the molds.
Paint the two black pupils and the orange beak first, then pop the mold in the freezer for about 3 minutes, until the candy hardens.
When you remove the mold from the freezer, you need to allow it to come to room temperature before continuing to paint. The mold will look frosty until it's ready.
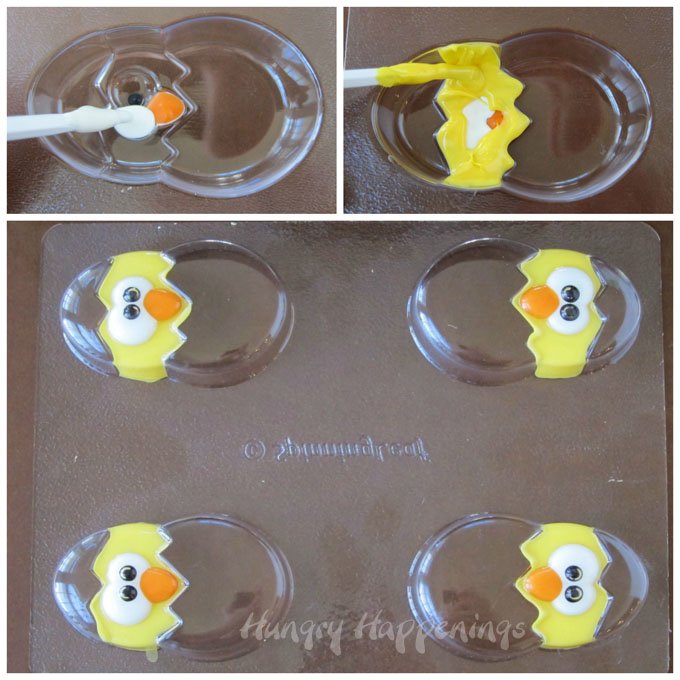
Next, paint the whites of they eyes and pop in the freezer again. Remove, let warm up, then paint on the yellow.
Pop back in the freezer once again, remove, and allow the mold to warm up again.
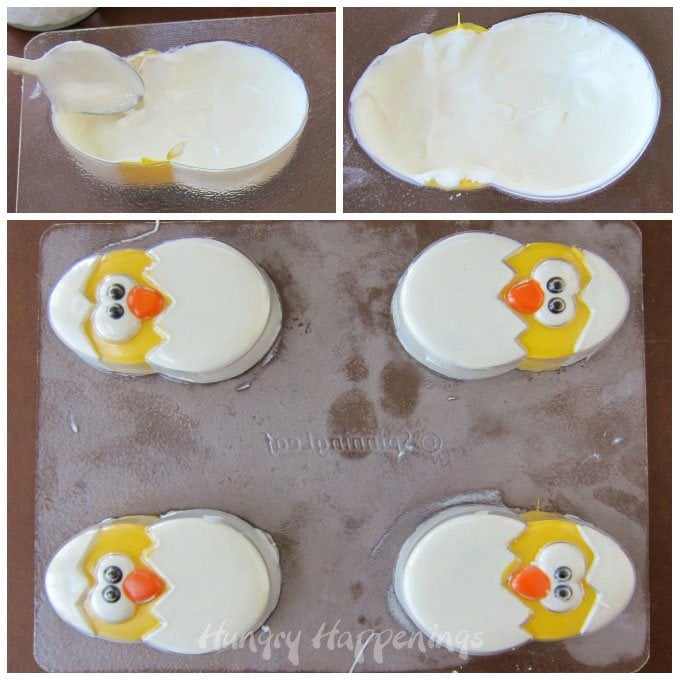
Spoon white candy melts into the mold, and use a paint brush or spoon to brush it into a thin layer over the bottom and sides of the mold.
Freeze for 5-8 minutes until hardened. Remove the mold, and once again, allow the mold to warm up to room temperature.
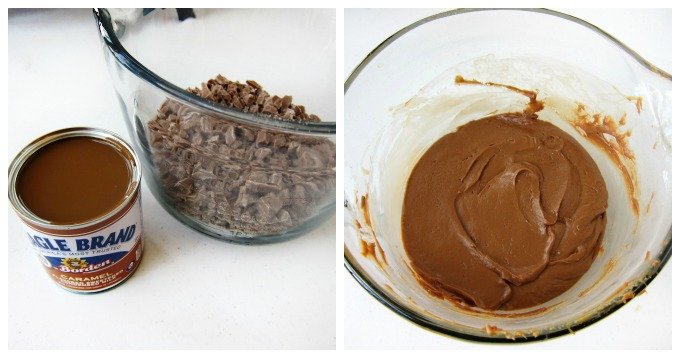
To make the chocolate caramel fudge filling, finely chop milk chocolate and pour it into a mixing bowl. Heat it on high power in the microwave for two 30 second increments, stirring after, each.
Stir in the caramel flavored sweetened condensed milk. Heat for 20 seconds on high power then let it sit in the microwave for 3 minutes. Remove and stir.
Heat for 10 more seconds on high. Let it sit in the microwave for about 3 minutes, then remove and stir. If not all melted, heat for 10 more seconds, let sit for 2 minutes, then stir. Repeat, if needed.
Let the fudge cool for 20 minutes.
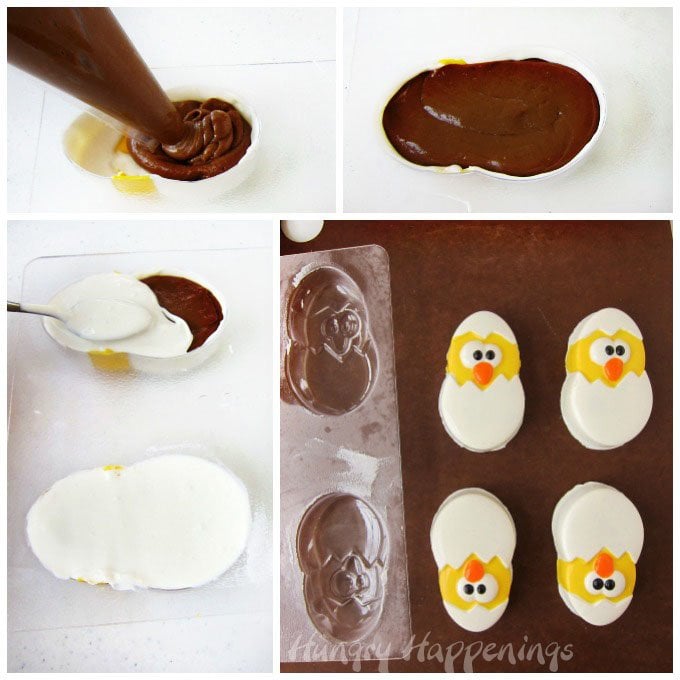
Spoon the chocolate caramel fudge into a disposable pastry bag or large zip top back. Snip off the tip and pipe fudge into the white candy shells.
Flatten the fudge, if needed, using your finger. You want the fudge to fill the mold leaving just enough space for the top layer of white chocolate.
Spoon more white candy coating over top of the fudge. Scrape off using an offset metal spatula, if needed, to make a smooth surface.
Freeze for about 5 minutes then remove and turn upside down, allowing the chocolate chicks to fall out of the mold. Be sure to hold your hand over the chicks when you turn the mold upside down, so the chicks come out slowly.
Allow the Chocolate Caramel Fudge filled Hatching Chicks to come to room temperature. You can put each chick into a clear cellophane bag and tie with some ribbon or you can just nestle the chicks in among some jelly beans in your Easter baskets.
You can find everything you need to make these cute Easter chocolates at Amazon.com. (commission earned for sales)
 Wilton Black Vanilla Candy ...Shop on Amazon
  Wilton Orange Candy Melts, ...Shop on Amazon
 Wilton Candy Melts, Bright ...Shop on Amazon
  Wilton Yellow Candy Melts, ...Shop on Amazon
  14 oz Cans") Eagle Brand Limited Edition...Shop on Amazon
Eagle Brand Limited Edition...Shop on Amazon ") Lindt CLASSIC RECIPE Milk C...Shop on Amazon
Lindt CLASSIC RECIPE Milk C...Shop on Amazon Chocolate Caramel Fudge filled Hatching Chicks for Easter
Recipe Type: Candy
Author:
Serves: 16
RELATED: Find dozens of easy fudge recipes at HowToMakeEasyFudge.com.
White chocolate Easter chicks filled with milk chocolate caramel fudge.
Ingredients
- White Chocolate Shells:
- 2 ounces black confectionery coating (candy melts)
- 2 ounces orange confectionery coating
- 18 ounces bright white confectionery coating
- 4 ounces yellow confectionery coating
- Chocolate Caramel Fudge
- 16 ounces milk chocolate, finely chopped
- 1 (14 ounce) can caramel flavored sweetened condensed milk
Instructions
White Chocolate Shells:
- Paint Easter chick mold, creating 16 hatching chicks, using black, orange, white, and yellow confectionery coating, freezing as needed, until all candy hardens. (see tutorial for complete instructions)
- Once eyes, beak and chick body are all painted, spoon about ¾ of an ounce of white candy coating into a mold. Paint the candy coating around the inside of the mold, creating a thin shell.
- Freeze for 5-8 minutes until hardened.
Chocolate Caramel Fudge:
- Microwave finely chopped chocolate on high for two 30 second increments, stirring after each.
- Stir in caramel flavored sweetened condensed milk.
- Heat on high for 20 seconds, then allow it to sit in the microwave for 3 minutes.
- Remove and stir.
- Heat for 10 more seconds, and let rest for 2 minutes before stirring.
- If needed, repeat for 10 more seconds.
- Cool for 20 minutes.
- Pour into a disposable pastry bag.
- Pipe into white candy shells.
- Cover fudge with thin layers of white chocolate.
- Freeze for 5 minutes until the candy coating hardens.
- Remove and pop candies out of molds.
If this Easter Recipe interests you, then you should go and check out all these other delicious ideas.
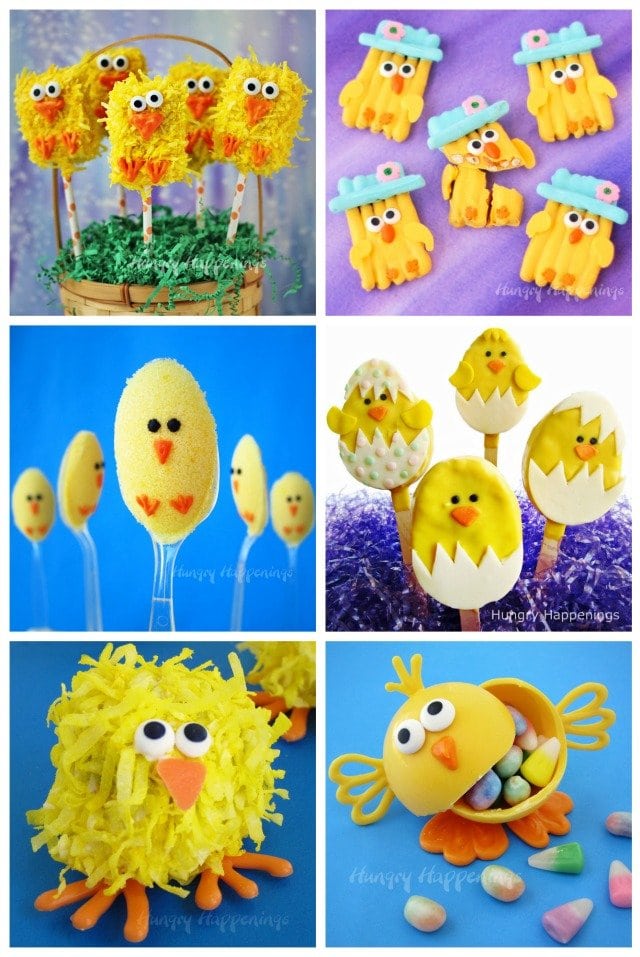
Rice Krispies Treat Fuzzy Chicks • White Chocolate Pretzel Chicks
Easter Chick Sugar Spoons • Rice Krispie Treat Hatching Chicks
Cake Ball Chicks • White Chocolate Candy Filled Chicks
If you recreate these Chocolate Caramel Fudge Hatching Chicks for Easter
be sure to link to this tutorial and send a picture to beth@hungryhappenings.com,
so I can share it in my Readers' Gallery.

- Banana Split Bars – A Fun and Easy Summer Dessert - March 4, 2026
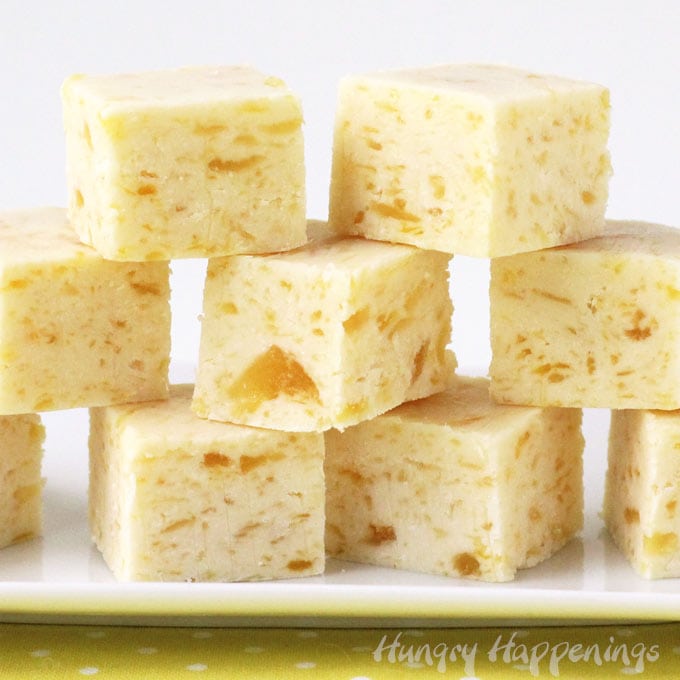
- Pineapple Fudge (No Candy Thermometer Needed!) - March 4, 2026
- No-Bake Peanut Butter Pie Recipe - March 3, 2026
Karla M. says
These are so stinkin' cute!!! Plus they sound yummy.
Lisa Snyder says
Adorable! I love the little faces!
Beth says
🙂
The Partiologist says
Soooo cute, I love that mold and how sweet those little chicks look! You did such a great job with the chocolate colors in the mold, they're just perfect!
Beth says
Thanks. I've painted tens of thousands of molds over the years and love making Easter candies. These are some of my all time favorite Easter treats.