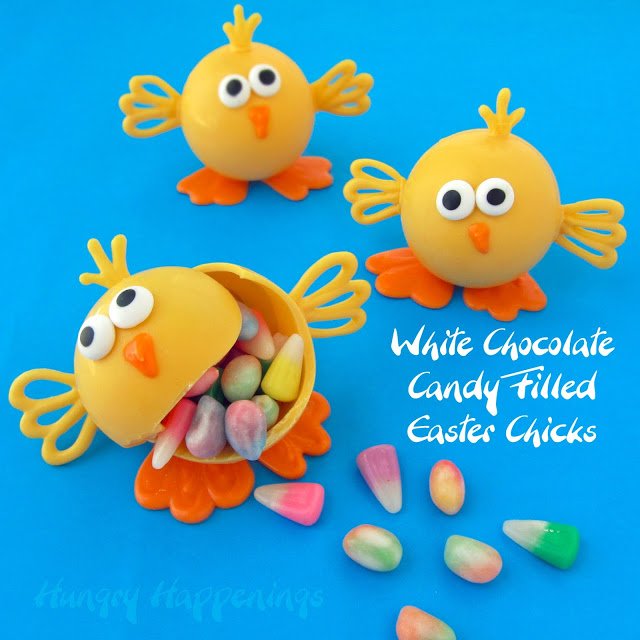
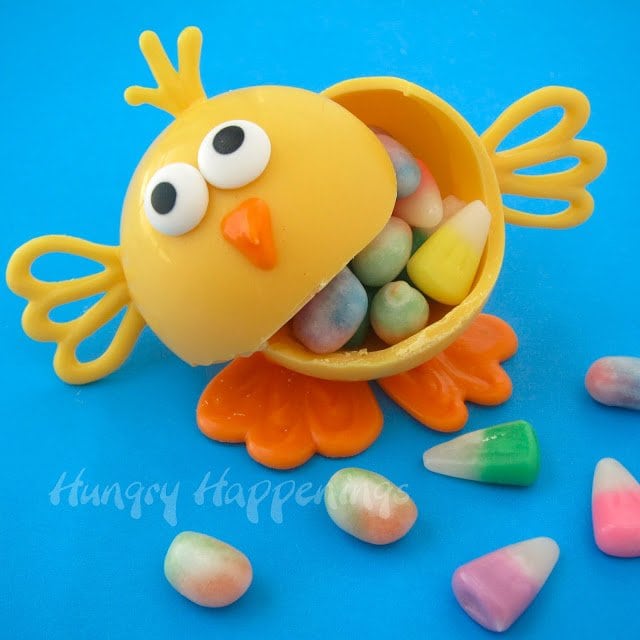
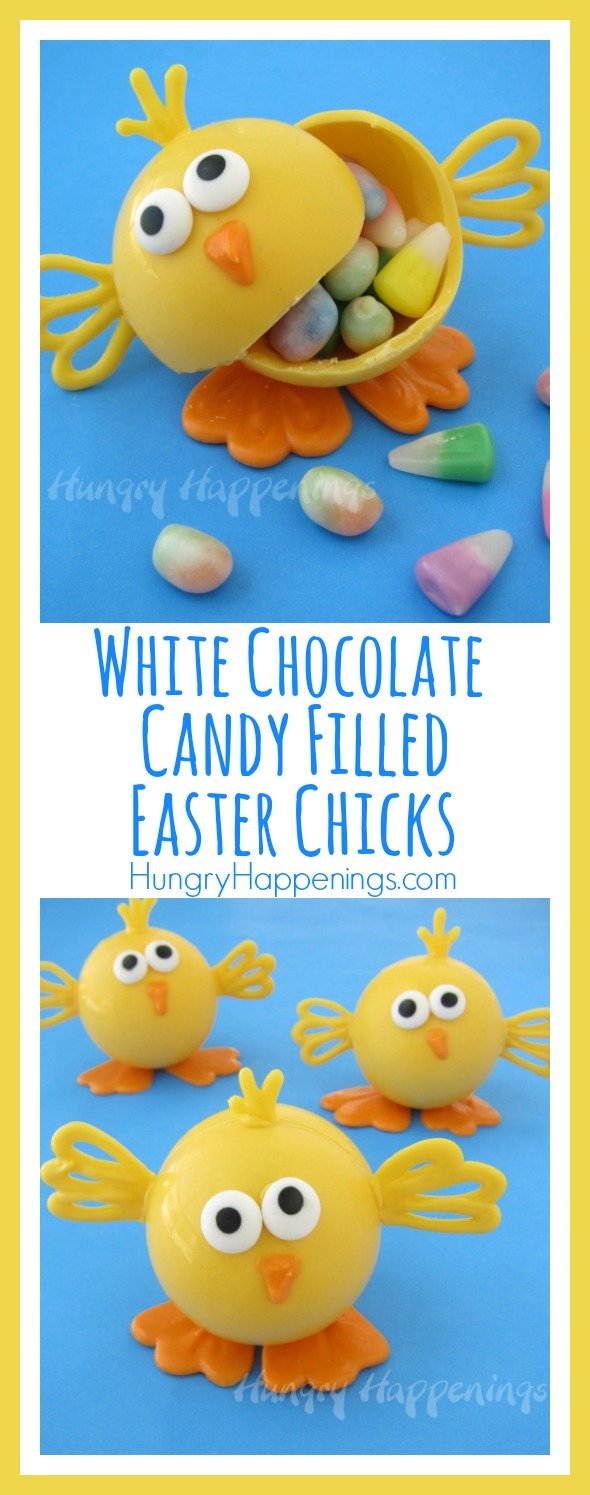
Looking for a fun treat to make with your kids for Easter? These adorable Easter Chocolates - White Chocolate Candy Filled Easter Chicks are the treat to make! Crack them open for a fun surprise and enjoy every bite of this delicious dessert.
Every holiday I come up with more edible craft ideas than I have time to create and these White Chocolate Candy Filled Chicks are a holdover from last Easter.
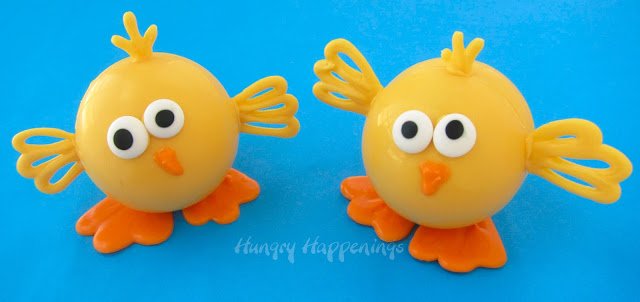
I have a scribbled drawing of what I thought these would look like, and I'm so happy that they turned out even cuter than I had imagined.
Each of these sweet chicks is completely edible. They can be made using pure white chocolate, if you are experienced with tempering chocolates, but can also be made using confectionery coating/candy melts.
You'll create a hollow chocolate ball, using a round plastic ornament as a mold. Each chocolate ball can be filled with any type of Easter candy you like. Then you will pipe wings, feet, feathers, and a beak and attach them along with some candy eyes to the ball.
If you look at the step-by-step pictures below, you might feel a bit overwhelmed, but I gave you very detailed instructions, and making each ball is simpler than it looks.
White Chocolate Candy Filled Easter Chicks
Before you begin, if you don't have experience working with chocolate or confectionery coating, read my Chocolate Making Tips page.
Ingredients
- melted and tempered pure white chocolate OR
- melted confectionery coating/candy melts (use white and color it or use yellow and orange)
- yellow and orange candy coloring (if using white chocolate or white candy coating)
- 2 candy eyes per chick
Supplies
- 60mm fillable small round plastic ornaments (see note below next image)
- disposable pastry bags or Squeezit mold painter bottles fitted with a small
- round decorating tip
- baking sheet lined with parchment paper
Items used to create these White Chocolate Candy Filled Easter Chicks can be found on Amazon (commission earned for sales).
 Pack of 12 Clear Plastic Cr...Shop on Amazon
 Wilton Yellow Candy Melts®...Shop on Amazon
 Wilton Orange Candy Melts, ...Shop on Amazon
 ⅜" White And Black Icing ...Shop on Amazon
Instructions
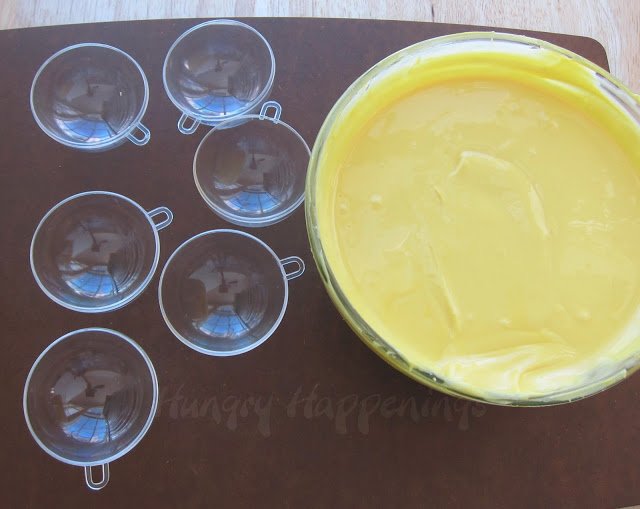
Note: You want a smooth surface all the way to the edge when molding your chocolate, so you'll only want to use one piece from each plastic ornament.
Choose the piece that is smooth all the way to the edge and has a groove on the exterior edge. Don't use the piece that has a groove right near the inside edge.
Color the white chocolate or confectionery coating with yellow candy coloring. You'll also need some colored orange later on.
If using confectionery coating/candy melts, allow it to cool to about 91 degrees so that it thickens slightly.
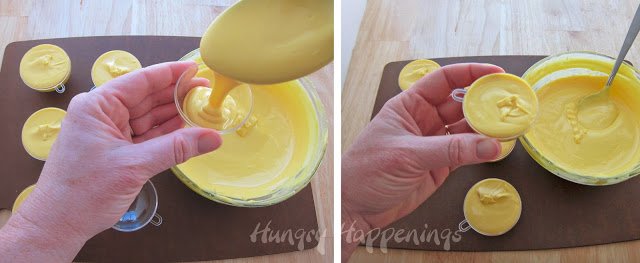
Pour yellow chocolate into your round plastic ornament halves, which I'll call the mold from now on. Allow filled molds to sit at room temperature for a minute or two.
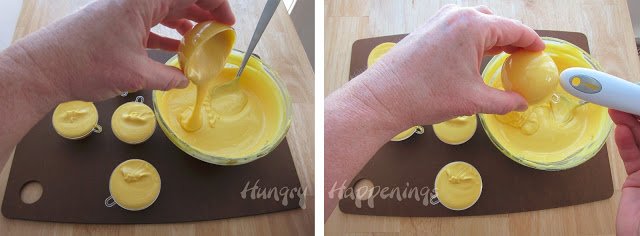
Turn the molds upside down allowing the chocolate to drip out. Tap the back of the mold to help move the chocolate out of the mold evenly.
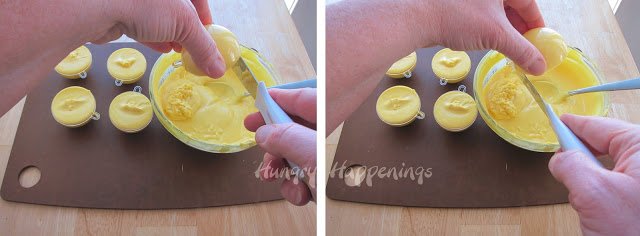
Use a metal spatula or knife to scrape off the excess chocolate from the edge of the mold.
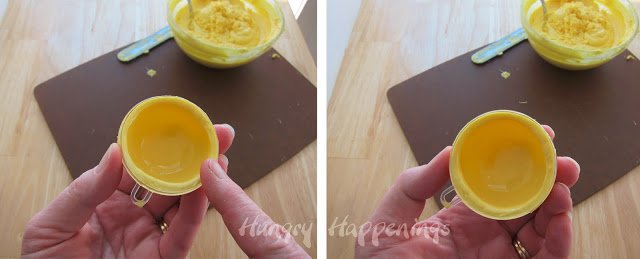
Use your finger to wipe the edge of the chocolate so that you end up with a nice flat edge.
Refrigerate if using pure white chocolate for 5-10 minutes, freeze if using confectionery coating/candy melts just until the chocolate sets 3-5 minutes. If left in for too long, the pieces will crack.
Note: You'll notice the chocolate shell is fairly thick. If yours is not, you may need to repeat the steps above to add a second layer.
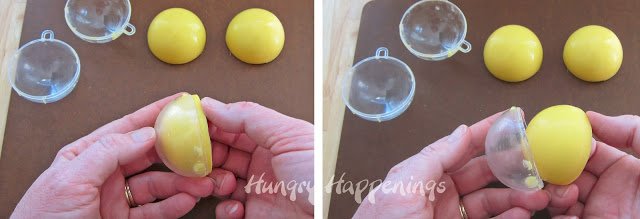
Remove molds from refrigerator/freezer. Carefully pull on the chocolate releasing it from the mold.
If it doesn't come out easily, put the mold back for a minute, then try again.
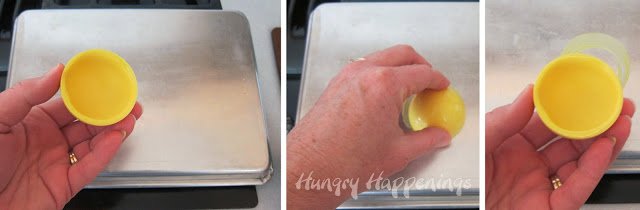
The best way to stick the two sides of your chocolate balls together is to melt the edges of both halves and stick them together. I set a clean baking sheet on my gas stove top, and turn on the heat to medium for 30-60 seconds, just long enough to heat the pan. Don't overheat the pan or you'll actually burn the chocolate.
Set one half of your chocolate ball down onto the hot pan allowing the edge to melt a bit, very quickly do the next two steps.
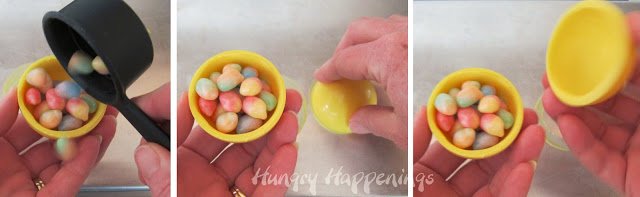
Pour in some candy. Set the second half of the chocolate ball on the hot pan to melt just a bit of the edge.
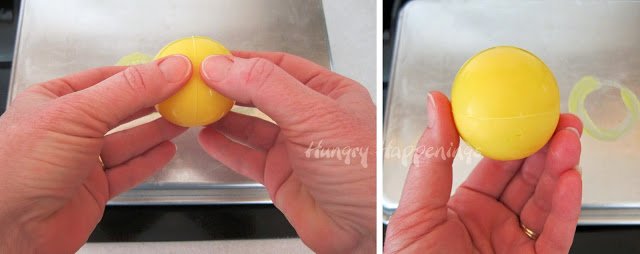
Set the two pieces together, being sure to line them up exactly, and press and hold for a few seconds. Ta-da, your first chick body is ready.
You can use the pan a few times while it's still warm to make a few chick bodies, then clean the chocolate off the pan before heating it up in order to make more chocolate balls.
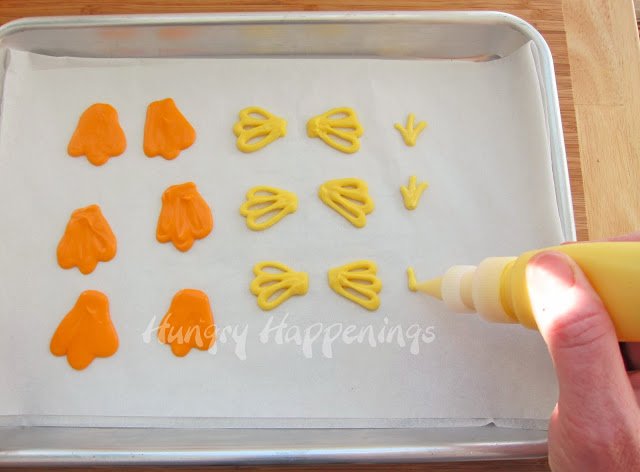
Fill one Squeeze-it bottle or a disposable pastry bag with orange-colored chocolate and another with yellow.
Attach a small round pastry tip (#3 or #4 work well.) Pipe feet, wings, and feathers for each chick.
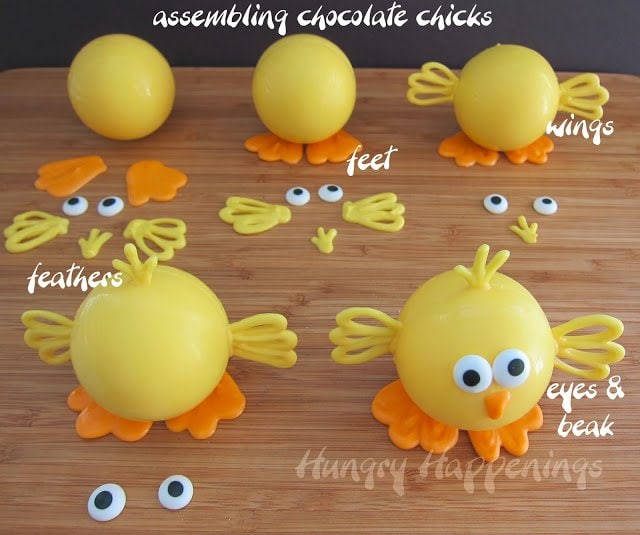
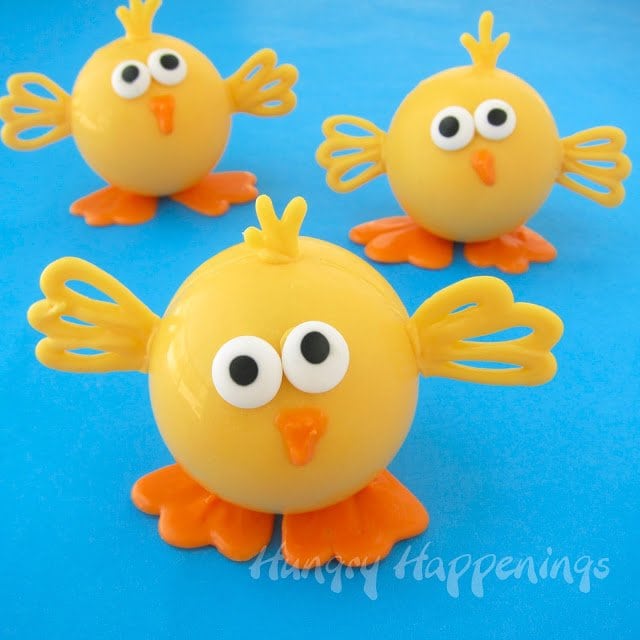
Assemble your Chocolate Chicks. Set the chick so the seam goes around from the top to the bottom and the front of the chick's face is smooth. Use melted chocolate to attach the feet first.
Then attach the wings and feathers. I found it helped to melt the part of the wing that attaches to the chocolate ball. I wasn't working near my stove, so I just used a lighter to heat up a metal spatula, I set the spatula up against the chocolate, allowed it to melt, and then pressed the wing onto the chocolate ball. I then used a bit more melted yellow chocolate to fill in the gap. I had to hold the wing for a bit until it would stay put.
Attach two candy eyes then pipe on an orange beak.
Use these chicks as party favors or in your Easter baskets. The wings are delicate, so it's best to package them in boxes as opposed to bags. I found some clear cupcake boxes that worked great.
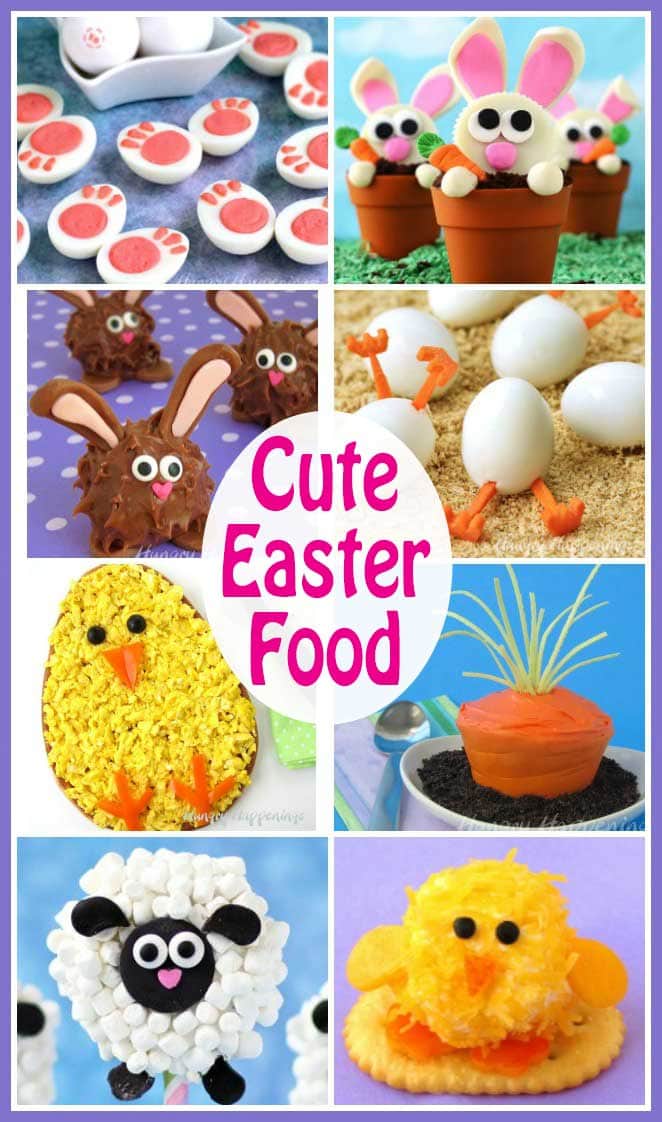
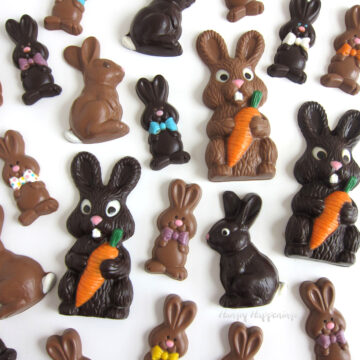
If this Easter Recipe interests you, then you should go and check out all these other delicious ideas.

- Banana Split Bars – A Fun and Easy Summer Dessert - March 4, 2026
- Pineapple Fudge (No Candy Thermometer Needed!) - March 4, 2026
- No-Bake Peanut Butter Pie Recipe - March 3, 2026
Anonymous says
I'm thinking there might be an easier way to fill these, using the ornaments whole. Although it would take some advance preparation, it would eliminate the need for melting and quick assembly of the two chocolate halves. It whould also enable you to fill the chicks more completely.
Use a rotary tool to cut a 3/4"-1" diameter round hole in the center of only one half of each ornament. (I'm guessing on a good size for the hole.)
Assemble the ornaments and fill with melted chocolate through the hole. Allow to set, and pour out the extra chocolate as above. Balance them on napkin rings while filling and cooling.
Pipe the orange feet attached at the heels as one piece, like a butterfly wing.
After the chocolate is cooled, remove the body of the chick by opening the ornament. Fill with candy, and apply the feet to cover the hole.
Beth Jackson Klosterboer says
That is a great suggestion for those with a rotary tool. I've never tried cutting a hole in plastic and don't own the tool, but would love to give your idea a try.
TidyMom says
these are just too cute Beth!!
Thanks for linking up! I featured your post in my wrap up!
Beth Jackson Klosterboer says
Thanks so much, Cheryl. Happy Easter to you too!
Auntiepatch says
That is just too stinking cute!
The Pennington Point says
Oh my goodness....cute, cute, CUTE! I always flub up these things when I try them at home, but you make it look doable I may actually make these....adorable! Thanks, Lisa~
why_in_the_heck says
They're so cute! I'm going to have to try them.
Cindy deRosier says
Wow - this is so cool!
Anonymous says
Wow! Those are amazing! I think the Godiva filled truffles secret is out! I was thinking about doing this myself, but with plastic easter eggs and brown candy melts, then filling the middle with a little yellow cream cheese frosting and some eyes and a beak (to make it look like a chick in the middle). Do you think that would work?
I just can't get over how adorable these all are!
Beth Jackson Klosterboer says
Thanks! Yes, you can fill these with just about anything you'd like. I might just fill them with chocolate mousse to put on my Easter table. Frosting should stick to the chocolate as long as it is pretty stiff. Have fun and be sure the send me some pictures!
Marsha Baker says
Fabulously cute!!! How very creative...awesome tutorial. Even I can understand it...I was curious how you got them to be hollow, but pouring the candy out, once the inside of the 'bowl' is covered, is just very clever. Kudos to you and your lovely creativity!!
Christie Daruwalla says
These are adorable. I'm not sure I could actually do it but it sure would be fun to try. Saw you on Mix it up Monday.
InkBlotMom, Kim says
OMG!! I LOVE these!!
cofesq says
Just when I thought I knew what I was making for Easter..... Do you think these could be made a week or more in advance & kept in the fridge? Or at the very least maybe the piped wings & feet? Think I'll used orange coated sunflower seeds for the nose. Thx so much.
Beth Jackson Klosterboer says
You can make these several weeks in advance. Just keep them in an airtight container on the counter. Do not refrigerate them. I never store chocolate in the refrigerator as it can become sticky from condensation and it will pick up odors from other foods. Chocolate has a good shelf life and should be kept relatively cool, around 68-70 degrees Fahrenheit, so just avoid direct sunlight and heat sources.
I had thought about using the orange coated sunflower seeds too. It's a great idea!
Sharon Zambito says
I love your blog and all of your great ideas! I shared this on my FB page.
Vanessa says
Those are the cutest things I've ever seen. I'd feel bad breaking them open because they are so cute.
Michelle | Creative Food says
These are beyond cute!!!!!!!!! They are simple so adorable I don't even know if I could eat them!
Lisa@hooplapalooza says
those are waaaay too cute to crack in half and get the candy out! but by golly i'm gonna make them anyway! :>D
Beth Jackson Klosterboer says
I know, it actually hurt my heart a little to crack the one open, but the chick didn't make a peep.
Cheri Deck says
cool
Janine Eshelbrenner says
Holy smokes! This is so cool! I was staring at the picture of the completed chicks wondering how you made that perfectly smooth ball with the candy surprise inside. Brilliant!
Anonymous says
Just when I thought I knew what I was making for Easter - YOU come up with another fabulous, way too cute idea.
It does sound a little time intensive but by carefully following your step by step process, this is definitely doable. Since YOU have faith is US - we should have faith also. As always, your photos are just wonderful and your helpful hints, not only save us from the pitfalls, the hints will be quite useful for other, similar projects.
On their faces I was initially looking for the little line where the 2 halves attach, but, of course, you thought of that already and said to put the line at the top & bottom so it's not visable on the face.
I'm visualizing chubby Bunny rabbits also made this same way.
Would it be possible, once the 2 halves are attached, to hold the ball on the heated pan to slightly melt the bottom of the ball so the chick will sit on it's own? Or - would the attachment of his feet then throw him off balance?
Like you said, plastic bags are out of the question, but I'm not sure I would even trust little individual boxes to transport these cutie pies as the wings could so easily get knocked off. People will just have to take them from the table and from then on - they're on their own.
Thinking some more, one could cut a piece of styrofoam to exactly fit the bottom of the box, set the chick inside and carefully stick extra long pins (or thick florist wire) into the styrofoam right alongside the chick to keep him from shifting around. To remove, remove the pins first and then gently lift out the chick. Think that would work???
People are gonna want to take these adorable little chicks home with them. Forget breaking them open - they're just too cute.
Have you ever encountered someone with so many questions? 🙂 It shows you've got your readers not only creating but thinking as well.
Tavette
Beth Jackson Klosterboer says
Hi Tavette,
Thanks! Love the long comment:) If you heat the bottom of the ball to flatten it out, you just want to be sure the walls of your ball are thick enough. If too thin, you'll bore a hole right through the chocolate. They sit really nicely on the feet. I found some clear cupcake boxes that the chicks fit into perfectly. I nestled them on some Easter grass and closed the lid. The wings are snug against the box, so there is no way for the chicks to move. I got the boxes from the Kroger bakery. I had to pay 99 cents each with a cupcake inside. I've paid more than that for empty boxes. Your styrofoam idea might work too. I'd just cover the styrofoam with some Easter grass before adding the chick to make it look nicer.
I can't wait to see pictures of your chocolate chicks or bunnies or whatever you decide to create. Have fun!
The Bearfoot Baker says
You are seriously killing me with cuteness here! These are by far the cutest chocolate Easter candy I have ever seen!! LOVE THEM!!! Pinning and Tweeting now:)
Anonymous says
Just when I thought I knew what I was making for Easter - YOU come up with another fabulous, way too cute idea.
It does sound a little time intensive but by carefully following your step by step process, this is definitely doable. Since YOU have faith is US - we should have faith also. As always, your photos are just wonderful and your helpful hints, not only save us from the pitfalls, the hints will be quite useful for other, similar projects.
On their faces I was initially looking for the little line where the 2 halves attach, but, of course, you thought of that already and said to put the line at the top & bottom so it's not visable on the face.
I'm visualizing chubby Bunny rabbits also made this same way.
Would it be possible, once the 2 halves are attached, to hold the ball on the heated pan to slightly melt the bottom of the ball so the chick will sit on it's own? Or - would the attachment of his feet then throw him off balance?
Like you said, plastic bags are out of the question, but I'm not sure I would even trust little individual boxes to transport these cutie pies as the wings could so easily get knocked off. People will just have to take them from the table and from then on - they're on their own.
Thinking some more, one could cut a piece of styrofoam to exactly fit the bottom of the box, set the chick inside and carefully stick extra long pins (or thick florist wire) into the styrofoam right alongside the chick to keep him from shifting around. To remove, remove the pins first and then gently lift out the chick. Think that would work???
People are gonna want to take these adorable little chicks home with them. Forget breaking them open - they're just too cute.
Have you ever encountered someone with so many questions? 🙂 It shows you've got your readers not only creating but thinking as well.
Tavette
Jill @ KitchenFunWithMy3Sons.com says
Eeekk! These are adorable!! Love them!