
Next time you fire up the grill for a backyard party, bring a batch of these fun, highly detailed BBQ Grill Cupcakes! Your family and friends will love them.
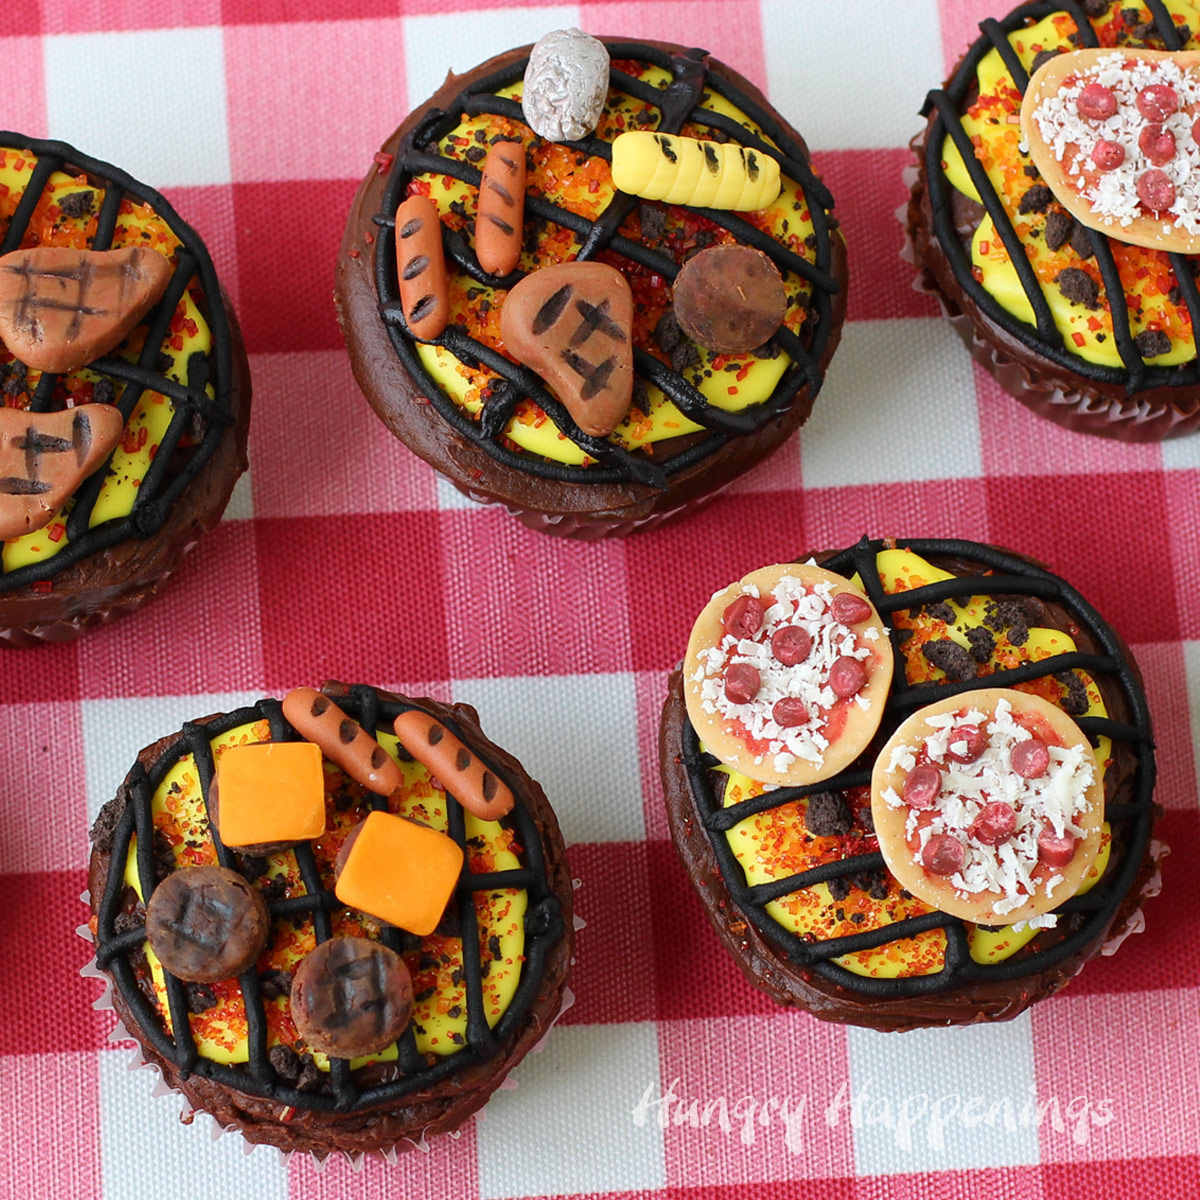
If you walk through my neighborhood on any summer evening, you can smell fresh-cut grass and meat smoking on the grill. Like most folks during the warmer months, we tend to migrate outside to enjoy the beautiful weather and good food cooked over an open flame. Recently, we were invited to a cookout, and since I was asked to bring dessert, I thought it would be fun to whip up a batch of grill-shaped cupcakes to honor this warm-weather tradition.
Not only do they taste great, but these cute summer party desserts are always a popular, show-stopping treat for Father's Day BBQs, 4th of July picnics, or neighborhood block parties.
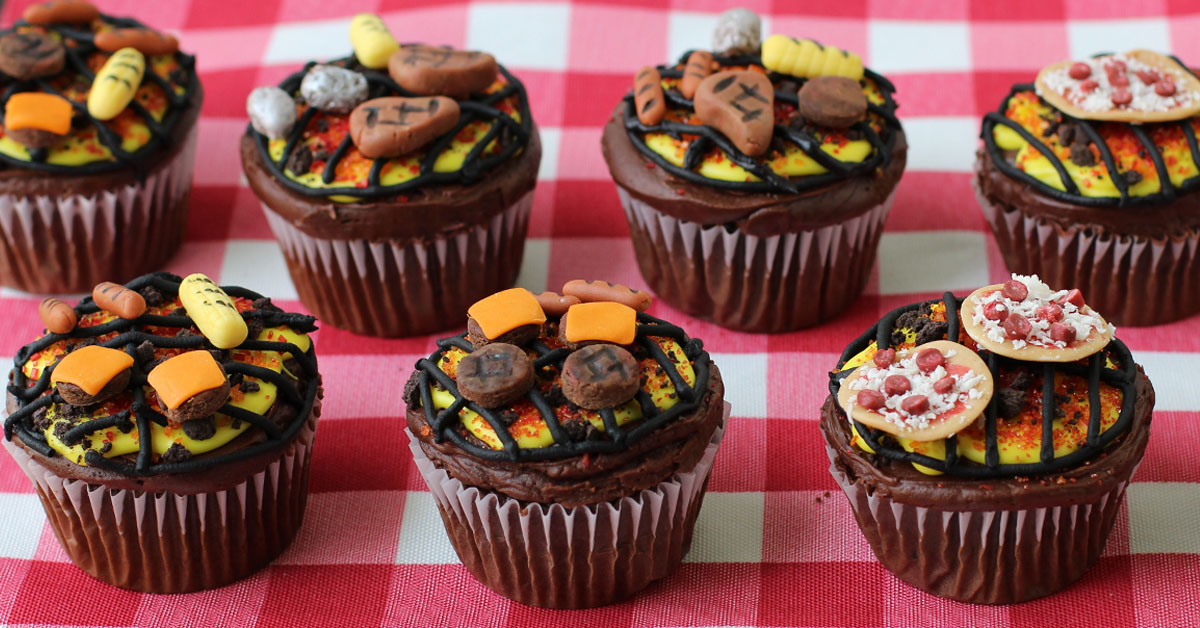
Why You'll Love Making These
While these cupcakes do take a bit of time and detail to sculpt, the process is incredibly rewarding and allows for tons of creativity:
- Customizable Toppers: Decorate your tiny grills with your favorite BBQ foods—from classic cheeseburgers and hot dogs to mini pizzas and corn on the cob!
- Clever Visual Tricks: Using crushed cookies for charcoal, colored sugar for embers, and luster dust for aluminum foil creates a shockingly realistic mini grill.
- Make-Ahead Friendly: You can sculpt all your mini food toppers days in advance so assembly on party day is quick and easy.
Ingredients & Supplies
For the Cupcake Base & Fire Pit:
- 1 box (15.25 oz) chocolate cake mix (plus required eggs, water, and oil)
- 1 to 2 tubs (16 oz each) chocolate frosting
- 1 tub (16 oz) vanilla frosting
- Yellow gel food coloring
- 3 tablespoon chocolate cookie crumbs (for the charcoal coals)
- Orange and red decorating sugar (for the glowing flames)
- 1 tube or pouch black decorating icing (for piping the grill grates)
For the Modeling Chocolate Cupcake Toppers:
- white modeling chocolate (click the link for the recipe)
- Assorted gel food coloring (brown, red, yellow, green)
- Black food coloring marker (to draw realistic grill marks)
- Optional: Silver luster dust + clear vanilla extract or vodka (for painting "foil" potatoes)
How to Make Grill Cupcakes Step-by-Step
Step 1: Bake & Smooth the Cupcake Base
- Bake 24 chocolate cupcakes according to package instructions and allow them to cool completely.
- Frost each cupcake with chocolate frosting, using an offset spatula to smooth the top flat so you have a clean, level surface for your grill pit.
Step 2: Create the Glowing Coals and Flame Layer
To make the grills look like they have a pit filled with flames and charcoal, build layers of color:
- Tint the tub of vanilla frosting using yellow food coloring. Scoop some into a microwave-safe bowl and heat for 15–25 seconds until melted and pourable.
- Spoon yellow frosting over the center of each cupcake, leaving a ¼-inch chocolate border around the edge.
- While the yellow frosting is wet, immediately sprinkle chocolate cookie crumbs in the center for "charcoal" and add orange and red decorating sugar around it to mimic glowing embers.
Step 3: Pipe the Edible Grill Grate Lines
Pipe black cookie icing over each cupcake to form the grill grate:
- Detailed Grate: Pipe a large black circle around the outer edge of the flame area. Pipe one line straight down the center, then several lines perpendicular to it.
- Simplified Option: Simply pipe parallel lines straight across each cupcake to save time.
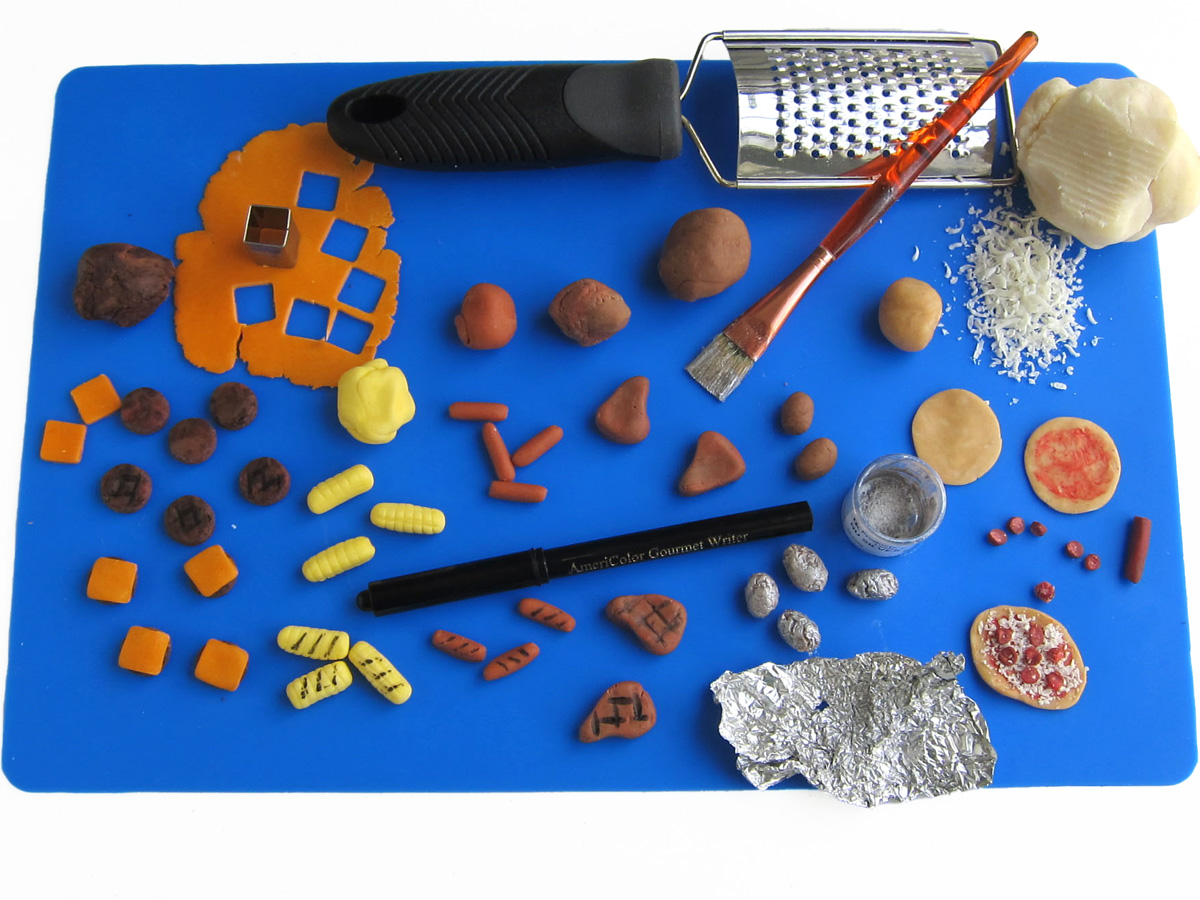
Step 4: Sculpt Modeling Chocolate Mini BBQ Foods
Color portions of modeling chocolate to sculpt your food toppers, then use a black edible food marker to draw on grill marks:
- Hamburgers & Steaks: Shape brown patties and draw dark grill marks across the tops.
- Hot Dogs: Roll tiny reddish-brown logs and add subtle char marks.
- Corn on the Cob: Roll yellow cylinders and score crosshatch lines to make kernels.
- Foil-Wrapped Potatoes: Shape small brown potatoes and roll them on a piece of crumpled aluminum foil to add texture. Mix a small amount of clear vanilla extract with silver luster dust and paint it onto the potato to mimic shiny foil.
- Mini Pizzas: Create a crust, brush on red food coloring for sauce, and grate white modeling chocolate over a fine cheese grater to create "shredded cheese." Add mini pepperoni slices!
Step 5: Assemble the Cupcakes
Use a small dab of leftover chocolate frosting or black icing to secure your modeling chocolate toppers to the top of each piped grill grate.
Pro Tips for Success
Prep in Advance: Sculpt your modeling chocolate toppers several days early! Keep them stored in an airtight container at room temperature away from direct heat and sunlight.
Watch the Frosting Temp: Make sure your yellow vanilla frosting is warm enough to pour smoothly, but not boiling hot, so it doesn't melt the chocolate frosting underneath.
Frequently Asked Questions
What can I use instead of modeling chocolate for the mini food toppers?
Store-bought fondant or marzipan works as a direct substitute for modeling chocolate! You can color and sculpt them the exact same way.
How do I store these cookout cupcakes ahead of a party?
Store the decorated cupcakes in an airtight container at room temperature for up to 2 days. If you live in a warm climate, keep them in a cool area so the modeling chocolate toppers maintain their shape!
Bring the ultimate summertime treat to your next cookout with these fun BBQ Grill Cupcakes! Featuring glowing frosting "coals," piped icing grates, and tiny modeling chocolate burgers, hot dogs, and sides, these cute themed desserts are guaranteed to steal the show at any Father's Day party, 4th of July picnic, or summer BBQ.
- 1 box (15.25 oz) chocolate cake mix
- Eggs, water, and vegetable oil (as called for on the cake mix box)
- 24-36 ounces chocolate frosting
- 16 ounces vanilla frosting
- Yellow food coloring
- 3 tablespoons chocolate cookie crumbs
- Orange and red decorating sugar
- 1 tube (or pouch) black decorating icing or cake icing
- 6 ounces white modeling chocolate
- Assorted food coloring, to color the modeling chocolate
- Black food coloring marker
- Optional: Silver luster dust and clear vanilla extract or vodka
-
Bake & Cool: Bake cupcakes according to the package instructions. Allow to cool completely.
-
Base Frosting: Frost the cupcakes using the chocolate frosting. Smooth out the top of each cupcake so you have a flat surface for your grill base.
-
Melt Vanilla Frosting: Color the vanilla frosting using yellow food coloring. Scoop some into a microwave-safe bowl and heat for 15–25 seconds until melted and pourable.
-
Create Fire & Charcoal: Spoon a small circle of yellow frosting over the center of one cupcake, leaving about a ¼-inch chocolate frosting border around the edges.
-
Add Embers: Immediately sprinkle on some chocolate cookie crumbs, orange sugar, and red sugar to give the cupcake the appearance of hot coals and glowing flames.
-
Repeat: Repeat steps 4 and 5 for all 24 cupcakes.
-
Pipe Grill Grates: Pipe grill grate lines over the top of each cupcake using black decorating icing.
-
Sculpt Mini Foods: Tint portions of modeling chocolate and shape them into mini hot dogs, hamburgers, cheeseburgers, corn, steaks, potatoes, and pizzas. Draw grill marks on the foods using a black food coloring marker. For the potatoes, brush on silver luster dust mixed with a few drops of clear vanilla extract to mimic aluminum foil.
-
Assemble: Use a small dab of leftover frosting or decorating icing to secure the modeling chocolate toppers to the top of each grill grate.

- BBQ Grill Cupcakes: The Ultimate Summer Cookout Dessert - August 8, 2026
- Banana Split Bars – A Fun and Easy Summer Dessert - March 4, 2026
- Pineapple Fudge (No Candy Thermometer Needed!) - March 4, 2026

Please leave a comment.